An introduction and analysis of Henry Lindeman s Method for saxophone
|
|
|
- Oswin Gibson
- 6 years ago
- Views:
Transcription

 thesis, University of Iowa, 2017. http://ir.uiowa.edu/etd/5436. Follow this and additional works at: http://ir.")
1 University of Iowa Iowa Research Online Theses and Dissertations Spring 2017 An introduction and analysis of Henry Lindeman s Method for saxophone Yiqun Chen University of Iowa Copyright 2017 Yiqun Chen This dissertation is available at Iowa Research Online: Recommended Citation Chen, Yiqun. "An introduction and analysis of Henry Lindeman s Method for saxophone." DMA (Doctor of Musical Arts) thesis, University of Iowa, Follow this and additional works at: Part of the Music Commons
2 AN INTRODUCTION AND ANALYSIS OF HENRY LINDEMAN S METHOD FOR SAXOPHONE by Yiqun Chen An essay submitted in partial fulfillment of the requirements for the Doctor of Musical Arts degree in Music in the Graduate College of The University of Iowa May 2017 Essay Supervisor: Professor Kenneth Tse
3 Copyright by Yiqun Chen 2017 All Rights Reserved
4 Graduate College The University of Iowa Iowa City, Iowa CERTIFICATE OF APPROVAL This is to certify that the D.M.A. essay of D.M.A. ESSAY Yiqun Chen has been approved by the Examining Committee for the essay requirement for the Doctor of Musical Arts degree in Music at the May 2017 graduation. Essay Committee: Kenneth Tse, Essay Supervisor Benjamin Coelho Nicole Esposito Courtney Miller Damani Phillips
5 To saxophonists and the pursuit of artistry. ii
6 Acknowledgements I would like to thank my mother and father for their love and support of my musical endeavors. Also, I am also grateful for my fiancée, Xuan Kuang, who took care of me and encouraged me throughout my writing process. My heartfelt appreciation goes out to all of my saxophone teachers and mentors. This document exists because of the wisdom I received from Dr. Christopher Charbonneau, Mr. James Barrera, Mr. Leo Potts, and Mr. Phil Sobel. They are the teachers responsible for introducing me to Henry Lindeman and the Lindeman Method, forming the foundational elements of my playing. Lastly, the teaching and guidance of Dr. Kenneth Tse and Dr. Damani Phillips have been crucial to my development as a saxophonist. They have taken my saxophone playing to levels that I never would have thought possible. I would also like to thank Dr. Tse and the rest of my essay committee for supporting this document and allowing me to present research on a saxophone method that means a great deal to me. iii
7 Public Abstract In the early twentieth century, the saxophone was a new instrument in the United States. However, its popularity quickly grew as the instrument was featured in many genres of music, most notably military bands and jazz bands. Instrumental manufacturers sold millions of saxophones as demand for the instrument increased. However since the saxophone was so new, there was a lack of quality instruction. As a result, the general playing level of saxophonists was low. Saxophonist Henry Lindeman published one of the first comprehensive method books for the instrument in the United States in The book was the product of Lindeman s extensive research into the fundamentals of saxophone playing. The book was a success after it was published, and Lindeman s reputation as a teacher grew. The Lindeman Method discusses all of the fundamental aspects of saxophone playing in great detail including the following: breathing, posture, embouchure, tone production, finger technique, vibrato, melody playing, and articulation. Lindeman s book had a lasting effect on how saxophone is taught, as all of his fundamental concepts are generally still approached in the same manner in modern saxophone pedagogy. Lastly, the method book itself continues to be used, thanks to Lindeman s students and their students and so forth. iv
8 Table of Contents LIST OF FIGURES... vi INTRODUCTION...1 CHAPTER I. FUNDAMENTALS...8 Breathing...10 Posture...15 Embouchure...17 Facial Mask...20 Initiation of Sound...22 Tone...25 II. AIR AND FINGERS...29 The Airstream...30 The Fingers...31 Intervals...36 III. VIBRATO...39 IV. MELODY PLAYING...46 V. ARTICULATION...54 The Technique of Tonguing...54 Articulation Patterns...63 VI. LEGACY OF THE LINDEMAN METHOD...69 CONCLUSION...74 APPENDIX ADDITIONAL EXERCISES FROM THE LINDEMAN METHOD...76 BIBLIOGRAPHY...87 v
9 List of Figures Figure 1. Diagrams and Illustrations on Breathing Illustration on Head Position Embouchure Illustration Facial Mask Illustration Bouncing Ball/ Note Attack Illustration Excerpt of Attack Exercises Illustration of Finger Technique Excerpt of Finger Exercise One Excerpt of Finger Exercise Two Excerpt of Interval Exercise One Excerpt of Interval Exercise Two Excerpt of Vibrato Exercises Violin Bowing Illustration Excerpt of Melody Exercise One Excerpt of Melody Exercise Two Excerpt of Melody Exercise Three Excerpt of Tonguing Exercise One Excerpt of Tonguing Exercise Two Excerpt of Tonguing Exercise Three Excerpt of Tonguing Exercise Four A...60 vi
10 21. Excerpt of Tonguing Exercise Four B Excerpt of Tonguing Exercise Four C Tonguing Exercise Five Illustrations of Articulation Excerpt of Articulation Exercise One Excerpt of Articulation Exercise Two Excerpt of Articulation Exercise Three...67 vii
11 Introduction In the years following the American debut of the saxophone in 1853, the popularity of the young instrument grew rapidly in the United States. 1 American concert audiences heard the new wind instrument featured in the orchestral works of Hector Berlioz and Maurice Ravel and in the military bands of Patrick Gilmore and John Philip Sousa. At the beginning of the twentieth century, the saxophone was featured in burlesque and vaudeville shows throughout the country. The inclusion of saxophones in military band, jazz, and orchestral music generated, between 1900 and 1920, a demand for the instrument known as the saxophone craze. 2 With the growing popularity of a new instrument in the United States, there naturally came a demand for teachers and method books. Finding quality instruction on the saxophone in the United States was a problem at the beginning of the twentieth century, as there were not many experienced saxophone instructors and published methods available. The methods that did exist often offered contradictory information regarding the basics of saxophone playing. For instance, some methods promoted the double-lip embouchure while others taught the single-lip approach. 3 Paul de Ville s Universal Method for the Saxophone, published in 1908, is one of the most well known early American saxophone method books. While De Ville s method is full of useful exercises and duets, it offers minimal explanation on the fundamentals of playing. The 1 Harry Burdette Hindson, Aspects of the Saxophone in American Musical Culture (DMA Diss. University of Wisconsin-Madison, 1992), 1. 2 Michael Segell, The Devil s Horn (New York: Farrar, Straus, and Giroux, 2005), Gail Beth Levinsky, Early Saxophone Methods: An Analysis of Methods Published Between (DMA Diss. Northwestern University, 1997),
12 book also has very few fundamental exercises before the student is thrown into technically challenging etudes, solos, and duets. The earliest saxophone soloists in the United States, such as Edward A. Lefebre, switched to the instrument from the clarinet and used method books that were adapted from other woodwind instruments or were obtained from Europe. The lack of saxophone teachers and method books resulted in generally low performance and artistic abilities from musicians playing the instrument. It was the lack of artistry and performance proficiency that motivated saxophonist Henry Lindeman to create one of the earliest methods for the saxophone devoted towards teaching students and professionals how to control the saxophone and develop a higher level of proficiency. Henry Lindeman was born in New York in 1902 and was still living in New York when he passed away During World War I, a sixteen-year-old Lindeman lied about his age in order to enlist in the navy and was assigned to play in the ship band aboard the USS Arizona from After his service in the navy, Lindeman returned to New York to work as a freelance musician and teacher. In 1934, Lindeman published his saxophone method. The Henry Lindeman Method for Saxophone was one of the first American saxophone methods to discuss all of the vital foundational elements of saxophone playing, such as breathing, embouchure, air, fingers, vibrato, and articulation. The Lindeman Method was a success, and Lindeman s reputation as a saxophone teacher grew. Saxophonists of all ages and skill levels sought out Lindeman at 4 Henry Lindeman, Henry Lindeman Method for Saxophone (New York: Mills Music, Inc.), Back of book. 5 Ibid. 2
13 his private studio in New York City. Metronome Magazine, which was a national publication for musicians, heavily advertised Lindeman s new book and featured him as a saxophone columnist multiple times from Lindeman wrote about various fundamental issues of saxophone playing and expanded on the ideas from his method book in his articles. Unfortunately, Lindeman s career was cut short when a heart attack forced him to stop teaching and playing the saxophone in Despite his retirement from the saxophone, Lindeman s heart condition continued to plague him, and he passed away on March 7, 1961 due to complications from heart surgery. 6 Lindeman got the idea to write a method book around At that time, he was playing saxophone in Paul Whiteman s Jazz Orchestra and was frustrated by the saxophone section s inability to play in tune. 7 This frustration led Lindeman to research was of improving saxophone playing through proper fundamental instruction. He would then present his findings and publish them in a method book. It was not uncommon at the time for saxophonists to turn to other instruments with a longer history and more developed pedagogy for inspiration. Lindeman turned to the violin as a source of information and inspiration when beginning to formulate his method. In an interview for the Saxophone Journal, one of Lindeman s former students, Phil Sobel, states the following: Lindeman wondered how it was that a violin that has no buttons could play in tune, but a saxophone, with buttons, could be out of tune. The saxophone has a primary difficult problem; sometimes you are putting keys down to make a note, and sometimes you are lifting them up and not always in a very logical way. It is very unlike a piano, which you are always putting a key down to make a note, but very like a violin which has 6 Ibid. 7 Robert Kyle, Phil Sobel, Saxophone Journal 25 no. 3 (2001): 15. 3
14 similar difficulties. The problem lies in getting two contrary motions to produce two equal and matched sounds. 8 Lindeman s fascination with how the violin worked led him to seek an interview with violin virtuoso Jascha Heifetz. 9 In the interview, Heifetz told Lindeman that while playing, his whole attention and energy was focused on the bow and the fingers. These two elements were essential to Heifetz s artistry on the violin. Lindeman took this concept and translated it to the saxophone, thinking of the airstream for saxophone playing as the equivalent of the violin bow. Although there is no written record of Lindeman s interview with Heifetz, the timeline matches as Heifetz moved to New York around 1920, which is the same time that Henry Lindeman began his freelance career. Additionally, Heifetz was influential in convincing Arturo Toscanini to form the National Broadcasting Company orchestra. 10 Lindeman was called to play with the orchestra whenever a saxophone was required. 11 It is logical to conclude that Henry Lindeman met Jascha Heifetz through the NBC orchestra. There are three points that justify the need for this document. The first of which is Lindeman s reputation as a teacher. Henry Lindeman was a sought-after teacher in New York following the publication of his method book. Additionally, writing for Metronome Magazine was a great honor as he joined the likes of saxophone virtuosos Meryl Johnson and Cecil Leeson, who also contributed articles regarding saxophone performance. 8 Kyle, Ibid., Artur Weschler-Vered, Jascha Heifetz (London: Robert Hale), Henry Lindeman, Henry Lindeman Method for Saxophone (New York: Mills Music, Inc.), Back of book. 4
15 The information presented in the Lindeman Method has withstood the test of time, as later books, such as those written by Cecil Leeson, Larry Teal, and Eugene Rousseau, contain nearly the exact same fundamental information. Cecil Leeson s dissertation, published in 1978 and entitled The Basis of Saxophone Tone Production, describes the basic saxophone embouchure: The upper lip and that portion of the lower one not in direct contact with the reed itself are then shaped about the mouthpiece such as articulating the letter o. 12 Leeson s pedagogy confirms Lindeman s writing on the subject. The Lindeman Method states that the lips should wrap around the mouthpiece and come forward during playing in a manner similar to whistling. Additionally, the term facial mask was first used by Lindeman to describe the formation of the facial muscles during saxophone playing. The same term is found in Larry Teal s Art of Saxophone Playing in the same context. This coincidence makes me wonder if Teal got the term from Lindeman. Unfortunately, I have not yet found any evidence to support that theory. However, it is difficult to ignore the presence of the same unique term in two books as simple coincidence. Also, in describing articulation both Lindeman and Teal make the connection to articulation in speech. Lastly, many of Lindeman s fundamental concepts, such as breathing, embouchure, posture, and vibrato, have since become universally accepted among saxophonists. Eugene s Rousseau s book from 1983, Practical Hints on Playing the Alto Saxophone, features photos on proper playing posture that resemble Lindeman s illustrations. Yet again confirming that in 1934, Henry Lindeman s approach to saxophone fundamentals was correct and credible. 12 Cecil Leeson, The Basis of Saxophone Tone Production (DFA diss., University of Chicago Musical College, 1955),
16 The third rationale would be that there is a legacy of success in Lindeman s teaching. One of his students, Phil Sobel, moved to Los Angeles following Lindeman s passing and continued to teach from the method book. Sobel had many successful students who also continued to use the method. In essence, the Lindeman Method migrated to the west coast and has maintained a following in that area since the 1960s. The fact that the Lindeman Method has endured over the years and has helped to produce successful saxophonists is a testament to the quality and wisdom found in the book. More information regarding the legacy of the method book will be discussed in chapter six. Lindeman s method book is not widely known in the saxophone community and little scholarship has been written about Lindeman and his method. However, having been taught through this method in the early days of my saxophone education in California and having studied with Phil Sobel and Sobel s student, Leo Potts, I feel that Lindeman s ideas and approach to saxophone playing are still relevant and should be introduced to the saxophone community. It is my hope that this document will serve that goal. The Lindeman Method has a great deal of importance to me, as it is the first method book that I studied from when I began private saxophone lessons. Although I have played through many other method and etude books since then, I always return to the Lindeman Method as a way of reviewing my fundamentals. The purpose of this document will be to present detailed information on Henry Lindeman s concepts on saxophone playing as written in the Lindeman Method. Lindeman s book will provide saxophonists with a historical perspective to the origins of saxophone fundamentals in the United States. Excerpts from the method book will be included to illustrate his fundamental concepts. 6
17 Research on the concepts of the Lindeman Method has been obtained through examination of the method book as well as published interviews, documents, and personal experience with the method along with related literature. My sources are divided into two categories: primary sources include the method book as well as articles written by Lindeman discovered on microfilm through archival research. Secondary sources include scholarly writing on the general subject of early saxophone pedagogy in the United States. 7
18 CHAPTER 1 FUNDAMENTALS According to Gail Beth Levinsky s analysis on early saxophone methods, books written in the United States on the subject tended to include five principles: body position, head position, finger position, instrument position, and strap position. 13 Henry Lindeman followed in this trend and explains all of these factors along with breathing and embouchure in great detail in the opening pages of his Method. Lindeman viewed proper fundamentals as critical to developing as a fine saxophonist. Prior to the publication of the Lindeman Method, saxophone method books published in the United States provided a great deal of exercises, etudes, solos, and duets but offered very little in the way of explaining the fundamentals of the instrument. This can be seen in the books written or complied by Paul deville, Ben Vereecken, and JL Small. All of who were notable early method book writers. In the early twentieth century, there was a misconception about the saxophone in the United States. The misconception was that the saxophone could be learned quickly and easily. This belief led many students to overlook fundamental elements of playing such as embouchure formation. In stressing fundamentals in his book, Lindeman hoped to counter the existing misconception about the saxophone and make students understand that the saxophone cannot be played well if fundamentals are not mastered. The final statement of the Lindeman Method s introduction states that an unsound foundation will hinder rapid progress. 14 By current saxophone pedagogical standards, the fundamental elements mentioned above are common-sense practices. However, in the early twentieth- 13 Levinsky, Lindeman, Henry Lindeman Method for Saxophone, 5. 8
19 century, this information was not commonly known among saxophonists in the United States. Throughout the opening section, Lindeman constantly connects fundamental skills to the effects they will have on saxophone tone production in an effort to justify the benefits of his concepts. Playing with a ringing and vibrant tone on the saxophone was a top priority for Lindeman, and much of the teachings in his method book are geared toward eliminating any physical interference from the player that would hinder the tone quality of the instrument. Lindeman knew that the saxophone would never gain respect as an instrument capable of artistic expression if its players could not produce a pleasing tone. A wide range of saxophone tones were considered acceptable in the early twentieth century, fueled by the misconception mentioned above that the instrument was easy to play. Indeed it was not difficult to produce a sound on the saxophone, but it was a challenge to control the instrument and produce a resonant and clear sound. In an article for Metronome Magazine, Lindeman wrote: Just a few years back it was impossible to recognize a saxophone tone, so great was the variety of sounds which were classified under that name. One tone suggested a violin, one a trumpet, and others just plain foghorn. 15 Lindeman wanted students to establish a good tone quality through mastery of the fundamentals of the instrument. The text in the introduction to the Lindeman Method offers advice on practicing. This was rare, as most method books of the era spoke very little about the skill of practicing. 16 Lindeman s advice on practicing is simply this: Incorrect practice, no 15 Henry Lindeman, On the Question of Breathing, Metronome Magazine Jan (1936): Levinsky,
20 matter how long or how faithful, does more harm than good. 17 In his book, Lindeman encourages students and professionals to always practice correctly as opposed to mindlessly going through the motions, otherwise it would be time wasted. At the time it was published in 1934, the Lindeman Method, along with Koehler s The Excelsior Method and Rudy Wiedoft s Complete Modern Method for Saxophone, offered the best information and advice on learning how to practice. 18 Breathing Henry Lindeman begins his method book with his thoughts on breathing as it pertains to wind instrument playing. Based on my research and experience as a wind instrument player I have come to the realization that breathing is a function that the body is constantly engaging in, so in that sense, it is a natural function. However, in breathing, there are variations such as a high breath, where the chest expands, and a low breath, in which the diaphragm expands. Additionally, breathing from the nose is also natural, and the rate of breathing is yet another factor. Lindeman addressed the issue of natural breathing and the inherent problems with that statement in his article on breathing in the January 1936 issue of Metronome Magazine titled: On the Question of Breathing On the question of breathing, it doesn t take any paragon of learning or of intelligence to tell you to breathe naturally. Any fool can tell you that. But tell a hundred people to breathe naturally and observe the hundred different reactions to your suggestion and the several hundred different ways in which musicians can attempt to carry out your instructions. 19 (1936): Lindeman, Henry Lindeman Method for Saxophone, Levinsky, Henry Lindeman, On the Question of Breathing, Metronome Magazine Jan 10
21 Saxophone students in the 1930s needed standardized, specific, and precise instructions on breathing as it pertains to wind instrument playing. Lindeman describes the process in detail in the Lindeman Method. The section on breathing begins with a simple exercise where Lindeman asks the pupil to stand erect and inhale, filling up the lungs with air and expanding the diaphragm as a result. Before exhaling the air, the pupil is to place a hand in front of the mouth and blow a steady stream of air directed towards the hand. This simple exercise is designed to help students understand the mechanics of breathing for saxophone playing. Lindeman s initial breathing exercise is still used by private teachers and band directors. For instance, professional tuba players Sam Pilafian and Patrick Sheridan created the Breathing Gym system, which involves multiple variations of the breathing process Lindeman used. To further illustrate his point, Lindeman compares inhaling to the filling of a fountain pen with ink and exhaling with the steady release of air from a punctured tire. Figure 1 is an illustration from the Lindeman Method modeling his concept of inhaling and exhaling. Towards the end of his prose on breathing, Lindeman points out that correct breathing is essential to both beginner and advanced players: The beginner starting out correctly will develop perhaps a little more slowly but with a surer and better tone. The more advanced musician may notice his faults and be moved to correct them, and what is more important, learn to recognize the correct thing in music. Others of you who read this book may be well satisfied with yourselves because you are doing well financially; perhaps your interest may be awakened to look deeper into the finer aspects of woodwind playing Lindeman, Henry Lindeman Method for Saxophone, 7. 11


22 Figure 1. Diagrams and Illustrations on Breathing In Lindeman s prose on breathing, he uses vocalists as an example of proper breathing technique and its relation to tone quality. According to his article in Metronome Magazine, vocalists spend a great deal of time and effort perfecting their breathing skills, for it is a key factor in improving their voice. 21 There is little variation in the approach to breathing for vocalists. Breathing is a rhythmic process according to the article. 22 The method of breathing as described by Lindeman begins with an inhalation right before beginning 21 Lindeman, Henry Lindeman Method for Saxophone, Lindeman, Henry Lindeman Method for Saxophone, 7. 12
23 note. Inhalation, exhalation, and the start of the note should be one action. 23 Once a proper inhalation is achieved, the diaphragm is engaged, and the airflow will cause the facial muscles to apply the proper pressure around the mouthpiece. 24 In his article, Lindeman concludes with the idea that there are no shortcuts to mastering breathing for wind instrument playing and the approach of simply breathing naturally is not valid. For a student, breathing is mastered through detailed instruction and an understanding of the physical mechanisms involved. Lindeman s pedagogy on breathing as presented in his method book is a result of research into human physiology and anatomy along with elements of vocal training. His way of teaching breathing from the initial exercise to application on the saxophone is quite logical and effective even by modern pedagogical standards. Prior to his article on breathing, Henry Lindeman wrote an article for the April 1935 issue of Metronome Magazine titled: The Way You Start Sax Tone Important as Tone Itself. Though not directly dealing with breathing, the article does address the relationship between breathing and tone quality on the saxophone. Here again, Lindeman makes the connection between a fundamental saxophone skill and tone quality. Having a full and resonant tone at the start of the note was a skill that was high on Lindeman s saxophone playing priority list, and in the article, he insists that the process must begin with proper breathing. Lindeman begins the article by stating: In my estimation the most vital thing for a saxophone player to master is the start of a note. This involves several things but at the 23 Ibid. 24 Ibid. 13
24 root of all of them is learning proper breathing. 25 Further into the article, Lindeman explained that a breath taken from the lower abdominal region is crucial to generating the start of the note on the saxophone with a good tone. Once the breathing process has begun from the abdominal area, the air continues contact with the mouthpiece at a fast rate through pressure from the diaphragm. As with the majority of Lindeman s articles, tone quality is often at the heart of the matter. Tone qualify is a subject that Lindeman keeps returning to and all of the fundamental skills are linked to obtaining optimal tone on the saxophone. Embouchure formation will also improve from proper breathing, according to the article. In relation to embouchure, Lindeman writes, This correct utilization and expulsion of the air supply also controls the facial muscles which automatically contract from a nozzle the air passes through. 26 This statement has merit, as the lips need to be protruding forward with a small and focused aperture in order to generate a focused and fast airstream. However, the proper amount of pressure on the mouthpiece from the lips is not an automatic process and must be properly managed by the player. In general, what Lindeman is trying to say here is that there is only one facial structure that can be formed in order to channel the airstream that is coming from the lungs into the mouthpiece. In Lindeman s experience as a teacher, he had often noticed that students would compensate for poor breathing by having a tighter grip on the mouthpiece, thinking that it would somehow help them achieve more control over the start of the note. However, over 25 Henry Lindeman, The Way You Start Sax Tone Important as Tone Itself, Metronome Magazine April (1935): Ibid. 14
25 gripping the mouthpiece not only compromises the response and tone quality, it also hinders the vibrato because the jaw is not able to move freely. According to Lindeman, Furthermore a proper contact of air and instrument will permit the teeth to move freely for the vibrato and the vibrato produced will be in perfect balance with the sound. When you have mastered the proper start of a note you will realize that heretofore you have always begun to play too soon; that you have prepared to play by gripping your lips around the mouthpiece and then have tried to push the tone through and perhaps have added vibrato after that. 27 A proper inhalation and exhalation will cause the face to naturally form the proper embouchure, which in turn will free the lower jaw, allowing for an unhindered vibrato. Here again, the freeing of the lower jaw is active process not an automatic one by the player. The correct lower jaw pressure will only become automatic once the muscle memory is developed and a habit is formed. The errors and pitfalls described by Lindeman in his article are all habits that he witnessed both from his own students and other professional players. As saxophone pedagogy evolved over the decades, Lindeman s breathing concepts became common practice as other saxophone teachers began to teach breathing utilizing the same concept. The historical development of saxophone performance lends credibility to Lindeman s teachings and shows that in 1934, his method was a great contribution to saxophone instruction. Posture Through his research and personal experience, Lindeman realized that body tension, poor posture, and improper breathing were related. According to Lindeman, 27 Ibid. 15

26 unnatural breathing leads to chest tension, which affects the tone of the saxophone. Here again, Lindeman refers to tone quality. Just as inhaling should be natural and free of tension, the air must be allowed to flow naturally in exhaling as well. To further illustrate his point about relaxed breathing, Lindeman uses swimming as an example and states that good swimmers breathe properly. They have established a smooth and relaxed pattern of inhaling and exhaling to avoid becoming winded and needing to take a quick, tense breath. To achieve a natural exhalation while playing the saxophone, the Lindeman Method explains that the head must be kept level so as to allow a free flow of air from the throat. A lowered or raised head creates interference with airflow and compromises both the tone and intonation of the saxophone. Lindeman promotes the natural head position used during speaking, and when playing the saxophone, the mouthpiece should never be position below the mouth. Figure 2 is Lindeman s drawing showing proper head angle and incorrect lowered head angle. Figure 2. Illustration on Head Position 16
27 Additionally, if the saxophone is held improperly or if the body is contorted in anyway, the fingers will not have the agility necessary to handle the keys of the instrument. In his method book, Lindeman states that the upper body must be straight with head, neck, and shoulders must be aligned and the saxophone should be held slightly to the right. Yet again, in an effort to stress tension-free playing, Lindeman points out that the arms should be loose and relaxed. The saxophone should be balanced with the weight of it on the neckstrap. Once the proper balance is achieved, the saxophone will be stable and the fingers will be able to move freely. It is interesting that Lindeman makes no mention of the thumbs and their role in balancing the saxophone. Aside from the neckstrap, the thumbs help to balance the instrument as well, eliminating the need to grip the instrument with the hands. Embouchure Lindeman s breakdown and description of the mouth and lips in forming the saxophone embouchure are extremely detailed for a method book published in the 1930s. According to the interview with Phil Sobel, Lindeman sought a doctor to better understand the facial muscles involved with playing the saxophone. The mouth is first discussed in the method as Lindeman insists that above all, the mouth must allow enough air to pass through to generate an appropriate vibration of the reed. According to Lindeman s experience, the common tendency is for players to grasp the mouthpiece tightly with the mouth thus killing the sound or necessitating a stiffer reed 17

28 than should be used. 28 His method book calls for a controlled and proper use of the lip muscles, rather than pressure, to form a firm yet flexible embouchure needed for controlled saxophone playing. The air must be allowed to flow from the mouth and lips like water from a nozzle. An illustration regarding embouchure from the method book is shown in figure 3. The picture on the left depicts the proper embouchure, which allows the air to flow naturally. On the right, an embouchure that is too tight is shown. The rope represents lip pressure, closing off the reed and hindering airflow. This illustration is misleading in that the airstream would not actually be directed downwards in the mouth as the arrows suggest in the picture on the right. However, an embouchure that is too tight will restrict the ability of the reed to vibrate. Figure 3. Embouchure Illustration The lower lip is a critical element in Lindeman s concept of a proper saxophone embouchure. Fatigue, intonation issues, and lower lip pain are often signs of improper lower lip pressure and position. Lindeman was not in favor of having the lower lip rest on the chin muscles; instead he insisted that they should be knit together and firm, 28 Lindeman, Henry Lindeman Method for Saxophone,
29 causing the muscles in the area to be drawn together. 29 Only with this type of support can the lower lip withstand great amounts of pressure without tiring or hurting. What Lindeman is trying to say here is that a saxophone embouchure should have a square chin as would be found in a clarinet embouchure. Rather, the lower chin should be more bunched together. The upper lip and the corners of the mouth serve to support the lower lip in order to create a bed for the reed to vibrate on. 30 Lindeman s concepts of saxophone embouchure are all based on discussions he had with a doctor regarding the physiology of the facial structure. 31 Through his research, Lindeman concluded that the primary muscles used in embouchure formation are located in the upper lip and corners of the mouth. Lindeman explains that the lips and the corners of the mouth will move forward during playing, similar to the principle of whistling. The forward motion of the embouchure is an important component in developing a warm and resonant sound. This approach resulted in what later became known as the O shape embouchure. The information provided by Lindeman regarding embouchure was vastly different from other published methods in the United States between , as it was one of the first to recommend the forward O shape utilizing the corners of the mouth. Most published methods at the time did not address the corners of the mouth nor mention any information regarding the physical structure of the face. 32 Lindeman s principles of the mouth and lips in formation of the embouchure are still taught in modern saxophone pedagogy. 29 Ibid., Ibid. 31 Kyle, Levinsky,
30 Facial Mask The final element in Lindeman s writing on saxophone embouchure is the concept of the facial mask. In the September, 1935 edition of Metronome Magazine, Lindeman wrote an article about the facial mask. Lindeman defines the term facial mask in the article as all the muscles and tissues of the entire face, those beneath the eyes, around the nose, in the cheeks, and all the muscles around the lips. 33 All of these elements must be set while playing the saxophone, in essence forming a mask that is unchanging. In the article, Lindeman states that a common habit of saxophone players is to throw the mask out of balance so that they can create their own grip around the mouthpiece instead of allowing the entire face to fall into position naturally. 34 Lindeman insists that the facial mask must not be formed before blowing into the saxophone, but rather it should form as the blowing begins to initiate sound. The rationale behind this is the fact that it is not logical to preset the saxophone embouchure before even putting the mouthpiece into the mouth. The facial mask should form once the mouthpiece is in the mouth with the airstream present. As the facial mask becomes a habit, the muscles of the face will become strengthened and conditioned for saxophone playing. Modern saxophone pedagogy would generally agree with Lindeman s concept, however, the airstream does not need to present in order for the facial mask to fall into place. A proper mask can be formed by simply putting the mouthpiece in the mouth. The facial mask ties together many elements of saxophone playing as it helps with facilitating the airstream as it travels into the mouthpiece, tonguing, and vibrato. A 33 Henry Lindeman, Facial Mask, Metronome Magazine September (1935): Ibid. 20
31 properly formed mask will prevent biting from the lower lip. Lindeman wrote the following in his Facial Mask article: This formation [facial mask], has a direct bearing on the contact between the diaphragm and the lips. This contact is what gives a musician perfect control and ease in playing which makes difficult passages a simple matter to play. It does more than this, it allows your tongue to do its work unhampered and without an opposition from a tight grip of the lips. When the mask of your face is holding the mouthpiece, your jaw is automatically relieved of all tension and the teeth will be enabled to hang loosely and permit a free, even vibrato. 35 The Lindeman Method explains the origins of the term facial mask and states, The facial mask is an aid used by professional singers to keep their voices ringing clearly by making the face feel dead and lifeless, as far as possible without sensation. 36 Lindeman adapted the concept to his saxophone teaching as a method to prevent students from creating any extraneous manipulation of the embouchure. The ultimate goal of a natural facial mask formation is producing a clear and resonant tone. In his Metronome Magazine article, Lindeman wrote the following: Singers take great pride in the placement of their voices. On an instrument a clear tone is a matter for just as great pride and satisfaction. But it is very easy to ruin a clear tone by gripping the mouthpiece or adopting some sort of a tight, set hold. 37 In modern saxophone pedagogy, it is accepted that once the embouchure and facial structures are set around the mouthpiece, they do not change regardless of register or dynamic level. Changes that do occur happen inside the oral cavity. The only 2002), Ibid. 36 Lindeman, Henry Lindeman Method for Saxophone, Henry Lindeman, Facial Mask, Metronome Magazine September (1935): Eugene Rousseau, Saxophone High Tones 2 nd ed. (St. Louis: MMB Music Inc., 21

32 exception to this rule would be extreme altissimo notes, which requires a decrease in the amount of the lower lip that is used to facilitate a faster vibration of the reed. 38 A slight loosening of the embouchure is also necessary for the low register, though the facial mask should stay intact. Lindeman s claim that many saxophonists tend to manipulate the embouchure and facial structure still holds true in modern day performance, and often equipment is blamed for poor response, tone quality, and intonation when more attention should be placed on the facial mask. Figure 4 is Lindeman s illustration of the facial mask. Figure 4. Facial Mask Illustration Initiation of Sound Many of Lindeman s students had trouble producing a clear attack on the saxophone. The ability to produce a note on the saxophone with a clear and resonant tone on command is a critical fundamental and was a challenge for many saxophonists at the time. Lindeman prescribes the tu syllable in his method book. 22
33 To model the proper attack or initiation of sound on the instrument, Lindeman would have the student watch him bounce a ball and would explain that regardless of the speed of the ball bounce, there is always a pattern of thud-catch. 39 Figure 5 is Lindeman s diagram of the ball motion from his book. Then the student would practice with the ball bounce in mind, with the thud being the attack. The imaginary ball would then return to the hand and the next attack would not begin until the next thud. This method allowed the student to understand the timing involved with the movement of the tongue in initiating the sound. Although Lindeman s bouncing ball analogy is an effective explanation of how to time the start of a note, it does not explain the physical process involved. Lindeman does explain the physical process of how to articulate on the saxophone but later in the book. It would have been more helpful to have that information along with this section on attacks. A combination of understanding the physical actions involved in starting a note on the saxophone along with the timing would yield the most optimal results for a student. Figure 5. Bouncing Ball/ Note Attack Illustration 39 Lindeman, Henry Lindeman Method for Saxophone,13. 23

34 Three short exercises for practicing attacks are provided in the Lindeman Method. The first deals with attacks of quarter and eighth notes. The second addresses attacks of half notes. The third involves initiating the sound, then playing a series of slurred or joined notes. The purpose of the Prolonged Attack and the Joining Notes exercises is to have the student practice getting the tongue out of the way after the initial attack so there is no interference with the tone. The goal of these exercises is have the student develop the ability to start a note with a full and resonant tone on command. Figure 6. Excerpt of Attack Exercises 24
35 Lindeman was a proponent of having the tongue drop all the way down to the bottom of the mouth after the attack and recommended the reflex of the tongue movement be practiced without the instrument. stand before a mirror and watch the motions of your tongue striking the roof, falling to the bottom as you hum an unbroken tone. 40 A more detailed explanation of Lindeman s physical approach to articulation is provided in chapter five. Tone Tone is at the core of the Lindeman Method. Lindeman emphasized the importance of having a clear concept of different types of sounds in his book as a point of departure for developing a solid tonal concept on the saxophone. By sounds, he means dry sounds such as a steam whistle or siren versus ringing sounds from a bell or gong. 41 According to the Lindeman Method, the most desirable sounds are the ones that have the most even vibrations. Once the student has a clear concept of different types of sounds, a sort measuring stick is formed for judging their own tone quality on the saxophone. In the initial stages, Lindeman s method stressed that the student must first be able to produce a clear straight tone without vibrato. It is generally agreed upon that vibrato should only be added on once the straight tone is mastered and never used as a means to disguise poor tone quality. The February 1935 edition of Metronome Magazine featured an article by Lindeman regarding tone entitled, Importance of Tone Placement in Sax Playing. The article discusses how to place the saxophone tone so as to produce a homogenous 40 Lindeman, Henry Lindeman Method for Saxophone, Ibid. 25
36 sound throughout the full range of the instrument. Tone placement is Lindeman s term for describing how to produce the optimal resonance for a note. This concept is derived from vocal pedagogy, as Lindeman explains in the article: in voice culture proper placement is of prime importance, and a great portion of a singer s study is devoted to placing the ring in that area where he is best able to sing clearly and to sing changes in register with complete ease. 42 A note on the saxophone can only be placed correctly if the embouchure is properly formed so that the mouthpiece is not gripped too tightly or too loosely. A tight embouchure will cause the sound to be pinched and thin; conversely, a loose embouchure will generate an unfocused tone that is flat in quality. In the article Lindeman explains the benefits of a well-placed tone when he writes the following: A well-placed tone enables a saxophonist to play with perfect command of his instrument. It gives him elasticity, makes for fine and subtle phrasing, he can play loud or soft and need never worry about notes cracking or certain notes in high registers becoming thin. 43 The article concludes with wise practice advice from Lindeman, encouraging students to practice tone placement slowly, utilizing only a few fundamental notes around the C4 octave as a starting point. Saxophone students of the era, especially ones that used self-teaching methods, tended to skip slow practice, instead opting to hurry into playing fast and technical works. Many self-instruction methods published in the United States in the early twentieth century promoted a dangerous notion that the saxophone could be played well in only a short time without a teacher. The purpose of Lindeman s practice 42 Henry Lindeman, Importance of Tone Placement in Sax Playing, Metronome Magazine February (1935): Ibid. 26
37 advice was to help saxophone students realize that time and patience were required in order to develop proper playing skills. Additionally, in the article, Lindeman also encouraged students to analyze their sound. One should play a note and learn to analyze its imperfections. Does it sound forced, is it flat, is the vibrato uneven? And then proceed to eliminate these possible faults, until that single note is perfectly played. When one cultivates this habit of analysis he will find himself possessing such a complete control of certain notes that other notes will require increasingly less effort. 44 During the 1930s, the saxophone was still a relatively new instrument in the United States. As a result, there was a wide range of tone qualities among saxophonists. Standardized tone quality particularly among concert saxophonists was not fully established so many students had no example to follow. Lindeman s writing and teaching regarding tone provided a guide for students to help develop tone. The foundational elements addressed in the opening pages of the Lindeman Method were commonly found in many early American saxophone methods. However, Lindeman s explanations on topics such as breathing, posture, and embouchure seemed to have withstood the test of time as these elements regarding saxophone playing are generally agreed upon and taught in the same manner in institutions across the United States. In fact, later method and instruction books published in the United States, such as Larry Teal s The Art of Saxophone Playing, describe the approach to teaching the same fundamental elements in the exact same manner as Henry Lindeman, with further details added as saxophone pedagogy evolved. Despite the fact that there are saxophone pedagogy books with more updated and in depth information, Lindeman s method book 44 Ibid. 27
38 gives saxophonist an origin point that was further elaborated on by later teachers such as Larry Teal. 28
39 CHAPTER 2 AIR AND FINGERS For the purposes of this document, the term finger technique will refer to the pressing and lifting of the fingers on the keys of the saxophone. Teaching proper finger technique and its relationship to tone quality on the saxophone is a unique aspect of the Lindeman Method. Early American method book writers recognized the importance of proper finger position and technique in developing fluidity and speed on the saxophone. 45 In 1939, a method book by Gardener Huff supported Lindeman s concepts on finger technique. Huff states, In order that a speedy technique may be learned, move the fingers only the distance necessary to open or close the pad, and see that they are always in a position to do so. 46 Lindeman, however, taught finger dexterity from a different perspective and insisted that his students develop sensitivity in regards to how much pressure or force is used to put down and release the keys of the saxophone because that pressure affected the tone of the saxophone. Finger pressure and its connection to tone quality and phrasing is a topic not often discussed in saxophone pedagogy. This concept alone makes the Lindeman Method relevant and worthy of consideration by modern saxophonists. I can remember by own experiences as a high school student and being taught to be mindful of not slamming down the keys of the saxophone or throwing my fingers up too high when releasing keys. Those early lessons on finger technique have stayed with me ever since. 45 Levinsky, Ibid. 29
40 Henry Lindeman developed a unique pedagogical approach to air and fingers through his interview with Jascha Heifetz. In the interview, Heifetz stated, I do not move my body when I play the violin, I focus all of my energy on the bow and my fingers. 47 To Heifetz, the fingers and the bow were the only two things that were responsible for sounding a note. He also said, My shoulder does not help to play a note, my fingers and bow are what does the work. 48 After speaking with Heifetz and hearing his thoughts on playing the violin, Lindeman felt that saxophonists should be just as sensitive and attentive to their fingers and, in lieu of the bow, the airstream. Both elements have direct effects on tone quality and note response on the saxophone. The first two lessons with Henry Lindeman always involved the fingers and the air, respectively. 49 The Airstream Henry Lindeman stressed to his students that the air should be constant and always in motion, directed towards the bottom or bell of the saxophone while playing. 50 In teaching about the airstream, Lindeman employed imagery and asked his students to visualize the airstream traveling down the tube of the saxophone towards the bell. The stream should also be totally uninfluenced by any note being played; that is to say, each note on the saxophone does not require a different airstream. One of my former saxophone teachers, Leo Potts, who taught from the Lindeman Method, liked to say, The airstream should never know what the fingers are doing. Potts would often demonstrate 47 Kyle, Ibid. 49 Ibid. 50 Ibid. 30
41 this Lindeman concept by having me blow into my saxophone while he fingered the notes. A constant and unhindered airstream combined with proper finger technique would allow the saxophonist to play any note on the instrument with optimal response and consistent tone quality across the saxophone s full range. Issues with the airstream can be difficult to diagnose for a teacher, as it is something that cannot be seen as opposed to the bow of a string instrument. Lindeman s approach to visualization gives teachers a means to make the direction and speed of the airstream a more tangible concept for the student to grasp. The Fingers Lindeman devoted an entire section of his method book just to developing proper finger technique. His finger concept was derived from his interview with Heifetz. In the method book, Lindeman states the issue succinctly: it is impossible to keep the tone flowing while the fingers are moved forcibly from one key to another. 51 The effect of the fingers on tone is most noticeable by observing beginning saxophone students when they make the initial attempts to finger notes on the instrument. Novice students do not yet have the finger control to smoothly press and release keys. Instead, they tend to slam down keys and lift up their fingers high in the air when releasing. A smooth connection between notes is difficult to achieve through this manner, and the sound is unrefined when going from note to note. In regards to the fingers, Phil Sobel states in his interview, the speed at which you put down or pick up a finger affects 51 Henry Lindeman, Henry Lindeman Method for Saxophone,
42 the sound and the pitch of the note. 52 Sobel also points out that there are many prominent jazz saxophonists, such as Charlie Parker, Johnny Hodges, and Julian Cannonball Adderley, who have developed a strong control and finesse in their finger technique and were able to improvise long and flowing lines because of it. 53 Figure 7 shows Lindeman s finger concept: the top line displays proper finger technique as the finger never loses contact with the key, while the bottom approach shows wasted motion as the finger is not in contact with the key prior to pressing it down and also leaves the key once the key is released. Figure 7. Illustration of Finger Technique Timing, proper finger placement, and synchronization of the fingers are the three elements in Lindeman s concept of finger technique. Timing involves the movement of the fingers while changing notes. Lindeman uses an example of playing B to C on saxophone in his book and states that in playing from B5 or 6 to C5 or 6, do not raise your second finger in anticipation of the C. 54 Cross fingerings such as the one described where finger one and two alternate or finger four and five, are generally avoided on the 52 Kyle, Ibid. 54 Lindeman, Henry Lindeman Method for Saxophone,
43 saxophone whenever possible through the use of alternate chromatic fingerings. However, instances will arise where this is not possible and the cross fingering must be used. In those situations, every effort must be made to smooth out the cross move. Lindeman s approach to timing and synchronization is an effective method of developing a smooth cross finger motion. Lindeman was insistent that the fingers should not lose contact with the instrument, whether it be putting down a key or releasing a key. Any excess moving of the fingers away from the keys of the instrument is considered to be wasted motion. The fingers should generally be kept in contact with the keys. For instance, if the first finger starts from above the pearl when playing a B, there is an extra motion involved where the finger must first make contact with the pearl and then the key is put down. Also, if a finger leaves the pearl in the release of a key, an extra motion is again created. Improper finger position contributes to the slamming down or lifting up of keys on the saxophone, which in turn will compromise phrasing and hinder finger dexterity in technical passages. In theory, Lindeman s idea that the fingers should remain in contact with the keys at all times is logical. However, in practice it is not possible to maintain such a connection at all times. Despite limitations in actual performance practice, every effort should be made to eliminate as much wasted motion as possible. The Lindeman Method offers several exercises to develop relaxation, sensitivity, and awareness of the fingers so that they stay in contact with the saxophone. In the initial exercise, the student is asked to hold out fingerings for various notes on the saxophone without actually playing. While holding, the student is required to focus on the sensation of the arm muscles all the way to the palms and then the fingers. By the end of the 33
44 exercises, the fingers should feel as if they are a part of the instrument. Though the exercise seems laborious, Lindeman makes this claim: Many hours of this will produce for the student a very fast technique and though you cover a series of notes at lighting speeds your fingers will still be a part of the instrument just as they are playing the prolonged notes. When the note is telegraphed from the brain to the finger there will be no stiffened nerves to impair your speed and the fingers will be so well synchronized that the change from note to note will take place without any shifting of the embouchure. 55 Finger exercise one, shown in figure 8, includes key signatures and involves various combinations of slurred sixteenth notes that can be repeated as needed. The idea is to apply Lindeman s finger concepts and practice synchronizing the fingers, moving them in them in a relaxed manner without losing contact with the keys. Articulations are not included in this exercise as the goal is keep the air flowing while fingering smoothly between notes. In the beginning stages, the focus is all on the air and fingers; exercises involving the tongue are featured later in the method book. Lindeman also does not include a tempo marking; students are expected to begin playing slowly to develop proper technique and coordination. As shown in figure 8, each cell contains two pitches either a whole step or half step apart. However, the second page of the exercise includes cells with three-note patterns. If the finger is thrown above the pearl while releasing to the upper pitch, that note will stick out of the texture. Likewise if the key is slammed down with excessive force for the lower pitch, that note will be accented. The challenge for the student here is to play both pitches in a smooth manner with both notes balanced and unaccented. Additionally, the airstream must be kept constant and not change in quantity or speed to accommodate individual notes. Lindeman did not intend for these exercises to be played 55 Ibid.,

45 with changing dynamics. Instead, a single dynamic level should be maintained throughout. Figure 8. Excerpt of Finger Exercise One The second finger exercise, shown in figure 9, is similar to the first. However, the rhythm is now slurred triplets. In the text above exercise two, Lindeman presents the idea that proper timing of the fingers will help ensure proper response of the note on the saxophone without any need to manipulate the embouchure. The issue of embouchure manipulation is present to varying degrees among saxophonists. An example would be playing across the break, C5 or C#5 to D5. The mechanics in this motion on the saxophone is going from a note that has very little resistance, an open-tube note, to a closed-tubed note, which has a greater amount of resistance. A common tendency is to tighten the embouchure and slam the keys down when going to the closed-tube D, causing the D to be sharp and stick out of the texture compared to the open-tube note preceding it. The proper approach should be a gentle yet firm closing of the keys for the long tube note. Exercise two is also designed to reinforce 35

46 the fundamental concept of the facial mask, as a constant airstream is required when playing the passages, thus helping to ensure proper tone production throughout the range of the saxophone when combined with proper finger movements. Figure 9. Excerpt of Finger Exercise Two Intervals Pages thirty-four and thirty-five of the Lindeman Method include a section on interval playing, along with two exercises. The first is shown in figure 10, and an excerpt of the second exercise can be found on figure 11. Both exercises consist of triadic and chord patterns in various inversions, thus creating various interval leaps. The interval portion of the book extends the concepts of air and fingers to include notes that are farther apart, since the first two finger exercises contained passages that mostly moved step-wise. When playing interval leaps, the tendency for the saxophonist is to manipulate the embouchure, thus compromising the tone quality and pitch of the upper note. In order to explain how to keep a consistent tone quality while playing intervals, Lindeman uses the 36

47 vocal approach. In his book, Lindeman states, Vocalists who wish to stay in good voice practice singing from one note to another without moving the larynx; so that the tone placement will stay in one groove, and the voice will keep ringing even while the notes are changing. 56 Lindeman believed that saxophonists must take the same approach and not move or involve the larynx while changing notes. Instead, the key is, yet again, the timing of the air and the fingers. With proper timing and no larynx movement, the tone will not change as interval leaps are played. Both interval exercises must be played slowly and mindfully with the student paying close attention to the connection of notes across large intervals. If played too fast and mindlessly, the student will have little benefit from it. Figure 10. Excerpt of Interval Exercise One 56 Lindeman, Henry Lindeman Method for Saxophone,
48 Figure 11. Excerpt of Interval Exercise Two Lindeman insisted that his students develop a subtlety and intimacy with their fingers as they put down and lift up the keys of the instrument. Additionally, all wasted motion in the fingers should be eliminated. The saxophone repertoire is notoriously demanding from a technical standpoint, and new works for the instrument continue to push the limits of saxophone technique. However, even in this type of environment, Lindeman s concepts on the fingers will allow for a refined and artistic performance of even the most demanding saxophone literature. 38
49 CHAPTER 3 VIBRATO The first American saxophone method book to introduce vibrato was written by Rudy Wiedoeft in Prior to this method, vibrato on the saxophone was subject to debate, with some teachers believing that only a straight tone should be used. However, by the 1930s, it was standard practice for saxophones to play with vibrato regardless of genre, and it became incorporated into all method books. General aspects of vibrato found in method books published from the mid 1920s through the 1930s included width, speed, and application of the vibrato. 58 Jaw and lip vibrato were the two common approaches that could be found in methods written in the United States, although as saxophone pedagogy evolved, the jaw vibrato became the standard. Henry Lindeman explained vibrato in his book addressing all three of the elements mentioned above. The purpose of vibrato, according to Lindeman, is to enhance an already ringing and resonant tone. Vibrato should never be used as a crutch to hide poor tone quality or intonation. One of the articles that Henry Lindeman wrote for Metronome magazine was entitled, Many Sax Players Use Vibrato to Cover Faults. 59 The main focus of the article was to emphasize that a ringing and resonant straight tone must be acquired on the saxophone before vibrato is attempted. Lindeman uses the violin, piano, and voice as examples in this article: (1935): Levinsky, Ibid. 59 Henry Lindeman, On the Question of Breathing, Metronome Magazine Jan 39
50 A student of the violin spends months learning to produce a single note perfectly; he must learn to control his right hand and to bow to perfection before proceeding to the vibrato or any of the phrasings or shadings which are done with the left hand. The pianist similarly is required to acquire a clean, perfect touch before adding any sort of interpretation. And a vocalist, we know, devotes a considerable portion of his study to learning correct placement. 60 Saxophonists approach to vibrato, according to the article, should be no different. Lindeman was frustrated by the fact that it was commonplace for saxophonists to play with vibrato without having mastered the rudiments of good basic tone quality. The vibrato then ends up being used to cover up poor tone quality and intonation. This issue was more common in the first half of the twentieth century. As saxophone performance standards improved, more and more saxophonists entered the professional world without the need to use vibrato as a crutch to cover issues in tone quality. Additionally, Lindeman felt that this was one of the reasons why the saxophone was not favorably regarded by legitimate musicians. 61 Vibrato should be utilized as an embellishment of tone designed to serve the music being played. Conversely, Lindeman stressed in his article that vibrato should not compromise a resonant straight tone. When a violinist uses the vibrato he does not interfere with the free vibration of the strings and when the sax player uses it he should not in any way alter the normal vibration of the reed or the amount of air which would pass through it if he were not using vibrato Ibid. 61 Ibid. 62 Ibid. 40
51 Henry Lindeman s overall philosophy behind saxophone vibrato still hold true in modern day pedagogy. As it makes little sense to attempt vibrato without attaining a resonant and consistent basic tone first. The Lindeman Method states, Vibrato is gotten by a loose movement of the teeth. The lower jaw is connected to the head not by any bone structures but by a tendon on either side of the face. Do not lift the teeth to meet the reed but allow the lower lip to come up over the teeth to form a bed for the reed to rest on. 63 Essentially what Lindeman is describing here is that vibrato on the saxophone is produced by a vertical and regular motion of the lower jaw structure, which includes the lower teeth. The student is also reminded that the lower lip should always be over the lower teeth, forming a cushion. The jaw vibrato was generally agreed upon and taught in early American methods. The text regarding vibrato in the Lindeman Method provides some helpful troubleshooting tips for the time period it was published. For example, if the movement of the jaw is too wide, the vibrato will be slow and comprise tone quality along with pitch. 64 Lindeman also cautions the student not to confuse jaw vibrato with lip vibrato, as the lips are not involved in the process. 65 In fact, any squeezing of the lips will hinder the movement of the lower jaw. In the text, Lindeman states that only a loose movement of the teeth and jaw will allow the tone to ring without interference. 66 Once the basic motion is understood, the task of the student must be to develop control over the jaw motion. An initial exercise is presented in the book, in which the 63 Lindeman, Henry Lindeman Method for Saxophone, Ibid. 65 Ibid. 66 Ibid. 41
52 student is asked to stand in front of a mirror and move the lower teeth up and down evenly while humming from note to note. 67 The student must make sure that the jaw never stops while changing notes so the vibrato is kept constant. 68 This initial exercise is not commonly used in current pedagogy as most teachers instead begin with teach a specific syllable such as yu for the student to use in producing vibrato. Lindeman insisted that his students be able to produce the exact amount of vibrations per note. For instance, playing a phrase with exactly four vibrations for each quarter note. The intention here is not to have the student actually apply vibrato in such a manner in performance but rather as a goal to develop control. This manner of learning vibrato on saxophone is still used and highly favored among teachers. Lindeman wrote several vibrato exercises in his method book with the intention of having the student develop a mechanical control over vibrato in the beginning stages. The vibrato should be studied mechanically at first and not with any effort to beautify the tone. It is essential that you learn to control the movement of the teeth and that this motion continue absolutely evenly so that the when successive notes are played they will fall into one continuous wave of sound. 69 All of the exercises, as shown in figure 12, require the student to play with a specific number of vibrations per note. As with all of the exercises in the Lindeman Method, there is no indicated tempo marking. In fact, Lindeman makes no mention of a preference in vibrato speed. The lack of any indication for vibrato speed sets the Lindeman Method apart from other early American saxophone methods, as it was 67 Lindeman, Henry Lindeman Method for Saxophone, Ibid. 69 Ibid. 42
53 standard to indicate specific tempi when discussing vibrato. However, since the exercises include specific indications for the amount of vibrato waves to be played per note, this shows a preferred range of vibrato speed. Additionally, the indicated number of vibrations could only be practically played at a certain tempo range, which would then imply the tempo at which Lindeman thought was tasteful and practical for mechanical vibrato practice. Additionally, as shown in figure 12, the vibrato waves are constant even through eighth and sixteenth notes, which indicates that Lindeman preferred that the vibrato be present at all times. As performance style evolved, the need to have a constant vibrato was eliminated. However, Lindeman s pedagogical approach and exercises are still valid. As a side note, Lindeman used the term vibratos in the text above his vibrato exercises, which is not a proper word to describe the undulations involved in vibrato. Henry Lindeman was not an academic and his method book was not originally meant to be used in a university setting. As a result, some of the terminology and wording throughout the book tend to be more pedestrian in nature. Henry Lindeman s vibrato exercises are rudimentary but are written so that the student has a vehicle with which to explore the mechanics of vibrato. Exercise one requires the student to practice vibrato on individual quarter notes with a break in between. No attempt is initially made to have the student play a full phrase with vibrato. Exercises two and three progress to include connecting notes with vibrato, not in a melodic context, but rather in the context of playing scale patterns. It is only in the final vibrato exercises that Lindeman has the student apply vibrato to an actual melody. 43
54 The primary goals in Lindeman s book regarding vibrato are about understanding the mechanics of the jaw movement and developing a firm control over it. Putting vibrato in a melodic context is the next section of the book. Ultimately, the speed of the vibrato seems to be left up to the preference of the student as he states in the book, When this has been mastered, the mechanical aspect of the vibrato will be a thing of the past and the jaw will be able to fall into various tempos and changes in tempo naturally, and without any assistance from you. 70 In the final sentence, Lindeman brings back the connection to violin playing when he states, If these are done diligently, the student will shortly acquire great control and flexibility of his jaw as the fine violinist has of his left wrist. 71 Lindeman s pedagogical information on saxophone vibrato was revolutionary at the time the Lindeman Method was published. His method book provided a detailed description of the face and jaw structure involved in vibrato, which shed light on how to physically produce vibrato on the saxophone. The vibrato exercises provided are very similar to exercises found in other books of the era and allowed the student to develop a firm control over vibrato in a mechanical sense before applying it musically. Lindeman was wise in not insisting on specific tempi for vibrato; this allowed the student the flexibility to play at any desired speed depending on genre and musical trends. One thing that is lacking here in Lindeman s book is a diagram or explanation of the undulations or waves of vibrato. Modern saxophone method books include some of kind visual chart of the general frequency, depth, and direction of the waves. This aids the student in understanding how vibrato affects pitch. 70 Lindeman, Henry Lindeman Method for Saxophone, Ibid. 44
55 Figure 12. Excerpt of Vibrato Exercises The pedagogy behind saxophone vibrato has changed very little since the publication of the Lindeman Method. Vibrato is still initially taught in a mechanical manner through generating regular pulsations and eventually applying it in a more natural manner in performance. Based on my research, Henry Lindeman could be considered one of the originators of the modern approach to teaching saxophone vibrato in the United States. 45
56 CHAPTER 4 MELODY PLAYING Melody playing or phrasing was addressed in most early American saxophone methods. The general consensus among writers was that phrasing was achieved through a combination of dynamics, vibrato, tone color, and articulation. On the subject of phrasing, saxophone soloist Rudy Wiedoeft favored imitating the vocal approach in interpreting melodies: In solo playing, the phrasing is of extreme importance, and this is a difficult subject to cover in mere words. I have heard many saxophone soloists, who are capable of fine effects, did not bring the passages out through their fear of the tone becoming reedy A melody played without tone color, or in a tiresome continuity of tone, is like a painting, perhaps of noble conception, but lacking the requisite colors to make it altogether charming. In playing a melody try to imitate the human voice of a good artist, playing a gradual crescendo as it ascends and a diminuendo as it descends. Ballad playing is popular on the saxophone and one should study the words of the melody to ensure proper phrasing and to avoid taking breath in the wrong place. 72 Early American methods approached melody playing in both a mechanical and artistic manner. 73 The mechanical approach involves dynamics, articulation, breathing, tempo, and tone quality. 74 Mastery of the mechanical aspects of expressive playing was the initial step towards cultivating an artistic approach to expression. All of the mechanical and fundamental skills involved in melody playing were important to Henry Lindeman as well. However, Lindeman introduced yet another element: timing. According to Lindeman, saxophonists have a tendency to anticipate the notes within a melody or phrase. This error in timing causes a disruption in the flow of the melody. In his method, Lindeman refers to the bowing of violinists as a way to ensure 72 Levinsky, Ibid., Ibid. 46
57 proper timing. Figure 13 shows Lindeman s illustration of violin bow movement. What is shown in the illustration on the left is a figure-eight motion of the bow while the right shows a variation of the same motion. In the method book Lindeman states the following: Here I should like to point out what the violinist does which will be valuable in assisting the player of woodwinds. The common error is that players, seeing notes before them, often anticipate them. When you are playing try to imagine the steady, graceful bowing of the violinist who keeps his tones flowing with each bend of the wrist. When he comes to the end of his bow, the wrists keep it moving across the strings by a sort of round the corner motion which produces an elongated figure eight. This although he has used several bowings there is a perpetual, unbroken tone as though he were passing over the strings with one enormous bow. 75 Figure 13. Violin Bowing Illustration Lindeman s intent here is to have his students connect the notes of a melody. It is common for wind players to chop up musical phrases through poorly timed breathing, errors in rhythm, and an inconsistent sense of tempo. By utilizing imagery and having 75 Lindeman, Henry Lindeman Method for Saxophone,
58 students imagine a bow movement while playing, Lindeman provides a visual method of achieving proper timing. In regards to timing, Lindeman states, Time your playing, and in your mind s eye, see the bow of the violinist as it moves steadily across the strings. If a note comes in too soon you will visualize a jerky movement of the bow and know that your timing has been incorrect. 76 As stated in chapter two, Lindeman considered the airstream of a saxophonist the equivalent of a bow to a violinist. Although the airstream is not directly addressed in the melody playing section of the book, Lindeman does write about how a violinist keep the bow always in motion so that the tone is consistent and unbroken. That statement would imply that the airstream is a critical element on expressive melody playing on the saxophone. The airstream, like the violin bow, must be kept steady and continuous to ensure consistent tone quality and note connection. With regards to bow movement and rhythm, Lindeman explains, When in varied rhythms, it is necessary to stop the bow momentarily, the bowing motion is resumed without distorting the continuance of the figure eight. 77 Vibrato and ensemble playing is mentioned briefly at the end of his prose on melody playing as he writes, In a group or ensemble playing, the vibrations and vibrato of all the players must match. Even when one may be playing variations against the long tones of the others all will be perfectly blended. Vibrato was a dominant part of saxophone playing in the early twentieth century. In dance bands, it was standard practice for the entire saxophone section to utilize vibrato. What Lindeman is stating here is that 76 Lindeman, Henry Lindeman Method for Saxophone, Ibid. 48
59 when playing melodies as a section or ensemble, in addition to timing, the vibrato must match. The melody playing section contains three exercises for the student to apply Lindeman s timing concept as well review his concepts of air, fingers, and vibrato. Exercise one, shown in figure 14, is a triple meter melody, and the phrases throughout the exercise are marked with a combination of slur and phrase marks. Lindeman intended this melody to be played in a legato style with continuous vibrato. A tempo marking is not indicated, which gives the student room to explore a variety of tempi. For the purposes of this exercise, speed was not of great importance to Lindeman. Instead, achieving proper timing and forward motion is the main focus. Breath marks are also not indicated, although Lindeman is very clear about when the phrases end so that breathing could be planned appropriately. Figure 14. Excerpt of Melody Exercise One 49
60 Exercise two contrasts exercise one in terms of style, as it is written in cut time. Here, Lindeman does provide a general tempo indication, stating that the exercise should be played at a dance tempo. Lindeman utilizes a specific rhythmic scheme when he constructed the phrases in this exercise as well as the previous one. The phrases that he composed consistently end on long note values before continuing straight into the next phrase without a rest. This was intentionally done to allow the student a method of practicing timing by coming off of long note durations and making the next entrance. Exercise two is shown in figure 15. Figure 15. Excerpt of Melody Exercise Two 50
61 At the top of the page, Lindeman reminds the student to not anticipate any of the notes and let the vibrato guide the timing. Having the vibrato being at timing guide implies the use of more metronomic vibrato for the sake of this exercise. The vibrato and keeping the violin bow movements in the mind s eye were strategies Lindeman prescribed for the student to maintain forward motion, energy, and tempo through any given phrase. The final melody exercise, as seen in figure 16, is actually comprised of two separate short works. Both works are written in a slow legato style. Rhythmically, Lindeman breaks his previously established pattern and writes combinations of quarter, eighth, and sixteenth notes with very little usage of longer note values. Articulation and breath marks are not included here, leaving the student room to explore different options. The only indicated articulation is an accent under the quarter note in the first measure. Dynamics are also not notated. The second work is written in triple meter, and Lindeman notates specific articulation and breath marks for each phrase. A dynamic marking is written in the last two measures of the page with a fortissimo dotted half note going to a pianississimo quarter note, indicating that the dotted half note should be heavily stressed before ending the exercise softly. Henry Lindeman had a very unique perspective on the common topic of phrasing and expression on the saxophone. Aside from the mechanical and fundamental aspects involved with phrasing and expression, Lindeman added that timing was an important aspect as well. Based on his comparisons with the violin bow, the timing concept was no doubt influenced by his interaction with Jascha Heifetz. String players have a visual 51
62 advantage over wind players in that they can see the bow movements. If there is any interruption in the sound or phrasing, a string player can immediately see where the issue is occurring in terms of bow movements. Lindeman is attempting to get saxophonists to utilize a visual approach as well, having all of the notes in the phrase fall within the imaginary bow movements. The final results should be melodic playing with more forward motion, energy, connection, and consistent tone quality in addition to improved internal sense of time. Lindeman s pedagogy regarding timing is useful in helping students approach long note durations. Playing phrases containing large amounts of notes and active rhythmic patterns can be done well through metronomic and regular practice. However, in dealing with long note durations or slow tempi, a strong sense of time is required in order to come off of a given note and make the next entrance. A common error among students is to loose track of the tempo when holding out long not durations and be late or early on the next entrance. Figure 16. Excerpt of Melody Exercise Three 52

63 (Figure 16-Continued) 53
64 CHAPTER 5 ARTICULATION The Technique of Tonguing As with all his saxophone fundamentals, Henry Lindeman teaches tonguing on the saxophone with tone quality in mind. Lindeman teaches that the tone must be kept consistent and ringing while the tongue is active. In the book, Lindeman states, The reed must be kept vibrating clearly as though you were holding a long tone and the tongue kept bouncing against it, d-d-d-d, so as not to interfere with any of the vibrations. 78 The Lindeman Method prescribes two syllable types for tonguing: d and t. The d type tonguing is used for legato-style playing, while the t type is reserved for staccato passages. 79 Lindeman also mentions that the two syllables occupy different areas of the tongue. The tip of tongue touches the area where the top gums meet the top teeth for the t syllable, while the d syllable involves a region of the tongue that is slightly farther back. Lindeman briefly mentions the tongue stop in the method book and writes that it should only be used as an effect. In current wind pedagogy, the same basic syllables are used, however, vowel ah are added at the end. The vowel creates the proper tapering at the end of the note. Henry Lindeman s approach to teaching how to tongue on the saxophone provided a guide for students at the time. Without proper instruction on tonguing, many variations on the technique crop up, such as anchor tonguing, where the tip of the tongue touches the inside of the bottom lip while the back is used to touch the reed. Lindeman s tutorial on how to tongue in his method book is made even more effective because he 78 Lindeman, Henry Lindeman Method for Saxophone, Ibid. 54
65 discusses the role of the airstream as well. Tonguing is another one of Lindeman s fundamental concepts that has since become standard practice among saxophonists. In the initial stage of tonguing practice, Lindeman again recommends that the student practice without the instrument. The initial exercise involves students verbally saying d-d-d and t-t-t until each syllable is clear and consistent. 80 Once the student has mastered verbalizing the syllables, they are applied to the instrument. According to Lindeman, When you apply this correctly to the instrument you should be able to hear your ring come through steadily, to feel your tongue bounce and to hear your d-d-d-d (legato) or t-t-t-t (staccato) come forth clearly. 81 In his method book, Lindeman states that the d type tonguing be mastered first due to the fact that it is more commonly used for fast and light tonguing. With regards to tonguing practice on the saxophone, Lindeman uses an analogy of running up a flight of stairs: Imagine yourself running lightly up a flight of steps. Practice just a few of these steps at first, always ascending lightly and easily; gradually you will be able to add more and more. If your tongue becomes slower and heavier as you ascend, you are attempting more steps than you can handle. 82 Speed of articulation and the duration of notes are not specified here by Lindeman. The idea here is to have the student experiment with a variety of possibilities or speed and duration. This statement is Lindeman s reminder to students that the tongue should be relaxed and kept bouncing off of the reed. If at any point during practice, the tongue 80 Lindeman, Henry Lindeman Method for Saxophone, Ibid. 82 Ibid. 55

66 movement becomes tense and labored, the student should stop. During practice, the student should only tongue as many notes as can be done correctly. Lindeman wrote five tonguing exercises for his method book. The exercises are progressive, starting from tonguing repeated notes to separate pitches utilizing both the d and t syllables. Tempo markings are not included for any tonguing exercise. Lindeman wanted students to play at a tempo at which they could tongue with proper technique. Tonguing exercise one, shown in figure 17, utilizes d -type tonguing. The exercises involve tonguing repeated pitches in eighth-note and sixteenth-note combinations. Breath marks are included every two measures, indicating that the exercise is divided into two-bar cells. The instructions for the exercise state, Play lightly. Do not permit your tongue to interfere with the free vibration of the reed. 83 This is Lindeman s reminder to maintain a clear and ringing tone while keeping the tongue relaxed and bouncing off of the reed. Figure 17. Excerpt of Tonguing Exercise One 83 Lindeman, Henry Lindeman Method for Saxophone,
67 Exercise two, as shown in figure 18, is similar to exercise one but with the addition of triplet and dotted eighth-sixteenth rhythms. Breath marks are mainly included at the end of each line and after the third measure from the end. At the top, Lindeman writes, Use your own judgment about taking breaths here. 84 In contrast to the first exercise, tonguing exercise two contains no note values longer than a quarter note; the predominant rhythms are combinations of eighth notes, sixteenth notes, and triplets. The purpose is to engage the tongue further by not giving it time to rest while holding notes, as was the case in the previous exercise. The third tonguing exercise, illustrated in figure 19, involves tonguing separate pitches and is modeled after Lindeman s analogy of running up stairs. Exercise three begins with tonguing two notes: G5 and A5. Then one more pitch is added on, in a step wise motion, each time until C6 is reached. Then the pattern starts to descend, again adding on one note at a time until C4 is reached. Lindeman further reinforces his stair concept by drawing stairs under the notes of the exercise. The instructions state, Check your progress from time to time by seeing how many of these steps you can play to perfection Ibid. 85 Lindeman, Henry Lindeman Method for Saxophone,

68 Figure 18. Excerpt of Tonguing Exercise Two Figure 19. Excerpt of Tonguing Exercise Three Exercises one through three were designed to gradually introduce the student to Lindeman s pedagogy on the technique of tonguing. Once these could be executed at a proficient level, the pupil would progress to exercise four. This exercise is a page long and involves tonguing continuous eighth notes in common time using both d and t - 58
69 type tonguing. Lindeman offers a reminder in the instructions that states, stop to rest frequently to keep your tongue limber. 86 This suggests that Lindeman s intention was not to require the student to play through the entire page or large sections of the page in one pass. Rather, proper technique and keeping the tongue relaxed and moving correctly were more important to Lindeman. Breath marks are not included and therefore left up to the student or the teacher. This exercise could be divided into three parts and, for the purposes of this document, will be labeled as exercises 4a, 4b, and 4c. Illustrated in figure 20, 4a spans the first twenty-five measures of the page and is written in a single-measure motif of an ascending and descending pattern of five repeated eight notes followed by three eight notes moving up in stepwise motion and leaping down a third to the down beat of the next measure. 4a begins on G5 and ascends to C6 before descending down to C4. No sharps or flats are included in the key signature, which suggests the key of C-major. The last note of 4a reinforces this, which is a C4. Illustrated in figure 21, 4b comprises the next eighteen measures on the page. This section consists of no repeated pitches. Instead, the exercise moves in ascending and descending scale patterns only. The range of this exercise is very similar to 4a, although it does extend to D6. The final seventeen measures of the page make up 4c, illustrated in figure 22. The key signature and range remain unchanged from 4b. The motifs are similar to 4b, but 4c begins on a G6. This would be the first instance of a Lindeman tonguing exercise beginning in a higher register. 86 Lindeman, Henry Lindeman Method for Saxophone,

70 Figure 20. Excerpt of Tonguing Exercise Four A Figure 21. Excerpt of Tonguing Exercise Four B 60

71 Figure 22. Excerpt of Tonguing Exercise Four C The fifth and final tonguing exercise, illustrated in figure 23, is the most technical of the series. Exercise five is a page long and involves nearly constant sixteenth notes with occasional quarter notes and eighth notes and the phrase ends. These phrase ends are also the only logical places to breathe. Additionally, this exercise is not diatonic but rather chromatic. In the instructions, Lindeman writes, Imagine you are playing one note continuously throughout the exercise. 87 This is his reminder to students to keep the airstream constant and unchanging so that the tone will be continuously ringing as the exercise is played. 87 Lindeman, Henry Lindeman Method for Saxophone,


72 Figure 23. Excerpt of Tonguing Exercise Five 62
73 Articulation Patterns With regard to clear articulation on the saxophone, Lindeman writes this: It is the different variations in attack and phrasing which distinguish the artist from the hack -- individually or as a section, and in dance as well as in concert work. If there is not sufficient variation of the accents, or if a phrase is meant to be flowing and it sounds labored, it is very noticeable even to the layman. 88 Lindeman goes on to compare articulation on the saxophone to that of speech. An effective speaker delivers words with clear diction and inflections that make a speech interesting. Saxophonists must strive for the same clarity of articulation and inflection when playing musical phrases. Lindeman stresses that student should practice short passages until the articulation is clear. The technical approach to articulation presented in the Lindeman Method is quite straightforward and effective. According to the method, the tongue should drop to the bottom of the mouth once the note is initiated and not move again until the next attack. 89 Here, it is important to point out a divergence with current saxophone pedagogy, as it is now common practice to keep the tongue closer to the reed in preparation for the next attack. Dropping the tongue down to the bottom of the mouth increases the travel distance of the tongue, which slows the articulation down and could affect intonation as well. Though Lindeman had the correct general idea regarding articulation, the process has been considerably refined. Figure 24 shows Lindeman s illustrations in tongue movement in relation to articulated passages. The ta syllable is used to indicate tongued notes while the a or ah are for slurred notes. Under the articulated pitches, Lindeman draws two 88 Lindeman, Henry Lindeman Method for Saxophone, Ibid. 63

74 illustrations of the tongue: the dotted drawing shows the starting position of the tongue, and the dark drawing indicates the resting position of the tongue at the bottom of the mouth. The written section on articulation concludes with a warning by Lindeman to not anticipate the tongue movement by gradually raising the tongue to prepare the next attack. Figure 24. Illustrations of Articulation 64

75 Lindeman wrote three articulation exercises featuring various slurring and tonguing patterns in the method book. Exercise one, featured in figure 25, contains chromatic triplet patterns in common time with various articulation patterns. Aside from the articulation markings in the exercise itself, Lindeman also includes fifteen alternate articulation patterns at the top of the page. No tempo marking is indicated, as the approach of the method book is to focus more on accuracy more than speed in the initial exercises. The range of the exercise is limited, as it spans only from C4 to C6. Figure 25. Excerpt of Articulation Exercise One Articulation exercise two switches to sixteenth notes and includes a tempo indication of vivace. Articulation markings this time are much more consistent 65


76 featuring predominantly the slur two, tongue two pattern. The range for exercise two is wider, as it stretches to F6. An excerpt of exercise two is shown in figure 26. Figure 26. Excerpt of Articulation Exercise Two Lindeman returns to the format of exercise one for the final articulation study. Eight alternate articulation patterns are provided above the actual exercise. Exercise three is written in triple meter, with sixteenth notes again being the primary rhythm. The 66

77 written articulation pattern is tongue two, slur three and remains in that pattern throughout with the exception of the final measure, which is written as slur two, tongue two. An excerpt of articulation exercise three is shown in figure 27. Figure 27. Excerpt of Articulation Exercise Three Henry Lindeman s approach to teaching tonguing articulation is practical and effective even in present-day saxophone pedagogy. American saxophone methods that were published after the Lindeman Method offer essentially the same explanations regarding saxophone articulation but with added information. For instance, Larry Teal, in the Art of Saxophone Playing, also compares articulation to speech in nearly the same manner as Lindeman. Teal writes, In speech, articulation is characterized by clear and distinct words. The public speaker or vocalist must learn to articulate clearly if his 67
78 message is to be understood. 90 Eugene Rousseau suggests initial exercises similar to those found in the Lindeman Method in his book, Saxophone Artistry in Performance & Pedagogy. The similarity of pedagogical information between more current methods and the Lindeman Method reinforces the validity and accuracy of Henry Lindeman s teaching. 1963), Larry Teal, The Art of Saxophone Playing (Miami: Summy- Birchard Music, 68
79 CHAPTER 6 LEGACY OF THE LINDEMAN METHOD Henry Lindeman became a much sought-after saxophone teacher in New York following the publication of his method book. Lindeman had a private studio located at 127 West 48 th Street and taught students of all levels from beginner to professional. It is rumored that jazz saxophonist Charlie Parker studied with Lindeman at one point. 91 After his passing, Lindeman s students continued to use the Lindeman Method. One of the biggest proponents of the method was Phil Sobel ( ), who studied with Lindeman from Sobel moved to Los Angeles, California, in 1948 and quickly built a career as a freelance studio musician. From , Sobel was the first woodwind chair for the NBC Staff Orchestra. 93 Aside from studio work, Phil Sobel also taught privately from his studio and at the Dick Grove School of Music. Composer and music educator Richard Dean Grove founded the Dick Grove School of Music in 1973, though it would eventually close in Although Sobel retired from full time studio work in 1981, he continued to teach privately from his home until his passing in The main focal points of Sobel s teaching with regards to the Lindeman Method were finger technique and posture. He taught his students to not use any more pressure than necessary to put down or release a key and to move the fingers with finesse while going from note to note. In his interview in the Saxophone Journal, Sobel stated this: 91 Lindeman, Henry Lindeman Method for Saxophone, Back of book. 89 Ibid. 90 Ibid. 91 Ibid. 69
80 It may take only one pound of pressure to put a key down, so why do so many people use 10, 20, 30, or 100 pounds or pressure? People are always slamming the keys down and grabbing the horn. There is no intimacy with the instrument. 95 Aside from awareness of the fingers, Sobel believed that the body should remain still while playing. The reasoning behind that is so that all of the body s energy is focused on the air and fingers, which are responsible for producing sound and rhythm on the saxophone. Sobel believed that any excess body movement is wasted motion and that the body should be completely relaxed. The notes in the various registers of the saxophone all have a different resistance. For instance, the low pitches on the horn are particularly resistant and challenging to control at soft dynamics, while the upper register has much less resistance and is easier to control at soft dynamic levels. This concept is not directly addressed in the Lindeman Method but was developed and added by Phil Sobel. Awareness and knowledge of resistance on the saxophone promotes the proper amount and speed of air that will allow all notes to respond and the sound to be homogenous throughout the instrument. For instance, playing from open-tube notes to closed-tube notes without sufficient air support will result in either the closed tubed notes not responding or a lack of a smooth connection between the two pitches. The proper airstream should allow for notes in both areas of the saxophone to respond equally with the same tonal color. Phil Sobel produced many successful students in Los Angeles, including Leo Potts, who is currently Professor Emeritus at California State University Long Beach. In his early twenties, Potts became the first instructor of saxophone at the university, and it was during this time that he began his studies with Sobel. Prior to this, Potts participated 95 Lindeman, Henry Lindeman Method for Saxophone, Back of book. 70
81 in the last year of Marcel Mule s saxophone class, , and studied privately with Daniel Deffayet. 96 Potts was deeply influenced by Sobel s teaching and the Lindeman Method and would eventually incorporate the book into his own teaching. The Lindeman Method became a required book for saxophone students at California State University Long Beach. Over the course of his years of university teaching, Potts developed his own method of teaching the Lindeman Method. For instance, according to Potts, the airstream and the fingers are the two major elements in saxophone playing. In his interview from the Saxophone Journal, Potts said, Everything I teach in relationship to airstream and fingers. When you think about it, if you don t talk about the fingers, how are you going to play more than one note? I tell people that the finger doesn t really go up and down, it goes in an oval so it s always returning to the key. All we have is a series of picking up fingers and putting down fingers to create whatever sounds we are going to play. So, air and fingers are the major things as far as the instrument is concerned. 97 During his time at California State University Long Beach, Leo Potts produced several students who have gone on to have successful careers as freelance musicians and college professors. Jay Mason and Sal Lozano are two former students of Potts and are both currently active freelance musicians in the Los Angeles area, playing in studio sessions and musical theater shows. Both Mason and Lozano are members of the Grammy-Award-winning Big Phat Band, a jazz ensemble based out of Los Angeles. The band consists of top freelance musicians in the city. Concert saxophonist James Barrera is another former student of Leo Potts who has found success both as a teacher and a performer. After completing a bachelor of music degree in saxophone performance with 96 Nicholas H. Bradley, Leo Potts, Saxophone Journal, 16 no.4 (1992): Ibid. 71
82 Leo Potts, Barrera attended Indiana University and received a master s degree. After completing his graduate studies, Barrera returned to California and, along with Jay Mason and Sal Lozano, took over as saxophone instructors at California State University Long Beach following Potts retirement. Due to their positive experiences with the Lindeman Method, Barrera, Mason, and Lozano all continue to include the book as part of their teaching materials. I had the pleasure of studying with Leo Potts starting in the fall of 2004 until his retirement after the spring 2005 semester. He assigned multiple method books for my lessons, but the one that we visited most frequently was the Lindeman Method. One of Potts favorite exercises from the Lindeman Method was his fingering exercise on page 19. The instructions on the page state, Proper timing of the fingers will insure the production of any note without change of embouchure 98 Potts would make an addition to Lindeman s instructions and write at the end of Lindeman s sentence, as long as the airstream is under the fingers. The purpose of Potts statement was to help me visualize my airstream, as the air does not actually travel down the tube of the saxophone. Rather, the vibration from the reed and mouthpiece generate the sound. Studying the concepts of the Lindeman Method with Leo Potts has shaped my approach to playing the saxophone. It has been roughly eleven years since I studied with Potts, and since that time I have learned even more about the saxophone outside of the realm of the Lindeman Method. However, Potts concepts of the relationship between air and the fingers are still at the forefront of my mind when I play. In my experience as a saxophone student, I have always been able to combine Lindeman s concepts with more 98 Lindeman, Henry Lindeman Method for Saxophone,
83 current saxophone pedagogy with positive results. Although the Lindeman Method is considered old and archaic, the concepts presented in the book still have relevance to modern saxophonists. I intend to incorporate Lindeman s concepts with my own students in the future. Because of Phil Sobel s influence as a saxophone teacher and player, the Lindeman Method continues to thrive on the west coast. Leo Potts relocated to Washington following his retirement from California State University Long Beach and is still traveling throughout the United States giving clinics, master classes, and lessons regarding the concepts from the Lindeman Method. I believe that as long as students continue to be exposed to the method, the legacy will continue, and the name Henry Lindeman will never be forgotten as an important figure in early American saxophone pedagogy. 73
84 CONCLUSION Henry Lindeman s desire to improve the artistic and technical aspects of saxophone playing led him to develop a method book containing information that would eventually become the core fundamentals of the instrument. The book is a result of Lindeman s research into human physiology, vocal pedagogy, and an interview with violinist Jascha Heifetz. To a modern saxophonist reading about the Lindeman Method, most if not all of the concepts in the book would seem like common sense. However, in the 1930s, such concepts were far from common among saxophonists. In a time where quality saxophone instruction was scarce, the Lindeman Method provided a guide for building fundamental skills. At first glance, the exercises in the Lindeman Method do not seem complicated or particularly challenging from a technical standpoint. However, ask any saxophone performance major to play through the fingering, articulation, or melody exercises slowly, and fundamental issues will present themselves in varied degrees of severity. The end goal of the method is not to have the student play higher, faster, or louder, but rather to play with more sensitivity and artistry. Many works in the saxophone repertoire place great demand on the player in terms of finger dexterity. I feel that Lindeman s approach is more relevant now than ever before, as it offers the saxophonist a way to approach difficult repertoire so that they can be performed securely and with artistry. I hope that this document will be the first step in introducing the Lindeman Method to more saxophonists and provide an origin story of saxophone pedagogy in the United States. More importantly, the method should not be overlooked simply because it 74
85 is outdated. Despite its age, the Lindeman Method is still relevant as a fundamental saxophone study and is worth revisiting from time to time for the sake of practicing fundamental skill. Additionally, older method books from the late nineteenth and early twentieth centuries are also used by other wind instruments as well. The Henry Lindeman Method for Saxophone would make a fine addition to the library of any saxophone teacher for two reasons. It would serve as an invaluable historical piece to reference the origins of modern saxophone pedagogy in the United States. Secondly, the exercises contained in the book can still be effectively used for instructional purposes. Lindeman s writing and exercises on the fingers and its relationship with tone and connection between notes is something that is not found in other method books. When studied and practiced diligently, the Lindeman Method will be of great service to the modern saxophonist, and as long as there are teachers who use the book, it will never fall into obscurity. 75

86 Appendix Additional Exercises from the Lindeman Method 76
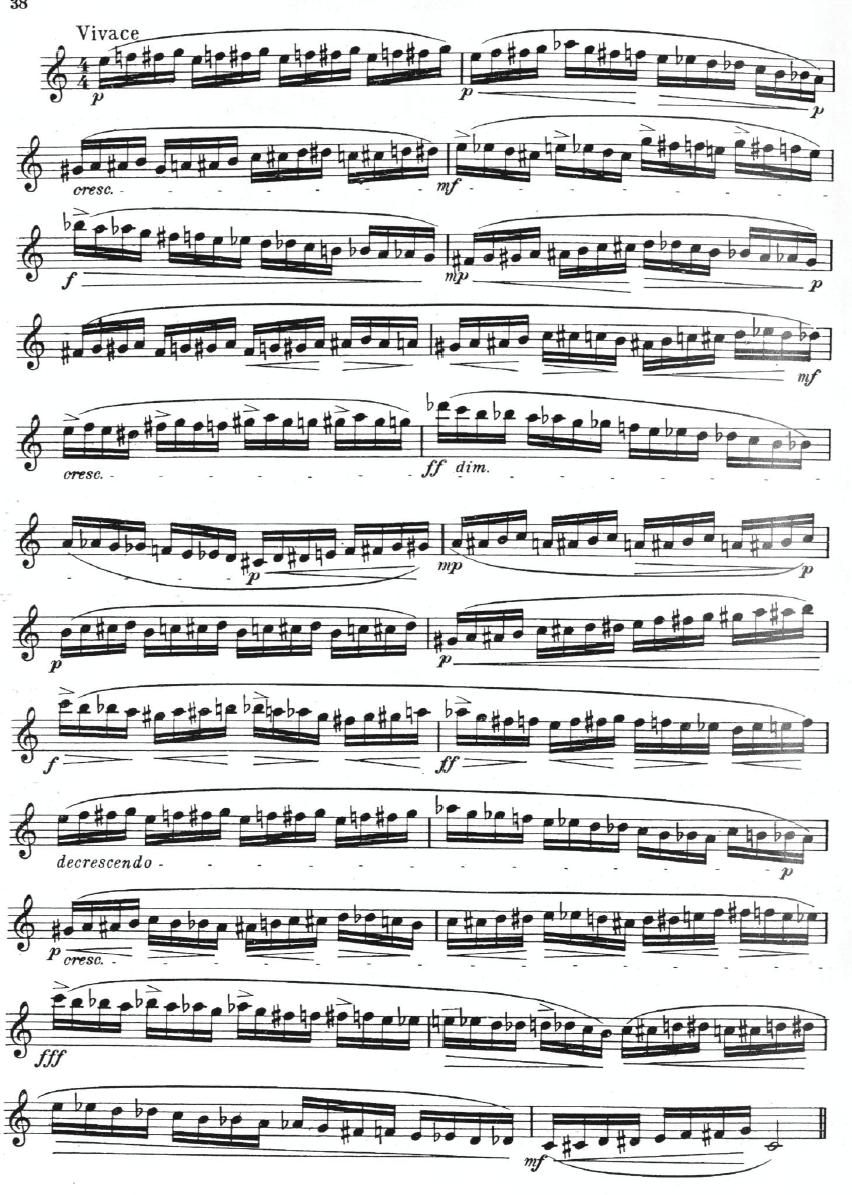
87 77

88 78
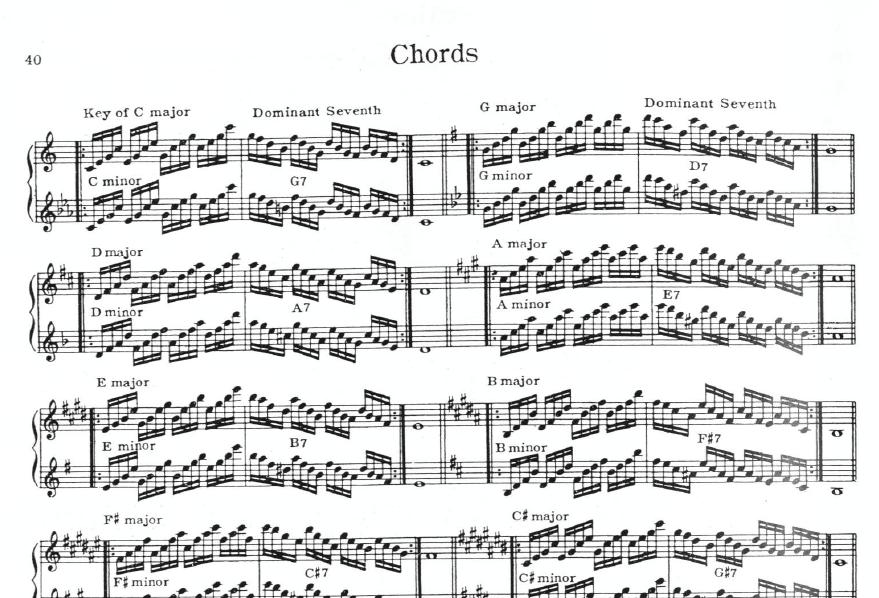
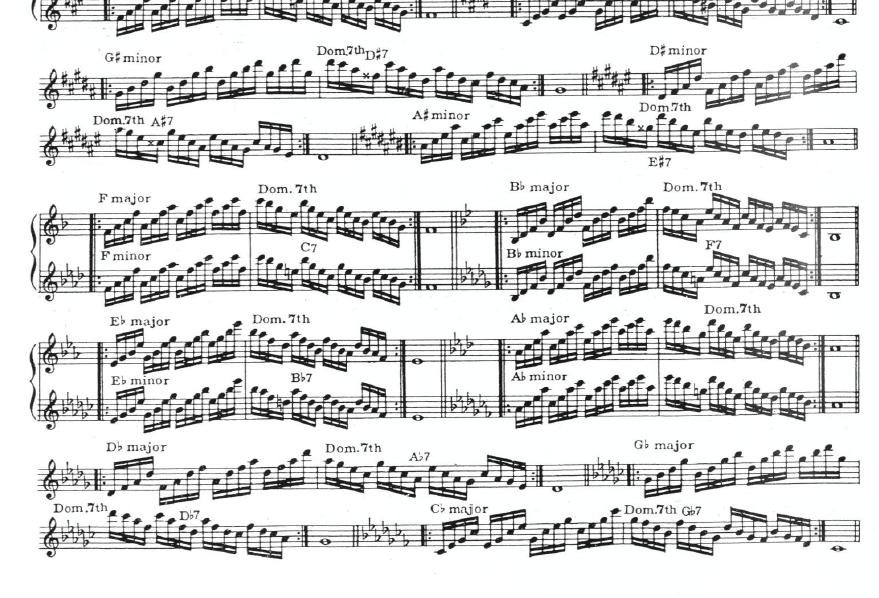
89 79
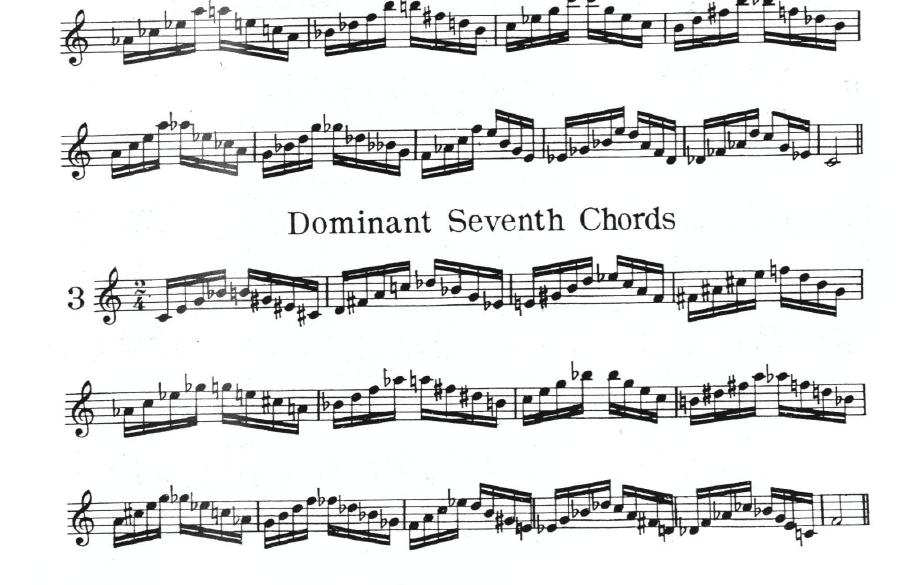
90 80
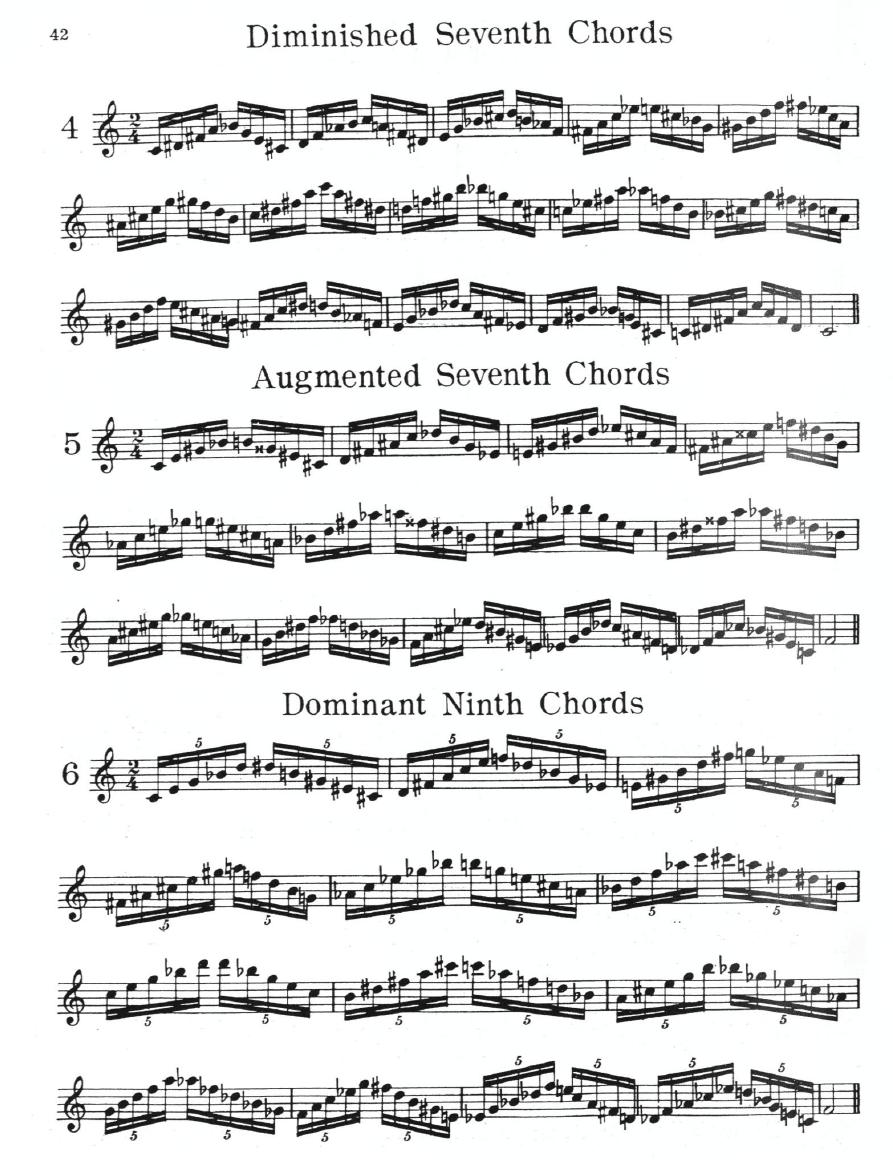
91 81
92 82
93 83
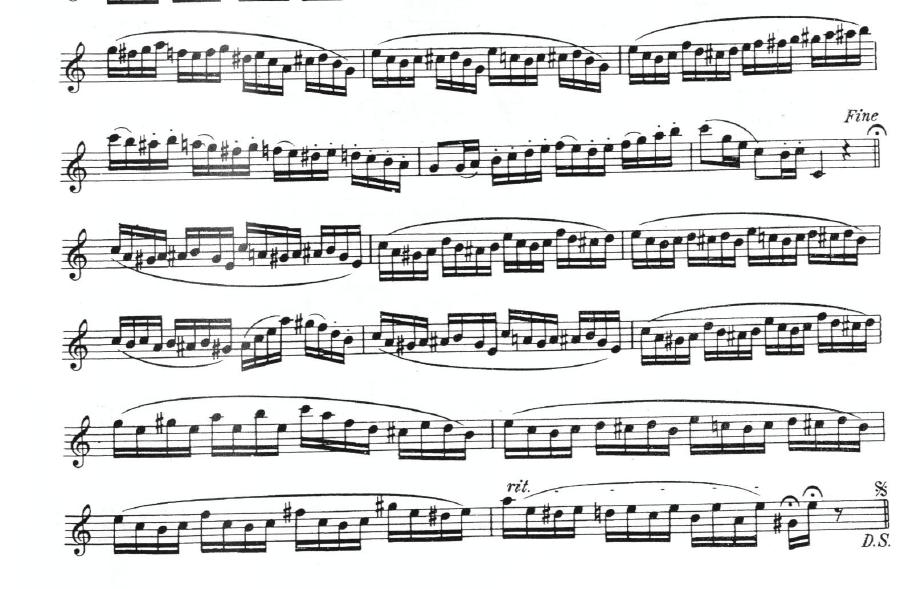
94 84
95 85

96 86
Clarinet Basics, by Edward Palanker
 Clarinet Basics, by Edward Palanker I ve had the good fortune of studying with some of the last century s finest clarinet players and teachers, and I wanted to share with you some of the teaching techniques
Challenges in Beginning Trombone Pedagogy
 The University of Akron IdeaExchange@UAkron Honors Research Projects The Dr. Gary B. and Pamela S. Williams Honors College Fall 2016 Challenges in Beginning Trombone Pedagogy Robert Sobnosky University
Arkansas High School All-Region Study Guide CLARINET
 2018-2019 Arkansas High School All-Region Study Guide CLARINET Klose (Klose- Prescott) Page 126 (42), D minor thirds Page 128 (44), lines 2-4: Broken Chords of the Tonic Page 132 (48), #8: Exercise on
10. Before practicing and learning a difficult passage choose proper fingerings that will ensure technical ease and good intonation rather than
 College of Lake County Grayslake, IL The Complete Clarinetist Dr. Caroline Hartig Master Class Technician or Musician: Finding the music within demanding technical passages Noon-1:30 p.m. in P101 Saturday,
This question will most likely be the favorite one asked by your prospective switcher to tuba. The answers are fairly simple indeed:
 Why switch to Tuba? This question will most likely be the favorite one asked by your prospective switcher to tuba. The answers are fairly simple indeed: Tubas are the heart of a dark sound. The balance
Similar but different: an analysis of differences in clarinet and saxophone pedagogy and doubler s misconceptions
 University of Northern Iowa UNI ScholarWorks Honors Program Theses University Honors Program 2015 Similar but different: an analysis of differences in clarinet and saxophone pedagogy and doubler s misconceptions
MARCHING BAND WARMUPS
 MARCHING BAND WARMUPS BARITONE Table of Contents Foreword...3 Breathing Exercises.4 Buzzing Exercises....5 Long Tones...6 Lip Slurs.......7 Articulation and Flexibility.....8 Helpful Tips.......11 2 FOREWORD
2018 White Sabers Brass Warm-up Packet
 2018 White Sabers Brass Warm-up Packet Welcome to the 2018 version of the White Sabers Drum and Bugle Corps brass section! This packet is intended to help you become more familiar ith hat you can expect
Clarinet Basics, Foundations for Clarinet Players
 Clarinet Basics, Foundations for Clarinet Players By John Cipolla Embouchure Harmonics Hand Position Tonguing/Articulation Scales Etudes Solos Chord Progressions Embouchure The clarinet embouchure can
TEXAS BANDMASTERS ASSOCIATION
 TEXAS BANDMASTERS ASSOCIATION Beginners Instructional Series Clarinet Clinician: Leigh Ann Dixon 55th Annual Convention/Clinic San Antonio, Texas 2002 Forward The Texas Bandmasters Association has a long
Guiding the Saxophonist in Concert Band
 Guiding the Saxophonist in Concert Band By Dr. Patrick Jones Edinboro University of PA As junior high and high school saxophonists advance, band directors are faced with the prospect of guiding these young
Flute. Selection 10% of students will be selected for FLUTE. Flute Player Personality Conscientious
 Flute The flute is the smallest of the beginner instruments. It is a very popular selection each year, but only a small portion of those wishing to play flute will be selected. Flute players should have
THE BASIC BAND BOOK. a project by Mr. Glynn SAXOPHONE THIS BOOK BELONGS TO
 THE BASIC BAND BOOK a project by Mr. Glynn SAXOPHONE THIS BOOK BELONGS TO Before we begin YOU ARE CREATIVE YOU ARE A MUSICIAN YOU CAN DO THIS - 3 - THE MUSICAL ALPHABET FORWARDS BACKWARDS E F G A B C
A Guide to Using the Asper Pickett Visualizer
 A Guide to Using the Asper Pickett Visualizer This guide will help you get the most benefit from your Asper Pickett Visualizer (APV). Also known as a mouthpiece visualizer, the APV allows a player to see
Special Studies for the Tuba by Arnold Jacobs
 Special Studies for the Tuba by Arnold Jacobs I have included a page of exercises to be played on the mouthpiece without the Tuba. I believe this type of practice to have many benefits and recommend at
American Band College of Sam Houston State University
 Max McKee Executive Director (541) 840-4888 Scott McKee Managing Director (541) 778-4880 Paul Kassulke Director of Operations (541) 778-3161 Visit us @ www.bandworld.org Another ABC Presentation American
PRODUCTIVE PRACTICING
 PRODUCTIVE PRACTICING Suggestions to Help Ensure a Productive Practice Session By Patrick McAvoy Thanks for requesting my new article Productive Practicing: Suggestions to Help Ensure a Productive Practice
TMEA Clinic Presentation 2002
 TMEA Clinic Presentation 2002 Clarinet A tone ment: Practical tips and Diagnostic Tools to Improve the Tone of Your Clarinet Section Dr. David Shea, Texas Tech University dshea@ttacs.ttu.edu 1. There are
Rehearsal Techniques Log
 Anne McTighe Prof. Farris Instrumental II May 29, 2012 Divide each stand; have one player do the sixteenth note subdivision, while the other plays the part. Then switch. Sight-reading rhythms in a new
The Art Of Saxophone Playing PDF
 The Art Of Saxophone Playing PDF According to Larry Teal, the best method of learning to play the saxophone is to study with a competent teacher. Teal's studies were mostly of instruments other than the
Instrument Selection Guide
 FLUTE The flute is the smallest of the beginner instruments. It is a very popular selection each year, but only a small portion of those wishing to play flute will be selected. Physical Characteristics:
THE BASIC BAND BOOK. a project by Mr. Glynn CLARINET THIS BOOK BELONGS TO
 THE BASIC BAND BOOK a project by Mr. Glynn CLARINET THIS BOOK BELONGS TO Before we begin YOU ARE CREATIVE YOU ARE A MUSICIAN YOU CAN DO THIS - 3 - THE MUSICAL ALPHABET FORWARDS BACKWARDS E F G A B C D
Klages Philosophy of Trumpet Pedagogy
 Klages Philosophy of Trumpet Pedagogy My pedagogic approach for trumpet is sound centered. Before even one note is played I speak with the student to learn and establish goals we will pursue. Next, we
Texas Bandmasters Association 2017 Convention/Clinic
 The Advanced Trombone Player CLINICIAN: Dr. Deb Scott Texas Bandmasters Association 2017 Convention/Clinic JULY 20 22, 2017 HENRY B. GONZALEZ CONVENTION CENTER SAN ANTONIO, TEXAS The Advanced Trombone
by Staff Sergeant Samuel Woodhead
 1 by Staff Sergeant Samuel Woodhead Range extension is an aspect of trombone playing that many exert considerable effort to improve, but often with little success. This article is intended to provide practical
Teaching Total Percussion Through Fundamental Concepts
 2001 Ohio Music Educators Association Convention Teaching Total Percussion Through Fundamental Concepts Roger Braun Professor of Percussion, Ohio University braunr@ohio.edu Fundamental Percussion Concepts:
 What's 2012 Directo Schools NO LOGIN R National Sousa Directors add win names (both curre this new list. Special Student Professors/Teac a student group pdf Students - order To order/renew in below. Subsc
Help for Your Horn Players: Guiding Your Young Horn Players to Success! Ideal Beginners or How to Avoid a Lot of Headaches Later Body Position
 Help for Your Horn Players: Guiding Your Young Horn Players to Success! The Midwest Clinic: An International Band and Orchestra Conference Rachel Maxwell, clinician Traughber Junior High School, Oswego,
RIM CUP DEPTH. Increases endurance. Improves flexibility, range. Improves comfort. Increases brilliance, precision of attack.
 Selecting a Mouthpiece When selecting a mouthpiece, a brass instrumentalist should choose one with a solid, compact tone of large volume. A carefully selected Bach mouthpiece can help improve a player
Presented by Michael Pote and Chris Grifa Carmel, Indiana. Saturday, February 4th, :45 p.m. - 3:45 p.m. 4:00 p.m. - 5:00 p.m.
 Achieving Your Ensemble Sound: It s Fundamental! Presented by Michael Pote and Chris Grifa Carmel, Indiana Saturday, February 4th, 2016 2:45 p.m. - 3:45 p.m. 4:00 p.m. - 5:00 p.m. Mesa Room Featuring the
Clarinet Clarity: An Interview with Julie DeRoche
 Clarinet Clarity: An Interview with Julie DeRoche Mary Ellen Cavitt Part Two. The first part of this interview was printed in the April issue of the Bandmasters Review. The entire article can be found
Chris Buckholz University of Northern Iowa
 Section Playing Basics Sound Balance Intonation Articulation Rhythm Dynamics Style Brass in the Big Band: Basics That Will Quickly Improve Your Brass Section Chris Buckholz University of Northern Iowa
Sample Teaching Inventory Database:
 Sample Teaching Inventory Database: What to Teach TONE TIMING TUNING DYNAMICS Proper embouchure information for each instrument Resonance and ring Support air in motion Good equipment, including mouthpieces
Council for Research in Music Education
 Council for Research in Music Education An Investigation of Two Clarinet Tonguing Techniques by Ronald Herbert Goddard Review by: Norman M. Heim Bulletin of the Council for Research in Music Education,
Marion BANDS STUDENT RESOURCE BOOK
 Marion BANDS STUDENT RESOURCE BOOK TABLE OF CONTENTS Staff and Clef Pg. 1 Note Placement on the Staff Pg. 2 Note Relationships Pg. 3 Time Signatures Pg. 3 Ties and Slurs Pg. 4 Dotted Notes Pg. 5 Counting
Ensemble Skill Development Young Bands
 Ensemble Skill Development Young Bands Clinician: Tom Bennett, TBA Featured Clinician DEMONSTRATION GROUP FROM NEISD: Reagan HS, Levi Chavis-Director & Johnson HS, Jarrett Lipman-Director SponsorS: The
Clarinet Clarity: An Interview with Julie DeRoche
 Clarinet Clarity: An Interview with Julie DeRoche Dr. Mary Ellen Cavitt Part One. This interview will be continued in the June issue of the Bandmasters Review. Julie DeRoche is Chair of the Music Performance
Fundamental Music Instruction
 Fundamental Music Instruction Clarinet Welcome to the Fundamental Music Instruction First Songs for Band a beginner s starter kit. The goal of this booklet (and the Supplement Book) is to help the very
Texas Bandmasters Association 2017 Convention/Clinic
 Reeder's Digest: A Comprehensive Guide to Beginning Clarinet CLINICIANS: Christine Cumberledge, Manuel San Luis, Jessica Shin Texas Bandmasters Association 2017 Convention/Clinic JULY 20 22, 2017 HENRY
Trombone Troubleshooting
 Trombone Troubleshooting Dr. Erik Shinn University of Florida FMEA Professional Development Conference January 12, 2017 etshinn@ufl.edu ~ www.erikshinn.com I. Problem: Equipment a. Right Horn for the Right
When you open your case, this is what you should see: LOWER JOINT UPPER JOINT. Instrument Assembly
 PAGE 7 When you open your case, this is what you should see: LOWER JOINT BARREL Accessories: Reeds, Swab, & Cork Grease BELL Corks MOUTHPIECE with ligature & cap Tone Holes with and without rings Bridge
Techniques for the Intermediate Tuba Player A Clinic for the Texas Bandmasters Association By John Canfield and Trevor Culp
 I. Equipment Techniques for the Intermediate Tuba Player A Clinic for the Texas Bandmasters Association By John Canfield and Trevor Culp a. Use good equipment and keep it in good condition It takes a great
instrument-specific beginning band tips
 instrument-specific beginning band tips contents Introduction 2 Flute 4 Double Reeds: Oboe 5 Bassoon 6 Single Reeds: Clarinet & Saxophone 8 High Brass: Trumpet & French Horn 10 Low Brass: Trombone & Tuba
Are you a student who is looking for a CHALLENGE? Are you a student who is MOTIVATED to try something new and STICK WITH IT?
 Are you a student who is looking for a CHALLENGE? Are you a student who is MOTIVATED to try something new and STICK WITH IT? Do you want to have FUN learning something that you can do for the rest of your
Clarinet Assembling the Instrument
 Clarinet Assembling the Instrument 1. Have students take instrument cases to another area of the room and set the cases flat on a table. If no table is available, students should put cases on the floor
A Clinician s Observations by William W. Gourley
 A Clinician s Observations by William W. Gourley My experiences as a clinician working with eighty to one hundred ensembles yearly and adjudicating festivals have created a core set of suggestions that
Creating a Successful Audition CD
 Creating a Successful Audition CD The purpose of the following information is to help you record a quality audition CD for National Youth Band of Canada. The information has been divided into different
TMEA ALL-STATE AUDITION SELECTIONS
 TMEA ALL-STATE AUDITION SELECTIONS 2014-2015 Hello, my name is Amy Anderson, Oboe Professor at Texas Tech University. I have recorded the 2014-2015 All-State Audition music for oboe including Masterclasses
GPS. (Grade Performance Steps) The Road to Musical Success! Band Performance Tasks YEAR 1. Conductor
 The Road to Musical Success! Band Performance Tasks YEAR 1. Conductor") Name: GPS (Grade Performance Steps) The Road to Musical Success! Band Performance Tasks YEAR 1 Conductor Ontario Music Educators Association www.omea.on.ca GPS Task Student Evaluation Chart Band Performance
Name: GPS (Grade Performance Steps) The Road to Musical Success! Band Performance Tasks YEAR 1 Conductor Ontario Music Educators Association www.omea.on.ca GPS Task Student Evaluation Chart Band Performance
Signal Mountain Middle School Band
 Signal Mountain Middle School Band 6 th Grade Instrument Selection Guide Choosing an instrument is an exciting first step to learning music! This guide will explain how the instrument selection process
FUNDAMENTALS FOR THE TROMBONE
 FUNDAMENTALS FOR THE TROMBONE 1 2 WARM UPS AND DAILY EXERCISES The purpose of these exercises is to begin with the simplest and most fundamental principle of playing, the use of the air. Only the stream
Page 7 Lesson Plan Exercises 7 13 Score Pages 70 80
 1 Page 7 Lesson Plan Exercises 7 13 Score Pages 70 80 Goal Students will progress in developing comprehensive musicianship through a standards-based curriculum, including singing, performing, reading and
Oskaloosa Community School District. Music. Grade Level Benchmarks
 Oskaloosa Community School District Music Grade Level Benchmarks Drafted 2011-2012 Music Mission Statement The mission of the Oskaloosa Music department is to give all students the opportunity to develop
5 th Grade BAND. Artistic Processes Perform Respond. Fairfield s Band Program Ensemble Sequence
 5 th Grade BAND Band is offered to all 5 th grade students. Instruments offered are: Flute, Oboe, Bb Clarinet, Eb Alto Saxophone, French Horn in F, Bb Trumpet, Trombone, Baritone Horn, and Percussion.
Recruiting and Retaining Trombone Players
 Recruiting and Retaining Trombone Players Deal with the myths The trombone is hard The trombone is too big or too heavy The trombone is a boy s instrument The trombone doesn t play melodies Others? Too
Double Tonguing On the Saxophone: Tips from the Masters By: Sean Murphy
 Double Tonguing On the Saxophone: Tips from the Masters By: Sean Murphy Although multiple tonguing is a common technique for rapid articulation in brass pedagogy, it has long been a source of mystery for
PRACTICE. Why Practice? How Do You Do It?
 PRACTICE Why Practice? How Do You Do It? The Principles of Learning: Principle of Readiness Principle of Exercise Principle of Effect Principle of Primacy Principle of Intensity Principle of Recency Taken
If your fingers can cover all the holes on this flute, you can learn to play it!
 The Pocket Flute Part 1: Beginning Techniques for the Pocket Flute If your fingers can cover all the holes on this flute, you can learn to play it! Holding the Flute To make covering the holes easier,
Arnold Jacobs: Mentor, Teacher, Friend
 Arnold Jacobs: Mentor, Teacher, Friend Midwest Clinic, Friday, December 18 th 12:00-1:00pm Handouts enclosed for this panel discussion: I Don t Care How You Sound, I Care How You Are Thinking, by Rex Martin
Before I proceed with the specifics of each etude, I would like to give you some general suggestions to help prepare you for your audition.
 TMEA ALL-STATE TRYOUT MUSIC BE SURE TO BRING THE FOLLOWING: 1. Copies of music with numbered measures 2. Copy of written out master class 1. Hello, My name is Dr. David Shea, professor of clarinet at Texas
Forestwood Middle School Band Instrument Selection Guide
 Forestwood Middle School Band Instrument Selection Guide Clarinet The clarinet uses a single reed and mouthpiece to produce a beautiful sound. This is a very versatile instrument. It can play very high
Independence HS Band
 2014 2015 Independence HS Band Wind Musician Manual: Woodwind Edition Chris Cansler, Director of Bands Tanner Smith, Associate Director of Bands Revised 7/20/14 1 2014-15 Independence HS Band -- TABLE
Before I proceed with the specifics of each etude, I would like to give you some general suggestions to help prepare you for your audition.
 TMEA ALL-STATE TRYOUT MUSIC BE SURE TO BRING THE FOLLOWING: 1. Copies of music with numbered measures 2. Copy of written out master class 1. Hello, My name is Dr. David Shea, professor of clarinet at Texas
Ellefson Warm-up No. 4 Assembled for the 2017 Alessi Seminar
 Ellefson Warm-up No. 4 Assembled for the 2017 Alessi Seminar Each day is like peeling off the dirty layer of a lint roller; begin fresh, clean and positie, unsoiled by bad habits. A thoughtful warm-up
Music OFFICIAL STATEMENT OF ACCEPTABLE MUSIC FOR WCA STUDENT CONVENTION COMPETITION
 Music OFFICIAL STATEMENT OF ACCEPTABLE MUSIC FOR WCA STUDENT CONVENTION COMPETITION The intent of music competition is to encourage students to develop their musical ability and apply their musical talents
OSU MARCHING BAND PERCUSSION A GUIDE TO TECHNIQUE
 OSU MARCHING BAND PERCUSSION A GUIDE TO TECHNIQUE 2015 WELCOME TO THE OSU MARCHING BAND PERCUSSION SECTION THE APPROACH The 2014, OSU percussion program, will be focusing on technique as it applies to
Yamaha Advantage, Accent on Achievement, and Premier Performance method. books, my preferred selection would be the Standard of Excellence, by Bruce
 After an in depth analysis of Essential Elements, Standard of Excellence, Yamaha Advantage, Accent on Achievement, and Premier Performance method books, my preferred selection would be the Standard of
WIND INSTRUMENTS. Math Concepts. Key Terms. Objectives. Math in the Middle... of Music. Video Fieldtrips
 Math in the Middle... of Music WIND INSTRUMENTS Key Terms aerophones scales octaves resin vibration waver fipple standing wave wavelength Math Concepts Integers Fractions Decimals Computation/Estimation
Clarinet Technique 101: Dr. Robert Spring. It is a Requirement, not an Elective
 Clarinet Technique 101: It is a equirement, not an Elective Dr. obert Spring Herberger Institute of Design and the Arts School of Music Arizona State University ThisClinicissponsoredinpartbyBuffetCramponandCie.andinpart
GROSSE POINTE SOUTH HIGH SCHOOL BAND AUDITIONS
 GROSSE POINTE SOUTH HIGH SCHOOL BAND AUDITIONS GENERAL INFORMATION: Auditions will take place the week of April 23-27. Please see the sign-up sheets in the Band Room (room 25). There will be audition times
HOW CAN MY STUDENTS SOUND LIKE PROFESSIONALS?
 HOW CAN MY STUDENTS SOUND LIKE PROFESSIONALS? The upper part of the body must be very stoic so air can naturally pass from the body to the instrument. Students should never move when breathing or while
Colorado Music Educators Convention Thursday January 27, 2011 Trombone: The DIFFERENT Wind Instrument Nick Keelan, Lawrence University
 Colorado Music Educators Convention Thursday January 27, 2011 Trombone: The DIFFERENT Wind Instrument Nick Keelan, Lawrence University GOALS, TARGET GROUPS, CLINIC STRUCTURE Something for teachers: those
TMEA ALL-STATE OBOE MASTERCLASSES Before we begin with the selections, following are general suggestionsfor preparation:
 TMEA ALL-STATE OBOE MASTERCLASSES 2011-2012 Hello, my name is Amy Anderson, Oboe Professor at Texas Tech University. For the 2011-2012 All- State Tryout Music, we have recorded performances, practice tempos,
This document can be used for Men s and Women s Glee Clubs as well as beginning and intermediate choirs.] Table of Contents
![This document can be used for Men s and Women s Glee Clubs as well as beginning and intermediate choirs.] Table of Contents](/thumbs/78/77269705.jpg "This document can be used for Men s and Women s Glee Clubs as well as beginning and intermediate choirs.] Table of Contents") [Editor s Note: The CAP is intended to serve the choral music educator with suggested procedures and timelines to adhere to the CCSD Vocal Music Course Syllabi. This document will help our teaching across
[Editor s Note: The CAP is intended to serve the choral music educator with suggested procedures and timelines to adhere to the CCSD Vocal Music Course Syllabi. This document will help our teaching across
Beginning Band Primer Part 1
 Alto Sax Beginning Band Primer Part 1 by Mike Davies Alto Saxophone: The Basics Putting Instrument Together: Step 1:! Open case right side up.! put thin end of reed into your mouth to moisten the reed.!
The Complete Conductor: Breath, Body and Spirit
 The Complete Conductor: Breath, Body and Spirit I. Complete Conductor A. Conductor is a metaphor for: 1. Music 2. Tone 3. Technique 4. Breath 5. Posture B. Pedagogue, historian, leader, supporter 1. Love,
OREGON CRUSADERS BRASS MANUAL
 OREGON CRUSADERS BRASS MANUAL 2016 (update 08.20.15) OREGON CRUSADERS BRASS PROGRAM TABLE OF CONTENTS - Audition Process, Audition Camp Materials, & Audition Music 3-8 - Equipment for Contracted Members
Section V: Technique Building V - 1
 Section V: Technique Building V - 1 Understanding Transposition All instruments used in modern bands have evolved over hundreds of years. Even the youngest instruments, the saxophone and euphonium, are
Choir Workshop Fall 2016 Vocal Production and Choral Techniques
 Choir Workshop Fall 2016 Vocal Production and Choral Techniques Choir Workshop Fall 2016: Vocal Production and Choral Techniques *I recommend a great book called The Singerʼs Companion by Brent Monahan
ATSSB Bb clarinet (revised February 2016) Artistic Studies Book I from the French School David Hite/Southern Music
 Artistic Studies Book I from the French School David Hite/Southern Music") ATSSB Bb clarinet (revised February 2016) Artistic Studies Book I from the French School David Hite/Southern Music Year A Page 26, No. 24 A minor Quarter note = 54 60 Play from the beginning through measure
ATSSB Bb clarinet (revised February 2016) Artistic Studies Book I from the French School David Hite/Southern Music Year A Page 26, No. 24 A minor Quarter note = 54 60 Play from the beginning through measure
American Band College of Sam Houston State University
 Max McKee Executive Director (541) 840-4888 Scott McKee Managing Director (541) 778-4880 Paul Kassulke Director of Operations (541) 778-3161 Visit us @ www.bandworld.org Another ABC Presentation American
HOW TO SELECT A NEW CLARINET by Tom Ridenour
 HOW TO SELECT A NEW CLARINET by Tom Ridenour Choosing a new clarinet is not rocket science. But it isn't falling off a log either. Like in all endeavors, the more you know and the less you guess the better
Tone for Clarinet Ensemble
 Tone for Clarinet Ensemble Name Surname Yos Vaneesorn Academic Status Clarinet Lecturer Faculty Faculty of Music University Silpakorn University Country Thailand E-mail address vaneesorn@gmail.com Abstract
Page 4 Lesson Plan Exercises Score Pages 50 63
 Page 4 Lesson Plan Exercises 14 19 Score Pages 50 63 Goal Students will progress in developing comprehensive musicianship through a standards-based curriculum, including singing, performing, reading and
Bedford Junior High School Band
 Bedford Junior High School Band Bedford Junior High School 325 Carolyn Drive Bedford, TX 76021 817-788-3101 Band Directors: Valerie Howell Eric Suzanne Dell Clarinet Lesson Handbook Summer 2014 Melissa
THE RESISTANCE CURVE
 UNDERSTANDING CLARINET MOUTHPIECE FACINGS by Tom Ridenour Clarinet mouthpiece facings need not be complicated or confusing. The following remarks, though generalizations, should give the clarinetist adequate
Practical Horn Pedagogy! Dr. Abigail Pack ABC 2017!!
 Practical Horn Pedagogy Dr. Abigail Pack ABC 2017 Session 1: The Fundamentals of Posture and Mouthpiece Placement Session 2: Embouchure and Tone Production Session 3: More Technique and Troubleshooting
BEGINNING BAND FUNDAMENTALS THAT WORK THROUGH HIGH SCHOOL
 BEGINNING BAND FUNDAMENTALS THAT WORK THROUGH HIGH SCHOOL Presented by: Julie Capps Missouri Music Educators Association Convention January 29, 2016 Tan-Tar-A Resort Chuck Appleton Establish routines and
Before I proceed with the specifics of each etude, I would like to give you some general suggestions to help prepare you for your audition.
 TMEA ALL-STATE TRYOUT MUSIC BE SURE TO BRING THE FOLLOWING: 1. Copies of music with numbered measures 2. Copy of written out master class 1. Hello, My name is Dr. David Shea, professor of clarinet at Texas
Beginning Band Primer Part 1
 Trumpet, Cornet, Baritone Beginning Band Primer Part 1 by Mike Davies Trumpet, Cornet, Baritone: The Basics Putting Instrument Together: Step 1:! Open case right side up. Step 2:! Hold instrument in your
Section IV: Ensemble Sound Concepts IV - 1
 Section IV: Ensemble Sound Concepts IV - 1 Balance and Blend Great bands are great because they work harder and understand how sound works better than other bands. The exercises and literature we play
Texas Bandmasters Association 2017 Convention/Clinic
 Is the Doctor In? DPA Training for Successful Band Progams (Diagnose, Prescribe & Administer) CLINICIAN: Harry Blake Texas Bandmasters Association 2017 Convention/Clinic JULY 20 22, 2017 HENRY B. GONZALEZ
Page 16 Lesson Plan Exercises Score Pages
 1 Page 16 Lesson Plan Exercises 56 60 Score Pages 167 178 Goal Students will progress in developing comprehensive musicianship through a standards-based curriculum, including singing, performing, improvising,
Advanced Fundamentals Packet Dr. George Palton
 Tuba and Euphonium Advanced Fundamentals Packet Dr. George Palton Group Breathing Exercises Buzzing 1. Intervals 2. Major Triads 3. Buzz Melodies by Ear Tone and Air Flow 1. Long Tones 2. Simple Flow 3.
POWER PRACTICING by Eli Epstein The quieter you become, the more you can hear. -Baba Ram Dass
 POWER PRACTICING by Eli Epstein The quieter you become, the more you can hear. -Baba Ram Dass When we practice we become our own teachers. Each of us needs to become the kind of teacher we would most like
Music for All Summer Symposium presented by Yamaha. Flute Master Class Mihoko Watanabe
 Music for All Summer Symposium presented by Yamaha www.musicforall.org Flute Master Class Mihoko Watanabe Tone Production For Flutists 1 M U S I C F O R A L L J U N E 2 0 1 3 I: Common Problems in Flute
The Goal of this Session is to help attendees answer the three questions.
 So, What s the Plan? We Know What We Want to Rehearse, But What Are We supposed to Teach? to A Path for Figuring Out What To Teach Upper Level String Players and When To Teach It Christopher R. Selby The
2006 MIDWEST CLINIC CONVENTION
 2006 MIDWEST CLINIC CONVENTION A Teachers Guide to a Happier Tuba Section Richard Murrow Miraphone Performing Artist/Clinician Texas Christian University I. Who s right for the tuba? Johnny, the 6 foot,
Habits. of a. How Successful Band Directors Leave a Musical and Personal Legacy. Scott Rush
 Habits of a Significant band Director How Successful Band Directors Leave a Musical and Personal Legacy by Scott Rush Wednesday! December 20, 2017! 12:00 1:00pm The Midwest Clinic 71st Annual Conference
2012 Directory of Music Schools NO LOGIN REQUIRED
 What's New 2012 Directory of Music Schools NO LOGIN REQUIRED National Sousa Registry - Directors add winning students' names (both current and past) to this new list. Special Student Rates - Professors/Teachers