Contents. 1. Introduction Overview 1.2 Main Features. 2. Safety/Precautions Safety 2.2 Precautions
|
|
|
- Geoffrey Long
- 5 years ago
- Views:
Transcription
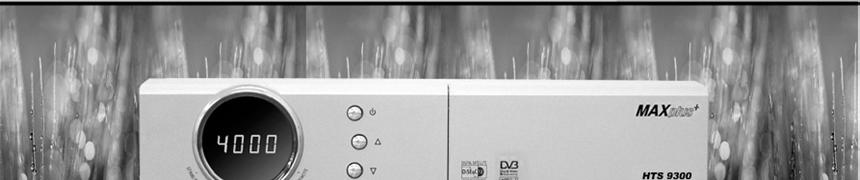
1 HTS 9300
2 Contents 1. Introduction Overview 1.2 Main Features 2. Safety/Precautions Safety 2.2 Precautions 3. Check Point before Use Accessories 4. Controls/Functions Front Panel 4.2 Rear Panel 4.3 Remote controller 5. How to Connect Operation Getting Started 6.2 System Setting 6.3 Channels 6.4 Guide 6.5 Games 6.6 System Information 7. Trouble Shooting Specifications 32 DiSEqC is a trademark of EUTELSAT 1
3 Introduction Safety/Precaution 1.1 Overview 2.1 Safety This satellite receiver is designed for using digital free-to-air channel reception. Enjoy the rich choice of more than 4,000 different channels, broadcasting a large range of culture, sports, cinema, news, events, etc. This receiver is a technical masterpiece, assembled with the highest qualified electronic parts. Be sure to read the user's manual before starting the operation of the unit. Do not touch the power cord with wet hands as it may cause electric shock. 1.2 Main Features MPEG-II Digital & fully DVB compliant. On-screen display with 256 color resolution. DiSEqC Control Version 1.0, 1.1, 1.2 and USALS compatible. Renameable 8 Favorite channel groups. Powerful Channel control by Favorites, Lock, Skip, Move and Delete. Channel Sorting by Alphabet, Transponder and CAS. 10 languages(osd & Menu) : English, Italian, Turkish, Arabic, Parsi, German, French, Russian, Spanish, Protuguese. Extended EPG and Program Reservation through EPG. Teletext support. (OSD and VBI Insertion) Last channel memory function. Total 4,000 Channels programmable. Multi-Satellite Search. Games Included. (Tetris, Sokoban, Snake) Software & Channel Database Upgrade via RS-232C from PC (PC-to-Set) or Set (Set-to- Set). Parental lock / Installation Lock / Receiver Lock / Channel Lock / Lock Channel confirm. Zoom Function in Pause. Never open the cover. It is very dangerous to touch the inside of the unit due to possible electric shock. When you do not use this unit for a long time, make sure that power cord is pulled out from the outlet. Also do not use a damaged power cord as it may cause fire or electric shock. Place the unit in a well ventilated and no-heat environment. A professional installation is required. If reception is interrupted, contact your local service centre. 2 3
4 INFO TV/RADIO GUIDE MENU RECALL AUDIO TEXT PAUSE GROUP EXIT TV/SAT 2.2 Precautions Check Points before Use When installing the unit Install the unit horizontally. An uneven installation may cause the unit to be damaged. Do not put heavy items such as a TV on the unit. That may cause the unit to be damaged. 3.1 Accessories Accessories of this are as below User's manual : 1 Remote control : 1 User's manual Do not leave the unit where the water drops or splashs. Do not put water holding items shch as vase on the unit. Batteries (AAA type) : 2 RCA Cable : 1 Do not install the unit: Where it is subject to vibrations Where it is exposed to direct sunlight Where there is humidity Where the temperature is too high or too low. Where there is no ventilation Moving the unit to a hot area from a cold one will cause condensation. Do not operate the unit for one or two hours or until it has dried completely. If any accessories listed above are missing, contact the sales representative where you purchased this unit. 3.2 The Satellite dish Your dish should be properly installed and azimuth and elevation must be precisely set up. This unit is working with DiSEqC 1.2 on a compatible antenna positioner. Ask your dealer for information. 4 5
5 Controls/Functions 4.2 Rear Panel 4.1 Front Panel RF OUT UHF LNB INPUT MHz 400mA max. LOOP OUT AC V 47-63Hz, 30W TV ANT IN AUDIO VIDEO RS-232C Standby/Power on lndication Light : Flashing red on Stand By mode and no right on Power On mode. Indication Light : While pressing RCU key, this light will be flashing at the same time. Power : To switch the receiver in standby mode or in power on mode / : To change channel or cursor position on the application screen. Smart Card Reader(option) : To insert smart card for encrypted channel access. No. Name Connector Function 1 RF OUT UHF IEC male Output to TV. 2 TV ANT IN IEC female Input from terrestrial antenna. 3 AUDIO R RCA cinch Right audio output. 4 AUDIO L RCA cinch Left audio output. 5 VIDEO RCA cinch Composite video output. 6 RS-232C DB-9 Low speed serial port. 7 LNB INPUT IEC female IF input from LNB to digital tuner. 8 LOOP OUT IEC female IF loop-through output from digital tuner. 6 7
6 4.3 Remote Control 4.3 Remote Control 1 2 POWER : Turns the receiver On/Off. MUTE : Turns the sound On/Off Up & Down( / ) : Changes channels in non-menu mode and moves the cursor up/down in menu mode Numeric Keys(0-9) : Controls the numerical operation and channel numbers directly Left & Right( / ) : Changes the volume level in non-menu mode and change setting in menu mode. 4 6 INFO GUIDE PAUSE GROUP INFO. : Shows the information of the current program. If you press once more, detail information box will be shown. INFO GUIDE PAUSE GROUP 16 (OK) : Shows the Channel List in nonmenu mode and select an item or confirm in menu mode MENU TV/RADIO RECALL AUDIO TEXT EXIT TV/SAT PAUSE : This key is used to pause the video. Press once more to resume the video. GUIDE(EPG:Electronic Program Guide) : Show the TV/Radio program guide. GROUP : To change the channel groups(satellites or favorite groups). MENU : Enter or exit the main menu MENU TV/RADIO RECALL AUDIO TEXT EXIT TV/SAT TV/RADIO : Switches between TV and Radio. TV/SAT : Toggles the TV output source between the satellite input and UHF/VHF antenna input. RECALL(RED) : Moves to previous channel. Used for special function in menu. 9 EXIT : Exit from the present menu and moves to the previous menu Double arrow UP/DOWN( / ) : Move to the next or previous page if more than one page are available AUDIO(GREEN) : Shows the multilanguage audio track, stereo-mono mode, subtitle information. Used for special function in menu. TEXT(YELLOW) : Shows the teletext contents if teletext is transmitted. Used for special function in menu. 22 BLUE : Used for special function in menu. 8 9

7 MHz 400mA max. How to Connect Operation 5.1 When Connecting IRD to TV with RF, AV connectors 6.1 Getting Started Connect the TV antenna to TV ANT IN Connect the RF-IN of TV to RF-OUT Connect the Video and Audio of TV to the Video and Audio. Connect Red and White connector to Audio R and Audio L, and Yellow into Video port respectively Connect your satellite dish After your receiver is powered on, proceed with installation as follows: 1) Menu Language Setting Turn on your TV and receiver. The pop-up menu for language selection will appear <Figure 6-1>. Select one language and press the to proceed. <Figure 6-1> RF OUT UHF LNB INPUT LOOP OUT AC V 47-63Hz, 30W Note : Languages displayed in 'Language' raw are supported by your receiver. TV ANT IN AUDIO VIDEO RS-232C 10 11

 frequency.")
8 6.1 Getting Started 2) Antenna Setup Press the MENU button to display the main menu. Use the / and / to move in menu. Press the on the "Dish Setting". The following window will appear. <Figure 6-2> If you have motorized dish, press the on the "Motorized Setting". <Figure 6-3> Note : Enter 4-Digit password if need arise. The default password is Getting Started - Sat Degree : Satellite location. - Antenna Position : Press. - Goto Reference : Move the dish to the 0 position. - Antenna Longitude : Your longitude at present. - Antenna Latitude : Your latitude at present. Note : When you change each parameter,you need to know exact parameter of LNB to modify L.O.(local oscillator) frequency. Note : When you change each parameter,you need to understand environment of connecting the receiver and antenna in order for you to set 22KHz and DiSEqC properly. After setting, press the EXIT button to store the changed data. 3) Satellite Scan <Figure 6-2> <Figure 6-3> Select item you want to edit and change each parameter.<dish Setting> - LNB Power : Select LNB power( ON / OFF / 13V / 18V) - LNB Type : Select your LNB Type.(Single / Universal / OCS) - LNB Freq : Select LNB oscillator frequency. - 22KHz : Set the path of 0/22KHz switch box. - DiSEqC switch : Select DiSEqC box type(off / 1,0 / 1.1) - Committed / Uncommitted : Select DiSEqC port. Select item you want to edit and change each parameter.<motorized Setting> - DiSEqC Motor : Select DiSEqC Motor type (OFF / 1,2 / USALS) - Move : You can change the dish position to West / East. - Limit : If you want to set limit, press. - Disable Limit : You can disable East and West Limit. - Goto Center : Move the dish to the 0 position. - Set East / West Limit : You can move the dish East or West using /. Press the to fix East or West limit. Through this function, the receiver searches for all the available channels and saves them in the memory. Auto Scan <Figure 6-4> Press the satellite. on which you want to scan in satellite list. You can select more than one Press the and select "Search type" or "network Search" option. - Search Type : Determine searching channels(all channel / Free channel only / TV channel only) - Network Search : If you set to ON, you can find more transponders through NIT Scan. If you press the <Figure 6-5> on the "SCAN", the selected satellites will be scanned
, just input information using NUMERIC button.")

 Select Channel You can change the current channel to any other channel you want.")
9 6.1 Getting Started 6.1 Getting Started Manual Scan <Figure 6-6> Select transponder which you want to scan. If you want to change an information of current transponder(frequency, Symbol Rate and Polarization), just input information using NUMERIC button. If you want to add new transponder, press GREEN button. If you want to delete current transponder, move cursor to the Frequency and press YELLOW button. PID Scan <Figure 6-7> <Figure 6-4> <Figure 6-5> Select transponder which you want to scan. If you want to change an information of current transponder(frequency, Symbol Rate and Polarization), just input information using NUMERIC button. <Figure 6-6> <Figure 6-7> Note : Now you have complete all steps needed for watching programs. If you could not see the program after finishing these procedures, please contact a shop where you bought your receiver or installer who installed your receiver. 4) Select Channel You can change the current channel to any other channel you want. In case you want to select a channel at random without knowing the channel name, you can navigate between channels untill you fild the channel you want. If you know the channel number, enter the number and wait 2 seconds till the channel changed. If you know the channel name, press and the channel list will appear.<figure 6-8> If you want to add new transponder, press GREEN button. If you want to delete current transponder, move cursor to the Frequency and press YELLOW button. You can also search a channel of the specified transponder by specifying PID data(video, Audio and PCR). <Figure 6-8> 14 15
10 6.1 Getting Started 6.1 Getting Started In the right side of screen, detailed information of the selected channel will be displayed. (Satellite Name, Frequency(polar) and Channel Name) You can navigate between channels with this buttons. - / : Moves up / down. - or / or : Moves page up / page down. - RED : Shows all channels in current group. - GREEN : Shows channels sorted by alphabet. - YELLOW : Shows channels sorted by Transponder. - BLUE : Shows channels sorted by CAS system. When the scroll bar is positioned on the channel you want to see, press. 5) Other Function on Remote Control Volume Control While you are watching a program, press or to control volume. When necessary, press MUTE button to remove the sound of the program. Then, your receiver goes into mute condition and the mute icon will be displayed. Press MUTE button again to turn the sound on. Channel Information Whenever press the INFO button, the information banner will appear for a few seconds. If you press the INFO again on the information mode, the detail banner will appear. TV / RADIO switching You can use this menu when you change a TV channel to a Radio channel or vice versa. RECALL(RED) Return to the previous channel. Subtitle / Audio You can adjust the subtitle and audio status of the current channel. Press AUDIO(GREEN) button, then subtitle and audio related menu will be displayed. - Audio Mode : Stereo -> Mono-Left -> Mono-Right - Audio Track : All tracks available in this program. - Subtitle : All subtitle language available in this program. Note : These subtitle and audio parameters are workable only when the receiving channel supports these functions. Teletext(YELLOW) Teletext Service is text data service from Service Provider. It is available only when the satellite signal carries teletext service data. PAUSE This key is used to pause the video. Press once more to resume the video. In pause mode you can zoom in partial of video. In pause mode, select position using / / /. Press to zoom in. Press again to zoom out. TV / SAT switching If you press TV/SAT, the signal reception path will be changed to RF modulator. - TV Mode : TV ANT In signal will be out. (front will display "TV") - SAT Mode : Decoded signal will be out through RF.(front will display channel number) GROUP When watching TV or listening to Radio, you can get the satellite or favorite channel group list by pressing the GROUP button on the remote control unit. Group menu will display only registered satellite and favorite group
11 6.2 System Setting 1) Time Setting This sub menu allows you to set your local time, wake up time, wake up channel and sleep time. <Figure 6-9> - GMT Usage : If you set ON, local time is determined by adjusting the differences from GMT(Greenwich Meantime), according to your location. - Current Date : If GMT Usage ON, this date is determined by GMT. If GMT Usage OFF, you can modify this by pressing. If you set OFF, receiver doesn't refer to GMT. Local time is determined by adjusting current date and current time. - Current Time : If GMT Usage ON, this time is determined by GMT. If GMT Usage OFF, you can modify this by pressing NUMERIC button. - Local Offset : If GMT Usage ON, Local time is GMT time + Local Offset. - Wake Up Mode : You can set the cycle of the wake up mode.(off / Once / Daily) - Wake Up Time : You can set wake up time by pressing NUMERIC button. - Wake Up Channel : You can set wake up channel by pressing. - Sleep Mode : You can set the cycle of the sleep mode(off / Once / Daily) - Sleep Time : You can set sleep time by pressing NUMERIC button. 6.2 System Setting 2) A/V Output Setting This sub menu allows you to set audio/video output setting. <Figure 6-10> - Audio Language : Default language of audio when changing channel. - Subtitle Language : Default language of subtitle. - Video Format : Video output format(auto / PAL / NTSC). - Screen Format : TV aspect ratio(16:9 / 4:3 Letter-Box / 4:3 Pan Scan) - RF Type : If you set PAL in Video Format, this receiver supports PAL B/G, PAL I, PAL D/K among PAL Standards. - RF Channel : Sets the channel to display the audio and video signal on your TV.(21~69) If you select 40, receiver will be displayed at channel 40 on your TV. <Figure 6-10> 3) OSD Setting <Figure 6-9> This sub menu allows you to set menu language, OSD transparency, Information and volume timeout. <Figure 6-11> - Menu Language : Select the desired language of the menu. - Transparency : Select OSD transparency of the menu.(1% ~ 100%) - Information Timeout : Select the display duration of the information banner. (1 sec / 2 sec / 3 sec / 5 sec / 10 sec) - Volume Timeout : Select the display duration of the volume box. (1 sec / 2 sec / 3 sec / 5 sec / 10 sec) 18 19
12 6.2 System Setting 6.2 System Setting <Figure 6-11> <Figure 6-12> 4) Security Setting This sub menu allows you to change the password option to unlock or lock some menu entry and to change password. <Figure 6-12> - Receiver Lock : If you set ON, receiver asks you to enter PIN code when power on. - Install Lock : If you set ON, receiver asks you to enter PIN code when entering Installation menu. - Channel Lock : If you set ON, receiver asks you to enter PIN code on channels menu. - Lock Channel Confirm : If you set ON, receiver asks you to enter PIN code when changing to locked channel. - Age Limit : Prevents children or unauthorized people from watching programs. (Free / 8 above / 12 above / 15 above / 18 above) - Current Password : Input current password for change your password. - New Password : Input new password you want to change. - Verify Password : Input new password one more for confirmation. 5) Database Reset This sub menu allows you to restore the factory set values in case the user has encountered some problems after changing any new values of channel data and others which may be in error. <Figure 6-13> - Delete Radio Channel : Erase all radio channels in database. - Delete Scramble Channel : Erase all scramble channels in database. - Delete All Channel : Erase all channels in database. - Factory Set : Erase all channels and restore default setting. The receiver will return to factory default parameters. Note : The default password is '0000'. <Figure 6-13> 20 21


13 6.3 Channels 1) Set Favorites This sub menu allows you to set up favorite name and favorite lists as you want. You can choose TV or Radio channels in an alternative way by pressing TV/RADIO button. This receiver support 8 favorite list. 6.3 Channels Note : The VIDEO PID, AUDIO PID and PCR PID are very important for optimal satellite signal reception. We recommend you get professional advice where available. Press the on the "Set Favorites". The following menu will be displayed. <Figure 6-14> Press / and. The following menu will be displayed. <figure 6-15> If you want to change favorite group name, press the RED button. Press Press to select the channel that you want to add into favorite channel list. one more to remove the channel that added favorite channel list. Press EXIT button to return to previous menu. <Figure 6-16> 3) Move Channels This sub menu allows you to move the channels. You can choose TV or Radio channels in an alternative way by pressing TV/RADIO button. You can change channel list group by pressing GROUP button. <Figure 6-14> <Figure 6-15> Press the on the "Move Channels". The following menu will be displayed. <Figure 6-17> Press to select the channel that you want to move. Moving icon will be displayed. Press / / / / NUMERIC button to move the selected channel. 2) Edit Channels This sub menu allows you to rename the channels and input user PID. You can choose TV or Radio channels in an alternative way by pressing TV/RADIO button. You can change channel list group by pressing GROUP button. Press one more to place the channel. Press EXIT button to return to previous menu. Press the on the "Edit Channels". The following menu will be displayed. <Figure 6-16> Press Press to select the channel that you want to edit. in Edit Name to rename the channel, the keypad will be displayed. You can edit PID by pressing NUMERIC key. 22 <Figure 6-17> 23
14 6.3 Channels 6.3 Channels 4) Lock Channels This sub menu allows you to lock the channels for prevent watching this channel. Once the channel is locked, every time you try to watch the channel, you will be asked to enter password. You can choose TV or Radio channels in an alternative way by pressing TV/RADIO button. You can change channel list group by pressing GROUP button. Press the on the "Skip Channels". The following menu will be displayed. <Figure 6-19> Press to select the channel that you want to skip. Skip icon will be displayed. Press one more to cancel skip. Skip icon will be disappeared. Press EXIT button to return to previous menu. Note : If you set "Lock Channel Confirm(refer <6.2>security setting)" to OFF, you will not be asked to enter password even if the channel is locked. Press the on the "Lock Channels". The following menu will be displayed. <Figure 6-18> Press Press to select the channel that you want to lock. Lock icon will be displayed. one more to cancel lock. Lock icon will be disappeared. Press EXIT button to return to previous menu. <Figure 6-19> 6) Delete Channels 5) Skip Channels <Figure 6-18> This sub menu allows you to skip the channels. Once the channel is skipped, every time you try to change channel using / in non-menu mode, this channel will be skipped. You can choose TV or Radio channels in an alternative way by pressing TV/RADIO button. You can change channel list group by pressing GROUP button. Note : If you try to change channel using NUMERIC button in non-menu mode, you can watch this channel. 24 This sub menu allows you to delete the channels. You can choose TV or Radio channels in an alternative way by pressing TV/RADIO button. You can change channel list group by pressing GROUP button. Note : Be careful!! If you delete channel, you can't watch this channel until rescan. Press the on the "Delete Channels". The following menu will be displayed. <Figure 6-20> Press Press to select the channel that you want to delete. Delete icon will be displayed. one more to cancel delete. Delete icon will be disappeared. Press INFO button to delete all channels in current list. You will be asked to enter password. Press EXIT button to return to previous menu. 25


15 6.3 Channels 6.4 Guide <Figure 6-20> <Figure 6-21> 2) Timer 6.4 Guide 1) GUIDE(EPG:Electronic Program Guide) This sub menu allows you to get the electronic program guide if available. If you press GUIDE button, guide menu will be displayed. <Figure 6-21> Press the / to see previous/next guide. Press the / / / to move to other channel. Press to watch and get the EPG data. If you press in current viewing channel - If current EPG is selected, return to previous menu and change to selected channel. - If next EPG is selected, selecting event will be reserved and event color will be changed. This sub menu allows you to set the on/off time of your receiver. If you press RED button in guide menu, timer menu will be displayed. <Figure 6-22> Press the / to move to other items. Press the / to change the parameter. - Timer No. : Selete the timer that you want to modify.(1 ~ 8) - State : Select the timer cycle of action.(off / once / daily / weekly) - Date : Select the date using. Calendar pop-up will be displayed. - Start Time : Input the time using NUMERIC button for your receiver power-on. - End Time : Input the time using NUMERIC button for your receiver power-off. - Channel : Select the channel using. Channel list pop-up will be displayed. By pressing TV/RADIO button, you can choose TV or Radio list. By pressing GROUP button, you can choose channel list group. If you press RED button, timer menu will be displayed. <Figure 6-22> <Figure 6-22> 26 27


16 6.5 Games 6.5 Games 1) Tetris Press the on the "Tetris". The following menu will be displayed. <Figure 6-23> You can select skill using /. Press the to start game <Figure 6-24>, or press the EXIT button to return previous menu. Press the to rotate the block. Press / to move the block. Press the / / / to move. Press RED button to undo previous move. You can undo only one step. Press GREEN button to restart. Press YELLOW/BLUE button to jump previous/next level. You can jump between completed level. Press EXIT button to quit the game. Press DOWN button to drop the block. In the right top small window, you can see next block. Press EXIT button to quit the game. <Figure 6-25> <Figure 6-26> <Figure 6-23> <Figure 6-24> 3) Snake Press the on the "Snake". The following menu will be displayed. <Figure 6-27> You can select skill using /. 2) Sokoban To play the sokoban, you have to push the balls to their correct positions. The balls can only be pushed, never pulled, so you have to be careful not to push them into a corner where you can't get them out again. You can only push one ball at a time. Press the on the "Sokoban". The following menu will be displayed. <Figure 6-25> You can select skill using /. Press the to start game <Figure 6-28>, or press the EXIT button to return previous menu. Press the / / / to move. If the snake is passed through the BLUE icon, the length will be increased. If the snake is passed through the RED icon, the length will be decreased. If the snake is passed through the GRAY icon(block), the game end. Press EXIT button to quit the game. Press the menu. to start game <Figure 6-25>, or press the EXIT button to return previous 28 29


17 6.5 Games Trouble Shooting There may be various reasons for the abnormal operation of the unit.therefore,if the unit does not work properly,check it according to the procedures shown in the table below : Problem Possible causes Remedy LED on front panel does not light. AC power cord disconnected. Connect power cord properly into the power socket. <Figure 6-27> <Figure 6-28> No Picture or sound. Wrong connection of the video/audio output to TV input terminal. Connect two terminals correctly with RCA or RF cable. Wrong connection of satellite antenna cable. Connect the antenna cable correctly. 6.6 System Information Wrong direction of satellite antenna. Adjust the direction of antenna. You can check the current information about your receiver such as receiver model name, S/W version, H/W version, manufacturing date, etc. <Figure 6.29> Note : This information is necessary when you download new software or you need to repair the receiver. No signal or weak signal. Wrong setting of channel information in MENU screen. Check the cable connections, LNB and other equipment connected between the LNB and the receiver or adjust the antenna. Type the setting value correctly. Black-and-white screen or V-Hold. Your TV mode is different from satellite broadcasting mode. Use TV of same mode. Use the NTSC/PAL converter connected to the receiver and TV. <Figure 6-29> The remote controller is not working. Battery exhausted. Fluorescent light interfering with the remote controller. Change the batteries. Switch off the light. Remote controller is incorrectly aimed. Aim the remote control at the receiver

18 Specifications System capabilities Fully DVB compliant Power supply Power consumption max 30W LNB/Tuner input Connector IEC ,female Supply voltage 90V ~ 250V Frequency range 950MHz ~ 2150MHz Supply frequency 47Hz ~ 63Hz Signal level LNB supply -65dBm ~ -25dBm 14/18V, max 500mA Rear Panel connectors Video out Audio L/R 1 X RCA cinch 2 X RCA cinch LNB switch control 22KHz Serial data 9pin D-sub DiSEqC Ver 1.0/1.1/1.2/USALS Compatible Digital tuner input IEC Demodulator Front end QPSK Loop-through Digital tuner IEC Symbol rate 2Msps ~ 45Msps Terrestrial ant input IEC SCPC and MCPC Capable RF modulator output IEC System resource Video decoder Spectral inversion Processor SDRAM FLASH EEPROM MPEG 2 Auto conversion 32bit processor (80MHz) 8Mbyte 2Mbyte 32Kbyte Main Level RF modulator PAL G/I/K TV Type Physical Specification Connector Frequency Output channel number Size (W X H X D) Weight (Net) IEC 169-2, female/male 470 ~ 860MHz 21 ~ X 54 X 232(mm) 1.8 Kg Data Rate up to 15M bits/s Resolution 720 X 576, 720 X 480 Video format NTSC, PAL Aspec Ratio 4:3,16:9 Teletext DVB compliant MPEG Audio MPEG 1 layer 1 &2 Type Mono,Dual mono,stereo,joint Stereo Sampling rates 32,44.1 and 48 KHz Serial data interface Connector 9pin D-sub male, Max 115K bps Remote control Code NEC-IR Operating condition up to 7 Meter 32 33
19
20
USER S MANUAL. Digital Satellite Receiver
 USER S MANUAL Digital Satellite Receiver E109000257A STRONG & Co. (FAR EAST), LTD. P. O. Box : 85, YOKOHAMA, KANAGAWA-KEN JAPAN 231-91 - FAX : +81 45 662-4957 Website : www.strong-technologies.com E-mail
Xpresionn Digital Terrestrial Receiver. User Guide
 Xpresionn 2150 Digital Terrestrial Receiver User Guide GENERAL INFORMATION...3 A) SAFETY PRECAUTIONS...3 B) MAIN FEATURES...4 C) CONTENTS OF THE PACKAGING...4 D) REMOTE CONTROL...5 INSTALLATION...6 A)
CONTENTS. 1. Introduction Overview 1.2. Main Features
 CONTENTS 1. Introduction 4 1.1. Overview 1.2. Main Features 2. Safety/Precaution 5 2.1. Safety 2.2. Precaution 3. Check Point before Use 7 3.1. Accessories 3.2. The Satellite dish 4. Controls/Functions
GENERAL INFORMATION INSTALLATION MENU INFORMATION. Main Features For your Safety Unpacking General Operation RCU Rear Panel.
 GENERAL INFORMATION 3 Main Features For your Safety Unpacking General Operation RCU Rear Panel 3 4 7 7 8 9 INSTALLATION 10 MENU INFORMATION Main Menu 1. Installation 1.1 Satellite list 1.2 Dish Setting
SYMBOLS USED ON THE RECEIVER... 3 SAFETY INSTRUCTIONS... 4 I.GENERAL INFORMATION...
 Table of Contents SYMBOLS USED ON THE RECEIVER... 3 SAFETY INSTRUCTIONS... 4 I.GENERAL INFORMATION... 5 1. Preface... 5 2. Main Features... 5 3. General Operation of the Receiver... 6 4. Front Panel...
English SAFETY PRECAUTION DO NOT INSTALL THE RECEIVER: PAG. 2
 U4109 SAFETY PRECAUTION The lightning fl ash with arrowhead symbol, within an equilateral triangle, is intended to alert the user to dangerous voltage and to prevent from a risk of electric shock. Warning:
Xsarius Satmeter Pro. Manual
 Xsarius Satmeter Pro Manual 1 2 Directory of content Introduction Directory of content 3 Introduction 3 Satmeter Pro 02 Frontpanel & buttons 6 Xsarius provides high quality products that enable you to
English SAFETY PRECAUTION DO NOT INSTALL THE RECEIVER: PAG. 2
 U4127 SAFETY PRECAUTION The lightning fl ash with arrowhead symbol, within an equilateral triangle, is intended to alert the user to dangerous voltage and to prevent from a risk of electric shock. Warning:
User s Guide. Digital Satellite Receiver
 User s Guide Digital Satellite Receiver Before Getting Started Information contained in this manual is subject to change without notice. No part of this publication may be copied, reproduced, or translated
Digital Terrestrial Television Receiver USER S MANUAL
 # 5024 Digital Terrestrial Television Receiver USER S MANUAL CAUTION RISK OF ELECTRIC SHOCK DO NOT OPEN This symbol is intended to alert the user to the presence of insulated dangerous voltage within the
SAFETY PRECAUTION ENGLISH DO NOT INSTALL THE RECEIVER: PAG. 2
 MAX S92+ HDMI SAFETY PRECAUTION The lightning fl ash with arrowhead symbol, within an equilateral triangle, is intended to alert the user to dangerous voltage and to prevent from a risk of electric shock.
English SAFETY PRECAUTION DO NOT INSTALL THE RECEIVER: PAG. 2
 U4125 SAFETY PRECAUTION The lightning fl ash with arrowhead symbol, within an equilateral triangle, is intended to alert the user to dangerous voltage and to prevent from a risk of electric shock. Warning:
PART 1 English 1.0 Usage
 SAT OUT SAT IN Thank you for choosing this Strong satellite receiver. This receiver is of our latest development and it is designed to be capable of safely install your receiver and to achieve its optimum
CONNECTION TO THE SATELLITE DISH LNB
 Safety Instructions Safety Instructions This product has been manufactured to satisfy the international safety standards. Please read all of safety and operating instructions before operating the product
Remote Control Unit
 Contents Declaration of Conformity --------------------------------------------------------------------------------- 3 General Information -----------------------------------------------------------------------------------------
Table of Contents. Table of Contents. Safety Warning General Information. Installing Equipment Channel List Guide Menu Guide Main Page
 TABLE OF CONTENTS Table of Contents Table of Contents Safety Warning General Information Package Contents & Features Front Panel Rear Panel Remote Control Unit (RCU) Programing the Remote Control Installing
SET TOP BOX MODEL: GDB01SFV1 USER MANUAL
 SET TOP BOX MODEL: USER MANUAL 1 2 3 4 5 6 7 8 Welcome Your Set Top Box 2.1 In The Box 2.2 Front View 2.3 Rear View Quick Setup 3.1 TV Connection 3.2 Recording from the set top box 3.3 Record one channel
1. Before Getting Started Main Features Accessories 2
 çêðð Ð Í» Š ̱ Š Þ± Ë» Ž Ù«¼» For your safety Information contained in this manual is subject to change without notice. No part of this publication may be copied, reproduced, or translated to another
Quick Start Digital Satellite Receiver
 Quick Start Digital Satellite Receiver Support of SD (MPEG2), DVB-S system Standard resolution video output - SCART Compatible with Diseqc 1.0, 1.1, 1.2, and USALS Electronic Program Guide - EPG Multilingual
GDB9 INSTRUCTION MANUAL DIGITAL TERRESTRIAL RECEIVER
 GDB9 INSTRUCTION MANUAL DIGITAL TERRESTRIAL RECEIVER Goodmans Support: www.goodmans.co.uk/support Please read these instructions before use and keep for future reference IMPORTANT SAFETY INSTRUCTIONS Thank
User s Manual Digital Satellite Receiver
 A_ENG_110944 User s Manual Digital Satellite Receiver Please read the entire manual thoroughly and retain it for future reference. ENG - 1 General Safety Warning CAUTION RISK OF ELECTRIC SHOCK DO NOT OPEN
DIGITAL SATELLITE RECEIVER ESR-D101 INSTRUCTION MANUAL
 DIGITAL SATELLITE RECEIVER ESR-D101 INSTRUCTION MANUAL 1 SATETY INSTRUCTION Please read the following instructions carefully Do not overload the following wall outlets, extension cords or integral convenience
I.General Information Preface Main Features For Your Safety General Operation of the Receiver Front Panel...
 I.General Information...3 1. Preface...3 2. Main Features...3 3. For Your Safety...4 4. General Operation of the Receiver...4 5. Front Panel...5 6. Rear Panel...6 7. Remote control unit...7 8. Installation
IMPORTANT SAFETY INSTRUCTIONS
 IMPORTANT SAFETY INSTRUCTIONS All the safety and operating instructions should be read before operating this product. The safety and operating instructions should be retained for future reference. All
DIGITAL SET TOP BOX STB 7017 INSTRUCTION MANUAL
 DIGITAL SET TOP BOX STB7017 INSTRUCTION MANUAL STB 7017 CHANNEL After Sales Support Now you have purchased a Tevion product you can rest assured in the knowledge that as well as your 3 year parts and labour
NMS ETA TM Stereo Advanced Digital TV Set-top Box
 Digital TV HD Set-top Box STB2-T2 NMS ETA TM Stereo Advanced Digital TV Set-top Box User Guide CONTENTS Safety Information... 3 Introduction... 4 Set-top Box Front Panel... 4 Set-top Box Back Panel...
Table of Contents. Table of Contents
 Table of Contents Table of Contents 1. SAFETY PRECAUTIONS 2. GENERAL FEATURES 3. HARDWARE DESCRIPTION 4. HOW TO CONNECT YOUR RECEIVER 5. SYSTEM SETUP 6. MENU STRUCTURE 7. MENU OPERATION 7.1. USER SETTING
USER S MANUAL. High Definition Digital Satellite Television Receiver and Recorder
 USER S MANUAL High Definition Digital Satellite Television Receiver and Recorder 1 Contents 1. Introduction -------------------------------------------------------3 1.1 Overview --------------------------------------------------------
USER S MANUAL. High Definition Digital Satellite Television Receiver and Recorder. [ ]SRT4922A 매뉴얼 _english_aus.indd 오후 4:49:40
![USER S MANUAL. High Definition Digital Satellite Television Receiver and Recorder. [ ]SRT4922A 매뉴얼 _english_aus.indd 오후 4:49:40](/thumbs/80/81768448.jpg "USER S MANUAL. High Definition Digital Satellite Television Receiver and Recorder. [ ]SRT4922A 매뉴얼 _english_aus.indd 오후 4:49:40") USER S MANUAL High Definition Digital Satellite Television Receiver and Recorder [2013.01.04]SRT4922A 매뉴얼 _english_aus.indd 1 2013-01-04 오후 4:49:40 Contents 1. Introduction -------------------------------------------------------
USER S MANUAL High Definition Digital Satellite Television Receiver and Recorder [2013.01.04]SRT4922A 매뉴얼 _english_aus.indd 1 2013-01-04 오후 4:49:40 Contents 1. Introduction -------------------------------------------------------
Be sure to run the vehicle engine while using this unit to avoid battery exhaustion.
 CAUTION: TO REDUCE THE RISK OF ELECTRIC SHOCK DO NOT REMOVE COVER (OR BACK) NO USER-SERVICEABLE PARTS INSIDE REFER SERVICING TO QUALIFIED SERVICE PERSONNE; Please Read all of these instructions regarding
Thank you for purchasing STB10HD Digital High Definition Set Top Box.
 Thank you for purchasing STB10HD Digital High Definition Set Top Box. This manual will help you to install, use and maintain the receiver. Please read this manual carefully before operating your unit and
OWNER'S MANUAL MODEL: DTV-2000 STANDBY/ON
 OWNER'S MANUAL MODEL: DTV-2000 STANDBY/ON CH+ CH- TABLE OF CONTENTS SAFETY PRECAUTIONS IMPORTANT SAFETY INSTRUCTIONS and FEATURES ACCESSORIES and LOADING BATTERIES REMOTE CONTROL UNIT FRONT PANEL and REAR
SAFETY PRECAUTION ENGLISH DO NOT INSTALL THE RECEIVER: PAG. 2
 MAX S21 SAFETY PRECAUTION The lightning fl ash with arrowhead symbol, within an equilateral triangle, is intended to alert the user to dangerous voltage and to prevent from a risk of electric shock. Warning:
English CONTENTS 1. GUIDE OUTLINE THE MENU OSD INSTRUCTION TECHNICAL SPECIFICATION...17
 USER S MANUAL English CONTENTS 1. GUIDE...2 1.1 IMPORTANT SAFETY INSTRUCTIONS...2 1.2 UNPACKING...2 1.3 PRODUCT OVERVIEW& ILLUSTRATION...3 1.4 INSTALLATION OF METER...4 2. OUTLINE...5 3. THE MENU OSD INSTRUCTION...6
FV400 DIGITAL TV RECEIVER WITH MODULATOR INSTRUCTION MANUAL
 FV400 DIGITAL TV RECEIVER WITH MODULATOR INSTRUCTION MANUAL Please read this instruction manual carefully before using your receiver Table of Contents Introduction-----------------------------------------------------------------------------
5 Getting Started Connecting the DVB-T Receiver First Steps... 9
 Table of Contents 1. Introduction... 2 2. Features... 3 3. Safety Notes... 4 4. Your Receiver and its Functions... 5 4.1 Remote Control Functions... 5 4.2 Front Panel Controls... 7 4.3 Rear Panel Connections...
STM 26 HD. DVB-S2+T2/C Compact meter User Manual. Ref R13. CAHORS Digital CS Cahors Cedex 9 FRANCE
 STM 26 HD DVB-S2+T2/C Compact meter User Manual Ref 0145225R13 Preface USER MANUAL Please read this manual carefully before using your Digital Sat meter for the first time. This operating manual will help
OPERATION Channel Manager HDD Installation... 22
 1.General Information... 3 2. Main Features... 3 3. FOR YOUR SAFETY... 4 4. ACCESSORIES... 4 OVERVIEW... 6 1. REMOTE CONTROL KEY... 6 2.FRONT PANEL... 8 3.REAR PANEL... 9 CONNECTION DIAGRAMS... 11 1. PVRX2
Front and Rear Panel Remote Control Connecting to a Television...4. Connecting to an Audio System...5
 Table of Contents Front and Rear Panel... 1 Remote Control...... 2 Connecting to a Television...4 Connecting to an Audio System...5 Connecting to a DVD Recorder or VCR... 6 First Time Installation... 7
Contents. English. 1. Introduction Overview 1.2 Main Features. 2. Safety/Precautions Safety 2.2 Precautions
 Contents 1. Introduction... 2 1.1 Overview 1.2 Main Features 2. Safety/Precautions... 3 2.1 Safety 2.2 Precautions 3. Points to Check before Use... 5 3.1 Accessories 4. Controls/Functions... 6 4.1 Front
S7030PVR User Manual
 S7030PVR User Manual Important Safety Instructions 1) Do not use this apparatus near water. 2) Clean only with dry cloth. 3) Do not block any ventilation openings, install in accordance with the instructions.
User's Manual 700HDMI PVR
 Digital Satellite Receiver User's Manual 700HDMI PVR INDEX INDEX... 3 Precautions... 5 1. Important Safety Instructions... 5 2. Notice... 5 3. Copyright... 6 4. Disclaimer... 6 Before You Begin... 7 1.
SAFETY PRECAUTION ENGLISH PAG. 2. rev 1.2. dangerous voltage and to prevent only. operating and maintenance from a risk of electric shock.
 MAX S93+ SAFETY PRECAUTION The lightning fl ash with arrowhead WARNING: To reduce the risk of The exclamation point within an symbol, within an equilateral triangle, electric shock, don t open the cabinet.
User Manual High Definition Digital Set Top Box DVBT9070 Please read this User Manual carefully to ensure proper use of this product and keep this man
 User Manual High Definition Digital Set Top Box DVBT9070 Please read this User Manual carefully to ensure proper use of this product and keep this manual for future reference. Important Safety Instructions
English CONTENTS 1. GUIDE OUTLINE THE MENU OSD INSTRUCTION TECHNICAL SPECIFICATION TROUBLE SHOOTING...
 English CONTENTS 1. GUIDE...2 1.1 IMPORTANT SAFETY INSTRUCTIONS...2 1.2 UNPACKING...2 1.3 PRODUCT OVERVIEW& ILLUSTRATION...3 1.4 INSTALLATION OF METER...4 2. OUTLINE...5 3. THE MENU OSD INSTRUCTION...6
User Manual Of Digital Set Top Box
 Size:120X170mm User Manual Of Digital Set Top Box VEA T100 Please read this User Manual carefully to ensure proper use of this product and keep this manual for future reference. Safety Instructions Always
User Manual. High Definition Digital Set Top Box HDSTB250
 User Manual High Definition Digital Set Top Box HDSTB250 CHANNEL HDSTB250 Please read this User Manual carefully to ensure proper use of this product and keep this manual for future reference. Important
The following symbols will serve as follows: Indicates any other additional important or helpful information. Indicates warning information.
 Contents 1 2 HD2011IR User Manual Notice This manual can help you to become familiar with the many great features of our high definition digital Satellite receiver, as well as how to use and operate these
CONNECTION TO THE SATELLITE DISH LNB
 Safety Instructions Safety Instructions This product has been manufactured to satisfy the international safety standards. Please read all of safety and operating instructions before operating the product
User manual FT-8100 HD. English
 User manual FT-8100 HD English WARNING!!! On the USB Memory Function for FT-8100 HD model, user can make recording or playing function using by external USB devices such as USB Flash Memory Disk or external
Digital Terrestrial Television Receiver USER S MANUAL
 Digital Terrestrial Television Receiver USER S MANUAL CAUTION RISK OF ELECTRIC SHOCK DO NOT OPEN This symbol is intended to alert the user to the presence of insulated dangerous voltage within the products
Throughout the whole user manual, pay special attention to the following marks that
 Notice Warnings, Cautions and Notes Throughout the whole user manual, pay special attention to the following marks that indicate hazardous situations. Warning ** Indicates a hazardous situation which could
For Freeview HD User s Manual
 extra Terrestrial HD For Freeview HD User s Manual 1 Table of contents 1 INTRODUCTION...4 2 MAIN FUNCTIONS AND FEATURES...4 3 THE REMOTE CONTROL...5 4 FRONT AND REAR PANEL...7 4.1 FRONT PANEL... 7 5 FIRST
Receiver/Digital Decoder DVB-T2 Set Top Box. Installation Manual & User Manual
 Receiver/Digital Decoder DVB-T2 Set Top Box Installation Manual & User Manual SAFETY PRECAUTION CAUTION: The lightening flash with arrowhead symbol, within an equilateral triangle, is intended to alert
Alpha Plus. User Guide
 Alpha Plus User Guide Contents Contents i 1 Introduction 1 1.1 Features.............................. 1 1.2 Accessories............................ 2 1.3 The Remote Control....................... 3 1.4
DIGITAL SATELLITE METER
 DIGITAL SATELLITE METER THE PROFESSIONAL EQUIPMENT DIGITAL SATELLITE METER THE PROFESSIONAL EQUIPMENT USER S MANUAL Product Description 1.Guide 2. Menu 1.1 Face Panel & Button 1.2 Power On/Off 1.3Power
IMPORTANT SAFETY INSTRUCTIONS
 USER MANUAL 1 2 3 IMPORTANT SAFETY INSTRUCTIONS 1. Be sure to read this user manual before operating your PVR. 2. Never open the cover. It is very dangerous to touch the inside of the unit due to possible
Converts any TV to Digital. MFR-300 User Guide
 Converts any TV to Digital MFR-300 User Guide Introduction Thank you for choosing this TVonics Freeview box. Record the serial number in the space provided below (the serial number can be found on the
English CONTENTS 1. GUIDE OUTLINE THE MENU OSD INSTRUCTION TECHNICAL SPECIFICATION TROUBLE SHOOTING...
 USER S MANUAL English CONTENTS 1. GUIDE...2 1.1 IMPORTANT SAFETY INSTRUCTIONS...2 1.2 UNPACKING...2 1.3 PRODUCT OVERVIEW& ILLUSTRATION...3 1.4 INSTALLATION OF METER...4 2. OUTLINE...5 3. THE MENU OSD INSTRUCTION...6
CONTENTS 8 ACCESSORIES 13 9 TROUBLE SHOOTING AND ADVICE SPECIFICATIONS BATTERY USAGE CAUTION 13
 CONTENTS 1 PREFACE 2 2 SAFETY PRECAUTIONS 2 3 FRONT & BACK VIEW, REAR CONNECTION OF LCD 3 4 TV INSTALLATION DRAWINGS 4 4.1 ANTENNA CONNECTION 4 4.2 AV1 INPUT CONNECTION 4 4.3 AV2 INPUT CONNECTION 4 4.4
DIGITAL TERRESTRIAL RECEIVER NVR-2090DU CHANNEL
 DIGITAL TERRESTRIAL RECEIVER NVR-2090DU CHANNEL 1 Espanol ~ Digital Video Broadcasting 2 3 STANDBY DTV/VCR TEXT MUTE VOL+ INFO PLAY/PAUSE EPG VOL- CH+ STOP SETUP EXIT 23 FAV- ENTER FAV+ 24 25 SOURCE CH-
User s Manual S9 HD PVR
 User s Manual S9 HD PVR High Definition Digital Satellite Recorder Personal Video Recorder 1 Common Interface 4 CONTENTS 1. REMOTE CONTROLLER...7 2. BASIC OPERATIONS...8 2.1 TURN ON STB..8 2.2 POWER.8
Safety warning Important Safety Instructions. Wall Mount Specifications. Electronic Program Guide. Lock Menu 18. PVR File System
 LT-32N370Z 32 INPUT Safety warning Important Safety Instructions Wall Mount Specifications Electronic Program Guide Lock Menu 18 PVR File System 11 11 11 14 15 16 17 19 20 21 21 22 23 24 25 INPUT AAA
SatKing DVBS-250S2RF. Instruction Manual
 SatKing DVBS-250S2RF Instruction Manual SAFETY Safety Precaution The IRD is complied with international safety standards. Please read these simple guidelines carefully before using this device. Power Supply
SIRD-FTA Free-to-Air Digital Satellite Receiver PICO MACOM. SIRD-FTA-2 Owners Manual
 VOL- VOL+ MENU OK CH- CH+ P O W E R L O C K Free-to-Air Digital Satellite Receiver SIRD-FTA Free-to-Air Digital Satellite Receiver Owners Manual Please read this manual thoroughly before use. Keep this
Contents. Safety instructions Reference 1.1 Genareal Features Delivery... 04
 HD 580 user manual Contents Safety instructions... 03 1. Reference 1.1 Genareal Features... 04 1.2 Delivery... 04 2. Names and key assignment 2.1 Front view... 05 2.2 Rear view... 05 2.3 Remote Control...
The product must be installed in accordance with national regulations.
 Important safety instructions to be kept with the product Please read attentively To prevent fire and electric shock, do not expose this receiver to rain or moisture. In order to avoid any possible risk
Table of contents 1 / 20
 Table of contents 1 GUIDE...3 1.1 Important Safety Instructions...3 1.2 Unpacking...3 1.3 PRODUCT OVERVIEW & ILLUSTRATION...4 1.4 INSTALLATION OF METER...5 2 OUTLINE...6 3. THE MENU OSD INSTRUCTION...6
User s Manual. Full HD Digital Satellite Receiver. v1310. Please read this User s Manual carefully before installing the receiver.
 User s Manual Full HD Digital Satellite Receiver v1310 Please read this User s Manual carefully before installing the receiver. 2 CONTENTS 1 Introduction 4 1.1 Features 4 1.2 Accessories 4 1.3 The Remote
HDTV-Sat-Irdeto-Receiver
 HDTV-Sat-Irdeto-Receiver TABLE OF CONTENTS 1 SAFETY ADVICE... 4 2 QUICK SETUP... 6 3 FEATURES... 8 4 HOW TO CONNECT YOUR RECEIVER... 9 5 HARDWARE:... 11 6 WATCHING TV... 15 7 MENU OPERATION... 23 8 EDITING
WARNING/CAUTION FCC NOTICE
 WARNING/CAUTION The lightning flash with ar rowhead symbol, within an equilateral triangle, is intended to alert the user to the presence of uninsulated dangerous voltage within the product s enclosure
Notice ** Copyright (Copyright 2001 HUMAX Corporation) GB 1
 GB 1") Notice Copyright (Copyright 2001 HUMAX Corporation) Not to be copied, used or translated in part or whole without HUMAX's prior consent in writing except approval of ownership of copyright and copyright
Notice Copyright (Copyright 2001 HUMAX Corporation) Not to be copied, used or translated in part or whole without HUMAX's prior consent in writing except approval of ownership of copyright and copyright
Digital Terrestrial Receiver SRT 5200/SRT 5202/SRT5205
 Digital Terrestrial Receiver SRT 5200/SRT 5202/SRT5205 Picture similar User manual Table of Contents 1.0 Instruction 2 1.1 Safety Instructions 2 1.2 Storage 3 1.3 Equipment Set-up 4 1.4 Features & Accessories
DVB-T2. Digital Terrestrial Receiver WD-822T2 USER S MANUAL
 DVB-T2 Digital Terrestrial Receiver WD-822T2 USER S MANUAL Index Important Safety Instructions... 3 Main Features.... 5 Front and Rear Panel.... 6 Remote Control..... 7 Installing the Batteries..... 8
MKV, MOV, MPEG-1/2/4, H.264)
") dvblink DVB-T tuner Dual DVB-T tuner Product features Dual DVB-T tuner DVB-T MPEG2 and MPEG4 compatible (HD) AFS* - auto frequenzy switching USB AV-player port USB-devices up to 2TB (FAT32 and NTFS), supports
dvblink DVB-T tuner Dual DVB-T tuner Product features Dual DVB-T tuner DVB-T MPEG2 and MPEG4 compatible (HD) AFS* - auto frequenzy switching USB AV-player port USB-devices up to 2TB (FAT32 and NTFS), supports
M5-H002. Multiview T-35. DVB-T to PAL / 5 channels on all TV s
 120531 M5-H002 Multiview T-35 DVB-T to PAL / 5 channels on all TV s Contents Multiview... 3 Features... 3 Caution... 3 Front & Rear Panel... 4 Connecting... 5 Programming... 6 Information... 7 Installation...8
Digital Terrestrial Receiver SRT 5300
 Digital Terrestrial Receiver SRT 5300 Picture similar User manual www.strong.tv 17 Feb 2011 21:16 1 2 3 4 5 1 Table of Contents 1.0 Instruction 2 1.1 Safety Instructions 2 1.2 Storage 3 1.3 Equipment Set-up
User s Manual. Digital Satellite Receiver. INSTRUCTION ABOUT WEEE SYMBOL I/B parenthesis to offer information for user. Viaccess CAS Embedded
 INSTRUCTION ABOUT WEEE SYMBOL I/B parenthesis to offer information for user. User s Manual Viaccess CAS Embedded This marking shown on the product or its literature, indicates that it should not be disposed
User s Guide. HD Satellite Receiver Pansat 9500HDX
 User s Guide HD Satellite Receiver Pansat 9500HDX Panarex Electronics Sun Valley, California, U.S.A. c 2011 by Panarex Electronics 1 CONTENTS 1 - GETTING STARTED... 4 1.1 Introduction... 4 1.2 Caution...
AVE HOME FAGOR CVBS TO DVB-T ENCODER MODULATOR. Fagor Electr6nica
 AVE HOME CVBS TO DVB-T ENCODER MODULATOR FAGOR Fagor Electr6nica TABLE OF CONTENTS 1. SPECIFICATIONS... 12 1.1 Product Overview... 12 1.2 Appearance and Description... 12 1.3 Diagram... 13 1.4 Characteristics...
RFT-851FTA. Twin DVB-T to PAL remodulator. User Manual
 RFT-851FTA Twin DVB-T to PAL remodulator User Manual 1. Purpose of use RFT-851FTA is designed for prosessing two COFDM modulated signals into standard CCIR channels. RFT-851FTA is supplied with a A2 stereo/dual/swap
ATLANTA ASF 2033HD+ DVB-S/S2 METER. User`s Manual
 ATLANTA ASF 2033HD+ DVB-S/S2 METER User`s Manual Buttons and Indicators... 2 How to measure... 3 Main menu... 4 LNB Setting... 4 Edit Satellite... 6 Spectrum Chart... 7 Constellation... 9 Angle Calculation...
ASF 2050 COMBO USER MANUAL
 ASF 2050 COMBO USER ASF 2050 COMBO USER 1. BUTTONS AND INDICATORS... 2 2. BASIC FUNCTIONS.... 4 2.1 Satellite... 5 2.2Terrestrial... 24 2.3 Cable... 33 2.4 Saving... 41 2.5 System Setting... 42 2.6 USB
Instructions for use. UFS 810 English IMPORTANT READ CAREFULLY BEFORE USE
 Instructions for use UFS 810 English IMPORTANT READ CAREFULLY BEFORE USE List of Contents 1 About these instructions...4 1.1 Contents...4 1.2 Markings...4 1.2.1 Pre-requirements for certain functions...4
English DMB-118HDMK3
 English DMB-118HDMK3 Table of Contents Safety Information...1 System Connection...1 Remote Control...2 First Time Installation...3 Basic Operation...3 Change Channel...3 Volume and Mute...3 Subtitle/Audio
Goodmans Helpline Phone Number
 Goodmans Helpline Phone Number 0870 873 0080 contents Introduction 4 Connecting up 5 Overview diagrams 6 Getting started 8 Using the main menu 10 Troubleshooting 15 Technical Specifications 16 3 introduction
All Rights Reserved. Disclaimer. Trademarks
 WWW.I-CAN.TV i All Rights Reserved The product described in this manual is protected by international copyright laws. Under this copyright law, you are prohibited from duplicating the software or hardware
Quick Start Digital Satellite Receiver HD
 Quick Start Digital Satellite Receiver HD One slot for Smart Card in Conax system One slot for Common Interface Module Support of SD / HD (MPEG2 / MPEG4 H.264), DVB-S, DVB-S2 system High resolution video
Table of Contents. Safety Instruction 2. Trademark Information 3 Introduction 4. Package Contents 4. Features 5. Product Overview 6 Front Panel 6
 - 0 - Table of Contents Safety Instruction 2 Trademark Information 3 Introduction 4 Package Contents 4 Features 5 Product Overview 6 Front Panel 6 Rear Panel 7 Remote Control 8 System Installation 11 Setting
SatKing DVBS-100HD. Instruction Manual
 SatKing DVBS-100HD Instruction Manual SAFETY Safety Precaution The IRD is complied with international safety standards. Please read these simple guidelines carefully before using this device. Power Supply
Digital High Definition Satellite Receiver SRT 7100
 Digital High Definition Satellite Receiver SRT 7100 Picture similar User Manual 1 3 Fig. 1 2 1 6 3 9 10 Fig. 2 2 4 5 7 8 Fig. 3 SCART Fig. 4 A B C HDMI Fig. 5 A B C A A Fig. 6 B C Table of Contents 1.0
1. GUIDE Important Safety Instructions Unpacking PRODUCT OVERVIEW&ILLUSTRATION INSTALLATION OFMETER
 1. GUIDE... 3 1.1 Important Safety Instructions... 3 1.2 Unpacking... 3 1.3 PRODUCT OVERVIEW&ILLUSTRATION... 4 1.4 INSTALLATION OFMETER... 6 2. OUTLINE... 6 3. THE MENU OSD INSTRUCTION... 7 3.1 DVB S2...
SATELLITE FINDER SK-3200 USER MANUAL
 SATELLITE FINDER SK-3200 USER MANUAL CONTENTS 1. GUIDE...1 1.1 IMPORTANT SAFETY INSTRUCTIONS... 1 1.2 UNPACKING...1 1.3 PRODUCT OVERVIEW & ILLUSTRATION... 2 2. OUTLINE...4 3. THE MENU OSD INSTRUCTION...5
S7070rHD-XM USER MANUAL
 S7070rHD-XM USER MANUAL CONTENTS GENERAL INFORMATION 2 Features and Unpacking Remote Control Rear Panel Connections Connecting your S7070rHD Freeview EPG 3 4 5 5 6 FIRST TIME INSTALLATION 7 MENU INFORMATION
Digital TV receiver User guide
 Digital TV receiver User guide Welcome Thank you for buying this Free-toview Digital Box. This product allows you to enjoy free-to-view Digital TV on any television - with crisp sound, clear pictures and
High Definition Digital Terrestrial Receiver USER S MANUAL
 High Definition Digital Terrestrial Receiver USER S MANUAL Important Safety Instructions To avoid electric shock, do not open the unit. There are no user-serviceable parts inside. Servicing can only be
USER MANUAL KGN1080P32VD
 USER MANUAL KGN1080P32VD USB... Power cord Remote control/batteries Power/Standby button Picture mode button Sound mode button Multi-digits channel buttton P.MODE S.MODE FREEZE SLEEP 1 2 3 4 5 6 7 8 9
MANUAL ENG DT-1600 ENGLISH. Also contains Menu options and data for built-in modulator Data for broadband amplifier QPSK
 ENG-1 030206 01261-3 ENGLISH Also contains Menu options and data for built-in modulator Data for broadband amplifier QPSK A versatile digital receiver with a guaranteed future has been developed to transmit
Instructions for use GB
 Instructions for use DIGITAL TERRESTRIAL RECEIVER SAFETY INSTRUCTIONS SAFETY INSTRUCTIONS This STB has been manufactured to satisfy international safety standards. Please read the following recommended
1. Safety precautions Environment protection Features Accessories Front panel Rear panel...
 Contents 1. Safety precautions... 1 2. Environment protection... 3 3. Features... 4 4. Accessories... 4 5. Front panel... 4 6. Rear panel... 5 7. Remote controller... 6 8. Basic connection... 7 8.1. Connecting