IMPORTANT SAFETY INSTRUCTIONS
|
|
|
- Shana Baker
- 5 years ago
- Views:
Transcription


1 USER MANUAL 1
2 2 3 IMPORTANT SAFETY INSTRUCTIONS 1. Be sure to read this user manual before operating your PVR. 2. Never open the cover. It is very dangerous to touch the inside of the unit due to possible electric shock. 3. When not using your PVR for a long time, please pull the power cord from the outlet. 4. Ensure that there is no damage to your power cord. 5. Do not touch the unit with wet hands. If there is liquid flowing into the unit, pull out the power cord immediately because it may cause fire or electric shock. 6. Place the unit in a well ventilated environment. 7. Install the unit horizontally. Unbalanced installation may cause damage to the unit. 8. When the unit is suddenly moved to a hot area from a cold area, it may cause problems. In that case, turn off the power, and turn on after 1-2 hours. 9. Install the unit in a place with: good ventilation, suitable temperature, away from direct sunlight, and low humidity. 10. Do not put heavy objects on the unit. Instruction Markings: This symbol indicates there is a dangerous voltage within the PVR, which may have sufficient magnitude to constitute a risk of electric shock if not handled correctly. To avoid the risk of electric shock, do not open the housing at any time. Danger Symbol The lightning flash with arrowhead symbol within an equilateral triangle is intended to alert the user to the presence of dangerous voltage in the unit. Warning Symbol The exclamation point within an equilateral triangle is intended to alert the user to the presence of important operation and maintenance (servicing) instructions in the manual accompanying the unit.
3 4 5 Table of Contents IMPORTANT SAFETY INSTRUCTIONS...3 Instruction Markings:...3 GENERAL INFORMATION Preface Main Features Accessories General Operation...7 OVERVIEW Front Panel Rear Panel Remote Control Unit...9 The Learning Key...10 Appendix: Connection Diagram...11 A. Using HDMI Cable...11 B. USING COMPONENT (RGB) LEAD C. Using RCA Cable OPERATION Installation Auto Search Manual Search Channel Edit Factory Default Program Guide Program Manage Program Edit Favourite Edit Program Select PVR Record File Edit PVR Setting Recording Info HDD Format System Setting Common Set Audio Set Time Zone Adjust System Information Shortcut Key Explanations Audio MUTE TeleText Information EPG and EPG Schedule [FAV] Recall favourite channel [HDD] File List PVR ASSIST Time shift REC File playback Bookmark...31 SPECIFICATIONS...32 TROUBLE SHOOTING...34 WARRANTY INFORMATION...35
4 6 7 GENERAL INFORMATION 1. Preface Congratulations on your purchase of the Wintal PVR2HD. Your HD PVR is equipped with the latest technology and design; it can decode high and standard definition digital TV programs, and can also record and playback terrestrial digital broadcasts. You can view a variety of programs provided through terrestrial transmission. Simply pressing the power button on your remote control will provide you with crystal clear picture and DVD quality sound. Throughout this manual you will notice that operating your HD PVR is easy. In case you experience any difficulties using this product, please consult the relevant section of the manual for assistance. 2. Main Features MPEG-2 HD/SD decoding (MP@HL/ML) Fully DVB-T & MPEG-2 compliant Down-mixes 5.1 AC3 to two channels encoded with Dolby Prologic Surround, also Support PCM digital audio output (Bitstream) 5000 Editable Channels Auto or Manual installation Electronic Program Guide and Information Plate (EPG) RF modulator for TV standard (PAL B/G, NTSC) Digital Audio Output S/P DIF Signal level & quality indicator Composite video output Software upgradeable via RS-232 serial port Auto PAL/ NTSC conversion Standby with low power consumption Clock adjustment Excellent Performance Fast Channel Change Conversion between SD programs and HD programs YPbPr Output: supporting 1080i HDMI output: supporting 1080i Digital Reception covers through VHF & UHF band Wide screen 16:9 and normal 4:3 Aspect Ratio Bandwidth of 6MHz & 7MHz & 8MHz Supported TeleText / Bitmap subtitle, compliant with ETSI/EN S/P DIF (Digital Audio or Dolby AC3 Stream out) RTC (Real Time Clock) Timer Colour Graphic 8 Favourite Channel List Channel Editing Capability (Move, Delete, complied Lock and etc.) PVR Functions and Twin Tuner Function Time shift (buffering): 1 Hours Recording Time: 120hrs SD/ 75 hours HD Variable Forward Play Speed: 2, 4, 8, 16, 32, 1/2, 1/4, 1/8 Variable Reverse Play Speed: 2, 4, 8, 16, 32, 1/2, 1/4, 1/8 Fast Schedule: Support Once/Daily/Weekly mode Chase Play Region Selection for Replay Variable Combination of Watching and Recording Simultaneously Live Watching or Recording + Live Watching or Recording or HDD Playback Grouping for Cascade Playing Assist Key to make operate more convenient 3. Accessories Please check the following accessories are enclosed 1 x User Manual 1 x Remote Control Unit 1 x AV lead 2 x AAA Batteries 1 x RF Male to RF Female Cross Cable Note: If any of the accessories listed above are missing, please contact the dealer where this product was initially purchased. 4. General Operation Throughout this manual you will notice that the everyday operation of your Wintal PVR2HD is based on a series of user friendly on screen display and menus. These menus will help you get the most from your PVR, guiding you through installation, channel organizing, viewing and many other functions. All functions can be carried out using the buttons on the RCU (Remote Control Unit), and some of the functions can also be carried out using the buttons on the front panel. Should you experience any difficulties with the operation of your unit, please consult the relevant section of this manual, including Problem Shooting, or alternatively call your dealer or a customer service adviser.
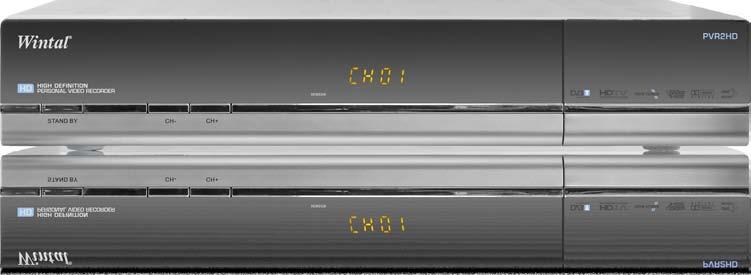
5 8 9 OVERVIEW 1. FROnt Panel NAME STAND BY CH+/ CH- 2. Rear Panel FUNCTION Switch between operation and standby modes Change channel HDTV TERRESTRIAL RECEIVER 3. REMOte ContROl Unit STB POWER Press to switch between Operation and Standby modes MUTE Press to temporarily cut off the sound AUDIO Press to switch the audio channel among the Left, Right and Stereo modes 0-9 Press to enter required numbers in the input box or select a channel to watch TEXT Press to enter the teletext window CC Used to turn Closed Caption subtitles on or off LAST Returns to previous program. INFO Press to show information of the current channel Move cursor up/down/left/right, Page up/ down, Volume +/- OK Press to execute the selected item in the menu, or to confirm the desired value in input mode MENU Press to display the Main Menu on the screen EPG Press to display EPG (Electronic Program Guide) menu FAV+/- Press to display the FAV list EXIT Press to return to the previous menu or escape from the item From left to right: name FUNCTION ant 2 IN Connect to terrestrial antenna ant 1 IN Connect to terrestrial antenna LOOP OUT 2 RF Loop through output to 2nd receiver LOOP OUT 1 RF Loop through output to 2nd receiver HDMI HDMI video output [Supports high definition output] S/PDIF Connect to amplifier for digital audio output RS232 Serial port used for software upgrade YPbPr Component video output [Supports high definition output] R-AUDIO Right audio output L-AUDIO Left audio output CVBS Composite video output V Power supply ON/OFF Main power switch PVR functions: LIST PVR FIRST SET MARK PLAY MARK END PLAY PAUSE STOP RECORD REW F.F SLOW TIMER RECORD Press to display the Recorded Program List. Press to display the PVR Assist window. Change file playback position (backward). Set the bookmark in playback progress bar. Press to jump to the next bookmark in playback progress bar. Change file playback position (Forward). Return to Normal Speed Playback from FF/FR/ Slow/Paused mode. Pause from live video or playback, and step when playback in Paused mode. Stop playback when playback or stop recording when recording. Record current service or set stop recording time when recording. Fast rewind Fast forward Press to slow at 1/2, 1/4, speed Shortcut to schedule recording
6 10 11 The Learning Key Your PVR remote has four learning keys plus a self-coding function. The keys can be used for the STB remote to function as any of the four keys on your TV remote. The recommended keys to use are TV POWER, the two grey keys below TV POWER TV/ AV, and SET. The identification of TV/AV key varies with the TV type. For example, identifying AV INPUT 1 2 3, etc. You do not need to use your TV remote when watching the digital TV program and services once your PVR remote has been set up to turn on your TV and change to the correct AV channel. Instructions to use the STB RCU learning keys: Press and hold the SET key on your remote for three seconds, indicator light will keep on; Aim your TV remote to the receiving window on the back of your PVR remote while pressing the key you want it to learn (eg. the Power button on your TV remote). The indicator light of the STB RCU flashes three times, and it indicates that the STB RCU has received the signal from your TV remote; And press corresponding learning key on TV key window of your PVR remote again (such as the TV power key), the indicator light will flash three times. This indicates that the key has been learnt successfully and is ready to use. When pressing keys on the TV key section on your PVR remote, the indicator light will flash. This indicates that your PVR remote is sending control signals to your TV. It is the same as the VOL+, VOL- and TV/AV keys. Appendix: 1. When watching TV pressing the INFO key on your remote will bring up the information of the current and next program, such as name, starting time and ending time. This message will disappear automatically after several seconds. 2. The description information of the current channel will be displayed on the screen for several seconds by pressing the INFO button again. 4. Connection Diagram There are various ways to connect your PVR to your TV. The recommended options to obtain high definition picture is via HDMI, followed by Component (YPbPr). Important: To make use of the twin tuner functionality built-in to your PVR, you must ensure that you connect the supplied RF crossover lead from Loop Out 1 to Ant in 2. A. Using HDMI Cable HDMI is the recommended connection for your PVR (if you have a TV with an HDMI input). An HDMI connection will allow you to transmit 1080i digital video and digital audio signals using a single lead. Connect the antenna to ANT IN of the STB Connect one end of your HDMI lead to the PVR and the other end to the HDMI port on your TV.
7 12 13 B. USING COMPONENT (RGB) LEAD Connect the antenna to ANT IN of the STB. Connect to TV as shown. C. Using RCA Cable Connect the antenna to ANT IN of the STB Connect to TV by using the supplied AV lead as shown:
8 14 15 OPERATION Pressing the MENU key when there is no other dialogue window open, will display the main menu. The main menu consists of five menu items as shown below. 1. Installation 2. Program Guide 3. Program Manage 4. Program Select 5. PVR 6. System Setting For beginners the Auto Search feature is the best choice. First use the keys to select Auto Search from the Installation menu. Then press OK to enter the Auto Search sub-menu. The System will automatically search programs under Channel Edit. Once the search is complete, the newly found programs will be added to the TV program list and your PVR will automatically display the first found channel. During the search process you may press the EXIT key to stop or press the OK key to skip. Press the EXIT key again to exit from this window. 1.2 Manual Search Use the keys to move up or down from one item to another. Press the OK key on your remote to enter the selected sub-menu. To exit the menu system at anytime, press EXIT on your remote. Note: When in sub-menus, pressing the EXIT key will take you back one-step through the submenus. To completely exit from the menu, keep pressing the EXIT key on your remote. 1. Installation You can set parameters in Manual Search window if you are familiar with relevant parameters (such as specific transmission frequencies for specific channels). In this mode, only one channel, whose necessary parameters are set in Manual Search window by hand, can be searched. Channel No.: Press the keys to select proper option among the Channel List that you can edit in the Channel Edit window. Frequency: The value varies with what you have selected in Channel No. Bandwidth: Press the keys to choose 6M, 7M or 8M. At the bottom of this window, there are two dynamic colour bars reflecting the signal s quality and strength. You can check whether you have set your antenna well by these two bars. After modifying, press the OK key to start searching. If the search is completed successfully your PVR will turn to view the first searched program automatically. During the whole process, you can press EXIT key at any time to exit. 1.3 Channel Edit The Installation menu allows two ways to search for programs: Auto Search and Manual Search. 1.1 Auto Search Select Channel Edit item in the Installation menu and press the OK key. The Channel Edit window will be displayed on the screen. From here, new channels can be added and the existing ones can be edited or deleted. You can use the colour keys on your remote to execute the corresponding command shown at the bottom of this window.
9 Add (Red key) Delete (Green key) Modify (Yellow key) NOTE: After restoring default, all programs you have searched will be erased and all parameters will return to the factory default. Please use this operation with care. 2. Program Guide Add After pressing red key on your remote, the Add Channel window, where you can set necessary parameters of the new channel, will be displayed on the screen. Frequency: You can input values referring to above by using the number keys on your remote. Bandwidth: Press the keys to choice 6M, 7M or 8M. After setting all the parameters, press the OK key to confirm and exit from the Add Channel window. In Channel Edit window, you can find that the new channel has been added to the end of the list. Delete This command allows you to delete one or more unwanted channels. Select the channel you want to delete and press the green key on your remote. Note: After you choose to delete the channel (by pressing the green key), the system won t ask you to confirm your deletion. So please make sure before you delete the channel. Modify Select the channel you want to edit first and then press the yellow key to display the Modify Channel window. The operations are the same as Add. 1.4 Factory Default NOTE: Pressing the EPG key on your remote will also enter the Program Guide window directly. The left hand of this screen displays the available channels. You can see a preview of the channel and the EPG information on the right hand side. Press the Recall key to switch between several days of EPG for that channel. Press the FAV key to change the group. Press the Green colour key to enter into the program schedule window. Press the EXIT key to return to main menu. Note: EPG information is entirely based on what the broadcaster chooses to broadcast. And may not necessarily be accurate. 3. Program Manage 3.1 Program Edit Through this window, you can edit programs according to your requirements. The three colour keys on your remote have the following functions. Delete (Red key) Move (Green key) Rename (Blue key) In Installation menu, move the selection to Factory Default and press the OK key, a warning message box will be displayed on the screen, press OK key to confirm your selection. Delete Delete allows you to delete one or more unwanted programs permanently. First select the program you want to delete and press the red key on your remote. You can continue to select other unnecessary programs and mark them (shown with a red 16 17
10 cross) and finally press OK key to delete all of them from the list. How to define a favourite group Press the Red key on your remote, and a on screen keypad will pop up where you can define a favourite group name. In this keypad window, select your required character by using the direction keys on your remote and press OK key. Move Only one program item can be moved up or down each time. Press the keys to select the program you want to move and press the green key on your remote. An Up-Down-Pointed arrow will be displayed right of the selected program. You can press the keys to move this program to where you want. Press the green key again to confirm the new location. Then the selected character will be shown in the title bar at the top of this keypad window. To switch between capital and lowercase letters, please select Caps On command and press the OK key on your remote. The Back command allows you to erase the unwanted character in the title bar. Move cursor to the OK command and press the OK key on your remote. The keypad will disappear and the new name will be shown in the fav column. You can define several favourite groups in the same way. Rename Use the keys to select the program you want to rename, press the blue key on your remote, and a on screen keypad will pop up where you can rename the program name. In this keypad window, select your required character by using direction keys on your remote and press OK key. The selected character will be shown in the title bar at the top of this keypad window. To switch between capital and lowercase letters, please select Caps On command and press the OK key on your remote. The Back command allows you to erase the unwanted character in the title bar. Move cursor to the OK command and press the OK key on your remote. The keypad will disappear and the new name will be shown in the program name column. You can define several program names in the same way. 3.2 Favourite Edit This window includes the three columns of FAV, Selected, and Programs. While there are no prepared favourite groups in FAV column, you can define and modify favourite groups name by using the corresponding colour keys on your remote. Additionally, you can add programs to any favourite group. The keys are used to switch among the three columns, and the keys are used to select items in each column. Notice that what will be shown in the Selected and Programs column varies with the favourite group that you have selected in the FAV column. How to modify a favourite group In the FAV column, use the keys to select one that you want to modify and press the yellow key. Once the on screen keyboard pops up refer to the above instructions to make your modifications. How to delete a favourite group In the FAV column, the selected favourite group will be deleted from the list after the green colour key on your remote is pressed. Note: After you choose to delete the group (by pressing the green key), the system won t ask you to confirm your deletion. So please make sure before you delete the group. How to add programs into a favourite group Select one favourite group (for example Sports favourite group that you have just defined) in the FAV column, and then move the cursor to the Programs column. In the Programs column, select programs that have a relation with Sports and press OK key, and then those programs 18 19
11 will be added into Sports favourite group and shown in the selected column. If you want to deselect one program in Sport favourite group, move cursor to program that you want to delete from selected column and press the OK key, and then this designated program will disappear in selected column. 4. Program Select In the Main Menu, use the keys to select the Program List item, and press the OK key to enter into the Program List menu. From here, the default mode is TV mode. In program list, the keys are used to select the desired program and pressing the OK key allows you to view the selected program. For example, let s say you set up 2 favourite Groups: 1. All HD channels 2. All SD channels To watch only the selected favourite channels (see section: Favourite Edit), you can use the left and right arrow buttons to select how the program list is displayed. You can choose between show ALL, or only HD or SD groups (which you created earlier). Rename: Press the Yellow key to display the on screen keyboard. You can edit the file name using the arrow keys on your remote Lock: Press the Blue key on the selected file name. This feature will prevent you from accidentally deleting the selected recording. Say you choose HD favourite group, you will see the Channels you added into this favourite group. If you highlight one of these channels and pressed OK, the PVR2HD will go back to normal viewing mode, but each time you change channel, you will only cycle through channels within your HD favourite group. To get back to all channels, simply press OK button and get the program list back up, and use the Left and Right arrow keys to change the Program list choice back to ALL. 5. PVR 5.1 Record File Edit You can edit recorded channels in this menu. GroupManager: The Group Manager allows you to make groups of your recordings for easy location. Press the Green key to create a new group list. You can press the OK key to add a recorded file to the group. Red key cancels an existing group and the Yellow Key modifies its name. Delete: Select a recorded file you want to delete, and press the Red key
12 Schedule Select the Schedule menu item and enter it by pressing the OK key. The Schedule Programs list window will be shown. Schedule mode: Once / Daily / Weekly. Once: The task will activate only on the selected date and time. To add a new Scheduled task, press the Green key on your remote. To delete existing scheduled tasks: press the Red key to delete an individual task, or press the Blue key to delete all the existing tasks. You will have to confirm your decision once you press OK. Press the EXIT or MENU keys to exit Adding Scheduled Tasks In Add Schedule, there are parameters below to be set. Schedule Type: Rec or Play You can either have the PVR2HD start recording, or automatically switch a selected channel at a desired time. Daily: The task will be activated every day on the selected start and end times. Weekly: The task will be activated every week on the selected day(s) When you choose the Weekly mode and press the OK key on your remote, you will see the option to choose the week day/s, select the days you want and press the OK key to back. Channel Name: Select the desired channel you wish to record or have your PVR2HD start playing. 5.3 PVR Setting Schedule Start Time: Input wanted time by using the number keys on your remote, or press OK to enter the sub-menu to set the date and time (The FAV key on your remote is used to switch between date and time) Schedule End Time (hh:mm): Input wanted time to stop recording, or playback using the number keys on your remote. Schedule start time offset: Schedule record or play to start earlier or later. This is to compensate for programs that have an earlier or later than advertised start time. Schedule stop time offset: Schedule record or play to stop earlier or later. Remind before schedule start: Remind you before schedule is going to start. Divide Record By EPG Event: Select on or off. If set to On, recordings will be broken up to individual entries based on the program name transmitted via the EPG. PVR Icon Time Out: Select the time that the PVR icon is displayed on the screen by using the keys. Default Recording Duration: the default duration for manual record (when you press the REC button on the remote during an ongoing program). Time shift Start Mode: The available options are: Never, Always and Pause key. Changing this setting comes into effect after playing a new service (ie. changing channels).
13 Always: Timeshift, when set to Always ensures that the PVR2HD is always recording in the background. This will allow you to pause, and rewind live TV, as the PVR2HD buffer will have a certain amount of pre-recorded content. Pause key: If this option is selected, Timeshift will only begin when you press the Pause key on your remote. This is useful when you need to answer a phone call or the door while watching a TV, so that you can resume watching from where you left. 6. System Setting In the Main Menu, use the keys to select the System Setting menu item, and press the OK key to enter. This menu consists of five items. You can access the sub-menus by highlighting your selection and pressing the OK key. 6.1 Common Set Never: Will disable the time shift feature. 5.4 Recording Info When there is a recording, you can see the light down left on the front panel blinking. And you can enter the Recording info. If there are no recordings currently in place, there will be a message warning you that there are currently no recordings. When there is a recording happening and you press the Info button on your remote the recording info box will tell you the recording information as follows: Index: R1 or R2 Mode: Quick or Schedule Channel Name File Name: you can change the name by pressing OK key. Valid Record Time: the real recording time Past Time: Duration: Showing you how long there is left till the recording stops. Transparency: This effects the transparency of the closed captions. The value is from 0 to 30%. Banner Time: Determines the display time of info boxes before they disappear. After making your selections, press the OK or EXIT key to save and exit. 6.2 Video Set 5.5 HDD Format Screen Type: 4:3 or 16:9 Aspect Ratio: Full Screen / Letterbox / Pan Scan Resolve: AUTO / 1080I / 576P / 720P Please be extra careful when using this feature as it will completely erase your hard drive and you will lose any previously recorded content. For security purposes you will be asked to enter the password to confirm your decision (Default password is: 0000). 6.3 Audio Set Audio Channel Mode: Stereo / left / right Decoder: MPEG or AC
14 6.4 Time Zone Adjust be displayed on the up-right corner of your TV screen. Volume can be restored by pressing the MUTE key again. 7.3 TeleText You can press the CC key on your remote to enter the TeleText or Closed Caption windows. This feature will only become active if the channel broadcast contains Teletext or Closed Captions. To exit TeleText, press the EXIT key. To exit Closed Captions press the CC key again on your remote. This screen allows you to adjust the time zone settings to suit your location. Press the keys to change between states and use the keys to select between Daylight Saving On and Daylight Saving Off for daylight saving settings. Press OK or EXIT key to save and exit. 6.5 System Information The system information screen displays general and version information relating to your hardware and software. 7.4 Information When watching a channel, pressing the INFO key button will display a simple EPG dialogue box that includes current and next program information. Note: The duration of info windows on your PVR2HD can be adjusted to be longer or shorter. Refer to 6.1 Common Set > Banner Time. An SD or HD icon will also display at top-right corner of this window that will show you whether you are watching a SD or HD channel. 7. Shortcut Key Explanations Your PVR2HD remote comes with dedicated keys to make accessing certain features on your PVR easily accessible. Refer to the following section: 7.1 Audio Press Audio key to display the Audio Selection window. Press the keys to switch among Left, Right, Stereo, and mix. Select the best audio channel output for the current program. Pressing the INFO key again on this screen will pop up a bigger window showing more details about the current program. By pressing the INFO key again on your remote you can continue reading the next program information. Press INFO key once again to return to the initial view mode. During the whole operation, press the EXIT key to exit from this window at any time. 7.5 EPG and EPG Schedule For more information on EPG, see 2. Program Guide. NOTE: The available selections in the audio language dialogue window depend on the channel broadcast. If the service provides several audio languages, use keys to select appropriate language and press the OK key to confirm. 7.2 MUTE Press the MUTE key on your PVR2HD button to cut off the sound completely; a MUTE icon will To schedule recordings from the EPG window: When you select a particular program in the EPG window and press the OK key on your remote, you can enter the EPG Schedule window. This will allow you to assign Recording or Playback tasks based on the selected program see Adding Scheduled Tasks for information on each option. When you are done with setting up your options, press the OK key on your remote to save your changes, or press the EXIT key to exit without saving
15 If you schedule a recording via this method, you will notice a timer icon next to the selected program, indicating it is scheduled to record (or play). 7.6 [FAV] Recall favourite channel Press the FAV key to recall a stored favourite channel. Favourite channels are programmed and stored in the Program list menu. See 3.2 Favourite Edit for more information on setting up favourites. 7.7 [HDD] File List Press the HDD key on your PVR2HD remote to view a list of all the recordings available on your PVR. You can see the used percentage of hard disk space on the bottom left corner of this screen. 7.9 Time shift Start Time shift When Time shift Start Mode is Always, you can press the Red, Blue Key or Pause Key to start it. When the mode is Pause, you can only start it by pressing Pause Key. You can t start time shift when the mode is never. You can change the TimeShift mode in PVR Settings see 5.3 PVR Settings Change time shift speed After pressing the REW, FF, Slow or Pause keys to change time shift speed, a speed icon will be displayed on the upper left corner of the screen Change time shift playing position Press the Red or Blue keys to display time shift process bar. You can change the time shift playing position Stop time shift Method 1: Press the Stop key to stop time shift and return back to watching the live broadcast. Method 2: If you switch channels, the time shift buffer for the previous channel will be replaced by the new channel. Pressing the keys to change view between group list and file list. When File list is on focus, its program name, start time and duration will be displayed, and you can operate as follows: Press INFO key to see the information of this file, when there is no information, it will display this file has no description. Press the INFO key again to remove this window. Press the OK key to playback this file. 7.8 PVR ASSIST 7.10 REC Start record Press the RECORD key to start recording. A record icon is displayed on the top left part of the screen and the recording light on the front panel of your PVR2HD will start flashing to indicate a recording is in progress. The record icon displays recording number, duration and recording name. Recording name is in the form of Channel Name-Event Name Change recording information See 5.4 Recording Info for more information on this feature EPG record and Common scheduled record If scheduled EPG or scheduled REC is reached, a new record can also be started. For more information, refer to Scheduled list. The PVR Assist feature is a convenient function that will display all the PVR operation according to the current situation. Press OK key to start a on-screen tutorial from the available list Recording file information If current recording service has EPG information, recorded file is partitioned automatically according EPG items. Recorded file name is program name, file duration is program duration and file description is program description. If current recording service has no EPG information, recorded file name is channel name and it will not be partitioned Stop record Press the STOP key to stop recording. You will be asked to confirm
16 7.11 File playback Change file playback speed Press the REW, FF, SLOW keys to change file playback speed, a speed icon is displayed in the top left of the screen. 3. Specify your start position with the GREEN key, and your end position with the YELLOW key. Finally, press the OK key to confirm. 4. Select the OK button to cut or the CANCEL button to cancel the operation Change file playback position Press the Play, Red or Blue keys to display playback progress bar. You can press the Red or Blue keys to change file playback position Display playing file information Press the INFO key to pop up a bar to show information on the current playback Jump file playback time In the playback progress bar, you can press the number keys on your remote to input a time, then press the OK key or wait for a while, playback will skip to your selected time (if time setting is valid) Cut out and Save Selected Region Follow the instructions below to cut out certain sections of your recording Bookmark The bookmark function allows you to quickly jump to specified positions in your recording with the press of a button. Follow the instructions below: Add a bookmark 1. Start playback of a recording. To add a bookmark, press the GREEN key at the position you want to add it into the playback progress bar. You can bookmark a maximum 20 positions per recording. 2. Press the Play, Red, or Blue button on your remote to display the Playback progress bar; press the OK key twice which will bring up the following prompt: Please add a start or an end mark position, then confirm to cut! Go to a bookmark Press the YELLOW key to jump to the next bookmark in the playback progress bar. The file will start playing from the bookmarked position Delete a bookmark To remove a bookmark, you should jump to the bookmarked position by pressing the YELLOW key and then press the GREEN key to delete the bookmark
17 32 33 SPECIFICATIONS Tuner 2 Input Connector F-type, IEC Signal Level Input Bandwidth Input Impedance Carrier Mode FEC Code Rate Compliant Constellation Auto -20 ~ +20 dbm 6 ~ 8 MHz Auto Software Setting 75 Ohms 2K / 8K Auto(1/2,2/3,3/4,5/6,7/8) Fully DVB-T MPEG-2 Compliant (QPSK,16 and 64 QAM) Guard Interval Modes 1/32, 1/16, 1/8, 1/4 Transport Stream Mpeg transport stream & A/V decoding Compliant Record Stream Aspect Ratio Video Resolution Audio Decoding Audio Mode Audio sampling frequency Microprocessor & Memories Main Processor CPU Clock Flash Memory SDRAM Data Port Connector Protocol Data Rate RF Modulator Connector Frequency TV Standard LNB power supply Front Panel ISO , 2 * MPEG-2, MP@ML Fully DVB-T MPEG-2 4Mbps Stream 4:3, 16:9 Letter Box 1920*1080i MAX MPEG layer I and II Single / Dual Channel, Stereo, Joint Stereo 32, 44.1, 48KHz STi MIPS 8 Mbyte 32 Mbyte*4 9 Pin D-Sub type RS232 asynchronous Max kbps IEC 169-2, Male / Female 47 MHz to 862 MHz PAL/NTSC 13V/18/OFF, Imax=400mA 4 Digits LED Display Channel Number Display 8 Keys Standby, Menu, Select, Exit, Channel, VOL Rear Panel IF Input IF Loop Through Output TV output HDMI output Digital Audio Out Modulator RS232 Serial Port Remote Control Type Battery HDD HDD F-type Connector F-type Connector YPbPr/CVBS, Audio L/R HDMI S/P DIF or AC-3 Optical 9 Pin D-sub Type Infra-red (Carrier Freq: 38 KHZ) 2 1.5V AAA Type 320GB, Recording up to 120 hours (@4Mbps) SD, 75hrs for HD
18 TROUBLE SHOOTING The table below covers some of the more common reasons for abnormal PVR function. Problem Likely Causes Remedy Can t record 2 channels The RF Cross over lead is not connected Connect the supplied Cross over lead from RF Loopout 2 to ANT In 1. Front LED s do not light AC power cord disconnected Connect power cord properly to the power socket No picture or sound Black and white screen or V-Hold Your remote Control Unit is not working Distorted Menu Screen Connection of Video or Audio to input terminals is incorrect. Antenna cables incorrectly connected Antenna not delivering clear signal No signal or weak signal Wrong Channel Information in menu Your TV or PVR picture mode does not match broadcast Battery exhausted Fluorescent light interfering with remote control signals Remote control is incorrectly aimed Brightness or Contrast level of TV set too high Check your choice of AV or RF is right. Check each AV lead at each end. Check the RF path from antenna through both tuners to modulator and RF OUT Check cable connections, or adjust the antenna Call an antenna specialist from local paper or similar. Type values again carefully Check that screen shape best matches your screen and PAL B/G is selected. Replace remote batteries with new ones Switch light Off Point front of RCU carefully towards PVR. Adjust Brightness and Contrast to lower levels Not working Processor stopped Remove the power cord or switch AC OFF and ON CUSTOMER CARE CENTRE CUSTOMER CARE CENTRE this product is warranted for 12 months from the date of purchase. Subject to the conditions of this warranty, the Customer Care Centre will perform necessary service on the product without charge for parts, or labour if, in the opinion of the manufacturer/ manufacturer s agent, the product is found to be faulty within the warranty period. This warranty only applies if the product has been installed and used in accordance with the manufacturer s recommendations (as noted in the operating instructions) under normal use and reasonable care. The warranty covers normal domestic use only and does not cover damage, malfunction or failure resulting from use of incorrect voltage, accident, misuse, neglect, build-up of dirt or dust, abuse, misadjustment of customer controls, mains supply problems, thunderstorm activity, infestation by insects or vermin, tampering or repair by unauthorised persons (including unauthorised alterations), exposure to abnormally corrosive conditions or any foreign object or matter having entered the product. If warranty service is required you should: Telephone the Customer Care Centre on Provide a copy of your purchase receipt that shows retailers identity and date of purchase. Send or bring the product to your Customer Care Centre. Please note that freight to and/or from your Customer Care Centre must be arranged by you. The warranties hereby conferred do not extend to any costs associated with the delivery, handling, freighting or transportation of the product or any part thereof or replacement of and do not extend to any damage or loss occurring during, or associated with transit. THIS WARRANTY CARD AND THE PURCHASE DOCKET (OR SIMILAR PROOF OF PURCHASE) SHOULD BE RETAINED BY THE CUSTOMER AT ALL TIMES TROUBLE SHOOTING HELP LINE Customer Care Centre 562 Spencer Street, West Melbourne VICTORIA


19 36 HDTV TERRESTRIAL RECEIVER
SYMBOLS USED ON THE RECEIVER... 3 SAFETY INSTRUCTIONS... 4 I.GENERAL INFORMATION...
 Table of Contents SYMBOLS USED ON THE RECEIVER... 3 SAFETY INSTRUCTIONS... 4 I.GENERAL INFORMATION... 5 1. Preface... 5 2. Main Features... 5 3. General Operation of the Receiver... 6 4. Front Panel...
Xpresionn Digital Terrestrial Receiver. User Guide
 Xpresionn 2150 Digital Terrestrial Receiver User Guide GENERAL INFORMATION...3 A) SAFETY PRECAUTIONS...3 B) MAIN FEATURES...4 C) CONTENTS OF THE PACKAGING...4 D) REMOTE CONTROL...5 INSTALLATION...6 A)
OPERATION Channel Manager HDD Installation... 22
 1.General Information... 3 2. Main Features... 3 3. FOR YOUR SAFETY... 4 4. ACCESSORIES... 4 OVERVIEW... 6 1. REMOTE CONTROL KEY... 6 2.FRONT PANEL... 8 3.REAR PANEL... 9 CONNECTION DIAGRAMS... 11 1. PVRX2
I.General Information Preface Main Features For Your Safety General Operation of the Receiver Front Panel...
 I.General Information...3 1. Preface...3 2. Main Features...3 3. For Your Safety...4 4. General Operation of the Receiver...4 5. Front Panel...5 6. Rear Panel...6 7. Remote control unit...7 8. Installation
Thank you for purchasing STB10HD Digital High Definition Set Top Box.
 Thank you for purchasing STB10HD Digital High Definition Set Top Box. This manual will help you to install, use and maintain the receiver. Please read this manual carefully before operating your unit and
FV400 DIGITAL TV RECEIVER WITH MODULATOR INSTRUCTION MANUAL
 FV400 DIGITAL TV RECEIVER WITH MODULATOR INSTRUCTION MANUAL Please read this instruction manual carefully before using your receiver Table of Contents Introduction-----------------------------------------------------------------------------
healing HHR787 HD Digital Terrestrial Twin Tuner Recorder Operating Manual INTRODUCTION... 3 HHR787 FEATURES... 4 SAFETY INSTRUCTIONS...
 CONTENTS INTRODUCTION... 3 HHR787 FEATURES... 4 SAFETY INSTRUCTIONS... 5 FRONT PANEL AND REAR PANEL...6 and 7 REMOTE CONTROL UNIT KEY FUNCTIONS...8 and 9 REMOTE CONTROL BATTERY CARE... 10 INSTALLATION
Digital Terrestrial Television Receiver USER S MANUAL
 # 5024 Digital Terrestrial Television Receiver USER S MANUAL CAUTION RISK OF ELECTRIC SHOCK DO NOT OPEN This symbol is intended to alert the user to the presence of insulated dangerous voltage within the
GDB9 INSTRUCTION MANUAL DIGITAL TERRESTRIAL RECEIVER
 GDB9 INSTRUCTION MANUAL DIGITAL TERRESTRIAL RECEIVER Goodmans Support: www.goodmans.co.uk/support Please read these instructions before use and keep for future reference IMPORTANT SAFETY INSTRUCTIONS Thank
DIGITAL SET TOP BOX STB 7017 INSTRUCTION MANUAL
 DIGITAL SET TOP BOX STB7017 INSTRUCTION MANUAL STB 7017 CHANNEL After Sales Support Now you have purchased a Tevion product you can rest assured in the knowledge that as well as your 3 year parts and labour
Front and Rear Panel Remote Control Connecting to a Television...4. Connecting to an Audio System...5
 Table of Contents Front and Rear Panel... 1 Remote Control...... 2 Connecting to a Television...4 Connecting to an Audio System...5 Connecting to a DVD Recorder or VCR... 6 First Time Installation... 7
User manual FT-8100 HD. English
 User manual FT-8100 HD English WARNING!!! On the USB Memory Function for FT-8100 HD model, user can make recording or playing function using by external USB devices such as USB Flash Memory Disk or external
NMS ETA TM Stereo Advanced Digital TV Set-top Box
 Digital TV HD Set-top Box STB2-T2 NMS ETA TM Stereo Advanced Digital TV Set-top Box User Guide CONTENTS Safety Information... 3 Introduction... 4 Set-top Box Front Panel... 4 Set-top Box Back Panel...
Be sure to run the vehicle engine while using this unit to avoid battery exhaustion.
 CAUTION: TO REDUCE THE RISK OF ELECTRIC SHOCK DO NOT REMOVE COVER (OR BACK) NO USER-SERVICEABLE PARTS INSIDE REFER SERVICING TO QUALIFIED SERVICE PERSONNE; Please Read all of these instructions regarding
WARNING/CAUTION FCC NOTICE
 WARNING/CAUTION The lightning flash with ar rowhead symbol, within an equilateral triangle, is intended to alert the user to the presence of uninsulated dangerous voltage within the product s enclosure
GENERAL INFORMATION INSTALLATION MENU INFORMATION. Main Features For your Safety Unpacking General Operation RCU Rear Panel.
 GENERAL INFORMATION 3 Main Features For your Safety Unpacking General Operation RCU Rear Panel 3 4 7 7 8 9 INSTALLATION 10 MENU INFORMATION Main Menu 1. Installation 1.1 Satellite list 1.2 Dish Setting
Standard Definition Digital Set Top Box
 Standard Definition Digital Set Top Box USER MANUAL COMPONENT VIA SCART OPTICAL AUDIO www.wintal.com.au SAFETY INSTRUCTIONS Please observe the following safety instructions carefully operating this unit.
1080p to 4K2K Scaler with Audio Extraction. Operating Instruction SC4K2K. Manual Version:Release 0714
 1080p to 4K2K Scaler with Audio Extraction Operating Instruction SC4K2K Manual Version:Release 0714 Notice The information in this document is subject to change without notice. Every effort has been made
Throughout the whole user manual, pay special attention to the following marks that
 Notice Warnings, Cautions and Notes Throughout the whole user manual, pay special attention to the following marks that indicate hazardous situations. Warning ** Indicates a hazardous situation which could
OWNER'S MANUAL MODEL: DTV-2000 STANDBY/ON
 OWNER'S MANUAL MODEL: DTV-2000 STANDBY/ON CH+ CH- TABLE OF CONTENTS SAFETY PRECAUTIONS IMPORTANT SAFETY INSTRUCTIONS and FEATURES ACCESSORIES and LOADING BATTERIES REMOTE CONTROL UNIT FRONT PANEL and REAR
Digital Terrestrial Television Receiver USER S MANUAL
 Digital Terrestrial Television Receiver USER S MANUAL CAUTION RISK OF ELECTRIC SHOCK DO NOT OPEN This symbol is intended to alert the user to the presence of insulated dangerous voltage within the products
For Freeview HD User s Manual
 extra Terrestrial HD For Freeview HD User s Manual 1 Table of contents 1 INTRODUCTION...4 2 MAIN FUNCTIONS AND FEATURES...4 3 THE REMOTE CONTROL...5 4 FRONT AND REAR PANEL...7 4.1 FRONT PANEL... 7 5 FIRST
Table of Contents. Table of Contents. Safety Warning General Information. Installing Equipment Channel List Guide Menu Guide Main Page
 TABLE OF CONTENTS Table of Contents Table of Contents Safety Warning General Information Package Contents & Features Front Panel Rear Panel Remote Control Unit (RCU) Programing the Remote Control Installing
User Manual High Definition Digital Set Top Box DVBT9070 Please read this User Manual carefully to ensure proper use of this product and keep this man
 User Manual High Definition Digital Set Top Box DVBT9070 Please read this User Manual carefully to ensure proper use of this product and keep this manual for future reference. Important Safety Instructions
Mini Combo STB Model:Timbox-Mini
 Model: Main Feature: DVB-S/S2, DVB-T/T2 or DVB-C tuner and demodulation MPEG-2/MPEG-4AVC/H.264 SD/HD decoding Automatic, manual and full band channel scanning Manage up to 1000 TV and Radio channels Channel
HDR2250T. Twin Tuner PVR
 HDR2250T Twin Tuner PVR WARRANTY PROCEDURE v1.7b: July 2016 for 12M Repair Please read the owner s manual carefully and ensure that you have followed the correct installation and operating procedures.
Quick Start Digital Terrestrial Receiver
 Quick Start Digital Terrestrial Receiver Support of SD / HD (MPEG2 / MPEG4 H.264), DVB-T system PVR Ready - possibility to record on external USB drive Time Shift (video pausing, rewinding) HDMI video
MAX T200 HD QUICK INSTALLATION GUIDE
 MAX T200 HD QUICK INSTALLATION GUIDE MAX T200 HD QUICK INSTALLATION GUIDE CONTENT receiver BATTERIES x 2 REMOTE CONTROL Quick installation guide Quick Installation Guide The lightning flash with arrowhead
USER MANUAL KGN1080P32VD
 USER MANUAL KGN1080P32VD USB... Power cord Remote control/batteries Power/Standby button Picture mode button Sound mode button Multi-digits channel buttton P.MODE S.MODE FREEZE SLEEP 1 2 3 4 5 6 7 8 9
SET TOP BOX MODEL: GDB01SFV1 USER MANUAL
 SET TOP BOX MODEL: USER MANUAL 1 2 3 4 5 6 7 8 Welcome Your Set Top Box 2.1 In The Box 2.2 Front View 2.3 Rear View Quick Setup 3.1 TV Connection 3.2 Recording from the set top box 3.3 Record one channel
< > ϯϯyyϭ USER MANUAL
 USER MANUAL Contents Contents Safety Precautions Power Supply... 1 Installation... 2 Use and Maintenance... 3 Important Safety Instructions... 4-5 User Guidance Information Names of each part(front View)
KGN&, > Ϯϰs USER MANUAL
 USER MANUAL KGN Contents Contents Safety Precautions Power Supply... 1 Installation... 2 Use and Maintenance... 3 Important Safety Instructions... 4-5 User Guidance Information Names of each part(front
CAUTION RISK OF ELECTRIC SHOCK NO NOT OPEN
 Evolution Digital HD Set-Top Box Important Safety Instructions 1. Read these instructions. 2. Keep these instructions. 3. Heed all warnings. 4. Follow all instructions. 5. Do not use this apparatus near
User Manual. High Definition Digital Set Top Box HDSTB250
 User Manual High Definition Digital Set Top Box HDSTB250 CHANNEL HDSTB250 Please read this User Manual carefully to ensure proper use of this product and keep this manual for future reference. Important
English DMB-118HDMK3
 English DMB-118HDMK3 Table of Contents Safety Information...1 System Connection...1 Remote Control...2 First Time Installation...3 Basic Operation...3 Change Channel...3 Volume and Mute...3 Subtitle/Audio
English CONTENTS 1. GUIDE OUTLINE THE MENU OSD INSTRUCTION TECHNICAL SPECIFICATION TROUBLE SHOOTING...
 English CONTENTS 1. GUIDE...2 1.1 IMPORTANT SAFETY INSTRUCTIONS...2 1.2 UNPACKING...2 1.3 PRODUCT OVERVIEW& ILLUSTRATION...3 1.4 INSTALLATION OF METER...4 2. OUTLINE...5 3. THE MENU OSD INSTRUCTION...6
HHT894 USER S MANUAL
 HHT894 USER S MANUAL CONTENTS CONTENTS... 2 PREFACE AND FEATURES... 3 FEATURES INCLUDE... 3 SAFETY... 4 GENERAL OPERATION OF THE RECEIVER... 4 FRONT PANEL... 5 REAR PANEL... 5 REMOTE CONTROL UNIT KEY LAYOUT...
DVB-T2. Digital Terrestrial Receiver WD-822T2 USER S MANUAL
 DVB-T2 Digital Terrestrial Receiver WD-822T2 USER S MANUAL Index Important Safety Instructions... 3 Main Features.... 5 Front and Rear Panel.... 6 Remote Control..... 7 Installing the Batteries..... 8
Thank you for purchasing DVBS2 800CA Digital Satellite Receiver.
 Thank you for purchasing DVBS2 800CA Digital Satellite Receiver. This manual will help you to install, use and maintain the receiver. Please read this manual carefully before operating your unit and keep
Evolution Digital HD Set-Top Box Important Safety Instructions
 Evolution Digital HD Set-Top Box Important Safety Instructions 1. Read these instructions. 2. Keep these instructions. 3. Heed all warnings. 4. Follow all instructions. 5. Do not use this apparatus near
HD Digital Set-Top Box Quick Start Guide
 HD Digital Set-Top Box Quick Start Guide Eagle Communications HD Digital Set-Top Box Important Safety Instructions WARNING TO REDUCE THE RISK OF FIRE OR ELECTRIC SHOCK, DO NOT EXPOSE THIS PRODUCT TO RAIN
S7030PVR User Manual
 S7030PVR User Manual Important Safety Instructions 1) Do not use this apparatus near water. 2) Clean only with dry cloth. 3) Do not block any ventilation openings, install in accordance with the instructions.
Converts any TV to Digital. MFR-300 User Guide
 Converts any TV to Digital MFR-300 User Guide Introduction Thank you for choosing this TVonics Freeview box. Record the serial number in the space provided below (the serial number can be found on the
Safety warning Important Safety Instructions. Wall Mount Specifications. Electronic Program Guide. Lock Menu 18. PVR File System
 LT-32N370Z 32 INPUT Safety warning Important Safety Instructions Wall Mount Specifications Electronic Program Guide Lock Menu 18 PVR File System 11 11 11 14 15 16 17 19 20 21 21 22 23 24 25 INPUT AAA
Goodmans Helpline Phone Number
 Goodmans Helpline Phone Number 0870 873 0080 contents Introduction 4 Connecting up 5 Overview diagrams 6 Getting started 8 Using the main menu 10 Troubleshooting 15 Technical Specifications 16 3 introduction
The User s Manual. Digital Terrestrial Receiver Personal Video Recorder
 TM The User s Manual Digital Terrestrial Receiver Personal Video Recorder Please read this User's Manual carefully. The menu structure and specification can be changed without notice. TABLE OF CONTENTS
IMPORTANT SAFETY INSTRUCTIONS
 IMPORTANT SAFETY INSTRUCTIONS 1. Read, follow and keep these instructions safely. 2. Heed all warnings. 1. Do not use this apparatus near water. 2. Clean only with dry cloth. 3. Do not block any ventilation
High Definition Digital Terrestrial Receiver USER S MANUAL
 High Definition Digital Terrestrial Receiver USER S MANUAL Important Safety Instructions To avoid electric shock, do not open the unit. There are no user-serviceable parts inside. Servicing can only be
AVE HOME FAGOR CVBS TO DVB-T ENCODER MODULATOR. Fagor Electr6nica
 AVE HOME CVBS TO DVB-T ENCODER MODULATOR FAGOR Fagor Electr6nica TABLE OF CONTENTS 1. SPECIFICATIONS... 12 1.1 Product Overview... 12 1.2 Appearance and Description... 12 1.3 Diagram... 13 1.4 Characteristics...
Quick Start Digital Satellite Receiver
 Quick Start Digital Satellite Receiver Support of SD (MPEG2), DVB-S system Standard resolution video output - SCART Compatible with Diseqc 1.0, 1.1, 1.2, and USALS Electronic Program Guide - EPG Multilingual
HRM 8760 CI+ User s Manual (ENG)
") HRM 8760 CI+ User s Manual (ENG) TABLE OF CONTENTS 1 SAFETY ADVICE... 3 2 QUICK SETUP... 5 3 FEATURES... 7 4 HOW TO CONNECT YOUR RECEIVER... 7 5 HARDWARE... 9 6 WATCHING TV... 13 7 MENU OPERATION... 21
HRM 8760 CI+ User s Manual (ENG) TABLE OF CONTENTS 1 SAFETY ADVICE... 3 2 QUICK SETUP... 5 3 FEATURES... 7 4 HOW TO CONNECT YOUR RECEIVER... 7 5 HARDWARE... 9 6 WATCHING TV... 13 7 MENU OPERATION... 21
English CONTENTS 1. GUIDE OUTLINE THE MENU OSD INSTRUCTION TECHNICAL SPECIFICATION TROUBLE SHOOTING...
 USER S MANUAL English CONTENTS 1. GUIDE...2 1.1 IMPORTANT SAFETY INSTRUCTIONS...2 1.2 UNPACKING...2 1.3 PRODUCT OVERVIEW& ILLUSTRATION...3 1.4 INSTALLATION OF METER...4 2. OUTLINE...5 3. THE MENU OSD INSTRUCTION...6
High Definition Digital Set Top Box With USB Record DFTA45R. The Gold Technical Support Line: (Charges will apply at $2.
 High Definition Digital Set Top Box With USB Record INSTRUCTION MANUAL DFTA45R The Gold Technical Support Line: 1902 215 259 (Charges will apply at $2.95 per minute) Safety Instructions Always read the
Quick Start Digital Satellite Receiver HD
 Quick Start Digital Satellite Receiver HD One slot for Smart Card in Conax system One slot for Common Interface Module Support of SD / HD (MPEG2 / MPEG4 H.264), DVB-S, DVB-S2 system High resolution video
USER MANUAL KGNPRO19VD
 USER MANUAL KGNPRO19VD X P.MODE S.MODE SLEEP AUDIO 1 2 3 4 5 6 7 8 9 A/DTV USB/SD FAV + 0 SOURCE MENU OK INFO EXIT MUTE VOL CH ASPECT TTX TITLE /AUTO DVD.SETU P EPG SU BTITL E D.MENU ZOOM/REC.LIST GOTO
The product must be installed in accordance with national regulations.
 Important safety instructions to be kept with the product Please read attentively To prevent fire and electric shock, do not expose this receiver to rain or moisture. In order to avoid any possible risk
USER MANUAL (UK) IMPORTANT! Please read this manual before you connect the receiver! DIGIALITY T-2000 FTA / T-2001 CX
 IMPORTANT! Please read this manual before you connect the receiver! DIGIALITY T-2000 FTA / T-2001 CX") USER MANUAL (UK) IMPORTANT! Please read this manual before you connect the receiver! DIGIALITY T-2000 FTA / T-2001 CX 1 2 DIGIALITY T-2000 FTA / T-2001 CX BASIS USE AND BASIS FUNCTIONS TABLE OF CONTENTS
USER MANUAL (UK) IMPORTANT! Please read this manual before you connect the receiver! DIGIALITY T-2000 FTA / T-2001 CX 1 2 DIGIALITY T-2000 FTA / T-2001 CX BASIS USE AND BASIS FUNCTIONS TABLE OF CONTENTS
5 Getting Started Connecting the DVB-T Receiver First Steps... 9
 Table of Contents 1. Introduction... 2 2. Features... 3 3. Safety Notes... 4 4. Your Receiver and its Functions... 5 4.1 Remote Control Functions... 5 4.2 Front Panel Controls... 7 4.3 Rear Panel Connections...
User's Manual 700HDMI PVR
 Digital Satellite Receiver User's Manual 700HDMI PVR INDEX INDEX... 3 Precautions... 5 1. Important Safety Instructions... 5 2. Notice... 5 3. Copyright... 6 4. Disclaimer... 6 Before You Begin... 7 1.
Table of Contents. 1. Safety Use. 2. General Description. 3. Connection Diagram. 4. Operations and Management. 4.1 Display Status. 4.
 DTM-HD01 Thank you for buying this encoder modulator. Please read this manual carefully to install, use and maintain the encoder modulator in the best conditions of performance. Keep this manual for future
INSTRUCTIONS MANUAL SAVE THESE INSTRUCTIONS IN A SAFE PLACE FOR FUTURE REFERENCE
 High Definition Digital Set Top Box MPF3573HU INSTRUCTIONS MANUAL SAVE THESE INSTRUCTIONS IN A SAFE PLACE FOR FUTURE REFERENCE Important Safety Instructions 1) Read these instructions. 2) Keep these instructions.
TWIN TUNER HIGH DEFINITION DIGITAL RECORDER PVR 6600
 TWIN TUNER HIGH DEFINITION DIGITAL RECORDER PVR 6600 CONTENTS CONTENTS... 2 SAFETY INSTRUCTION... 3 FRONT PANEL... 4 REAR PANEL... 4 REMOTE... 5 PRECAUTIONS ABOUT BATTERIES... 5 PREPARATION OF REMOTE CONTROL...
S7070rHD-XM USER MANUAL
 S7070rHD-XM USER MANUAL CONTENTS GENERAL INFORMATION 2 Features and Unpacking Remote Control Rear Panel Connections Connecting your S7070rHD Freeview EPG 3 4 5 5 6 FIRST TIME INSTALLATION 7 MENU INFORMATION
TOPFIELD. TF 5810 PVRt. User Guide. Digital Terrestrial Receiver. Personal Video Recorder
 TOPFIELD TF 5810 PVRt User Guide Digital Terrestrial Receiver Personal Video Recorder Contents iii Contents Contents iii 1 Introduction and getting started 1 1.1 Unpacking..............................
Celect Communications. Complete TV Users Guide
 Celect Communications Complete TV Users Guide 1 Contents Setting up your Remote... 4 Remote Guide... 5 Using the Guide Button... 8 Searching...10 Reminders...12 DVR Guide...13 Important Note...26 TV Main
Complete TV Users Guide
 Celect Communications Complete TV Users Guide Connected Your pathway to the world 1 2 Contents Setting up your Remote... 4 Remote Guide... 5 Using the Guide Button... 8 Searching...10 Reminders...12 DVR
USER GUIDE. Get the most out of your DTC TV service!
 TV USER GUIDE Get the most out of your DTC TV service! 1 800-367-4274 www.dtccom.net TV Customer Care Technical Support 615-529-2955 615-273-8288 Carthage Area Carthage Area 615-588-1277 615-588-1282 www.dtccom.net
S7070rHD - XM USER MANUAL
 S7070rHD - XM USER MANUAL CONTENTS GENERAL INFORMATION 2 Features and Unpacking Remote Control Rear Panel Connections Connecting your S7070rHD Freeview EPG 3 4 5 5 6 FIRST TIME INSTALLATION 7 MENU INFORMATION
Receiver/Digital Decoder DVB-T2 Set Top Box. Installation Manual & User Manual
 Receiver/Digital Decoder DVB-T2 Set Top Box Installation Manual & User Manual SAFETY PRECAUTION CAUTION: The lightening flash with arrowhead symbol, within an equilateral triangle, is intended to alert
Instruction Guide. Model Number: HDPVR2400. After Sales Support C TEL: High Definition Personal Video Recorder
 High Definition Personal Video Recorder Instruction Guide Model Number: HDPVR2400 The original Instruction Manual was produced by Bauhn. This revised unofficial document was produced by Referee (Whirlpool
<'E&, > WZKϮϰs USER MANUAL
 USER MANUAL Contents Contents Safety Precautions Power Supply... 1 Installation... 2 Use and Maintenance... 3 Important Safety Instructions... 4-5 User Guidance Information Names of each part(front View)
Welcome to W light up your life
 USER GUIDE 1 Welcome to light up your life Dear Vision Communications Customer, Thank you for choosing LightWave TV from Vision. LightWave TV will open a whole new world of TV entertainment for you and
GET STARTED. For assistance, call us on or visit manhattan-tv.com/help
 GET STARTED For assistance, call us on 020 8450 0005 or visit manhattan-tv.com/support Check Freeview HD coverage in your area by visiting freeview.co.uk For assistance, call us on 020 8450 0005 or visit
1. INTRODUCTION SAFETY INSTRUCTIONS HHT895 FEATURES INCLUDE: ACCESSORIES INCLUDED WITH YOUR RECEIVER:...
 1. INTRODUCTION... 2 1.1 SAFETY INSTRUCTIONS... 2 1.2 HHT895 FEATURES INCLUDE:... 3 1.3 ACCESSORIES INCLUDED WITH YOUR RECEIVER:... 4 2. INSTALLATION... 4 2.1 FRONT PANEL... 4 2.2 REMOTE CONTROL UNIT BATTERY
1. Safety precautions Environment protection Features Accessories Front panel Rear panel...
 Contents 1. Safety precautions... 1 2. Environment protection... 3 3. Features... 4 4. Accessories... 4 5. Front panel... 4 6. Rear panel... 5 7. Remote controller... 6 8. Basic connection... 7 8.1. Connecting
HD-1603 Single Input MPEG-4 DVB-T HD Encoder/Modulator User Guide and Install Manual
 ZyCastR digi-mod HD Range digi-mod HD-1603 www.digi-modbyzycast.com HD-1603 Single Input MPEG-4 DVB-T HD Encoder/Modulator User Guide and Install Manual Table of Contents www.digi-modbyzycast.com Safety
High Definition Digital Set Top Box With USB Record
 High Definition Digital Set Top Box With USB Record INSTRUCTION MANUAL DFTA46R Toll Free Warranty and Service: 1800 509 394 The Gold Technical Support Line: 1902 215 259 (Charges will apply at $2.95 per
GHDD1782DVBT Freeview Digital Tapeless Video Recorder User Guide
 GHDD1782DVBT Freeview Digital Tapeless Video Recorder User Guide www.goodmans.co.uk Table of Contents Quick Guide...4 Connecting to a TV set...4 Introduction...5 Getting Started...7 In the box...7 Identification
DURING A LIGHTNING STORM,
 Safety Instructions Safety Instructions This product has been manufactured to satisfy the international safety standards. Please read all of safety and operating instructions before operating the product
SAFETY PRECAUTION ENGLISH DO NOT INSTALL THE RECEIVER: PAG. 2
 MAX S92+ HDMI SAFETY PRECAUTION The lightning fl ash with arrowhead symbol, within an equilateral triangle, is intended to alert the user to dangerous voltage and to prevent from a risk of electric shock.
Table of Contents Safety Precautions 1.1 Safety Precautions... Introduction to the Product 2.1 Features Important Information
 best, and Table of Contents Safety Precautions 1.1 Safety Precautions..... 1 Introduction to the Product 2.1 Features..... 3 2.2 Important Information... 4 2.3 The Device and Accessories... 5 Functional
QUICK START GUIDE MODEL : PHD-VRX2
 Full HD 1080p Dual Tuner Digital HDTV Recorder, Receiver and Media Center Box QUICK START GUIDE MODEL : PHD-VRX2 Copyright 2013, PrimeDTV Technologies, Inc. Front View Menu: Display On-screen (OSD) Main
DIGITAL VIDEO RECORDING (DVR) SERVICES
 SERVICES") DIGITAL VIDEO RECORDING (DVR) SERVICES With a Digital Video Recorder (DVR) set-top box, you can easily record your favorite programs and then play them back anytime. The DVR and Picture-In-Picture (PIP)
DIGITAL VIDEO RECORDING (DVR) SERVICES With a Digital Video Recorder (DVR) set-top box, you can easily record your favorite programs and then play them back anytime. The DVR and Picture-In-Picture (PIP)
HD Digital Satellite Receiver. User s Manual
 HD Digital Satellite Receiver ZDX-670 User s Manual Keep this manual for future reference II General Safety This STB has been manufactured to meet international safety standards. Please read the following
AX1919/AX1922/AX1924/AX /24V LED DVD/TV
 AX1919/AX1922/AX1924/AX1932 12/24V LED DVD/TV PANEL - Display Size: 19 (48cm) - AX1919 22 (56cm) - AX1922 24 (60cm) - AX1924 32 (81cm) - AX1932 - High Definition LED TV - AX1919/32 - Full High Definition
BeoVision Guide
 BeoVision 8-40 Guide Contents Menu overview, 3 See an overview of on-screen menus. Navigate in menus, 4 See how to use the different remote controls for menu operation. First-time setup, 5 Which menus
The following symbols will serve as follows: Indicates any other additional important or helpful information. Indicates warning information.
 Contents 1 2 HD2011IR User Manual Notice This manual can help you to become familiar with the many great features of our high definition digital Satellite receiver, as well as how to use and operate these
Manhattan Model: Plaza HDR S 500GB LET S GET STARTED YOUR USER GUIDE
 Manhattan Model: Plaza HDR S 500GB LET S GET STARTED YOUR USER GUIDE WELCOME TO FREESAT We are so pleased you bought this 500GB Manhattan Plaza HDR S Freesat+ HD recorder. Now you can enjoy: Quality state-of-the-art
HyperMedia User Manual
 HyperMedia User Manual Contents V3.5 Chapter 1 : HyperMedia Software Functions... 3 1.1 HyperMedia Introduction... 3 1.2 Main Panel... 3 1.2.2 Information Window... 4 1.2.3 Keypad... 4 1.2.4 Channel Index...
Table of Contents. Safety Instruction 2. Trademark Information 3 Introduction 4. Package Contents 4. Features 5. Product Overview 6 Front Panel 6
 - 0 - Table of Contents Safety Instruction 2 Trademark Information 3 Introduction 4 Package Contents 4 Features 5 Product Overview 6 Front Panel 6 Rear Panel 7 Remote Control 8 System Installation 11 Setting
Preparation. Connection. Switching On. Tuning In. Please refer to Antenna Connection (See the page 10).
.") Preparation Connection Please refer to Antenna Connection (See the page 10). NOTE: Please use good-quality RF cable. Make sure well connected with tuner to ensure effect. Switching On Turn on your TV Set.
Preparation Connection Please refer to Antenna Connection (See the page 10). NOTE: Please use good-quality RF cable. Make sure well connected with tuner to ensure effect. Switching On Turn on your TV Set.
PART 1 English 1.0 Usage
 SAT OUT SAT IN Thank you for choosing this Strong satellite receiver. This receiver is of our latest development and it is designed to be capable of safely install your receiver and to achieve its optimum
INSTRUCTION MANUAL. High Definition Digital Set Top Box with DAB+ Receiver DFTA52DAB. The Gold Technical Support Line:
 High Definition Digital Set Top Box with DAB+ Receiver INSTRUCTION MANUAL DFTA52DAB The Gold Technical Support Line: 1902 215 259 (Charges will apply at $2.95 per minute) Introduction Thank you for buying
User Manual Of Digital Set Top Box
 Size:120X170mm User Manual Of Digital Set Top Box VEA T100 Please read this User Manual carefully to ensure proper use of this product and keep this manual for future reference. Safety Instructions Always
English CONTENTS 1. GUIDE OUTLINE THE MENU OSD INSTRUCTION TECHNICAL SPECIFICATION...17
 USER S MANUAL English CONTENTS 1. GUIDE...2 1.1 IMPORTANT SAFETY INSTRUCTIONS...2 1.2 UNPACKING...2 1.3 PRODUCT OVERVIEW& ILLUSTRATION...3 1.4 INSTALLATION OF METER...4 2. OUTLINE...5 3. THE MENU OSD INSTRUCTION...6
Table of Contents. Safety Precautions... Control elements and connections... Remote control... Quick Installation Guide Installation guide...
 V100806 GB Table of Contents Safety Precautions... Control elements and connections... Remote control... Quick Installation Guide... 1. Installation guide... 1.1 Connection... 1.2 Installation diagrams...
DVB-T2 HD mobile digital TV Box. Product Specification
 DVB-T2 HD mobile digital TV Box Model:TDB15H Product Specification Version: V1.0 Date: 2014.04.28 1 Foreword Thank you for purchasing the mobile digital TV receiving box (Model No.: TDB15H) from our company.
TELEVISION. Star Plans. Interactive Guide and DVR (Digital Video Recorder) Manual ARVIG arvig.net
 Manual ARVIG arvig.net") TELEVISION Star Plans Interactive Guide and DVR (Digital Video Recorder) Manual 888.99.ARVIG arvig.net TABLE OF CONTENTS DVR Remote Control Button Features...3 Arvig Digital TV i-guide Quick Reference
TELEVISION Star Plans Interactive Guide and DVR (Digital Video Recorder) Manual 888.99.ARVIG arvig.net TABLE OF CONTENTS DVR Remote Control Button Features...3 Arvig Digital TV i-guide Quick Reference
ZXV10 B760H ZXV10 B760E RichMedia Box User Guide
 ZTE CORPORATION NO.55,Hi-techRoadSouth,ShenZhen,P.R.China Postcode:518057 Tel: (86) 755 26771900 800-9830-9830 Fax: (86) 755 26772236 URL: http://support.zte.com.cn E-mail: doc@zte.com.cn ZXV10 B760H ZXV10
Ref SATELLITE. User Manual. High Definition TV Satellite Receiver.
 SATELLITE High Definition TV Satellite Receiver Ref. 717501 User Manual www.televes.com Index SATELLITE 1. Safety recommendations............................................................ 4 2. General