55.5cm (22 ) LCD TV with DVD, DVB-T & CI Model No.: DVT-2234
|
|
|
- Loreen Violet Ball
- 5 years ago
- Views:
Transcription
1 55.5cm (22 ) LCD TV with DVD, DVB-T & CI Model No.: DVT-2234 For information and support,
2
3 Contents 1-3 SAFETY INFORMATION Unit Remote Control Aerial connection Connecting external devices Common Interface slot Auto installation setup Source menu Menu settings DVD Operation TROUBLE SHOOTING GUIDE TECHNICAL SPECIFICATIONS options
4 SAFETY INFORMATION IMPORTANT SAFETY INSTRUCTIONS - READ CAREFULLY BEFORE USE. Take note of the following safety information which appears on the back of the TV. CAUTION TO PREVENT ELECTRICAL SHOCK, DO NOT REMOVE ANY COVER SCREWS, NO USER SERVICEABLE PARTS INSIDE, REFER SERVICING TO QUALIFIED SERVICE PERSONNEL. This symbol indicates that there are important operating maintenance instructions in the literature accompanying this unit. This symbol indicates that dangerous voltage constituting a risk of electric shock is present within this unit. Keep these instructions Do not use this TV near water. Clean only with a slightly damp cloth. Do not block any ventilation openings. Install in accordance with the supplied Quick Start Guide and this User Guide. Protect the power chord from being walked on or pinched, particularly at plugs, and the point where it exits from the TV. Do not allow the power chord to overhang the edge of a table. Unplug this TV during lightening storms or when unused for long periods of time. WARNING! TO REDUCE THE RISK OF FIRE OR ELECTRICAL SHOCK, DO NOT EXPOSE THIS TV TO RAIN OR MOISTURE. THE TV MUST NOT BE EXPOSED TO DRIPPING AND SPLASHING AND NO OBJECTS FILLED WITH LIQUIDS SHOULD BE PLACED ON THE TV. NOTE: No naked flames such as candles should be placed on the TV. 1
5 IMPORTANT SAFETY INFORMATION (Continued) This unit has been produced according to all current safety regulations. The following safety tips should safeguard users against careless use and the dangers connected with such use. Although this appliance has been carefully manufactured and rigorously checked prior leaving the factory, as with all electrical appliances it is possible for problems to develop. If you notice smoke, an excessive build up of heat or any other unexpected phenomena, you should disconnect the plug from the mains power socket immediately. Ensure that the unit is sufficiently ventilated! Never place next to or underneath curtains! The mains plug or appliance coupler is used as the disconnect device, the disconnect device shall remain readily operarble. This set should only be connected to a mains power supply which matches that stated on the label on the rear of the TV do not attempt to connect it to any other type of supply. The socket outlet must be installed near the equipment and easily accessible. To prevent overload, don t share the same mains supply socket with too many other items of equipment. Apparatus with Class 1 construction shall be connected to a mains socket outlet with a protective earthing connection. Keep away from rodents. Rodents enjoy biting into electric flexes. Always hold the plug when pulling out the plug from the mains supply socket. Do not pull on the flex, the flex can become overloaded and cause a short circuit. Set up the unit so that no one is able to trip over the flex. Do not place heavy items on the flex, which may damage it. Take note that the flex cannot be reached and pulled by young children, avoiding injury. Do not set up the unit near to heat sources. The casing and the flex could be damaged by the impact of heat. The screen is made of plastic and can break if damage is done to it. Be careful when collecting sharp edged plastic splinters to avoid injury. Avoid placing the unit on any surfaces that may be subject to vibrations or shocks. To protect the unit during a thunderstorm unplug the AC power cable and disconnect the aerial. Caution: Do not touch the aerial (RF) connector. When you leave your home for long periods of time, unplug the AC power cable for safety reasons. The unit becomes warm when in operation. Do not place any covers or blankets on the unit in order to prevent overheating. The ventilation holes are not to be blocked. Do not set up near radiators. Do not place in direct sunshine. When placing on a shelf leave 5 cm (2 ) free space around the whole unit. Do not allow water or moisture to enter the TV. Do NOT use in wet or moist areas such as Bathrooms, steamy kitchens or near swimming pools. Do not use this unit when moisture condensation may occur Any repairs must be carried out by qualified personnel only. Do not open this unit. A non expert attempting to repair the unit could be dangerous and potentially cause a fire hazard. 2
6 IMPORTANT SAFETY INFORMATION (continued) Liquids spilt into the unit can cause serious damage. Switch the set OFF and disconnect the mains power supply, then consult a qualified service person before attempting to use the unit again. Do NOT remove the safety covers. There are no useable or serviceable parts inside. You may invalidate the warranty. Qualified personnel must only service this apperatus. Do NOT tap or shake the screen, you may damage the internal circuits. Take good care of the remote control, do not drop. Never place hot objects or open flame sources on or close to the TV. High temperatures can melt plastic and lead to fires. To clean the TV use a soft dry cloth. Do NOT use solvents or petrol based fluids. For stubborn stains, you may use a damp cloth with dilute detergent. Headphone Warning Loud music can damage your hearing irreversibly, therefore do not set the volume to a high level when listening through headphones, particularly for lengthy listening periods. Where to install Locate the television away from direct sunlight and strong lights, soft indirect lighting is recommended for comfortable viewing. Use curtains or blinds to prevent direct sunlight falling on the screen. Place the TV on a sturdy platform of which the surface should be flat and steady. This will prevent it from falling over. Make sure the television is located in a position where it cannot be pushed or hit by objects, as pressure will break or damage the screen, and so that small objects cannot be inserted into the ventilation slots or openings in the cabinet. 3
7 Unit Please insert a 12cm disc according to the silk Led Indicator & Remote Control window SWITCH (Keep clear) Turn on/off the power supply. The functions of the TV buttons are described below. MENU: Press to display the OSD menu, Press again to exit the menu. CH-/CH+: Press to scan through channels. They are also can be used to move down/up in the OSD menu screen. VOL-/VOL+: Press to adjust the volume. They are also can be used to move left/right in the OSD menu screen. VOL+ button can be used to skip forward to next menu. INPUT: Press to select the source. PLAY: Play / Pause the disc playing. EJECT: Eject the disc. Power: Turn on/off the TV set. 4
8 Remote control SYS-MENU INPUT DVD DVB SYS-EXIT TV/RADIO FAV FAV+ FAV- DISPLAY LANGUAGE POWER: Turn the TV on/standby. 2. buttons for DVD operation : Load/eject DVD disc : Play/pause DVD program : Stop DVD program : DVD fast reverse : DVD fast forward : DVD previous chapter : DVD next chapter 2.buttons for DVD operation LANGUAGE: Select DVD disc language ZOOM: Adjust picture size in DVD mode SUBTITLE: Turn on/off the DVD subtitle display MENU: DVD play list/disc menu ANGLE: Select DVD picture angle TITLE: DVD title GOTO: DVD search, Tracks or Chapters PROGRAM: Edit the program and play SLOW: play DVD programs at slow speed REPEAT: Play the title or chapter once again A-B: Select and play the preferable paragraph of DVD program by pressing this key twice at the beginning and end of it. 2. buttons for TELETEXT(In ATV mode) TV/TXT: Teletext on/off CANCEL: Turn off the Teletext display REVEAL: Reveal any hidden text, for example-quiz answer HOLD: Hold or carry on the current subpage SIZE: Press to see top half of page double size, Press again to see the bottom half of page double size, Press again for normal size SUBPAGE: press to subpage, again to cancel. INDEX: go to index. Colour buttons: short cuts-follow the coloured links in the text. (In DTV mode, press red key to switch between TV and radio. Green key, yellow key and blue key are invalid.) 3. SYS-MENU: System setup menu. 4. INPUT: Press to display the input source menu. 5. CH+/-: Scan through channels. 6. VOL+/-: Adjust the volume. 7. DVD: switch to DVD 8. DVD-SETUP: DVD system setup 9. Cursor left/right up/down: Cursor buttons used in menus. OK:CONFIRM BUTTON for menu.
9 Remote control (continued) DVB: switch to DTV 11. SYS-EXIT: Exit the OSD menu ,-/-- Choose channel directly. Number buttons for DVD. Returns to the previous channel DVD DVB SYS-MENU INPUT SYS-EXIT TV/RADIO PICTURE: Select the picture mode. SOUND: Select the sound mode. NICAM/A2: Selects Nicam or Mono sound. MUTE: Mutes the Audio. SLEEP: Standby Timer TV/RADIO: Disc menu change between TV and Radio. Buttons for DTV function FAV: Display the favorite program list. FAV+/-: Favorite program up/down. PIC FORMAT: Press to change the display mode of the screen: 4:3, 16:9.etc SUBTITLE: To switch the dialogue at the bottom of the screen. TEXT: To view the teletext broadcasting program. DISPLAY: Display current mode information. LANGUAGE: To select audio language. EPG: To show the Electronic Program Guide during no-menu state only. 13 FAV FAV+ FAV- DISPLAY LANGUAGE
10 Aerial connection USER GUIDE WARNING! ENSURE THE TV AND ALL ANCILLARY EQUIPMENT IS UNPLUGGED FROM THE MAINS BEFORE MAKING ANY CONNECTIONS! Connecting the TV Antenna Connect the TV antenna to the aerial socket with a 75 ohm co-axial plug. For best results use a high gain TV aerial, preferably roof or loft mounted. To improve picture quality in a poor signal area, purchase and install a signal amplifier. If the antenna needs to be split for two TVs, use a 2-Way Signal Splitter (not supplied). Connecting external devices This instruction manual shows the simplest and most effective way of connecting your TV to ancillary equipment. Alternate methods are listed below. HDMI Lead You can connect this TV to a compatible device using a HDMI lead. This method will give the best picture. Connect the cable from the HDMI equipment to the TV HDMI socket. SCART Lead You can connect this TV to a compatible device using a SCART lead. The connection uses component video signals, i.e. the red, green and blue (RGB) content of the video are sent on separate signals. VGA Cable You can use your TV as a monitor for your personal computer by using a VGA cable. Sound from your personal computer may also be played through the TV. 7
11 Connecting external devices (continued) USB SCART POWER: Connect to the mains adaptor. USB: For DVB-T software upgrade only. HDMI: Connect it to the HDMI of DVD or other equipment. VGA: For PC display.connect it to the D-Sub 15 pins analog output connector of the PC. PC-IN: Connect it to the audio output terminal of PC. SCART: Connect them to the SCART video output terminal of DVD.(used in component source) Headphone: Connect it to your headphone or other audio equipment. Coax: DVD coaxial output. Common Interface: CI slot. RF: Connect antenna or cable 75 Ohm coaxial to receive TV signal. R/L in: Connect them to the audio output terminal of DVD.(shared with YPbPr) VIDEO: Connect it to video output terminal of DVD. YPbPr: Connect them to the YPbPr video output terminal of DVD.(used in component source) Caution: Before connecting external devices: Makes sure to disconnect the appliances from the power supply in order to avoid any potentialdamagefromoccurring. Make sure to establish the required connection. Make sure that the connectors are properly and correctly attached before connecting the appliances to the power supply. 8
12 Connecting external devices (continued) PC connection As PCs are sometimes still supplied with a conventional CRT monitor, you may need to adjust the display settings of your PCs graphics card, otherwise the pictures may not appear correctly. Switch on your PC (still with your original monitor connected) no w select the screen resolution, and select 60Hz refresh rate. Switch off your PC, then connec t it to your TV while both appliances are still switched off. VGA, HDMI PC Connection Use a PC-VGA cable (not supplied) to connect the TV to your PC. You can also use an HDMI cable to connect to your PC (if your PC Graphic card supports HDMI). When the HDMI cable is used, the PC audio cable is no longer required. If you use the HDMI to DVI cable, you will need to use the PC audio cable. Connect all cables carefully and do not bend or break the connector pins. When using the VGA cable Switch on the TV Switch on the PC Select PC/VGA as input source VGA cable HDMI to DVI cable When using the HDMI cable Audio cable Select HDMI as input source HDMI to HDMI ( All illustrated cables are not supplied) 9
13 Connecting external devices (continued) Connecting Video camera and Video recorder Video camera Connect the AV cable to the TV and to the video camera. Turn on both video camera and the TV. Select AV/CVBS source You can now see the playback picture from the video camera. Note: To connect the video camera using other cables, refer to the video camera instruction manual. Video recorder Connect the Scart cable to the TV and video recorder. Turn on both video recorder and the TV. Select Scart source You can now see the playback picture from the video recorder. Note: To connect the video recorder using other cables, refer to the video recorder instruction manual. Video recorder Scart cable Video camera AV cable All illustrated cables are not supplied 10
14 Connecting external devices (continued) Connecting an audio system(available in ATV, DTV and AV mode only) You can supply the TV sound to the stereo system (A) with the Scart socket. Use a special scart cable SCART to RCA. (Please consult your hi-fi instructions for details). If you have a surround sound amplifier/decoder (B) Use the Scart cable or the special scart cable Scart to RCA. (A) (B) Scart to RCA cable Scart cable All illustrated cables are not supplied) Connecting a DVD player Connect a DVD player using either a SCART cable or the HDMI cable. (only if your external equipment supports HDMI). HDMI to HDMI When using the SCART cable Switch on the TV Switch on the DVD player Select SCART as input source When using the HDMI cable SCART Select HDMI as input source (All illustrated cables are not supplied) 11
15 USER GUIDE Common Interface Slot USING YOUR COMMON INTERFACE SLOT Common Interface The Common Interface (CI) slot is designed to accept the Conditional Access Module (CAM) and Smart Card in order to view the pay TV programmes and additional services. Contact your Pay Per View TV service provider to get more information about the modules and subscriptions. NOTE: Conditional Access Module and Smart Cards are sold separately. WARNING! SWITCH OFF YOUR TV BEFORE ANY MODULE IS INSERTED INTO THE COMMON INTERFACE SLOT, THEN ADD THE SMART CARD TO THE CAM. 1. Turn on the TV and ensure DTV Source is selected. 2. If the CAM is detected the TV will display the following message on the screen. "Common Interface Module inserted" wait for a few moments until the card is activated. 3. Select the relevant digital Pay Per View channel. 4. Detailed information on the Smart Card in use is displayed 5. Press the Ok button to access the card menu. Refer to the Module Instruction Manual for setting details. 6. When the module is removed, the following message will appear on the screen. "Common Interface module removed". 12

16 Auto installation setup Power On / Off the LCD TV 1. Connect to the power supply with a power cord and an adaptor. 2. -To turn on the TV Press POWER button on the TV or remote control. -To turn off the TV Press POWER button on the TV or remote control. When you initially turn on the LCD TV you will see the first time installation menu as below: Ensure that the aerial is plugged in to the TV, Make sure your Remote is in TV mode (by pressing INPUT button), switch on the TV by pressing POWER. You will see the first time installation menu. START SEARCH Source Menu You can select the input source menu by pressing the Source button on the remote control or the INPUT button on the LCD TV. INPUT SOURCE ATV DTV HDMI SCART YPBPR AV VGA DVD 13
17 Bas c Use Source Menu 1. Turn the LCD TV on. 2. Press the MENU button on the Remote Control. 3. Use the and buttons to navigate through the menu. 4. Press the EXIT button to exit the Menu. CHANNEL MENU Allows you to search channels and set up a variety of channel options. (Select DTV source for example) (Select DTV source for example) Allows you to customize the sound options and effects. (Select DTV source for example) SETTING MENU: Allows you to setup a variety of setup options. (Select DTV source for example) FUNCTION MENU: Allows you to set up a variety of lock/time and setup options. (Select DTV source for example) 14
 Auto Search Press button to start auto search.")

18 Application Menu Settings (continued) Use the and buttons to select the CHANNEL menu (as the picture above), press button to enter the menu. The CHANNEL menu includes the following options : Country Press and buttons to select the Country. (Can be selected in ATV mode) Auto Search Press button to start auto search. Auto Search menu for DTV Auto Search menu for ATV Manual Program Press button to enter the submenu. Manual Program menu for ATV Program Select the program you want to edit. Color Sys. Select the color system for the program you want to edit. Sound Sys. Select the sound system for the program you want to edit. Manual Search Use and button to manual search. AFT Turn on/off the Auto Frequency Tuning function for Manual Search. Fine Use and button to fine-tune. Skip Select Yes to skip the program when you scan the programs by CH+/-. 15


19 Menu Settings (continued) Manual Program menu for DTV Program Select the program you want to edit. Start Search Press button to start search. Channel Found Display the channel it found. SIG. Quality Display the singal quality of the channel it found. SIG. Strength Display the singal strength of the channel it found. Frequency Display the frequency of the channel it found. Program Edit: Press button to enter the submenu as the following picture. Program Edit menu for ATV Program Edit menu for DTV TV List 07/05/09 00:45 ALL No. Program Name Digital Digital Digital Digital HD Digital 006 LUXE.TV SD 007 LUXE.TV UK HD 008 LUXE.TV HD 009 BBC ONE Status Lock Ch5 / Khz PID: V 1025, A 1026 FAV NAME: Select the channel, press GREEN button on the remote control to change the name of the channel. (Use button to name, and press OK button to confirm) LOCK: Select the channel, press RED button to lock the channel. You have to enter the code to view the channel you have locked. Note: you could set the code in System Lock menu in FUNCTION menu, the original code is INSERT: Select a channel you want to insert, press YELLOW button, then select the position, press GREEN button to insert, or you could press RED button to cancel the option. FAV Press blue button to add the channel FAV list. 16 EDIT: Switch MENU Exit FAV: Use 1-8 number buttons to set the current channel to your favorite group 1-8. if the current channel already be one of your favorite gruop 1-8, use 1-8 number buttons again will set it to a normal channel. Use Yellow button on the remote, the menu will appear: save the change? LOCK: channel and fav 1-8 channel. Use the Ok button to set the current channel to lock. if the current channel already lock, use it again will unlock. options and use Ok button to select. Use the button to select channel, then use Ok button to enter the program info menu. Fav


20 SEARCH: Use OK button to enter the search menu. Use the number buttons to select the corresponding characters. Use the button to select channel, then use Ok button to rename the program. There are two options: Use the 1-9 number buttons to select different character. Use the Green button to Switch between upper and lower case letters.circularly press the number buttons 2 to select between a, b, c and 2 and use OK button to save. SKIP: Use the cursor buttons to select the channel you want to Skip. Use OK button and will be shown at the channel selected. To remove the skip function by using OK button again. When a channel has been selected to Skip, you still may select that channel with the numeric buttons. DELETE: Use the cursor buttons to select the channel you wish to delete. Use OK button and will be shown at the channel selected. To remove the delete function, use OK button. CI MENU(in DTV mode) Please contact your pay perview provider who can supply a viewing card and cam unit with instructions for their use. 17
21 Menu Settings (continued) Use the and buttons to select the PICTURE menu (as the picture above), press button to enter the menu. Picture Mode Choose from Standard, Movie, Vivid and Personal. Note: Contrast, Brightness, Color and Sharpness can only be adjusted in the Personal mode option in the Picture Mode Settings. Contrast Controls the difference between the brightest and darkest regions of the picture. Brightness Controls the overall brightness of the picture Color Sharpness Tint Colour Temp. Noise Reduction Control the color. Increase this setting to see crisp edges in the picture; decrease it for soft edges. Controls the tint ( NTSC mode only). Choose from Normal, Cool, and Warm. Reduce any interference noise by selecting ON. (Can be selected in ATV mode). 18
22 Application Menu Settings (continued) Use the and buttons to select the SOUND menu (as the picture above), press button to enter the menu. Sound Mode Allows you to select among: Standard, Music, Movie and Personal. Bass (Can be adjusted when the sound mode is set to User) Controls the relative intensity of lower pitched sounds. Treble (Can be adjusted when the sound mode is set to User) Controls the relative intensity of higher pitched sounds. Balance AVL To adjust the balance of the left and right sound track, or turn off the volume of the left and right sound track. Control the volume of the program automatically when you turn on the function by selecting On. 19
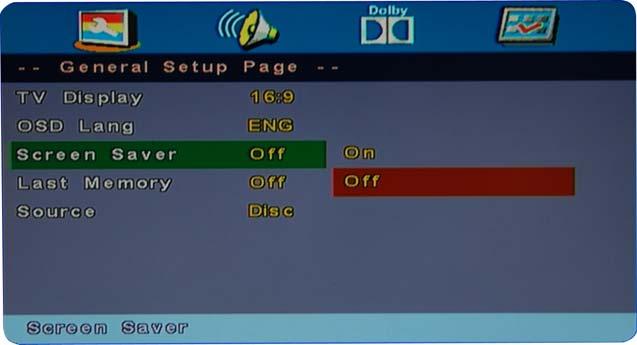
23 Menu Settings (continued) Use the and buttons to select the SETTING menu (as the picture above), press button to enter the menu. The SETTING menu includes the following options: Language Allows you to select menu language. OSD Timer Transparence Overscan Allows you to select the time for OSD menu displays on the screen. Allows you to select the transparence for OSD menu displays on the screen. Turn on/off the overscan funciton. (Can be selected in HDMI mode ) Reset Press button to restore factory default. 20

 Turn on the blue screen display in no signal state by selecting ON (Can be selected in ATV mode) System Lock Press button, and enter the code to enter the submenu.")
24 Menu Settings (continued) Use the and buttons to select the FUNCTION menu (as the picture above), press button to enter the menu. The FUNCTION menu includes the following options : Sleep Timer Aspect TT Language Blue Screen Allows you to setup the sleep timer to : 15min, 30min, 45min, 60min, 75min, 90min,105min, 120min and off. Allows you to select the screen display mode. (Can be selected in DTV mode) Allows you to select the Teletext language. (Can be selected in ATV mode) Turn on the blue screen display in no signal state by selecting ON (Can be selected in ATV mode) System Lock Press button, and enter the code to enter the submenu. The original code is H O T E L M O D E System Lock Child Lock Key Lock Parental Change Code FTI (First Time Installation) Turn on/off the system lock function. Lock the channel, you have to enter the code to view the channel. Lock the buttons on the TV set, you could not operate the TV by the buttons on the TV set. Select the parental control mode. Change the code. Press button to enter the First Time Installation menu. 21

25 Menu Settings (continued) Use the and buttons to select the PC SETUP menu (as the picture above), press button to enter the menu. The PC SETUP menu includes the following options : H-Position V-Position Clock Phase Adjust the transverse position of the screen. Adjust the vertical position of the screen. Adjust the pixel clock frequency, until the image size is maximized for the screen. Adjust the phase of the ADC sampling clock relative to the sync signal, until a stable image is obtained. Auto Adjust Press button to setup the parameter of the screen automatically. 22

26 DVD Operation DVD Operation Press the Power button on the TV or the remote control, then press the INPUT button to select DVD mode. If there is no disc in the DVD player the screen will show "NO DISC". Insert Disc according to picture next to disc slot. Do not touch the playing surface. Hold the disc around the outside with your fingers and place the disc into the slot. The player will automatically draw the disc into the player. To "Eject" the disc, press the EJECT button on the TV or the " " button on the remote control. Audio 4:3 Pan Scan 4:3 Letter Box Wide 4:3 PanScan 4:3 Letter Box Wide 23

27 DVD Operation DVD Operation 24

28 DVD Operation DVD Operation 25
29 DVD Operation DVD Operation Spdif Setup 26
30 DVD Operation DVD Operation or NO disc 27
31 DVD Operation DVD Operation 28
32 DVD Operation DVD Operation 29
33 DVD Operation DVD Operation 30
34 USER GUIDE TROUBLE SHOOTING GUIDE To assist in locating possible faults use the help guide below. SYMPTOM No Picture, no sound No Picture No Sound No picture on some channels No colour on some channels (black & white) Noisy, Snowy, Ghosting picture. TROUBLESHOOTING Check that the TV is correctly plugged in. Check that the TV is connected to a suitable power source. Check the electrical supply is turned on. Ensure that the TV is powered on. Check that the cables are fitted securely. Ensure the aerial and/or external sources are connected. Press the INPUT button to change the source. Turn the TV on or off. Press the MUTE button and check if Mute mode is set. Switch to another channel and see if the same problem occurs. Press V+ button to see if the problem can be solved. Check that correct channel is selected Adjust the antenna. Check if the same problem exists on other channels. Ensure the correct picture settings are selected. Check the antenna is connected correctly. Check that the antenna Is in good condition. Try moving the antenna. NOTE: The TV must only be repaired by a qualified registered service person. Never attempt to remove the back cover as the TV has dangerous voltages inside that may cause fatality or fire. 31
35 TECHNICAL SPECIFICATIONS Specifications of the TV that you have just purchased may vary from the information in this table due to technical innovations. TV Specifications TV System PAL / BG / DK / I; SECAM/BG/DK/L/L Audio System BG / DK / I / L/L Screensize 22 (Diagonal) Resolution 1366 x 768Pixels(RGB) Aerial input 75 (unbalanced) Audio output power 2 x 3W Power requirements 12V 5A Power consumption 60W 32
36
37
26 Wide screen LCD TV With DVD Model No.: DVT-2621
 26 Wide screen LCD TV With DVD Model No.: DVT-2621 For information and support, www.lenco.eu Contents Contents Caution Safety Information Unit and Accessories Product Feature Introduction 1. Front View
TFD-2622 USER S MANUAL
 26 Wide Screen LCD TV with DVD player TFD-2622 USER S MANUAL Contents Contents Caution Safety Information Unit and Accessories Product Feature Introduction 1. Front View 2. Rear View 3. Remote Control
KGN&, > Ϯϰs USER MANUAL
 USER MANUAL KGN Contents Contents Safety Precautions Power Supply... 1 Installation... 2 Use and Maintenance... 3 Important Safety Instructions... 4-5 User Guidance Information Names of each part(front
KALED24DVDWA USER MANUAL
 KALED24DVDWA USER MANUAL Contents Contents Safety Precautions Power Supply... 1 Installation... 2 Use and Maintenance... 3 Important Safety Instructions... 4-5 User Guidance Information Names of each part(front
< > ϯϯyyϭ USER MANUAL
 USER MANUAL Contents Contents Safety Precautions Power Supply... 1 Installation... 2 Use and Maintenance... 3 Important Safety Instructions... 4-5 User Guidance Information Names of each part(front View)
<'E&, > WZKϮϰs USER MANUAL
 USER MANUAL Contents Contents Safety Precautions Power Supply... 1 Installation... 2 Use and Maintenance... 3 Important Safety Instructions... 4-5 User Guidance Information Names of each part(front View)
28 4K LED monitor. User Manual M284K
 28 4K LED monitor User Manual M284K CONTENTS Safety Information... 2 What s included..... 4 Getting Started....... 8 Troubleshooting.... 14 Specification.... 15 2 of 15 SAFETY INFORMATION Read these instructions
60cm(23.6 ) LED TV WITH DVD & DVB-T
 LED TV WITH DVD & DVB-T") 60cm(23.6 ) LED TV WITH DVD & DVB-T INSTRUCTION MANUAL TFTV6045LEDR Contents Power Supply... 1 Installation... 2 Use and Maintenance... 3 Important Safety Instructions... 4-5 Overview(Front View) / Accessories...
60cm(23.6 ) LED TV WITH DVD & DVB-T INSTRUCTION MANUAL TFTV6045LEDR Contents Power Supply... 1 Installation... 2 Use and Maintenance... 3 Important Safety Instructions... 4-5 Overview(Front View) / Accessories...
CONTENTS 8 ACCESSORIES 13 9 TROUBLE SHOOTING AND ADVICE SPECIFICATIONS BATTERY USAGE CAUTION 13
 CONTENTS 1 PREFACE 2 2 SAFETY PRECAUTIONS 2 3 FRONT & BACK VIEW, REAR CONNECTION OF LCD 3 4 TV INSTALLATION DRAWINGS 4 4.1 ANTENNA CONNECTION 4 4.2 AV1 INPUT CONNECTION 4 4.3 AV2 INPUT CONNECTION 4 4.4
19 LCD TV WITH DVB & DVD
 19 LCD TV WITH DVB & DVD Model NO.: TFD-1945DVBT BLACK(UT) Instruction Manual CONTENTS Safety Precautions Power Supply 1 Installation 2 Use and Maintenance 3 Important Safety Instructions 4~5 User Guidance
Safety Instructions. General Safety Instructions
 Table of Contents Safety Instructions...2 General Safety Instructions...2 Installation...3 Cleaning...4 General Description...5 Specifications & Accessories...5 Specifications...5 Accessories...5 Input
HD TV USER MANUAL 21.5 LED LCD TV. > Please read carefully before use
 HD TV 21.5 LED LCD TV USER MANUAL > Please read carefully before use Contents Safety Precautions Power Supply... 1 Installation... 2 Use and Maintenance... 3 Important Safety Instructions... 4-5 User
AX1919/AX1922/AX1924/AX /24V LED DVD/TV
 AX1919/AX1922/AX1924/AX1932 12/24V LED DVD/TV PANEL - Display Size: 19 (48cm) - AX1919 22 (56cm) - AX1922 24 (60cm) - AX1924 32 (81cm) - AX1932 - High Definition LED TV - AX1919/32 - Full High Definition
Safety Instructions. General Safety Instructions
 Table of Contents Safety Instructions...2 General Safety Instructions...2 Installation...3 Cleaning...4 General Description...5 Specifications & Accessories...5 Specifications...5 Accessories...5 Overview...6
User Manual High Definition Digital Set Top Box DVBT9070 Please read this User Manual carefully to ensure proper use of this product and keep this man
 User Manual High Definition Digital Set Top Box DVBT9070 Please read this User Manual carefully to ensure proper use of this product and keep this manual for future reference. Important Safety Instructions
24 LED TV Model NO.: LED-2449
 24 LED TV Model NO.: LED-2449 Instruction Manual Contents Contents Caution Safety Information Accessories Technical Specification Product Introduction Front View Rear View Connections Remote Control Basic
32 LED TV Model NO.: LED-3264MC
 32 LED TV Model NO.: LED-3264MC Instruction Manual Contents Contents Safety Information 1-3 Product Introduction 4 Connections 5 Remote Control 6-7 AUTO INSTALLATION 8-9 Basic Operation 10 OSD Menu 1.
USER MANUAL KGN1080P32VD
 USER MANUAL KGN1080P32VD USB... Power cord Remote control/batteries Power/Standby button Picture mode button Sound mode button Multi-digits channel buttton P.MODE S.MODE FREEZE SLEEP 1 2 3 4 5 6 7 8 9
Safety Instructions. General Safety Instructions
 Table of Contents Safety Instructions...2 General Safety Instructions...2 Installation...3 Cleaning...4 General Description...5 Specifications & Accessories...5 Specifications...5 Accessories...5 Overview...6
FV400 DIGITAL TV RECEIVER WITH MODULATOR INSTRUCTION MANUAL
 FV400 DIGITAL TV RECEIVER WITH MODULATOR INSTRUCTION MANUAL Please read this instruction manual carefully before using your receiver Table of Contents Introduction-----------------------------------------------------------------------------
Safety warning Important Safety Instructions. Wall Mount Specifications. Electronic Program Guide. Lock Menu 18. PVR File System
 LT-32N370Z 32 INPUT Safety warning Important Safety Instructions Wall Mount Specifications Electronic Program Guide Lock Menu 18 PVR File System 11 11 11 14 15 16 17 19 20 21 21 22 23 24 25 INPUT AAA
22" fhd led tv with atv and mpeg-2 dvb-t + dvb-s + c.i & usb input + pvr function Model NO.: LED-2256DVBTS
 22" fhd led tv with atv and mpeg-2 dvb-t + dvb-s + c.i & usb input + pvr function Model NO.: LED-2256DVBTS Instruction Manual Contents 1-3 SAFETY INFORMATION 4 5-6 7 8-11 12 13 14-21 22-25 Unit Remote
User Manual. High Definition Digital Set Top Box HDSTB250
 User Manual High Definition Digital Set Top Box HDSTB250 CHANNEL HDSTB250 Please read this User Manual carefully to ensure proper use of this product and keep this manual for future reference. Important
NMS ETA TM Stereo Advanced Digital TV Set-top Box
 Digital TV HD Set-top Box STB2-T2 NMS ETA TM Stereo Advanced Digital TV Set-top Box User Guide CONTENTS Safety Information... 3 Introduction... 4 Set-top Box Front Panel... 4 Set-top Box Back Panel...
KGNϭϬϴϬWWZKϮϮs USER MANUAL
 USER MANUAL KGN X P.MODE S.MODE SLEEP AUDIO 1 2 3 4 5 6 7 8 9 USB/SD A/DTV FAV + 0 SOURCE MENU OK INFO EXIT MUTE VOL CH ASPECT /C AN CE L TTX /SIZE D.MENU/HOLD U P G /AUTO DVD.SETU P /S B A E TITLE EPG
USER MANUAL KALED32DVDWC
 USER MANUAL KALED32DVDWC Contents Caution Safety Information Names of each part Front View Accessories Back View Remote Control Basic Operation OSD Menu 1. Picture menu 2. Sound menu 3. Channel menu 4.
23 LED Television TLAE-02319
 Instruction Manual 23 LED Television TLAE-02319 Contents Caution Safety Information Accessories Technical Specification Product Introduction Front View Rear View Connections Remote Control Basic Operation
USER MANUAL KGNPRO19VD
 USER MANUAL KGNPRO19VD X P.MODE S.MODE SLEEP AUDIO 1 2 3 4 5 6 7 8 9 A/DTV USB/SD FAV + 0 SOURCE MENU OK INFO EXIT MUTE VOL CH ASPECT TTX TITLE /AUTO DVD.SETU P EPG SU BTITL E D.MENU ZOOM/REC.LIST GOTO
22 LED TV. Model NO.: LED-2253MC. Instruction Manual
 22 LED TV Model NO.: LED-2253MC Instruction Manual Contents Caution Caution Safety Information Product Introduction Front View Rear View Connections Remote Control Basic Operation 1. Video menu 2. Audio
Attention. Please handle this product with care and inspect it regularly to ensure it is in good working order.
 Attention Please handle this product with care and inspect it regularly to ensure it is in good working order. If the product, power supply cord or plug shows any signs of damage: stop use, unplug and
DIGITAL SET TOP BOX STB 7017 INSTRUCTION MANUAL
 DIGITAL SET TOP BOX STB7017 INSTRUCTION MANUAL STB 7017 CHANNEL After Sales Support Now you have purchased a Tevion product you can rest assured in the knowledge that as well as your 3 year parts and labour
100cm(40 ) LED TV WITH DVB-T
 LED TV WITH DVB-T") 100cm(40 ) LED TV WITH DVB-T PT4088F 6 400mm 400mm Contents Power Supply... 1 Installation... 2 Use and Maintenance... 3 Important Safety Instructions... 4-5 Overview(Front View) / Accessories... 6 Overview(Back
100cm(40 ) LED TV WITH DVB-T PT4088F 6 400mm 400mm Contents Power Supply... 1 Installation... 2 Use and Maintenance... 3 Important Safety Instructions... 4-5 Overview(Front View) / Accessories... 6 Overview(Back
MAX T200 HD QUICK INSTALLATION GUIDE
 MAX T200 HD QUICK INSTALLATION GUIDE MAX T200 HD QUICK INSTALLATION GUIDE CONTENT receiver BATTERIES x 2 REMOTE CONTROL Quick installation guide Quick Installation Guide The lightning flash with arrowhead
35 INCH CURVED QHD LED MONITOR
 35 INCH CURVED QHD LED MONITOR eiq-35cmuwq60gafs Thank you for choosing electriq Please read this user manual before using this monitor and keep it safe for future reference. Visit our page www.electriq.co.uk
Acer LCD TV AT2001 User's Guide
 Acer LCD TV AT2001 User's Guide Copyright 2005. Acer Incorporated. All Rights Reserved. Acer AT2001 User' s Guide Original Issue: May 2005 Acer and the Acer logo are registered trademarks of Acer Incorporated.
DIGITAL TERRESTRIAL RECEIVER NVR-2090DU CHANNEL
 DIGITAL TERRESTRIAL RECEIVER NVR-2090DU CHANNEL 1 Espanol ~ Digital Video Broadcasting 2 3 STANDBY DTV/VCR TEXT MUTE VOL+ INFO PLAY/PAUSE EPG VOL- CH+ STOP SETUP EXIT 23 FAV- ENTER FAV+ 24 25 SOURCE CH-
2.0 Wall Mount TV Soundbar Instruction Manual
 8010275 2.0 Wall Mount TV Soundbar Instruction Manual Read all of the instructions before using this soundbar and keep the manual in a safe place for future reference. Safety Information CA UT IO N RISK
Owner s Manual. TFT-LCD TV High Brightness & Contrast NICAM/A2 Stereo Sound MODEL: L15SV6-A0, L17LV6-A1,L20AV6-A0 L17L6A-G1,L20L6A
 TFT-LCD COLOUR TV Owner s Manual TFT-LCD TV High Brightness & Contrast NICAM/A2 Stereo Sound Please read this manual carefully before using your television and keep this manual in a good place for future
Full High Definition LCD TV. Kogan 1080p42 USER MANUAL
 Full High Definition LCD TV Kogan 1080p42 USER MANUAL Safety information To ensure reliable and safe operation of this equipment, please read carefully all of the instructions in this user guide, especially
39" 1080p LCD Television PLCD3992A
 PROSCAN 39" 1080p LCD Television PLCD3992A Contents Contents Caution Safety Information Unit and Accessories Product Feature 2 3 4 4 Introduction 5-9 1. Front View 5 2. Rear View 6 3. Instruction for
TFT LCD MONITOR USER MANUAL. L80AP and L101AP
 TFT LCD MONITOR USER MANUAL L80AP - 8.0 and L101AP - 10.1 Table Of Contents Table of contents/ Warning.... 2 Precautions...3 About this user manual and products / Items included in the delivery..... 4
PLL1920M LED LCD Monitor
 PLL1920M LED LCD Monitor USER'S GUIDE www.planar.com Content Operation Instructions...1 Safety Precautions...2 First Setup...3 Front View of the Product...4 Rear View of the Product...5 Installation...6
17 19 PROFESSIONAL LCD COLOUR MONITOR ART
 17 19 PROFESSIONAL LCD COLOUR MONITOR ART. 41657-41659 Via Don Arrigoni, 5 24020 Rovetta S. Lorenzo (Bergamo) http://www.comelit.eu e-mail:export.department@comelit.it WARNING: TO REDUCE THE RISK OF FIRE
DIGITAL WATERPROOF TV / MIRROR TV USER MANUAL. copyright and intellectual property rights. 10"/15" /17"/19"/22"/26"/32" series
 DIGITAL USER MANUAL MENU VOL- VOL+ CH- CH+ TV/AV POWER IR copyright and intellectual property rights The original manufacturer exclusively own or are licensed to use all copyright and other intellectual
66CM (26 ) LCD TV with DVBT / C & DVD Model No.: DVT-2681 BLACK
 LCD TV with DVBT / C & DVD Model No.: DVT-2681 BLACK") 66CM (26 ) LCD TV with DVBT / C & DVD Model No.: DVT-2681 BLACK For information and support, www.lenco.eu Contents Contents Caution Safety Information Accessories Technical Specification Product Introduction
66CM (26 ) LCD TV with DVBT / C & DVD Model No.: DVT-2681 BLACK For information and support, www.lenco.eu Contents Contents Caution Safety Information Accessories Technical Specification Product Introduction
Be sure to run the vehicle engine while using this unit to avoid battery exhaustion.
 CAUTION: TO REDUCE THE RISK OF ELECTRIC SHOCK DO NOT REMOVE COVER (OR BACK) NO USER-SERVICEABLE PARTS INSIDE REFER SERVICING TO QUALIFIED SERVICE PERSONNE; Please Read all of these instructions regarding
LCD VALUE SERIES (32 inches)
") LCD VALUE SERIES (32 inches) http://www.orionimages.com All contents of this document may change without prior notice, and actual product appearance may differ from that depicted herein 1. SAFETY INSTRUCTION
LCD VALUE SERIES (32 inches) http://www.orionimages.com All contents of this document may change without prior notice, and actual product appearance may differ from that depicted herein 1. SAFETY INSTRUCTION
Full High Definition LCD TV USER MANUAL
 1080p3 LCD TV Full High Definition LCD TV 1080p3 USER MANUAL Important Safety Precautions Important Safety Precautions 1 CAUTION RISK OF ELECTRIC SHOCK DO NOT OPEN This symbol indicates important instructions
99cm (39 ) LCD TV/DVD Combo WITH DVB-T
 LCD TV/DVD Combo WITH DVB-T") 99cm (39 ) LCD TV/DVD Combo WITH DVB-T INSTRUCTION MANUAL TFTV3900DT 5 Offering Australians quality since 1958 www.palsonic.com.au Contents Power Supply... 1 Installation... 2 Use and Maintenance... 3
99cm (39 ) LCD TV/DVD Combo WITH DVB-T INSTRUCTION MANUAL TFTV3900DT 5 Offering Australians quality since 1958 www.palsonic.com.au Contents Power Supply... 1 Installation... 2 Use and Maintenance... 3
32 (80cm) HD LED LCD TV
 HD LED LCD TV") 32 (80cm) HD LED LCD TV / GVADLED32 Instruction Manual 2 Contents Preface 4 Safety Precautions 4 Important Safety Instructions 7 In the Carton 10 Connections and Functions 11 Basic Installation 12 Remote
32 (80cm) HD LED LCD TV / GVADLED32 Instruction Manual 2 Contents Preface 4 Safety Precautions 4 Important Safety Instructions 7 In the Carton 10 Connections and Functions 11 Basic Installation 12 Remote
26 TV/DVD COMBO Model NO.: TFD-2627MC
 26 TV/DVD COMBO Model NO.: TFD-2627MC Instruction Manual Contents Caution Caution Safety Information Product Introduction Front View Rear View Connections Remote Control Basic Operation OSD Menu 1. Video
TFT-LCD TV USER MANUAL W102T READ CAREFULLY BEFORE OPERATION W102T
 TFT-LCD TV W102T USER MANUAL READ CAREFULLY BEFORE OPERATION W102T IMPORTANT SAFETY INSTRUCTIONS CAUTION RISK OF ELECTRIC SHOCK. DO NOT OPEN. This symbol indicates dangerous voltage inside the product
Winmate Communication INC.
 20.1 Military Grade Display Model: R20L100-RKA2ML User s Manual Winmate Communication INC. May, 2011 1 IMPORTANT SAFETY INSTRUCTIONS Please read these instructions carefully before using the product and
IMPORTANT SAFETY INSTRUCTIONS
 IMPORTANT SAFETY INSTRUCTIONS 1. Read, follow and keep these instructions safely. 2. Heed all warnings. 1. Do not use this apparatus near water. 2. Clean only with dry cloth. 3. Do not block any ventilation
User manual FT-8100 HD. English
 User manual FT-8100 HD English WARNING!!! On the USB Memory Function for FT-8100 HD model, user can make recording or playing function using by external USB devices such as USB Flash Memory Disk or external
Programming Manual for Broadcastvision Entertainment
 Programming Manual for Broadcastvision Entertainment 18.5 Widescreen LCD Part Number: AXS19HD2G 18.5 Widescreen Controller Part Number: AXSPVSC-BVE AXS19HD2G AXSPVSC-BVE Other parts and accessories included
USER MANUAL. 27 Full HD Widescreen LED Monitor L27ADS
 USER MANUAL 27 Full HD Widescreen LED Monitor L27ADS TABLE OF CONTENTS 1 Getting Started 2 Control Panel/ Back Panel 3 On Screen Display 4 Technical Specs 5 Care & Maintenance 6 Troubleshooting 7 Safety
IMPORTANT! USER MANUAL. LCDV3255HD 32 HD Wide Screen LCD TV WARRANTY INFORMATION INSIDE. PLEASE READ. Product Image to be inserted
 LCDV3255HD 32 HD Wide Screen LCD TV Product Image to be inserted USER MANUAL IMPORTANT! WARRANTY INFORMATION INSIDE. PLEASE READ Trademark of TEAC Corporation JAPAN www.teac.com.au WARRANTY REGISTRATION
27'' Full HD LED Monitor KALED27MONSC Quick Start Guide
 Safety Warnings 27'' Full HD LED Monitor KALED27MONSC Quick Start Guide TO REDUCE THE RISK OF ELECTRIC SHOCK, DO NOT REMOVE ANY COVERS (OR BACKINGS). NO USER SERVICEABLE PARTS ARE INSIDE. REFER ALL SERVICING
19 HD Ready Digital LCD TV with DVD Player
 19 HD Ready Digital LCD TV with DVD Player Instruction Manual L19DVDP10 L19DVDB20 Logik L19DVDP10_B20_IB_100914_Zell.indd 1 14/09/2010 3:02 PM Logik L19DVDP10_B20_IB_100914_Zell.indd 2 14/09/2010 3:02
LED TV MODEL NO.: NE22K5BG. Please read this manual carefully before installing and operating the TV. Keep this manual handy for further reference
 LED TV USER MANUAL MODEL NO.: NE22K5BG IMPORTANT Please read this manual carefully before installing and operating the TV. Keep this manual handy for further reference Table Of Contents Preparations Guide
Throughout the whole user manual, pay special attention to the following marks that
 Notice Warnings, Cautions and Notes Throughout the whole user manual, pay special attention to the following marks that indicate hazardous situations. Warning ** Indicates a hazardous situation which could
OWNER'S MANUAL MODEL: DTV-2000 STANDBY/ON
 OWNER'S MANUAL MODEL: DTV-2000 STANDBY/ON CH+ CH- TABLE OF CONTENTS SAFETY PRECAUTIONS IMPORTANT SAFETY INSTRUCTIONS and FEATURES ACCESSORIES and LOADING BATTERIES REMOTE CONTROL UNIT FRONT PANEL and REAR
Contents Unpacking the TV / Accessory s Installing / Removing the Base Stand
 Contents Unpacking the TV / Accessory s Installing / Removing the Base Stand Front / Right Side View and Controls Rear View and Sockets 1 2 3 4 Remote Control 5-6 Installing Batteries in the Remote Control
50 (127cm) FHD LED LCD TV. Instruction Manual L50HTV17a 24 Month Manufacturer s Warranty
 FHD LED LCD TV. Instruction Manual L50HTV17a 24 Month Manufacturer s Warranty") 50 (127cm) FHD LED LCD TV Instruction Manual L50HTV17a 24 Month Manufacturer s Warranty Contents Guide to the Television 3 Front / Bottom View and Controls 3 Rear View and Sockets 4 Remote Control 5 Installing
50 (127cm) FHD LED LCD TV Instruction Manual L50HTV17a 24 Month Manufacturer s Warranty Contents Guide to the Television 3 Front / Bottom View and Controls 3 Rear View and Sockets 4 Remote Control 5 Installing
FD Trinitron Colour Television
 R 4-205-569-32(1) FD Trinitron Television Instruction Manual GB KV-14LM1U 2000 by Sony Corporation NOTICE FOR CUSTOMERS IN THE UNITED KINGDOM A moulded plug complying with BS1363 is fitted to this equipment
USER MANUAL. 22" Class Slim HD Widescreen Monitor L215DS
 USER MANUAL 22" Class Slim HD Widescreen Monitor L215DS TABLE OF CONTENTS 1 Getting Started Package Includes Installation 2 Control Panel / Back Panel Control Panel Back Panel 3 On Screen Display 4 Technical
Xpresionn Digital Terrestrial Receiver. User Guide
 Xpresionn 2150 Digital Terrestrial Receiver User Guide GENERAL INFORMATION...3 A) SAFETY PRECAUTIONS...3 B) MAIN FEATURES...4 C) CONTENTS OF THE PACKAGING...4 D) REMOTE CONTROL...5 INSTALLATION...6 A)
TFTV7450M 72cm(29")HD LED TV/DVD Combo
HD LED TV/DVD Combo") TFTV7450M 72cm(29")HD LED TV/DVD Combo Table Of Contents Important Safety Instructions...2 View of Unit...4 Front Panel... 4 Right Side Panel... 4 Rear Panel... 5 Remote Control...6 Remote Control Drawing...
TFTV7450M 72cm(29")HD LED TV/DVD Combo Table Of Contents Important Safety Instructions...2 View of Unit...4 Front Panel... 4 Right Side Panel... 4 Rear Panel... 5 Remote Control...6 Remote Control Drawing...
61CM CORDLESS REMOTE COLOUR TELEVISION MODEL: Type Tested Electrical Safety AS/NZS 3250 Lic 4165 Standards Australia APP No: N16712
 OWNER'S MANUAL 61CM CORDLESS REMOTE COLOUR TELEVISION MODEL: 6159 Type Tested Electrical Safety AS/NZS 3250 Lic 4165 Standards Australia APP No: N16712 PALSONIC CORPORATION PTY LTD 1 JOYNTON AVENUE WATERLOO
Contents. Contents. Important safety instructions Wall mounting the set. Important safety instructions Wall Mounting the Set
 Contents Contents Important safety instructions Wall mounting the set 2 4 Important safety instructions Wall Mounting the Set Introduciton 5 6 7 10 10 11 11 11 12 12 13 13 Controls Connection options Remote
GENERAL INFORMATION INSTALLATION MENU INFORMATION. Main Features For your Safety Unpacking General Operation RCU Rear Panel.
 GENERAL INFORMATION 3 Main Features For your Safety Unpacking General Operation RCU Rear Panel 3 4 7 7 8 9 INSTALLATION 10 MENU INFORMATION Main Menu 1. Installation 1.1 Satellite list 1.2 Dish Setting
DVB-T2. Digital Terrestrial Receiver WD-822T2 USER S MANUAL
 DVB-T2 Digital Terrestrial Receiver WD-822T2 USER S MANUAL Index Important Safety Instructions... 3 Main Features.... 5 Front and Rear Panel.... 6 Remote Control..... 7 Installing the Batteries..... 8
VITEK VTM-TLM191 VTM-TLM240
 VTM-TLM191 VTM-TLM240 19 & 24 Professional LED Monitors with HDMI, VGA, and Looping BNC VITEK FEATURES 19 & 24 Wide Screen LED Display Panel HDMI, VGA, and Looping BNC Composite Video Inputs & Stereo Audio
LT-50N530Z 50" class INPUT
 LT-50N530Z 50" class INPUT Safety warning Important Safety Instructions Wall Mount Specifications Electronic Program Guide Lock Menu 18 PVR File System 11 11 11 14 15 16 17 19 20 21 21 22 23 24 25 Safety
User Manual LED TV CLOUD TV 55SU CLOUD TV 65SU. Design and Specification are subject to change without prior notice
 User Manual Thank you for purchasing CloudWalker LED TV. Please feel free to reach out to us for any service related query/complaints or for any feedback/suggesstions on the contact details mentioned below
17" & 19" Color TFT LCD Monitor
 17" & 19" Color TFT LCD Monitor KMC-17B & KMC-19B User's Manual for Operation and installation Screen Size : KMC-17B (17" inch TFT LCD) KMC-19B (19" inch TFT LCD) Display Size : KMC-17B (337.920mm X 270.336mm)
User Manual of digital Set Top Box PAT1 02
 User Manual of digital Set Top Box PAT1 02 Please read this User Manual carefully to ensure proper use of this product and keep this manual for future reference. Important Safety Instructions 1) Read these
10.4" LCD Monitor with Aluminum Front Bezel YPM1040PHB
 SPECIFICATION FOR APPROVAL M0DEL: 10.4" LCD Monitor with Aluminum Front Bezel YPM1040PHB BASE MODEL Customer's Confirmation Approved by: Reviewed by: Prepared by: Supplier's Confirmation Approved by: Reviewed
HD Digital Set-Top Box Quick Start Guide
 HD Digital Set-Top Box Quick Start Guide Eagle Communications HD Digital Set-Top Box Important Safety Instructions WARNING TO REDUCE THE RISK OF FIRE OR ELECTRIC SHOCK, DO NOT EXPOSE THIS PRODUCT TO RAIN
SIZE/WEIGHT - AX Size (without base): 447 x 40 x 270 mm - Size (with base): 447 x 160 x 309 mm - Net weight: 3.4 kg (no stand/packaging)
: 447 x 40 x 270 mm - Size (with base): 447 x 160 x 309 mm - Net weight: 3.4 kg (no stand/packaging)") STANDBY MUTE PROGRAM FAV CH GOTO SUBTITLE A-B AUDIO ASPECT HOLD INDEX SIZE EPG RAVEAL TEXT REC ANGLE DISPLAY REPEAT D.SETUP D.MENU TITLE EJECT ZOOM MIX SUBPAGE TIMESHIFT TV/RADIO AX1519/AX1522/AX1524/AX1532
STANDBY MUTE PROGRAM FAV CH GOTO SUBTITLE A-B AUDIO ASPECT HOLD INDEX SIZE EPG RAVEAL TEXT REC ANGLE DISPLAY REPEAT D.SETUP D.MENU TITLE EJECT ZOOM MIX SUBPAGE TIMESHIFT TV/RADIO AX1519/AX1522/AX1524/AX1532
USER MANUAL. 27 Full HD Widescreen LED Monitor L270E
 USER MANUAL 27 Full HD Widescreen LED Monitor L270E TABLE OF CONTENTS 1 Getting Started 2 Control Panel/ Back Panel 3 On Screen Display 4 Technical Specs 5 Care & Maintenance 6 Troubleshooting 7 Safety
LED LCD TV OWNER' S MANUAL
 LED LCD TV OWNER' S MANUAL MODEL: LE22T1000F LE24T1000F Please READ this manual carefully before operating your TV, and retain it for future reference Contents 1 Safety and warnings...2-3 2 Introduction...4
EDISION OS mega VIEWS
 + + H.265 HEVC VIEWS 1 2 3 4 5 Front view: 1. Power Button Switch between operation and standby modes 2. Display current menu information and channel name etc. 3. USB Connect to the External HDD or USB
26 HD READY DIGITAL LCD TV WITH DVD PLAYER
 M26DVDB19 26 HD READY DIGITAL LCD TV WITH DVD PLAYER INSTRUCTION MANUAL Safety Warnings Read all the instructions carefully before using the unit and keep them for future reference. Retain the manual.
USER MANUAL. 28" 4K Ultra HD Monitor L28TN4K
 USER MANUAL 28" 4K Ultra HD Monitor L28TN4K TABLE OF CONTENTS 1 Getting Started 2 Control Panel/ Back Panel 3 On Screen Display 4 Technical Specs 5 Care & Maintenance 6 Troubleshooting 7 Safety Info &
USER S Manual NGLT104WPD NGLT150WPD LCD TV / Monitor (IP67 Grade)
") USER S Manual NGLT104WPD NGLT150WPD LCD TV / Monitor (IP67 Grade) This Manual is revisable without further notice Contents CONTENTS ------------------------------------------------------------------- 1
USER S Manual NGLT104WPD NGLT150WPD LCD TV / Monitor (IP67 Grade) This Manual is revisable without further notice Contents CONTENTS ------------------------------------------------------------------- 1
26 HD Ready Digital LCD TV with DVD Player
 26 HD Ready Digital LCD TV with DVD Player Instruction Manual L26DVDB10 L26DVDB10_IB_final110210_running change3.indd 1 10/02/2011 3:36 PM Contents Preparation... 4 Unpacking the TV...4 Installing / Removing
E-LED TV 32 DVB-T2. Please read these instructions before operating your set and retain them for future reference. Model: J32E601B2 EUF4ZX-E011 ENG
 E-LED TV 32 DVB-T2 ENG Operating Instruction Please read these instructions before operating your set and retain them for future reference. Model: J32E601B2 EUF4ZX-E011 PRECAUTION ENG 1. Read these instructions.
Front and Rear Panel Remote Control Connecting to a Television...4. Connecting to an Audio System...5
 Table of Contents Front and Rear Panel... 1 Remote Control...... 2 Connecting to a Television...4 Connecting to an Audio System...5 Connecting to a DVD Recorder or VCR... 6 First Time Installation... 7
Table of Contents Safety Precautions 1.1 Safety Precautions... Introduction to the Product 2.1 Features Important Information
 best, and Table of Contents Safety Precautions 1.1 Safety Precautions..... 1 Introduction to the Product 2.1 Features..... 3 2.2 Important Information... 4 2.3 The Device and Accessories... 5 Functional
SAFETY WARNINGS AND GUIDELINES
 SAFETY WARNINGS AND GUIDELINES Please read this manual thoroughly, paying extra attention to these safety warnings and guidelines: Do not expose this monitor to water or moisture of any kind. Do not handle
AUTO - SCANNING WITH DIGITAL CONTROL LCD COLOR MONITOR FS-L1903C. User manual (Rev.01) SMITHS HEIMANN
 SMITHS HEIMANN") AUTO - SCANNING WITH DIGITAL CONTROL LCD COLOR MONITOR FS-L1903C User manual (Rev.01) SMITHS HEIMANN www.smithsdetection.com Table of Contents Safety Instructions... 5 Accessories... 8 Power Connections...
AUTO - SCANNING WITH DIGITAL CONTROL LCD COLOR MONITOR FS-L1903C User manual (Rev.01) SMITHS HEIMANN www.smithsdetection.com Table of Contents Safety Instructions... 5 Accessories... 8 Power Connections...
p LCD Television with LED Backlight and Built-in DVD Player MODEL: TL23K1-DTP
 23 1080p LCD Television with LED Backlight and Built-in DVD Player MODEL: TL23K1-DTP 17 Contents Contents Caution Safety Information Unit and Accessories 2 3 4 Introduction 5-9 1. Front View 5 2. Rear
User Manual TFTV4000FHD FHD LCD TV. PALSONIC CUSTOMER SERVICE Telephone AUSTRALIA :
 User Manual TFTV4000FHD FHD LCD TV PALSONIC CUSTOMER SERVICE Telephone AUSTRALIA : 1300 657 888 www.palsonic.com.au Important safety information nglish CAUTION RISK OF ELECTRIC SHOCK; DO NOT OPEN WARNING
Channel Management Favorite Management Country Auto Search DTV Manual Search ATV Manual Search
 C20230F-LED 3 4 5 6 7-8 9 9 10 10 11 11 12 12 13 13 14-15 15 15 15 15 16-17 18 18 18 Management Favorite Management Country Auto Search DTV Manual Search ATV Manual Search 19 19 19 20 20 21 21 Setting
LED LCD TV OWNER' S MANUAL
 LED LCD TV OWNER' S MANUAL MODEL: LE22M600 LE24M600 Please READ this manual carefully before operating your TV, and retain it for future reference Contents 1 Safety and warnings...2-3 2 Introduction...4
23 Wide Screen LCD TV
 23 Wide Screen LCD TV DFT-2370 FULL HD USER S MANUAL 8 8-9 10 11 11 12 13-14 15 1 2 User s Manual Mains cable This User Guide 3 Indicator on(red) Indicator on(null) Standby mode Power on mode TV/AV 9
24 HD Ready 1080p Digital LCD TV. Instruction Manual L24DIGB10
 24 HD Ready 1080p Digital LCD TV Instruction Manual L24DIGB10 Contents Preparation... 4 Unpacking the TV...4 Installing / Removing the Base Stand...5 Front / Top / Side View and Controls...6 Rear View
INSTRUCTION MANUAL. 19 HD Widescreen Water Resistant Television VSPA19LCD-AE1B VSPA19LCD-AE1M VSPA19LCD-AE1W. Model No. FINGER TOUCH TECHNOLOGY RATED
 INSTRUCTION MANUAL 19 HD Widescreen Water Resistant Television VSPA19LCD-AE1B Model No. VSPA19LCD-AE1M VSPA19LCD-AE1W FINGER TOUCH TECHNOLOGY IMPORTANT: Please read these instructions before installing