Register your product and get support at User manual 47PFL7864H 47PFL7404H 47PFL5604H
|
|
|
- Hugh Mason
- 6 years ago
- Views:
Transcription

1 Register your product and get support at EN User manual 47PFL7864H 47PFL7404H 47PFL5604H
2 Contact information Type nr. Product nr. België / Belgique / min Danmark Lokalt opkald Luxembourg / Luxemburg Ortsgespräch Appel local Nederland / min United Kingdom Local Estonia Local Magyarország Ingyenes hívás Romānä gratuit Deutschland / min France / min Norge Lokalsamtale Österreich / min Lithuania Local Latvia Local Россия - Moсква (495) Местный звонок Местный звонок Ελλάδα Κλήση χωρίς χρέωση España / min Italia / min Portugal Chamada local Suisse / Schweiz / Svizzera Ortsgespräch Appel local Chiamata locale Sverige Lokalsamtal Kaзaкcтaн Local Бълария Местен разговор Hrvatska Lokalni poziv Србија Lokalni poziv Slovakia Bezplatný hovor Slovenija Lokalni klic Ireland Free Northern Ireland Suomi paikallispuhelu Česká republika Bezplatný hovor Polska połączenie lokalne Türkiye Şehiriçi arama Україна Мicцeвий виклик
3 1.1.1 Enjoy HD This TV can display High Definition programmes, but to enjoy HD TV you need to get programmes in HD first. If you are not watching HD programmes, the picture quality will be that of a normal TV. You can receive programmes in High Definition from... Contact your dealer for more information. Go to to find FAQ s featuring the list of HD channels or providers in your country. a digital HD receiver, connected with an HDMI cable, with a subscription to HD channels from a cable or satellite company a Blu-ray/DVD player, connected with a HDMI cable, with a HD Movie an Over-the-air HD broadcaster (DVB-T MPEG4) an HD channel on your DVB-C network an HD Game console (Xbox 360 / PlayStation 3), connected with an HDMI cable, with an HD game.
4 1.1.2 Safety Read and understand all instructions before you use your TV. If damage is caused by failure to follow instructions, the warranty does not apply. 1/5 Risk of electric shock or fire! Never expose the TV to rain or water. Never place liquid containers, such as vases, near the TV. If liquids are spilt on or into the TV, disconnect the TV from the power outlet immediately. Contact Philips Consumer Care to have the TV checked before use....
5 1.1.2 Safety Never insert objects into the ventilation slots or other openings on the TV. When the TV is swivelled ensure that no strain is exerted on the power cord. Strain on the power cord can loosen connections and cause arcing. Never place the TV, remote control or batteries near naked flames or other heat sources, including direct sunlight. To prevent the spread of fire, keep candles or other flames away from the TV, remote control and batteries at all times.... 2/5
6 1.1.2 Safety Risk of short circuit or fire! Never expose the remote control or batteries to rain, water or excessive heat. Avoid force coming onto power plugs. Loose power plugs can cause arcing or fire. Risk of injury or damage to the TV! Two people are required to lift and carry a TV that weighs more than 55 lbs. When stand mounting the TV, use only the supplied stand. Secure the stand to the TV tightly. Place the TV on a flat, level surface that can support the combined weight of the TV and the stand. 3/5 When wall mounting the TV, use only a wall mount that can support the weight of the TV. Secure the wall mount to a wall that can support the combined weight of the TV and wall mount. Koninklijke Philips Electronics N.V. bears no responsibility for improper wall mounting that results in accident, injury or damage. Before you connect the TV to the power outlet, ensure that the power voltage matches the value printed on the back of the TV. Never connect the TV to the power outlet if the voltage is different....
7 1.1.2 Safety Risk of injury to children! Follow these precautions to prevent the TV from toppling over and causing injury to children: Never place the TV on a surface covered by a cloth or other material that can be pulled away. Ensure that no part of the TV hangs over the edge of the mounting surface. 4/5 Never place the TV on tall furniture, such as a bookcase, without anchoring both the furniture and TV to the wall or a suitable support. Educate children about the dangers of climbing on furniture to reach the TV. Risk of overheating! Never install the TV in a confined space. Always leave a space of at least 4 inches around the TV for ventilation. Ensure curtains or other objects never cover the ventilation slots on the TV....
8 1.1.2 Safety 5/5 Risk of injury, fire or power cord damage! Risk of hearing damage! Never place the TV or any objects on the power cord. Avoid using earphones or headphones at high volumes or for prolonged periods of time. To easily disconnect the TV power cord from the power outlet, ensure that you have full access to the power cord at all times. When you disconnect the power cord, always pull the plug, never the cable. Disconnect the TV from the power outlet and aerial before lightning storms. During lightning storms, never touch any part of the TV, power cord or aerial cable. Low temperatures If the TV is transported in temperatures below 5 C, unpack the TV and wait until the TV temperature matches room temperature before connecting the TV to the power outlet.

9 1.1.3 Position the TV Carefully read the safety precautions before positioning the TV. Position the TV where light does not shine directly on the screen.
10 1.1.4 Viewing distance Position the TV at the ideal viewing distance. Benefit more from HD TV picture or any picture without straining your eyes. Find the 'sweet spot', right in front of the TV, for the best possible TV experience and relaxed viewing. The ideal distance to watch TV from is three times its diagonal screen size. While seated, your eyes should be level with the centre of the screen.

11 1.1.5 Security slot Your TV is equipped with a Kensington security slot at the back of the TV. Purchase a Kensington anti-theft lock (not supplied) to secure the TV.
12 1.1.6 Screen care Risk of damage to the TV screen! Never touch, push, rub or strike the screen with any object. Unplug the TV before cleaning. Clean the TV and frame with a soft damp cloth. Never use substances such as alcohol, chemicals or household cleaners on the TV. To avoid deformations and colour fading, wipe off water drops as soon as possible. Avoid stationary images as much as possible. Stationary images are images that remain on-screen for extended periods of time. Stationary images include on-screen menus, black bars, time displays, etc. If you must use stationary images, reduce screen contrast and brightness to avoid screen damage.
13 1.1.7 End of use Your product is designed and manufactured with high quality materials and components, which can be recycled and reused.... 1/3

14 1.1.7 End of use When this crossed-out wheeled bin symbol is attached to a product it means that the product is covered by the European Directive 2002/96/EC. Please inform yourself about the local separate collection system for electrical and electronic products. Please act according to your local rules and do not dispose of your old products with your normal household waste. Correct disposal of your old product helps to prevent potential negative consequences for the environment and human health.... 2/3
15 1.1.7 End of use Your product contains batteries covered by the European Directive 2006/66/EC, which cannot be disposed with normal household waste. Please inform yourself about the local rules on separate collection of batteries because correct disposal helps to prevent negative consequences for the environmental and human health. 3/3
16 1.2.1 Switch on It takes a few seconds for the TV to start up. If the red standby indicator is off, press O at the right of the TV to switch it on. Press O again to switch off. The white LED flashes during start up and switches on when the TV is ready for use. You can set the white LED off permanently or set its brightness. Press h> Setup > Installation > Preferences > LightGuide brightness.
17 1.2.2 Volume V The keys on the side of the TV allow basic TV control. You can adjust the volume with Volume + / - on the side of the TV.
18 1.2.3 Programme P The keys on the side of the TV allow basic TV control. You can switch TV channels with Program + / - on the side of the TV.
19 1.2.4 Source key The keys on the side of the TV allow basic TV control. To view connected sources, press Source s continuously to select different sources.

20 1.2.5 IR sensor Always take care to point the remote control at the remote control infra red sensor on the front of the TV.

21 1.3.1 VESA info Your TV is prepared for VESA compliant wall mounting. A VESA wall mount bracket is not included. Use the following VESA code to purchase the bracket. 19 / 48cm VESA MIS-D 75, 4 22 / 56cm VESA MIS-D 100, 4 26 / 69cm VESA MIS-E 200, 100, 4 32 / 81cm VESA MIS-F 200, 200, 6 37 / 94cm VESA MIS-F 200, 200, 6 42 / 107cm VESA MIS-F 400, 400, 6 47 / 119cm VESA MIS-F 400, 400, 8 52 / 132cm VESA MIS-F 400, 400, 8 Use a screw length as shown in the drawing.

22 1.3.2 Unmount the stand 32-52" models: Unscrew the 4 stand screws on the back of the TV, before you lift the TV from the stand. 1/2
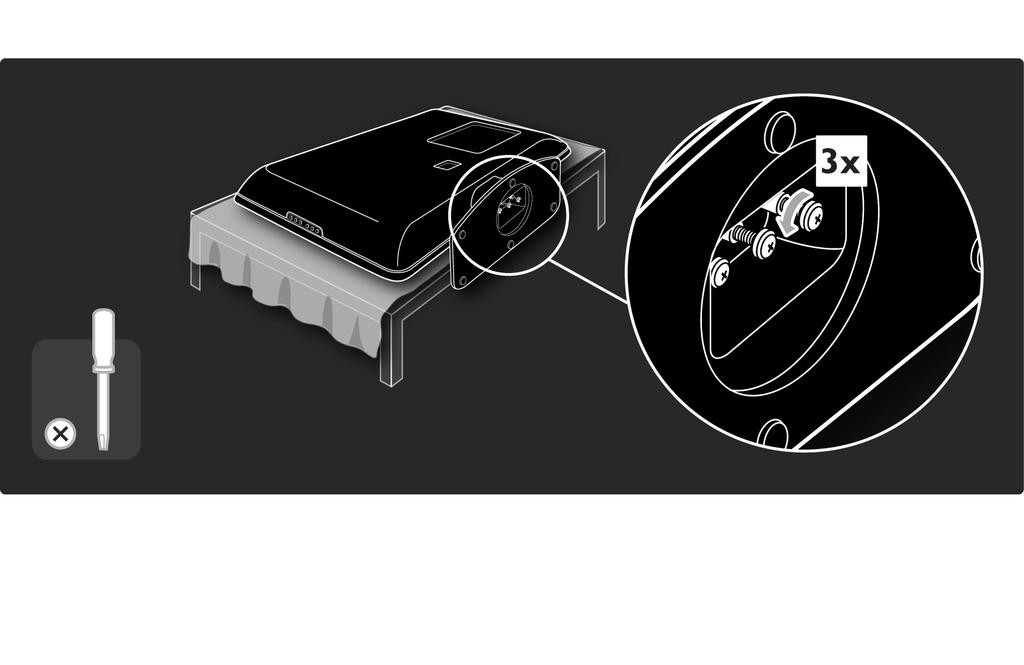
23 1.3.2 Unmount the stand 19-26" models: Partially unscrew the 3 screws under the stand, before you detach the TV from the stand. 2/2
24
25 1.4.1 Full High Definition LCD display* This TV is equipped with a full High Definition (HD) display. A full HD 1920x1080p, the highest resolution of HD sources. This display offers a brilliant flicker free progressive scan picture with optimum brightness and superb colours. * Certain models are equipped with a HD display only. For detailed product information, go to support. To enjoy HD TV you need to get programmes in HD first. If you are not watching HD programmes, the picture quality will be that of a normal TV. Read Get started > Important > Enjoy HD TV
26 1.4.2 DVB-T/DVB-T Lite and DVB-C integrated tuner In addition to normal analogue TV broadcasts, your TV can receive digital terrestrial (DVB-T/DVB-T Lite) and in certain countries, also digital cable (DVB-C) TV and radio broadcasts. DVB Digital Video Broadcasting gives you better picture and better sound quality. Some broadcasters have several audio (speech) and/or teletext languages available. Verify if the TV supports DVB-T/DVB-T Lite or DVB-C in your country. Check the 'Digital TV Country Compatibility' sticker on the back of the TV.
27 1.4.3 Electronic Programme Guide* The EPG is an on-screen guide to scheduled TV programmes. This guide is provided by digital broadcasters. You can read the programme summary, set a message to remind you when the programme starts or select programmes by genre. Read More on > Electronic Programme Guide. * EPG is not available in all countries.
28 1.4.4 USB connection View or play your own multimedia files (photos, music, videos, ) from the USB connection on the side of the TV.
29 1.5.1 On-screen You are reading the built in user manual. This manual contains all of the information needed to install and operate this TV. You can open or close the user manual with the yellow key on the remote control. Alternatively, access the user manual via the Home menu. Before you carry out the instructions, close the manual with the yellow key. When you open the manual again, it opens on the same page you left it.
30 1.5.2 On the internet A printable version of the user manual is available on the internet. View or print the user manual at
31 1.6 Open source licenses

32 2.1.1 Remote control overview 1/6 1 Standby O To switch the TV on or back to standby. 2 Home h To open or close the Home menu. 3 Guide g To open or close the Electronic Programme Guide. To open or close the content list when you browse multimedia content. 4 Options o To open or close the options menu which shows the available options....

33 2.1.1 Remote control overview 2/6 5 Navigation key To navigate up, down, left or right. 6 OK key To open the channel overview To activate a selection 7 Back b P/P To return to the previous menu screen. To return to the previous channel (UK only: Not supported on MHEG channels). 8 Info i To show channel or programme information, if available....

34 2.1.1 Remote control overview 3/6 9 Audio Video keys T, P, Q, S, R To play multimedia files (from USB device). Also used to control EasyLink HDMI-CEC compliant devices. 10 Volume V To adjust the volume. 11 Mute m To mute the sound or restore it. 12 Channel / Programme up and down To switch to the next or previous channel in the channel overview. To switch to the next or previous teletext page. 13 Format f To select a picture format....
35 2.1.1 Remote control overview 4/6 14 TV key To switch back to the antenna source. 15 Subtitle To enable or disable subtitles. 16 MHEG / Teletext To open or close MHEG / Teletext. 17 Source s To select a connected device from the Source list....

36 2.1.1 Remote control overview 5/6 18 Red key / Demo To open or close the Demo menu Easy page selection in Teletext 19 Green key / SCENEA Easy page selection in Teletext Scenea transforms your TV into a personalized photo frame. Not supported on all models. 20 Yellow key / e To open or close the user manual Easy page selection in Teletext 21 Blue key / AD Easy page selection in Teletext AD (Audio Descriptor) enables audio commentary for the visually handicapped. Not supported on all models....

37 2.1.1 Remote control overview 6/6 22 Number keys To select a TV channel or enter digits and text. 23 Sound N To open or close the Sound menu. 24 Picture A To open or close the Picture menu.
. Remove the batteries if you have not used the remote control for a long time.")
38 2.1.2 Batteries Open the battery cover on the back of the remote control to insert the 2 batteries supplied (Type AAA-LR03-1.5V). Make sure the + and - ends of the batteries line up correctly (+ and - are marked inside). Remove the batteries if you have not used the remote control for a long time. Dispose of batteries according to the end of use directives. Read Get started > Important > End of use.
39 2.2.1 Channel overview While watching TV, press OK to open the Channel overview. This overview shows the TV channels and possible radio stations installed on your TV. Navigate to a channel or station with the u or v, w or x keys. Press OK to watch or listen to the selected channel or station. Press Back b to leave the channel overview without changing the channel. 1/3 With the Channel overview on screen you can press Options o to access the following functions: Select list Select which channels are shown in the Channel overview. When a filter is set in the Channel overview, press P+/- to go through the channels of the filtered overview, while watching TV. Mark as favourite When a channel is highlighted in the Channel overview, you can set it as a favourite channel. Read More on > Favourite channels....
40 2.2.1 Channel overview 2/3 Reorder Rename You can reposition channels within the overview. You can rename a channel. 1 Select Reorder in the Options o menu to start reordering channels. 1 In the channel overview, navigate to the channel you want to rename. 2 Highlight a channel and press OK. 2 Select Rename in the Options o menu. 3 Reposition the channel where you want it with the navigation keys. 4 Press OK to confirm the position. 3 Press Back b to delete a character. Use the remote control number pad as you do for SMS/text messaging to scroll to the character you need. Use the 0 number key to enter a special character. Press OK to end the text input. You can highlight another channel and do the same. 4 Select Done and press OK to end Rename. To stop Reorder, press Options o and select Exit reorder....
41 2.2.1 Channel overview 3/3 Show hidden channels Hide channel You can show all channels, including all hidden channels. You can unhide or hide channels. Select this option when you want to hide a channel in the Channel overview. When you hide a channel, it will be hidden next time you open the Channel overview. 1 Select Show hidden channels from the Options o menu. 2 Navigate to a channel. 3 Press Options o and select Hide or Unhide channel. You can navigate to another channel and do the same. To exit the Show hidden channels view, select Exit hidden channels in the Options menu. The overview is adapted the next time you open it. To unhide hidden channels select the Show hidden channels from the Options o menu.
42 2.2.2 Homeh The Home menu lists the activities you can do with your TV. Press h to open the Home menu. To start an activity, highlight the desired item with the navigation keys and press OK. You can add an activity, always linked to a device, with the Add your devices item. To exit the Home menu, press h again.
43 2.2.3 Add your devices When you have connected a device to the TV, always add this device as an item in the Home menu. With this item in the Home menu, you can easily switch the TV to this device. In the Home menu, select Add your devices and press OK. Follow the instructions on screen. The TV asks you to select the device and the connector to which the device is connected. From now on, this device is added to the Home menu. To remove a device item from the Home menu, select the item, press Options o and select Remove device in the list. Press OK.
44 2.2.4 Setup The Setup item in the Home menu holds most TV settings. In the Setup menu you can... set picture or sound settings set some special features update or re-install TV channels update the TV software... In the Home menu, select Setup and press OK. Select an item with the w or x, u or v keys and press OK. To exit the Setup menu, press Back b.

45 2.2.5 Options o The Options menu offers convenient settings related to what is on screen. Press Options o in any circumstance to see which options are available. To exit, press Options o again.
46 2.2.6 Electronic Programme Guide You can view a list of scheduled TV programmes with the Electronic Programme Guide (EPG) menu (only for digital broadcasts in certain countries). Also, use the Guide key to view the list of your photos, music or videos from a connected USB memory device. While watching TV, press Guide g to open the EPG, if this information is available. When browsing your USB memory device, press Guide g to show the content. Read More on > Electronic Programme Guide or More on > Multimedia.
47 2.3.1 Switch channels To switch TV channels, press P + or on the remote control. You can use the number keys if you know the channel number. To switch back to the previous viewed channel, press Back b. If digital broadcasting is available, digital radio stations are installed during installation. Switch to a radio channel as you would do for TV channels. Radio stations usually start from channel number 400 onwards. Channel overview While watching TV, press OK to open the Channel overview. Select the channel with the navigation keys and press OK to switch to the channel. To leave the channel overview without changing the channel, press Back b.
48 2.3.2 Programme info When watching a digital TV channel, information on the current and next programme is available. While watching TV, press Info i to open the programme information on the channel you are watching. To close the programme information, press Info i again. Options o When the programme information is on screen, press Options o to access information on the quality of the digital channel you are watching.
49 2.3.3 Switch to standby If the TV is on, press O on the remote control to switch to standby. The red standby key indicator is on. Although the TV consumes very little power when in standby, energy continues to be consumed. When the TV is not in use for an extended period of time, we advise to switch the TV off with the O key on the TV and to unplug the TV mains cord from the mains outlet. If you can not locate your remote control and you want to switch the TV to Standby, press O on the side of the TV. This switches off your TV. To switch the TV back on, press O again.
50 2.3.4 Smart Settings You can set the TV to the predefined setting that is best for what you're watching at the moment. Each setting combines picture and sound. Personal Sets the TV to your personal preferences set in the Picture and Sound menus. While watching TV, press Options o and select Picture and sound. Press OK. Standard Factory standard settings. Select Smart settings and press OK. Select a setting from the list and press OK. Vivid Rich and dynamic settings, ideal for daylight use. Cinema Ideal settings for watching movies. Game Ideal settings for gaming. Energy saving with the most energy conscious settings.
51 2.3.5 Picture format 1/2 If black bars appear in the screen, adjust the picture format. Ideally change the picture format to a format that fills the screen. You can select the following picture format settings... While watching TV, press Format f to switch on the Picture format menu, select an available picture format and press OK. Enlarges the picture automatically to fill the screen. Minimal picture distortion, subtitles remain visible. If subtitles are hidden in a programme, press u to shift the picture upwards. In the Setup > Picture > Auto format mode menu you can select 2 Auto format settings... Auto format Not fit for PC. Auto-fill, to fill the screen as much as possible. Autozoom, to keep the original picture format, black bars may be visible....
52 2.3.5 Picture format 2/2 Super zoom Wide screen Removes the black bars on the side of 4:3 broadcasts. The picture is adjusted to fit the screen. Stretches the format to 16:9. 4:3 format Displays programme in the 4:3 format. Movie expand 16:9 Scales the format to 16:9. Unscaled Maximum sharpness. Distortion may appear on borders. Black bars may appear with pictures from your PC. Only for HD and PC.
53 2.4 Watch a DVD movie To watch a DVD movie using your DVD player, switch on your DVD player, insert a disc and press Play on the player. The DVD picture automatically appears on the screen if the DVD player is connected by HDMI and is EasyLink HDMICEC compliant. If the DVD picture does not appear, press h on the remote control and select DVD player. Press OK. Wait a few seconds until the DVD picture appears. If the DVD player is not yet in the Home menu, read Get started > Menus > Add your devices.
54 2.5 Watch TV using a digital receiver When you watch TV using a digital receiver, with a subscription from a cable or satellite company, connect the receiver and add the receiver to the Home menu. To add the receiver to the Home menu, read Get started > Menus > Add your devices. To watch the receiver programme, switch on the receiver. If the receiver programme does not appear automatically, press h and select the receiver item in the Home menu. Press OK. Use the remote control of the digital receiver to select TV channels.
55 2.6 Watch TV from a connected device When you have added a connected device as an item to the Home menu, you can easily and directly select that device to watch its programme. To add the device to the Home menu, read Use your TV > Menus > Add your devices. To watch TV from a connected device, press h and select the device item in the Home menu. Press OK. If the connected device is not in the Home menu, select the device from the Source menu. Press s Source on the remote control or at the side of the TV, to show the source list. Select the device or its connector and press OK.
56 3.1.1 Select a teletext page Most TV channels broadcast information through teletext. While watching TV, press MHEG / Teletext. To exit teletext, press MHEG / Teletext again. To select a page Enter the page number with the number keys. Press P +/- or u or v or b to view the next or the previous page. Press a colour key to select a colour-coded item at the bottom of the screen.
57 3.1.2 Select a teletext language Some digital TV broadcasters have several teletext languages available. You can set your primary and secondary language. Press h > Setup > Installation > Languages > Primary or Secondary teletext and select your preferred teletext languages.
58 3.1.3 Select teletext subpages A teletext page number can hold several subpages. The pages are shown on a bar next to the main page number. Use w or x to select the subpages when they are available on a teletext page.

59 3.1.4 Select T.O.P. teletext You can easily jump from one subject to another without using page numbers with T.O.P. teletext. Not all channels broadcast T.O.P. teletext. Press Info i when teletext is switched on. The T.O.P. overview appears. Select a subject and press OK to view the page.
60 3.1.5 Search teletext In teletext, you can quickly jump to a subject linked to a series of page numbers. Also, you can search for specific words in teletext pages. Switch on teletext and press OK. The first word or first index number of the page is highlighted on-screen. Jump to the next word or number on the page with w or x, u or v. Press OK to search for a page featuring the highlighted word or number. Each time you press OK, the next page featuring the highlighted word or number is shown. To exit Search, press MHEG / Teletext.
61 3.1.6 Teletext options 1/2 When in teletext, press Options o on the remote control to reveal hidden info, let subpages cycle automatically, change the character setting, freeze a teletext page, view the TV channel and teletext simultaneously or show a teletext page full screen again. Dual screen / Full screen Freeze page Select the option Full screen to show full screen teletext again. Stop the automatic rotation of subpages or stop the page counter when you have entered a wrong page number or when the page is not available. Not available for channels with Digital Text services. Select Dual screen to view the TV channel and teletext alongside each other. Reveal Hide or unhide hidden information on a page, such as solutions to riddles or puzzles....
62 3.1.6 Teletext options 2/2 Cycle subpages Enlarge teletext page If subpages are available for the selected page, you can make subpages cycle automatically. You can enlarge the teletext page for more comfortable reading. Language In teletext, press f to enlarge the top part of the page and f again to view the enlarged lower part of the page. With u or v you can scroll through the enlarged page. Some languages use a different set of characters. Switch to the other character group to show the text correctly. Press f again to return to the normal page size.
63 3.1.7 Digital text (UK only) Some digital TV broadcasters offer dedicated digital text or interactive services on their digital TV channels, for example BBC1. These services include normal teletext with the number, colour and navigation keys to select and navigate. While watching TV, press MHEG / Teletext and navigate to select or highlight items. Use the colour keys to select an option and press OK to confirm or activate. Press MHEG / Teletext again to cancel Digital text or interactive services. Digital text services are blocked when subtitles are broadcast and Subtitle On is set in the Features menu. Read Subtitles and languages > Subtitles.
64 3.1.8 Teletext 2.5 Teletext 2.5 offers more colours and better graphics, if broadcast by the TV channel. Teletext 2.5 is activated as a standard factory setting. To switch it off select h > Setup > Installation > Preferences > Teletext 2.5.
65 3.2 Favourite channels After you have finished the installation, all TV and radio channels are added to the Channel overview. In this overview, you can mark channels as favourites and set the Channel overview to only show these favourites. While watching TV, press OK to open the Channel overview. With a channel highlighted, press Options o. Select Mark as favourite to make the highlighted channel a favourite channel. Favourite channels are marked with a F. Unmark the channel as favourite with Unmark favourite. Select list With the Select list option in the Channel overview, you can set the overview to show only your favourite channels. Read Get started > Menus > Channel overview.
66 3.3.1 Electronic Programme Guide The Electronic Programme Guide (EPG) is an on-screen guide of scheduled TV programmes*. This guide is provided by the broadcasters. You can set a reminder to show a message when a programme starts or select programmes by genre. While watching TV, press Guide g to open the EPG. If available, a list of the current TV programmes appears. It may take some time to load this information. To exit the EPG, press Guide g. * EPG is not available in all countries. When available, you will receive either Now/Next or 8 Days EPG.... 1/3
67 3.3.1 Electronic Programme Guide Navigate through the list to select a programme. Info i To open the programme details and summary, press Info i. To show a message on-screen when the programme starts, select Set reminder and press OK. The programme is marked with. To cancel the message, select Clear reminder and press OK. To switch to the TV channel of the programme directly, select Watch channel and press OK. 2/3 Options o In the EPG list, press Options o to select the following... Set reminder If a reminder is set, the option Scheduled reminders is available with a list of all reminders. Change day View the previous or next day's programmes. More info Opens the info screen with details and a summary of the programme....
68 3.3.1 Electronic Programme Guide Search by genre View all programmes by genre. Select a programme and press Info i for more info or to set a reminder. List of preferred programmes Set channels to appear in the EPG list (max. 50 channels). 3/3
69 3.4.1 Sleeptimer With Sleeptimer you can switch the TV to standby at a specified time. Close the user manual and press h > Setup > Features > Sleeptimer. With the Sleeptimer slider bar you can set the time up to 180 minutes in steps of 5 minutes. If set to 0 minutes, Sleeptimer is switched off. You can always switch off your TV earlier or reset the time during countdown.
70 3.4.2 Child lock To prevent children from watching TV, you can lock the TV or block age rated programmes. Set your personal code Before you set Child lock to lock the TV or set an age rating, set your personal lock code in h > Setup > Features > Set code. Enter the four-number code with the number keys. You can always change the code if necessary. 1/2 Child lock Select Lock as Child lock setting, to lock all TV channels and the programmes from devices. When Lock is set, you need to enter your personal code to unlock the TV. The lock is activated the moment you close the menu on screen or set the TV in standby....
71 3.4.2 Child lock 2/2 Parental rating * Did you forget your code? Select Parental rating as Child lock setting, so that an age can be set in the Parental rating age list. Set the age of your child. Programmes with a higher rating will be blocked. Select Change code, press x and enter the overriding code To set an age rating in this list, read More on > Timers and locks > Age rating. * Parental rating is not available in all countries. Enter a new personal code and confirm. The previous code is erased and the new code is stored.
72 3.4.3 Age rating Some digital broadcasters, depending on your country, have their programmes rated. When the rating is higher than the rating you have set for your child s age, the programme will be blocked. To set an age rating, press h > Setup > Features > Child lock and select Parental rating. With Parental rating selected in Child lock go to h > Setup > Features > Parental rating and select the age rating for programmes that are allowed to be viewed. A programme with a higher age rating will be blocked and the TV will ask for the Lock code to unblock the programme. Age rating is activated the moment you close the menu on screen or set the TV in standby. Read More on > Timers and locks > Child lock.
73 3.5.1 Subtitles Programme subtitles are available most of the time. You can set subtitles to display constantly. Depending on the channel, an analogue or digital channel, a different method is used to set constant subtitles. For digital channels, a preferred subtitle language can be set. 1/3 For analogue channels To have subtitles constantly on-screen, select an analogue TV channel and press MHEG / Teletext to switch on teletext. Enter the three number page number of the subtitles page, usually 888, and press MHEG / Teletext again to switch off teletext. Subtitles will show if available. Each analogue channel needs to be set separately....
74 3.5.1 Subtitles For digital channels To switch subtitles on constantly, press Subtitle. Select Off, On or On during mute. With On during mute, the TV displays subtitles only when the sound is muted with m.... 2/3
75 3.5.1 Subtitles Digital channel subtitle languages If subtitles are available on digital channels, you can select a preferred subtitle language from a list of broadcast languages. See h > Setup > Features > Subtitle language. Select a subtitle language from the list of available languages and press OK. The preferred subtitle languages set in the Installation menu are overruled temporarily. 3/3
76 3.5.2 Audio languages Digital TV channels can broadcast several audio languages that go with the programme. You can set your preferred languages to switch to when these audio languages are broadcast. To set your preferred audio languages, press h > Setup > Installation > Languages > Primary language. You can also set a secondary language in the same Languages menu. The TV will automatically switch to the language you set, if the language is broadcast. To check if an audio language is available, press Options o and select Audio language. You can select another audio language from the list. Some digital TV channels broadcast special audio and subtitles adapted for people that are hearing or visually impaired. Read More on > Universal access.
77 3.5.2 Menu language When the TV was switched on for the first time, you selected a menu language. To change the menu language, press h > Setup > Installation > Languages > Menu language. The TV will automatically switch to the menu language you set.
78 3.6.1 Browse USB Watch photos or play music and videos on TV from a USB memory device. Insert a USB device in the USB connector on the left hand side of the TV while the TV is switched on. The TV detects the device and opens a list showing the content of the USB device on-screen. If the content does not show, press h > Browse USB and press OK. 1/2 While the USB content list is open on-screen, select the file you want to play and press OK or play P. A song, a slideshow of photos or a video starts playing. To pause, press P again. To jump to the next file, press x or P +. To jump to the previous file, press w or P -. To fast forward a music file, press Q. Press Options o to Play once, Repeat, Shuffle, Rotate and much more....
79 3.6.1 Browse USB Watch videos Select a video in the Guide menu and press play P. To pause the video, press pause P. To fast forward, press Q once to go slow, press twice to go fast. Press again for normal speed. Press Options o to change to Full screen, Small screen, Play once, etc. To exit Browse USB, press h and select another activity or disconnect the USB memory device. 2/2
80 3.7.1 Hearing impaired Some digital TV channels broadcast special audio and subtitles adapted for people who are hearing impaired. To switch on hearing impaired audio and subtitles, press h > Setup > Installation > Languages > Hearing impaired. Select On and press OK. The TV switches to hearing impaired audio and subtitles, if available. To verify whether a hearing impaired audio language is available, press Options o and select Audio language and look for an audio language with an ear icon.
81 3.7.2 Visually impaired Some digital TV channels broadcast special audio adapted for people who are visually impaired. The normal audio is mixed with extra commentary. To switch on visually impaired audio, press Options o while watching the digital TV channel and select visually impaired. Select On and press OK. The TV switches to visually impaired audio, if available. In the Options menu, you can set the visually impaired audio to be heard from the Speakers, the Headphones only or from both Speakers and headphones. Also in the Options menu, select Volume - Visually impaired to change the volume of the extra commentary. To verify whether a visually impaired audio language is available, press Options o and select Audio language and look for an audio language with an eye icon.
82 4.1.1 Smart settings You can set the TV to the predefined setting that is best for what you're watching at the moment. Each setting combines picture and sound. Personal Sets the TV to your personal preferences set in the Picture and Sound menus in Setup. While watching TV, press Options o and select Picture and sound. Press OK. Standard Factory standard settings. Select Smart settings and press OK. Select a setting from the list and press OK. Vivid Rich and dynamic settings, ideal for daylight use. Cinema Ideal settings for watching movies. Game Ideal settings for gaming. Energy saving with the most energy conscious settings.
83 4.1.2 Picture In the Picture menu, you can adjust all picture settings individually. Close this user manual and press h > Setup > Picture. Use w or x, u or v to select and adjust a setting. Press OK to activate a setting. 1/4 Settings assistant Start the Settings assistant to guide you through basic picture settings easily. Follow the instructions on screen. Contrast Changes the level of brightness in the picture but the level of darkness remains the same. Brightness Changes the level of light in the whole picture. Colour Changes the level of saturation....
84 4.1.2 Picture 2/4 Hue Custom tint If NTSC is broadcast, this level compensates the colour variations. Use a slider bar to change the colour temperature of the picture Sharpness - R-WP red whitepoint Changes the level of sharpness of fine details. - G-WP green whitepoint Noise reduction - B-WP blue whitepoint Filters out and reduces the noise in the picture. Set levels to Minimum, Medium, Maximum or Off. - R-BL red blacklevel Tint Sets the colours to Normal, Warm (reddish) or Cool (bluish). Select Custom to make your own personal settings in the Custom menu. - G-BL green blacklevel...
85 4.1.2 Picture 3/4 Pixel Plus/Pixel Precise HD - Dynamic contrast Controls the advanced settings of Pixel Plus/Pixel Precise HD. Sets the level at which the TV automatically enhances the details in the dark, middle and light areas of the picture. - HD Natural Motion - Dynamic backlight Removes motion judder and reproduces smooth movement, especially in movies. This setting is not available on all models. Sets the level at which power consumption can be reduced by dimming the brightness intensity of the screen. Choose for the best power consumption or for the picture with the best brightness intensity Hz LCD Offers a fast pixel response time for extreme motion sharpness for all your movies and sports. This setting is not available on all models....
86 4.1.2 Picture 4/4 - MPEG artefact reduction Light sensor Smooths the digital transitions in the picture. Adjusts the picture settings automatically to the lighting conditions of the room. Switches the Light sensor on or off. - Colour enhancement Makes the colours more vivid and improves the resolution of details in bright colours PC mode Sets the TV to the ideal predefined computer setting in case a computer has been connected. Picture format / auto format mode Read Use your TV > Watch TV > Picture format Picture shift To shift the picture vertically on the screen with the navigation keys.
87 4.1.3 Sound In the Sound menu, you can adjust all sound settings individually. Close the user manual and press h > Setup > Sound. Use w or x, u or v to select and adjust a setting. Press OK to activate a setting. 1/3 Bass Changes the low tones of the sound. Select each bar to change the setting. Treble Changes the high tones of the sound. Use each slider bar to change the setting. Volume Changes the volume. If you do not want the volume bar to appear, press h > Setup > Installation > Preferences > Volume bar. Select Off and press OK....
88 4.1.3 Sound 2/3 Audio language Mono/stereo Shows the list of broadcast audio languages of digital TV channels. If stereo broadcasting is available, you can select Mono or Stereo for each TV channel. You can set your preferred audio language in h > Setup > Installation > Languages > Primary audio. TV speakers Dual I/II If you have an audio system connected to your TV, you can switch off the TV speakers. If broadcast, you can choose between two different languages. If your audio system supports EasyLink, read Connections > EasyLink. Select Automatic (EasyLink) to have the sound from your TV automatically reproduced by your audio system....
89 4.1.3 Sound 3/3 Surround Balance Switches the TV automatically to the best surround sound mode dependant on the broadcast. Select On or Off. Sets the balance of the left and right loudspeakers to best fit your listening position. Headphones volume Auto volume levelling Changes the volume of the headphones. Reduces sudden volume differences like at the beginning of commercials or when switching from one channel to another. Select On or Off. You can mute the TV speakers with m. Delta volume Levels out volume differences between channels or connected devices. First, switch to the channel or device whose volume difference you want to level out.
90 4.1.4 Factory settings You can return to the original factory settings. Only picture and sound settings will be reset. Close the user manual and press h > Setup > Installation > Factory reset and press OK.
91 4.2.1 Reorder and rename After the first installation, you might want to reorder or rename installed channels. Organise TV channels in the Channel overview according to your own preference or give them a recognisable name. While watching TV, press OK to open the Channel overview. The Channel overview shows the TV channels and radio stations installed on your TV. To reorder or rename, press Options o and select the option you need. 1/2 Reorder You can reposition channels within the overview. 1 Select Reorder in the Options o menu to start reordering channels. 2 Highlight a channel and press OK. 3 Reposition the channel where you want it with the navigation keys. 4 Press OK to confirm the position. You can highlight another channel and do the same. To stop Reorder, press Options o and select Exit reorder....
92 4.2.1 Reorder and rename Rename You can rename a channel. 1 In the channel overview, navigate to the channel you want to rename. 2 Select Rename in the Options o menu. 3 Press Back b to delete a character. Use the remote control number pad as you do for SMS/text messaging to scroll to the character you need. Use the 0 number key to enter a special character. Press OK to end the text input. 4 Select Done and press OK to end Rename. 2/2
93 4.2.2 Update channels When the TV was switched on for the first time, a full installation of channels was performed. You can set the TV to add or remove digital channels automatically. You can also manually start the channel update. 1/2 Automatic update To set the TV to update digital TV channels automatically, leave the TV in standby mode. Once a day, the TV updates earlier found channels and stores new channels. Empty channels are removed from the Channel overview....
94 4.2.2 Update channels 2/2 If a channel update has been performed, a message shows at TV start up. If you do not want this message to appear, select No in h > Setup > Installation > Channel installation > Channel update message. Manual update To disable automatic updates, select Off in h > Setup > Installation > Channel installation > Channel update in standby. Start the update and select Update Channels. To update channels yourself at any time, press h > Setup > Installation > Channel installation > Automatic installation and press OK. The update may take a few minutes.
95 4.2.3 Reinstall channels When the TV was switched on for the first time, a full installation of channels was performed. You can redo this full installation all over again to set your language, country and install all available TV channels. Full installation To reinstall the TV, press h > Setup > Installation > Channel installation > Automatic installation and press OK. Start the installation and select Reinstall channels. The update may take a few minutes. To reorder or rename found channels, read Setup > Channels > Reorder and rename.
96 4.2.4 Digital reception quality If you receive digital TV broadcasting (DVB) from your own antenna (DVB-T) or use the TV tuner to receive digital cable channels (DVB-C), you can verify the quality and signal strength of a channel. If the reception is poor, you can reposition your antenna to try to improve the reception. For best results, contact a specialised antenna installer. 1/2 To verify the reception quality of such a digital channel, select the channel, press h > Setup > Installation > Channel installation > Digital:Reception test > Search and press OK. The digital frequency is shown for this channel. If the reception is poor, you can reposition your antenna. Select Search and press OK to verify the signal quality of this frequency again....
97 4.2.4 Digital reception quality You can enter a specific digital frequency yourself. Select the frequency, position the arrows on a number with x and w and change the number with u and v. Press Search to verify this frequency. 2/2 If you receive the channel with DVB-C, the options Symbol rate mode and Symbol rate are shown. For Symbol rate mode, select Automatic unless your cable provider supplies a specific symbol rate value. You can enter this supplied value in Symbol rate using the number keys.
98 4.2.5 Manual installation of analogue channels Analogue TV channels can be manually tuned-in channel by channel. To start the manual installation of analogue channels, press h > Setup > Installation > Channel installation > Manual install - analogue. Follow each step in this menu. You can redo these steps until you have all available analogue TV channels. 1 System If you have your own antenna, you need to select the country or part of the world where the TV channel comes from. If you receive TV channels via a cable system, you only need to select the country or part of the world once. 2 Find channel Search for an analogue TV channel. The search starts automatically but you can manually enter a frequency. If the channel reception is bad, select Search next to search again. Select Done and press OK if you want to store this TV channel.... 1/2
99 4.2.5 Manual installation of analogue channels 3 Fine tune Fine tune the found channel with u and v. Press Done once the channel is fine tuned. 4 Store A found channel can be stored on the current channel number with Store current channel or as a new channel number with Store as new channel. 2/2
100 4.2.6 Fine tune analogue channels If the reception of an analogue TV channel is poor, you can try to fine tune the TV channel. To fine tune analogue channels, press h > Setup > Installation > Channel installation > Manual install analogue > Fine tune. Fine tune the channel with u and v. Press Done once the channel is fine tuned. You can store this fine tuned channel on the current channel number with Store current channel or as a new channel number with Store as new channel.
101 4.2.7 DVB-T/DVB-T Lite or DVB-C If both DVB-T/DVB-T Lite and DVB-C reception is available in your country, and this TV is prepared for both DVB-T/ DVB-T Lite and DVB-C for your country, you need to select DVB-T/DVB-T Lite or DVB-C before you install TV channels. To select DVB-T/DVB-T Lite or DVB-C reception, press h > Setup > Installation > Channel installation > Antenna or Cable DVB. Select Antenna for a DVB-T/DVB-T Lite installation. Select Cable for a DVB-C installation. DVB-C channel installation All DVB-C TV settings are set to automatic but the DVB-C network might need some settings supplied by the DVBC provider. Enter these settings or values when the TV asks for them. You can install your TV for DVB-T/DVB-T Lite and DVB-C. In that case, you need to carry out two channel installations. First, carry out an installation with Antenna selected followed by an installation with Cable selected. Afterwards, the Channel overview will show both DVB-T/DVB-T Lite and DVB-C TV channels.
102 4.2.8 Clock settings In some countries, digital TV broadcasts do not send UTC Coordinated Universal Time information. Therefore, winter and summer time changes might be ignored. You can correct this with the clock settings. If the TV shows the incorrect time, press h > Setup > Installation > Clock > Auto clock mode and select Manual. In the Daylight saving menu, select Standard time (winter) or Daylight saving time (summer) according to your local time.
103 4.3.1 With a USB memory device In some cases, it might be necessary to update the TV software. Start the software update on the TV. Then, download the TV software from the internet onto your PC. Use a USB memory device to upload the software from your PC to the TV. 1/3 Preparation You need a PC with a high speed internet connection. You will need a USB memory device with 256Mb free space and make sure that the write protection is switched off. Some USB memory devices might not work with the TV....
104 4.3.1 With a USB memory device 2/3 1 Identification 2 Download from PC to USB Close this user manual, press h > Setup > Software update > Update now and press OK. Once the TV identification file is written to the USB device, insert the USB into your PC that is connected to the internet. On the USB device, locate the file 'update.htm' and double-click it. Click on Send ID. If new software is available it will download to the USB device. Select USB and press OK. Follow the on-screen instructions. The TV will ask to insert the USB device into the USB connector at the side of the TV....
105 4.3.1 With a USB memory device 3 Download from USB to TV Insert the USB memory device back into the TV. 3/3 At the end of the update the message Operation successful appears on screen. Remove the USB device and press O on the remote control. Follow the on-screen instructions to start the new TV software update. The TV switches off for 10 seconds and back on again. Please wait. Do not Do not use the O switch on the TV use the remote control The TV switches off (for 10 seconds) and back on again. Please wait. remove the USB device from the TV during the software update If a power cut occurs during the update, never remove the USB memory device from the TV. When the power returns, the TV continues to update. press O twice Now the new TV software update is finished. You can use the TV again.
106 5.1.1 Power cable Make sure the power cable is securely inserted in the TV. Make sure that the power plug in the wall socket is accessible at all times. When disconnecting the power cable, always pull the plug, never the cable. Although this TV has a very low standby power consumption, unplug the power cable to save energy if you do not use the TV for a long time.
107 5.1.2 Antenna cable Locate the antenna connection at the back of the TV. Insert the antenna cable securely in the Antenna a socket.
108 5.2.1 Cable quality Before you connect devices to the TV, verify which connectors are available on the device. Connect the device to the TV with the highest quality connection available. Good quality cables ensure a good transfer of picture and sound. The connections shown in this user manual are recommendations for the cases most used. Other solutions are possible. Read more on specific cable types and available connections in About cables > HDMI etc. Add your devices When you have connected a device to the TV, always add this device as an item in the Home menu. With this item in the Home menu, you can easily switch the TV to this device. To add a new device, press h > Add your devices. Follow the instructions on screen.
109 5.2.2 HDMI An HDMI connection has the best picture and sound quality. One HDMI cable combines video and audio signals. Use HDMI for High Definition (HD) TV signals. An HDMI cable transfers picture and sound signals in only one direction, the opposite to a scart cable. Do not use an HDMI cable longer than 5 m.... 1/2
110 5.2.2 HDMI HDMI supports HDCP (High-bandwidth Digital Contents Protection). HDCP is a copy protection signal that comes with HD content (DVD disc or Blu-ray Disc). DVI to HDMI Use a DVI to HDMI adaptor if your device has only a DVI connection. Use one of the HDMI connectors and, for sound, add an Audio L/R cable to Audio In Left / Right, HDMI / DVI mini jack connector, on the back of the TV. 2/2 EasyLink HDMI with EasyLink offers easy operating of your connected devices when these have the HDMI CEC standard. Read Connections > EasyLink HDMI-CEC.
111 5.2.3 YPbPr Component video Use the Component Video YPbPr connection together with an Audio Left and Right connection for sound. Match the YPbPr connector colours with the cable plugs when you connect. YPbPr can handle High Definition (HD) TV signals.
112 5.2.4 Scart A scart cable combines video and audio signals. Scart connectors can handle RGB video signals but cannot handle High Definition (HD) TV signals.
113 5.2.5 S-Video Use an S-Video cable together with an Audio Left and Right (cinch) cable. Match the Audio connectors colours with the cable plugs when you connect.
114 5.2.6 Video Use a Video (cinch) cable together with an Audio Left and Right (cinch) cable. Match the Audio connectors colours with the cable plugs when you connect.

115 5.2.7 VGA Use a VGA cable (DE15 connector) to connect a computer to the TV. With this connection you can use the TV as a computer monitor. You can add an Audio Left and Right cable for sound. Read Connections > More devices >TV as PC Monitor.
116 5.3.1 DVD player Use an HDMI cable to connect the DVD player to an HDMI connector on the back of the TV.
117 5.3.2 DVD Home Theatre System First, use an HDMI cable to connect the device to the TV. 1/3
118 5.3.2 DVD Home Theatre System Finally, use a digital audio cinch cable to connect the device to the TV or alternatively, use the analogue Audio Out L/R. 2/3
119 5.3.2 DVD Home Theatre System 3/3 Audio Out L/R Audio and Video synchronisation (sync) If there is no digital audio output on the Home Theatre System, you can use the TV's analogue Audio Out L/R connection. If the sound does not match with the video on screen, you can set a delay on most DVD Home Theatre Systems to match the sound and video. Do not connect the audio signal from a DVD player or other device directly to the Home Theatre System. Always lead the sound through the TV first.
120 5.3.3 DVD Recorder First, use 2 antenna cables to connect the antenna to the DVD Recorder and the TV. 1/2
121 5.3.3 DVD Recorder Finally, use a scart cable to connect the DVD Recorder to a scart connector on the back of the TV. 2/2
122 5.3.4 Digital receiver or Satellite receiver First, use 2 antenna cables to connect the antenna to the receiver and the TV. 1/2
123 5.3.4 Digital receiver or Satellite receiver Finally, use a scart cable to connect the receiver to the back of the TV 2/2
124 5.3.5 Digital receiver and DVD Recorder First, use 3 antenna cables to connect the digital receiver and the DVD Recorder to the TV. 1/3
125 5.3.5 Digital receiver and DVD Recorder Then use a scart cable to connect the digital receiver to the TV. 2/3
126 5.3.5 Digital receiver and DVD Recorder Finally, use 2 scart cables to connect the 2 devices and the TV. 3/3
127 5.3.6 Digital receiver, DVD Recorder and Home Theatre System First, use 3 antenna cables to connect the 2 devices and the TV. 1/5
128 5.3.6 Digital receiver, DVD Recorder and Home Theatre System Then use a scart cable to connect the digital receiver to the TV. 2/5
129 5.3.6 Digital receiver, DVD Recorder and Home Theatre System Then use 2 Scart cables to connect the Digital receiver to the DVD Recorder and the DVD Recorder to the TV. 3/5
130 5.3.6 Digital receiver, DVD Recorder and Home Theatre System Then use an HDMI cable to connect the Home Theatre System to the TV. 4/5
131 5.3.6 Digital receiver, DVD Recorder and Home Theatre System Finally, use a digital audio cinch cable to connect the Home Theatre System to the TV. 5/5
132 5.3.7 Blu-ray Disc player Use an HDMI cable to connect the Blu-ray Disc player to an HDMI connector on the back of the TV.
133 5.3.8 Digital HD receiver First, use 2 antenna cables to connect the Digital HD receiver to the TV. 1/2
134 5.3.8 Digital HD receiver Use an HDMI cable to connect the Digital HD receiver to the TV. 2/2
135 5.4.1 Game console The most practical connections for a game console are at the side of the TV. You can use an HDMI, S-Video or Video connection but never connect the S-Video and Video at the same time. If you use an HDMI or YPbPr connection, you can use the connectors at the back of the TV. See the next pages for how to connect your games console. 1/3 Picture delay To prevent picture delay, set the TV to Game mode. Close this user manual and press Options o and select Picture and sound. Press OK. Select Smart settings and press OK. Select Game and press OK....
136 5.4.1 Game console The most practical connections for a game console are at the side of the TV. 2/3
 cable to connect the game console to the back of the TV.")
137 5.4.1 Game console Use an HDMI or the EXT3 (YPbPr and Audio L/R) cable to connect the game console to the back of the TV. 3/3
138 5.4.2 HD Game console Use an HDMI cable or YPbPr cables to connect a High Definition game console to the TV. Read also Connections > More devices > Game.
139 5.4.3 Camcorder The most practical connection for a camcorder is at the side of the TV. You can use an HDMI, S-Video or Video connection but never connect the S-Video and Video at the same time. See the next pages for how to connect your camcorder.... 1/3
140 5.4.3 Camcorder The most practical connection for a camcorder is at the side of the TV. 2/3
 cable to connect the camcorder to the back of the TV.")
141 5.4.3 Camcorder Use an HDMI or the EXT3 (YPbPr and Audio L/R) cable to connect the camcorder to the back of the TV. 3/3
142 5.4.4 TV as PC monitor 1/3 You can connect the TV to your computer as a PC monitor. Ideal TV setting Before connecting the PC, set the PC monitor refresh rate to 60 Hz. Set the TV Picture format to Unscaled for the sharpest picture quality. While watching TV, press Options o, select Picture format and select Unscaled. You can connect the PC to the side of the TV or alternatively to the back. See the next pages for how to connect your computer. Supported PC resolutions For a list of supported resolutions see Technical data > Display resolutions....
143 5.4.4 TV as PC monitor Use a DVI to HDMI adapter to connect the PC to HDMI and an audio L/R cable to connect the Audio L/R to the side of the TV. 2/3
144 5.4.4 TV as PC monitor Use a VGA cable to connect the PC to the VGA connector and an audio L/R cable to connect the VGA Audio L/R to the back of the TV. 3/3
145 5.4.5 Decoder Use a scart cable to connect a decoder which decodes analogue antenna channels. Use the EXT1 or EXT2 connectors at the back of the TV. You have to assign the TV channel as a channel to be decoded. Then assign the connection where the decoder is connected. Close this user manual and press h > Setup > Installation > Decoder. Select Channel to set the channel that you want to decode. Select Status to set the connector you use for the decoder.
146 5.5.1 EasyLink If a device is equipped with the HDMI-CEC standard, the device and the TV can work together. Connect the TV to the device using an HDMI cable. The TV comes with EasyLink set to On. To switch EasyLink off, press h > Setup > Installation > Preferences > EasyLink. 1/2 With EasyLink, the following functions are available: One touch play Insert a disc and press Play on the device. The TV switches on from standby mode and shows the disc programme automatically. System standby Press O on the TV remote control for 3 seconds to switch the connected devices into standby mode....
147 5.5.1 EasyLink 2/2 System audio control Naming of HDMI-CEC on other brands If you connect an audio system, you can listen to the audio from the TV through the audio system. The TV speakers are muted automatically. The HDMI-CEC functionality has different names with different brands. Some examples of name are: Anynet, Aquos Link, Bravia Theatre Sync, Kuro Link, Simplink, Viera Link,... The TV comes with the speakers set to EasyLink (Automatic). To switch the TV speakers off or permanently on, press h > Setup > Sound > TV speakers. Make sure that all HDMI-CEC settings are properly set up on the device. EasyLink might not work with devices from other brands. Not all brands are fully compatible with EasyLink.
148 5.5.2 EasyLink Remote Control First read Connections > EasyLink, before you go on with EasyLink Remote control. To switch EasyLink Remote control on, press h > Setup > Installation > Preferences > EasyLink Remote control. With EasyLink Remote control, the TV remote control commands are sent directly to the device you are watching on TV. There is no need to select the device on the remote control first. Except for the Home h key, all remote control commands will try to operate the device. Some commands might not work with the device. Caution> This is an advanced setting. Verify if all devices are suited for this setting. Unsuited devices will not respond. Try out this function first, before you switch on EasyLink Remote control permanently. To switch back to TV control, press h and select Watch TV To control another device, press h and select the other device.
149 5.6 Conditional Access Module (CAM) Scrambled digital TV channels can be decoded with a Conditional Access Module (CAM). Digital TV service operators provide the CAM when you subscribe to their services. Contact a digital TV service operator for more information and terms & conditions. Insert a CAM Switch off the TV before inserting a CAM. Look on the CAM for the correct method of insertion. Incorrect insertion can damage the CAM and the TV. Look for the common interface slot on the side of the TV. Gently insert the CAM as far as it will go and leave it in the slot permanently. It can take a few minutes before the CAM is activated. Removing the CAM will deactivate the service on TV.... 1/2
150 5.6 Conditional Access Module 2/2 Watching a CAM service If a CAM is inserted and subscription fees have been paid, the TV shows the programme from the digital TV service provider. The applications, their function, the content and the on-screen messages all come from the CAM service. CAM settings To set passwords or PIN codes for the CAM service, press h > Setup > Features > Common Interface. Select the CAM provider and press OK.
151 6.1 Contact information Warning Contact information Consumer Care If your TV breaks down, NEVER try to repair the TV yourself. If the TV problem is not solved you can call the Philips Consumer Care hotline in your country. Find the telephone number on the printed documentation that came with the TV. If the advice and suggestions in Troubleshooting do not help resolve the problem, try switching the TV off and back on again. Or consult our website TV model number and serial number Find these numbers on the packaging label or on the type label on the back or bottom of the TV.
152 6.2 TV and remote control 1/2 The TV does not switch on The TV does not respond to the remote control Verify the power cable connection. Verify that the batteries of the remote control are not empty or weak. Verify their + / - orientation. Verify that the batteries of the remote control are not empty or weak. Verify their + / - orientation. Unplug the power cable, wait for a minute and plug it back in. Try switching it on again. You can use the buttons on the TV to switch the TV on. Clean the remote control and TV sensor lens. Verify if EasyLink Remote control is set to Off During the warming-up time of the TV, which is about two minutes, it is possible that the TV and some external devices do not immediately respond to commands from the remote control. The device is functioning normally and is not broken....
153 6.2 TV and remote control The TV switches off and the red light blinks Unplug the power cable, wait a minute and plug it back in. Verify if there is enough space for ventilation. Wait until the TV has cooled down. If the TV does not restart from standby and the blinking occurs again, call Consumer Care. You forgot your code to unlock Child lock Read Timers and locks > Child lock. 2/2
154 6.3 TV channels Some TV channels are gone Verify if the correct channel filter for the Channel overview is selected. Read Use your TV > Menus > Channel overview. A channel could be hidden in the Channel overview. Read Use your TV > Menus > Channel overview. No digital channels found during installation Verify if the TV supports DVB-T/DVB-T Lite or DVB-C in your country. Check the 'Digital TV Country Compatibility' sticker on the back of the TV.
155 6.4 Picture 1/3 White LED indicator is on but there is no picture The TV picture is poor Verify if the antenna is connected properly. Verify if the antenna is connected properly. Verify if the correct device is selected. Non-earthed audio devices, neon lights, high buildings or mountains can influence the picture quality. Try to improve the picture by changing the position of the antenna or placing devices away from the TV. The sound is on, but there is no picture Verify the contrast or brightness setting in the menu. Verify that the correct TV system is chosen in the Manual installation menu. If only a certain channel is poor, try to fine tune this channel with the Fine tune menu. Read Setup > Installation > Analogue: manual installation....
156 6.4 Picture The picture has poor colour Verify the colour settings in the Picture menu. Select any of the Smart settings in the Setup menu. Verify the connections and cables of the connected devices. Picture delay when a game console is connected To prevent picture delay, set the TV to game mode. Select Game in the Smart settings in the Setup menu. 2/3 The TV does not remember my settings when I switch it back on The TV is in Shop mode. Check that the TV is set to Home mode in the Home menu > Setup > Installation > Preferences > Location menu. It is necessary to switch the TV to standby to ensure that the TV exits Shop mode completely....
157 6.4 Picture 3/3 An "e-sticker" banner displaying product information appears on the TV display. The picture does not fit the screen; it is either too big or too small The TV is in Shop mode. Remove the e-sticker by setting the TV to Home mode in the Home menu > Setup > Installation > Preferences > Location menu. It is necessary to switch the TV to standby to ensure that the TV exits Shop mode completely. Press f and select a more fitting picture format in the Picture format menu. The picture position on screen is not correct Some picture signals from some devices do not fit the screen properly. You can move the picture with the cursor keys on the remote control. Check the signal output of the device.
158 6.5 Sound There is a picture but no sound The sound comes from one speaker only Verify the volume is not set to 0. Verify that the Balance is not set to extreme left or right. Verify the sound has not been muted with m. Verify that all cables are connected properly. If no sound signal is detected, the TV automatically switches off the sound. This is proper operation and is not a malfunction. The sound is poor Verify that the sound is set to Stereo. Select any of the Smart settings in h > Setup > Smart settings. Sound delay when a DVD Home Theatre System device is connected Read the user manual of the DVD device to adjust the audio sync delay. If you cannot set a delay, switch off HD Natural Motion in h > Setup > Picture > Pixel Plus/Pixel Precise HD.
159 6.6 Devices HDMI connections The HDMI-HDCP procedure might take a few seconds before the TV shows the picture from a device. If the TV does not recognise the device and the screen shows no picture, try switching from one device to another and back again to restart the HDCP procedure. If sound interruptions occur persistently, see the user manual of the device to verify the output settings. If that does not help, connect an additional audio cable. 1/2 If a DVI to HDMI adaptor is used, verify that an additional audio connection is in place to complete the DVI connection. HDMI with EasyLink Verify if the connected device supports the HDMI-CEC standard and is properly set up. Read the user manual that comes with the device. Verify if the HDMI cable is properly connected. Verify if EasyLink is activated in h >Setup > Installation > Preferences > EasyLink.
160 6.6 Devices 2/2 Make sure that the System audio control in your HDMICEC audio devices is properly set up. Read the user manual that comes with your audio device. The PC display on my TV is not stable or is not synchronised (with TV as PC monitor) EasyLink Remote control Verify that the correct resolution mode is selected on your PC. Read Technical data > Display resolutions. Some devices have identical functionality but do not support the specific remote control commands. Read Connections > EasyLink HDMI-CEC > EasyLink RC. Set the refresh rate of your PC to 60Hz.
161 6.7 Multimedia USB device content is not shown Set your device (camera) to Mass Storage Class compliant. The USB device may need specific driver software. Unfortunately, this software cannot be downloaded to your TV. Not all audio and picture files are supported. Read Technical data. USB device content does not play back smoothly The transfer performance of the USB device limits the transfer rate.
162 7.1 Power and reception Product specifications are subject to change without notice. For more specification details of this product see Reception Antenna input : 75ohm coaxial (IEC75) TV system : DVB COFDM 2K/8K, Video playback : NTSC, SECAM, PAL Power DVB : DVB Terrestrial 0151 Cable Mains power : AC V +/-10% (see selected countries on the TV typeplate) Ambient temperature : 5 C to 35 C Tunerbands : VHF, UHF, S-Channel, Hyperband Power and standby power consumption, see the technical specification on
163 7.2 Supported display resolutions Video formats Computer formats Resolution Refresh rate Resolution Refresh rate 480i - 60 Hz 640 x Hz 480p - 60 Hz 800 x Hz 576i - 50 Hz 1024 x Hz 576p - 50 Hz 1280 x Hz (full HD only) 720p - 50 Hz, 60 Hz 1360 x Hz 1080i - 50 Hz, 60 Hz 1600 x Hz (full HD only) 1080p - 24 Hz, 25 Hz, 30 Hz 1920 x Hz 1080p - 50 Hz, 60 Hz
164 7.3 Multimedia Connections Supported file formats USB Images : JPEG Supported USB / memory device formats FAT 16, FAT 32, NTFS Audio : MP3, LPCM Video : MPEG-1, MPEG-2, H.264/MPEG-4 AVC
165 7.4 Connectivity Back Side EXT1 (scart): Audio L/R, CVBS in, RGB HDMI side in EXT2 (scart): Audio L/R, CVBS in, RGB S-Video in* (Y/C) EXT3:Y Pb Pr, Audio L/R Video in* (CVBS) VGA, Audio L/R (mini jack 3.5 mm) Audio L/R in* HDMI 1 in (HDMI 1.3a for all HDMI connections) Headphones (stereo mini jack 3.5mm) HDMI 2 in* USB HDMI 3 in* Common interface slot Audio In L/R - DVI to HDMI (min jack 3.5 mm) Audio Out L/R display synchronised Digital Audio out (coaxial-cinch-s/pdif) display synchronised * Availability varies according to TV model.
166 Safety Risk of electric shock or fire! Never expose the TV to rain or water. Never place liquid containers, such as vases, near the TV. If liquids are spilt on or into the TV, disconnect the TV from the power outlet immediately. Contact Philips Consumer Care to have the TV checked before use. Never place the TV, remote control or batteries near naked flames or other heat sources, including direct sunlight. To prevent the spread of fire, keep candles or other flames away from the TV, remote control and batteries at all times. Never insert objects into the ventilation slots or other openings on the TV. When the TV is swivelled ensure that no strain is exerted on the power cord. Strain on the power cord can loosen connections and cause arcing. Risk of short circuit or fire! Never expose the remote control or batteries to rain, water or excessive heat. Avoid force coming onto power plugs. Loose power plugs can cause arcing or fire. Risk of injury or damage to the TV! Two people are required to lift and carry a TV that weighs more than 55 lbs. When stand mounting the TV, use only the supplied stand. Secure the stand to the TV tightly. Place the TV on a flat, level surface that can support the combined weight of the TV and the stand. When wall mounting the TV, use only a wall mount that can support the weight of the TV. Secure the wall mount to a wall that can support the combined weight of the TV and wall mount. Koninklijke Philips Electronics N.V. bears no responsibility for improper wall mounting that results in accident, injury or damage. Before you connect the TV to the power outlet, ensure that the power voltage matches the value printed on the back of the TV. Never connect the TV to the power outlet if the voltage is different. Risk of injury to children! Follow these precautions to prevent the TV from toppling over and causing injury to children. Never place the TV on a surface covered by a cloth or other material that can be pulled away. Ensure that no part of the TV hangs over the edge of the mounting surface. Never place the TV on tall furniture, such as a bookcase, without anchoring both the furniture and TV to the wall or a suitable support. Educate children about the dangers of climbing on furniture to reach the TV. Risk of overheating! Never install the TV in a confined space. Always leave a space of at least 4 inches around the TV for ventilation. Ensure curtains or other objects never cover the ventilation slots on the TV. Risk of injury, fire or power cord damage! Never place the TV or any objects on the power cord. To easily disconnect the TV power cord from the power outlet, ensure that you have full access to the power cord at all times. When you disconnect the power cord, always pull the plug, never the cable. Disconnect the TV from the power outlet and aerial before lightning storms. During lightning storms, never touch any part of the TV, power cord or aerial cable. Risk of hearing damage! Avoid using earphones or headphones at high volumes or for prolonged periods of time. Low temperatures If the TV is transported in temperatures below 5 C, unpack the TV and wait until the TV temperature matches room temperature before connecting the TV to the power outlet.
167 Notice 2009 Koninklijke Philips Electronics N.V. Specifications are subject to change without notice. Trademarks are the property of Koninklijke Philips Electronics N.V or their respective owners. Philips reserves the right to change products at any time without being obliged to adjust earlier supplies accordingly. The material in this manual is believed adequate for the intended use of the system. If the product, or its individual modules or procedures, are used for purposes other than those specified herein, confirmation of their validity and suitability must be obtained. Philips warrants that the material itself does not infringe any United States patents. No further warranty is expressed or implied. Warranty Risk of injury, damage to TV or void of warranty! Never attempt to repair the TV yourself. Use the TV and accessories only as intended by the manufacturer. The caution sign printed on the back of the TV indicates risk of electric shock. Never remove the TV cover. Always contact Philips Customer Support for service or repairs. Any operation expressly prohibited in this manual, or any adjustments and assembly procedures not recommended or authorised in this manual shall void the warranty. Pixel characteristics This LCD product has a high number of color pixels. Although it has effective pixels of % or more, black dots or bright points of light (red, green or blue) may appear constantly on the screen. This is a structural property of the display (within common industry standards) and is not a malfunction. Open source software This television contains open source software. Philips hereby offers to deliver or make available, upon request, for a charge no more than the cost of physically performing source distribution, a complete machinereadable copy of the corresponding source code on a medium customarily used for software interchange. This offer is valid for a period of 3 years after the date of purchase of this product. To obtain the source code, write to Development Manager Technology & Development Philips Consumer Lifestyle 620A Lorong 1, Toa Payoh TP1, Level 3 Singapore Compliance with EMF Koninklijke Philips Electronics N.V. manufactures and sells many products targeted at consumers, which, like any electronic apparatus, in general have the ability to emit and receive electromagnetic signals. One of Philips leading Business Principles is to take all necessary health and safety measures for our products, to comply with all applicable legal requirements and to stay well within the EMF standards applicable at the time of producing the products. Philips is committed to develop, produce and market products that cause no adverse health effects. Philips confirms that if its products are handled properly for their intended use, they are safe to use according to scientific evidence available today. Philips plays an active role in the development of international EMF and safety standards, enabling Philips to anticipate further developments in standardisation for early integration in its products. Mains fuse (UK only) This TV is fitted with an approved moulded plug. Should it become necessary to replace the mains fuse, this must be replaced with a fuse of the same value as indicated on the plug (example 10A). 1. Remove fuse cover and fuse. 2. The replacement fuse must comply with BS 1362 and have the ASTA approval mark. If the fuse is lost, contact your dealer in order to verify the correct type. 3. Refit the fuse cover. In order to maintain conformity to the EMC directive, the mains plug on this product must not be detached from the mains cord. Copyright VESA, FDMI and the VESA Mounting Compliant logo are trademarks of the Video Electronics Standards Association. Windows Media is either a registered trademark or trademark of Microsoft Corporation in the United States and/or other countries. Kensington and Micro Saver are registered US trademarks of ACCO World corporation with issued registrations and pending applications in other countries throughout the world. All other registered and unregistered trademarks are the property of their respective owners.
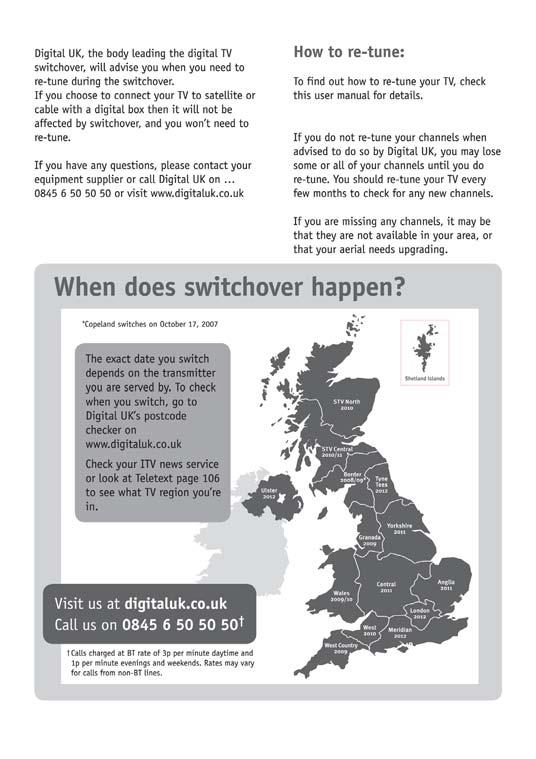
168
 Register your product and get support at www.philips.com/welcome EN User Manual Contents 1 Get started 3 Important 3 Enjoy HD TV 7 Wall mount the TV 7 Product highlights 8 Access more information 9 2
 Register your product and get support at www.philips.com/welcome EN User Manual 32PFL5405H/05 37PFL5405H/05 42PFL5405H/05 32PFL5405H/12 37PFL5405H/12 42PFL5405H/12 32PFL5405H/60 37PFL5405H/60 42PFL5405H/60
 Register your product and get support at www.philips.com/welcome 32PFL5615D 32PFL6615D 40PFL5615D 40PFL6615D 40PFL8605D 46PFL5615D 46PFL6615D 52PFL8605D EN User Manual Contents 1 Get started 3 TV Tour
EasySuite 32HFL3232D/10. Hospitality User Manual. Philips Hospitality Nov
 EasySuite 32HFL3232D/10 Hospitality User Manual Philips Hospitality Nov.2010 www.philips.com/hospitalitysolutions Österreich 0810 000205 0.07 pro Minute België/Belgique 078250145 0.06 Per minuut/par minute
Signature 46HFL4382D/10 32HFL7382A/10 40HFL7382A/10 58HFL9852A/10
 Signature 46HFL4382D/10 32HFL7382A/10 40HFL7382A/10 58HFL9852A/10 Hospitality User Manual Philips Hospitality Nov.2010 www.philips.com/hospitalitysolutions Österreich 0810 000205 0.07 pro Minute België/Belgique
Register your product and get support at 32PFK PFK PFK PFK5109. User Manual
 Register your product and get support at www.philips.com/welcome LED TV 32PFK5109 40PFK5109 48PFK5109 55PFK5109 User Manual Contents 10.1 Sleep timer 32 10.2 Clock 32 10.3 Auto switch off 32 1 Your new
User Manual 22PFK PHK4000
 Register your product and get support at www.philips.com/welcome LED TV series User Manual 22PFK4000 24PHK4000 Contents 1 Your new TV 3 1.1 Pause TV and recordings 3 1.2 EasyLink 3 2 Setting up 4 2.1 Read
12 Recording Specifications Software 39. Troubleshooting 58 Register Safety Screen care 62
 Register your product and get support at www.philips.com/welcome LED TV 32PFH4309 32PFH4399 32PFT4309 32PFT4309 32PHH4309 32PHH4309 32PHH4319 32PHH4329 32PHT4309 32PHT4319 40PFH4309 40PFH4319 40PFH4329
 Register your product and get support at www.philips.com/welcome EN USER MANUAL www.philips.com/support Model Serial Österreich 0810 000205 0.07 pro Minute België/Belgique 078250145 0.06 Per minuut/par
78881',0%,'19*50/1:;<1=> -,.%'/,012)301#0)43(/15641.,/1'3##)0/15/ !!!"#$%&%#'"()*+!,&()*, E8AB:7C8C ECAB:7D8C G',01*5635&
301#0)43(/15641.,/1'3##)0/15/ !!!#$%&%#'()*+!,&()*, E8AB:7C8C ECAB:7D8C G',01*5635&") -,.%'/,012)301#0)43(/15641.,/1'3##)0/15/!!!"#$%&%#'"()*+!,&()*, 78881',0%,'19*50/1:;?@AB:7C8C?DAB:7C8C E8AB:7C8C F@AB:7C8C ECAB:7D8C G',01*5635& Contents 1 1.1 1.2 1.3 1.4 1.5 Getting started 3 TV
-,.%'/,012)301#0)43(/15641.,/1'3##)0/15/!!!"#$%&%#'"()*+!,&()*, 78881',0%,'19*50/1:;?@AB:7C8C?DAB:7C8C E8AB:7C8C F@AB:7C8C ECAB:7D8C G',01*5635& Contents 1 1.1 1.2 1.3 1.4 1.5 Getting started 3 TV
Multimedia Software 39. Troubleshooting 42 Register Safety Screen care 46
 Register your product and get support at www.philips.com/welcome LED TV 32PFH4100 32PFT4100 32PFT4100 32PHH4100 32PHT4100 32PHT4100 40PFH4100 40PFT4100 40PFT4100 48PFH4100 48PFT4100 48PFT4100 User Manual
3011 series. User Manual 24HFL3011T 32HFL3011T 40HFL3011T
 3011 series User Manual 24HFL3011T 32HFL3011T 40HFL3011T Contents 1 Setting up 1.1 Read safety 3 1.2 TV stand and wall mounting 1.3 Tips on placement 3 1.4 Power cable 3 1.5 Antenna cable 3 2 Connect devices
User Manual 32PHT4100
 Register your product and get support at www.philips.com/welcome 4100 series User Manual 32PHT4100 Contents 1 Your new TV 3 13 Settings 3 1.1 Pause TV and recordings 1.2 EasyLink 3 2 Setting up 4 2.1 Read
EN User manual. Register your product and get support at
 Register your product and get support at www.philips.com/welcome 47PFL4606H 42PFL4606H 42PFL4506H 42PFL3606H 42PFL3506H 40PFL5606H 37PFL4606H 32PFL5606H 32PFL5406H 32PFL4606H 32PFL3606H 32PFL3506H 32PFL3406H
User Manual 32PFK PHK PFK PFK4101
 Register your product and get support at 4101 series www.philips.com/welcome User Manual 32PFK4101 32PHK4101 40PFK4101 48PFK4101 Contents 1 TV Tour 10.1 Recording 10.2 Pause TV 3 3 1.1 Pause TV and recordings
User Manual 32PHH PHT PHT PFH PFT4201
 Register your product and get support at 4201 series www.philips.com/welcome User Manual 32PHH4201 32PHT4201 32PHT4201 40PFH4201 40PFT4201 Contents 1 TV Tour 11.1 Sleep timer 31 11.2 Clock 31 11.3 Switch
Register your product and get support at 40PFT PFT PFT PFT4109. User Manual
 Register your product and get support at www.philips.com/welcome 4109 40PFT4109 40PFT4109 47PFT4109 50PFT4109 User Manual Contents 11.1 Pause TV 31 1 Your new TV 3 12 Recording 32 1.1 Pause TV and recordings
 Register your product and get support at www.philips.com/welcome PFL30x7H PFL30x7T PFL30x7K PFL35x7H PFL35x7T PFL35x7K EN User Manual Contents 1 Get started 3 TV tour 3 TV controls 4 Important information
 Register your product and get support at www.philips.com/welcome 32PFL3605H/12 42PFL3605H/12 47PFL3605H/12 User Manual www.philips.com/support Model Serial Österreich 0810 000 205 0.07 pro Minute België/Belgique
 Register your product and get support at www.philips.com/welcome PFL30x7H PFL30x7T PFL30x7K PFL31x7H PFL31x7K PFL32x7H PFL33x7H PFL35x7H PFL35x7T PFL35x7K PFL38x7H PFL38x7T PFL38x7K EN User Manual Contents
 Register your product and get support at www.philips.com/welcome 32PFL3205H/12 32PFL3405H/12 32PFL3605H/12 42PFL3405H/12 42PFL3605H/12 47PFL3605H/12 User Manual www.philips.com/support Model Serial Österreich
User Manual 43PUH PUK PUT PUT PUH PUK PUT PUT PUH PUK PUT PUT4900
 Register your product and get support at 4900 series www.philips.com/welcome User Manual 43PUH4900 43PUK4900 43PUT4900 43PUT4900 49PUH4900 49PUK4900 49PUT4900 49PUT4900 55PUH4900 55PUK4900 55PUT4900 55PUT4900
 Register your product and get support at www.philips.com/welcome 40PFL58x6D 32PFL66x6D 40PFL66x6D 32PFL76x6D 40PFL76x6D 46PFL76x6D EN User Manual Contents 1 Get started 3 TV tour 3 Important 6 Environmental
221TE4L 231TE4L. EN Notice & important information 2. User manual 5. Troubleshooting 26. English
 221TE4L 231TE4L www.philips.com/welcome EN Notice & important information 2 User manual 5 Troubleshooting 26 www.philips.com/support Model Serial Country Telephone number Argentina 0800 3330 856 Brazil
User Manual 22PFT PHT4031
 Register your product and get support at www.philips.com/welcome 4031 series User Manual 22PFT4031 24PHT4031 Contents 1 TV tour 3 1.1 Pause TV and recordings 3 1.2 EasyLink 3 2 Setting up 4 2.1 Read safety
 Register your product and get support at www.philips.com/welcome EN User Manual Contents 1 Get started 3 TV tour 3 TV controls 4 Important information 5 Sustainability 9 Help and support 10 2 Use your
User Manual 22PFS PHS4031
 Register your product and get support at 4031 series www.philips.com/welcome User Manual 22PFS4031 24PHS4031 Contents 1 TV tour 12 Settings 3 1.1 Pause TV and recordings 1.2 EasyLink 3 2 Setting up 3 Connect
Register your product and get support at
 Register your product and get support at www.philips.com/welcome 32PFL66x6H 37PFL66x6H 40PFL66x6H 46PFL66x6H 55PFL66x6H 32PFL66x6K 37PFL66x6K 40PFL66x6K 46PFL66x6K 55PFL66x6K 32PFL66x6T 37PFL66x6T 40PFL66x6T
 Register your product and get support at www.philips.com/welcome 32PFL7406H/K/T 32PFL7476H/K 32PFL7486H/K 32PFL7496H/K 42PFL7406H/K/T 42PFL7456H/K 42PFL7486H/K/T 47PFL7456H/K EN User Manual Contents 1
32PFL6606M 37PFL6606M 40PFL6606M 46PFL6606M 55PFL6606M
 Register your product and get support at www.philips.com/welcome 32PFL6606M 37PFL6606M 40PFL6606M 46PFL6606M 55PFL6606M EN User Manual Contents 1 Get started 3 TV tour 3 Important 6 Environmental efforts
78881',0%,'19*50/1:;<1=> -,.%'/,012)301#0)43(/15641.,/1'3##)0/15/ !!!"#$%&%#'"()*+!,&()*, E8AB:7C8C ECAB:7D8C G',01*5635&
301#0)43(/15641.,/1'3##)0/15/ !!!#$%&%#'()*+!,&()*, E8AB:7C8C ECAB:7D8C G',01*5635&") -,.%'/,012)301#0)43(/15641.,/1'3##)0/15/!!!"#$%&%#'"()*+!,&()*, 78881',0%,'19*50/1:;?@AB:7C8C?DAB:7C8C E8AB:7C8C F@AB:7C8C ECAB:7D8C G',01*5635& Contents 1 1.1 1.2 1.3 1.4 1.5 Getting started 3 TV
-,.%'/,012)301#0)43(/15641.,/1'3##)0/15/!!!"#$%&%#'"()*+!,&()*, 78881',0%,'19*50/1:;?@AB:7C8C?DAB:7C8C E8AB:7C8C F@AB:7C8C ECAB:7D8C G',01*5635& Contents 1 1.1 1.2 1.3 1.4 1.5 Getting started 3 TV
 Register your product and get support at www.philips.com/welcome 46PFL6806H/12 46PFL6806K/02 46PFL6806T/12 46PFL6806H/60 EN User Manual Contents 1 Get started 3 TV tour 3 Important 5 Environmental efforts
Philips Professional and Business Solution
 Philips Professional and Business Solution 22HFL3350D 26HFL3350D 32HFL3350D EN SETUP MANUAL Table of contents 1 Important..................... 4 1.1 Safety........................... 4 1.2 Screen care.......................
22PFL6403D/12 32PFL6403D/12 42PFL6403D/12. Register your product and get suppor t at User Manual.
 22PFL6403D/12 32PFL6403D/12 42PFL6403D/12 Register your product and get suppor t at www.philips.com/flavors IT User Manual Manuale D uso www.philips.com/support Model Serial Österreich 0810 000205 0.07
User Manual 32PFT PHT PFT PFT4131
 Register your product and get support at www.philips.com/welcome 4131 series User Manual 32PFT4131 32PHT4131 43PFT4131 49PFT4131 Contents 1 TV tour 12.2 Play your videos 12.3 View your photos 12.4 Play
Table of contents. 1 Important Safety Care of the screen Recycling 3. 2 Your TV Television overview Product highlights 5
 Table of contents 1 Important 3 1.1 Safety 3 1.2 Care of the screen 3 1.3 Recycling 3 2 Your TV 4 2.1 Television overview 4 2.2 Product highlights 5 3 Getting started 5 3.1 Position the TV 5 3.2 Wall mounting
Register your product and get support at 26PFL3606H 22PFL3606H 19PFL3606H. EN User manual
 Register your product and get support at www.philips.com/welcome 26PFL3606H 22PFL3606H 19PFL3606H User manual Contact information België/ Belgique 0800 80 190 Gratis/Gratuit ß CHAT www.philips.com/support
22PFL4556/V7 32PFL4356/V7 32PFL4556/V7. EN User manual
 22PFL4556/V7 32PFL4356/V7 32PFL4556/V7 EN User manual Contents 1 Notice 2 2 Important 3 3 Your TV 5 4 Remote Control Functions 7 5 Use your TV 8 6 FAQ 12 7 Other Information 13 8 Product information 14
Table of contents. 1 Important Safety Care of the screen Recycling 3. 2 Your TV Television overview Product highlights 5
 2675.1 eng 03-08-2007 14:51 Pagina 1 Table of contents 1 Important 3 1.1 Safety 3 1.2 Care of the screen 3 1.3 Recycling 3 2 Your TV 4 2.1 Television overview 4 2.2 Product highlights 5 3 Getting started
User Manual 24PFS5231
 Register your product and get support at www.philips.com/welcome 5231 series User Manual 24PFS5231 Contents 1 TV tour 1.1 Pause TV and recordings 3 1.2 EasyLink 3 1.3 Bluetooth connection (for 5231 series
221TE4L 231TE4L. EN Notice & important information 2. User manual 5. Troubleshooting 34. English
 221TE4L 231TE4L English www.philips.com/welcome EN Notice & important information 2 User manual 5 Troubleshooting 34 www.philips.com/support Model Serial Country Code Telephone number Tariff Austria +43
User Manual 24PFS5231
 Register your product and get support at www.philips.com/welcome 5231 series User Manual 24PFS5231 Contents 1 TV tour 11.2 Play your videos 11.3 View your photos 11.4 Play your music 3 1.1 Pause TV and
User Manual 22PFT PHT4031
 Register your product and get support at 4031 series www.philips.com/welcome User Manual 22PFT4031 24PHT4031 Contents 1 TV tour 12.2 Play your videos 12.3 View your photos 12.4 Play your music 3 3 1.1
User Manual 43PUS PUS PUS PUS PUS6412
 Register your product and get support at 6412 series www.philips.com/welcome User Manual 43PUS6412 49PUS6412 50PUS6412 55PUS6412 65PUS6412 Contents 1 Setting Up 1.1 Read Safety 4 1.2 TV Stand and Wall
Register your product and get support at 32PFL3615/60
 Register your product and get support at www.philips.com/welcome 32PFL3615/60 E N User manual www.philips.com/support Model Serial Österreich 0800 180 016 België/Belgique 80080190 България 00800 11 544
User Manual 43PUS PUS PUS PUS6412
 Register your product and get support at www.philips.com/welcome 6412 series User Manual 43PUS6412 49PUS6412 55PUS6412 65PUS6412 Contents 1 Setting Up 4 1.1 Read Safety 4 1.2 TV Stand and Wall Mounting
User Manual 24PFS PFT PFS PFT5603
 Register your product and get support at 5603 series www.philips.com/welcome User Manual 24PFS5603 24PFT5603 32PFS5603 32PFT5603 Contents 1 Get Support 3 13 Specifications 1.1 Identify and Register your
Register your product and get support at 22HFL3381D/10 26HFL3381D/10. User Manual
 Register your product and get support at www.philips.com/welcome 22HFL3381D/10 26HFL3381D/10 EN User Manual Notice fi «'»'»»»»fi »»» fi» fi ø» fi fi»» fi ø»»»»»»» fi»» fi ł æ»»» fi fi»» '» «»»» fi fi»»
User Manual 43PUT PUT PUT PUT PUT6262
 Register your product and get support at www.philips.com/tvsupport 6262 series User Manual 43PUT6262 49PUT6262 50PUT6262 55PUT6262 65PUT6262 Contents 1 Get Support 13.1 Setup Smart TV 41 13.2 Smart TV
 Register your product and get support at www.philips.com/welcome 47PFL76x6M 42PFL76x6M 37PFL76x6M 32PFL76x6M EN User Manual Contents 1 Get started 3 TV tour 3 Important 6 Environmental efforts 8 Position
User Manual 19HFL4010W
 Register your product and get support at series www.philips.com/welcome User Manual 19HFL4010W Contents 1 Setting up 12.1 Wired network 12.2 Network settings 3 1.1 Read safety 3 1.2 Arm mounting 3 1.3
-,.%'/,012)301#0)43(/15641.,/1'3##)0/15/!!!"#$%&%#'"()*+!,&()*, 78!"#$%&'()'*
301#0)43(/15641.,/1'3##)0/15/!!!#$%&%#'()*+!,&()*, 78!#$%&'()'*") -,.%'/,012)301#0)43(/15641.,/1'3##)0/15/!!!"#$%&%#'"()*+!,&()*, 78!"#$%&'()'* 9:;?@AK C@;?@AK CD;?@AK !"#"$%$&'()(*+),*-$./)+)01$2+-345'()31$6787 9++$5):/41$5-1-5;-)3?4)'(1$?5-$1@A,-34$4'$3/?(:-$B)4/'@4$
-,.%'/,012)301#0)43(/15641.,/1'3##)0/15/!!!"#$%&%#'"()*+!,&()*, 78!"#$%&'()'* 9:;?@AK C@;?@AK CD;?@AK !"#"$%$&'()(*+),*-$./)+)01$2+-345'()31$6787 9++$5):/41$5-1-5;-)3?4)'(1$?5-$1@A,-34$4'$3/?(:-$B)4/'@4$
Table of contents. 1 Important Safety Care of the screen Recycling 3. 2 Your TV Television overview Product highlights 5
 2662.1 eng 03-07-2007 12:03 Pagina 1 Table of contents 1 Important 3 1.1 Safety 3 1.2 Care of the screen 3 1.3 Recycling 3 2 Your TV 4 2.1 Television overview 4 2.2 Product highlights 5 3 Getting started
Table of contents. 1 Important Safety Care of the screen Recycling 3
 Table of contents 1 Important 3 1.1 Safety 3 1.2 Care of the screen 3 1.3 Recycling 3 2 Your TV 4 2.1 Television overview 4 2.2 Product highlights 5 3 Getting started 5 3.1 Position the TV 5 3.2 Wall mounting
Table of contents. 1 Important Safety Care of the screen Recycling 3. 2 Your TV Television overview Product highlights 5
 2671.2 aus AL 09-10-2007 10:40 Pagina 1 Table of contents 1 Important 3 1.1 Safety 3 1.2 Care of the screen 3 1.3 Recycling 3 2 Your TV 4 2.1 Television overview 4 2.2 Product highlights 5 3 Getting started
1 Addendum. Use dual screen teletext. Enlarge teletext pages. 1 Press Dual screen on your remote control to enable dual screen teletext.
 1 Addendum Enlarge teletext pages The section Enlarge teletext pages in this user manual instructs you to press OPTION to enlarge teletext pages. Use dual screen teletext The section Use dual screen teletext
User Manual 55OLED803 65OLED803
 Register your product and get support at OLED803 series www.philips.com/tvsupport User Manual 55OLED803 65OLED803 Contents 1 What's new 1.1 Home and channels 4 1.2 Apps and Philips TV Collection 2 Setting
 Register your product and get support at www.philips.com/welcome 22PFL4008H/K/T 24PFL4008K/T 24PFL40x8H EN User Manual Contents 1 Important 3 Safety 3 Care 4 Legal 5 Sustainability 7 Help and support 8
Table of contents. 1 Important Safety Care of the screen Recycling 3. 2 Your TV Television overview Product highlights 5
 2695.1 en (+ softw) 13-09-2007 13:30 Pagina 1 Table of contents 1 Important 3 1.1 Safety 3 1.2 Care of the screen 3 1.3 Recycling 3 2 Your TV 4 2.1 Television overview 4 2.2 Product highlights 5 3 Getting
User Manual 49PUS PUS7503
 Register your product and get support at www.philips.com/welcome 7503 series User Manual 49PUS7503 55PUS7503 Contents 1 Setting Up 9.1 Start Internet 40 9.2 Options on Internet 4 1.1 Read Safety 4 1.2
User Manual 55PUS PUS8602
 Register your product and get support at 8602 series www.philips.com/welcome User Manual 55PUS8602 65PUS8602 Contents 1 Setting Up 4 10 TV Menu 1.1 Read Safety 4 1.2 TV Stand and Wall Mounting 1.3 Tips
User Manual 32PFS PFS6401
 Register your product and get support at 6401 series www.philips.com/welcome User Manual 32PFS6401 32PFS6401 Contents 1 What's new 8.6 Storage 4 2 Setting Up 9 Internet 4 1.1 All-in-one source menu 1.2
 Register your product and get support at www.philips.com/welcome 42PFL86x6D 47PFL86x6D EN User Manual Contents 1 Get started 3 TV tour 3 Important 6 Environmental efforts 8 Position the TV 9 Help and support
User Manual 43PUT PUT PUT6401
 Register your product and get support at 6401 series www.philips.com/welcome User Manual 43PUT6401 49PUT6401 55PUT6401 Contents 1 What's new 9.1 Start Internet 41 9.2 Options on Internet 4 1.1 New Browser
 Register your product and get support at www.philips.com/welcome 32PHT5109 40PFT5109 50PFT5109 EN User manual Contents 1 Caution 2 2 Important 3 Safety 3 3 Your TV 5 Remote Control 5 Remote control usage
User Manual 55OLED903 65OLED903
 Register your product and get support at OLED903 series www.philips.com/tvsupport User Manual 55OLED903 65OLED903 Contents 1 Setting Up 9.1 Start Internet 41 9.2 Options on Internet 4 1.1 Read Safety 4
EN LCD television. IT Televisore LCD. DE LCD-Fernsehgerät. ES Televisor LCD. FR Téléviseur LCD. PT Televisor LCD. NL LCD televisie.
 Register your product and get support at www.philips.com/welcome 37PFL7403 42PFL7403 47PFL7403 EN LCD television IT Televisore LCD DE LCD-Fernsehgerät ES Televisor LCD FR Téléviseur LCD PT Televisor LCD
Table of contents. 1 About this User Manual Digital Broadcasting Analogue Broadcasting... 3
 Table of contents About this User Manual.... Digital Broadcasting.... Analogue Broadcasting... Important...4. General... 4. Care of the screen... 4. Stationary images on the TV screen... 4.4 Electric,
User Manual 49PUS PUS PUS7803
 Register your product and get support at 7803 series www.philips.com/tvsupport User Manual 49PUS7803 55PUS7803 65PUS7803 Contents 1 What's new 1.1 Home and channels 4 1.2 Apps and Philips TV Collection
User Manual 32PHS PHT4503
 Register your product and get support at 4503 series www.philips.com/welcome User Manual 32PHS4503 32PHT4503 Contents 1 Get Support 3 13 Specifications 1.1 Identify and Register your TV 3 1.2 TV Help and
EN LCD television. IT Televisore LCD. DE LCD-Fernsehgerät. ES Televisor LCD. FR Téléviseur LCD. PT Televisor LCD. NL LCD televisie.
 Register your product and get support at www.philips.com/welcome 32PFL7623 42PFL7623 47PFL7623 EN LCD television IT Televisore LCD DE LCD-Fernsehgerät ES Televisor LCD FR Téléviseur LCD PT Televisor LCD
 Register your product and get support at www.philips.com/welcome 47PFL76x6M 42PFL76x6M 37PFL76x6M 32PFL76x6M EN User Manual Contents 1 Get started 3 TV tour 3 Important 6 Environmental efforts 8 Position
 Register your product and get support at www.philips.com/welcome EN DE FR NL IT ES PT EL USER MANUAL BENUTZERHANDBUCH MANUEL DE L UTILISATEUR GEBRUIKERSHANDLEIDING MANUALE D USO MANUAL DEL USUARIO MANUAL
User Manual 43PUS PUS PUS PUS7363
 Register your product and get support at 7363 series www.philips.com/welcome User Manual 43PUS7363 50PUS7363 55PUS7363 65PUS7363 Contents 1 Setting Up 9.1 Start Internet 40 9.2 Options on Internet 4 1.1
-,.%'/,012)301#0)43(/15641.,/1'3##)0/15/!!!"#$%&%#'"()*+!,&()*,!"#$%&'()'* 789:;<=>?H A>9:;<=>?H A=9:;<=>?H?89:;<=>?H
301#0)43(/15641.,/1'3##)0/15/!!!#$%&%#'()*+!,&()*,!#$%&'()'* 789:;<=>?H A>9:;<=>?H A=9:;<=>?H?89:;<=>?H") -,.%'/,012)301#0)43(/15641.,/1'3##)0/15/!!!"#$%&%#'"()*+!,&()*, BC!"#$%&'()'* 789:;?H 7@9:;?H A>9:;?H A=9:;?H?89:;?H !"#"$%$&'()(*+),*-$./)+)01$2+-345'()31$6787 9++$5):/41$5-1-5;-)3?4)'(1$?5-$1@A,-34$4'$3/?(:-$B)4/'@4$
-,.%'/,012)301#0)43(/15641.,/1'3##)0/15/!!!"#$%&%#'"()*+!,&()*, BC!"#$%&'()'* 789:;?H 7@9:;?H A>9:;?H A=9:;?H?89:;?H !"#"$%$&'()(*+),*-$./)+)01$2+-345'()31$6787 9++$5):/41$5-1-5;-)3?4)'(1$?5-$1@A,-34$4'$3/?(:-$B)4/'@4$
FD Trinitron Colour Television
 R 4-205-569-32(1) FD Trinitron Television Instruction Manual GB KV-14LM1U 2000 by Sony Corporation NOTICE FOR CUSTOMERS IN THE UNITED KINGDOM A moulded plug complying with BS1363 is fitted to this equipment
 Register your product and get support at www.philips.com/welcome 55PFL76x6H 47PFL76x6H 42PFL76x6H 37PFL76x6H 32PFL76x6H 55PFL76x6K 47PFL76x6K 42PFL76x6K 37PFL76x6K 32PFL76x6K 55PFL76x6T 47PFL76x6T 42PFL76x6T
User Manual 43PUS PUS PUS PUS PUS6162
 Register your product and get support at 6162 series www.philips.com/welcome User Manual 43PUS6162 49PUS6162 50PUS6162 55PUS6162 65PUS6162 Contents 1 Get Support 13.1 Setup Smart TV 42 13.2 Smart TV Start
EN LCD television. IT Televisore LCD. DE LCD-Fernsehgerät. ES Televisor LCD. FR Téléviseur LCD. PT Televisor LCD. NL LCD televisie.
 Register your product and get support at www.philips.com/welcome 32PFL9603 32PFL9613 37PFL9603 42PFL9603 42PFL9703 42PFL9803 47PFL9603 47PFL9703 52PFL9703 EN LCD television IT Televisore LCD DE LCD-Fernsehgerät
 Register your product and get support at www.philips.com/welcome 22PFL3557H/12 EN User Manual Contents 1 Get started 3 TV tour 3 TV controls 4 Important information 6 Sustainability 10 Help and support
User Manual 43PUS PUS PUS PUS PUS6262
 Register your product and get support at 6262 series www.philips.com/welcome User Manual 43PUS6262 49PUS6262 50PUS6262 55PUS6262 65PUS6262 Contents 1 Get Support 3 13 Smart TV 42 1.1 Identify and Register
User Manual 24PFS PFS5863
 Register your product and get support at www.philips.com/tvsupport 5863 series User Manual 24PFS5863 32PFS5863 Contents 1 Get Support 1.1 Identify and Register your TV 3 1.2 TV Help and User Manual 3 1.3
Safety Instructions. General Safety Instructions
 Table of Contents Safety Instructions...2 General Safety Instructions...2 Installation...3 Cleaning...4 General Description...5 Specifications & Accessories...5 Specifications...5 Accessories...5 Overview...6
User Manual 43PUS PUS PUS6501
 Register your product and get support at 6501 series www.philips.com/welcome User Manual 43PUS6501 49PUS6501 55PUS6501 Contents 1 What's new 8.6 Storage 4 1.1 New Browser Engine 2 Setting Up 9 Internet
NMS ETA TM Stereo Advanced Digital TV Set-top Box
 Digital TV HD Set-top Box STB2-T2 NMS ETA TM Stereo Advanced Digital TV Set-top Box User Guide CONTENTS Safety Information... 3 Introduction... 4 Set-top Box Front Panel... 4 Set-top Box Back Panel...
Register your product and get support at. series
 Register your product and get support at series www.philips.com/welcome User Manual 22PFS4022 22PFS4232 22PFT4022 22PFT4022 22PFT4022 22PFT4232 24PFS4022 24PFS4032 24PFT4022 24PFT4022 24PFT4022 24PFT4032
About this handbook. In the stripe under each menu you are told which keys you can press and how you can switch the menus off again.
 English About this handbook This is a handbook to help you with the installation and operation of your new menu TV. With a menu TV, menus can be called up on the screen. These menus provide information
 Register your product and get support at www.philips.com/welcome PFL43x8 PFL31x8 PFL30x8 EN User Manual Contents 1 Important 3 Safety 3 Care 5 Legal 6 Sustainability 8 Help and support 9 2 Use your TV
 Register your product and get support at www.philips.com/welcome USER MANUAL www.philips.com/support Model Serial Country Number Tariff Austria 0810 000205 0.07/min Belgium 078250145 0.06/min Bulgaria
BeoVision Guide
 BeoVision 8-40 Guide Contents Menu overview, 3 See an overview of on-screen menus. Navigate in menus, 4 See how to use the different remote controls for menu operation. First-time setup, 5 Which menus
Safety Instructions. General Safety Instructions
 Table of Contents Safety Instructions...2 General Safety Instructions...2 Installation...3 Cleaning...4 General Description...5 Specifications & Accessories...5 Specifications...5 Accessories...5 Overview...6
7000 Series 42PFL7404D/78 52PFL7404D/ Series 32PFL5604D/78 42PFL5604D/78 47PFL5604D/78. EN User manual
 Register your product and get support at www.philips.com/welcome 7000 Series 42PFL7404D/78 52PFL7404D/78 5000 Series 32PFL5604D/78 42PFL5604D/78 47PFL5604D/78 * Non-contractual image User manual Contents
User Manual 32PFS PFS PFS5803
 Register your product and get support at 5803 series www.philips.com/welcome User Manual 32PFS5803 43PFS5803 50PFS5803 Contents 1 Get Support 13.1 Setup Smart TV 43 13.2 Smart TV Start Page 13.3 App Gallery
User Manual 49PUS PUS6561
 Register your product and get support at 6561 series www.philips.com/welcome User Manual 49PUS6561 55PUS6561 Contents 1 What's new 4 1.1 All-in-one source menu 1.2 Top picks 4 1.3 Media browser 5 2 Setting
User Manual 65PUS6521
 Register your product and get support at series www.philips.com/welcome User Manual 65PUS6521 Contents 1 What's new 4 1.1 New Browser Engine 2 Setting Up 9 Internet 4 5 10 TV Menu 2.1 Read Safety 5 2.2
Register your product and get support at USER MANUAL
 Register your product and get support at www.philips.com/welcome EN USER MANUAL www.philips.com/support Model Serial Country Number Tariff Austria 0810 000205 0.07/min Belgium 078250145 0.06/min Czech
Daily use, 6 How to bring up and use the menus on the screen. First-time setup, 15 See what the first-time setup sequence consists of.
 DVB HD Guide Contents 3 Introducing the module and remote control, 4 Find out how to use your remote control with the DVB Module. Daily use, 6 How to bring up and use the menus on the screen. See programme
KGN&, > Ϯϰs USER MANUAL
 USER MANUAL KGN Contents Contents Safety Precautions Power Supply... 1 Installation... 2 Use and Maintenance... 3 Important Safety Instructions... 4-5 User Guidance Information Names of each part(front
FV400 DIGITAL TV RECEIVER WITH MODULATOR INSTRUCTION MANUAL
 FV400 DIGITAL TV RECEIVER WITH MODULATOR INSTRUCTION MANUAL Please read this instruction manual carefully before using your receiver Table of Contents Introduction-----------------------------------------------------------------------------
User Manual 43PUT PUT PUT6801
 Register your product and get support at 6801 series www.philips.com/welcome User Manual 43PUT6801 49PUT6801 55PUT6801 Contents 1 What's new 4 9 Internet 4 1.1 All-in-one source menu 1.2 Top picks 4 1.3