DIGITAL PORTABLE RECORDER TRAINING MANUAL FOR COURT REPORTING OFFICERs
|
|
|
- Damon Nelson
- 6 years ago
- Views:
Transcription

1 SUPREME & NATIONAL COURTS OF JUSTICE Court Reporting Service DIGITAL PORTABLE RECORDER TRAINING MANUAL FOR COURT REPORTING OFFICERs Author: Training Manager CRS 15/1/16 1
2 Contents Page 1. Portable case layers Assembling and connection procedures Digital portable recording equipment setup Flash Drive archiving Procedure in shutting down the digital portable system DMX4 configuration Procedure to record using the Marantz Troubleshooting or common errors Quick Notes Power and audio path for digital portable Procedures to follow when travelling Security of the portable Digital portable checklist 39 2
 layers.")
3 PORTABLE CASE The portable case contains the digital portable recording components and accessories. The case is comprised of three (3) layers. Portable Case 1st Layer The first layer consists of the laptop, the headset, flash drive and the laptop lock. Top Layer 3


4 2 nd Layer. The second layer consists of microphones and leads Middle layer X5 Microphones Audio leads, UPS power lead and audio Splitter lead 4


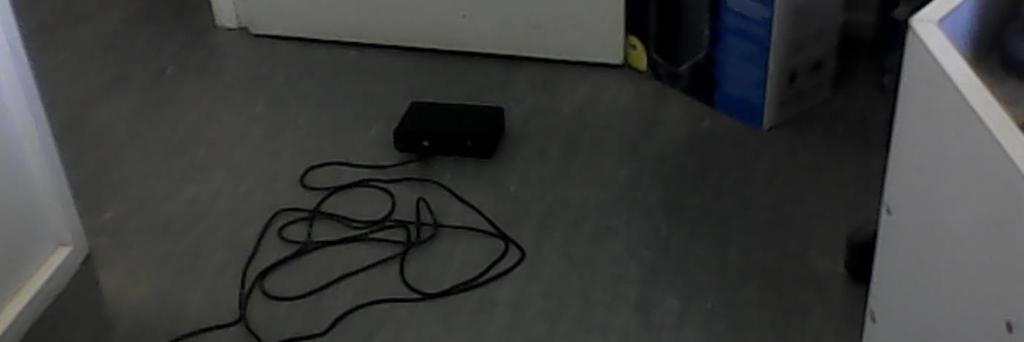
5 3 rd Layer The third layer consists of the marantz, UPS, mixer, microphone stands including the other accessories UPS Marantz Bottom layer Mixer X5 Microphone Stands USB lead, Marantz/ mixer audio lead, laptop power lead, Marantz/mixer power lead, voice box. 5

6 Assembling and Connection Procedures 1. Assemble the Mixer, Marantz, UPS and Laptop on the monitor table. 2. Assemble all five microphone stands and insert all microphones to the stands. 6


7 3. Connect all four leads to the four channel mixer and run the audio leads to each of the five microphones. The fifth microphone connection will run from the split lead connection from channel 2 of the mixer. The image below is depicting the connections. Note: there are 2 lengths for microphone leads. 8 metre + 5 metre. Channel 2 will have a split lead connected from the Mixer adjoining to the 2 nd and 5 th microphones. Audio Input Split lead. Connect to Input 2 on the mixer then run the audio leads to the Witness and the Accused dock. There are 2 formats for the splitter lead which are set out below. 7


8 Number 2 format is most used when 3 microphones are requied on the bar table. 8


9 4. Connect the Marantz-Mixer split power lead to the UPS. Connect the large pin to the Mixer and small pin to the Marantz. Marantz-Mixer power lead (2 pins). Connect to the UPS To Marantz To Mixer Connect the small pin to the Marantz where it is indicated as DC-in 9


10 Connect the large pin to the Mixer where it is indicated as DC. The image below depicts when connected. Note: Make sure when you plug in the mixer power the indicator on the front of the mixer is Green. This indicates full power. A Red indicator means low power. To fix this, unplug the power to the mixer and re-plug. 5. Connect the Marantz to the Mixer using the audio lead below. Marantz to Mixer lead 10


11 The red or white lead should match the red or white input port on the Mixer. The large lead is connected to the Marantz input port that is stating MONO on the left side as depicted in the above image. Note: Check the input lead to the Marantz is on MONO. Check the Mic/Line switch is in the Line position. 11


12 6. Connect the USB cable as depicted below from the laptop to the Mixer. Note: The USB lead must be plugged in and the mixer powered on with Green indicator on front of the mixer before turning PC on. 12


13 7. The image below depicts the voice-box and connection plugs to the marantz and laptop. To Marantz For Headset To Laptop Connect the large plug to the Marantz whilst the smaller plug is connected in to the Laptop audio port. The headset is then connected to the voice box. Note: The plug from the headset to the voicebox is very tight, please ensure it is fully inserted. 13

14 8. Digital Portable Recording Equipment Complete Setup Confirm the connections by going through the set up procedures in the manual. If there are no errors, then CONGRATULATIONS, you have successfully setup the portable recording system. The image below depicts a complete setup of the portable recording system Powering-up the Portable system 1 st Power up the UPS 2 nd Power up the Mixer 3 rd Power up the Marantz 4 th Power up the Laptop 5 th Log onto the Laptop 6 th Start up the FTR Reporter. Do a test to ensure that the system is ready for recording. Listen to sound in both PC and BUP to confirm the system is working. 14
.")
 to the laptop. Wait until the flash drive is connected. 2.")
15 DIGITAL PORTABLE FLASH DRIVE ARCHIVING Archiving Steps 1. After the court rises/adjourns for the day, stop recording and complete editing the log sheet(s). After editing, close log sheet(s) and you will have a blank Reporter as shown below. 1. Insert the Flash Drive (Removable Drive) to the laptop. Wait until the flash drive is connected. 2. Click on the Archive to Removable icon as shown below.. Note: ARCHIVE MUST be done every day whilst on circuit. The Flash Drive must be kept on your person at all times. 15


16 4. A dialog box will appear as shown below 5. Select the Drive Letter as shown below. Click on the triangle 16


17 6. Once the Drive is selected, observe that the Pending list of recordings yet to be archived is displayed. Click Start to Archive as shown below. 7. A message box will appear as shown below. Just click Yes. 8. Box below showing archiving in progress. 9. Once completed, it will show completion of archiving. 17


18 10. Close the Archive to Removable Drive Finally access the Flash Drive and confirm all has been archived. To confirm flash drive archive 1. Go to Start button and Click Computer. 2. Open the Flash Drive 18


19 3. Open the Public Folder and see the Archive Folders for the day. The files are listed in Date range starting from the year/month/day. E.g Open the folder of your recording to confirm that all the recordings had been captured. 5. Finally, eject the flash drive. 19
20 Shutting down the Portable system 1. Close the FTR Reporter application 2. Turn off the Marantz 3. Turn off the UPS and the Mixer 4. Shut down the Laptop Repacking of the Portable System Reverse the whole process of the portable setup process. Make sure to go by the digital portable check list to ensure that everything is packed and intact. Note: It is very important to carefully pack the portable after use. This includes carefully rolling the microphone leads and putting all hardware in the correct place. 20

21 DMX4 Configuration How to adjust the DMX4 Mixer configuration when there is a big amount of noise or interference from outside or within the room causing distortion (E.g. Rain, heavy machineries nearby or noisy air-condition) then changes should be made to lower the Input Level following the procedure. Until everything gets back to normal then scene can be restored to default. If the recording is normal with quality audio coming through then leave the Scene as it is on Default. In the event there is sound or noise interference from outside or within the court room, the setting can be adjusted by following this procedure. 1. Double click on DMX4 Configuration Icon on the desktop to open. 2. Go to Scene and click the Open button NOTE THE SETTING BELOW 21


22 Default Setting of the Input Level 3. In the pop-up window select NJSS_02.scene4 file and click Open to load the new setting for the Input Level to avoid noise interference. 22

23 23 4. The new setting of the Input Level should look like this.


24 Microphone Phantom Power Recording Channel Monitor Channel Input Level Important The picture above shows the actual configuration of the DMX4 Mixer used on the portable system. Below are the important things to check after powering up the system. Confirm that; 1. all the microphone is ON (shaded)for each channel (1-4) 2. all phantom power ON (shaded) for each channel (1-4) 3. recording channel should be shaded following the pattern shown on the picture 4. all the monitor channel should be shaded Note: In order to shade the options above, you just have to click on each one. Input Level should follow the settings shown below (Default) 24

25 PROCEDURE TO RECORD DIRECTLY USING MARANTZ PMD661 MKII USING THE INTERNAL MICROPHONE IN THE MARANTZ. In standard format the Digital Portable has a Marantz 661 setup as a backup recorder. This backup recorder receives a single channel line level feed from the DMX4 Digital Mixer. The front panel of the Marantz 661is shown below. Right Arrow Menu/Exit Enter Down Arrow If this mixer fails there are a number of options for recording. The recording quality will be less than the standard 4 channel quality. The options include: 1. Using the Marantz with the Internal Mic. In this option we change the Input Setting on the Marantz to record from the Internal Mic. This will act as a standalone recorder. The procedure is: - Press Menu - press Enter Button to Select 1 Presets - press Enter to Preset-1 - press Down Arrow to Select Edit - press Enter to confirm Edit - press the Up or down arrow to highlight 01 Input (if not already done) - Press right Arrow until INT MiC is highlighted 25

26 - press EXIT - press Left Arrow to Select Yes - press enter to confirm - press enter for Preset 1 - press enter to Select the Machine will quickly display message Confirmed The setting in the Presets are shown below. Mic/Line and INT Mic Mono/Stereo If the Mixer fails Record using 2 Microphones from the Portable plugged to the Marantz.. In this option 2 mics and leads from the existing portable will be plugged direct to the Marantz. These mics can be run out the court participants. The procedure is to set the Input to MIC/LINE and if 2 mics are to be used set the Record Channel to Stereo. In normal Operation the Record Channel is set to MONO. The procedure is: - Press Menu - press Enter Button to Select 1 Presets - press Enter to Preset-1 - press Down Arrow to Select Edit
27 - press Enter to confirm Edit - press the Up or down arrow to highlight 01 Input (if not already done) - Press right Arrow until MIC/LINE is highlighted - press the Up or down arrow to highlight 03 Rec Channel - Press right Arrow until Stereo is highlighted - press EXIT - press Left Arrow to Select Yes - press enter to confirm - press enter for Preset 1 - press enter to Select the Machine will quickly display message Confirmed. On the back of the Marantz move the Mic/Line switch to MIC position. 27
28 If the UPS fails Record using Batteries inserted in the Marantz with 2 Microphones plugged to the Marantz. In this option 2 microphones and leads from the existing portable will be plugged direct to the Marantz. The procedure is to move the MIC/LINE switch to MIC. This switch is located at the back of the Marantz and set the Record Channel to Stereo. The procedure to follow is outlined below: - Press Menu - press Enter Button to Select 1 Presets - press Enter to Preset-1 - press Down Arrow to Select Edit - press Enter to confirm Edit - press the Up or down arrow to highlight 01 Input (if not already done) - Press right Arrow until MIC is highlighted - press the Up or down arrow to highlight 03 Rec Channel - Press right Arrow until Stereo is highlighted - press EXIT - press Left Arrow to Select Yes - press enter to confirm - press enter for Preset 1 - press enter to Select the Machine will quickly display message Confirmed. 28
29 On the back of the Marantz move the Mic/Line switch to MIC position. UPS FAILURE - RECORD USING THE MARANTZ If the UPS fails record using the marantz. 1. Insert double A (AA) batteries in the backup/marantz; 2. Plug 2 microphones direct to the BUP and record. PC FAILURE RECORD USING MARANTZ If the PC or laptop fails record using the marantz. 1. Plug 2 microphones direct to the backup (BUP) and record 2. Take down notes using paper log sheets or sequence sheets. 29
30 IF MIXER FAILS RECORD USING THE INTERNAL MICROPHONE IN THE LAPTOP 1. To use the Internal Microphone in the Laptop to record is another option if there is power failure and the UPS has gone off, the marantz does not have power supply or battery or the mixer has failed. Outlined are the steps to follow in setting up the internal microphone on the laptop t record On the FTR Reporter go to the MENU toolbar and select TOOLS When in TOOLS template, click and OPTIONS template will appear From OPTIONS template, click and RECORDING template will appear From RECORDING options template select MULTIMEDIA 6. 5.Click on the dropdown arrow (little triangle) to select INTERNAL MICROPHONE ARRAY (IDT) 7. 6.Click FINISH to save the changes you have made and start recording using the internal microphone mode. 8. To reset back to normal line out mode: On the FTR Reporter go to the MENU toolbar and select TOOLS When in TOOLS template click and OPTIONS template will appear From OPTIONS template click and RECORDING template will appear From RECORDING options template select MULTIMEDIA Click on the dropdown arrow (little triangle) to select MICROPHONE (ANTEX ELECTRONICS U.) Click FINISH to save the changes you have made and start recording in the normal line out mode. 15. Note: It may be necessary to place the Laptop close to persons speaking to get best quality audio. VOICEBOX FAILUE RECORD USING PC/LAPTOP If the voicebox fails connect the headset to the PC or laptop to capture sound. 1. Plug headset direct to PC or laptop; 2. Switching from FTR to marantz (BUP) is disabled so you cannot hear or listen to the audio recording on the marantz. 30


31 COMMON ERRORS The common error encountered is when the USB cable is not connected properly to the DMX4 mixer or when it is accidently unplugged during recording which causes the FTR to freeze. Note: This error is most likely to occur when starting the recorder after setup is complete when the USB cable is accidently unplugged. Identified error a. Recording has halted Below is a FTR reporter interface and the error message which pops up when trying to start the recording. When start record button is clicked the error message pops-up This pop-up message notifies us that there is no connection between the pc and the DMX4 mixer via the USB cable. Troubleshoot Steps to troubleshoot this error; 1. Check to see that the USB cable is properly connected to the mixer and the laptop. 31 START AND STOP RECORDING 2. If the USB cable is well connected to the mixer and laptop then unplug the cable from the mixer and plug back in or;


32 3. Restart the laptop. 4. Go to option on the menu bar. Select recording, under Line Out mode click on the drop down button and select Antex USB DMX-8 Wave Below is another error message that would pop-up at times when you unplug and plug back the USB. 5. If the error continues than try using a different USB cable. Note that it is the connection between the mixer and the laptop that s causing the issue. Identified error b. PC Freezing Error FTR reporter freezes when the power lead at the back of the mixer is accidently disturbed or unplugged during recording. The FTR reporter freezes and recording is also interrupted. All audio channels activity on the channel level window stops Red indicator still on Playback panel time stops Note that no error message would appear to alert you that the pc freezes. Freezing will be realised when the mouse cursor is not moving or when the keys on the keyboard are not responding to your request. 32


33 Troubleshoot Steps to troubleshoot this error; Stop recording 1. Check to see that the power lead at the back of the mixer is connected and the green indicator in front of the mixer is on, if the green indicator turns red than the mixer is off. Connect the power lead firmly to the port and make sure the green indicator comes on. 2. Click on the record button to stop recording. 3. Click on the record button to start recording. Start recording 4. If the recording doesn t start than repeat steps 2 & 3 again and the recording should start. Identified error c. Sound Volume Error Low transmission of audio to the headset. When this issue arises then; 1. Laptop Volume Check the speaker volume on the laptop to make sure the volume level is not too low or on mute. Volume on mute Volume too low The two illustrations above depict how the volume level will look like if low sound transmission through the headset is caused by the Volume on the laptop. 33


34 2. Playback Panel- Channel Volumes Check to see that Channel Volumes are on and are high enough to hear clearly. Below is the correct configuration to the playback panel and also how the interface should look like inorder to transmit clear audio through the headset. Channel on Master Volume Individual channel volumes 3. Check the volume adjustor on the headset knob to ensure the volume is up. 34
35 QUICK NOTES Template: LABEL SHORTCUT TEXT Court Commences Ctrl + 9 Court Commences His Honour Ctrl + H His Honour 1 Her Honour Ctrl + A Her Honour 1 Arraignment Ctrl + 9 Arraignment Allocutus Alt + B Allocutus Conviction Alt + C Conviction Witness Sworn Alt + 6 Witness Sworn 2 Examination in-chief Alt + 1 Examination in-chief Cross-examination Alt + 2 Cross-examination Re-examination Alt + 3 Re-examination Further crossexamination Alt + 4 Further cross-examination Further re-examination Alt + 5 Further re-examination The Witness Withdrew Alt + 7 THE WITNESS WITHDREW The Witness Ctrl + W The Witness 2 Indictment presented Ctrl + N Indictment presented Brief Facts Presented Ctrl + F Brief facts presented Submissions Alt + S Submissions Exhibit tendered Ctrl + E Exhibit tendered marked Short Adjournment Ctrl + S Short Adjournment Luncheon Adjournment Ctrl + L Luncheon Adjournment MFI Ctrl + M Marked for Identification Next Matter Alt + X Adjournment Stood Down Alt + A Matter is stood down 35
36 Diagram of the Digital Portable Recorder Audio Path M UPS AC Power 4 Channel Microphones Power Lead: UPS to Marantz Power Lead: UPS to Mixer Mixer USB Lead: PC to Mixer Audio Lead: Mixer to BUP BUP Marantz Power lead to the laptop Laptop Audio Lead: Marantz to V/Box Voicebox Audio Lead: PC to V/Box Headphones 36
37 PROCEDURES TO FOLLOW WHEN TRAVELLING ON CIRCUIT 1. When travelling out on circuit check with the assistant digital systems engineer (Waigani) or the technically qualified CRO (regions) for a portable digital recording system. 2. A portable recording system will be assigned and a check should be made against the checklist to ensure that all components and accessories are packed and intact. The checklist will have to be signed by both officers before the circuit. You are responsible to check and ensure that you have all the equipment. (A sample of the checklist is attached at the back of the manual.) 3. When travelling the laptop only will have to be removed from the portable case and inserted in its soft carry satchel and will be carried by the officer on his or her person. 4. On return from circuit the engineer/tqcro will check against the checklist to ensure that all components and accessories are packed and intact and returned safely. Both officers will have to sign the checklist after the check. 5. Statistics - on return to site or base, log sheets to be printed and entered directly online. 6. Back-up on flash drive has to be done daily and the flash drive is to be on the officer s person at all times during the duration of the circuit until return to base. ADDITIONAL ITEMS TO TAKE ON CIRCUIT 1. Flash Drives 2. Power extension cord or power board 37
38 SECURITY OF THE PORTABLE The matter of safety of the portable recording machine is a problem that will be faced. These are certain things you will do: (a) Never leave the laptop computer unattended; (b) During luncheon adjournment lock the laptop computer to the leg of a table in the courtroom; (c) Adjournment for the day. All components are to be packed in the portable case and locked with the portable case lock and left in the associate or judge s chamber. The portable case must be locked to the leg of a table. 38
39 No Items DRTS Portable Hardware& Software Check list Form DSIT CRO DSIT CRO 1 USB cable - laptop to mixer 1 2 Audio lead (Marantz to mixer) 1 3 Audio Leads 5 4 Audio Input Splitter 1 5 UPS Power lead 1 6 Power lead (Marantz & mixer to UPS) 1 7 Voicebox 1 8 Laptop power lead 1 9 Laptop 1 10 Headset 1 11 Mixer 1 12 Marantz 1 13 UPS 1 14 Microphones 5 15 Microphones Stand 5 16 Flash Drive 1 17 Power Board 1 18 Extension Power lead 1 This area is only for the Digital Systems Officer 19 FTR Reporter 1 20 Mixer Driver 1 21 Archiving configurations 1 22 Antivirus Update 1 23 Laptop battery fully charged 1 Qty Before circuit After circuit Remarks - give brife description of the items if problem arises Court Monitor: Sign before circuit: Sign after circuit: DS Officer: Sign before circuit: Sign after circuit: Date before circuit: / /2015 Date after circuit: / /2015 Portable No: POMDPR Circuit Location: 39
VIDEO JUDGE SYSTEM SETUP & CAPTURE
 VIDEO JUDGE SYSTEM SETUP & CAPTURE TABLE OF CONTENTS GENERAL OVERVIEW... 1 ABOUT THE COMPETITIONS... 1 PRIOR TO THE EVENT... 2 EQUIPMENT LIST... 2 ARRIVAL AT THE VENUE... 3 EQUIPMENT SETUP... 4 Camera
Quick Start for TrueRTA (v3.5) on Windows XP (and earlier)
 on Windows XP (and earlier)") Skip directly to the section that covers your version of Windows (XP and earlier, Vista or Windows 7) Quick Start for TrueRTA (v3.5) on Windows XP (and earlier) Here are step-by-step instructions to get
Skip directly to the section that covers your version of Windows (XP and earlier, Vista or Windows 7) Quick Start for TrueRTA (v3.5) on Windows XP (and earlier) Here are step-by-step instructions to get
Hardware Setup. If you have any further questions after checking this document, please contact
 Hardware Setup If you have any further questions after checking this document, please contact support@cognisens.com Hardware Setup Getting Started: NeuroTracker Pro WHAT TO BUY SETTING UP YOUR 3D TV SETTING
Part names (continued) Remote control
 Remote control") Introduction Part names (continued) Remote control (1) STANDBY ( 25) (1) (2) ON ( 25) (3) (3) ID - 1 / 2 / 3 / 4 s ( 18) (4) (4) COMPUTER 1 ( 27) (7) (5) COMPUTER 2 * (8) (6) COMPUTER 3 * (10) (13) (7)
Introduction Part names (continued) Remote control (1) STANDBY ( 25) (1) (2) ON ( 25) (3) (3) ID - 1 / 2 / 3 / 4 s ( 18) (4) (4) COMPUTER 1 ( 27) (7) (5) COMPUTER 2 * (8) (6) COMPUTER 3 * (10) (13) (7)
USING MEDIACAST FOR LIVE EVENTS THERE ARE THREE SEPARATE KEYS NEEDED TO ACCESS THE FRONT AND BACK OF THE VIDEO CART.
 USING MEDIACAST FOR LIVE EVENTS THERE ARE THREE SEPARATE KEYS NEEDED TO ACCESS THE FRONT AND BACK OF THE VIDEO CART. 1). Plug in the cart to a power source and a network plug-in drop that is in the sam
CCE900-IP-TR. User s Guide
 CCE900-IP-TR CCE900-IP-T & CCE900-IP-R User s Guide i-tech Company LLC TOLL FREE: (888) 483-2418 EMAIL: info@itechlcd.com WEB: www.itechlcd.com 1. Introduction The CCE900-IP-T & CCE900-IP-R is a solution
CVM-WM300. UHF Wireless Microphone USER MANUAL
 CVM-WM300 UHF Wireless Microphone USER MNUL Foreword Thanks for purchasing COMIC WM300 UHF wireless microphone. WM300 is an all-metal wireless microphone with dual-transmitter triggered by one receiver,
DVR-431 USB Wireless Receiver User Manual
 DVR-431 USB Wireless Receiver User Manual Thank you for using our wireless USB receiver, please read the following content carefully before using, it will help you make better use of this product. Introduction
AVTuner PVR Quick Installation Guide
 AVTuner PVR Quick Installation Guide Introducing the AVTuner PVR The AVTuner PVR allows you to watch, record, pause live TV and capture high resolution video on your computer. Features and Benefits Up
DVB-T USB SET-TOP BOX
 DVB-T USB SET-TOP BOX User Manual Version: 1.0 (February 2005) TRANSYSTEM INC. No.1-2 Li-Hsin Rd.I Science-Based Industrial Park, Hsinchu, Taiwan Tel:+886-3-5780393 Fax:+886-3-5784111 e-mail: sales@transystem.com.tw
42 Freestanding Infrared Multi Touch Screen Kiosk User s Manual
 42 Freestanding Infrared Multi Touch Screen Kiosk User s Manual Manual Version L42HD-T2.2 Safety Instructions Please keep the display away from any heat sources such as radiators or direct sunlight. Place
2 Connect your video source
 EX90 2 Connect your video source Quick Setup Connect the projector to a computer or video source using any of the available connections shown below. Check the connectors on your video equipment. If more
PRECAUTIONS CONTENTS: Please follow these precautions:
 PRECAUTIONS Please follow these precautions: To prevent fire or shock hazard, do not expose the unit to rain or moisture. To prevent electrical shock, do not open the cabinet. Refer to qualified personnel
A/V Equipment Manual
 A/V Equipment Manual Setup, Operation and Troubleshooting for the Audio-Visual Equipment Jessica White September 20, 2012 This manual provides comprehensive instructions on how to setup, operate and troubleshoot
Remote Control. degraded, causing unreliable operation. The recommended effective distance for remote operation is about 16 feet (5 meters).
.") Media Streaming Sound Bar RTS736W User Manual Remote Control using the remote control Point the remote control at the REMOTE SENSOR located on the unit (see Front Panel illustration for precise location).
Media Streaming Sound Bar RTS736W User Manual Remote Control using the remote control Point the remote control at the REMOTE SENSOR located on the unit (see Front Panel illustration for precise location).
The amazing power of FiOS starts here.
 SELF-INSTALLATION GUIDE The amazing power of FiOS starts here. LET S GET STARTED Welcome to a network that s light years ahead. Welcome to life on FiOS. Congratulations on choosing Verizon FiOS! You re
insors Grid Room System Installation Guide
 insors Grid Room System Installation Guide May 2006 insors Integrated Communications www.insors.com 312-786-9169 Introduction insors Grid is a state-of-the-art software-based system that supports a highly
HD Digital Set-Top Box Quick Start Guide
 HD Digital Set-Top Box Quick Start Guide Eagle Communications HD Digital Set-Top Box Important Safety Instructions WARNING TO REDUCE THE RISK OF FIRE OR ELECTRIC SHOCK, DO NOT EXPOSE THIS PRODUCT TO RAIN
TF5 / TF3 / TF1 DIGITAL MIXING CONSOLE. TF Editor User Guide
 TF5 / TF3 / TF1 DIGITAL MIXING CONSOLE EN Special notices Copyrights of the software and this document are the exclusive property of Yamaha Corporation. Copying or modifying the software or reproduction
The Playful Invention Company. PicoCricket Troubleshooting. Version 1.2a
 The Playful Invention Company PicoCricket Troubleshooting Version 1.2a PicoCricket Troubleshooting For the latest troubleshooting hints, see www.picocricket.com/troubleshooting Can t find the Beamer Solutions
FlyTV Express M5 MST-T 2 A 2
 FlyTV Express M5 MST-T 2 A 2 User Manual Animation Technologies Inc. www.lifeview.com Ver: 1.0 Copyright and Trademark Notice 2006 by Animation Technologies Inc. All rights reserved. Information in this
NSU Distance Delivery Teleconference Operations Polycom 2005
 NSU Distance Delivery Teleconference Operations Polycom 2005 Polycom Teleconference & Crestron Control Presentation Room Operations E-learning Studio Mode Classroom Presentation Mode DDN Remote Site Capability
KV-901T & AV-901R. Quick Guide
 KV-901T & AV-901R Quick Guide This quick guide provides basic information only, for a complete version of user s manual please down load at: http://www.avextender.com/comm/upfile/p_110913_ 04468.pdf Copyright
Dejero LIVE+ 20/20 Transmitter
 Dejero LIVE+ 20/20 Transmitter This Dejero kit will allow you to broadcast live from the field, using an NX5 camera kit. Please follow the following steps in order!! 1. Preliminary Check: To set up the
LCD MONITOR. quick start guide P2070,P2270,P2370,P2070G,P2270G,P2370G
 LCD MONITOR quick start guide P2070,P2270,P2370,P2070G,P2270G,P2370G ii Introduction Package Contents Please make sure the following items are included with your monitor. If any items are missing, contact
Unicable II Programmer. IDLU-PROG01-OOOOO-OPP Item: Installation & User Guide
 Unicable II Programmer IDLU-PROG01-OOOOO-OPP Item: 5273 Installation & User Guide 1 2 Thank you for purchasing Inverto s advanced Unicable II programmer. Before installing and using the programmer, please
LINK-MI LM-WHD05B. Wireless HDMI AV Transmission System. User Manual
 LINK-MI LM-WHD05B Wireless HDMI AV Transmission System User Manual Table of Contents 1.Important Information... 3 1.1 Safety Precautions... 3 1.2 Declaration of Conformity... 4 1.3 Trademark Information...
Outdoor & Indoor Full Color LED Display Screen. Installation Manual
 SHENZHEN VISULAL LUMEN CO.,LTD. Outdoor & Indoor Full Color LED Display Screen Installation Manual Thank you for your selected Visuallumen's outdoor & Indoor Full Color LED Display. For proper operation,
Quick Help Teaching Room Technology Support
 Quick Help Teaching Room Technology Support Technical assistance is available. If you require assistance, please call Ext 6066 Quick Help Technology Overview INDEX INDEX Touch Screen Is not active 3 Technology
COLOR TFT LCD MONITOR. Manual
 COLOR TFT LCD MONITOR Manual Safety defended: Properly maintains your system to be possible to guarantee its service life and to reduce the damage risk. It should avoid the damp and exceeding temperature
2 Connect your video source
 PowerLite 822+/83+ 2 Connect your video source Quick Setup Connect the projector to a computer or video source using any of the available connections shown below. Check the connectors on your video equipment.
Quick Reference. PowerLite 5510/5520W/5530U/5535U
 PowerLite 5510/5520W/5530U/5535U Quick Reference This Quick Reference card gives brief instructions on connecting your projector and using common features. For details, see the online User s Guide. VGA
Evolution Digital HD Set-Top Box Important Safety Instructions
 Evolution Digital HD Set-Top Box Important Safety Instructions 1. Read these instructions. 2. Keep these instructions. 3. Heed all warnings. 4. Follow all instructions. 5. Do not use this apparatus near
2 Connect your video source
 PowerLite 6110i 2 Connect your video source Quick Setup Choose a location The projector supports 4 viewing setups. Choose the best one for your environment. If you install the projector in a rear or overhead
VideoMate U3 Digital Terrestrial USB 2.0 TV Box Start Up Guide
 VideoMate U3 Digital Terrestrial USB 2.0 TV Box Start Up Guide Compro Technology, Inc. www.comprousa.com Copyright 2001-2005. Compro Technology, Inc. No part of this document may be copied or reproduced
DC162 Digital Visualizer. User Manual. English - 1
 DC162 Digital Visualizer User Manual English - 1 Table of Contents CHAPTER 1 PRECAUTIONS... 5 CHAPTER 2 PACKAGE CONTENT... 7 CHAPTER 3 PRODUCT OVERVIEW... 8 3.1 PRODUCT INTRODUCTION... 8 3.2 I/O CONNECTION...
Be sure to run the vehicle engine while using this unit to avoid battery exhaustion.
 CAUTION: TO REDUCE THE RISK OF ELECTRIC SHOCK DO NOT REMOVE COVER (OR BACK) NO USER-SERVICEABLE PARTS INSIDE REFER SERVICING TO QUALIFIED SERVICE PERSONNE; Please Read all of these instructions regarding
Guide to Courtroom Technology. July 2017
 16 th Judicial Circuit Court Macomb County Probate Court 42 nd District Courts July 2017 Written by: Michael Whitacre Technology Liaison 16 th Judicial Circuit Court The courts have made certain technologies
The Switcher: TriCaster 855 Extreme
 The Switcher: TriCaster 855 Extreme OVERVIEW The typical studio production is composed of content from various sources: CAMERAS: Moving images from studio cameras normally three. AUDIO from studio mics
Video Conference Classroom Documentation
 Updated: 8/18/2017 Video Conference Classroom Documentation Contents About These Classrooms... 2 Where... 2 Podium Overview... 2 On Top of Podium... 2 Inside the Podium... 2 Equipment Information... 2
Zoom Pro Classroom Facilitator and User Guide
 Zoom Pro Classroom Facilitator and User Guide Version 1 08/21/2017 Tom M c Kellips, DM 1 Table of Contents Introduction...3 Technical Support...3 Starting a video conference...3 Sharing a screen...4 Recording...4
HyperMedia User Manual
 HyperMedia User Manual Contents V3.5 Chapter 1 : HyperMedia Software Functions... 3 1.1 HyperMedia Introduction... 3 1.2 Main Panel... 3 1.2.2 Information Window... 4 1.2.3 Keypad... 4 1.2.4 Channel Index...
Camera 220C Document Camera User s Guide
 Camera 220C Document Camera User s Guide #401-220C-00 Table of Contents TABLE OF CONTENTS... 0 TABLE OF CONTENTS... 1 COPYRIGHT INFORMATION... 2 CHAPTER 1 PRECAUTIONS... 3 CHAPTER 2 PACKAGE CONTENT...
T2210HD/T2210HDA 21.5 Wide-Screen LCD Monitor User Manual
 T2210HD/T2210HDA 21.5 Wide-Screen LCD Monitor User Manual Table of Contents Package contents...3 Installation...4 To connect the monitor to your PC... 4 Adjusting your monitor...5 Functions of the buttons
LavryBlack Series Model AD11 Stereo Analog to Digital Converter With Microphone Preamplifier
 LavryBlack Series Model AD11 Stereo Analog to Digital Converter With Microphone Preamplifier Lavry Engineering, Inc. P.O. Box 4602 Rolling Bay, WA 98061 http://lavryengineering.com email: techsupport@lavryengineering.com
Please follow the safety instructions in your notebook s directions for use.
 TV Remote Control Tuner Content Safety Instructions... 2 Battery disposal... 2 Summary... 3 TV card... 3 Remote control... 4 Inserting batteries... 4 Button Layout... 5 Changing the transmission/reception
Fujitsu LifeBook S Series Notebook Voluntary Product Accessibility Template
 Fujitsu LifeBook S Series Notebook Voluntary Product Accessibility Template 1194.23 (k) Products which have mechanically operated controls or keys, shall comply with the following: (1) Controls and keys
Yamaha LC4 Installation Guide
 Installation Guide Yamaha LC4 Installation Guide Contents LC4 Installation Page List of LC4 Controller Parts................. 1 Step 1: Positioning of Instruments in Class...... 2 Step 2: Standard Installation
P-2 Installing the monitor (continued) Carry out as necessary
 Carry out as necessary") P-2 Installing the monitor (continued) Carry out as necessary Using the monitor without the bezel MDT552S satisfies the UL requirements as long as it is used with the bezel attached. When using the monitor
P-2 Installing the monitor (continued) Carry out as necessary Using the monitor without the bezel MDT552S satisfies the UL requirements as long as it is used with the bezel attached. When using the monitor
RS Part No Instruction Manual Solid State DVR. (Single Chanel for Mobile) SSD01CA
 SSD01CA") RS Part No. 696-1210 Instruction Manual Solid State DVR (Single Chanel for Mobile) RS PART NO.: 696-1210 MJPEG 1CH CAR DVR (Compact size 1ch Stand Alone DVR) Simple & Max Low cost but great guality MJPEG
RS Part No. 696-1210 Instruction Manual Solid State DVR (Single Chanel for Mobile) RS PART NO.: 696-1210 MJPEG 1CH CAR DVR (Compact size 1ch Stand Alone DVR) Simple & Max Low cost but great guality MJPEG
DIGITAL MIXING CONSOLE. TF Editor V3.6 User's Guide
 DIGITAL MIXING CONSOLE TF Editor V3.6 User's Guide EN Special notices Copyrights of the software and this document are the exclusive property of Yamaha Corporation. Copying or modifying the software or
Audio-Visual Systems Description
 Dawson County Audio-Visual Systems Description The following description of the audio-visual systems for the building is meant to complement the drawings and specifications and provide additional clarification
LAN Network Tester LAN Network Tester
 LAN Network Tester Model Item no. LAN Network Tester 157011 Version EN triax.com Safety and Disposal The LAN Network Tester operates off 6V DC only. Only use the internal, battery powered, 6V power supply
M-16DX 16-Channel Digital Mixer
 M-6DX 6-Channel Digital Mixer Workshop Getting Started with the M-6DX 007 Roland Corporation U.S. All rights reserved. No part of this publication may be reproduced in any form without the written permission
Lab experience 1: Introduction to LabView
 Lab experience 1: Introduction to LabView LabView is software for the real-time acquisition, processing and visualization of measured data. A LabView program is called a Virtual Instrument (VI) because
DVB-T Box, USB Monheim/Germany Tel. +49 (0)9091/ Fax +49 (0)9091/ Hama GmbH & Co KG.
9091/ Fax +49 (0)9091/ Hama GmbH & Co KG.") www.hama.de Hama GmbH & Co KG Postfach 80 86651 Monheim/Germany Tel. +49 (0)9091/502-0 Fax +49 (0)9091/502-274 hama@hama.de www.hama.de 00062776-01.05 DVB-T Box, USB 2.0 00062776 L TV USB receiver User
www.hama.de Hama GmbH & Co KG Postfach 80 86651 Monheim/Germany Tel. +49 (0)9091/502-0 Fax +49 (0)9091/502-274 hama@hama.de www.hama.de 00062776-01.05 DVB-T Box, USB 2.0 00062776 L TV USB receiver User
Service FOR SERVICE. Quick Reference Guide. Page 23. Contact your help desk at
 Service Page 2 FOR SERVICE Contact your help desk at Quick Reference Guide 0 Judson Street, Unit 5 Toronto, ON M8Z 5T6 Tel: -800-652-266 www.adcom.ca Copyright 2004 Power Source Page 22 UPS Connect the
Voluntary Product Accessibility Template
 Date: May 18th, 2015 Product Name: Samsung DB D Series Large Format Displays Product Version Number: DB22D-T Vendor Company Name: Samsung Electronics America, Inc. Vendor Contact Name: Kevin Schroll Vendor
Manual Addendum For Rerun V1.1 software 12/12/2006, RERUN-A = Serial #06A068, RERUN-P = Serial #06A031
 Manual Addendum For Rerun V1.1 software 12/12/2006, RERUN-A = Serial #06A068, RERUN-P = Serial #06A031 The Rerun product manual was written for V1.0 software. The new release, V1.1, adds a number of new
1 Unpack the projector. Quick Setup. EPSON PowerLite S1+ Your projector comes with the following items:
 EPSON PowerLite S1+ Quick Setup 1 Unpack the projector Your projector comes with the following items: Projector Power cord Computer cable Computer Projector Projector remote control Presentation remote
Gazer VI700A-SYNC/IN and VI700W- SYNC/IN INSTALLATION MANUAL
 Gazer VI700A-SYNC/IN and VI700W- SYNC/IN INSTALLATION MANUAL Contents List of compatible cars... 3 Package contents... 4 Special information... 6 Car interior disassembly and connection guide for Ford
QIP7232 P2. Hybrid QAM/IP High-definition Set-top. Quick Start Guide
 QIP7232 P2 Hybrid QAM/IP High-definition Set-top Quick Start Guide Before You Begin Introduction Congratulations on receiving a Motorola QIP7232 Hybrid QAM/IP High-definition Set-top. This document will
Voluntary Product Accessibility Template
 Date: October 12, 2016 Product Name: Samsung NE Smart HealthCare TV series Product Version Number: HG43NE593SFXZA Vendor Company Name: Samsung Electronics America, Inc. Vendor Contact Name: Sylvia Lee
Dirac Live for Emotiva Automatic Room Correction
 Dirac Live for Emotiva Dirac Live for Emotiva Automatic Room Correction ENTER Differential Reference Media Controller TUNER 1 2 3 4 5 6 7 8 VOLUME ------------------------------------------ INPUTS ------------------------------------------
MULTI CHANNEL AV RECEIVERSTR-DH750/STR- DH550
 MULTI CHANNEL AV RECEIVERSTR-DH750/STR- DH550 PROTECTOR The receiver will automatically turn off after a few seconds. Check the followings: There may be an electrical surge or power failure. Unplug the
Digital Adapter Easy Setup Guide. Installation Operation Troubleshooting
 Digital Adapter Easy Setup Guide Installation Operation Troubleshooting Table of Contents What s included in this Install Kit? 4 Connecting to a TVwith HDMI Cable 8 Connecting to a TV with Coax Cable 9
HD Video Capture Pro
 HD Video Capture Pro Quick Start Guide Thanks for purchasing ezcap291 HD Video Capture Pro. The following guides you how to set up. Hope this device will bring you nice digital experience. With this ezcap291
Buhl Industries VP-30 Visual Presenter. USER MANUAL Version
 Buhl Industries VP-30 Visual Presenter USER MANUAL Version 8-5-08 NOTICES: PLEASE READ CAREFULLY BEFORE USE Use the visual presenter under rated electric conditions with included power supply only Do not
USER MANUAL USER MANUAL. VIO 4K Ref. V701 PROGRAMMER S GU.
 USER MANUAL VIO 4K Ref. V701 1 Table of Contents 1 Introduction... 6 1.1 Why use the VIO 4K?... 6 1.2 VIO 4K at a glance... 6 1.3 Key features... 6 1.4 Inputs... 7 1.5 Outputs... 7 1.6 Universal system
USER GUIDE FOR NETmc MARINE X-Ops
 USER GUIDE FOR NETmc MARINE X-Ops Rev.2.2 Firmware v.1.2.8 X-Ops, 1.2.9 Pipeline September 2013 NETmc Marine X-Ops Manual-Rev.2.2 September 2013 1 of 17 Contents 1. Introduction... 3 1.1 Multi-channel
Electronic Equipment Manual For 101, 102, 301 & 302 Azrieli Theatre For further information, please visit our website at:
 Electronic Equipment Manual For 101, 102, 301 & 302 Azrieli Theatre For further information, please visit our website at: http://www.carleton.ca/ims/ 2 TABLE OF CONTENTS: Topic Page # Logging onto the
CONTENTS 8 ACCESSORIES 13 9 TROUBLE SHOOTING AND ADVICE SPECIFICATIONS BATTERY USAGE CAUTION 13
 CONTENTS 1 PREFACE 2 2 SAFETY PRECAUTIONS 2 3 FRONT & BACK VIEW, REAR CONNECTION OF LCD 3 4 TV INSTALLATION DRAWINGS 4 4.1 ANTENNA CONNECTION 4 4.2 AV1 INPUT CONNECTION 4 4.3 AV2 INPUT CONNECTION 4 4.4
Tandberg 1700 MXP User Guide
 Tandberg 1700 MXP User Guide Rev 08Sept2017 TABLE OF CONTENTS 1.0 OBJECTIVES... 3 2.0 THE TANBERG 1700 MXP... 3 3.0 GENERAL SET UP AND USE... 5 3.1 General Set Up... 5 3.2 Mute/Microphone... 6 3.3 Placing
Classroom Setup... 2 PC... 2 Document Camera... 3 DVD... 4 Auxiliary... 5
 Classroom Setup... 2 PC... 2 Document Camera... 3 DVD... 4 Auxiliary... 5 Lecture Capture Setup... 6 Pause and Resume... 6 Considerations... 6 Video Conferencing Setup... 7 Camera Control... 8 Preview
1 Unpack the projector. Quick Setup. Epson PowerLite 62c/82c. User s Guide. You should have the following items: Computer cable. Power cord.
 Epson PowerLite 62c/82c Quick Setup 1 Unpack the projector You should have the following items: Projector Power cord Computer cable Projector remote control Password protect sticker User s Guide CD-ROM
The Dangerous Music D-Box user s operating guide
 The Dangerous Music D-Box user s operating guide Thank you for choosing products from the exciting line of Dangerous Music recording equipment. Many years of dependable and trouble-free service can be
QUICK START GUIDE QT ANALOG HD CAMERA & DVR BUNDLE ENGLISH
 QUICK START GUIDE QT ANALOG HD CAMERA & DVR BUNDLE ENGLISH Table of Contents Welcome What s Included...3 Understanding your DVR...4 Get Connected Registration...5 Connect Your Cameras...5 Connect DVR to
D-901 PC SOFTWARE Version 3
 INSTRUCTION MANUAL D-901 PC SOFTWARE Version 3 Please follow the instructions in this manual to obtain the optimum results from this unit. We also recommend that you keep this manual handy for future reference.
Pro L1500UH/L1500UHNL/L1505UH/ L1505UHNL/L1750UNL/L1755UNL/L1715SNL
 Pro L1500UH/L1500UHNL/L1505UH/ L1505UHNL/L1750UNL/L1755UNL/L1715SNL Quick Reference This Quick Reference card gives brief instructions on connecting your projector and using common features. For details,
Call Recorder Pico Manual V2.0 VC2000
 Call Recorder Pico Manual V2.0 VC2000 1. Green LED * 2. Red LED ** 3. Record button 4. Handset out / Line out 5. I II Switch 6. Handset in / Line in 7. USB 8. Speaker / microphone *** *) The green LED
F24X DSK Setup and Tutorial
 F24X DSK Setup and Tutorial 1999 DSP Development Systems F24X DSK Setup and Tutorial 504706-0001 Rev. A July 1999 SPECTRUM DIGITAL, INC. 10853 Rockley Road Houston, TX. 77099 Tel: 281.561.6952 Fax: 281.561.6037
About your Kobo ereader...6
 User Guide Kobo Glo HD User Guide Table of Contents About your Kobo ereader...6 Anatomy of your Kobo ereader...6 Charging your Kobo ereader...8 Charging your Kobo ereader with a wall adapter...9 Turning
Maryland State Board of Elections
 Maryland State Board of Elections Electronic Pollbook Step-by-Step Guide 2016 Presidential Election This step-by-step guide provides election judges with a quick reference for the most commonly used election
AcoustiSoft RPlusD ver
 AcoustiSoft RPlusD ver 1.2.03 Feb 20 2007 Doug Plumb doug@etfacoustic.com http://www.etfacoustic.com/rplusdsite/index.html Software Overview RPlusD is designed to provide all necessary function to both
PLUSTV 1680ex USER S MANUAL
 PLUSTV 1680ex USER S MANUAL Ver 1.0 Contents 1. Instruction... 1 1.1 Functions and features... 1 1.2 Packaged contents... 2 1.3 Technical specifications... 3 2. Remote control instructions... 4 2.1 Diagram
LCD VALUE SERIES (32 inches)
") LCD VALUE SERIES (32 inches) http://www.orionimages.com All contents of this document may change without prior notice, and actual product appearance may differ from that depicted herein 1. SAFETY INSTRUCTION
LCD VALUE SERIES (32 inches) http://www.orionimages.com All contents of this document may change without prior notice, and actual product appearance may differ from that depicted herein 1. SAFETY INSTRUCTION
OPERATING INSTRUCTIONS
 OPERATING INSTRUCTIONS MATRIX SYSTEM SX-2000 SERIES Thank you for purchasing TOA's Matrix System. Please carefully follow the instructions in this manual to ensure long, trouble-free use of your equipment.
COLOR TFT LCD MONITOR WITH MULTI-TOUCH FUNCTION Manual
 COLOR TFT LCD MONITOR WITH MULTI-TOUCH FUNCTION Manual DEAR CUSTOMERS Thank you for choosing our TFT LCD (liquid crystal display) monitor. This product employs integrate circuits, low power consumption,
Instruction Guide. The TV Jockey Computer Monitor TV Tuner with Remote COMP2VGATVGB. The Professionals Source For Hard-to-Find Computer Parts
 VIDEO ADAPTER The TV Jockey Computer Monitor TV Tuner with Remote COMP2VGATVGB Instruction Guide * Actual product may vary from photo The Professionals Source For Hard-to-Find Computer Parts FCC COMPLIANCE
Show Designer 3. Software Revision 1.15
 Show Designer 3 Software Revision 1.15 OVERVIEW... 1 REAR PANEL CONNECTIONS... 1 TOP PANEL... 2 MENU AND SETUP FUNCTIONS... 3 CHOOSE FIXTURES... 3 PATCH FIXTURES... 3 PATCH CONVENTIONAL DIMMERS... 4 COPY
Quick Reference Guide
 Multimedia Projector Quick Reference Guide MODEL 103-011100-01 Projection lens is optional. English Use this book as a reference guide when setting up the projector. For detailed information about installation,
DH551C/DH550C/DL550C Double Sided Display User Manual
 DH551C/DH550C/DL550C Double Sided Display User Manual Disclaimer BenQ Corporation makes no representations or warranties, either expressed or implied, with respect to the contents of this document. BenQ
LAN Network Tester. Operating Manual. Part No TRIAX - your ultimate connection
 LAN Network Tester Part No. 157011 Operating Manual TRIAX - your ultimate connection Safety and Disposal The LAN Network Tester operates off 6V DC only. Only use the internal, battery powered, 6V power
Contacts: English Department Office 238 Moreland Media Services 109 Kidder
 Contacts: English Department Office 238 Moreland 7-3244 Media Services 109 Kidder September 2006 Welcome...3 Starting Out...5 Unlocking the Station...5 Touch Panel Operation...5 Projector...6 Selecting
The only warranties for HP products and services are set forth in the express warranty statements accompanying such products and services.
 The only warranties for HP products and services are set forth in the express warranty statements accompanying such products and services. Nothing herein should be construed as constituting an additional
Syntor X Flash Memory Module Revision C
 Syntor X Flash Memory Module Revision C The PIEXX SynXFlash memory module, along with the supplied PC software, replaces the original SyntorX code plugs and allows you to easily set modify and update your
VNS2200 Amplifier & Controller Installation Guide
 VNS2200 Amplifier & Controller Installation Guide VNS2200 Amplifier & Controller Installation 1. Determine the installation location for the VNS2200 device. Consider the following when determining the
DMX-LINK QUICK OPERATION
 DMX-LINK QUICK OPERATION RESETTING THE CURRENT PATCH TO A ONE-TO-ONE OR ZERO PATCH The current Patch List may be initialised as a One-to-One or Zero patch as follows: 1. Ensure the Record LED is on. If
Voluntary Product Accessibility Template
 Date: June 2014 Product Name: Samsung 450 Series LED Monitors Product Version Number: S27C450D, S24C450D, S24C450DL, S23C450D, S22C450D, S19C450BR, S23C450D Vendor Company Name: Samsung Electronics of
CAUTION RISK OF ELECTRIC SHOCK NO NOT OPEN
 Evolution Digital HD Set-Top Box Important Safety Instructions 1. Read these instructions. 2. Keep these instructions. 3. Heed all warnings. 4. Follow all instructions. 5. Do not use this apparatus near