LEGO MINDSTORMS PROGRAMMING CAMP. Robotics Programming 101 Camp Curriculum
|
|
|
- Dorthy Lambert
- 6 years ago
- Views:
Transcription

1 LEGO MINDSTORMS PROGRAMMING CAMP Robotics Programming 101 Camp Curriculum
2 2 Instructor Notes Every day of camp, we started with a short video showing FLL robots, real robots or something relevant to the day s lesson We switched between using powerpointslides and showing the actual EV3 software environment We created some add-on challenges for students who finished early We created a new project each day We did not show the challenge solution slide unless someone needed help.


3 3 What is a robot? Robots are machines in factories, play soccer, are in research labs, behave like animals. We will use the LEGO MINDSTORMS


4 4 Lego Mindstorms Robots You can place a video of your choice here to introduce FLL/Lego robotics
5 5 Dos and Do Nots this week Share the laptop and the robot Work together in your group Help each other finish each challenge Lift the robot by the handle Take Turns Do not drop, throw, push on the robot they are very expensive Treat your computer well they are expensive
6 6 What will we do this week? Learn basic EV3-G Programming Make a Mindstorms robot follow your instructions Learn how to make your robot move straight, turn, repeat actions, choose between actions and follow lines Have FUN with robots and get inspired to learn more!!
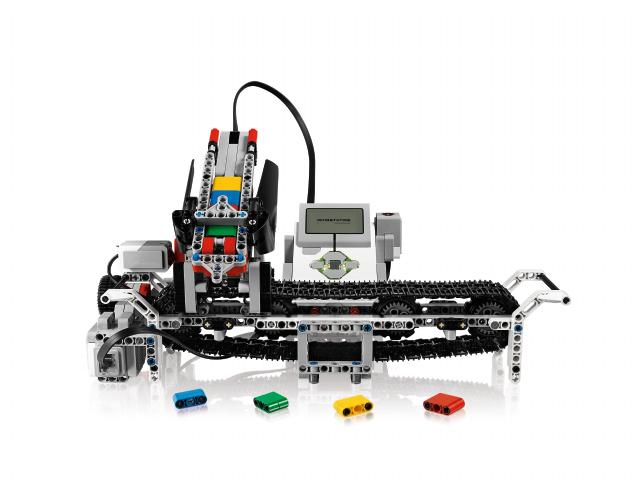
7 7 Instructor Notes We use the CyberBot NXT design please note the location of the color sensor We use the NXT brick but program with the EV3 software. The NXT brick has less memory. You will have to delete the files often (at the end of every session) Students who create and use a lot of sound files will fill in the brick faster. We asked students to make a new project file each day for their programs.
8 BEGINNER EV3 PROGRAMMING Lesson: Introduction Topics Covered: NXT Basics Introduction to the NXT Brick and EV3 Software
9 9 Lesson Objectives 1. Learn how the NXT brick operates 2. Learn about the main components of the EV3 software

10 10 The Brick Buttons 1 = Left, Right à Navigate menus 2 = Center Button à Select options Run Program Turn robot on 3 = Back à Undo Stop Program Turn robot off
11 11 The Brick Screen Menus on Screen 1. My Files Find programs you downloaded 2. Use left/right buttons to find other menus such as View

12 12 Ports, Sensors, motors Motors: make your robot move Ports A, B, C = Motors Touch Sensor: Make your robot detect objects Default setup assumes Right Motor is in C, Left Motor is in B Color sensor: Make your robot detect colors Ultrasonic sensor: Make your robot measure distances Ports 1, 2, 3, 4 = Sensors Default setup B C Front

13 13 EV3 Software Open Saved Project Create New Project

14 14 EV3 Software: Saving your project File..Save Project As Save project on desktop as CampPM1 Each project can contain multiple programs. You will create a new project for each day this week.

15 15 EV3 Software: Starting A new program Opened Projects Create a Project Opened Programs Create a Program Project Properties List of programs


16 16 EV3 Software: Naming your program Double click on Program Change name of program to Move Straight
17 17 PROJECTS VS. PROGRAMS You will start by creating a PROJECT which has a.ev3 extension. You change the name of a project by using the Save Project As option from the the File menu. You will write many PROGRAMS as part of each PROJECT file. You change the name of a program within a project by doubling clicking on the program s tab and typing in a new name. Note: If there is an * next to the project name, you have made changes to the project and you have not yet saved yet. There is a x next to project and program names. Clicking on it simply closes the file (it does not get deleted).


18 18 EV3 Software: Programming screen Click on a program tab to bring up the programming canvas. Programming Area or Canvas Programming Blocks in 6 Colored Tabs Brick Status & Downloading

19 19 EV3 Blocks: Colored Tabs ACTION BLOCKS Move, Large & Medium FLOW BLOCKS Start, Wait, Loop, Switch, SENSOR BLOCKS Brick Buttons, Gyro, Color, Motor, Display 1 Loop Interrupt 2 Ultrasonic DATA OPERATIONS Variables, Array, Logic, Math, Compare ADVANCED BLOCKS Data Logging, Unregulated MY BLOCKS Custom Blocks you create 4 Motor 5 6
20 20 Adding Blocks To Your Program STEP 1: Green Block Tab, Click and hold any block and drag to programming area STEP 2: Drop next to the Start Block (green arrow) (See animation)
21 Beginner Lesson: Moving Straight EV3 PROGRAMMING Lesson: Moving Straight
22 22 Lesson Objectives 1. Learn how to make your robot go forward and backwards FINISH 2. Learn how to use the Move Steering block Learn how to read sensor values using View START B C
23 23 How do you Move Straight? STEP 1: Green Block Tab, Click and hold Move Steering and drag to programming area STEP 2: Drop next to the Start Block (green arrow) (See animation)
24 24 CHALLENGE 1: Move Straight STEP 1: Green Block Tab, Click and hold Move Steering and drag to programming area Step 3 STEP 2: Drop next to the Start Block (green arrow) Step 4 STEP 3: Connect USB cable to NXT and Laptop. STEP 4: Download to NXT


25 25 Move STEERING Block B C Mode of operation Brake/ Coast Steering: Straight or turn Power/Speed Duration/Distance


26 NEGATIVE & POSITIVE POWER: BACKWARD & FORWARD 26 Negative Power = Backwards Positive Power = Forward


27 CHALLENGE 2: Move Straight (3 SECONDS) 27 Step 3 STEP 1: Green Block Tab, Click and hold Move Steering and drag to programming area Step 4 STEP 2: Drop next to the Start Block (green arrow) STEP 3: Select Options. Move 3 Seconds Step 5 STEP 4: Connect USB cable to NXTand Laptop. STEP 5: Download to NXT
28 Move Straight: Seconds vs. degrees vs. rotations 28 CHALLENGE: Move your robot forward from the start line to the finish line (1) and back to the start (2). FINISH Try mode SECONDS, DEGREES or ROTATIONS and adjust duration/distance 1 2 Try different speeds START B C
29 29 MOVE STRAIGHT discussion Did you guess and check a lot? Yes. Programming with seconds, rotations and degrees using guess and check takes a lot of time and effort. Did changing the speed matter? Yes. When you move in seconds your speed will matter. Do you think the wheel size will matter? Why? Wheel size affects degrees/rotations. Do you this the battery level will matter? Why? When you move in seconds, battery levels change the power.
30 30 CHALLENGE SOLUTION This would be changed for degrees or seconds There is a better way (go to next slide) to solve this challenge
31 31 SOLUTION: Use View Try view on brick (instruction below) Move your robot with your hand from your start line to your end line Read how many degrees your robot moved Use this number in the Move Steering Block to move the correct distance. Browse for Motor degrees option
32 Beginner Lesson: Turning BEGINNER EV3 PROGRAMMING Lesson: Turning
33 33 Lesson Objectives 1. Make a robot baseball player 2. Learn how to make the robot turn B C C Second Base B B C Start and End position First Base
34 34 PIVOT Vs. SPIN Turns B 180 Degree Pivot Turn End Position Notice where the robot ends in both pictures after a 180 degree turn. C Start Position Motor B Moves 180 Degree Spin Turn C B In the Spin Turn, the robot moves a lot less and that makes Spin Turns are great for tight positions. Spin turns tend to be a bit faster but also a little less accurate. Start Position B C Motors B and C Move End Position C B So when you need to make turns, you should decide which turn is best for you!

35 35 How to Make Pivot and Spin turns Move Steering or Large Motor Large Motor B Large Motor C Move Steering Steering=100 B B B Move Steering Steering=-100 B C C C C Pivot Turn Right Pivot Turn Left Spin Turn Right Spin Turn Left Large Motor Block Move Steering Block Change Steering value here
36 36 Measuring Turns Turns are measured in degrees /

37 37 Making a Pivot turn for 90 Degrees B? C C B Program your robot to turn 90 degrees...does the robot actually turn 90 degrees if you just pick 90 degrees for distance? Ans. NO! This makes the wheel turn 90 degrees. The correct solution on next page


38 How do you make the robot turn 90 degrees? 38 Ans. Try using the port view to measure the turn and then input the correct number of degrees. Motor degrees
39 39 TURNING CHALLENGES Challenge 1 Challenge 2 Your robot is a baseball player who has to run to all the bases and go back to home plate. Your robot baseball player must run to second base, turn around and come back to first. Can you program your robot to move forward and then turn left? Go straight. Turn 180 degrees and return to the same spot. Use a square box or tape Second Base B C Start and End position First Base
40 40 Class Discussion Guide Did you try PIVOT and SPIN turns? What did you discover? Pivot turns were fine for Challenge 1, but for Challenge 2, if we used Pivot turns, we were farther away from the base. What situations would one work better than the other? Spin turns are better for tight turns (places where there is not enough space) and you stay closer to your original position.
41 41 CHALLENGE SOLUTIONS Challenge 1 Challenge 2 You probably used a combination of move steering to go straight and do pivot turns to go around the box. You probably used a spin turn because it is better for tighter turns and gets you closer to the starting point! Second Base B C Start and End position First Base

42 42 Review What do these programs do? What are the names of these blocks
43 Beginner Lesson: Display Blocks BEGINNER EV3 PROGRAMMING Lesson : Display to the screen By: Droids Robotics
44 44 LESSON OBJECTIVES 1. Make the robot display some fun faces while moving! 2. Learn to use the Display Block to display text and images 3. Understand why the Display Block can be useful in programming
45 45 Display Block The Display Block to show information and pictures on the screen You can control the location and size of text Display!!!!! You can use this same block to display sensor readings and instructions. Located in Green Tab
 Accuracy of a single line Click on top left of block to")
46 46 More on Display Blocks Two modes to display Pixel mode (Use for displaying images or text) Gives fine control over placement of image/text Grid mode (Easier to use, only works for text mode) Accuracy of a single line Click on top left of block to preview


47 47 Displaying Text in Grid Mode Step 1: Pick Display Block Step 2: Click on Switch Modes icon and hover over text. Then click on grid. The icon will change into a square with dots. Text Goes Here Step 3: Use the box on the top right to enter the text you want to display
48 48 DISPLAY BLOCK: CHALLENGE 1 Can you write a program to display text in the middle of the screen? Display Hello World How do we get the text to stay on the screen longer? Need to make the program wait before exiting

49 49 Wait Blocks Wait blocks make your program pause for some time (or until something happens) before moving to the next step For now, we are just going to wait for time Choose Time for mode Enter 3 for seconds to wait
50 50 DISPLAY BLOCK: CHALLENGE 2 Can you write a program to display text in the middle of the screen? Display Hello World Make the display block run for 3 seconds
51 51 DISPLAY BLOCK: CHALLENGE 3 Can you write a program to display text in the middle of the screen? Display Hello World Make the display block run for 3 seconds Can you also move while doing this?
52 A tip for Move Steering Blocks With Wait Blocks 52 Leaving the motor on and off Why use the on instead of degrees? May want the program to do other tasks while moving

53 Challenge 3 solution 53


54 54 Displaying an image in PIXEL Mode Step 1: Pick Display Block Step 2: Click on the Select Mode which has a folder icon and pick image Step 3: Use the empty box on the top right to pick the image you want to display Note: the image you choose may not show up correctly on a NXT


55 55 DISPLAY BLOCK CHALLENGE 4 Can you display eyes on the screen while moving? Alternate eyeballs that look left and right. Use the Display Block, Motor On and Wait Block Feel free to have fun with this challenge and make it yours!

56 56 CHALLENGE 4 Solution Motor On Display Block Wait Block Motor Off
57 57 Discussion Guide update? Why might you want to know how to use the display block? You might want to know what the sensor value your robot is seeing You might have to program a robot to stop when the robot reaches a red line but it stops before Does the robot see the same thing you see? You can display the value on the screen and check It s a great debugging tool. You can learn more about debugging code in one of our Intermediate lessons.
58 BEGINNER EV3 PROGRAMMING: Lesson Touch Sensor

59 59 Lesson Objectives 1. Make a robot that wanders the room bumps into walls and turns around 2. Learn how to use the Touch Sensor 3. Learn the difference between the Wait For Block and the Sensor Blocks B B C C C B

60 60 What is a sensor? A sensor lets an EV3 program measure and collect data about is surroundings The EV3 sensors include: Color measures color and darkness Ultrasonic measures distance to nearby surfaces Touch measures contact with surface
61 61 WHAT IS A TOUCH SENSOR? Touch Sensor can detect when the sensor s red button has been pressed or released With this information, you can program an action when the sensor is: Currently Pressed Currently Released Pressed and Released Just Before (Bumped) When might you use this sensor? Useful for programming moving until touch sensor is pressed/released/bumped You can also have your program start or stop when a touch sensor is pressed.

62 How do you program with the Touch Sensor? 62 There is a Touch Sensor Block in the Yellow Tab, but there is a Wait for Touch in the Orange Tab. What is the difference!!????! Yellow Sensor Tab: Sensor Blocks Used to Read and Compare Sensor Values Orange Flow Tab: Wait for Block Used to wait for a sensor reading (or time)
63 Reminder: A tip for Move Steering Blocks With Sensors 63 Leaving the motor on and off Why use the on instead of degrees? May want the program to do other tasks such as reading a sensor while moving


64 64 CHALLENGE 1 Program your robot to move straight until you tap the sensor with your hand. B C 0 = released 1 = pressed 2 = bumped Hint: You will combine: Move Steering + Wait Block
65 65 Challenge 1 Solution Add screenshot
66 66 CHALLENGE 2 Program your robot to move until it hits the edge of a wall. Then back up and turn right 90 degrees. B 0 = released 1 = pressed 2 = bumped C Hint: You will combine Move Steering + Turning + Wait Block

67 67 Challenge 2 Solution Add Screenshot
68 68 DISCUSSION Why did you use MOTOR ON for these challenges? You want to read the sensor while the motor is on. Why do we use the WAIT FOR BLOCK in these challenges? We need to program to wait for the correct reading What is the difference between PRESSED, RELEASED and BUMPED? PRESSED = pushed in, RELEASED = not pushed, BUMPED = pressed and released recently What are some situations you might want to use each of these for? PRESSED = running into a wall, BUMPED = tapped by hand RELEASED = no longer touching a wall
69 BEGINNER EV3 PROGRAMMING Lesson: Color Sensor
70 70 Lesson Objectives 1. Make the robot move up to the green line without doing any measurement! FINISH 2. Learn how to use the Color Sensor 3. Learn about Coast and Brake 1 2 START B C


71 What is the color sensor? 71 What are they? Sensors that detect the intensity of light that enters it Three modes: Color, Reflected Light Intensity and Ambient Light Intensity Color Mode: Recognizes 7 colors (black, brown, blue, green, yellow, red, white) and No Color Reflected Light: Measures the intensity of the light reflected back from a lamp that emits a red light. (0=very dark and 100=very light) Ambient Light: Measures the strength of the light that enters the sensor from the environment. (0=very dark and 100=very light) USES: Move until a line Follow a line We will use COLOR MODE in this Lesson
72 72 COLOR SENSOR CHALLENGE How do you make the robot move up to a green line using the color sensor? Step 1: Use Wait For Color Step 2: Use the color sensor in COLOR MODE Hint: You will use Move Steering (think about motor on and off) and Wait for Color
")
73 73 Color Sensor Challenge Solution FINISH Move Steering Set to ON Move Steering Set to OFF with BRAKE Wait until Color is Green (#3) START
74 BEGINNER EV3 PROGRAMMING Lesson: Loops By: Droids Robotics
75 75 Lesson Objectives 1. Can we improve our baseball robot by just programming it to go to the next base and repeating this action? 2. Learn how to repeat an action 3. Learn how to use Loop Blocks


 + (move")
 Loops make")

76 76 Repeating an Action How can we move around bases using the commands we already know? (move + turn) + (move + turn) + (move + turn) Loops make repeating a task multiple times easy Is there an easier way? Hint:

 Repeat the loop")
77 77 Loops Loops make repeating a task multiple times easy KEEP GOING.Forever, for a Count, Until touch (or something else) Repeat the loop 4 times

78 78 LOOP CHALLENGE Challenge: Write a program to go around bases until touched. You must use a LOOP

79 Loop CHALLENGE Solution 79
80 BEGINNER EV3 PROGRAMMING Lesson: Switches By: Droids Robotics

81 81 Lesson Objectives 1. Get the robot to show a happy face when you press its button and a sad face when you don t 2. Learn how to make your robot decide what to do out of different choices 3. Learn how to use a Switch Block

82 82 Switch Blocks Asking the robot a question and doing something different based on the answer Example: Does the robot see a line? Or not? Run this code if the answer is yes Basically a YES/NO QUESTION Switch blocks are found in the orange/flow tab The question being asked: is the touch sensor pressed Run this code if the answer is no

83 83 Switch Block CHALLENGE 1 Challenge: Write a program that changes the display based on if the touch sensor is pressed or not pressed. If pressed, your EV3 is happy! Display a smiley face. If not pressed, the EV3 is sad! Display a sad face. Hint: You will need to use the display block, loops and switch blocks!

84 84 Challenge 1 SOLUTION Display Block Touch Sensor Selected Wait Block Loop Display Block
85 85 Switch Block Challenge 2 Can you write a program that display big eyeballs if you touch it once and a sad face if you touch it a second time and toggles back and forth.

86 Challenge 2 solution 86
87 BEGINNER EV3 PROGRAMMING Lesson: Ultrasonic Sensor By: Droids Robotics

88 88 LESSON OBJECTIVES 1. Make a robot that follows you around like a dog 2. Learn about the Ultrasonic Sensor 3. Learn how to use Wait Until Ultrasonic Block 4. Learn the difference between the Wait Until Ultrasonic Block and the Ultrasonic Block


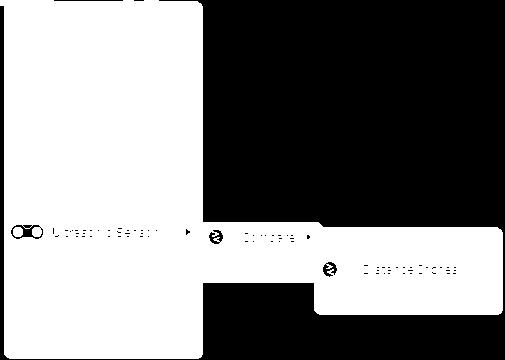
89 89 ULTRASONIC An ultrasonic sensor measures distance. You use it when you need to make sure you are a certain distance away from a target. The distance can be measured in inches or centimeters. To read the ultrasonic sensor, you use the Ultrasonic Block. To use the ultrasonic to do an action until a distance, you use Wait Until Read Ultrasonic VS. Wait for Ultrasonic

90 90 Ultrasonic Challenge 1 Challenge: Make the robot move until it is 5 inches away from the wall. Step 1: Make a new program Step 2: Set move to on Step 3: Set wait block to use the Ultrasonic Step 4: Set move block to off

91 Challenge 1 solution 91
92 92 Challenge 2: Dog Follower If the robot is closer than 5 inches away from your hand move backward, otherwise move forward. Step 1: Drag a loop from the orange tab Step 2: Drag switch inside loop Step 3: Set switch to Ultrasonic Step 4: Set move steering block to ON and place in TRUE Step 4: Set move steering block to OFF and place in FALSE


93 Challenge 2 Solution 93
94 BEGINNER PROGRAMMING Lesson: Basic Line Follower
95 95 LESSON OBJECTIVES 1. Learn how to make a robot follow a line 2. Learn how to get a robot to follow a line using Color Mode on the EV3 Color Sensor 3. Learn how to follow a line until a sensor is activated 4. Learn how to follow a line for a particular distance 5. Learn how to combine sensors, loops and switches
96 96 Instructor Notes We used CyberBot (see EV3Lessons.com Robot Design page) CyberBot has color sensors behind the wheel Therefore, students will have to line follow backwards (negative power) Programming a line follower on an NXT brick with an EV3 requires some adjustments We found that Move Steering with an angle does not work with the NXT for pivot turns Therefore, the code uses Large Motor blocks instead for turning


97 97 FOLLOW THE MIDDLE? Humans want to follow the line in the middle. Let s have the robot do the same thing using the Color Sensor What type of questions can we ask using this sensor Are you on line or not?
98 98 1. If we are on black, keep going straight 2. If we are on white, turn left to get back to the line Seems to work fine here

99 99 1. If we are on black, keep going straight 2. If we are on white, turn left to get back to the line OH NO my robot is running away. When the robot leaves the left side of the line, the program no longer works!
100 100 Line Following: ROBOT STYLE Why could the Human follow the middle?: They can see ahead. They can see the whole line and its surroundings They see both sides and which side they left Why can t the Robot do the same thing?: Can t tell right or left side of the line How do we make sure the robot always veers off on the SAME SIDE of the line? Instead of the middle, could the robot follow the edge? So now the robot will fall off only the same side. We will now show you how this works!
101 101 ROBOT LINE FOLLOWING Happens on the edges Left side line following If on black, turn left. If on white turn right. The robot has to choose which way to turn when the color sensor sees a different color. If on black, turn right. If on white turn left. Right side line following The answer depends on what side of the line you are following!
102 102 Starting the robot on the correct side
103 103 Line Follower challenge 1 Step 1: Write a program that follows the RIGHT edge of a line. 1. If your sensor sees black, turn right 2. If your sensor sees white, turn left 3. Use loops and switches! 4. You will need to use Large Motor block in ON Mode. 5. You will need to control each motor (B and C) separately. Step 2: Try it out on different lines. B C B C
104 104 Line Following challenge Solution Q. Does this program follow the Right or Left side of a line? A. The robot is following the Right Side of the line.

105 105 CHALLENGE 1 SOLUTION Q. This line follower goes forever. How do we make this stop? A. Change the end condition on the loop.
106 106 Line follower challenge 2 Part 1: Make a line follower that stops when you press the touch sensor Part 2: Make a line follower that stops after it travels a particular distance


107 Challenge 2 SOLUTION: Sensor 107

108 Challenge 2 Solution: Particular distance 108
109 109 DISCUSSION GUIDE Why is it important for the robot to follow the same side of the line? The robot only knows to check if it is on or off the line. This is a basic line follower. What are some things that were not good about this line follower? Do you think the line follower can be improved? It wiggles a lot. Smoother line followers are described in the Advanced lessons. What sensor measures how far you have travelled? The rotation sensor used in Challenge 2 solution measures how much the wheels have turned. How would you write a line follower that will stop when it sees a line? Or another color? Change the loop exit condition to use the color sensor.
110 Final Challenge


111 111 Using EV3Lessons Training Mats Line Follower Mat Line follower races Try your robot on different lines Black line follower Red line follower Move until a certain color Drive over all the colors and have the robot name the color Have robots follow each other around the track, but stay 5inches away Basic Mat Sensor Mat Line follower until green Line follow black then white Go around the box Start in green box and end in red without knocking over box (place light box in black rectangle)
112 112 CREDITS This tutorial was created by Sanjay Seshan and Arvind Seshan More lessons are available at This work is licensed under a Creative Commons Attribution- NonCommercial-ShareAlike 4.0 International License.
INTERMEDIATE PROGRAMMING LESSON
 INTERMEDIATE PROGRAMMING LESSON COLOR LINE FOLLOWER MY BLOCK WITH INPUTS: MOVE FOR DISTANCE By Sanjay and Arvind Seshan Lesson Objectives 1. Learn how to write a line follower that takes multiple inputs
(Skip to step 11 if you are already familiar with connecting to the Tribot)
") LEGO MINDSTORMS NXT Lab 5 Remember back in Lab 2 when the Tribot was commanded to drive in a specific pattern that had the shape of a bow tie? Specific commands were passed to the motors to command how
LEGO MINDSTORMS NXT Lab 5 Remember back in Lab 2 when the Tribot was commanded to drive in a specific pattern that had the shape of a bow tie? Specific commands were passed to the motors to command how
Lego Robotics Module Guide
 Lego Robotics Module Guide The RCX is a programmable, microcontroller-based brick that can simultaneously operate motors, sensors, an infrared serial communications interface, a display and speaker. Get
Follow the Light Pre-Quiz
 Follow the Light Follow the Light Pre-Quiz 1. Provide a stimulus-sensor-coordinatoreffector-response framework using human eyes as the color sensor. 2. Provide the logic for a program for a LEGO robot
ENGR 1000, Introduction to Engineering Design
 ENGR 1000, Introduction to Engineering Design Unit 2: Data Acquisition and Control Technology Lesson 2.4: Programming Digital Ports Hardware: 12 VDC power supply Several lengths of wire NI-USB 6008 Device
Your EdVenture into Robotics You re a Programmer
 Your EdVenture into Robotics You re a Programmer meetedison.com Contents Introduction... 3 Getting started... 4 Meet EdWare... 8 EdWare icons... 9 EdVenture 1- Flash a LED... 10 EdVenture 2 Beep!! Beep!!...
Linkage 3.6. User s Guide
 Linkage 3.6 User s Guide David Rector Friday, December 01, 2017 Table of Contents Table of Contents... 2 Release Notes (Recently New and Changed Stuff)... 3 Installation... 3 Running the Linkage Program...
Meet Edison. This is Edison, the programmable robot. What is a robot? A robot is a machine that can be made to do a task on its own.
 Edison and EdBlocks Activity 1 Programmer s Name Meet Edison This is Edison, the programmable robot. What is a robot? A robot is a machine that can be made to do a task on its own. There are many types
Diamond Piano Student Guide
 1 Diamond Piano Student Guide Welcome! The first thing you need to know as a Diamond Piano student is that you can succeed in becoming a lifelong musician. You can learn to play the music that you love
C - Smoother Line Following
 C - Smoother Line Following Learn about analogue inputs to make an even more sophisticated line following robot, that will smoothly follow any path. 2017 courses.techcamp.org.uk/ Page 1 of 6 INTRODUCTION
GET STARTED WITH ACADEMIC WRITER
 GET STARTED WITH ACADEMIC WRITER A Student s Guide to Using Academic Writer Academic Writer Customer Engagement https://on.apa.org/aw-support GET STARTED WHAT IS ACADEMIC WRITER? WHAT IS ACADEMIC WRITER?
Your EdVenture into Robotics You re a Controller
 Your EdVenture into Robotics You re a Controller Barcode - Clap controlled driving meetedison.com Contents Introduction... 3 Getting started... 4 EdVenture 1 Clap controlled driving... 6 EdVenture 2 Avoid
Harmony Ultimate. User Guide
 Harmony Ultimate User Guide Harmony Ultimate User Guide Table of Contents About this Manual... 6 Terms used in this manual... 6 At a Glance... 6 Features... 6 Know your Harmony Ultimate... 6 Features of
Experiment 0: Hello, micro:bit!
 Experiment 0: Hello, micro:bit! Introduction Hello World is the term we use to define that first program you write in a programming language or on a new piece of hardware. Essentially it is a simple piece
Quick Help Teaching Room Technology Support
 Quick Help Teaching Room Technology Support Technical assistance is available. If you require assistance, please call Ext 6066 Quick Help Technology Overview INDEX INDEX Touch Screen Is not active 3 Technology
Configuring the Stack ST8961 VS Module when used in conjunction with a Stack ST81xx series display.
 Configuring the Stack ST8961 VS Module when used in conjunction with a Stack ST81xx series display. Your Stack ST8961 VS module allows you to synchronize, overlay, and record data available on your Stack
Materials: Programming Objectives:
 Lessons Lesson 1: Basic Chassis Overview TETRIX Getting Started Guide In this lesson, users will learn how to use the elements of the TETRIX system that will be involved in building the basic chassis of
Informatics Enlightened Station 1 Sunflower
 Efficient Sunbathing For a sunflower, it is essential for survival to gather as much sunlight as possible. That is the reason why sunflowers slowly turn towards the brightest spot in the sky. Fig. 1: Sunflowers
F7000NV ROBOT VISION OPERATING MANUAL
 Rev. C Feb 2012 F7000NV ROBOT VISION OPERATING MANUAL Rev. C Feb 2012 This page has intentionally been left blank. Contents Contents Chapter 1. Getting Started... 5 1. Preface... 5 2. Manuals... 5 3. Setting
Scanning Electron Microscopy (FEI Versa 3D Dual Beam)
") Scanning Electron Microscopy (FEI Versa 3D Dual Beam) This operating procedure intends to provide guidance for basic measurements on a standard sample with FEI Versa 3D SEM. For more advanced techniques
Scanning Electron Microscopy (FEI Versa 3D Dual Beam) This operating procedure intends to provide guidance for basic measurements on a standard sample with FEI Versa 3D SEM. For more advanced techniques
A-ATF (1) PictureGear Pocket. Operating Instructions Version 2.0
 PictureGear Pocket. Operating Instructions Version 2.0") A-ATF-200-11(1) PictureGear Pocket Operating Instructions Version 2.0 Introduction PictureGear Pocket What is PictureGear Pocket? What is PictureGear Pocket? PictureGear Pocket is a picture album application
A-ATF-200-11(1) PictureGear Pocket Operating Instructions Version 2.0 Introduction PictureGear Pocket What is PictureGear Pocket? What is PictureGear Pocket? PictureGear Pocket is a picture album application
WAVES Cobalt Saphira. User Guide
 WAVES Cobalt Saphira TABLE OF CONTENTS Chapter 1 Introduction... 3 1.1 Welcome... 3 1.2 Product Overview... 3 1.3 Components... 5 Chapter 2 Quick Start Guide... 6 Chapter 3 Interface and Controls... 7
The NXT Big Thing #14
 The NXT Big Thing #14 The Sound Of... Robots? By Greg Intermaggio LDLDLDLDLDLLDDLLDLD! (Wookie for hello everyone!) In the last edition of The NXT Big Thing, we completed our gyro controlled robots. This
How-to Setup Motion Detection on a Dahua DVR/NVR
 How-to Setup Motion Detection on a Dahua DVR/NVR Motion detection allows you to set up your cameras to record ONLY when an event (motion) triggers (is detected) the DVR/NVR to begin recording and stops
AFM1 Imaging Operation Procedure (Tapping Mode or Contact Mode)
") AFM1 Imaging Operation Procedure (Tapping Mode or Contact Mode) 1. Log into the Log Usage system on the SMIF web site 2. Open Nanoscope 6.14r1 software by double clicking on the Nanoscope 6.14r1 desktop
AFM1 Imaging Operation Procedure (Tapping Mode or Contact Mode) 1. Log into the Log Usage system on the SMIF web site 2. Open Nanoscope 6.14r1 software by double clicking on the Nanoscope 6.14r1 desktop
Chapter 2: Lines And Points
 Chapter 2: Lines And Points 2.0.1 Objectives In these lessons, we introduce straight-line programs that use turtle graphics to create visual output. A straight line program runs a series of directions
Let s build the EdCrane Difficulty:
 EdBuild Let s build the EdCrane Difficulty: The EdCrane EdBuild by Microbric Education is licensed under a Creative Commons Attribution-ShareAlike 4.0 International License. EdBuild the EdCrane The EdCrane
AAW TOTAL EXPERIENCE VIDEOS
 AAW TOTAL EXPERIENCE VIDEOS Each AAW Total Experience video will include a brief AAW message and a woodturning tip. You ll want to share these with your chapter members. That said, sharing these videos
Store Inventory Instruction Guide
 Store Inventory Instruction Guide Review Equipment & Supplies page 2 Set-Up Access Point page 6 Register Scanners page 8 Place Fixture Stickers/Enter Ranges page 10 Scanning Basics and Additional Keyboard
Graphing Your Motion
 Name Date Graphing Your Motion Experiment 33 Graphs made using a Motion Detector can be used to study motion. In this experiment, you will use a Motion Detector to make graphs of your own motion. OBJECTIVES
Let s build the EdDigger Difficulty:
 EdBuild Let s build the EdDigger Difficulty: The EdDigger EdBuild by Microbric Education is licensed under a Creative Commons Attribution-ShareAlike 4.0 International License. EdBuild the EdDigger The
Remote Control Operation
 Remote Control Operation When you first switch the TV on, you will be presented with either the preview screen which shows the current program along with a brief summary of future programs or the full
The BBC micro:bit: What is it designed to do?
 The BBC micro:bit: What is it designed to do? The BBC micro:bit is a very simple computer. A computer is a machine that accepts input, processes this according to stored instructions and then produces
About your ereader Using your Library Reading on your ereader... 25
 User Guide Kobo Aura ereader User Guide Table of Contents About your ereader... 4 Charging your ereader... 7 Using the touch screen... 8 Putting your ereader to sleep and waking it up... 10 Using the light...
CHEMISTRY SEMESTER ONE
 APPENDIX A USING THE SPECTROMETER FOR AN EMISSION SPECTROSCOPY NANSLO REMOTE WEB-BASED SCIENCE LAB ACTIVITY The following provides information how to use the spectrometer controls for the Emission Spectroscopy
INTRODUCTION TO ENDNOTE. NTNU University Library, Medicine and Health Library January 2017
 INTRODUCTION TO ENDNOTE X8 NTNU University Library, Medicine and Health Library January 2017 CONTENTS About EndNote... 4 Obtaining and Installing EndNote... 4 Guides... 4 Creating a New Library... 5 Making
Contacts: English Department Office 238 Moreland Media Services 109 Kidder
 Contacts: English Department Office 238 Moreland 7-3244 Media Services 109 Kidder September 2006 Welcome...3 Starting Out...5 Unlocking the Station...5 Touch Panel Operation...5 Projector...6 Selecting
Let s build the EdRoboClaw Difficulty:
 EdBuild Let s build the EdRoboClaw Difficulty: The EdRoboClaw EdBuild by Microbric Education is licensed under a Creative Commons Attribution-ShareAlike 4.0 International License. EdBuild the EdRoboClaw
Video Conference Classroom Documentation
 Updated: 8/18/2017 Video Conference Classroom Documentation Contents About These Classrooms... 2 Where... 2 Podium Overview... 2 On Top of Podium... 2 Inside the Podium... 2 Equipment Information... 2
Neutron Spectrometer Operation Manual
 Neutron Spectrometer Operation Manual MIT Department of Physics (Dated: October 16, 2014) This document is for assisting in the understanding and accessing of the technical aspects of the neutron physics
GEC ITS Teaching and Learning Classroom Hotline Multimedia Classroom
 ITS Teaching and Learning Classroom Hotline Multimedia Classroom GEC 1005 This document is a publication of ITS Teaching and Learning Classroom Hotline at the University of North Carolina. It may be copied
Outback STX. User Guide Supplement. Parts List. STX Terminal Overview
 Outback STX User Guide Supplement This supplement details the following changes from STX v1.0 to STX v1.1: Parts List below STX Terminal Overview below Connection Diagram on page 2 AC110 Power Up and Power
Library ebooks and Your Sony ereader
 Library ebooks and Your Sony ereader When using your Sony ereader for the first time to obtain library ebooks and audiobooks, download the Overdrive Media Console, Adobe Digital Editions, and the Sony
Introduction to GRIP. The GRIP user interface consists of 4 parts:
 Introduction to GRIP GRIP is a tool for developing computer vision algorithms interactively rather than through trial and error coding. After developing your algorithm you may run GRIP in headless mode
Trimble TMX-2050 Display Quick Reference Card
 Trimble TMX-2050 Display Quick Reference Card The Trimble TMX-2050 display is a touchscreen platform for precision agriculture. Home screen Left side of screen Right side of screen Tap the buttons on the
TASKI Service Tool Edition: V5.10/2014
 Edition: V5.10/2014 Index 1 General 1.1 General information 1 1.1.1 Part reference 1 1.1.2 Consumable supplies 1 1.1.3 Direction description 1 1.1.4 Power source 1 1.2 Required material 2 1.2.1 Tools 2
Getting started with
 Getting started with Electricity consumption monitoring single phase for homes and some smaller light commercial premises OVERVIEW: The OWL Intuition-e electricity monitoring system comprises of three
CS24: COMPUTER ANIMATION Winter 2013 Prof. Lorie Loeb --- ASSIGNMENT 1: GRAVITY DUE Wednesday, January 9th
 CS24: COMPUTER ANIMATION Winter 2013 Prof. Lorie Loeb --- ASSIGNMENT 1: GRAVITY DUE Wednesday, January 9th INTRODUCTION Gravity (drawn) Animation is all about timing, spacing and change. This simple project
Technology Control Technology
 L e a v i n g C e r t i f i c a t e Technology Control Technology P I C A X E 1 8 X Prog. 1.SOUND Output Prog. 3 OUTPUT & WAIT Prog. 6 LOOP Prog. 7...Seven Segment Display Prog. 8...Single Traffic Light
HOW TO USE THE POLYCOM REMOTE CONTROL... 2 MAKING A CALL FROM THE ADDRESS BOOK... 3 ANSWERING A CALL... 4 HANGING UP A CALL... 4 REDIALING A CALL...
 HOW TO USE THE POLYCOM REMOTE CONTROL... 2 MAKING A CALL FROM THE ADDRESS BOOK... 3 ANSWERING A CALL... 4 HANGING UP A CALL... 4 REDIALING A CALL... 4 CAMERA CONTROLS... 5 AUDIO CONTROLS... 5 VIDEO INPUT...
E X P E R I M E N T 1
 E X P E R I M E N T 1 Getting to Know Data Studio Produced by the Physics Staff at Collin College Copyright Collin College Physics Department. All Rights Reserved. University Physics, Exp 1: Getting to
Writing Programs INTRODUCING THE BASIC STAMP EDITOR 2 SCRIBBLER HARDWARE PROGRAMMING CONNECTIONS 8 BLINKING THE LIGHTS WITH PROGRAM LOOPS 9
 Writing Programs 1 Writing Programs Inside the Scribbler Robot is a small computer called a BASIC Stamp microcontroller. It performs a list of instructions that make the Scribbler operate. With the BASIC
A Beginner's Guide to Digital 3-D Projection: A Guide for the Not-Too-Technically Inclined by David Starkman -
 A Beginner's Guide to Digital 3-D Projection: A Guide for the Not-Too-Technically Inclined by David Starkman - reel3d@aol.com A few years ago, thanks to the electronic and mechanical construction skills
Remote Control/Cloud DVR Guide. Special Instructions INPUT:
 Special Instructions Remote Control/Cloud DVR Guide INPUT: Programming your remote: Turn TV on Press TV Button Press & hold the Setup button until TV button flashes 3 times (1 flash & 2 quick flashes)
R.E.A.D.S. INSTRUCTIONS FOR KINDLE ereaders
 If you have a Kindle Fire, you will need to download the Overdrive Media Console App to your device. Overdrive App instructions are available at the Williamson County Public Library Reference Desk or on
COPYRIGHT NOVEMBER-1998
 Application Notes: Interfacing AG-132 GPS with G-858 Magnetometer 25430-AM Rev.A Operation Manual COPYRIGHT NOVEMBER-1998 GEOMETRICS, INC. 2190 Fortune Drive, San Jose, Ca 95131 USA Phone: (408) 954-0522
SYNCHRONOUS LECTURE HALL. i n s t r u c t o r g u i d e
 SYNCHRONOUS LECTURE HALL i n s t r u c t o r g u i d e New Brunswick Digital Classroom Services Welcome! The Synchronous Lecture Halls connecting the Busch and Cook/Douglass campuses are part of President
About your Kobo ereader...6
 Kobo Clara HD - User Guide Table of Contents About your Kobo ereader...6 Anatomy of your Kobo ereader...6 Turning your Kobo ereader on and off...8 Charging your Kobo ereader...9 Charging your Kobo ereader
Ultra 4K Tool Box. Version Release Note
 Ultra 4K Tool Box Version 2.1.43.0 Release Note This document summarises the enhancements introduced in Version 2.1 of the software for the Omnitek Ultra 4K Tool Box and related products. It also details
Pilot. Quick Start Guide
 Pilot Quick Start Guide For further assistance, please visit www.thehovercam.com/support to download the manual or email us at support@thehovercam.com. 1-------------HDMI 7-----------Lightning slot 2-------------21.5"
Digital Video User s Guide THE FUTURE NOW SHOWING
 Digital Video User s Guide THE FUTURE NOW SHOWING Welcome The NEW WAY To WATCH Digital TV is different than anything you have seen before. It isn t cable it s better! Digital TV offers great channels,
About your ereader Anatomy of your ereader Charging your ereader Using the touch screen... 8
 Kobo Glo User Guide Table of Contents About your ereader... 5 Anatomy of your ereader... 6 Charging your ereader... 7 Using the touch screen... 8 Putting your ereader to sleep and waking it up... 10 Using
WaveLinx Mobile. WaveLinx Mobile Quick Start Guide. Programming Steps
 WaveLinx Mobile WaveLinx Mobile Quick Start Guide General information WaveLinx Mobile is a unique mobile application to programming and use of the WaveLinx Wireless Connected Lighting system. WaveLinx
Technical Specifications
 1 Contents INTRODUCTION...3 ABOUT THIS LAB...3 IMPORTANCE OF THE MODULE...3 APPLYING IMAGE ENHANCEMENTS...4 Adjusting Toolbar Enhancement...4 EDITING A LOOKUP TABLE...5 Trace-editing the LUT...6 Comparing
About your Kobo ereader...6
 User Guide Kobo Glo HD User Guide Table of Contents About your Kobo ereader...6 Anatomy of your Kobo ereader...6 Charging your Kobo ereader...8 Charging your Kobo ereader with a wall adapter...9 Turning
Lab experience 1: Introduction to LabView
 Lab experience 1: Introduction to LabView LabView is software for the real-time acquisition, processing and visualization of measured data. A LabView program is called a Virtual Instrument (VI) because
LedSet User s Manual V Official website: 1 /
 LedSet User s Manual V2.6.1 1 / 42 20171123 Contents 1. Interface... 3 1.1. Option Menu... 4 1.1.1. Screen Configuration... 4 1.1.1.1. Instruction to Sender/ Receiver/ Display Connection... 4 1.1.1.2.
Concept of ELFi Educational program. Android + LEGO
 Concept of ELFi Educational program. Android + LEGO ELFi Robotics 2015 Authors: Oleksiy Drobnych, PhD, Java Coach, Assistant Professor at Uzhhorod National University, CTO at ELFi Robotics Mark Drobnych,
PHY221 Lab 1 Discovering Motion: Introduction to Logger Pro and the Motion Detector; Motion with Constant Velocity
 PHY221 Lab 1 Discovering Motion: Introduction to Logger Pro and the Motion Detector; Motion with Constant Velocity Print Your Name Print Your Partners' Names Instructions August 31, 2016 Before lab, read
Using Your TiVo Remote Control
 Using Your TiVo Remote Control Your TiVo remote control can be used for much more than meets the eye, from setting your recordings and managing your TiVo services, to streaming and downloading videos from
Select Presentation from System Mode
 Active Learning Lectern Touch the Screen to Begin or Home on the right side Select Presentation from System Mode Display content from USB through lectern PC 1. Insert USB into port marked PC USB (do not
Setting up your Roland V-Drums with Melodics.
 Setting up your Roland V-Drums with Melodics. melodics.com Introduction Level up your timing. Play along with classic breaks. Mix it up with modern styles. Melodics the critically acclaimed beat training
APPLICATION NOTE 4312 Getting Started with DeepCover Secure Microcontroller (MAXQ1850) EV KIT and the CrossWorks Compiler for the MAXQ30
 EV KIT and the CrossWorks Compiler for the MAXQ30") Maxim > Design Support > Technical Documents > Application Notes > Microcontrollers > APP 4312 Keywords: MAXQ1850, MAXQ1103, DS5250, DS5002, microcontroller, secure microcontroller, uc, DES, 3DES, RSA,
Maxim > Design Support > Technical Documents > Application Notes > Microcontrollers > APP 4312 Keywords: MAXQ1850, MAXQ1103, DS5250, DS5002, microcontroller, secure microcontroller, uc, DES, 3DES, RSA,
imso-104 Manual Revised August 5, 2011
 imso-104 Manual Revised August 5, 2011 Section 1 Getting Started SAFETY 1.10 Quickstart Guide 1.20 SAFETY 1.30 Compatibility 1.31 Hardware 1.32 Software Section 2 How it works 2.10 Menus 2.20 Analog Channel
MRF-250 INSTALLATION MANUAL
 MRF-250 INSTALLATION MANUAL Multi-Room No-Pointing RF Control of Audio/Video Components MRF-250 Installation Manual 2004 Universal Remote Control, Inc. The information in this manual is copyright protected.
PLEN Motion Editor Operation Procedures Temporary File
 1 PLEN Motion Editor Operation Procedures Temporary File 2 Table of Contents I. Introduction 3 1. Overview of MotionEditor 3 2. Operating Environment. 3 3. Installing the MotionEditor... 3 4. PLEN's Preparation
Precautions and Disclaimers What You Can Do with Geometry Manager Pro Check Your Computer System requirements...
 Operating Instructions Geometric & Setup Management Software Windows Geometry Manager Pro Ver. 4.0 Thank you for purchasing this Panasonic product. Before using this software, please read the instructions
PaletteOS Release Notes Software Version
 Welcome to PaletteOS 10.8.1 Welcome to the PaletteOS 10.8.1 software release. There are many changes and enhancements in this release. Here are some highlights of this highly anticipated software upgrade.
About your Kobo ereader...6
 User Guide Kobo Touch 2.0 User Guide Table of Contents About your Kobo ereader...6 Anatomy of your Kobo ereader...6 Charging your Kobo ereader...8 Charging your Kobo ereader with a wall adapter...9 Turning
HD Guide. User Manual
 HD Guide. User Manual You ve decided you want better TV. Here s how to enjoy it. Welcome to Shaw HD TV. To get the most out of your experience, it s best to know absolutely everything the service offers.
About your ereader Using Your Library Reading on your ereader... 17
 Kobo Mini User Guide Table of Contents About your ereader... 4 Anatomy of your ereader... 5 Charging your ereader... 6 Using the touch screen... 7 Putting your ereader to sleep and waking it up... 9 Connecting
Perform in the spotlight
 Student sheet 1 Perform in the spotlight Let s get the Edison robot to play music or dance when it detects light, just like a performer in the spotlight! To do this, there are a few things we need to learn:
Table of Contents. Introduction...1 Legal Notices...1 About the EZ Guide 250 System...1 Related Information...2 Technical Support...
 Version 2.00 Revision B June 2009 Table of Contents Introduction...1 Legal Notices...1 About the EZ Guide 250 System...1 Related Information...2 Technical Support...2 About the Lightbar...3 What's in the
Breathe. Relax. Here Are the Most Commonly Asked Questions and Concerns About Setting Up and Programming the SurroundBar 3000.
 Breathe. Relax. Here Are the Most Commonly Asked Questions and Concerns About Setting Up and Programming the SurroundBar 3000. Our Customer Service Department has compiled the most commonly asked questions
Quick Start Guide Building and Scheduling a Show
 Quick Start Guide Building and Scheduling a Show www.lightorama.com You have created or bought and installed your sequences and want to use them to build a show and schedule that show to run at certain
Cisco MX200/MX300/EX90 User Guide
 Cisco MX200/MX300/EX90 User Guide Prepared by: MBTelehealth Rev 13Sept2017 Table of Contents 1.0 OVERVIEW... 3 2.0 GENERAL USE... 5 2.1 How to Use the Touch Screen... 5 2.2 Set Up and Use of Videoconference
Harmony Smart Control. User Guide
 Harmony Smart Control User Guide Harmony Smart Control User Guide Table of Contents About this Manual... 6 Terms used in this manual:... 6 At a Glance... 6 Features... 6 Supported devices... 6 Know your
MANAGERS REFERENCE GUIDE FOR
 MANAGERS REFERENCE GUIDE FOR Receive Components/Supplies Device (Scanner) Set Up Access Point Routers Set up Scanners Scanner Functions Additional Scanner Functions - Menu Button - Function Descriptions
 QUICK REFERENCE GUIDE Fusion is the first triple-play Gateway providing cable TV, high speed Internet and optional home phone capabilities in one single, simple and elegant solution. The Fusion quick reference
Desktop. Basic use of EndNote. Important start info 3 tips p. 1. Entering references manually p. 3
 Basic use of EndNote Desktop Important start info 3 tips p. 1 Entering references manually p. 3 Import references from databases / search engines p. 4 Check for duplicates p. 5 Using EndNote with Word
inside i-guidetm user reference manual 09ROVI1204 User i-guide Manual R16.indd 1
 inside i-guidetm user reference manual 09ROVI1204 User i-guide Manual R16.indd 1 4/6/10 12:26:18 PM Copyright 2010 Rovi Corporation. All rights reserved. Rovi and the Rovi logo are trademarks of Rovi Corporation
Tektronix RSA306 USB Spectrum Analyzer
 Tektronix RSA306 USB Spectrum Analyzer Simple Demos The Demo of the RSA306 is easy. Even you do not have signal generators, devices under test, or demo boards, using the whip antenna provided in box, you
About your ereader... 4
 Kobo Touch User Guide TABLE OF CONTENTS About your ereader... 4 What s in this section... 4 Anatomy of your ereader... 5 Charging your ereader... 6 Using the touch screen... 7 Going to sleep and waking
Manual Addendum For Rerun V1.1 software 12/12/2006, RERUN-A = Serial #06A068, RERUN-P = Serial #06A031
 Manual Addendum For Rerun V1.1 software 12/12/2006, RERUN-A = Serial #06A068, RERUN-P = Serial #06A031 The Rerun product manual was written for V1.0 software. The new release, V1.1, adds a number of new
Import and quantification of a micro titer plate image
 BioNumerics Tutorial: Import and quantification of a micro titer plate image 1 Aims BioNumerics can import character type data from TIFF images. This happens by quantification of the color intensity and/or
2 Connect your video source
 EX90 2 Connect your video source Quick Setup Connect the projector to a computer or video source using any of the available connections shown below. Check the connectors on your video equipment. If more
Connecting You to the World YADTEL TV. User Guide
 Connecting You to the World YADTEL TV User Guide 1 Channel Guide Press GUIDE on the remote OR Press MENU and select the Guide option and press OK. Once you are in the Guide, pressing GUIDE again will change
Receiver Description and Installation
 The Receiver Front Panel Smart Card Door Behind this door is a slot for a future smart card. No smart card is included with this receiver. Info Button Press the INFO button to see information about a program
technology T05.2 teach with space MEET THE SENSE HAT Displaying text and images on the Sense HAT LED matrix
 technology T05.2 teach with space MEET THE SENSE HAT Displaying text and images on the Sense HAT LED matrix Activity 1 Assemble the Sense HAT page 4 Activity 2 Hello, this is Earth! page 5 Activity 3 How
User Guide. TotalGuide xd for ipad. User Guide FOR INTERNAL USE ONLY - NOT FOR DISTRIBUTION TO CONSUMERS OR THIRD PARTIES
 TotalGuide xd for ipad User Guide FOR INTERNAL USE ONLY - NOT FOR DISTRIBUTION TO CONSUMERS OR THIRD PARTIES LEGAL NOTICE Copyright 2014 Rovi Corporation. All rights reserved. TotalGuide xd, i-guide and