Available Shortcut Keys (PC/MAC) 134 Options Menu 136 General Options 137 Spectrum Options 139 Input/Output Options 140 EQ/Harmony Options 141 Pitch
|
|
|
- Rudolf Darcy Joseph
- 6 years ago
- Views:
Transcription
1
2 Table of Contents Introduction 4 What s New in Nectar 2? 6 Authorization 7 Quickstart 12 Global Menu 16 Preset Manager 18 Overview Panel 19 Input and Output Gain 26 Input and Output Meters 28 Equalizer Module 30 Compressors Module 36 De-Esser Module 45 Gate Module 50 Saturation Module 57 Pitch Correction Module 61 Harmony Module 67 Reverb Module 74 FX Module 79 Delay Module 86 Limiter Module 90 Pitch Editor Plug-in 93 Breath Control Plug-in 107 Preset System 111 Spectrum 116 History Menu 118 CPU Optimization 120 Buffer Size Viewer 121 Automation 122 Setting up MIDI Control 123 Setting up ReWire Control 129 Delay Compensation 131 Keyboard and Mouse Support 132
3 Available Shortcut Keys (PC/MAC) 134 Options Menu 136 General Options 137 Spectrum Options 139 Input/Output Options 140 EQ/Harmony Options 141 Pitch Editor General Options 142 Pitch Editor Pitch Options 144 Breath Control General Options 145 izotope Customer Support 147

4 Introduction Nectar was created out of a desire to provide engineers, musicians, and voice-over artists with a vocal mixing tool that could provide a great sound with just a few clicks of the mouse. Key Features Over 200 Vocal Presets in 12 Genres giving you instant access to a wealth of vocal sounds 10 DSP modules relevant to vocal production including Equalizer, Compressor, De-Esser, Gate, Limiter, Saturation, Pitch Correction, Reverb, Delay, FX, and Harmony Freely adjustable signal path allowing you to rearrange the flow of all DSP modules Simple preset system for saving your own adjustments and creating new sounds Innovative Metering which provides powerful feedback that can assist you when making adjustments
5
6 What s New in Nectar 2? Harmony module that allows you to easily add harmonized accompaniments to your vocal tracks or add your own custom backing vocals with your MIDI controller Reverb module accurately modeled after the renowned EMT 140 stereo plate reverb unit FX module containing 7 new DSP effects including: Distortion, Decimate (Downsampler), Phaser, Flanger, Chorus, Echo, and Shred Component plug-ins Pitch Editor and Breath Control* Refreshed manual pitch editing including: refined note detection, Vibrato control, and ReWire Support* Streamlined Overview Panel with the most relevant settings for the modules of Nectar Added five additional filter types to the EQ module including Bass and Treble Baxandall filters and Vintage Pultec-style shelf filters Key Detection to assist you in setting the key of your song for both real-time pitch correction and auto-harmonization Enhanced metering including gain reduction traces and threshold control meters in dynamics modules Added integrated Meter Tap functionality for seamless routing to Insight and Ozone 5 s Meter Bridge Added Floor control to the Gate Module *Only included in the Nectar 2 Vocal Production Suite
7 Authorization Each purchased copy of Nectar contains a unique serial. After downloading Nectar directly from izotope or another re-seller the serial number will be e- mailed along with the link to download the product. The serial number should resemble: SN-NECTAR2-XXXX-XXXX-XXXX-XXXX Launching the Authorization Wizard The first time you open Nectar 2, the Authorization Wizard will appear. You can choose to either authorize Nectar or use it in Trial mode for evaluation purposes. Please use your supplied Nectar serial number to fully authorize your product. Trial vs. Demo Mode For the first 10 days after the first instantiation, Nectar 2 will run in Trial mode, which offers full functionality. After 10 days, Nectar will revert to Demo mode. In Demo mode, Nectar will periodically mute audio output. Authorizing Your Copy of Nectar Online After opening Nectar and launching the Authorization Wizard, the following steps will complete the authorization process online: 1. First, click on 'Authorize'. 2. Next, enter the serial number ed to you. It should look like this: SN-NECTAR-XXXX-XXXX-XXXX-XXXX 3. You must also enter your name and a valid address.
8 Make note of the address you use to authorize your license. Your license and izotope account will be linked directly to this address. Note: Clicking the 'Advanced' button reveals a set of options that allow you to store your Nectar authorization on a portable hard drive or flash drive. Click here for more information on these options. 4. When you have confirmed that your serial number and information is accurate, click once more on 'Authorize'. 5. Lastly, click on 'Submit' in order to send your authorization message to the izotope servers. If the authorization is accepted, click on the 'Finish' button to complete the authorization. Authorizing Your Copy of Nectar Offline Some customers choose to keep their audio workstations offline, and a simple offline authorization option has been included. After opening Nectar and launching the Authorization Wizard, the following steps will complete the authorization process offline: 1. When first prompted to authorize Nectar, click on 'Authorize' 2. Next, click on the option for 'Offline Authorization' at the bottom of the authorization window, select "Authorize with izotope challenge/response" and click next. 3. You will be given a unique Challenge Code that is specific to your computer only. Write down or make a copy of the exact Challenge Code. It will look like this: IZ-NECTAR2-XXXXXXXX-XXXX-XXXX 4. Next, using a system with internet access, login to your customer account at the izotope website: 5. Click the 'Activate Software with a Serial Number' button, enter your full serial number and click 'Submit'. 6. Select the 'Challenge/Response' option and click on 'Submit'.
9 7. Read the License Agreement and click "Agree" if you find it agreeable. 8. Now enter your full Challenge Code copied in step After submitting your Challenge Code, you will receive a unique Response Code. The response code will look like this: IZ-NECTAR2-XXXX-XXXX-XXXX Write this response code or save a text file with the response code onto a flash drive. 10. Type or paste the Response Code into the text field of Step 3 in the Offline Authorization window. 11. Click Next to authorize Nectar. 12. You should now receive a message that your authorization has been successful and may click Finish to begin using Nectar. ilok Support Nectar does support ilok. Our plug-ins will be able to detect ilok keys and assets if you already use ilok and PACE software on your system. If you don't already have PACE or ilok, we will not install any PACE or ilok software to your system, and ilok authorizations will be unavailable. Authorizing Nectar with ilok 1. When first prompted to authorize Nectar 2, click on 'Authorize' 2. Next, enter the serial number ed to you. It should look like like this: SN-NECTAR2-XXXX-XXXX-XXXX-XXXX 3. You must also enter your name and a valid address. Make note of the address you use to authorize your license. Your license and izotope account will be linked directly to this address. 4. Select 'Use ilok Authorization' and enter your ilok ID.
10 5. When you have confirmed that all your information is accurate, click once more on 'Authorize'. 6. Lastly, click on 'Submit' in order to send your authorization message to the izotope servers 7. You will now be instructed to log in to your ilok account and transfer your Nectar license to your ilok. 8. When you have completed this step and have your ilok connected to the computer on which you want to use Nectar, click 'Next'. 9. You should now receive a message that your authorization has been successful and may click Finish to begin using Nectar. Nectar 2 Vocal Production Suite If you purchased Nectar 2 Vocal Production Suite, you will also receive the Nectar 2 Pitch Editor and Nectar 2 Breath Control plug-ins. By authorizing your main Nectar 2 plug-in your Pitch Editor and Breath Control plug-ins will also be authorized. Web Help Should you encounter any problems during authorization please consult our online portal with additional information: Contact Support Should you not be able to resolve your authorization issue please contact the customer at support@izotope.com. izotope's highly trained support team is committed to responding to all requests within one (1) business day and frequently respond faster. Please try to explain your problem with as much detail and clarity as possible.
11
12 Quickstart Nectar s Presets are designed to give you a quick starting point for your own projects. Every vocalist is different so no one preset will always work well for your audio. However we have attempted to provide a wide range of Presets that will help you find a good starting point for your own material. Step 1: Select your Genre and Preset The Preset Manager tells Nectar what style of vocals you're trying to produce and automatically sets the appropriate values for all the controls to achieve that sound. Click the Preset Display at the bottom of the Nectar interface to open the Preset Manager. We ve organized presets into genre categories that will let you search easily for presets for every purpose. Because every vocal track is different, we ve aimed to give you a lot of starting points so that you can choose the best one for your project.

13 Step 2: Setting Your Input Level Setting your input level is important when selecting a preset as it will sound drastically different if your input level is too loud or quiet. In order to ensure that you have a good neutral levels as a starting point, we recommend setting Nectar s input level so that the input meter is peaking within the recommended range bracket. Learn more about the Input and Output Gain of Nectar here.
14 Step 3: Adjust Presets to Taste When you ve found a Preset that has what your track needs, further adjust the controls to your liking to define your own unique sound. The Overview Panel view gives you instant access to the most relevant controls of Nectar s modules. Quickly adjust the settings of a given module to tailor the sound or quickly enable or disable modules.

15 Step 4: Dig Deeper Once you ve found an appropriate Preset and adjusted some module settings to your taste from the Overview Panel, have a look at the individual modules in the Advanced View. In each module s Advanced view you have access to deeper settings for a more customized sound as well as metering which can assist you when making adjustments.
16 Global Menu Overview/Advanced View Clicking the Overview/Advanced button toggles between Nectar 2 s Overview Panel and Advanced View which allows you to dig deeper into each module. Tracking/Mixing Mode Tracking Mode forces Nectar 2 to process with low latency, which assists in using Nectar 2 while tracking (recording) vocals. Tracking Mode performs less transparent dynamics processing and is lower quality. Mixing Mode performs high quality processing, but incurs more latency. Note: Modules affected by Tracking Mode are Gate, De-Esser, Compressors, Limiter, Pitch Correction, and Harmony. Options Clicking the Options button loads the Options Menu from which you can authorize your copy of Nectar, access additional resources for working with Nectar, adjust visual settings, and more. Learn more about Nectar s Options here. History Clicking the History button opens the History menu which allows you to recall and compare settings and adjustments. Learn more about the History menu here.
17 Reset Clicking the Reset button clears the current working settings and loads the currently selected module s or Overview panel to it s default state. A single-click often resets the most commonly adjusted settings, while a double-click will restore all settings to their factory default. Help You may click the Help button at any time to launch this Help Documentation. Bypass Button Clicking the Bypass button in the lower right of the interface will bypass Nectar s processing in your DAW allowing you to compare your vocal track with and without Nectar.

18 Preset Manager Nectar's Genres and Presets are designed to allow you to take full advantage of the underlying signal processing in the most concise and creative way possible. Click on the Preset Manager at the bottom of Nectar's interface in order to select your desired Genre and Preset from the preset menu that appears. When a Genre and Preset is chosen, Nectar will automatically load settings in Nectar s modules to allow you to recreate that style on your vocal track. Note: You can also use the arrow keys on your keyboard to scroll Up and Down between Presets and Genres. This can be especially helpful to audition the direction different presets will take your vocals. Learn more about Nectar s Preset System here.
19 Overview Panel Nectar 2 s Overview Panel gives you instant access to the most relevant settings of many of Nectar s modules. Use the Overview Panel for a quick glance at a preset s settings or for quick tweaking of modules to adjust them to suit your vocals. Choosing a Preset Start by selecting a Genre and Preset by clicking the large display at the bottom of Nectar s interface. From here, you can adjust your settings to taste.


20 Module Controls Nectar s Overview Panel View presents you with the most relevant controls for each of Nectar s modules. You can engage or bypass processing in the different modules by using the power buttons in the upper left corner of each block in the Overview Panel. Equalizer Within the EQ section of the Overview Panel you have the ability to interact with all enabled nodes from the EQ module. Adjust any of Nectar's EQ nodes in order to shape your vocals to fit your mix. Click and drag to alter the frequency and gain of any node and use the node brackets or the mouse-wheel to adjust the Q of that particular node. The Equalizer section also features a spectrum analyzer. Learn more about interacting with these EQ nodes in the EQ Module section here. Compressor The Overview Panel allows you to instantly adjust the most commonly adjusted settings within the Compressor module. Learn more about the settings described below in the Compressor Module section here.
21 Threshold Controls Controls for both the compressor s thresholds are displayed alongside an input and gain reduction meter. The threshold control sets the level at which the compressor will begin to affect the incoming signal. Parallel Mode These modes determine whether Nectar uses just one compressor and the dry signal routed in parallel or two independent compressors routed in parallel. Mix Control The mix control determines how much signal is sent to the first compressor versus the second compressor or the dry signal (depending on the Parallel Mode you have selected). In the first Parallel mode (one compressor in parallel with the dry, uncompressed signal), a setting of 100% blends no dry signal with the compressed signal and a setting of 0% completely bypasses the compressor. In the second parallel mode (two compressors) a setting of 100% routes all of the signal to the first compressor and a setting of 0% routes all of the signal to the second compressor. Gate You can raise the Threshold of Nectar's Gate in order to reduce the gain of any low level signals in your audio like room tone. It takes program material below the threshold and reduces it by a factor determined by the ratio. Learn more about the settings described below in the Gate Module section here. Threshold Slider (db) The Threshold slider sets the level where the Gate processing takes place. As the threshold is increased, more of the signal will be reduced.
22 De-Esser Nectar s De-Esser is a powerful tool for controlling sibilance on vocal takes. By applying the same amount of Ess reduction regardless of the incoming audio level, Nectar s De-Esser allows you to transparently reduce sibilance, no matter how dynamic your vocal take is. Learn more about the settings described below in the De-Esser Module section here. Ess Slider The Ess slider controls the amount of gain reduction that is applied to the incoming vocal take by setting a threshold at which detected sibilance is attenuated. This gain reduction is applied quickly and transparently to the entire incoming vocal take instead of simply reducing the gain of a particular set of frequencies, allowing for much more natural sibilant reduction. Saturation Nectar s Saturation module can add rich harmonics to your vocals, recreating the sounds of tube circuits and tape recordings. Breathe new life into a vocal recording giving it instant sparkle or a subtle gritty edge. Learn more about the settings described below in the Saturation Module section here. Amount Slider The amount slider controls the amount of drive in the saturation or how pronounced the added harmonics will be. Mix Slider The Mix slider allows you to blend dry (unsaturated) signal with wet (saturated) signal to get the perfect amount of warmth while retaining the qualities of the original recording. A setting of 100% will be purely saturated without any blended dry signal while a setting of 0% will add no saturated signal at all.
23 Harmony Nectar 2 s Harmony module allows you to quickly add harmonized vocal accompaniments to your vocal tracks without multiple performers or tracking passes. In addition, the Harmony module functions as a Doubler allowing you to add up to four voices to recordings. Learn more about the settings described below and the Harmony module here. Gain Slider The Gain slider determines the levels of the added voices produced by the Harmony module in relation to the original lead voice. Pan Slider The Pan slider affects the stereo width of the added voices produced by the Harmony module. Lower settings make the location of added voices more narrow while higher settings spread the stereo location of the added voices. Pitch Nectar s Overview Panel features a meter that reflects the amount of pitch correction processing taking place in real time. This meter is enabled only when you re using the real-time Pitch Correction module. Learn more about the Pitch Correction module here. Reverb Nectar s Plate Reverb module allows you to instantly add a warm depth to your vocal tracks reminiscent of timeless recordings. Learn more about the settings described below in the Reverb Module section here. Decay
24 The Decay control corresponds to the physical damper present in the EMT 140. While not an explicit control of reverb time as often seen in digital reverbs the control will affect the overall decay of the reverb. Wet The Wet control affects how much wet (reverberated) signal will be blended with the dry (not reverberated) signal. A setting of 0% will add no reverb while a setting of 100% will add reverb to all of the incoming audio. Delay Nectar's Delay module can help to create transparent or colorful delayed copies of your original vocal track. Learn more about the settings described below in the Delay Module section here. Time Determines the amount of time that will pass before each successive repeat of your incoming dry vocal. Wet The Wet control affects how much wet (delayed) signal will be blended with the dry (not delayed) signal. A setting of 0% will add no delay while a setting of 100% will add delay to all of the incoming audio. FX Nectar's FX module allows you to create both otherworldly and subtle vocal sounds with distortion, modulation, and time-based effects. Learn more about the settings described below in the FX module section here.
25 Dry The Dry control affects how much dry (unaffected) signal will be blended with the wet (affected) signal. Wet The Wet control affects how much wet (affected) signal will be blended with the dry (not affected) signal.
26 Input and Output Gain The panel on the right side of the interface is the main input/output section for Nectar. This is used for setting and monitoring gain levels going in and out of the Nectar plug-in. Setting Input and Output Gain You can adjust the input or output gain by sliding the silver faders with your mouse, either by clicking and dragging or using the wheel of a wheel mouse.
27 Double-click to Reset Faders Double-clicking on either input fader will reset the Input faders to 0 db. Doubleclicking on either output fader will reset the Output faders to 0 db.
28 Input and Output Meters Nectar s level meters display the input and output level for the left and right channels as your audio enters and exits Nectar. You can set options for the Input/Output meters by opening the I/O tab of the Options menu. Peak The Peak meter is a fast meter that measures the instantaneous maximum sample value of your signal. If you are tracking the peaks for possible clipping, the Peak meter is an appropriate choice.
29 RMS RMS (Root Mean Square) is a software-based implementation of an analog style level meter. The RMS meter displays the average level calculated over a short window of time. The result is a meter that is appropriate if you are interested in tracking the overall loudness. RMS + Peak This is a combined RMS and Peak meter. This meter displays a lower bar representing the average level (RMS) and a higher bar representing peak level. There is also a moving line above the bar representing the most recent peak level or peak hold. Peak Hold By default, the meters will temporarily hold the peak values of your incoming audio. Clipping Above the meter is a red LED that serves as a clipping indicator. If the level exceeds 0 db at any point, this LED will light up and remain lit until you doubleclick anywhere on the LED itself.

30 Equalizer Module Nectar s versatile EQ allows you to add warmth and character with analog matched filters. Nectar 2 adds a range of new filter shapes, including Baxandall Treble and Bass, which allow you make more complex boosts and cuts with less EQ nodes. Frequency and Gain The grey circles mark each of the eight EQ nodes. You can adjust an EQ band by clicking on a node and dragging the crosshairs to change the frequency and gain of the band. You can also use the arrow keys to adjust a selected band, or the Shift key in combination with the arrow keys to adjust in larger increments.
31 Q/Bandwidth If you move the mouse over the "handles" on the side of the band, you can adjust the Q or bandwidth of the EQ by dragging with the mouse and widening the band. If you have a wheel mouse, you can use the mouse wheel to widen/narrow a selected band. Selecting Filter Shapes Nectar provides the ability to set the type or shape of any of the eight EQ nodes. A number of new filters are available: Flat Lowpass/Highpass These are Butterworth filters; optimized for maximum flatness without ripple or resonance in the passband or stopband. Brickwall Lowpass/Highpass These are elliptic filters; optimized for steepness with minimal ripple in the passband and stopband. Vintage Low Shelf/High Shelf These high and low shelf filters exhibit a complimentary frequency dip modeled after the renowned Pultec analog equalizer creating a complex slope with one node. Resonant Low Shelf/High Shelf These high and low shelf filters exhibit a complimentary resonance at both ends of the filter slope creating a complex shape with one node.

32 Vintage Bell This is an asymmetrical bell filter that is more narrow when cutting frequencies than when boosting frequencies. Baxandall Bass/Treble These filters are based on a vintage equalizer designed by Peter Baxandall that originally had just two knobs: "treble" and "bass". The Baxandall EQ curves are known for their gentle slopes which are sonically pleasing. Unlike the original Baxandall EQ design which had no frequency control, Nectar's Baxandall Filters allow you to freely adjust frequency. EQ Table To change the filter shape, select a node and click on the drop down menu in the bottom right or simply right-click the node. To work in the expanded info view, click on the "+" button. From this table, you can specify a different filter shape for each node. If you had selected a node in the main screen before opening the expanded screen, that node is shown as selected in the table (i.e. Node 5 has brackets around it, indicating that this was the EQ node that is currently selected. Note that you can also use the dialog boxes to enter values for the EQ bands directly. You can also disable bands with this table by clicking on the square number box to the left of a band in the table.

33 Visuals As you adjust a band you will see two EQ curves. The bright orange curve is the composite of all EQ bands while the darker orange curve shows the EQ curve of the selected band. Spectrum Overlay A spectrum by default is overlaid on the EQ module for visual feedback of the incoming audio. You can set options such as average or real time spectrum, show peak spectrum, etc. These are available in the Spectrum Options screen. On the right you'll see the gain scale for the EQ. This will change as you zoom the EQ in or out. On the left you'll see the scale for the spectrum. On the bottom you'll see the frequency scale which applies to both the EQ and the spectrum. Note: The scales for the EQ and spectrum are different, by design. If they were made to match, you wouldn't see enough of the spectrum for it to be useful.

34 The Alt-Solo Feature If you hold down the Alt key and click on the spectrum, you have an "audio magnifying glass" that lets you hear only the frequencies that are under the mouse cursor, without affecting your actual EQ settings. This is useful for pinpointing the location of a frequency in the mix without changing your actual EQ bands. You can set the default bandwidth of this filter in the Options screen under "Alt- Solo Filter Q" or simply use your mouse's scroll wheel. Once you've pinpointed a particular frequency using the Alt-Solo feature, double-click that area to activate a new node in that exact location. Additional Tips using Nectar's Paragraphic EQ 1. The Paragraphic EQ's scales are freely zoomable and scrollable, allowing you to focus on a specific frequency and dynamic range. While hovering over the db meter on the right of the spectrum, you may use your mouse wheel to zoom in on a more focused dynamic range, then click and drag to scroll the db scales. Additionally, while hovering over the frequency scales at the bottom of the spectrum, you may use your mouse wheel to zoom in on a particular frequency then click and drag to scroll the scales.
35 2. If you hold down the Shift key and drag an EQ node, the EQ band will be "locked" in the direction that you're dragging. So if you just want to change the gain without affecting the frequency (or vice-versa) just hold the Shift Key while you drag. 3. If you hold down the Ctrl key (Windows) or the Command key (Mac), you can click and select multiple bands. Once selected, you can adjust them as a group by clicking and dragging on any band you selected in the group. 4. If you'd rather enter specific values for each node instead of using the visual EQ bands, clicking on the "+" button gives you a table view of the EQ band settings. You can enter values for the EQ bands directly in this table. You can also disable bands with this table by clicking on the square box to the left of a band. 5. If you've chosen to display an averaging spectrum or a peak hold spectrum (using the Spectrum Options screen) you can reset the peak hold or the averaging by clicking anywhere on the spectrum. 6. Right-click on the spectrum to quickly access the EQ Options or the Spectrum Options screen.

36 Compressors Module The Compressors module allows you to shape the dynamics of your vocal tracks by reducing the dynamic range of a recording, making it more consistent in volume, and increasing its average level. When the audio input level is greater than its threshold setting, gain will be reduced by an amount controlled by the ratio parameter. Using Parallel Compression Nectar splits the audio input to the compressors module into two paths. Depending on the Parallel mode selected these paths are either the first compressor and a dry (uncompressed) signal or the first compressor and a second compressor. This allows you to affect the two paths of your audio differently so that you can achieve the sound of aggressive compression while preserving some dynamics. To turn the second compressor on, simply click the dual-compressor logo button. When enabled, the second compressor will appear and the audio will now be routed into both compressors simultaneously. You can blend
 and wet (compressed) signal.")
37 between the dry and compressed sound using the Mix control described below. When only using one compressor, one signal will be sent dry through the compressor module. In this case the mix control affects the amount of dry (uncompressed) and wet (compressed) signal. Controls Threshold (db) The Threshold control sets the level at which the dynamics processing takes place. Lower threshold settings will perform more compression. Ratio The Ratio determines how much gain reduction happens when the input audio exceeds the threshold. Higher ratios will result in more extreme compression. Attack (ms) The attack time is the amount of time in milliseconds it will take to apply the specified ratio and compression algorithm when the incoming signal has passed the defined threshold value. Shorter attack times will result in much quicker
38 compression and faster reaction to incoming peaks in your audio, while longer attack times can result in much more subtle processing. Release (ms) The release time is the amount of time in milliseconds that it takes for the compressor to stop processing once the signal has fallen back below the threshold. Shorter release times can give an unnatural pumping sound on certain audio material, while longer release times have a more gradual feel. RMS detection When RMS Detection is enabled, instead of using the peak level of the incoming signal, the compressor detects the average signal level. By default, this is Off and the compressor will be triggered by incoming signal peaks. In general, peak detection is useful when you're trying to even out sudden peaks in your vocals. RMS detection is useful when you're trying to increase the overall volume level without changing the dynamic character of the sound. Compressor Modes Nectar s compressors contain multiple algorithms tailored specifically for vocal processing that give you access to a range of compressor types with various characteristics of different hardware compressors. Digital This compression mode is built upon modern, surgical compression techniques and is designed to provide very clear, precise, and linear compression to give a great sounding but minimally colored sound. Available Parameter ranges Ratio: 1:1 50:1
39 Attack: ms Release: ms Vintage This mode emulates the program-dependant compression and non-linear release characteristics of classic analog compressors. Available Parameter ranges Ratio: 1:1 50:1 Attack: ms Release: ms Optical In this mode, the compressor will emulate the smooth compression of hardware optical compressors. With non-linear attack and release characteristics and subtle harmonic coloration, Optical mode can provide transparent but pleasingly colored compression. Note: Turn RMS detection ON to further emulate the sound of hardware optical compressors which were based on this design. Available Parameter ranges Ratio: 4:1 fixed Attack: 1 100ms Release: ms
40 Solid-State Based on early VCA transistor based hardware compressors, the Solid-State mode can give a clear but aggressive compression sound distinguished by the very fast attack and nonlinear release times characteristic of the original hardware units. With its own unique harmonic coloration, Solid-State can be a great mode for accentuating vocal transients. Note: Leave RMS detection OFF to allow the Solid-State mode to react in a much quicker peak detection mode to make the pleasing vocal sound of this algorithm more present. Available Parameter ranges Ratio: 4:1 12:1 Attack: ms Release: ms Mix This control will allow you to blend how much of each signal s audio is output from the module. In single compressor mode, the mix control can be used to blend between the first compressor and the dry (uncompressed) audio passing through the module. In dual-compressor mode, the mix control can be used to blend between the first and second compressor. Compressor 2 Post Filter

41 The second compressor features a post filter with low and high shelf EQ nodes. After the audio has been compressed by the second compressor, the audio will run through the filter allowing you to further shape the sound. Boosting the high end of the second compressor audio, for example, will give a very pleasing bright sound when mixed in with the first compressor s audio, providing a more colorful alternative to a simple high end boost in the EQ module. This technique achieves what is known as the Motown sound. This filter is only available in dual-compressor mode. Gain (db) The Gain control adjusts the output gain of each compressor. This is useful for making up for any decrease in levels caused by compression. Auto Gain When selected, Auto Gain calculates the RMS levels of both the input and output signals of the compressor and applies the appropriate gain to the output signal to compensate for the difference. This keeps you from needing to manually apply make-up gain after you set the compressor. Auto Gain is also a useful tool for A/B'ing the compressed signal against your original audio. If you compare your original audio to the audio being processed by Nectar s Compressor module by hitting the module s Bypass switch, having Auto Gain enabled will ensure you re really hearing the effect of the module, not just a change in volume. Visuals The Threshold Control

42 The Threshold Control is a meter that allows you to adjust the thresholds of the Compressors with a slider on the left side. Additionally, the Threshold control allows you to monitor how the incoming signal is being affected in real time. Two meters display the levels of the incoming signal and as gain reduction begins to take place, a gain reduction meter appears in red between the two level bars. The Threshold meter also displays the amount of gain reduction in real-time with a db readout at the bottom. Dynamic Curve Meter The Dynamic Curve Meter shows the input signal (x axis) plotted against the output (processed) signal (y axis). More horizontal compression curves means the signal is being flattened (compressed) more. Nodes The Dynamic Curve Meter features a node for the Compressor as well a node representing the output. These nodes are linked to the Threshold and Ratio

43 controls and can be used to adjust the curve in a visual way, rather than setting them with the standard controls. In dual-compressor mode you will see representations of both compressors settings, with the one you re currently in highlighted. Gain Reduction Trace The Gain Reduction Trace display is a scrolling meter that displays the incoming signal s waveform with a superimposed curve illustrating the amount of gain reduction taking place in real-time. The Gain Trace can help you to set attack and release controls appropriately and monitor the envelope of gain reduction and addition. Mini-spectrum Display Each module of Nectar features a display of the frequency spectrum at the top for reference while making changes to your audio within the module. The Compressor s mini-spectrum features the second compressor s post filter mentioned above. Tracking vs. Mixing Mode In Mixing Mode, Nectar s Compressor module will make use of lookahead in order to provide the most transparent results. However, this process requires a small amount of latency (delay). In Tracking Mode the Compressor will use very little latency to assist in tracking, but will be less transparent.
44

45 De-Esser Module Nectar s De-Esser is a powerful tool for controlling sibilance on vocal takes as well as other high frequency problems. Traditionally, De-Essing dynamically reduces loud sibilant noises by means of a threshold and ratio. Nectar s hardware-modeled De-Esser is level-independent allowing you to consistently and transparently reduce sibilance on inconsistent audio like vocals. How Nectar s De-Esser Works Nectar's De-Esser performs its processing independent of the incoming audio level. Whether your vocals are loud or soft, the amount of De-Essing taking place will be the same. This is performed by analyzing the current level of the audio above the specified frequency parameter, and measuring how loud it is in proportion to the full-bandwidth signal of your vocal take. If a large difference is detected due to a sibilance, an amount of Ess gain reduction will be applied.

46 Controls Ess Sets the threshold and controls the amount of gain reduction that is applied to the incoming vocal take when a sibilance is detected. If the detected sibilance is over the threshold, the amount of gain reduction is relative to how high the signal goes above the threshold. This gain reduction is applied quickly and transparently to the entire incoming vocal take, instead of simply reducing the gain of a particular set of frequencies. This allows for much more natural sibilant reduction and prevents the effect of the singer having a lisp. Ess Only Allows you to audition the detected sibilance that is above the threshold. This can be useful if you find you need to adjust the Frequency control. Frequency


47 The frequency control is used to set how the De-Esser is going to detect incoming sibilant material. This control serves as a cutoff point in which everything above the specified frequency will be used to detect sibilance, in proportion to the level of the full-bandwidth audio take. In general, this control can be left at its default value of 2500 Hz and should not need to be adjusted much in order to achieve excellent results on a wide variety of material. Visuals Gain Reduction Trace The Gain Reduction Trace is a scrolling meter that displays the incoming signal s waveform with a superimposed tracing that illustrates the amount of gain reduction taking place in real-time. Mini-spectrum Display Each module of Nectar features a display of the frequency spectrum at the top for reference while making changes to your audio within the module. The Threshold Control The Threshold Control is a meter that allows you to adjust the threshold of the De-Esser with a slider on the left side. Additionally, the Threshold Control

48 allows you to monitor how the detected sibilance is being affected, by displaying gain reduction as it is taking place. Two meters display the levels of the detected sibilance and the gain reduction. As gain reduction begins to take place, a gain reduction meter appears in red between the two level bars. The Threshold meter also displays the amount of gain reduction in real-time with a db readout at the bottom. Dynamic Curve Meter The Y (vertical) axis of the graph represents the amount of gain reduction in db being applied to your vocals. The X (horizontal) axis shows the difference in level between the high frequency audio content as defined by the Frequency control, and the overall level of the incoming audio.

49 Node The meter features a node for the De-Esser s threshold. The node is linked to the Threshold control and can be used to adjust the curve in a visual way, rather than setting it with the standard controls. Tracking vs. Mixing Mode In Mixing Mode, Nectar s De-Esser module will make use of lookahead in order to provide the most transparent results. However, this mode requires a small amount of latency (delay). In Tracking Mode, the De-Esser will use very little latency to assist in tracking, but will be less transparent.
 or an upward expander (boosting quiet sections).")
50 Gate Module The Gate can be thought of as performing the opposite task as the compressor. It takes audio below the threshold and reduces it. Depending on the Ratio setting, this module can function as a noise gate (silencing quiet sections) or an upward expander (boosting quiet sections). Controls Threshold (db) Sets the decibel level where the gate/expander processing begins. Floor (db)
51 Sets the decibel level where the gate processing ends allowing you to preserve some noise floor. Ratio Sets the ratio for the dynamics process. Higher ratios will result in more extreme gating. Tip: The Gate can have a ratio greater or less than 1.0. When the ratio is greater than 1, it is operating as a gate and any signals below the threshold will be decreased in volume. With ratios less than 1 the Gate can act as an "upward compressor" by boosting the low level signals. This is an effective technique for adding fullness to a track as you can bring up the lower levels without compressing or limiting the upper levels.
52 Attack (ms) The attack time is the amount of time in milliseconds that it takes for Nectar to bring its gain reduction back to zero once the signal has fallen below the threshold. Tip: Shorter attack times can tend to unnaturally pump on certain audio material, where longer release times have a more subtle gradual feel to them. Release (ms) This is the amount of time in milliseconds that Nectar will wait after the incoming signal has passed the defined threshold value, to apply the specified ratio of gain to the signal. Shorter release times will engage the Gate module much more quickly, while longer release times can result in slower more subtle processing.
53 Detection Modes Peak When this option is enabled Nectar looks at the incoming peak signal level to trigger the gating dynamics process. This allows for more surgical and exact processing and can be effective when trying to remove room tone or noise from a signal. RMS When this option is enabled, instead of processing your audio based on the incoming peak level of the signal, Nectar looks at the RMS average signal level. This can allow for much more gradual processing and may give more natural results depending on the incoming audio. Make-Up Gain (db) Adjusts the output gain of the signal after being processed by the Gate module. This is useful for compensating for any change in volume caused by the processing.

54 Auto Gain When selected, Auto Gain calculates RMS levels of both the input and output signal and applies the appropriate amount of gain to the output signal to compensate for the difference. This allows you to not worry about manually applying make-up gain as you set the module's controls. Visuals Gain Reduction Trace The Gain Reduction Trace display is a scrolling meter that displays the incoming signal s waveform with a superimposed curve illustrating the amount of gain reduction taking place in real-time. The Gain Trace can help you to set attack and release controls appropriately and monitor the envelope of gain reduction and addition. Mini-spectrum Display


55 Each module of Nectar features a display of the frequency spectrum at the top for reference while making changes to your audio within the module. Threshold Meter The Threshold Meter is a meter that allows you to adjust the thresholds of the Gate and Gate Floor with sliders on the left and right side. Additionally, the Threshold meter allows you to monitor how the incoming signal is being affected by displaying gain reduction as it is taking place and level meters. Two meters display the levels of the incoming signal and as gain reduction begins to take place, a gain reduction meter appears in red between the two level bars. The Threshold meter also displays the amount of gain reduction in real-time with a db readout at the bottom.

56 Dynamic Curve Meter The Dynamic Curve Meter shows the input signal (x axis) plotted against the output (processed) signal (y axis). Nodes The Dynamic Curve Meter features individual nodes for the Gate and Gate Floor. These nodes are linked to the Threshold and Ratio controls and can be used to adjust the curve in a visual way, rather than setting them with the standard controls. Tracking vs. Mixing Mode In Mixing Mode, Nectar s Gate module will make use of lookahead in order to provide the most transparent results. However, this process requires a small amount of latency (delay). In Tracking Mode, the Gate will use very little latency to assist in tracking, but will be less transparent.

57 Saturation Module Nectar s Saturation module can infuse your vocals with the subtle effects of tube, tape and other analog hardware by emphasizing even and odd harmonics in varying amounts. Controls Amount Controls the drive of the selected harmonic-generating saturation mode. Mix Allows you to control the mix of the saturated (wet) signal with the original (dry) signal.

58 Modes Tape Tape mode emphasizes odd harmonics but with a shorter harmonic slope than a transistor, and emulates the sound of analog tape when pushed to saturation. Tube Tube mode emulates the sound of tube saturation with a mix of even and odd harmonics. It is characterized by its clear "tonal" excitation. Warm The Warm mode generates only even harmonics with a steep slope and, as such, may be used as a subtle warming effect. Analog The Analog mode emulates the sound of transistor type odd harmonics giving a driven grit to your audio. Retro This algorithm is based on a row of odd harmonics characteristic of transistors resulting in a sharp, somewhat aggressive sound.
59 High-shelf Filter When saturating your vocals, often times the added harmonic content can make the sibilant frequencies in a vocal take harsh or biting. Click and drag on the high-shelf filter node in order to reduce the gain of these high frequencies. The high-shelf filter will only reduce the high frequencies present in the saturated (wet) signal. Different saturation algorithms such as the Tube and Warm modes, rely on a strong dry signal in order to perform their saturation. As such, the high-shelf filter will have varying amounts of perceived effect on your vocals depending on the algorithm chosen. Visuals Mini-spectrum Display Each module of Nectar features a display of the frequency spectrum at the top for reference while making changes to your audio within the module. The Saturation module s Mini-spectrum Display also features a high-shelf post-filter which filters only the wet (saturated) signal. Harmonic Highlights
60 The Saturation module s Mini-spectrum display additionally features highlights to pinpoint where harmonics are being added to your signal. Brighter white highlights indicate more prominent added harmonics at that frequency.

61 Pitch Correction Module Controls Vocal Range An important control to set to correctly, the specified Vocal Range will control how Nectar detects and analyzes any incoming vocal data. Start with the Middle setting for most audio applications, and if you notice any undesirable behavior or artifacts in the detected pitches, experiment with the Low and High options to achieve the best results. Speed (ms) You can use the Correction Speed control in order to control how quickly your incoming vocals will be snapped to any particular note. Set your Correction
 This controls allows you to transpose anywhere between an Octave Up or Down.")
62 Speed to 0ms in order to achieve robotic, immediate pitch snapping, or use values from 30-60ms in order to obtain more natural and transparent results. Transposition (semitones) This controls allows you to transpose anywhere between an Octave Up or Down. Formant Controls Preserve Enabled by default, this option preserves the original formants of your vocals, allowing pitch to be corrected while retaining the original character of the performer s timbre. When this option is enabled, you also have the ability to finetune formants using the Formant Shift and Global Formant Scaling controls for each Note Region. Shift (semitones)

63 Use this control to specify the amount of Formant transposition you wish to apply to your incoming vocal tracks. In general, this can be left at 0, however use this control to manually adjust your vocal formants. Scale Nectar's Pitch Correction algorithm will preserve the formants of your incoming vocal takes exactly as they were recorded. These formants are what give the voice its timbre and are very important in keeping your vocals sounding as natural as possible when pitch shifting. However, it can be desirable to shift the formants slightly in the direction of the desired pitch shift, as this corresponds to what humans naturally do. When singers sing a higher note, our vocal formants also shift slightly higher. Global Formant Scaling can sometimes help achieve more natural results when necessary. Setting the Scale of your song Root Here you can define the root note or key that your vocal takes are in. It is important to set an accurate Root Note as this can help the pitch correction algorithm determine the best possible pitches for your vocals to correct to.

64 Type Chromatic A scale in which every note of every octave will be available as a pitch your vocals could be corrected to. If you are not sure of the scale that your vocal takes are in, be sure to set your scale type to Chromatic in order to get the best results. Note: When in chromatic mode, as every pitched note is available for pitch correction, the defined root note has no effect. Major / Minor / Custom Here you can select to snap your incoming vocal pitches to either a Major, Minor or Custom scale of your choosing based upon your specified Root Note. When defining a Custom scale, click upon the notes of the popup keyboard that you wish to enable as options for pitch correction. When the individual notes are enabled, they will turn gold or dark gold for black keys. White and black notes will be disabled and not used in pitch correction.
65 Calibration Pitch (Hz) By default, all pitches will be based upon a standard A = 440Hz tuning reference. If your audio is not based on this standard reference pitch, or has been moved slightly due to analog tape recording, you can adjust Nectar's Reference Pitch here. Key Detection Start/Stop Detection This button toggles Nectar s Key Detection on and off. Click once to start detection and again when you feel you have accurate results. Generally, running detection for one verse and chorus of your song is sufficient. Suggested Keys Once Key Detection has started, this selection window will be populated with a prioritized list of suggested keys for your song. After Key Detection has been performed for an adequate period of time (usually one verse and chorus), you ll find that the top three suggestions remain the same. Clicking the suggestions from the list will automatically change the Root and Key settings described above. Visuals Mini-spectrum Display Each module of Nectar features a display of the frequency spectrum at the top for reference while making changes to your audio within the module.
66 Tracking vs. Mixing Mode In Mixing Mode, Nectar s Pitch Correction module will make use of lookahead in order to provide the best results. However, this process requires a small amount of latency (delay). In Tracking Mode, Pitch Correction will use very little latency to assist in tracking, but will be lower quality.

67 Harmony Module Nectar 2 s new Harmony module allows you to instantly add harmonized vocal accompaniments to your tracks without time-consuming tracking, multiple takes, and performers. Key Detection technology intelligently suggests the key of your song to allow for real-time harmonized voice generation. Note: The Harmony module has replaced Nectar s Doubler Module. The Harmony module will act as a doubler when all added voices are shifted either up or down an octave. Controls Voices

68 The Harmony module offers up to four vocal accompaniments, known as voices. Each voice may be in unison or shifted up/down intervals as large as an octave. To enable a voice, click its corresponding voice number to the left. Once enabled, you may select the direction and amount the voice is shifted relative to the lead voice or if it is in unison. Solo Voices Clicking Solo Voices mutes the lead vocal so the module only outputs added voices. This can be useful when placing Nectar on an aux track to process harmonies independently from your lead vocal. MIDI Control Enabling MIDI Control allows you to trigger backing voices with your MIDI Controller. When enabled, the voice table will dim, and the settings of added voices will be determined by the four nodes in the X/Y Pad discussed below. The first four voices triggered by your MIDI controller will have the settings of the four nodes in the X/Y Pad. After four voices are added, the settings in the X/Y Pad will be repeated for more than four voices. Learn more about setting up MIDI Control here.

69 Variation Pitch Pitch Variation allows you to give each added voice its own subtle differences in pitch. This creates a humanizing effect to the added voices and reduces phase cancellation. Time Time Variation allows you to create varying time offsets in each added voice. This simulates multiple performances and reduces phase cancellation. Pitch Correction Determines the amount of pitch correction performed on the added vocal accompaniments. Values of 100% will be corrected while values of -100% will be further detuned. X/Y Pad Modes
70 The X/Y Pad features both Pan/Gain and Pitch/Delay modes. By default, the X/Y Pad displays Pan/Gain controls. Pan & Gain When in Pan/Gain mode, the Harmony module s X/Y Pad allows you to quickly adjust the level and stereo placement of each added voice. Each added voice is represented on the X/Y Pad as a node labeled with its corresponding voice number. Pitch & Delay When in Pitch/Delay mode, the Harmony module s X/Y Pad allows you to quickly fine-tune the pitch and adjust the offset/delay of each added voice. Each added voice is represented on the X/Y Pad as a node labeled with its corresponding voice number. Setting the Scale of your song Root Here you can define the root note or key that your vocal takes are in. It is important to set an accurate Root Note as this can help the pitch correction algorithm determine the best possible pitches for added voices. Type Chromatic A scale in which every note of every octave will be available for added voices. If you are not sure of the scale that your vocal takes are in, be sure to set your scale type to Chromatic in order to get the best results.

71 Note: When in chromatic mode, as every pitched note is available for added voices, the defined root note has no effect. Major / Minor / Custom Here you can select to snap your outgoing harmonized voices to either a Major, Minor or Custom scale of your choosing based upon your specified Root Note. When defining a Custom scale, click one upon the notes of the keyboard you wish to enable as options for pitch correction. When the individual notes are enabled, they will turn gold or dark gold for black keys. White and black notes will be disabled and not used in pitch correction. Reference Pitch (Hz) By default, all pitches will be based upon a standard A = 440Hz tuning reference. If your audio is not based on this standard reference pitch, or has been moved slightly due to analog tape recording, you can adjust Nectar's reference Pitch here.

72 Key Detection Start/Stop Detection This button toggles Nectar s Key Detection on and off. Click once to start detection and again when you feel you have accurate results. Generally, running detection for one verse and chorus of your song is sufficient. Suggested Keys Once Key Detection has started, this selection window will be populated with a prioritized list of suggested keys for your song. After Key Detection has been performed for an adequate period of time (usually one verse and chorus), you ll find that the top three suggestions remain the same. Clicking the suggestions from the list will automatically change the Root and Key settings described above. Visuals Mini-spectrum Display Each module of Nectar features a display of the frequency spectrum at the top for reference while making changes to your audio within the module. The Harmony module s mini-spectrum includes both a high and low shelf filter that affect only the voices added by the Harmony module. These filters allow you to sculpt the added backing vocals independently of the lead voice.
73 Tracking vs. Mixing Mode In Mixing Mode, Nectar s Harmony module will make use of lookahead in order to provide the best results. However, this process requires a small amount of latency (delay). In Tracking Mode, the Harmony module will use very little latency to assist in tracking, but will be lower quality.

74 Reverb Module Nectar 2 s completely revamped Reverb Module models the classic EMT 140ST Stereo Plate Reverb giving your vocals timeless space and character. Lacking early reflections of rooms and halls, Plate Reverb can add a dimension to your vocal tracks without making them muddy. EMT 140 History Invented in 1957 by Elektro-Mess-Technik the 140 plate reverb unit was composed of a thin metal plate suspended within a 8x4 sound-resistant wooden enclosure (weighing 600 pounds). A speaker-like transducer on one end of the plate reproduced the input signal causing the plate to vibrate while two microphone like transducers received the signal at the opposite end creating a stereo reverb effect (the stereo unit wasn t introduced until 1961). The reverb time of the unit was affected by a damping pad which pressed against the plate. The unit was considered small at the time and was an option for smaller studios without an echo chamber. While the sound of the plate was unlike the natural

75 reverb that occurs in physical spaces, its warm and dense sound made it the preference of engineers at both Abbey Road studios and RCA Studio B in Nashville and was featured on records from Pink Floyd and the Beatles. Today the EMT 140 remains a mainstay of recording and is still very much in demand. Modeling the EMT 140 In order to authentically recreate the sound of the EMT 140, izotope first located an original unit that was still in good working order (sadly many have fallen into disrepair). Then by running sine sweeps through the unit at many damping settings we were able to generate impulse responses that accurately captured the sound of the particular plate. Rather than just use pure convolution, we ve used a hybrid DSP algorithm which utilizes both convolution and algorithmic methods of generating reverb. Convolution is used to accurately generate the early reflections of the plate while an algorithm has been written to synthetically generate the late tails of the reverb. Using this sort of hybrid DSP provides continuous control of parameters like the damping in real-time, which isn t possible with pure convolution. Additionally, this hybrid DSP is significantly more CPU efficient than pure convolution. Controls Pre-delay (ms)
76 This determines the amount of time the processed (wet) signal is delayed from being output. This can help to keep the wet vocals from sounding on top of the dry vocals increasing clarity in the overall vocal track with a greater sense of space. While the EMT 140 didn t offer any pre-delay, it is present in Nectar 2 to give you added control of the plate reverb. Decay The Decay control corresponds to the physical damper present in the EMT 140 that pressed against the plate in order to affect the decay time. While not an explicit control of reverb time as often seen in digital reverbs, this damping effect will affect decay time though it is not constant across all frequencies. Width The width control affects the stereo spread of the reverb module. The default (100%) setting accurately represents the sound of a mono signal through the stereo version of the EMT 140, which was first offered as a mono unit, then stereo was later added, however explicit control of the spread was never offered. This control is only available in stereo and mono to stereo instantiations of the plugin. Saturation The saturation control allows you to add subtle harmonics to the wet (reverberated) signal. The EMT 140 s original preamp was known to add subtle distortion to the signal when levels were pushed. The saturation control allows you to recreate this effect. Low and High Cutoff
77 Housed in the mini-spectrum window at the top of the module, these filters control the amount of low and high frequency material that is sent through the reverb. The High Cutoff control will filter out the high frequencies of the wet signal resulting in an overall darker reverb sound while the Low Cutoff control which filters out the lower frequencies of the wet signal resulting in a brighter reverb sound. Dry The dry control affects how much dry (unprocessed signal) is output from the reverb module. Wet The wet control affects how much wet (reverberated signal) is output from the reverb module. Visuals Mini-spectrum Display Each module of Nectar features a display of the frequency spectrum at the top

78 for reference while making changes to your audio within the module. The Reverb module s Mini-spectrum display also includes the high and low cutoff filters mentioned above. Reverb Decay Plot The Reverb Decay Plot displays a graph that illustrates the decay characteristics of the reverb signal over time given the settings you have selected. This display can help you visualize how different settings affect the overall character of the reverb signal.

79 FX Module Nectar 2 s FX module simulates a vocal pedalboard offering 7 new creative effects that give you a wealth of unique ways to process your vocals to achieve out of this world sounds. Distortion Effects Overdrive The Overdrive effect adds a gritty and aggressive distortion to your vocals. Unlike Nectar s Saturation module, which subtly adds harmonics to your voice, the Overdrive effect has the ability to severely mangle your vocal tracks.


80 Decimate The Decimate effect is a downsampler that reduces the resolution rate of the incoming audio, creating a uniquely digital sounding distortion of the audio signal that adds artifacts. Used in combination with the Overdrive effect, you can quickly distort your voice beyond recognition. To use Decimate, you must first enable the effect then increase the amount control. Modulation Effects
81 Phaser The Phaser is a phase-shifting effect that adds an additional signal through a non-linear all pass filter creating a more subtle comb-filtering effect. Feedback The Feedback control determines the amount of the phased signal that is fed back into the Phaser. Depth The depth slider controls the frequency range of the filters of the phaser sweep. At lower settings, the phaser will affect low-end frequencies, and at higher settings, the phaser will sweep into higher frequencies. Flanger The Flanger is a phase-shifting effect that adds a slightly delayed signal to create a whooshing comb-filtering effect with frequency notches in linear harmonic series. Feedback The Feedback control determines the amount of the flanged signal that is fed back into the flanger. Depth The Depth control determines the amount of modulation by controlling the depth of the Flanger s filtering. Chorus The Chorus adds a delayed pitch-modulated signal to the input, producing a shimmering effect that also widens the stereo spread.

82 Feedback The Feedback control determines the amount of the chorused signal that is fed back into the Chorus. Depth The depth slider controls the range of the pitch modulation performed on your audio. Repeat Effects Echo The Echo is a unique delay-like effect which repeats and fades out segments of your vocal tracks. It provides a more pronounced and impacting delay effect that adds a presence to your vocal tracks. Feedback The Feedback control determines the amount of the echoed signal that is fed back into the Echo. Time The Time control affects the amount of audio captured before fading begins.
83 Shred The Shred effect is a unique stuttering delay-like effect that repeats samples of your audio, offering control of both sample size and the amount of repetition. It provides an upfront and aggressive repeating delay effect, allowing you to create complex rhythms. Shreds The Shreds control determines the number of times the repeated audio sample will play back within the specified capture window. Repeats The Repeats control affects the size of the sampled audio window that will be repeated. This control is directly related to the Global Tempo/Speed control described below. For example, if Host Sync is on and Speed is set to 1 bar, setting Repeats to ¼ will repeat the first quarter note of each captured bar, setting Repeats to ⅛ will repeat the first eighth note of each captured bar, and so on. You can only repeat segments of audio when your Speed setting is greater than your Repeats setting, since the Speed setting determines the length of the captured audio. When Host Sync is disabled, 1 bar of audio is captured by default. The length of this bar is determined by the Tempo control.

84 Global Controls Series/Parallel Modes In Series Mode, the effects contained in the module will affect the audio signal one after the other from Distort to Module to Repeat. In Parallel Mode, the effects will affect the incoming audio independently of each other. To visualize this, imagine that in Series Mode, the Distort effect output feeds the input of the Modulate effects, whose output feeds the input of the Repeat effects, whose output feeds the input of the Global Wet control. In Parallel Mode, imagine that the output of each effect is on its own path, all to be summed at the input of the Global Wet control. Tempo This control allows you to manually set the speed of relevant effects within the FX module. These include the effects within the Modulate and Repeat sections. By default, this control is set to sync to the effects every 1 bar at the specified tempo. Host Sync This button enables host syncing for relevant effects within the FX module. These include the effects within the Modulate and Repeat sections. Speed
85 When Host Sync is enabled the Tempo control becomes the Speed control. This control allows you to choose the note length used to sync the Modulate and Repeat effects, relative to your host s tempo setting. Dry/Wet Controls The Dry/Wet Controls affect the amount of Dry (unaffected) and Wet (affected) signal output by the module. Visuals Mini-spectrum Display Each module of Nectar features a display of the frequency spectrum at the top for reference while making changes to your audio within the module.

86 Delay Module Nectar's Delay module can help to create transparent or colorful delayed copies of your original vocal track. A helpful alternative to reverb, the Delay module can give your vocals a sense of space without losing any vocal clarity or adding unwanted clutter to your overall mix. Controls Mode Digital Transparent and classic, the Digital delay mode provides exact copies of the incoming vocal signal with minimally colored repetitions
87 Tape A unique and colorful sound, the Tape delay mode will filter and distort each progressive repeat in the way a signal would be degraded over time on magnetic tape. This can help to add extra color to your delayed vocals while preserving the clarity of the repeats. Analog Based off of circuit distortion, the Analog delay mode can give a large amount of grit and distortion to your signal. This grit can help to give your processed audio the extra edge that it needs. Trash This controls the amount of processing effect the specified Delay Mode will have upon the processed signal. Note: The Trash control is disabled when in Digital mode. Width (Stereo Only) This controls stereo width of the delayed signal from mono (0%) to extra-wide spread (200%). Delay (ms / note values) Determines the amount of time that will pass before each successive repeat of your incoming dry vocal. With Host Tempo enabled, these values can be specified in subdivisions or multiples of one musical beat determined by your host's time signature and beats per minute. Feedback

88 The feedback percentage will control how much the signal is repeated before it is faded out. For longer delays, increase this control whereas shorter feedback times result in very short one repeat slap back echoes. Note: When increasing this control to 100%, special delay effects can be created which while interesting, can also grow to be very loud. Be mindful of the levels of your audio when adjusting this control into higher percentages. Low and High Cutoff Filters These filter nodes control how much low or high frequency content from the original audio will be sent to the Delay, controlling the frequency band of your delayed signal. Modulation Depth and Rate In order to create more realistic delayed effects, the delay time will be varied in real-time within a certain limit. After enabling the Modulation check box, the Depth and Rate controls will determine how much of this effect is applied, and how fast the delay times will be varied. With subtle settings, a very gentle movement of the signals delay time can create a natural cohesive delay and with more extreme settings, creative delay effects can be achieved to fit the creative goals of your session.

89 Visuals Mini-spectrum Display Each module of Nectar features a display of the frequency spectrum at the top for reference while making changes to your audio within the module. The Delay module s Mini-spectrum display also includes the high and low cutoff filters mentioned above. Delay Decay Plot The Delay Decay Plot displays a graph that illustrates the decay characteristics of the delayed signals over time given the settings you have selected. This display can help you visualize how different settings affect the overall character of the delayed signals.
 Determines the level at which the limiter will begin limiting.")
90 Limiter Module Nectar s Limiter serves two purposes: it allows you to aggressively limit high level signals to prevent clipping, and it allows you to create an overall louder or fuller sound by limiting the dynamic range and boosting the perceived overall level of your vocals. Controls Threshold (db) Determines the level at which the limiter will begin limiting. Turning down the threshold limits more of the signal and in turn will create an overall louder output. In other words, by turning down the Threshold you limit the dynamic range of the audio. The limiter also automatically applies gain as you bring down the Threshold, boosting the overall level of your audio.

91 Margin (db) Determines how much to attenuate the output signal after limiting. Visuals Threshold Control The Threshold Control is a meter that allows you to adjust the Threshold and Margin of the Limiter in visual relation to the levels of the incoming signal. The Threshold Control displays gain reduction as it is taking place with level meters. Two meters display the levels of the incoming signal and as gain reduction begins to take place, a gain reduction meter appears in red between the two signal level bars. The Threshold Control meter also displays the amount of gain reduction in real-time with a db readout at the bottom. Gain Reduction Trace

92 The Gain Reduction Trace is a scrolling meter that displays the incoming signal s waveform with a superimposed tracing that illustrates the amount of gain reduction taking place in real-time. Mini-spectrum Display Each module of Nectar features a display of the frequency spectrum at the top for reference while making changes to your audio within the module. Tracking vs. Mixing Mode In Mixing Mode, Nectar s Limiter module will make use of lookahead in order to provide the more transparent results. However, this process requires a small amount of latency (delay) and is only available in Mixing Mode. In Tracking mode, Nectar s Limiter will incur less latency making tracking possible, but processing will be less transparent.

93 Pitch Editor Plug-in Nectar 2 offers a new resizable component plug-in dedicated to offline pitch correction simplifying the manual pitch correction process from within your DAW. Note: The component Pitch Editor plug-in is only available in Nectar 2: Vocal Production Suite. Capturing Audio

94 To begin performing offline pitch correction you must first click the Capture button then playback audio from your DAW. The Capture button puts the Pitch Editor plug-in into record mode and will begin capturing any audio played back through the plug-in. If you are using ReWire, you may click the Play button after the Capture button to initiate capture. Learn more about setting up ReWire in your host here. Note: The detected note regions will not be displayed until after you stop capture. Note Workspace After capture, the detected notes will be displayed as regions on the Note Workspace. Superimposed on the note regions are drawings of the pitch contours that make up each note. Piano Roll The Piano Roll on the left side of the Note Workspace represents the note scale. Enabled notes of the given scale are designated by an illuminated tick to the right of the associated piano roll key. By default, the Piano Roll (in Chromatic mode) will have all notes enabled.
95 Timeline The Timeline of captured audio is represented at the top of the Note Workspace. You may click anywhere on the timeline to move the playhead to that location when using ReWire. Tip: When hovering over the Piano Roll or Timeline you may use your mouse wheel to zoom in and out on the note or time scale in the workspace. You may also click and drag the piano roll to scroll vertically. Note Regions Notes detected after capture are represented by Note Regions on the Piano Roll and are shaped corresponding to their amplitude envelopes. Pitch Contours The Pitch Contours of each detected note will be superimposed on the Note Regions. These contours represent the continuous pitch variation of your vocals. This allows you to easily detect pitch variations such as vibrato and glissandos. By default, these contours will represent pitch after correction. Note Scroll Bar The scroll bar on the right side of the Note Workspace allows you to scroll vertically and zoom in and out within the Piano Roll of the Note Workspace. Additionally the scroll bar has visual representations of the location of capture notes in the form of orange ticks. Tip: When hovering over the scroll bar you may use your mouse wheel to scroll up and down on the note scale in the workspace.
96 Note Zoom Buttons Below the Note Scroll Bar, explicit zoom in and out buttons are available for vertical zooming on the Piano Roll. Timeline Scroll Bar The scroll bar on the bottom of the Note Workspace allows you to scroll horizontally and zoom in and out within the Timeline of the Note Workspace. Tip: When hovering over the scroll bar you may use your mouse wheel to scroll left and right on the Timeline in the workspace. Timeline Zoom Buttons To the right of the Timeline Scroll Bar, explicit zoom in and out buttons are available for horizontal zooming on the Timeline. Waveform Display After capture, the waveform of the input audio will be represented in a display at the top of the Pitch Editor plug-in. This display may also be used for navigation and zooming within the Timeline. Selection Handles The Waveform Display features Selection Handles, which indicate the portion of audio viewable within the Note Workspace. You may click and drag these handles to expand the viewable region or click and drag the selection within the handles to navigate across the timeline.
97 Tip: When hovering over the Waveform Display you may use your mouse wheel to zoom in and out on the timescale in the workspace. Transport Controls Transport Controls are available when using ReWire to control playback from within the Pitch Editor plug-in. Capture Button To begin capturing note data, you must first click the Capture Button and then either click the Play Button when using ReWire, or click play in your DAW. Play Button The Play Button begins playback at the current playhead location. Stop Button The Stop Button stops playback at the current playhead location. Skip Backward Button The Skip Backward Button instantly moves the playhead to the beginning of the captured portion of audio. Skip Forward Button
98 The Skip Forward Button instantly moves the playhead to the end of the captured portion of audio. It may be used to quickly navigate to the end of captured audio in order to capture subsequent audio after the captured portion. Loop Selection/Transport Button The Loop Selection/Transport Button loops playback of selected notes within the note workspace. Note Editing Tools Cursor The Cursor is the default tool selection in the Pitch Editor plug-in. It is used for selecting notes and for dragging Note Regions vertically within the Piano Roll to change their pitch. Clicking and dragging with this tool allows you to lasso select multiple notes at once. The following actions may performed with the Cursor tool: Auditioning Notes You may click and hold on any Note Region to hear playback of that note at its current pitch. This preview audio reflects a note s corrected pitch, not just its original pitch. Dragging Notes You may easily click and drag Note Regions to a given note lane. Note Regions will snap to note lanes, unless you hold the Control button while drag-
99 ging them (but after selecting them), which allows you to freely adjust a note s pitch. Double-click to Fix You may simply double-click any Note Region to lock it to the nearest note lane. Double-click the same Note Region again to return it to its original pitch. Split Tool The Split Tool allows you to divide a single detected note into two individual Note Regions that you may then edit independently. Simply click the Split Tool icon, then you may click anywhere in a Note Region to split it at that location into separate Note Regions. Merge Tool The Merge Tool allows you to heal a separation between two detected notes making them one unified Note Region. Simply select two or more neighboring Note Regions then click the Merge Tool icon to unify the individual selected notes into one new Note Region.
100 Zoom Controls Zoom to Selection The Zoom to Selection control allows you to easily zoom to a specific location in the Piano Roll/Timeline. Simply click the Zoom to Selection icon, then click and drag across a specific location in the Note Workspace to zoom to fit that selection. Zoom to Show All Captured Notes The Zoom to Show All Captured Notes control allows you to instantly zoom in or out to show all the detected Note Regions within the audio you have captured. Resetting/Deleting Notes Resetting Note Values After selecting one or more Note Regions within the Note Workspace, you may click the Reset button to return those notes to their original pitch location and to reset their associated Note Controls at the bottom of the interface. Deleting Notes

101 After selecting one or more Note Regions within the Note Workspace, you may click the Trash icon to remove that note from the Note Workspace and it will no longer be pitch corrected. Tip: You may right-click within the workspace to reveal an option to delete all Note Regions on the workspace. Note Controls Click on any detected Note Region with the cursor tool in order to select that particular note for editing. Shift-click multiple Note Regions in order to select many at a time. Setting Your Vocal Range Vocal Range is an important parameter to set correctly. The specified Vocal Range will control how the Pitch Editor processes audio. Start with the Middle setting for most performers, but if you notice any undesirable behavior or artifacts in the detected notes, experiment with the Low and High options to achieve the best results.

102 Formant Controls Formant Preservation Enabled by default, this option preserves the original formants of your captured vocals, allowing pitch to be corrected while retaining the original character of the performer s timbre. When this option is enabled, you also have the ability to fine-tune formants using the Formant Shift and Global Formant Scaling controls for each Note Region. Formant Shift (semitones) This control allows you to adjust the vocal formants of your captured vocal audio. While in many cases this can be left at 0 in order to preserve the formants as they were originally recorded, adjusting this parameter can aid in finding more natural results when performing larger pitch shifts beyond a few notes in a given direction. Global Formant Scaling Nectar's Pitch Correction algorithm will preserve the formants of your incoming vocal takes exactly as they were recorded. These formants are what give the voice its timbre and are very important in keeping your vocals sounding as natural as possible when pitch shifting. However, it can be desirable to shift the formants slightly in the direction of the desired pitch shift, as this corresponds to what humans naturally do. When singers sing a higher note, our vocal formants also shift slightly higher. Global Formant Scaling can sometimes help achieve more natural results when necessary.
103 Vibrato This control allows you to enhance and reduce available vibrato in captured notes by accentuating or smoothing out the variations of the pitch contour for a given Note Region. Notice the changes in pitch contours when adjusting Vibrato. Correction Speed (ms) This controls how quickly the selected regions will be snapped to their specified pitches. This control can be used to adjust Nectar's note transitions and can control how transparent or processed the pitch correction will sound. Correction Strength Use this parameter to define how much the incoming vocal will be corrected to the specified pitch. At %100, the incoming vocal will be snapped entirely to the desired pitch, whereas at %50, the incoming vocal will only be corrected half of the way from the original pitch to the desired pitch. Notice as you adjust Correction Strength how a Note Region s pitch contours are affected. Snapping Notes to a Set Key/Scale After capture, you may set the Key/Scale of your vocals to force them into specific note lanes.
104 Snap To Scale After setting the Root and Scale settings described below, clicking Snap To Scale forces all note regions into note lanes available in the specified Key/Scale. Root Here you can define the root note or key that your vocal takes are in. It is important to set an accurate Root Note as this can help the pitch correction algorithm determine the best possible pitches for your vocals to correct to. Type Chromatic A scale in which every note of every octave will be available as a pitch your vocals could be corrected to. If you are not sure of the scale that your vocal takes are in, be sure to set your scale type to Chromatic in order to get the best results. Note: When in chromatic mode, as every pitched note is available for pitch correction, the defined root note has no effect. Major / Minor / Custom Here you can select to snap your incoming vocal pitches to either a Major, Minor or Custom scale of your choosing based upon your specified Root Note. When
105 defining a Custom scale, click upon the notes of the popup keyboard that you wish to enable as options for pitch correction. When the individual notes are enabled, they will turn gold or dark gold for black keys. White and black notes will be disabled and not used in pitch correction. Input/Output Meters and Toolbar In the bottom right of the Pitch Editor plug-in s interface are I/O meters and a toolbar with global menu buttons. Input/Out Meters The Input/Output Meters allow you to monitor the levels of your audio both while capturing and playing back. Bypass Button Clicking the Bypass button will bypass the Pitch Editor s processing in your DAW, allowing you to compare your original vocal track to the processing of Nectar s Pitch Editor. History Button Clicking the History button opens the History menu, which allows you to recall and compare settings and adjustments. Learn more about the History menu here.
106 Options Button Clicking the Options button loads the Options Menu from which you can authorize your copy of Nectar, access additional resources for working with Nectar, adjust visual settings, and more. Learn more about Nectar s Options here. Help Button You may click the Help button at any time to launch this Help Documentation.

107 Breath Control Plug-in The Breath Control plug-in will automatically detect breaths in your vocal takes and suppress them. This can be an essential tool when editing a vocal track by streamlining a task that can be time-consuming when performed manually. Note: The component Breath Control plug-in is only available in Nectar 2: Vocal Production Suite.

108 How Breath Control Works The Breath Control plug-in automatically analyzes the incoming vocal take and distinguishes breaths from sung vocals based on their harmonic structure. If any piece of the incoming audio matches a harmonic profile similar to a breath, the module will suppress that portion of the audio until sung vocals are detected. Different from a 'Threshold' based process in which the module is only engaged once the audio has risen to a certain volume, Breath Control will perform its analysis regardless of level. This allows for accurate breath recognition with a multitude of quiet or loud vocal styles with minimal adjustment of the module's controls. Controls Modes Gain In Gain mode, the Breath Control plug-in will reduce the gain of breaths by an absolute amount, regardless of the level of the breath. In some cases, this is desirable when trying to handle egregious breathing or as a way of removing all breaths from a particular spoken or sung vocal take. Depending on your settings however, this can result in unnatural sounding results as the very quiet breaths may be inaudible, while the loud breaths will be reduced to a normal level.
109 Target When in Target mode, the reduction amount of the 'Target' slider represents the desired level that you wish all detected breaths to be reduced to. This can result in much more natural sounding breath reduction as the detected breaths in your audio are only reduced when necessary. Loud and abrasive breaths will be reduced heavily while quiet, natural sounding breaths will be left at the same volume. Note: By default, the Breath Control plug-in will be in Target mode. Sensitivity This controls how sensitive the breath control plug-in is when detecting the harmonic structure of breaths in your incoming audio. Gain (db) Sets the desired amount of gain reduction applied to all detected breaths, regardless of level. Target (db) Sets the resulting desired level of all detected breaths above the set target. Breaths Only When enabled, only the audio of the detected breaths will be passed to the output of the module. This can help when setting the Sensitivity control in order to make sure that only the breathing in your audio is being processed.

110 Visuals Gain Reduction Trace The Gain Reduction Trace is a scrolling meter that displays the incoming signal s waveform with a superimposed tracing that illustrates the amount of gain reduction taking place in real-time. Latency In order for the Breath Control plug-in to have time to perform its analysis, it must incur a good deal of latency. The result of this latency is that the incoming audio is delayed in time with respect to the other tracks in your session. Modern audio applications have a feature called 'Delay Compensation' which will recognize the latency (delay) that Nectar requires and will adjust the tracks in your session accordingly - making sure that all of your tracks are aligned and in time with each other. This 'Delay Compensation' can only occur once the audio has been recorded into your digital audio workstation however. When tracking (recording) your incoming audio the latency of the Breath Control module will cause a delay between when the audio comes in to your computer, and when it passes through Nectar. Note: If your host has a limited number of samples of latency compensation, Breath Control may still cause tracks to be played back out of sync with each other. In these cases, we recommend processing your vocal takes with Breath Control as a separate offline process.
111 Preset System Nectar has over 100 Presets designed by professional engineers, composers, musicians and sound designers. These presets are designed to help with common mixing techniques and tools for applications like Drums, Guitar, Bass, Vocal, Utility, Special Effects and Orchestral recordings. To access the Preset Manager, click the Global button under Presets in the lower right corner of Nectar's faceplate or press Ctrl+P. Folders Nectar 2 presets have been sorted and organized into separate categories or preset folders. This makes finding a good starting point for your mixing session quicker and easier. The default preset folders that are included with Nectar 2 are listed below: Alternative & Indie Classical, Folk, & Jazz Country Dance & Electronic Hip Hop & Rap Pop Rock Soul & RnB Special FX Utility Voice Over & Dialogue Dock and Undock Clicking the Undock button at the bottom of the Preset Manager opens a floating window. This lets you work with the Preset Manager while still being able to view the edit windows for the individual Nectar modules. To have the Preset Manager return to the Nectar interface click the Dock button.
112 Selecting Presets To access the Preset Manager, click the Global button under Presets in the lower right corner of the Nectar faceplate or press Ctrl+P. Loading Presets in Nectar You can select and audition any preset by simply clicking on the name in the list. This will activate selected Nectar modules and you will hear the effect of the preset when you playback your audio. You can easily compare several different presets just by picking a different name on the list. Working with Presets in Nectar Once you have selected a preset from the list, you may choose to change the original settings within a specific module. When you change any of the original settings within a preset you will see an asterisk* added to the beginning of the preset's name. This means that the preset has been altered. If you want to keep these settings you need to Add a new preset or Update the existing preset. Working Settings If you modify a preset's settings, then these modified settings become your "Working Settings". Your Working Settings will always be at the top of the preset list within the preset manager. This allows you to freely preview and compare different preset options. When you are done, you can return to your Working Settings by selecting the item at the top of the Preset Manager labeled <Working Settings>. To select a preset and have it replace your Working Settings, just select the name of the new preset and click the Close button. Sort by Name, Last Used, or Last Modified As a convenience you can sort presets by name, by the time/date last used, or the time/date last modified. Last Used A preset is considered "used" when you select it and you close the preset system dialog. The last used time/date stamp is not updated when you are selecting and auditioning presets from the list.
113 Last Modified A preset is considered "modified" when you either create one or you make changes to one and update it with the Update button.preset System Adding and Removing Presets Add: Clicking this button adds the current Nectar settings as a new preset. You can type a name and optionally add comments for the preset. Note that a few keys such as * or / cannot be used as preset names. If you try to type these characters in the name they will be ignored. Note: This is because presets are stored as xml files (for easy backup and transferring). Their file names are the same as the name you give the preset (for easy reference) and therefore characters that are not allowed in Windows file names are not allowed in preset names. Delete: To permanently delete a preset, select the preset from the list and click the Remove button. Update: When you click the Update button your current settings are assigned to the selected preset (highlighted). This is useful of course for selecting a preset, tweaking it, then coming back to the preset system and clicking Update to save your changes to the existing preset. Compare: The Compare button is a great way to quickly hear the difference between the default settings of the most recent preset that you've selected, and the result of any changes that you have made to this preset (Working Settings). This lets you start your mixing session based on one of Nectar's default presets and then continue to tweak the settings, always comparing to where you started. New Folder: The New Folder option allows you to easily add custom named folders to the Nectar preset manager. Show at Startup: This allows you to set whether or not the preset manager will open automatically when starting Nectar.
114 Close: Closes the preset manager loading the last preset you selected from the preset list. Renaming Presets: You can double click on the name of a preset to enter the "edit" mode and then type a new name for that preset. Changing Where Presets Are Stored Change Folder You don't need to store all of your presets in the default folder(s). You can create custom folders of presets for different projects, archive presets, etc. To change the folder that Nectar looks to for presets, click the Change Folder button and browse to the folder that contains the presets you want to use. Backing up Presets Backing up presets is as simple as copying files. Just browse to the location of your preset files. The XML files in this folder are your presets with one XML file for each preset. You can reference the preset files by their file names because the name you give the preset in Nectar becomes the name of the XML file. Windows Users Documents and Settings\<your username>\my Documents\iZotope\Nectar 2\Presets Mac Users <username>\documents\izotope\nectar 2\Presets Transferring Presets Similar to Nectar's Styles, Presets are stored as '.XML' files inside of your Preset directory. These '.XML' files will be named and categorized as they appear inside of your Nectar Preset window.
115 Backing up these presets is as simple as copying files. Just browse to the location of your presets, select the directory or individual '.XML' files you would like to backup, and copy them onto your backup drive or location. To restore any presets that have already been backed up, simply copy the desired presets back into your Nectar Preset directory, and on the next instantiation, Nectar will recognize their presence and display them in the internal Preset window. Preset Directories Windows Users Documents and Settings\<your username>\my Documents\iZotope\Nectar 2\Presets Mac Users <username>\documents\izotope\nectar 2\Presets

116 Spectrum The spectrum provides a real time display of the frequencies of the mix. Nectar can show both peak hold and real-time spectra, so users can see both a peak and running spectrum simultaneously in the display. By default, only a real-time averaging spectrum will be shown in the Equalizer. Options You can set options for the spectrum by accessing the Visuals Option tab or right-clicking (under OS X you can also Ctrl-click) the spectrum and selecting "Spectrum Options" from the context menu.
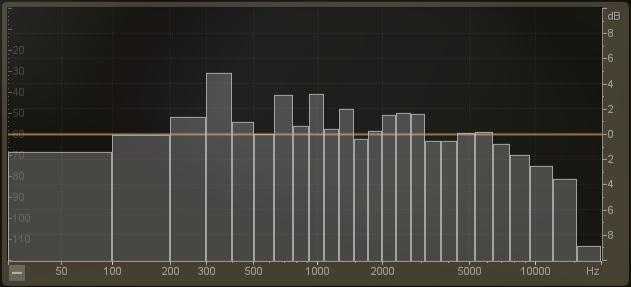
117

118 History Menu The History menu is a powerful feature for comparing settings in Nectar. To access the History list, click on the History button in the menu bar. As you tweak controls, each movement is captured and displayed in the History list. To go back and listen to a previous setting, simply click on the list at the point you want to audition. The changes that you've undone will show up in a lighter color. Clear You can also press the Clear button to clear the History list at any time. Close If you close the History window, processing resumes from the point you had last selected, so you can continue building on the History list from a earlier point. A,B,C,D You can assign up to four points in the History list to A, B, C and D buttons. To do this, select the point in the list you want to capture, and click on the 'Set' button below the A, B, C or D button. Clicking on the appropriate button will then recall the setting assigned to that button.
Precision DeEsser Users Guide
 Precision DeEsser Users Guide Metric Halo $Revision: 1670 $ Publication date $Date: 2012-05-01 13:50:00-0400 (Tue, 01 May 2012) $ Copyright 2012 Metric Halo. MH Production Bundle, ChannelStrip 3, Character,
Eventide Inc. One Alsan Way Little Ferry, NJ
 Copyright 2015, Eventide Inc. P/N: 141257, Rev 2 Eventide is a registered trademark of Eventide Inc. AAX and Pro Tools are trademarks of Avid Technology. Names and logos are used with permission. Audio
1 Prepare to PUNISH! 1.1 System Requirements. Plug-in formats: Qualified DAW & Format Combinations: System requirements: Other requirements:
 Table of Contents 1 Prepare to PUNISH!... 2 1.1 System Requirements... 2 2 Getting Started... 3 2.1 Presets... 3 2.2 Knob Default Values... 5 3 The Punish Knob... 6 3.1 Assigning Parameters to the Punish
Liquid Mix Plug-in. User Guide FA
 Liquid Mix Plug-in User Guide FA0000-01 1 1. COMPRESSOR SECTION... 3 INPUT LEVEL...3 COMPRESSOR EMULATION SELECT...3 COMPRESSOR ON...3 THRESHOLD...3 RATIO...4 COMPRESSOR GRAPH...4 GAIN REDUCTION METER...5
Eventide Inc. One Alsan Way Little Ferry, NJ
 Copyright 2017, Eventide Inc. P/N: 141236, Rev 4 Eventide is a registered trademark of Eventide Inc. AAX and Pro Tools are trademarks of Avid Technology. Names and logos are used with permission. Audio
spiff manual version 1.0 oeksound spiff adaptive transient processor User Manual
 oeksound spiff adaptive transient processor User Manual 1 of 9 Thank you for using spiff! spiff is an adaptive transient tool that cuts or boosts only the frequencies that make up the transient material,
USER S GUIDE DSR-1 DE-ESSER. Plug-in for Mackie Digital Mixers
 USER S GUIDE DSR-1 DE-ESSER Plug-in for Mackie Digital Mixers Iconography This icon identifies a description of how to perform an action with the mouse. This icon identifies a description of how to perform
Abbey Road TG Mastering Chain User Guide
 Abbey Road TG Mastering Chain User Guide CONTENTS Introduction... 3 About the Abbey Road TG Mastering Chain Plugin... 3 Quick Start... 5 Components... 6 The WaveSystem Toolbar... 6 Interface... 7 Modules
CLA MixHub. User Guide
 CLA MixHub User Guide Contents Introduction... 3 Components... 4 Views... 4 Channel View... 5 Bucket View... 6 Quick Start... 7 Interface... 9 Channel View Layout..... 9 Bucket View Layout... 10 Using
NOTICE. The information contained in this document is subject to change without notice.
 NOTICE The information contained in this document is subject to change without notice. Toontrack Music AB makes no warranty of any kind with regard to this material, including, but not limited to, the
MTurboComp. Overview. How to use the compressor. More advanced features. Edit screen. Easy screen vs. Edit screen
 MTurboComp Overview MTurboComp is an extremely powerful dynamics processor. It has been designed to be versatile, so that it can simulate any compressor out there, primarily the vintage ones of course.
VoiceStrip for PowerCore Manual. Manual VoiceStrip for PowerCore
 VoiceStrip for PowerCore Manual English Manual VoiceStrip for PowerCore SUPPORT AND CONTACT DETAILS TABLE OF CONTENTS TC SUPPORT INTERACTIVE The TC Support Interactive website www.tcsupport.tc is designed
Syrah. Flux All 1rights reserved
 Flux 2009. All 1rights reserved - The Creative adaptive-dynamics processor Thank you for using. We hope that you will get good use of the information found in this manual, and to help you getting acquainted
DW Drum Enhancer. User Manual Version 1.
 DW Drum Enhancer User Manual Version 1.0 http://audified.com/dwde http://services.audified.com/download/dwde http://services.audified.com/support DW Drum Enhancer Table of contents Introduction 2 What
WAVES Cobalt Saphira. User Guide
 WAVES Cobalt Saphira TABLE OF CONTENTS Chapter 1 Introduction... 3 1.1 Welcome... 3 1.2 Product Overview... 3 1.3 Components... 5 Chapter 2 Quick Start Guide... 6 Chapter 3 Interface and Controls... 7
Character Users Guide
 Cha r a c t e r Us e r sgui de Character Users Guide Metric Halo $Revision: 1619 $ Publication date $Date: 2012-02-10 20:41:00-0400 (Friday, 10 Feb 2012) $ Copyright 2011 Metric Halo Table of Contents
Voxengo Soniformer User Guide
 Version 3.7 http://www.voxengo.com/product/soniformer/ Contents Introduction 3 Features 3 Compatibility 3 User Interface Elements 4 General Information 4 Envelopes 4 Out/In Gain Change 5 Input 6 Output
MAutoPitch. Presets button. Left arrow button. Right arrow button. Randomize button. Save button. Panic button. Settings button
 MAutoPitch Presets button Presets button shows a window with all available presets. A preset can be loaded from the preset window by double-clicking on it, using the arrow buttons or by using a combination
Eventide Inc. One Alsan Way Little Ferry, NJ
 Copyright 2017, Eventide Inc. P/N: 141237, Rev 4 Eventide is a registered trademark of Eventide Inc. AAX and Pro Tools are trademarks of Avid Technology. Names and logos are used with permission. Audio
Neo DynaMaster Full-Featured, Multi-Purpose Stereo Dual Dynamics Processor. Neo DynaMaster. Full-Featured, Multi-Purpose Stereo Dual Dynamics
 Neo DynaMaster Full-Featured, Multi-Purpose Stereo Dual Dynamics Processor with Modelling Engine Developed by Operational Manual The information in this document is subject to change without notice and
TF5 / TF3 / TF1 DIGITAL MIXING CONSOLE. TF StageMix User's Guide
 TF5 / TF3 / TF1 DIGITAL MIXING CONSOLE EN Note The software and this document are the exclusive copyrights of Yamaha Corporation. Copying or modifying the software or reproduction of this document, by
WAVES H-EQ HYBRID EQUALIZER USER GUIDE
 WAVES H-EQ HYBRID EQUALIZER USER GUIDE TABLE OF CONTENTS CHAPTER 1 INTRODUCTION...3 1.1 WELCOME...3 1.2 PRODUCT OVERVIEW...3 1.3 CONCEPTS AND TERMINOLOGY...4 1.4 COMPONENTS...7 CHAPTER 2 QUICK START GUIDE...8
soothe audio processor Manual and FAQ
 soothe audio processor Manual and FAQ Thank you for using soothe! soothe is a spectral processor for suppressing resonances in the mid and high frequencies. It works by automatically detecting the resonances
TF5 / TF3 / TF1 DIGITAL MIXING CONSOLE. TF Editor User Guide
 TF5 / TF3 / TF1 DIGITAL MIXING CONSOLE EN Special notices Copyrights of the software and this document are the exclusive property of Yamaha Corporation. Copying or modifying the software or reproduction
ACME Audio. Opticom XLA-3 Plugin Manual. Powered by
 ACME Audio Opticom XLA-3 Plugin Manual Powered by Quick Start Install and Authorize your New Plugin: If you do not have an account, register for free on the Plugin Alliance website Double-click the.mpkg
MMorph. Randomize button. Presets button
 MMorph MMorph allows seamless morphing from one signal to another. Send one signal to the main input and another to the side chain, MMorph then allows you to transition frequency characteristics smoothly
The basic concept of the VSC-2 hardware
 This plug-in version of the original hardware VSC2 compressor has been faithfully modeled by Brainworx, working closely with Vertigo Sound. Based on Vertigo s Big Impact Design. The VSC-2 plug-in sets
Eventide Inc. One Alsan Way Little Ferry, NJ
 Copyright 2017, Eventide Inc. P/N 141298, Rev 3 Eventide is a registered trademark of Eventide Inc. AAX and Pro Tools are trademarks of Avid Technology. Names and logos are used with permission. Audio
Reason Overview3. Reason Overview
 Reason Overview3 In this chapter we ll take a quick look around the Reason interface and get an overview of what working in Reason will be like. If Reason is your first music studio, chances are the interface
MDistortionMB. Easy screen vs. Edit screen
 MDistortionMB Easy screen vs. Edit screen The plugin provides 2 user interfaces - an easy screen and an edit screen. Use the Edit button to switch between the two. By default most plugins open on the easy
S I N E V I B E S FRACTION AUDIO SLICING WORKSTATION
 S I N E V I B E S FRACTION AUDIO SLICING WORKSTATION INTRODUCTION Fraction is a plugin for deep on-the-fly remixing and mangling of sound. It features 8x independent slicers which record and repeat short
Newfangled Audio Eventide Inc. One Alsan Way Little Ferry, NJ 07643
 Copyright 2016, Newfangled Audio P/N: 141301 Eventide is a registered trademark of Eventide Inc. Newfangled Audio and Elevate are trademarks of Orthogonal Art and Science, LLC. AAX and Pro Tools are trademarks
SPL Analog Code Plug-in Manual
 SPL Analog Code Plug-in Manual EQ Rangers Manual EQ Rangers Analog Code Plug-ins Model Number 2890 Manual Version 2.0 12 /2011 This user s guide contains a description of the product. It in no way represents
USER S GUIDE ADX 100. Frequency Conscious Gating, Compression, Limiting, and Expansion. Plug-in for Mackie Digital Mixers
 USER S GUIDE ADX 100 Frequency Conscious Gating, Compression, Limiting, and Expansion TM Plug-in for Mackie Digital Mixers Iconography This icon identifies a description of how to perform an action with
Dynamic Spectrum Mapper V2 (DSM V2) Plugin Manual
 Plugin Manual") Dynamic Spectrum Mapper V2 (DSM V2) Plugin Manual 1. Introduction. The Dynamic Spectrum Mapper V2 (DSM V2) plugin is intended to provide multi-dimensional control over both the spectral response and dynamic
Dynamic Spectrum Mapper V2 (DSM V2) Plugin Manual 1. Introduction. The Dynamic Spectrum Mapper V2 (DSM V2) plugin is intended to provide multi-dimensional control over both the spectral response and dynamic
BOUNCE. COMPRESSOR with Analog Sound & Digital Transparency USER MANUAL
 BOUNCE COMPRESSOR with Analog Sound & Digital Transparency USER MANUAL BEAT SKILLZ Features: BOUNCE is a transparent yet versatile compressor that can do subtle compression to full thrusting and punchy
MDynamicsMB. Overview. Easy screen vs. Edit screen
 MDynamicsMB Overview MDynamicsMB is an advanced multiband dynamic processor with clear sound designed for mastering, however its high performance and zero latency, makes it ideal for any task. It features
SPL Analog Code Plug-in Manual
 SPL Analog Code Plug-in Manual EQ Rangers Vol. 1 Manual SPL Analog Code EQ Rangers Plug-in Vol. 1 Native Version (RTAS, AU and VST): Order # 2890 RTAS and TDM Version : Order # 2891 Manual Version 1.0
Fraction by Sinevibes audio slicing workstation
 Fraction by Sinevibes audio slicing workstation INTRODUCTION Fraction is an effect plugin for deep real-time manipulation and re-engineering of sound. It features 8 slicers which record and repeat the
OVERLOUD GEMS USER MANUAL
 USER MANUAL Rev. 1.1 TABLE OF CONTENTS INTRODUCTION... 1 WHY GEMS?... 1 MENU BAR... 3 COMP76... 4 EQ495... 6 TAPEDESK... 7 EQ84... 12 LEGAL NOTICE... 14 INTRODUCTION OVERLOUD GEMS is a collection of top
Original Marketing Material circa 1976
 Original Marketing Material circa 1976 3 Introduction The H910 Harmonizer was pro audio s first digital audio effects unit. The ability to manipulate time, pitch and feedback with just a few knobs and
reverberation plugin
 Overloud BREVERB vers. 1.5.0 - User Manual US reverberation plugin All rights reserved Overloud is a trademark of Almateq srl All Specifications subject to change without notice Made In Italy www.breverb.com
The Warm Tube Buss Compressor
 The Warm Tube Buss Compressor Warm Tube Buss Compressor PC VST Plug-In Library Creator: Michael Angel, www.cdsoundmaster.com Manual Index Installation The Programs About The Warm Tube Buss Compressor Download,
BRTC-M2 COMPRESSOR. CDSoundMaster BIG ROUND TUBE COMPRESSOR BY MX2 MICHAEL HEILER AND MICHAEL ANGEL
 BRTC-M2 COMPRESSOR CDSoundMaster BIG ROUND TUBE COMPRESSOR BY MX2 MICHAEL HEILER AND MICHAEL ANGEL Manual Index About the BRTC-M2 Installation User Controls Recommended Settings About the BRTC-M2 The BRTC-M2
fxbox User Manual P. 1 Fxbox User Manual
 fxbox User Manual P. 1 Fxbox User Manual OVERVIEW 3 THE MICROSD CARD 4 WORKING WITH EFFECTS 4 MOMENTARILY APPLY AN EFFECT 4 TRIGGER AN EFFECT VIA CONTROL VOLTAGE SIGNAL 4 TRIGGER AN EFFECT VIA MIDI INPUT
Eventide Inc. One Alsan Way Little Ferry, NJ
 Copyright 2017, Eventide Inc. P/N: 141218, Rev 7 Eventide is a registered trademark of Eventide Inc. AAX and Pro Tools are trademarks of Avid Technology. Names and logos are used with permission. Audio
Polytek Reference Manual
 Polytek Reference Manual Table of Contents Installation 2 Navigation 3 Overview 3 How to Generate Sounds and Sequences 4 1) Create a Rhythm 4 2) Write a Melody 5 3) Craft your Sound 5 4) Apply FX 11 5)
MAutoDynamicEq. Now, how is the level measured? Overview. The Band Settings
 MAutoDynamicEq Overview Dynamics processors, such as compressors and expanders, dynamically manipulate the overall level of the audio material. Equalizers change the spectral character of the audio, statically.
Eventide Inc. One Alsan Way Little Ferry, NJ
 Copyright 2017, Eventide Inc. P/N: 141255, Rev 5 Eventide is a registered trademark of Eventide Inc. AAX and Pro Tools are trademarks of Avid Technology. Names and logos are used with permission. Audio
Cristina Bachmann, Heiko Bischoff, Marion Bröer, Sabine Pfeifer, Heike Schilling, Benjamin Schütte This PDF provides improved access for
 Cristina Bachmann, Heiko Bischoff, Marion Bröer, Sabine Pfeifer, Heike Schilling, Benjamin Schütte This PDF provides improved access for vision-impaired users. Please note that due to the complexity and
SV-315 Compressor Operation Guide
 SV-315 Compressor Operation Guide Content copyright 2009 Sonalksis Ltd Contents Introduction... 3 Installation... 4...with the Plug-in Manager 4 Authorisation 4 Operation... 5 The Input Section 5 The Compression
Renaissance Compressor
 Renaissance Compressor Table of Contents Chapter 1... About the Renaissance Compressor... 2 Chapter 2... The Controls... 3 Mode, Behavior, Character buttons... 3 Threshold... 4 Ratio, Attack, Rekease,
«Limiter 6» Modules and parameters description
 «Limiter 6» Modules and parameters description Developed by: Vladislav Goncharov vladgsound.wordpress.com With collaboration of: Dax Liniere www.puzzlefactory.com.au 2011-2012 2 1 Introduction... 3 1.1
CVP-609 / CVP-605. Reference Manual
 CVP-609 / CVP-605 Reference Manual This manual explains about the functions called up by touching each icon shown in the Menu display. Please read the Owner s Manual first for basic operations, before
MTurboReverb. Overview. Under the hood
 MTurboReverb Overview MTurboReverb is probably the most powerful algorithmic reverb ever made. Most reverbs are based around a single algorithm, for which you can change certain properties, such as reverb
USB AUDIO INTERFACE I T
 USB AUDIO INTERFACE EN DE FR ES IT JA Contents Introduction...3 Contents in this Operation Manual... 3 Features... 3 Panel Controls and Terminals (Details)...4 Rear Panel... 4 Front Panel... 6 Panel Controls
User Guide 82S6MC040B
 Drumstrip User Guide 82S6MC040B Contents 1. Introduction 1 Features 1 2. System Requirements 3 Apple Macintosh 3 Windows/PC 3 Plug-in formats 3 3. Installation & Authorisation 4 4. Operational Overview
Lindell 354E User Manual. Lindell 354E. User Manual
 Lindell354EUserManual Lindell 354E User Manual Introduction Congratulation on choosing the Lindell 354E multi band compressor. This plugin faithfully reproduces the behavior and character of the most famous
DOD OWNER'S MANUAL 866 SERIES II GATED COMPRESSOR/LIMITER SIGNAL PROCESSORS
 DOD SIGNAL PROCESSORS 866 SERIES II GATED COMPRESSOR/LIMITER OWNER'S MANUAL 866 SERIES II GATED COMPRESSOR/LIMITER INTRODUCTION : The DOD 866 Series II is a stereo gated compressor/limiter that can be
Presents Tweakable Typewriters. for NI Kontakt 5.5+ Go to Index: 2
 Presents Tweakable Typewriters for NI Kontakt 5.5+ 1 Index About the Typewriters 3 General Stuff 9 The Front Page 10 The Global Tune Column 10 The Global Velocity Column 11 The Global FX Column 11 The
SPL Analog Code Plug-ins Manual Classic & Dual-Band De-Essers
 SPL Analog Code Plug-ins Manual Classic & Dual-Band De-Essers Sibilance Removal Manual Classic &Dual-Band De-Essers, Analog Code Plug-ins Model # 1230 Manual version 1.0 3/2012 This user s guide contains
Using Cubase SE with DSP Factory
 Manual by Ludvig Carlson, Anders Nordmark, Roger Wiklander Quality Control: C. Bachmann, H. Bischoff, S. Pfeifer, C. Schomburg The information in this document is subject to change without notice and does
Bionic Supa Delay Disciples Edition
 Bionic Supa Delay Disciples Edition VST multi effects plug-in for Windows Version 1.0 by The Interruptor + The Disciples http://www.interruptor.ch Table of Contents 1 Introduction...3 1.1 Features...3
+10db Compressor User s Manual. +10db Compressor. User s Manual
 +10db Compressor 1 Intro Thank you for installing +10db Compressor! This plugin is modelled after a very popular analog compressor unit that was built in the 60s, famous for it s ability to give a huge
Scheps Omni Channel User Guide
 Scheps Omni Channel User Guide Scheps Omni Channel Introduction... 3 Startup Condition... 4 Using Presets... 5 Components... 6 Mono Component... 6 Stereo Component... 7 Expanded View... 8 Stereo Mode and
MDistortionMB. The plugin provides 2 user interfaces - an easy screen and an edit screen. Use the Edit button to switch between the two.
 MDistortionMB Easy screen vs. Edit screen The plugin provides 2 user interfaces - an easy screen and an edit screen. Use the Edit button to switch between the two. By default most plugins open on the easy
Linrad On-Screen Controls K1JT
 Linrad On-Screen Controls K1JT Main (Startup) Menu A = Weak signal CW B = Normal CW C = Meteor scatter CW D = SSB E = FM F = AM G = QRSS CW H = TX test I = Soundcard test mode J = Analog hardware tune
OUTER SPACE USER GUIDE
 OUTER SPACE USER GUIDE 2017/10/18 Table of Contents 1. Outer Space...3 1.1 Specifications...3 1.2 Installation...3 1.3 Registration...3 2. Parameters...4 2.1 Main Panel...4 2.2 Second Panel...5 2.3 Tape
Credits:! Product Idea: Tilman Hahn Product Design: Tilman Hahn & Dietrich Pank Product built by: Dietrich Pank Gui Design: Benjamin Diez
 whoosh 1.1 owners manual Document Version: 2.0 Product Version: 1.1 System Requirements: Mac or PC running the full version of Native Instruments Reaktor 5.9 and up. For Protools users: We no longer support
Award Winning Stereo-to-5.1 Surround Up-mix Plugin
 Award Winning Stereo-to-5.1 Surround Up-mix Plugin Sonic Artifact-Free Up-Mix Improved Digital Signal Processing 100% ITU Fold-back to Original Stereo 32/64-bit support for VST and AU formats More intuitive
Optional Plug-ins for Auria 2.0
 Optional Plug-ins for Auria 2.0 Copyright 2015 by WaveMachine Labs, Inc Optional Plug-ins User Guide for Auria 2.0 Original documentation provided by individual plug-in manufactures. Adapted by Corey Weiner
L+R: When engaged the side-chain signals are summed to mono before hitting the threshold detectors meaning that the compressor will be 6dB more sensit
 TK AUDIO BC2-ME Stereo Buss Compressor - Mastering Edition Congratulations on buying the mastering version of one of the most transparent stereo buss compressors ever made; manufactured and hand-assembled
Eventide Inc. One Alsan Way Little Ferry, NJ
 Copyright 2017, Eventide Inc. P/N: 141263, Rev 5 Eventide is a registered trademark of Eventide Inc. AAX and Pro Tools are trademarks of Avid Technology. Names and logos are used with permission. Audio
Introduction! User Interface! Bitspeek Versus Vocoders! Using Bitspeek in your Host! Change History! Requirements!...
 version 1.5 Table of Contents Introduction!... 3 User Interface!... 4 Bitspeek Versus Vocoders!... 6 Using Bitspeek in your Host!... 6 Change History!... 9 Requirements!... 9 Credits and Contacts!... 10
C8000. switch over & ducking
 features Automatic or manual Switch Over or Fail Over in case of input level loss. Ducking of a main stereo or surround sound signal by a line level microphone or by a pre recorded announcement / ad input.
SIGNAL PROCESSOR. Operation Manual
 SIGNAL PROCESSOR Operation Manual Using the PDF manual From the Contents on page 2, click on the desired topic to automatically jump to the corresponding page. Click on a link in this manual to jump to
SIGNAL PROCESSOR. Operation Manual
 SIGNAL PROCESSOR Operation Manual Using the PDF manual From the Contents on page 2, click on the desired topic to automatically jump to the corresponding page. Click on a link in this manual to jump to
SR-D8-M, SR-D8-S. (Ver ) SOFTWARE INSTRUCTIONS
 SOFTWARE INSTRUCTIONS") SOFTWARE INSTRUCTIONS active l ine array speak er SYStems SR-D8-M, SR-D8-S (Ver. 1.1.1) Thank you for purchasing TOA's Active Line Array Speaker Systems. Please carefully follow the instructions in this
SOFTWARE INSTRUCTIONS active l ine array speak er SYStems SR-D8-M, SR-D8-S (Ver. 1.1.1) Thank you for purchasing TOA's Active Line Array Speaker Systems. Please carefully follow the instructions in this
Lindell 254E User Manual. Lindell 254E. User Manual
 Lindell 254E User Manual Introduction Congratulation on choosing the Lindell 254E compressor and limiter. This plugin faithfully reproduces the behavior and character of the most famous vintage diode bridge
XYNTHESIZR User Guide 1.5
 XYNTHESIZR User Guide 1.5 Overview Main Screen Sequencer Grid Bottom Panel Control Panel Synth Panel OSC1 & OSC2 Amp Envelope LFO1 & LFO2 Filter Filter Envelope Reverb Pan Delay SEQ Panel Sequencer Key
Reference Guide 2014 ZOOM CORPORATION. Copying or reprinting this manual in part or in whole without permission is prohibited.
 Reference Guide 2014 ZOOM CORPORATION Copying or reprinting this manual in part or in whole without permission is prohibited. Introduction is a mixer application designed specifically for the. Using a
Presents. Crystal Glasses V3. for NI KONTAKT 4+ Go to Index: 2
 Presents Crystal Glasses V3 for NI KONTAKT 4+ 1 Index Index 2 About the Crystal Glasses V3 3 Crystal Articulations/Instruments General Stuff 4 7 About the Presets 8 The Instrument Panel 9 The Main Page
DIGITAL MIXING CONSOLE. TF Editor V3.6 User's Guide
 DIGITAL MIXING CONSOLE TF Editor V3.6 User's Guide EN Special notices Copyrights of the software and this document are the exclusive property of Yamaha Corporation. Copying or modifying the software or
D-901 PC SOFTWARE Version 3
 INSTRUCTION MANUAL D-901 PC SOFTWARE Version 3 Please follow the instructions in this manual to obtain the optimum results from this unit. We also recommend that you keep this manual handy for future reference.
Operation Manual OPERATION MANUAL ISL. Precision True Peak Limiter NUGEN Audio. Contents
 ISL OPERATION MANUAL ISL Precision True Peak Limiter 2018 NUGEN Audio 1 www.nugenaudio.com Contents Contents Introduction Interface General Layout Compact Mode Input Metering and Adjustment Gain Reduction
F600A COMPRESSOR Operating Manual
 F600A COMPRESSOR Operating Manual The F600A Compressor is a high performance tool for professional recording and mastering engineers. The F600A features a fully externally and internally balanced signal
RELEASE NOTES. Introduction. Supported Devices. Mackie Master Fader App V4.5.1 October 2016
 RELEASE NOTES Mackie Master Fader App V4.5.1 October 2016 Introduction These release notes describe changes and upgrades to the Mackie Master Fader app and DL Series mixer firmware since Version 4.5. New
RetroMod 106 USER GUIDE. TRACKTION COMPANY
 RetroMod 106 USER GUIDE TRACKTION COMPANY www.tracktion.com Credits RetroMod 106 User Guide Project Management: Taiho Yamada Programming: Wolfram Franke Additional Programming: David Rowland User Interface
Operation Manual FXpansion Audio
 2 Table of Contents 1 Introduction 3 2 DCAM Dynamics processors 4 21 BusComp 6 22 ChanComp 9 23 CrossComp 12 24 EnvShaper 17 3 MIDI Learn 19 4 Credits 21 Introduction 1 3 Introduction Welcome to FXpansion
PSP Master Comp. Stereo Mastering Compressor
 PSP Master Comp Stereo Mastering Compressor By using this software you agree to the terms of any license agreement accompanying it. PSP, the PSP logo, PSP MasterComp, and It s the sound that counts! are
TrackComp. 1 Introduction System Requirements Installation and Setup How to Install on Windows... 4
 TrackComp Contents 1 Introduction 4 1.1 System Requirements.................................... 4 1.1.1 Windows....................................... 4 1.1.2 Mac OS........................................
PLUGIN MANUAL. karacter
 PLUGIN MANUAL karacter Welcome! introduction SYSTEM REQUIREMENTS Please check all information on this topic here: https://plugin-alliance.com/en/systemrequirements.html ACTIVATION Details about the activation
Mackie Control and Cubase SX/SL
 Mackie Control and Cubase SX/SL - 1 - The information in this document is subject to change without notice and does not represent a commitment on the part of Steinberg Media Technologies AG. The software
Wave Arts Tube Saturator Vintage
 Wave Arts Tube Saturator Vintage User Manual Copyright 2017, Wave Arts, Inc. All Rights Reserved 1 Table of Contents Table of Contents 1. Installation and Registration... 5 2. Plug-in Control Operation...
NanoGiant Oscilloscope/Function-Generator Program. Getting Started
 Getting Started Page 1 of 17 NanoGiant Oscilloscope/Function-Generator Program Getting Started This NanoGiant Oscilloscope program gives you a small impression of the capabilities of the NanoGiant multi-purpose
OVERLOUD GEMS USER MANUAL
 USER MANUAL Rev. 1.3 TABLE OF CONTENTS INTRODUCTION... 1 WHY GEMS?... 1 MENU BAR... 3 COMP76... 4 EQ495... 6 TAPEDESK... 7 EQ84... 12 DOPAMINE... 14 SCRIBBLES... 16 PREFERENCES... 18 LEGAL NOTICE... 19
SPL Analog Code Plugin Manual
 SPL Analog Code Plugin Manual EQ Ranger Plus Manual EQ Ranger Analog Code Plugins Manual Version 3.0 03/2016 This user s guide contains a description of the product. It in no way represents a guarantee
... read The Art of Tap Tuning by Roger H. Siminoff (Hal Leonard Publishing).
.") ... PO Box 2992 Atascadero, CA 93423 USA siminoff@siminoff.net www.siminoff.net 805.365.7111 Instruction Manual and Set-up Strobosoft v2.0 for tap tuning Rev: 11/25 /13 Pt# n/a StroboSoft is a software
... PO Box 2992 Atascadero, CA 93423 USA siminoff@siminoff.net www.siminoff.net 805.365.7111 Instruction Manual and Set-up Strobosoft v2.0 for tap tuning Rev: 11/25 /13 Pt# n/a StroboSoft is a software
User Guide 82S6MC110A
 X-Comp for SSL Duende User Guide 82S6MC110A CONTENTS 1. Introduction 1 Key Features 2 X-Comp Graphical User Interface 2 2. System Requirements 4 Apple Macintosh 4 Windows/PC 4 3. Installation & Authorisation
Credits MSMAX USER GUIDE - PAGE 2
 Credits MSMAX USER GUIDE - PAGE 2 Credits MSMAX CREDITS A GIANT THANK YOU GOES OUT TO THE BETA TESTING TEAM FOR THEIR VALUABLE INPUT AND SUPPORT. Instrument Credits: Product Design: Igor Shilov and Josh