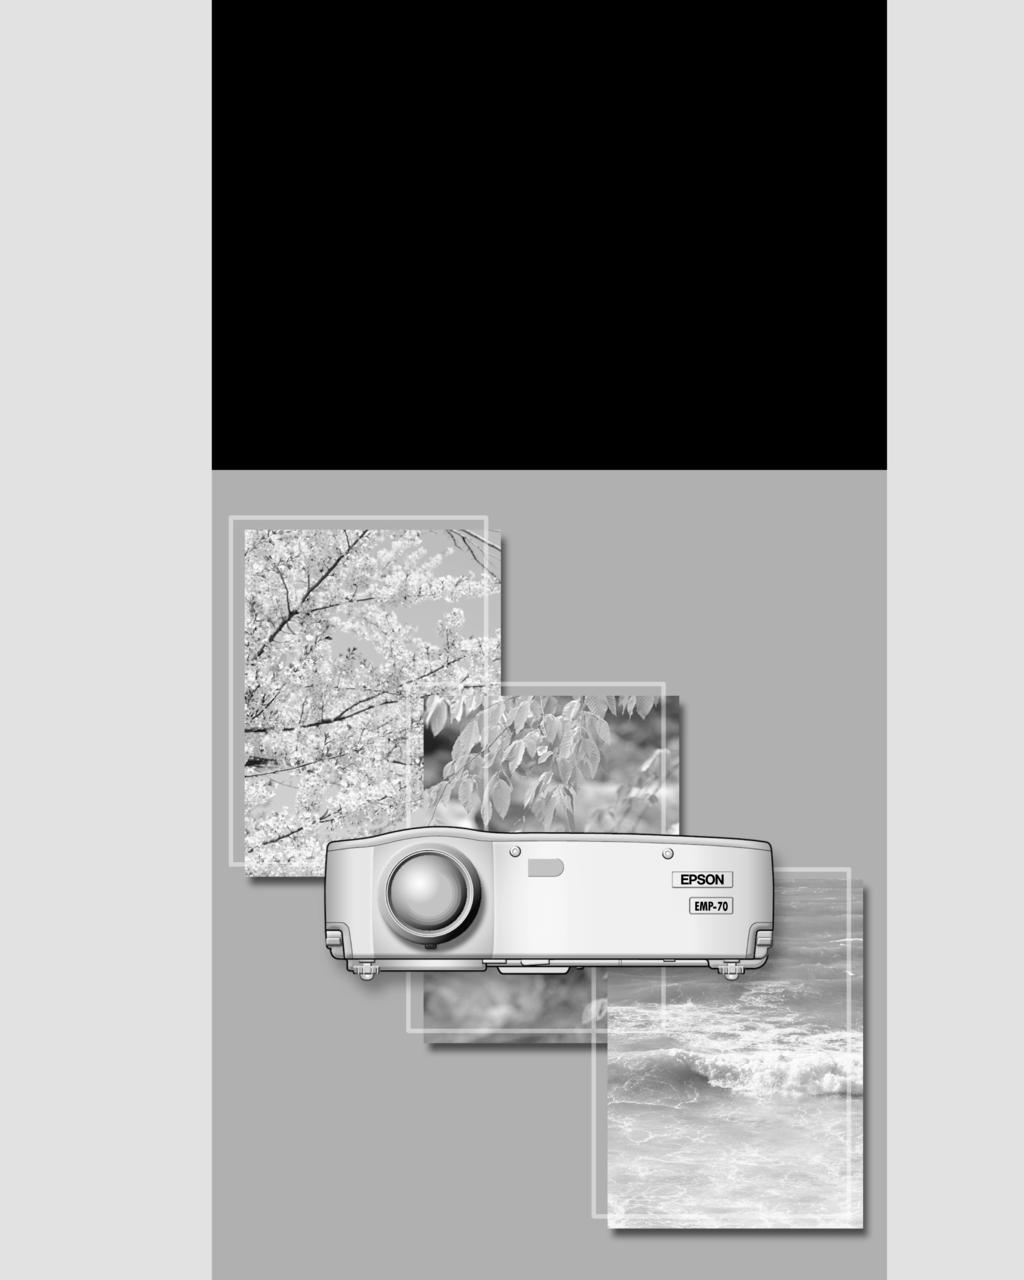
Checking Accessories. Projector main unit Lens cover with cord. batteries (AA manganese, R6) Power cord Computer cable A/V cable (red/white/yellow)
|
|
|
- Kristin Phelps
- 5 years ago
- Views:
Transcription
1
2 Checking Accessories When unpacking the projector and accessories from their box, check that the following items are included. If any items are missing, contact your vendor or an Epson Service Center. Projector main unit Lens cover with cord Remote control Two remote control batteries (AA manganese, R6) Power cord Computer cable A/V cable (red/white/yellow) USB mouse cable PS/2 mouse cable Instruction Manual (this manual) PS/2 Soft case Some references to "the unit" or "the projector" in this Manual also refer to accessories supplied with the projector or components sold separately from the projector itself.
3 In This Manual Getting Started Safety precautions and component names and functions Setup Special notes on setup, setup instructions, and screen size and projection distance details Projecting Images Connecting with different devices and projecting and adjusting images What You Can Do Functions to get the most out of your projector Menu Functions (Remote Control Only) Basic menu functions and settings Troubleshooting Troubleshooting projection failure, bad projection, and other problems Maintenance Performing lamp replacement and other routine maintenance and care General Notes Optional parts, shipping instructions, glossary, index, specifications and international warranty 1
4 Contents In This Manual... 1 Contents... 2 Features Getting Started 1.1 Safety Precautions Component Names and Functions Remote Control Setup 2.1 Special Notes on Setup Setup Instructions Screen Size and Projection Distance Details Projecting Images 3.1 Connecting to a Computer Connecting to an A/V Device Providing Sound Through an External Audio Device Projecting Images Adjusting Images Ending After the Projection What You Can Do 4.1 Using the Wireless Mouse Enlarging an Image Adjusting Image Size Adding Image Effects Freezing and Deleting Images Displaying Help Screens
5 5. Menu Functions (Remote Control Only) 5.1 Learning Basic Operations Video Menu Audio Menu Effect Menu Setting Menu Advanced Menu About Menu Reset All Menu Troubleshooting 6.1 Possible Failures When Indicators Do Not Help Maintenance 7.1 Projector Cleaning, Lens Replacement, Air Intake Vent Cleaning Lamp Replacement General Notes 8.1 Optional Parts Shipping Instructions Glossary Index Specifications External Dimensions International Warranty System
6 Features Compact and Lightweight The compact, lightweight design of your projector (6.6 liters and roughly 3.1 kilograms (6.83 pounds) ) allows easy carrying. Clear, Sharp Images Though compact, your projector provides clear, sharp presentations even in well-illuminated areas. Global Video Signal Compatibility Your unit projects virtually all of the video signal formats used world-wide, including NTSC, NTSC4.43, PAL, M-PAL, N-PAL, PAL60, and SECAM. Improved Video Image Clarity Projection of distinct video images from composite video and S-video input is possible. "Keystone" Correction Function (see pages 33 and 51) This built-in function allows easy correction of trapezoidal distortion caused by projection angle. Wireless Mouse Remote Control for Computer Mouse Operations (see page 38) The remote control allows wireless operation of various projector functions, including cursor/stamp, horizontal bar display, and image enlargement and reduction. Presentation Effects Function (Remote control Effect button, see page 42) Use of the remote control Effect button creates effective presentations. Cursor/Stamp Horizontal bar 4
7 E-Zoom Function (Remote control E-Zoom button, see page 40) Enlarges an image (from standard to 4x size vertically and horizontally). Automatic image sizing with Wide/Tele button (see page 41) Allows image enlargement and reduction. Enlargement Reduction 5
8 6
9 1 Getting Started 1.1 Safety Precautions Component Names and Functions Remote Control
10 1.1 Safety Precautions 8 To ensure safe and proper use of your projector, read these safety precautions completely. Warning: Caution: Improper operation that disregards this symbol may result in serious injury or death. Improper operation that disregards this symbol may result in injury or damage to objects. Warning: If any of the following malfunctions occur, immediately shut off and unplug the projector and consult your vendor or an Epson Service Center. Occurrence of smoking, odour, or abnormal noise Failure of projection or sound Penetration of unit by water or a foreign object Dropping of unit or other damage to the cabinet Continued use may cause fire or electric shock. Repairing the unit yourself is hazardous and should never be attempted. Only trained service personnel should open the projector cabinet, and the unit should never be disassembled or modified. The cabinet contains many high voltage components which may cause fire, electric shock, or other accidents. Use only a voltage indicated on the unit itself. Use of a non-designated voltage may cause fire or electric shock. Check that the power cord specifications are correct. A power cord which matches the specifications in the country of purchase is included with the projector. If the projector is used in a different country from the country of purchase, check the power supply voltage and the shape of the wall outlet in the destination country beforehand, and make sure that you obtain a proper power cord which matches the specifications for that country. Do not use a damaged power cord. Fire or electric shock may result. Treat the power cord as follows. Do not modify the power cord. Do not place heavy objects on the power cord. Do not bend, twist, or pull the power cord severely. Do not run the power cord near heating equipment. If the power cord becomes damaged, consult your vendor or an Epson Service Center.
11 When the projector is on, never look into the lens. The intense light may damage your vision. Where small children are present, take particular care. Handle the power cord plug and unit connector with care. Improper handling may cause fire or electric shock. Treat the power cord plug and connector as follows. Do not overload wiring. Do not insert a dusty or dirty plug or connector in an outlet. Insert firmly and completely. Do not pull out with wet hands. Do not use the cable to pull out the plug or connector. Always hold the plug or connector itself. The projector cabinet contains lenses, a lamp, and many other glass components. When handling any broken components, use care to avoid injury from fragments, and consult your vendor or an Epson Service Center for repair. Do not place breakable objects, containers of liquid, medicines, or similar items on the unit. Spillage or penetration may cause fire or electric shock. Do not insert or drop metal, flammable, or other foreign objects into the intake or exhaust vents of the unit. Fire or electric shock may result. Do not leave the unit or the remote control containing batteries in a closed automobile, area of direct sunlight, air conditioner or heater outlet, or other high temperature location. Heat may deform the unit or remote control or cause internal components to malfunction, leading to fire. 9
12 Caution: Do not sit, stand, or place heavy objects on the unit. Tipping or breakage may result and cause injury. Do not place the unit on an unsteady base, inclined location, or other unstable area. The unit may fall or tip and cause injury. Set up and store the unit out of reach of children. The unit may fall or tip and cause injury. Do not place the unit in a humid or dirty location, near a food preparation area or humidifier, or in the path of smoke or steam. Fire or electric shock may result. Do not block the ventilation slots of the unit. Blockage will cause internal heat build-up and may result in fire. Do not set up the unit in the following locations. In closets, bookshelves, or other cramped locations with poor ventilation On carpets, bedding, or blankets. Do not cover the unit with blankets, curtains, tablecloths, or other cloths. If set up near walls, allow at least 20cm (7.87inches) from all walls. For safety, always unplug the unit when it will not be used for extended periods. Fire may result. When moving the unit, switch off and unplug the unit and make sure that all cables are disconnected. Fire or electric shock may result. Never remove the lamp immediately after use. After shutting off the projector, allow an hour for complete cooling. Heat may cause burns or injury. 10
13 Improper use of batteries may cause battery damage and leakage of liquid, resulting in fire, injury, or corrosion of the unit. Observe the following precautions to ensure safety. Do not mix batteries of different type or age. Use only batteries specified in the Instruction Manual. In case of battery leakage, wipe up the leakage with a cloth or other item and insert fresh batteries. Exchange expired batteries promptly. Remove the batteries during extended periods of non-use. Do not heat the batteries or throw them into a fire or liquid. Insert the batteries with correct polarity (+, -). If any leakage contacts your hands or other areas, wash promptly with water. Dispose of batteries in accordance with local collection procedures. When maintaining the unit, disconnect the power cord at both ends. Electric shock may result. Cautions For Use Environments outside the temperature range for use (5 C to 35 C) may cause irregular display, strain of the fan, and malfunction. Environments outside the temperature range for storage (-10 C to 60 C) may cause malfunction and deformation of the cabinet. Take particular care not to leave the projector for extended periods in locations exposed to direct sunlight. Do not attempt projection with the lens cover in place. Heat may deform the lens cover. The LCD panel is a product of extremely high-precision technology and contains more than 99.99% functional pixels, but you should bear in mind that less than 0.01% of the pixels are non-functioning or light improperly. 11
14 1.2 Component Names and Functions Projector Unit [Front] Operation Display Indicator Problem/Alarm Display Indicator Operating Panel Wide/Tele Button Focus Ring Front Foot Speaker Air Exhaust Vent Remote Control Receiver Power Terminal Foot Lever [Side] Lens Cover Front Foot Air Intake Vent [Rear] Air Intake Vent Input/Output Terminals [Bottom] Front Foot Front Foot Rear Foot Lamp Cover 12
15 [Wide/Tele Button (see page 41)] [Operating Panel] Press the right side of the button (Tele) to reduce the image. Press the left side of the button (Wide) to enlarge the image. Power Button (see pages 29, 35) Switches power on and off. *Press twice to turn the power off. Help Button ( See page 44) Displays help screen. Keystone (Select) Button (see pages 33, 51) Adjust when screen is distorted trapezoidally. Source (Enter) Button (See page 30) Toggles the video source between Computer, S-Video, and Composite video. [Input Terminals] Computer/Component Video Terminal (See page 24) For video signal input from computer or component video. Mouse/Com Terminal (See page 39) Used when using the remote control as a wireless mouse. Audio In Terminal (See page 24) For input of audio signal from computer. Audio Out Terminal (See page 27) For output of audio signal from projector. L/R Audio Terminals (See page 25) For input of audio signal from A/V device. USB Mouse Terminal (See page 39) Used when using the remote control as a wireless mouse. S-Video Terminal (See page 25) For input of S-video signal from A/V device. Composite Video Terminal (See page 25) For input of Composite Video signal from A/V device. 13
16 Remote Control [Front] Freeze Button (See page 43) Temporarily stops a moving picture. To release the freeze, press the button again. A/V Mute Button (See page 43) Temporarily eliminates picture and sound. To release muting, press the button again or adjust the volume. Effect Button (See page 42) Executes an assigned effect function. Esc Button Cancels an executing function and serves as the right mouse button. Menu Button (See page 46) Displays or cancels menus. Auto Button (See page 34) Optimizes computer video. Volume Button (See page 34) Adjusts volume. Indicator Lights during signal output from remote control. Power Button (see page 29, 35) Switches projector power on and off. *Press twice to turn the power off. R/C On Off Button (see pages 29, 36) Switches remote control power on and off. E-Zoom Button (See page 40) Executes the E-Zoom function. Enter Button Used for scrolling, menu item selection, and as the left mouse button. Help Button (See page 44) Provides topic-specific explanation for addressing problems. Use this button when problems occur. Computer, S-Video, Video Button (See page 30) Switches to the selected video source. [Back] Battery Cover 14
17 1.3 Remote Control Operating Range The remote control may not operate beyond certain distances and angles from the receiver on the projector. Observe the following conditions during use. [Operating Distance : Approximately 10m (393.70inches) ] [Operating Area:] Horizontally Remote Control Receiver Remote Control Transmitter Approximately 30º Approximately 30º Vertically Approximately 15º Point: The remote control R/C On Off switch must be switched to "On" to use the remote control. Point the remote control towards the remote control receiver on the projector unit. Certain screens may shorten the operating distance (approximately 10m (393.70inches) ) of the remote control when the control is pointed towards the screen to reflect its signal during use. Situate the remote control receiver out of direct sunlight, fluorescent light, and similar light sources. These may cause the remote control to malfunction. If the remote control malfunctions or stops operating, the batteries may need changing. Replace the batteries with a fresh set. 15
18 Inserting Batteries in the Remote Control This section describes how to insert batteries in your remote control. 1. Remove the battery cover. Slide the catch of the battery cover in the direction shown by the arrow. Caution: Be sure to use fresh batteries of the same type as the old. 2. Insert batteries. Be sure to match the polarity to that indicated on the remote control. Point: Battery type (2) AA manganese cells (R6) Use of 30 minutes per day will require a change of batteries approximately every 3 months. 3. Replace the battery cover. Press the battery cover into the remote control until it clicks firmly into place. 16
19 2 Setup 2.1 Special Notes on Setup Setup Instructions Screen Size and Projection Distance Details
20 2.1 Special Notes on Setup The best picture is obtained when the projector and screen are set up facing each other directly, as shown below. Set your projector and screen up this way. [View from right or left] º Upward approximately 15º Downward approximately 15º 15º 15º Keystone correction allows correction of trapezoidal distortion (see pages 33, 51). [View from above or below] 90º 18 Caution: Do not block the air exhaust vent on the side of the projector or the air intake vents on the right side and rear of the projector. Do not place the unit in direct contact with air conditioner, heater, or other ventilation currents. When setting up the projector near walls, allow at least 20cm (7.87inches) from all walls.
21 2.2 Setup Instructions Your projector allows projection in the following two ways. Set up the projector as your location requires. [Viewing from the front] [Projection on a semi-transparent screen and viewing from the rear] 19
22 2.3 Screen Size and Projection Distance Details Select a distance from lens to screen that provides your desired screen size. The recommended distance is 1.0 m (39.37inches) 13.1 m (515.75inches). Refer to the following table for setup. Screen size (cm) Approximate projection distance* (m (inch) ) Size 300 (610x460) ( ) Size 200 (410x300) ( ) Size 150 (305x228) ( ) Size 120 (244x183) ( ) Size 100 (200x150) ( ) Size 80 (160x120) ( ) Size 60 (120x90) ( ) Size 40 (81x61) ( ) Size 30 (61x46) ( ) Size 28 (57x43) ( ) * Use the "approximate projection distance" as a guide to setup. Projection conditions and other factors can affect results. 610x460 (cm) 410x x x x x x90 81x61 61x46 57x43 Size 300" Size 200" Size 150" Size 120" Size 100" Size 80" Size 60" Size 40" Size 30" Size 28" ( ) ( ) ( ) ( ) ( ) ( ) m ( inch) ( ) ( ) ( ) 0.2(m)* 0.2(m)* *If installing to a wall, leave a space of at least 20 cm between the projector and the wall. 20 Point: A keystone correction will reduce screen size.
23 3 Projecting Images 3.1 Connecting to a Computer Connecting to an A/V Device Providing Sound Through an External Audio Device Projecting Images Adjusting Images Ending After the Projection
24 3.1 Connecting to a Computer Computers which can be connected Some computer models may not allow connection, and others may allow connection but not projection. Make sure that the specifications of the computer you are using for connection meet the following two requirements. [The computer must have a video signal output port] Make sure that the computer has a port that outputs a video signal. A port that outputs a video signal is called an "RGB port", "monitor port", or "video port" or the like. Consult the section describing "connection to an external monitor" or the like in the instruction manual for the computer that you are using, and make sure that the computer has a video signal output port. Computers with an integrated monitor and other components as well as notebook personal computers may require separate purchase of an external output port. In other cases, an external output port cannot be attached. [The resolution and frequency of the computer must be within the range of specifications shown on the following page] The resolution and frequency of the video signal output by your computer must be compatible with your projector in order to allow projection (some computers allow partial projection, but clear projection cannot be obtained). Check the resolution and frequency of the video signal in the instruction manual of the computer you are using for projection. 22
25 Compatible Mode Chart for Connectable Computers If the resolution and frequency of the video signals which are output from the computer do not correspond to any of the values in the table below, those video signals cannot be projected. (In some cases it may be possible to project such signals, but they will not produce clear images.) Check the instruction manual for the computer for details on the resolution and frequency of the video signals. Furthermore, some computers may let you change the output resolution. If this is the case, change the resolution to a value in the table below. Signal (Resolution) (dots) PC (RGB) compatible modes PC (YUV) compatible modes Video compatible modes Signal Refresh rate (Hz) Frequency used for resized displays (when resizing is on) (dots) EMP-70 EMP x 350 VGAEGA x x x 400 VGACGA x x x 400 VGA Text x x x 350 VGA Text x x x 480 VESA 60/72/75/ x x x 600 SVGA 56/60/72/75/ x x x 768 XGA 43i/60/70/75/ x x x 864 SXGA1 70/75/ x x 960 SXGA2 60/75/ x x 1024 SXGA3 43i/60/75/ x x 480 MAC x x x 624 MAC x x x 768 MAC19 60/ x x x 870 MAC x x HDTV525I 50/ x x HDTV525P 50/ x x x 720 HDTV750P 50/ x x x 1080 HDTV1125I 50/ x x NTSC x x PAL x x SECAM x x
26 Connecting to a Computer Before connecting, switch off power to the projector and computer. Check that cable and terminal interfaces match each other. [Projecting Computer Video] You can make presentations on a large screen by projecting computer video from your projector. Computer Terminal Computer Monitor Port (Video Port) Computer Cable (supplied with projector) * If your computer port style is not a mini D-Sub 15-pin interface, use a connection adapter that provides this interface. When connecting to a Macintosh, you may need an optional Mac desktop adapter. Point: When using the projector, do not bundle power cords and computer cables together. Some computer models may require a connection adapter during connection. Consult your computer instruction manual or the computer vendor. [Outputting Computer Audio From Your Projector] You can output computer audio from a built-in speaker in your projector. Your projector allows output at a maximum 1W. Audio In Terminal Computer Audio Output Port Audio Cable (sold separately) Point: When computer video has been selected or when audio input is specified on the computer by menu, your projector outputs an audio signal from the computer. Purchase an audio cable that matches the terminal style of your computer's output terminal and the projector's Audio In terminal (stereo mini jack). 24
27 3.2 Connecting to an A/V Device [Inputting a Composite Video Signal] R-Audio Terminal (Red) L-Audio Terminal (White) To video terminal (Yellow) To (L) audio terminal (White) To (R) audio terminal (Red) Video Terminal (Yellow) A/V Cable (supplied with projector) [Inputting an S-Video Signal] R-Audio Terminal (Red) L-Audio Terminal (White) To S-Video Terminal A/V Cable (supplied with projector) S-Video Terminal To (L) audio terminal (White) To (R) audio terminal (Red) S-Video Cable (sold separately) 25
28 [Inputting a Component Video Image Signal] If using a component video cable DVD player, etc. Computer/Component Terminal R-Audio Terminal (Red) To Y terminal (Green) To Pb or Cb terminal (Blue) To Pr or Cr terminal (Red) Component video cable (optional part) L-Audio Terminal (White) If using a D terminal cable A/V cable (supplied with projector) DVD player, etc. To (L) audio terminal (White) To (R) audio terminal (Red) Computer/Component Terminal R-Audio Terminal (Red) To D-terminal D-terminal cable (optional part) L-Audio Terminal (White) 26 A/V cable (supplied with projector) To (L) audio terminal (White) To (R) audio terminal (Red) Point: When projecting a component video image, select "YCbCr" or "YPbPr" in the Video > Input Signal menu. Select "YCbCr" if using a DVD player, and select "YPbPr" if using a HDTV video source. To change the aspect ratio of the projected image between 4:3 and 16:9, select Video > Aspect Ratio menu.
29 3.3 Providing Sound Through an External Audio Device Connecting the Audio Out terminal of your projector to a PA system, active speaker system, or other speakers with built-in amplifiers provides powerful, pleasing sound. Use a separately sold audio connection cable (pin ring) connecting to a 3.5mm (0.14inches) stereo mini-jack plug. External Audio Device Audio Out Terminal (Stereo mini jack) Audio Connection Cable (sold separately) Point: Insertion of pin plugs into the audio output terminals provides automatic external output of audio. Audio will no longer be output from the projector speaker. Though the projector outputs audio for projected video images, in the case of A/V devices, the audio output corresponds to the audio devices connected to the L/R audio terminals. Before purchasing an audio connection cable, thoroughly check the connection interface style of the external audio devices you are connecting. 27
30 3.4 Projecting Images Here we begin projecting images from an A/V device. Preparation Warning: Never look into the lens when the projector is switched on. The intense light can damage your vision. Use only the power cord supplied. Use of other cables may cause fire or electric shock. Caution: Do not attempt projection with the lens cover in place. Heat may deform the lens cover. Power Terminal Power cord Power Cord Connector 1. Check that the projector and computer or A/ V device are connected. 2. Remove the lens cover. 3. Attach the power cord (supplied with projector) to the projector. Align the power cord connector with the power terminal on the projector and insert the connector firmly and completely into the terminal. Power cord Power Cord Plug Outlet 4. Insert the plug end of the power cord in an outlet. The operation display indicator will light with an orange color. Point: Buttons cannot be operated while the operation display indicator is flashing orange. 28
31 Projection When preparations are complete, you are ready for projection. 1. To use the remote control, turn the remote control R/C On Off switch to "On". 2. Press the Power button to switch power on. The operation display indicator begins to flash green, and projection begins. After approximately 30 seconds, the operation display indicator changes from flashing green to steady green. "No-Signal" is displayed. Depending on your settings, there may be no display. (See page 51) The operation display indicator lights green. 29
32 Computer When no S-Video input S-Video Video 3. Press the Source button to select the video source you wish to project. Each time the Source button is pressed, the video source cycles between Computer, S- Video, and Video. If there is no input at the S-Video terminal, the Source button switches the video source from Computer to Video. Point: When you use the remote control to select the video source you wish to project, you can switch the source by pressing any of the Computer, S-Video, or Video buttons. If projecting a component video picture, change the setting to Computer. 4. Switch on power to the computer or A/V device to begin projection. The "No-Signal" display disappears, and a video signal from the computer or A/V device is projected. Point: If the "No-Signal" display remains, check the connections again. If the same static image is projected for some time, the video projection may contain an afterimage. 30
33 [Settings for notebook and integrated LCD computers (when connected)] When a notebook or integrated LCD computer is connected to the projector, some computers require key commands or settings to change the output destination of a video signal. Press "Fn" and "F0" simultaneously to change the setting. For details, consult the instruction manual of the computer you are using. Manufacturer NEC Panasonic Toshiba IBM SONY Fujitsu Macintosh Output Switching Example "Fn"+"F3" "Fn"+"F3" "Fn"+"F5" "Fn"+"F7" "Fn"+"F7" "Fn"+"F10" After restarting, the monitoring and sound on the control panel are set to mirror the computer. Point: Some computers may not be able to have images displayed on the computer screen at the same time as they are being projected. In such cases, use only external output. 31
34 3.5 Adjusting Images This section describes how to obtain the best video performance. See "2. Setup" for details on setting-up position and projection size. Adjusting the Image Projection Angle Adjust the projection angle of the projector. Adjust the projector to face the screen as directly as possible. 1. Lift the projector to your desired angle of projection. Foot Levers 2. Use your fingers to pull up the foot levers. Front feet emerge. 3. Release the foot levers. 4. Make fine adjustments to the height. Turn the lower portion of the front feet to make fine adjustments to height. Raise Lower Point: Setting back the front feet (see page 36) 32
35 Adjusting the Focus This section describes how to adjust the video focus. 1. Turn the focus ring on the projector to adjust the focus. Point: Focus cannot be achieved if the lens is dirty or covered with condensation. Wipe off any dirt or condensation (see page 66). If adjustment does not succeed, make sure the setup distance is between 1.0m (39.37inches) and 13.1m (515.75inches). Keystone Correction (Using Projector Button) When the foot levers are used to change the projection angle, the keystone correction function can be used to correct trapezoidal distortion upward or downward by roughly Press the Keystone button on the projector to minimize the trapezoidal distortion. Point: A keystone correction reduces screen size. The keystone correction is stored in memory. You will need to readjust the image if the projector is moved to a different location or the projection angle is changed. If a keystone correction makes the image noticeably uneven, reduce the video sharpness with the menu commands Video > Sharpness (see page 48). 33
36 Adjusting Images (Remote Control Only) [Optimizing Computer Video (Using the Auto button)] This function applies automatically optimized adjustment values to a computer input signal. If the input is a video signal, this function does not operate. Adjusted values set automatically are "Tracking", "Position (vertical and horizontal)", and "Sync". Point: This function cannot optimize the adjustment for some signal types. In these cases, use the Video Menu commands to perform adjustment (see page 47). When functions such as E-Zoom or A/V muting are engaged, press the Auto button to disengage these functions before adjustment. [Opening a Menu For Adjustment] Press the Menu button and perform adjustment using the Video Menu. For details, refer to "Menu Screen Operations (Remote Control Only)" (see page 45). Adjusting the Volume (Remote Control Only) Press the Volume +, - button to adjust the volume to an easily audible listening level. Point: Adjustment is not available if there is no audio signal. 34
37 3.6 Ending After the Projection Ending 1. Press the Power button. A "Power Off" confirmation message is displayed. 2. Press the Power button again. The projector lamp goes out, the operation display indicator flashes orange, and after cool-down is complete, the indicator switches to steady orange. Point: If you do not wish to shut the power, press another button. Or, if no action is taken, the message disappears after 7 seconds. Operation display indicator lights orange. 3. Check that the operation display indicator lights orange. Point: The flashing orange operation display indicator indicates that cool-down* (which takes about 2 minutes) is in progress. Buttons cannot be operated during cool-down (see page 74). If the power cord plug is pulled out of the outlet, the operation display indicator will go out. 35
38 Power cord Outlet Power Cord Plug 4. Pull the power cord plug out of the outlet. Caution: Do not pull the power cord plug out of the outlet while the operation display indicator is flashing orange. This may cause a malfunction or shorten the projector lamp life. 5. Set the remote control R/C On Off switch to Off. Point: Unless the remote control R/C On Off switch is switched off, a small amount of current will be supplied to the remote control and exhaust the batteries. If the remote control will not be used for a long period or you are moving the unit, set the remote control R/C On Off switch to Off. Storage When you are finished projecting, retract the foot levers into the unit. Foot Levers 1. Support the projector unit with your hands, pull upward on the foot levers with your fingers, and lower the unit slowly. 2. Attach the lens cover. 36
39 4 What You Can Do 4.1 Using the Wireless Mouse Enlarging an Image Adjusting Image Size Adding Image Effects Freezing and Deleting Images Displaying Help Screens
40 4.1 Using the Wireless Mouse The remote control included allows you to control a computer's mouse operations at a separate location. The Esc button has the same action as a right mouse button, and the Enter button has the same action as a left mouse button. Mouse operation by remote control allows you to make a presentation at the screen without assistance. Presenter Unassisted presentation is possible Enter Button Remote Control Mouse Point: If mouse button functions are swapped on your computer, the functions on the remote control also change as follows. Esc Button: Left mouse button Enter Button: Right mouse button This function cannot be used while an Effect Function, E-Zoom function, menu function, or Help function is in use. 38 Remote Control Mouse
41 Making a Connection Before making a connection, switch off power to the projector and computer. Caution: Connecting a non-usb mouse cable with the power on can cause malfunction or failure. Use only the mouse cable supplied. Any other cable may cause failure. Mouse/Com, USB Terminal Mouse/USB Port Mouse Cable (supplied with projector) Computer Mouse Cable Connection Method IBM PC/AT Compatible (DOS/V Machine) Computer for USB* Mouse (see page 74) PS/2 Mouse Cable USB Mouse Cable When using a USB mouse, note the following. Connect the computer mouse port and the projector Mouse/ Com terminal. Connect the computer USB port and the projector USB mouse terminal. Windows The only compatible models are those pre-installed with the standard USB interface configuration in Windows2000 and Windows98. Operation is not guaranteed in environments upgraded from Windows3.1 and Windows95 to Windows98 and Windows2000. Macintosh The only compatible models are those with the standard USB interface configuration. * The USB interface does not guarantee operation of all USB-compatible devices. 39
42 4.2 Enlarging an Image The remote control included lets you enlarge portions of an image. Reduction Enlargement 1. Press the E-Zoom button on the remote control to enlarge or reduce the display on screen. (The Esc button releases this feature.) Point: 24-step partial enlargement and reduction by factors of 1x-4x is available. Magnification factor is displayed. 2. Push the Enter button in any direction to scroll in that direction. Push up Push left Push right Push down 40
43 4.3 Adjusting Image Size The Wide/Tele button on the projector allows you to adjust the size of images. 1. When you press the right side of the button (Tele), images are reduced. 2. When you press the left side of the button (Wide), images are enlarged. Point: The enlargement/reduction range that the Tele and Wide buttons provide is from 0.8x to 1.0x in 32 steps. This function is active until the Reset All menu is executed (see page 55). 41
44 4.4 Adding Image Effects Using the Effect1 and Effect2 buttons, you can add effects to images during presentation (to cancel this function, press the Esc button). For effects settings, see "5.4 Effect Menu" (page 50). Cursor/Stamp This effect displays a cursor on the screen and freezes it at a desired location. 1. Press the Effect1 button to display a cursor. 2. Use the Enter button to move the cursor to a desired location. 3. Press the Enter button, and the cursor position is displayed as a stamp. Point: To remove the cursor stamp display, activate a horizontal bar. To remove the stamp, press the Effect3 button. Horizontal Bar This effect displays a horizontal line on the screen and allows you to move it up or down by remote control. 1. Press the Effect2 button to display a horizontal bar. 2. Move the Enter button up or down to move the horizontal bar up or down. Point: To remove the horizontal bar, activate the cursor/stamp. 42
45 4.5 Freezing and Deleting Images Freezing a Moving Image (Remote Control Only) You can freeze a moving image (video or other image). 1. Press the Freeze button on the remote control. (To release the freeze, press the Freeze button again.) Muting Images and Sound (Remote Control Only) You can temporarily mute images and sound and project a black or blue image. 1. Press the A/V Mute button on the remote control. (To cancel the muting feature, press the A/V Mute button or another button.) Point: Using the Setting > A/V Mute menu, you can change the color (black, blue) of the image projected when audio and video have been muted (see page 52). 43
46 4.6 Displaying Help Screens You can display topic-specific help on screen for solving problems. Use this function when problems occur. 1. Press the Help button to start the help function. (Press the Help button again to cancel this function.) Point: If you cannot solve your problem using the Help function, consult the "Troubleshooting" section in this manual (see page 57). 2. Use the Select button on the projector to select a topic (on the remote control, use the Enter button). 3. Press the Enter button to enter your selection. 4. Select a detailed topic as described in steps 2 and 3 and follow the instructions displayed. 44
47 5 Menu Functions (Remote Control Only) 5.1 Learning Basic Operations Video Menu Audio Menu Effect Menu Setting Menu Advanced Menu About Menu Reset All Menu
48 5.1 Learning Basic Operations This section presents the basic functions available in menus. For functions in each menu, access the guide available under each menu. [Explanation of symbols] : Push the Enter button to the upper or lower side. [Opening and Closing Menus] Press the Menu button to display the top menu. To close this menu, press the Menu button again. When the Menu button is pressed to close the top menu, the status at close will be maintained. [Menu Selection] : Push the Enter button to the left or right side. : Press the Enter button. : Press the Esc button. Push the Enter button to the lower side. Push the Enter button to the upper side. Push the Enter button to the upper or lower side to move the menu up or down. [Moving in Hierarchy Structure Sub-menu selection] Press Enter Press Esc Press the Enter button to move to the sub-menus. Press the Esc button to return to the top menu. Press the Menu button to clear the menu display. 46
49 5.2 Video Menu Displaying Menus Press the Menu button, use the Enter button to select "Video" from the top menu displayed, and press the Enter button to move to a submenu. Point: When there is no video signal from a computer or component video device, the "Video" menu is not available for settings. When there is no video signal from a video device, only the "Mode" menu is available for settings. Settings Video menu elements to be set differ as follows when projecting computer/ component video versus video images. Computer/Component Video Projection Video Projection Menu Position Tracking D-Sub15: Computer/Component video Video: Video image Content Adjust video position vertically and horizontally. * After position is adjusted, changes in the video signal from a computer (such as changes in output mode or display color) may change the adjusted value. Adjust when broad vertical streaks appear in image. (Available for setting only when input signal is RGB). Video Projection D-Sub15 Video Sync. Adjust when flickering or blurring occurs (available for setting only when input signal is RGB). * When tracking is wrong, adjustment of sync will not correct flickering. Always adjust tracking before adjusting sync. : setting available : setting not available 47
50 Menu Brightness Contrast Color Tint Sharpness Gamma Input Signal Auto Setup Mode Aspect Ratio Reset 48 D-Sub15: Computer/Component video Video: Video image Content Adjusts image brightness. +: Brightens image. - : Darkens image. Adjusts difference in color brightness/darkness. +: Increases difference in color brightness/ darkness. - : Decreases difference in color brightness/ darkness. Adjusts color depth. +: Deepens color. - : Lightens color. Adjusts tint. +: Strengthens red. - : Strengthens green. Adjusts image sharpness. +: Strengthens sharpness and defines image. - : Weakens sharpness and softens image. * If keystone correction makes unevenness distinctive, reduce the sharpness. Adjusts color of projected image. Dynamic : Increases contrast. (Used when projecting images containing text and graphics) Normal Natural : Sets normal contrast. : Weakens contrast to natural colors. (Used to give projected images a more natural look) Select the input signal of the computer/ component video in use. RGB:Computer images YUV:Color difference images YCbCr:DVD images YPbPr: HDTV images Optimizes computer input image. (Can only be set when the input signal is RGB) ON : Auto Setup active OFF : Auto Setup not active Select the video mode to use. * Selection of Auto provides automatic video signal identification, but for PAL (60Hz) mode, set to Manual. Select the aspect ratio. (Can only be set when projecting a component video image (YCbCr, YPbPr).) Returns Video menu settings to factory shipping values. * See page 56 for factory shipping values. To reset all menus to factory shipping values, use the "Reset All" menu. Video Projection D-Sub15 Video : setting available : setting not available
51 5.3 Audio Menu Displaying Menus Press the Menu button, use the Enter button to select "Audio" from the top menu displayed, and press the Enter button to move to a submenu. Settings Menu Volume Tone Audio Input Reset Content Adjusts the volume of sound output from the projector. +: Increases volume. - : Decreases volume. Adjusts the tone of sound output from the projector. +: Increases treble. - : Decreases treble. Select an audio input destination. (When the input signal is a component video signal, select Video.) Auto : Audio input matching that of the displayed video is selected. (Example: When computer video is displayed, computer audio input is selected). Computer : Audio input from computer is selected. Video : Audio input from an A/V device is selected. Returns Audio menu settings to factory shipping values. * See page 56 for factory shipping values. To reset all menus to factory shipping values, use the Reset All menu. 49
52 5.4 Effect Menu Displaying Menus Press the Menu button, use the Enter button to select "Effect" from the top menu displayed, and press the Enter button to move to a submenu. Settings Menu Cursor/Stamp Horizontal Bar Cursor Speed Reset Content Make detailed settings for the cursor/stamp function assigned to the remote control Effect1 button. Shape : Select the shape of the cursor/stamp. Zoom Rate : Select the display zoom factor for the cursor/stamp. Make detailed settings for the horizontal bar function assigned to the remote control Effect2 button. Color : Select the horizontal bar color. Width : Select the width of the horizontal bar from 2-20 dots (in 2-dot steps). Set the cursor speed. L : Low M : Medium H : High Returns Effect menu settings to their factory shipping values. * See page 56 for factory shipping values. To reset all menus to factory shipping values, use the Reset All menu. 50
53 5.5 Setting Menu Displaying Menus Press the Menu button, use the Enter button to select "Setting" from the top menu displayed, and press the Enter button to move to a submenu. Settings Menu Keystone Content If the screen is distorted in trapezoidal form, adjust it to normal display. -: Broadens upper screen Normal screen +: Broadens lower screen No-signal/Msg Prompt * You can also adjust the screen with the Keystone button on the projector. A keystone correction reduces screen size. The keystone correction is stored in memory. You will need to readjust the image if the projection angle is changed. If a keystone correction makes the image noticeably uneven, reduce the video sharpness with the menu commands Video > Sharpness. Set the screen display when there is no video signal. OFF : No message is displayed. (Screen displays black.) Black : "No-signal" is displayed on a black background (when the language is English). Blue : "No-signal" is displayed on a blue background (when the language is English). Set whether the input source currently selected is displayed/not displayed on the screen. ON : After input source switching, the input source is displayed for approximately 3 seconds. OFF : The input source is not displayed. 51
54 A/V Mute* (See page 74) Sleep Mode Reset Menu Content Temporarily eliminates video during a presentation in order to focus attention on the presenter or elsewhere. Press the A/V Mute button to use this function. Black : A black screen is displayed. Blue : A blue screen is displayed. After sleep mode is activated, the projector enters standby mode when no signal is input from an external source for a continuous period of 30 minutes. ON : Sleep Mode active OFF : Sleep Mode inactive Returns Setting menu settings to their factory shipping values. * See page 56 for factory shipping values. To reset all menus to factory shipping values, use the Reset All menu. 52
55 5.6 Advanced Menu Displaying Menus Press the Menu button, use the Enter button to select "Advanced" from the top menu displayed, and press the Enter button to move to a submenu. Settings Menu Language Color Setting Rear Proj. Ceiling Reset Content Select the menu language. Select from Japanese, English, German, French, Italian, Spanish, Portuguese, Chinese and Korean. Use color temperature or RGB to create settings for the colors displayed on screen. Color Temp: Adjusts the color temperature of the video. Select "Color Temp" and press the Enter button to create settings. The setting unit is Kelvins (K). + : Increases color temperature (strengthens blue). - : Decreases color temperature (strengthens red). RGB: Adjusts red, green, and blue intensity. Select "RGB" and press the Enter button to create settings. + : Strengthens color. - : Weakens color. This setting is used for projection from the rear of a screen. ON : Inverts a projected image vertically. OFF : Restores original. This setting is used for projection with the projector hanging from a ceiling. ON : Inverts a projected image vertically and horizontally. OFF : Restores original. Returns Advanced menu settings to their factory shipping values. * See page 56 for factory shipping values. To reset all menus to factory shipping values, use the Reset All menu. 53
56 5.7 About Menu Displaying Menus Press the Menu button, use the Enter button to select "About" from the top menu displayed, and press the Enter button to move to a submenu. Setting and Display Information The settings information displayed in the About menu differs as shown below during video projection from a computer/component versus a video device. Computer/Component Video Projection Video Projection 54 Menu Lamp Reset Lamp Timer Video Source Input Signal Frequency SYNC Polarity SYNC Mode Resolution Refresh Rate Video Signal D-Sub15: Computer/Component video Video: Video image Content Displays cumulative lamp-on time. Sets cumulative lamp-on time to zero. Use this function when replacing the lamp. Displays the source for the video displayed on screen. Displays a computer/component video input signal. Displays frequencies. H: Displays the horizontal scanning frequency. V: Displays the vertical scanning frequency. Displays sync polarity. Displays sync attributes. Displays input resolution. Displays refresh rate (vertical frequency). Displays an A/V device signal mode. (When set to Auto in the menu, "Auto (NTSC)" is displayed.) Video Projection D-Sub15 Video : Display : No display
57 5.8 Reset All Menu Displaying Menus Press the Menu button, and use the Enter button to select "Reset All" from the top-level menu displayed. Settings Menu Reset All Content Returns all menu settings to initial settings. (Lamp and language settings excluded) * Note that rear and invert settings will also be cleared by this operation. 55
58 Initial Settings List Initial settings at product shipment are shown below. Main Menu Title Submenu Title Initial Settings Video (Computer/ Position Central value Component Video) Tracking Dependent on the connected signal Sync. 0 Brightness Contrast Sharpness Gamma Central value Normal Input Signal RGB Auto Setup ON Aspect Ratio 4:3 Video (Video) Position Audio Effect 56 Brightness Contrast Color Central value Tint Sharpness Gamma Normal Mode Auto Aspect Ratio 4:3 Volume Tone Central value Audio Input Auto Cursor/Stamp Shape: Zoom Rate: 100% Horizontal Bar Color: Magenta Width: 2 Cursor Speed M Setting Keystone Central value No-Signal Msg Blue Prompt ON A/V Mute Black Sleep Mode OFF Advanced Language Color Setting Color Temp, (Computer/Component video: 7500K, Video: 6700K) Rear Proj. Ceiling OFF
59 6 Troubleshooting 6.1 Possible Failures When Indicators Do Not Help
60 6.1 Possible Failures If you think your projector may have failed, first check the indicators on the unit. Your projector includes an "operation display indicator" and a "problem/alarm display indicator" which provide information on projector status. Problem/Alarm Display Indicator Operation Display Indicator Operation Display Indicator Indicator Status Steady orange Flashing orange Steady green Flashing green Cause Standby status Cool-down in progress Projection in progress Warm-up in progress See Remedy or Status Page (Not abnormal) Press the Power button to begin projection. 28 (Not abnormal) Please wait. Cool-down* time takes about 2 minutes. (see page 74). 35 You cannot operate the Power button during cooldown. Press the button again after cool-down ends. (Not abnormal) 29 (Not abnormal) Please wait. Warm-up time is approximately 30 seconds. After warm-up is complete, the flashing green indicator changes to steady green. Not lit No power If the lamp has been replaced, check that the lamp and lamp cover are attached securely. 68 Check the power cord connections. 28 Check power at the outlet
61 Problem and Alarm Display Indicator Indicator Status Steady red Flashing red (1-second intervals) Flashing red (2-second intervals) Flashing orange Cause High internal temperature Problem with lamp Internal problem High-speed cooling in progress Remedy or Status See Page The usage temperature range of the projector is 5 C 35 C, and the projector should be used in this 77 range. Place the projector in a well-ventilated location where air intake and exhaust vents are not blocked. 18 Clean the air intake vent. 67 While the indicator is red, turn off the lamp to lower the internal temperature of the projector. - Replace with new lamp. Model No: ELPLP13 If the lamp is broken, handle pieces carefully to avoid injury, and consult an Epson Service Center for repair (video cannot be projected until the lamp is replaced). If the lamp or lamp cover is not attached securely, follow the replacement instructions to attach it securely. Stop using the projector, pull the plug from the outlet, and consult your vendor or an Epson Service Center (listed at the end of this manual) for repair. Not a problem, but projection will be interrupted automatically to prevent further temperature rise. - The usage temperature range of the projector is 5 C 35 C, and the projector should be used in this 77 range. Place the projector in a well-ventilated location where air intake and exhaust vents are not blocked. 18 Clean the air intake vent Point: If the indicator is normal but you experience problems with video projection, refer to "When Indicators Do Not Help" on the following page. If the indicator display status is not shown in this table, consult your vendor. 59
Printed in Japan ( ) A(C05)
 A(C05)") Printed in Japan 402029000 (9002201) 01.11-.7A(C05) Checking Accessories When unpacking the projector and accessories from their box, check that the following items are included. If any of the components
Printed in Japan 402029000 (9002201) 01.11-.7A(C05) Checking Accessories When unpacking the projector and accessories from their box, check that the following items are included. If any of the components
Before Use. Installation. Connections. Projection. Useful Functions. Adjustments and Setting. Troubleshooting. Maintenance. Others
 Before Use Installation Connections Projection Useful Functions Adjustments and Setting Troubleshooting Maintenance Others Accessory Verification Check to confirm that the following items are included
Before use. Installation. Connections. Projection. Useful Functions. Adjustments and setting. Troubleshooting. Maintenance. Others
 Before use Installation Connections Projection Useful Functions Adjustments and setting Troubleshooting Maintenance Others Accessory Verification Check to confirm that the following items are included
EPSON is a registered trademark of SEIKO EPSON CORPORATION.
 Important Safety Information WARNING: Never look into the projector lens when the lamp is turned on; the bright light can damage your eyes. Never let children look into the lens when it is on. Never open
Quick Reference Guide
 Multimedia Projector Quick Reference Guide MODEL 103-011100-01 Projection lens is optional. English Use this book as a reference guide when setting up the projector. For detailed information about installation,
Notations Used in This User s Guide
 User s Guide Notations Used in This User s Guide 1 CAUTION Indicates procedures which may result in damage or injury if sufficient care is not taken. TIP PROCEDURE Indicates additional information and
Features of the Projector
 Features of the Projector User s Guide 1 Position adjustment function for a variety of projection screens Images can be projected regardless of the location. The keystone distortion that occurs as a result
Before use. Installation. Connections. Projection. Useful Functions. Adjustments and setting. Using the projector software.
 Before use Installation Connections Projection Useful Functions Adjustments and setting Using the projector software Troubleshooting Maintenance Others Accessory Verification Check to confirm that the
Part names (continued) Remote control
 Remote control") Introduction Part names (continued) Remote control (1) STANDBY ( 25) (1) (2) ON ( 25) (3) (3) ID - 1 / 2 / 3 / 4 s ( 18) (4) (4) COMPUTER 1 ( 27) (7) (5) COMPUTER 2 * (8) (6) COMPUTER 3 * (10) (13) (7)
Introduction Part names (continued) Remote control (1) STANDBY ( 25) (1) (2) ON ( 25) (3) (3) ID - 1 / 2 / 3 / 4 s ( 18) (4) (4) COMPUTER 1 ( 27) (7) (5) COMPUTER 2 * (8) (6) COMPUTER 3 * (10) (13) (7)
DATA PROJECTOR XJ-S30/XJ-S35
 E DATA PROJECTOR XJ-S30/XJ-S35 User s Guide Be sure to read the precautions in the separate User s Guide (Basic Operation). For details about setting up the projector and lamp replacement, see the User
About the Manuals and Notations Used
 About the Manuals and Notations Used Types of Manual The documentation for your EPSON projector is divided into the following two manuals. Refer to the manuals in the order given below. Safety Instructions/World-Wide
EMP-S1 User s Guide User's Guide
 EMP-S1 User s Guide 1 User's Guide Meaning of Symbols 1 c p s Indicates the possibility that people may be injured or the equipment may be damaged if these symbols are ignored. Indicates important related
USER S GUIDE. BOXLIGHT CP-11t
 USER S GUIDE BOXLIGHT CP-t INFORMATION TO THE USER NOTE : This equipment has been tested and found to comply with the limits for a Class A digital device, pursuant to Part 5 of FCC Rules. These limits
General. zoom ring. focus ring. Size of liquid. Color. foot adjust levers. Projection. Computer In. Mouse/Com. Power
 Projector Specifications status lights control panel speakers zoom ring focus ring General Type of display Size of liquid crystal panels Poly-silicon Thin Film Transistor (TFT), active matrix Diagonal:
Warning & Cautions. Warning. Cautions
 Contents 1. Warning & Cautions 2. Components 3. Monitor Buttons 4. Connecting Monitor Cables 5. On Screen Display Menu 6. Display Specifications 7. Monitor Specifications 8. Troubleshooting (When using
EPSON PowerLite 500c/700c/710c. Multimedia Projector. User s Guide Supplement
 EPSON PowerLite 500c/700c/710c Multimedia Projector User s Guide Supplement Important Safety Information WARNING: Never look into the projector lens when the lamp is turned on; the bright light can damage
PLL1920M LED LCD Monitor
 PLL1920M LED LCD Monitor USER'S GUIDE www.planar.com Content Operation Instructions...1 Safety Precautions...2 First Setup...3 Front View of the Product...4 Rear View of the Product...5 Installation...6
DLP PROJECTOR FEATURES USER S GUIDE OUTLINE. 1. High Brightness. 2. High Resolution. 3. Compact Size, Feather Weight for Portability
 DLP PROJECTOR USER S GUIDE Thank you for purchasing the DLP TM Projector. Please read this user s guide to ensure correct use of the device. Save this user s guide for future reference. OUTLINE This DLP
28 4K LED monitor. User Manual M284K
 28 4K LED monitor User Manual M284K CONTENTS Safety Information... 2 What s included..... 4 Getting Started....... 8 Troubleshooting.... 14 Specification.... 15 2 of 15 SAFETY INFORMATION Read these instructions
Thank you for purchasing this projector.
 S55/X45/X55 Multimedia Projector Operator's Guide Thank you for purchasing this projector. CAUTION Before using, read the "Product Safety Guide" and these manuals to ensure correct usage through understanding.
EPSON PowerLite 50c/70c Multimedia Projector. User s Guide
 EPSON PowerLite 50c/70c Multimedia Projector User s Guide Important Safety Information WARNING: Never look into the projector lens when the lamp is turned on; the bright light can damage your eyes. Never
Precautions About the Product... 4 Package Overview Product Overview... 6 Start Your Installation... 8
 2 Table of Contents Usage Notice Precautions... 3 Introduction About the Product... 4 Package Overview... 5 Installation Product Overview... 6 Start Your Installation... 8 User Controls User Control Overview...
Thank you for purchasing this projector.
 Digital Projector X66 Operator's Guide Thank you for purchasing this projector. WARNING Before using this product, please read all manuals for this product. Be sure to read Product Safety Guide first.
Introduction...2. Features...2 Safety Precautions...2. Installation...4
 PE1900 Contents Introduction...2 Features...2 Safety Precautions...2 Installation...4 Unpacking the Display...4 Locations and Functions of Controls...4 Connections...5 Using Your Display...7 Turning the
User's Manual Operating Guide
 Projector User's Manual Operating Guide Thank you for purchasing this projector. WARNING Before using, read the "User's Manual - Safety Guide" and these manuals to ensure correct usage through understanding.
For safe and correct use, be sure to read "Safety Information" before using the machine. Operating Instructions
 For safe and correct use, be sure to read "Safety Information" before using the machine. Operating Instructions TABLE OF CONTENTS Introduction...4 Copyrights to Images...4 Important...4 Notes to Users
Contents. Contents About this manual Operation During Projection Image Operations During Projection... 3
 Contents Contents... About this manual...... Operation During Projection... 3 Image Operations During Projection... 3 Adjusting Image Brightness... 3 Selecting the Color Mode... 4 Zooming an Image... 4
Projector Features. User s Guide
 Projector Features 1 Colour mode function The following six preset colour modes are provided so that you can easily obtain optimum images simply by selecting a Colour mode. In addition, if projecting onto
Notations Used in This Guide
 User s Guide Notations Used in This Guide Indicates procedures which may result in damage or injury if sufficient care is not taken. Indicates additional information and points which may be useful to know
Table of Contents Table of Contents... 1 Usage Notice... 2 Introduction... 4 Installation User Controls Appendices...
 Table of Contents Table of Contents... 1 Usage Notice... 2 Precautions... 2 Introduction... 4 Product Features... 4 Package Overview... 5 Product Overview... 6 Main Unit... 6 Control Panel... 7 Connection
USER MANUAL. 27 Full HD Widescreen LED Monitor L27ADS
 USER MANUAL 27 Full HD Widescreen LED Monitor L27ADS TABLE OF CONTENTS 1 Getting Started 2 Control Panel/ Back Panel 3 On Screen Display 4 Technical Specs 5 Care & Maintenance 6 Troubleshooting 7 Safety
EPSON PowerLite S1. User s Guide
 1 EPSON PowerLite S1 User s Guide Meaning of Symbols 2 Meaning of Symbols c p s Indicates the possibility that people may be injured or the equipment may be damaged if these symbols are ignored. Indicates
Multimedia Projector LV Owner s Manual. E English
 Multimedia Projector LV-50 Owner s Manual E English TO THE OWNER Before operating this projector, read this manual thoroughly and operate the projector properly. This projector provides many convenient
Notations Used in This Guide
 User s Guide Notations Used in This Guide 1 Indicates procedures which may result in damage or injury if sufficient care is not taken. Indicates additional information and points which may be useful to
Thank you for purchasing this projector.
 Projector CP-X253 User's Manual (detailed) Operating Guide Thank you for purchasing this projector. WARNING Before using this product, please read all manuals for this product. Be sure to read Safety Guide
X6 X7. Reference Guide
 X6 X7 Reference Guide Table of Contents Table of Contents... 1 Usage Notice... 2 Precautions...2 Important Operating Considerations for Safety...4 Introduction... 5 Product Features...5 Package Overview...6
Multimedia Projector PLC-XW15 MODEL. Owner's Manual
 Multimedia Projector MODEL PLC-XW5 Owner's Manual TO THE OWNER Before operating this projector, read this manual thoroughly and operate the projector properly. This projector provides many convenient features
Features of the Projector
 Features of the Projector 1 Direct Power On You can make the projector turn on and be ready to project images simply by connecting the power cable. You can also turn the power on for projectors in places
USER MANUAL. 28" 4K Ultra HD Monitor L28TN4K
 USER MANUAL 28" 4K Ultra HD Monitor L28TN4K TABLE OF CONTENTS 1 Getting Started 2 Control Panel/ Back Panel 3 On Screen Display 4 Technical Specs 5 Care & Maintenance 6 Troubleshooting 7 Safety Info &
LCD VALUE SERIES (32 inches)
") LCD VALUE SERIES (32 inches) http://www.orionimages.com All contents of this document may change without prior notice, and actual product appearance may differ from that depicted herein 1. SAFETY INSTRUCTION
LCD VALUE SERIES (32 inches) http://www.orionimages.com All contents of this document may change without prior notice, and actual product appearance may differ from that depicted herein 1. SAFETY INSTRUCTION
Important Information About Your EMP-7100/5100
 Important Information About Your EMP-7100/5100 Please read the following important information about your EMP- 7100/5100 projector. Important Safety Information Warning: Never look into the projector lens
Precautions About the Product... 3 Package Overview... 4
 English 1 Table of Contents Usage Notice Precautions... 2 Introduction About the Product... 3 Package Overview... 4 Installation Product Overview... 5 Connecting the Projection Display... 8 Powering On/Off
Table of Contents... 1 Usage Notice Introduction Installation Connecting the Projector...10 Powering On/Off the Projector...
 Table of Contents Table of Contents... 1 Usage Notice... 2 Precautions...2 Introduction... 4 Product Features...4 Package Overview...5 Product Overview...6 Main Unit...6 Control Panel...7 Connection Ports...8
Table of Contents Table of Contents... 1 Usage Notice... 2 Introduction... 4 Installation User Controls Appendices...
 Table of Contents Table of Contents... 1 Usage Notice... 2 Precautions... 2 Introduction... 4 Product Features... 4 Package Overview... 5 Product Overview... 6 Main Unit... 6 Control Panel... 7 Connection
Thank you for purchasing this projector.
 Projector CP-RX70 User's Manual (detailed) Operating Guide Thank you for purchasing this projector. WARNING Before using this product, please read all manuals for this product. Be sure to read Safety Guide
PB7200. PB7100 User s Manual
 PB7200 BenQ PB7220 PB7100 User s Manual Copyright Copyright 2003 by BENQ Corporation. All rights reserved. No part of this publication may be reproduced, transmitted, transcribed, stored in a retrieval
Table of Contents Precautions... 2
 Table of Contents Precautions... 2 Special notes on LCD monitors... 2 Package contents... 3 Installation instructions... 3 Assembling the monitor... 3 Adjusting the viewing angle... 4 Connecting the devices...
Thank you for purchasing this projector.
 Projector CP-X205/CP-X305 User's Manual (detailed) Operating Guide Thank you for purchasing this projector. WARNING Before using this product, please read all manuals for this product. Be sure to read
Digital Multimedia Projector
 Digital Multimedia Projector About User s manual Thank you for purchasing the LCD projector. Please read this user s manual thoroughly to ensure correct usage of the projector and its features. After reading,
Digital Multimedia Projector
 Digital Multimedia Projector About User s manual Thank you for purchasing the LCD projector. Please read this user s manual thoroughly to ensure correct usage of the projector and its features. After reading,
Thank you for purchasing this projector.
 Projector CP-X608 User's Manual Operating Guide Thank you for purchasing this projector. WARNING Before using this product, please read the "User's Manual - Safety Guide" and related manuals to ensure
USER MANUAL Full HD Widescreen LED Monitor L236VA
 USER MANUAL 23.6 Full HD Widescreen LED Monitor L236VA TABLE OF CONTENTS 1 Getting Started 2 Control Panel/ Back Panel 3 On Screen Display 4 Technical Specs 5 Care & Maintenance 6 Troubleshooting 7 Safety
Thank you for purchasing this projector.
 S55i/X55i Multimedia Projector Operator's Guide Thank you for purchasing this projector. WARNING Before using this product, please read the "Product Safety Guide" and related manuals to ensure the proper
USER MANUAL. 22" Class Slim HD Widescreen Monitor L215DS
 USER MANUAL 22" Class Slim HD Widescreen Monitor L215DS TABLE OF CONTENTS 1 Getting Started Package Includes Installation 2 Control Panel / Back Panel Control Panel Back Panel 3 On Screen Display 4 Technical
USER S GUIDE. BOXLIGHT CP-305t
 USER S GUIDE BOXLIGHT CP-305t TO THE OWNER Before operating this projector, read this manual thoroughly and operate the projector properly. This projector provides many convenient features and functions.
PB2220/ PB2120 FEATURES DLP PROJECTOR USER S GUIDE OUTLINE
 DLP PROJECTOR PB2220/ PB2120 USER S GUIDE Thank you for purchasing the BenQ DLP Projector. Please read this user s guide to ensure correct use of the device. Save this user s guide for future reference.
LCD PROJECTOR MultiSync MT830/1030 USER'S MANUAL. English. Deutsch. Françe. Español. Italiano. Svenska
 LCD PROJECTOR MultiSync MT830/1030 USER'S MANUAL English Deutsch Françe Español Italiano Svenska MultiSync MT830/MT1030 LCD Projector User s Manual English IMPORTANT INFORMATION Precautions Please read
For safe and correct use, be sure to read "Safety Information" before using the machine. Operating Instructions
 For safe and correct use, be sure to read "Safety Information" before using the machine. Operating Instructions TABLE OF CONTENTS Introduction...5 Copyrights to Images...5 Important...5 Notes to Users
BOXLIGHT XD-16n FEATURES USER S GUIDE OUTLINE. 1. High Brightness. 2. High Resolution. 3. Compact Size, Feather Weight for Portability
 BOXLIGHT XD-16n USER S GUIDE Thank you for purchasing the BOXLIGHT XD-16n Multimedia Projector. Please read this user s guide to ensure correct use of the device. Save this user s guide for future reference.
User's Manual (detailed) Operating Guide
 Operating Guide") Projector CP-X2010/CP-X2510/CP-X3010 User's Manual (detailed) Operating Guide Thank you for purchasing this projector. WARNING Before using this product, please read all manuals for this product. Be sure
Projector CP-X2010/CP-X2510/CP-X3010 User's Manual (detailed) Operating Guide Thank you for purchasing this projector. WARNING Before using this product, please read all manuals for this product. Be sure
DATA PROJECTOR XJ-A141/XJ-A146 * XJ-A241/XJ-A246 * XJ-A251/XJ-A256 *
 E DATA PROJECTOR XJ-A141/XJ-A146 * XJ-A241/XJ-A246 * XJ-A251/XJ-A256 * User s Guide * USB Port Models Be sure to read the precautions in the separate Setup Guide. Be sure to keep all user documentation
The following are Safety Instructions that should be followed strictly when setting up and utilizing the projector:
 INTRODUCTION Good tools are essential for creating successful presentation. This projector allows you to project XGA full-color images and video onto a large screen from 30" ~ 350 either for presentation
BenQ PB8220 PB8120. User s Guide
 BenQ PB8220 PB8120 User s Guide Copyright Copyright 2003 by BENQ Corporation (formerly Acer Communications & Multimedia Inc.). All rights reserved. No part of this publication may be reproduced, transmitted,
Multimedia Projector PLV-60HT MODEL. Owner's Manual
 Multimedia Projector MODEL PLV-60HT Owner's Manual TO THE OWNER Before operating this projector, read this manual thoroughly and operate the projector properly. This projector provides many convenient
Multimedia Projector PLC-XP30 MODEL. Owner's Manual
 Multimedia Projector MODEL PLC-XP30 Owner's Manual TO THE OWNER Before operating this projector, read this manual thoroughly and operate the projector properly. This projector provides many convenient
Table of Contents Table of Contents... 1 Usage Notice... 2 Introduction... 4 Installation User Controls Appendices...
 Table of Contents Table of Contents... 1 Usage Notice... 2 Precautions... 2 Introduction... 4 Product Features... 4 Package Overview... 5 Product Overview... 6 Main Unit... 6 Control Panel... 7 Connection
28 & 32 & 40 & 55 & 65 & 84-INCH TFT-LCD 4K MONITOR
 28 & 32 & 40 & 55 & 65 & 84-INCH TFT-LCD 4K MONITOR INSTRUCTION MANUAL Please read this manual thoroughly before use, and keep it handy for future reference. TABLE OF CONTENTS 1, General information...
Digital Projector X66 Operator's Guide
 Digital Projector X66 Operator's Guide Thank you for purchasing this projector. WARNING WARNING CAUTION NOTE Trademark acknowledgment 1 Content About this manual.... 1 Content.... 2 Projector features....
PRESENTATIONS WORKING SESSIONS
 Pro AV 9350 English Deutsch Français Italiano Español E D F I ES Projection lens is optional. THIS IS TENTATIVE SAMPLE. PRESENTATIONS WORKING SESSIONS TRAINING MULTIMEDIA ANIMATION VIDEO TO THE OWNER Before
USER MANUAL. 27 Full HD Widescreen LED Monitor L270E
 USER MANUAL 27 Full HD Widescreen LED Monitor L270E TABLE OF CONTENTS 1 Getting Started 2 Control Panel/ Back Panel 3 On Screen Display 4 Technical Specs 5 Care & Maintenance 6 Troubleshooting 7 Safety
USER MANUAL Full HD Widescreen LED Monitor L215ADS
 USER MANUAL 21.5 Full HD Widescreen LED Monitor L215ADS TABLE OF CONTENTS 1 Getting Started 2 Control Panel/ Back Panel 3 On Screen Display 4 Technical Specs 5 Care & Maintenance 6 Troubleshooting 7 Safety
USER MANUAL Full HD Widescreen LED Monitor L215IPS
 USER MANUAL 21.5 Full HD Widescreen LED Monitor L215IPS TABLE OF CONTENTS 1 Getting Started 2 Control Panel/ Back Panel 3 On Screen Display 4 Technical Specs 5 Care & Maintenance 6 Troubleshooting 7 Safety
Table of Contents. English. Table of Contents... 1 Usage Notice Introduction Installation User Controls Appendices...
 Table of Contents Table of Contents... 1 Usage Notice... 2 Precautions... 2 Introduction... 4 Product Features... 4 Package Overview... 5 Product Overview... 6 Main Unit... 6 Control Panel... 7 Connection
LedSync820C LED Video Processor USER S MANUAL
 LedSync820C LED Video Processor USER S MANUAL TABLE OF CONTENTS I. Safety precautions ----------------------------------------------------------------- 3 II. Connections of hardware 1.Rear view ------------------------------------------------------------
Multimedia Projector LV-S2. Owner s Manual. English
 Multimedia Projector LV-S Owner s Manual E English TO THE OWNER Before operating this projector, read this manual thoroughly to operate the projector properly. This projector provides many convenient features
Acer LCD TV AT2001 User's Guide
 Acer LCD TV AT2001 User's Guide Copyright 2005. Acer Incorporated. All Rights Reserved. Acer AT2001 User' s Guide Original Issue: May 2005 Acer and the Acer logo are registered trademarks of Acer Incorporated.
Table of Contents Table of Contents... 1 Usage Notice... 2 Introduction... 4 Installation User Controls Appendices...
 Table of Contents Table of Contents... 1 Usage Notice... 2 Precautions... 2 Introduction... 4 Product Features... 4 Package Overview... 5 Product Overview... 6 Main Unit... 6 Control Panel... 7 Connection
DP-1200X Digital Projector User Manual
 DP-1200X Digital Projector User Manual English 030531 FCC Notice This equipment has been tested and found to comply with the limits for a Class B digital device, pursuant to part 15 of the FCC Rules. These
ACUBRITE 23 SS. Manual. Stainless Steel Chassis 23" LCD Display. Content
 ACUBRITE 23 SS Stainless Steel Chassis 23" LCD Display Manual Introduction... 2 Hardware Installation... 2 The Display Timing... 5 The Display Outline Dimensions... 6 The Display Controls... 7 The Screen
Safety Precautions and Maintenance
 Safety Precautions and Maintenance 1. Unplug the monitor before cleaning it with a slightly damp cloth. 2. Wiping the screen with a dry cloth is recommendable, and only during the power has been switched
Digital Multimedia Projector. About User s manual. Features. Multimedia LCD Projector
 Digital Multimedia Projector About User s manual Thank you for purchasing the LCD projector. Please read this user s manual thoroughly to ensure correct usage of the projector and its features. After reading,
HP mp2220 Series Digital Projector. User s Guide
 HP mp2220 Series Digital Projector User s Guide Copyright 2005 Hewlett-Packard Development Company, L.P. The information contained herein is subject to change without notice. The only warranties for HP
Multimedia Projector PLC-XF20 MODEL. Projection lens is optional. Owner's Manual
 Multimedia Projector MODEL PLC-XF0 Projection lens is optional. Owner's Manual TO THE OWNER Before operating this projector, read this manual thoroughly and operate the projector properly. This projector
19462 Powder Hill Place Poulsbo, WA USER MANUAL. CP755ew
 19462 Powder Hill Place Poulsbo, WA 98370 800.762.5757 360.779.7901 www.boxlight.com USER MANUAL CP755ew Digital Multimedia Projector About User s manual Thank you for purchasing the LCD projector. Please
CONTENTS 8 ACCESSORIES 13 9 TROUBLE SHOOTING AND ADVICE SPECIFICATIONS BATTERY USAGE CAUTION 13
 CONTENTS 1 PREFACE 2 2 SAFETY PRECAUTIONS 2 3 FRONT & BACK VIEW, REAR CONNECTION OF LCD 3 4 TV INSTALLATION DRAWINGS 4 4.1 ANTENNA CONNECTION 4 4.2 AV1 INPUT CONNECTION 4 4.3 AV2 INPUT CONNECTION 4 4.4
True Home Cinema Experience
 Home Cinema Projectors 16 : 9 WIDE PANEL True Home Cinema Experience 1 High-resolution 16:9 wide-screen LCD panels for extra picture quality 2 Extra short-throw lens allows display of large images in small
Indicates the possibility of death or serious injury if this symbol is ignored or if sufficient care is not taken.
 User's Guide 1 Notations Used in This Guide 2 f Safety Indications So that you can use the projector safely and correctly, symbols are applied in the documentation and on the projector to indicate possible
V-332 V-332 DATA PROJECTOR. User s Manual
 DATA PROJECTOR V-332 User s Manual V-332 IMPORTANT * DLP (Digital Light Processing) and DMD (Digital Micromirror Device) are registered trademarks of Texas Instruments Incorporated (U.S.A.). * VGA and
4K LED MONITOR 430LED4K & 550LED4K INSTRUCTION MANUAL. Please read this manual thoroughly before use, and keep it handy for future reference.
 4K LED MONITOR 430LED4K & 550LED4K INSTRUCTION MANUAL Please read this manual thoroughly before use, and keep it handy for future reference. CONTENTS 1. GENERAL INFORMATION...3 2. 3. 1.1. 1.2. 1.3. 2.1.
MultiSync LT100 Ultra-Portable Projector User s Manual
 MultiSync LT100 Ultra-Portable Projector User s Manual English IMPORTANT INFORMATION Precautions Please read this manual carefully before using your NEC MultiSync LT100 Projector and keep the manual handy
PLL2210MW LED Monitor
 PLL2210MW LED Monitor USER'S GUIDE www.planar.com Content Operation Instructions...1 Safety Precautions...2 First Setup...3 Front View of the Product...4 Rear View of the Product...5 Quick Installation...6
DRAFT USER S GUIDE. BOXLIGHT XP-8t
 DRAFT USER S GUIDE BOXLIGHT XP-8t TO THE OWNER Before operating this projector, read this manual thoroughly and operate the projector properly. This projector provides many convenient features and functions.
VPL-DX220. 2,700 lumens XGA desktop projector. Overview
 VPL-DX220 2,700 lumens XGA desktop projector Overview Efficient, easy-to-use projector for classrooms and meeting rooms: with excellent picture quality and low ownership costs. The VPL-DX220 XGA projector
MODEL 38-VIV User s Manual
 MODEL 38-VIV003-0 User s Manual TO THE OWNER Before operating this projector, read this manual thoroughly and operate the projector properly. This projector provides many convenient features and functions.
Thank you for purchasing this projector.
 Projector CP-X265 User's Manual Operating Guide Thank you for purchasing this projector. WARNING Before using this product, please read the "User's Manual - Safety Guide" and related manuals to ensure
Thank you for purchasing this projector.
 X68 Multimedia Projector Operator's Guide Thank you for purchasing this projector. CAUTION Before using this product, please read the "Product Safety Guide" and related manuals to ensure the proper use
Mini Projector User s Guide
 Mini Projector User s Guide Please read this manual before Model P50 Table of Contents 1. Table of Contents---------------------------------1 2. Warnings-----------------------------------------2 3. Accessories---------------------------------------4
Operating Instructions
 Operating Instructions Preparations for Using the Projector Projecting an Image Projecting Images from a USB Memory Device or Digital Camera Using the Projector via a Network Changing the Projector Settings
U5-632h/U5-732h. U5-532h/U5-512h DATA PROJECTOR. User s Manual. (U5-532h/U5-512h) (U5-632h) (U5-732h)
 (U5-632h) (U5-732h)") FREEZE MUTE UICK DATA PROJECTOR U5-632h/U5-732h U5-532h/U5-512h User s Manual (U5-532h/U5-512h) STATUS STATUS SOURCE SOURCE UICK FREEZE MUTE ECO ASPECT TIMER 1 2 3 4 VOL KSTN ZOOM STATUS (U5-632h) LASER
FREEZE MUTE UICK DATA PROJECTOR U5-632h/U5-732h U5-532h/U5-512h User s Manual (U5-532h/U5-512h) STATUS STATUS SOURCE SOURCE UICK FREEZE MUTE ECO ASPECT TIMER 1 2 3 4 VOL KSTN ZOOM STATUS (U5-632h) LASER
Various symbols are used in this manual. The meanings of these symbols are described below.
 Projector CP-X417 User's Manual (detailed) Operating Guide Thank you for purchasing this projector. WARNING Before using this product, please read all manuals for this product. Be sure to read Safety Guide