READ ME FIRST. Touchstone TV Lift
|
|
|
- Eustacia Willis
- 5 years ago
- Views:
Transcription

1 Whisper Lift II PRO

2 2 READ ME FIRST 1. After completing the unpacking and uncrating of the cabinet, you will find the Owner s Manual, TV, installation hardware, and the wireless remote all together and sealed in a clear plastic envelope and affixed to the underside of the cabinet. 2. To insure the safety and security during shipping, we package the wooden and/or glass shelves that come with some cabinets, along with the TV mounting brackets (2) under the main cabinet, and then we secure this with heavy duty strapping so it remains secure in shipping. 3. To access the package of parts, simply tilt the cabinet back on its edge and using a box cutter, cut the strapping as close to the underside edge of the cabinet as possible, releasing the package. Pull the package out and set the cabinet back down on its base. CAUTION: At least two people should be involved when tilting the cabinet back on its edge and always use great care when tilting the cabinet back on its edge to access the parts package. 4. Prior to starting the TV installation process, we recommend you write down the serial number for the cabinet which can be found on the 3x3 white rectangular label affixed prominently on the inside of the cabinet under the lid. The bottom line set of numbers on this label is the cabinet serial number. Cabinet Serial Number
3 3 Table of Contents Contents About Your Touchstone TV Lift Cabinet... 4 Storage Space... 4 Other features common to all Touchstone cabinets... 5 Additional Cabinet Features (unique to certain cabinets only)... 5 Basic Lift Mechanism Features... 5 Safety... 6 Lift Components & TV Installation Hardware... 7 Components... 7 Hardware... 7 Tools... 7 Operating the Whisper Lift II PRO TV Lift... 8 Initialize the Whisper Lift II PRO Lift... 8 Operating the Wireless Remote... Error! Bookmark not defined. Operating the Wired Remote... 9 Mounting and Installing the TV Attaching TV Mounting Brackets to Flat Panel TV Installing TV on Lift Installing Locking Brackets on Whisper Lift II PRO TV Lift Setting Height of Adjustable Roller Assembly... Error! Bookmark not defined. Whisper Lift II PRO TV Lift Features... Error! Bookmark not defined. Initialize the Whisper Lift II PRO Lift... Error! Bookmark not defined. Pairing Universal IR Remote with Whisper Lift II PRO... Error! Bookmark not defined. Setting Lift Height... Error! Bookmark not defined. Setting Lift Height Memory Button (Middle Button) on Wireless Remote... Error! Bookmark not defined. Whisper Lift II PRO Accessories Install IR Sensor (included) Install 12v Trigger Cable (optional) Infrared Repeater Kit (optional) Technical Support Touchstone Home Products Limited Warranty Warranty Coverage Warranty Registration... 21


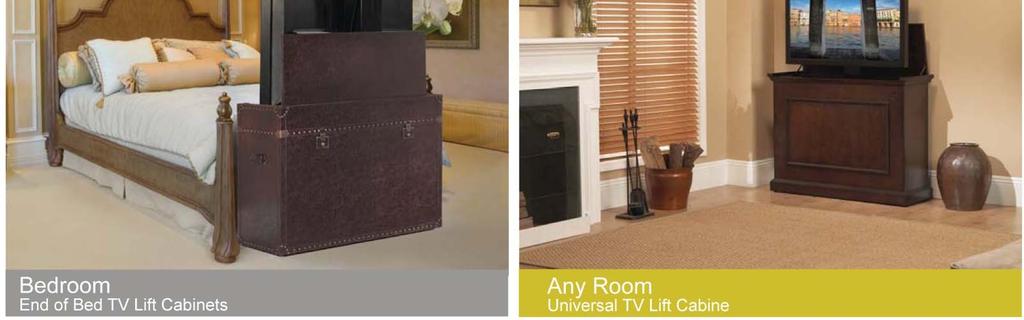
4 4 About Your Touchstone TV Lift Cabinet Congratulations on the purchase of your Touchstone TV Lift Cabinet. Touchstone Home Products takes pride in the quality of our cabinet craftsmanship and the smooth functionality of our TV lift mechanism. Please take a few minutes to learn about the features of your TV lift cabinet to insure you get the optimum use and performance from your new purchase. Storage Space - Our full size and mid-size cabinets come with ample storage space in the base of the main cabinet for placing your components. Cable boxes, DVR/DVD players, video game consoles can all be placed on the bottom of the cabinet and you can access the cords from the rear of the cabinet, using the handy slide panels in the back of the main cabinet. - Side cabinets for additional storage are available for our full-size cabinets - Each full size and mid-size cabinet comes with additional personal storage areas in the front for storing DVDs, CDs, books, video games, etc. - Each full size and mid-size cabinet comes with adjustable shelves. The shelves can be installed and placed at desired heights in the cabinet by placing the shelf clips into the pre-drilled holes. This is the same procedure for setting the shelves in the side cabinets as well. - If you purchased one of our series end-of-bed TV Lift cabinets, it comes equipped with a built-in component shelf which has room for at least two components, and raises and lowers with the lift, providing you with perfect line of sight and easy access to your cable box, DVD/DVR player, etc. End of Bed Cabinet Component Shelf Full & Mid Size Main Cabinet Interior

5 5 About Your Touchstone TV Lift Cabinet cont. Other features common to all Touchstone cabinets - All cabinets come with adjustable feet in all four corners of the cabinet. These can be used to raise/lower the cabinet, and to level the cabinet so that all doors and lid operate smoothly. Additional Cabinet Features (unique to certain cabinets only) - Our transitional series of cabinets that have glass fronts come with internal lights that operate by simply touching the hinges on the doors. - Our Adonzo media cabinet comes with a pull down speaker mesh compartment in the front of the main cabinet that is perfect for placing a Center Channel speaker, a 3.1 Sound Bar, or a vide game console Pull Down Media Compartment - Our Adonzo media cabinet also comes standard with wood front or mesh fronts, so that you can mix/match depending up on your audio-visual requirements for your system. - Our series cabinets come with a built-in component shelf that can store at least two (2) components. Basic Lift Mechanism Features - Lift mechanism comes fully assembles and ready for TV mounting (see the Mounting TV section) - Our lift is very quiet because it operates on a low voltage actuator (think piston that goes up and down). - Our lift is durable and comes with a 2 year warranty. However, should a part fail, it is very easy to replace. - Our unique roller extension gently and smoothly raises and lowers the lid of your TV Lift cabinet, saving wear and tear on your lift, and providing a soft and save closure. The extension also allows for the TV to be mounted higher on the lift, giving you more room for components in the bottom of the cabinet.
6 6 Safety Installing your Flat Screen TV in your Touchstone TV lift cabinet is fast and easy. Operating your lift is very straightforward. However, to avoid the risk of personal injury and to insure optimum performance of your TV lift mechanism, please pay particular attention to the warnings and safety notices throughout this manual. IMPORTANT SAFETY and PRE-INSTALLATION INSTRUCTIONS 1. Please adhere to the proper installation procedure as detailed in the installation instructions. 2. Safety precaution measures must be practiced at all times during installation of this product. 3. The entire installation instructions should be fully read and understood before beginning installation. 4. At least two people should be available to mount the TV on the lift mechanism. Please take care when handling your flat screen TV as injury and damage can result from dropping or mishandling of the TV. 5. Plasma screen TV s should remain upright at all times. Never place screen face down on the floor. This could cause damage to the TV. 6. The stand on your flat screen TV is removable! Please remove the stand prior to installing the TV on the lift mechanism. Consult your TV s owner s manual for instructions for removing the stand. 7. Carefully measure all dimensions of your LCD, PLASMA, or LED TV before proceeding. Then consult the Mounting and Installing the TV section of this manual for maximum TV size. IMPORTANT!: After installing your TV, you may find there is room in the bottom of the cabinet to install a small cable/satellite TV box. Once the TV is mounted, remove the front panel on the Elevate TV Lift Cabinet and completely lower the lift. Carefully inspect the space between the bottom of the TV and the bottom of the cabinet to see if your component will fit in the bottom of the cabinet. Consult the Mounting and Installing the TV section of this manual for more information. 8. All cords connecting components to the TV should be a minimum of 72 (6 feet) in length when installing component inside of cabinet or a minimum of 144 (12 feet) in length when installing component outside of cabinet (length of cable will depend on placement of your component). 9. WARNING!: TV Lift Mechanism contains moving parts. Please keep hands, arms, and fingers away from the lift and cabinet lid opening when the lift is in motion. Cables should be wire-tied or secured neatly so lift does not contact them during operation. Contact Touchstone Customer Service at for any questions regarding the operation of your TV lift cabinet. We are also available on the web at


7 7 Lift Components & TV Installation Hardware Components Hardware - 4 Lift Mounting Screws (included) - TV Mounting Screws -> Please consult your TV manufacturer for the size and length of the mounting screw for your TV. Included is a basic set of mounting screws that accommodates most LCD/Plasma TVs. Depending on your television, the screws included in the kit may not fit your television. If that is the case, these screws can be purchased at most hardware/home improvement stores. Tools In order to assemble the Whisper Lift II PRO, you will need the following tools: - Philips-head screwdriver - size 4 metric hex wrench - size 5 metric hex wrench - adjustable wrench or size 4 and size 5 metric socket wrench
8 8 Operating the Whisper Lift II PRO TV Lift Initialize the Whisper Lift II PRO Lift PLEASE RUN INITILIZATION PROCEDURE BEFORE OPERATING LIFT AFTER INSTALLATION! Before you run the Whisper Lift II PRO Lift, you will need to initialize the Control box. To initialize the control box, you will need to do the following: 1. Press and HOLD the UP and DOWN button on the wired remote control together at the same time until the red light on the top of the control box starts to flash. Press and HOLD both UP and DOWN button simultaneously. 2. Release the UP and DOWN button and the indicator light on the top of the control box will flash 3 times and turn off. The lift will go all the way to the bottom, back up the top and all the way down to the bottom again. The red light on the control box will come back on when the initialization procedure is complete. **Note: Do not proceed until this procedure is complete. **DO NOT INSTALL COMPONENTS IN CABINETS OR UNDER TV UNTIL AFTER RUNNING THE LIFT INITIALIZATION PROCESS. The initialization process is now complete and you can now use your Whisper Lift II PRO!


9 9 Operating the Whisper Lift II PRO TV Lift cont. Operating the Wireless Remote The remote control for your Touchstone Whisper Lift II PRO Advanced TV Lift is controlled via radio frequency. You do not need to point the remote control directly at the cabinet to operate the lift. UP Button MEMORY Button DOWN Button Indicator Light ** Lift Height Memory button will only function when button has been programmed by user. To program this button, please refer to the instructions on p. 18 of this manual. Operating the Wired Remote A wired control is included with your Touchstone Whisper Lift II PRO TV Lift, which can be mounted inside of the cabinet and control the lift should you misplace the wireless remote control. UP DOWN When installing the wired remote in the cabinet, the DOWN arrow points toward the wire and the UP arrow points away from the wire.

10 10 Mounting and Installing the TV IMPORTANT: Prior to installing the TV onto the lift, please ensure the following: - If you have not done so already, remove the stand from your flat screen TV. - TV weight needs to be under 100lbs. - TV has VESA compliant mounting pattern. Attaching TV Mounting Brackets to Flat Panel TV Tools Required - Phillips head screwdriver Parts Required - TV mounting brackets - TV mounting screws ***Note: Touchstone Home Products includes a screw pack containing some of the most popular sizes of mounting screws, used by most TVs on the market. Due to the amount of TVs in the marketplace and no standard for mounting screw size, Touchstone Home Products cannot guarantee that the screws required for your TV are included in the screw pack. Please consult your TV manufacturer for the size of the mounting holes in the back of your TV and use the appropriate size screws. Touchstone Home Products assumes no liability for damage to a TV. Instructions 1. Remove stand from TV. Consult TV manual for instructions on removing the stand from the TV. 2. Located the TV mounting brackets. They are pictured below.


11 11 Attaching TV Mounting Brackets to Flat Panel TV- cont 3. Align TV mounting brackets so that brackets are centered on the back of the TV. Place the TV mounting bracket so that the slotted holes are toward the top of the TV, while the round holes are toward the bottom of the TV. 3. Attach TV mounting brackets to back of TV. Consult your TV owner s manual for the proper size mounting screw.


 so that the bottom")


12 12 Installing TV on Lift 1. Using the internal wired control, move the lift to the up position. The UP button is the button opposite of the cable side of the wired remote. UP DOWN 2. Hang TV on top crossbracket. 3 With TV hanging on top crossbracket, slightly raise the TV (A) and push it back toward the lift (B) so that the bottom crossbracket is centered between the bottom set of hooks on the back of the TV mounting brackets. 4. Move the TV down slightly to fully attach TV to crossbrackets. The TV will hang on the top crossbracket and the upper set of hooks on the bottom of the TV mounting brackets will lock the TV in place from moving while on the lift.


13 13 Installing Locking Brackets on Whisper Lift II PRO TV Lift Tools Needed: - Philips-head screwdriver Instructions 1. Locate the bag with the Locking Bracket Kit included with your lift. In this bag, there will be 2 brackets and 2 philips-head screws. 2. Install the screw in each bracket so that the end opposite of the head of the screw is just slightly through the bracket.


14 14 Installing Locking Brackets on Whisper Lift II PRO TV Lift cont. 3. Place the angled end of the bracket into the slots in the TV mounting bracket just below the bottom cross bracket on the lift, as shown in the diagram below. 4. With a Philips-head screwdriver, tighten the screw so that the screw is tight against the cross bracket, as shown in the picture below. 5. After installing the first locking bracket, install the 2 nd locking bracket on the other TV bracket in the same manner. Your TV should now be locked in place and not move from side to side.


15 15 Setting Adjustable Roller Height Each Whisper Lift II PRO comes with an adjustable roller assembly that allows you to set the maximum height of the lift. Tools Needed: - none Instructions: 1. Raise the lift to a height that is comfortable for you to work at. 2. The adjustable roller is held in place by 2 screws and wing nuts on either side of the lift. By hand, remove the 4 sets of screws and wing nuts. 3. Raise the adjustable roller to the desired level and refasten the adjustable roller to the lift using the screws/nuts removed in step Adjust height of adjustable roller as needed so that lid of cabinet closes flush.
16 16 Whisper Lift II Pro Advanced TV Lift Features Initialize the Whisper Lift II PRO Lift PLEASE RUN INITILIZATION PROCEDURE BEFORE OPERATING LIFT AFTER INSTALLATION! Before you run the Whisper Lift II PRO Lift, you will need to initialize the Control box. To initialize the control box, you will need to do the following: 1. Press and HOLD the UP and DOWN button on the wired remote control together at the same time until the red light on the top of the control box starts to flash. Press and HOLD both UP and DOWN button simultaneously. 2. Release the UP and DOWN button and the indicator light on the top of the control box will flash 3 times and turn off. The lift will go all the way to the bottom, back up the top and all the way down to the bottom again. The red light on the control box will come back on when the initialization procedure is complete. **Note: Do not proceed until this procedure is complete. **DO NOT INSTALL COMPONENTS IN CABINETS OR UNDER TV UNTIL AFTER RUNNING THE LIFT INITIALIZATION PROCESS. The initialization process is now complete and you can now use your Whisper Lift II PRO!

17 17 Whisper Lift II PRO Advanced TV Lift Features - cont Pairing Universal IR Remote with Whisper Lift II PRO Advanced The Whisper Lift II PRO Advanced TV Lift can be paired with your existing universal IR remote control. To pair a universal IR Remote control with the Whisper Lift II PRO Advanced TV Lift, please follow the directions below: 1. Press and hold the learning button on the control box until the red indicator light starts to flash. The light will flash 3 times and turn off. When the light turns off, the control box is now in pairing mode. 3. Pair the UP/DOWN/STOP to a button on your IR remote. Do the following for each button: a. Press the UP button on the white wireless remote. The red light on the control box will flash once and turn ON. b. Aim the IR remote at the IR sensor and press any button on the IR remote to pair the UP function to that button. The red indicator light will flash again and stay ON. c. Follow steps A and B for both the DOWN and STOP buttons. 4. Once pairing is completed, press and hold the learning button on the control box starts to flash. The red indicator light will flash 5 times and light will stay solid once pairing is complete. You will now be able to operate the Whisper Lift II PRO Advanced TV Lift with your IR remote control.
18 18 Whisper Lift II PRO Advanced TV Lift Features - cont Setting Lift Height The Whisper Lift II PRO Lift has the ability to save a preset lift height. To set the lift height, you will need to do the following: 1. Press and HOLD the UP and DOWN button on the wired remote control together at the same time until the red light on the top of the control box starts to flash. Press and HOLD both UP and DOWN button simultaneously. 2. Release the UP and DOWN button and the indicator light on the top of the control box will flash 3 times and turn off. The lift will go all the way to the bottom and then start to go back up. 3. Once the lift raises to the desired height, press the UP button on the wired remote to STOP the lift. The lift will then pause and lower to the bottom. Press UP button to STOP lift The MAX height on your Whisper Lift II PRO lift will now be set. To go to the set height, press UP button on either the wired or wireless remote control. Setting Lift Height Memory Button (Middle Button) on Wireless Remote You can use the middle button on the wireless remote to set the lift to any height. Move the lift to the desired height and stop the lift. Press and HOLD the middle button on the wireless remote until the light on the control box starts to flash. Release the middle button and the lights on the remote will flash and turn off. The middle button is now set to move the lift to the desired height.


 The Whisper Lift II PRO TV Lift comes equipped with a 12v trigger port (port")
19 19 Whisper Lift II PRO Accessories Install IR Sensor (included) If you plan to use the Whisper Lift II PRO TV Lift with an existing IR remote control, attach the IR sensor to port B on the side of the control box. IR Sensor Cable After installing the IR Sensor cable, install the IR sensor cabinet into your cabinet. Please refer to p.21 for instructions on pairing the Whisper Lift II PRO TV Lift with your existing IR remote control. Install 12v Trigger Cable (optional) The Whisper Lift II PRO TV Lift comes equipped with a 12v trigger port (port A) for connection to automated systems. A male 3.5mm mono cable is required for this connection. **12v trigger cable not included.
20 20 Whisper Lift II PRO Accessories cont. Infrared Repeater Kit (optional) We have conveniently predrilled a hole in the upper right-hand corner of the front panel of the Elevate TV cabinet that will allow for the mounting of the Touchstone Infrared Repeater Kit (part number 70012). The Touchstone Infrared Repeater allows the customer to install a small satellite TV/cable box in the bottom of the cabinet. The Touchstone Infrared Repeater allows the user to change the channel on their box without having direct line of sight to the component. For more information on the Touchstone Infrared Repeater Kit, please visit or call our Customer Service Department at for more information and pricing. Technical Support Should you have any problems with your Touchstone Home Products Elevate TV Lift Cabinet, our technical support staff is here to support. Our technical support reps are available Monday to Friday from 8:00am to 5:00pm EST for phone assistance at We also can be reached via at support@touchstonehomeproducts.com 24hrs per day.
21 21 Touchstone Home Products Limited Warranty Warranty Coverage Touchstone Home Products, Inc warrants the lift mechanism and control box units to be free of defects in material and workmanship for five years. Touchstone Home Products, Inc warrants the cabinet (lift not included) to be free of defects in material and workmanship for two years. Touchstone will repair or replace any lift mechanism and/or control box unit that is defective or becomes defective during normal use within five years after the date of purchase. Touchstone does not warrant its products against damage caused by third parties. The warranty does not cover paint scratches, cosmetic blemishes, or other normal wear and tear associated with the cabinet. Extended warranty coverage for the lift mechanism is available by contacting Touchstone directly at Warranty Registration To register your Touchstone TV Lift cabinet, please go to our website at Prior to registering, make note of your cabinet serial number which can be found on the 3x3 white rectangular label affixed prominently on the inside of the cabinet under the lid. The bottom line set of numbers on this label is the cabinet serial number. Cabinet Serial Number
22 22 Notes:
23 23
24 24
TV Lift System Model CL-65 Installation Instructions
 TV Lift System Model CL-65 Installation Instructions Contact: Support@Nexus21.com Toll Free: (866) 500-5438 Phone: (480) 951-6885 Fax: (480) 951-6879 Revised: 01/17/17 Below is a parts list describing
In-Ceiling Electric Motorized Front Projection Screen Evanesce Series. User s Guide
 In-Ceiling Electric Motorized Front Projection Screen Evanesce Series User s Guide Important Safety & Warning Precautions Make sure to read this user s guide and follow the procedures below. Caution: The
Setup Guide. Read me BefoRe unpacking!
 Setup Guide Read me BefoRe unpacking! Package Contents In The Replicator package The Replicator SD card (in The Replicator SD card slot) In the Accessory Box found within The Replicator frame Single or
Caution. Hanging the Screen:
 Installation Instructions for Laminar and Laminar XL Projection Screens Caution 1. Read Instructions through completely before proceeding; keep them for future reference. Follow these instructions carefully.
Assembling and Mounting the Presentation Display, Speakers, Speaker Screens, and Table Door
 CHAPTER 8 Assembling and Mounting the Presentation Display, Speakers, Speaker Screens, and Table Door July 13, 2012, This document provides you with the procedures you perform to assemble and mount the
MY-HITE ADJUSTABLE TABLE
 MY-HITE ADJUSTABLE TABLE Corner T Leg Base Model Number : FCNAHBT Please Read Instructions Before Use ASSEMBLY INSTRUCTIONS ALL WORKSTYLES WELCOME Thank you for choosing Friant. We appreciate the trust
Troubleshooting Guide 9630 Series
 Troubleshooting Guide 9630 Series Satellite Solutions for Mobile Markets 11200 Hampshire Avenue South, Bloomington, MN 55438-2453 Phone: (800) 982-9920 Fax: (952) 922-8424 www.kingcontrols.com 1305-SEMI
Safety Rules Parts Check Lists and Photos Cable Diagrams for Various Crane Configurations Step by Step Instructions Tips for Packaging and Storage
 EZ CRANE USER MANUAL INCLUDED INSIDE Safety Rules Parts Check Lists and Photos Cable Diagrams for Various Crane Configurations Step by Step Instructions Tips for Packaging and Storage WATCH THE INSTRUCTIONAL
Starling Tab-Tension 2 Series
 Electric Wall/Ceiling Projection Screen Starling Tab-Tension 2 Series For: Spectra White FG and CineGrey 5D User s Guide Important Safety & Warning Precautions Make sure to read this user s guide and follow
Cable System Installation Guide
 Overview Cable System Installation Guide 5/19/2008 Our recommended approach for the installation of your Circle Graphics Cable Systems on the panels in your market is to install the fixed hardware (namely
PRO-ScalerHD2V HDMI to VGA & Audio Scaler Converter. User s Guide. Made in Taiwan
 PRO-ScalerHD2V HDMI to VGA & Audio Scaler Converter User s Guide Made in Taiwan Congratulations for owning a gofanco product. Our products aim to meet all your connectivity needs wherever you go. Have
INSTALLATION INSTRUCTIONS FOR
 INSTALLATION INSTRUCTIONS FOR MODEL 2240LED www.sportablescoreboards.com 1 Table of Contents 8 X 7 INDOOR SCOREBOARD... 3 THE SCOREBOARD SYSTEM SHOULD INCLUDE THE FOLLOWING PARTS:... 3 INSTRUCTIONS FOR
RT USB RETRACTABLE CABLE
 USB RETRACTABLE CABLE Welcome! Thank you for purchasing the MINI-ME RT300-155 USB cable retractor. We know you will find it easy to install, easy to use and easy to maintain. Our goal is to provide our
RT AUDIO RETRACTABLE CABLE
 AUDIO RETRACTABLE CABLE Welcome! Thank you for purchasing the MINI-ME RT300-134 audio Cable Retractor. We know you will find it easy to install, easy to use and easy to maintain. Our goal is to provide
Chapter 4. Dish Antenna Installation. Installing a DISH 500 Antenna. Finding the Satellites
 These instructions guide you through the installation of a satellite system which includes your receiver (included with this manual), and a DISH Pro DISH 500 antenna system that can be identified by the
Toughsat Flyaway Users Manual
 Toughsat Flyaway Users Manual TOUGHSAT FLYAWAY USERS MANUAL V.1.6 September 2012 Important warning regarding your TOUGHSAT System All power to the system (controller, modem, external network devices) MUST
Metal and Glass TV Stand for TVs up to 65 or 110 lbs. NS-HMG1856
 USER GUIDE Metal and Glass TV Stand for TVs up to 65 or 110 lbs. NS-HMG1856 SAFETY INFORMATION AND SPECIFICATIONS...2 PACKAGE CONTENTS: PARTS...3 PACKAGE CONTENTS: HARDWARE...4 ASSEMBLY INSTRUCTIONS...5
EZ-LIFT & RotoLift Lift Cases
 EZ-LIFT & RotoLift Lift Cases All Cases Feature: EZ-LIFT FRAME SYSTEM WITH SHOCK MOUNTING DISPLAY MOUNTING BRACKET ATA SHIPPING CASE CUSOM FOAMED INTERIOR CABLE MANAGEMENT STORAGE FOR ACCESSORIES 4 or
RT USB RETRACTABLE CABLE
 USB RETRACTABLE CABLE Welcome! Thank you for purchasing the MINI-ME RT300-160 USB C to USB A cable retractor. We know you will find it easy to install, easy to use and easy to maintain. Our goal is to
Electric Motorized Projection Screen PowerMax Tension Series
 Electric Motorized Projection Screen PowerMax Tension Series User s Guide Important Safety & Warning Precautions Make sure to read this user s guide and follow the procedures below. Caution: The screen
3. Electronics and MMU2 unit assembly
 Written By: Jakub Dolezal 2018 manual.prusa3d.com/ Page 1 of 34 Step 1 Tools necessary for this chapter Please prepare tools for this chapter: 2.5mm Allen key for M3 screws 2mm Allen key for nut alignment
Electric Wall/Ceiling Projection Screen Saker Tab-Tension Series User s Guide
 Electric Wall/Ceiling Projection Screen Saker Tab-Tension Series User s Guide Important Safety & Warning Precautions Make sure to read this user s guide and follow the procedures below. Caution: The screen
PLL2210MW LED Monitor
 PLL2210MW LED Monitor USER'S GUIDE www.planar.com Content Operation Instructions...1 Safety Precautions...2 First Setup...3 Front View of the Product...4 Rear View of the Product...5 Quick Installation...6
USER S MANUAL. Save this manual for future reference. For a digital version of this manual, visit
 TM USER S MANUAL Save this manual for future reference. For a digital version of this manual, visit www.mylifter.com/installation. 4 5 TABLE OF CONTENTS 4 INSTALLING THE PULLEY SYSTEM FOR LIFTING 100
SV-LCD50. Installation and User Guide. Thin-Film Transistor (TFT) Liquid Crystal Display (LCD) Color Rear Vision Monitor. Version 1.
 Liquid Crystal Display (LCD) Color Rear Vision Monitor. Version 1.") SV-LCD50 Installation and User Guide Thin-Film Transistor (TFT) Liquid Crystal Display (LCD) Color Rear Vision Monitor Version 1.00 August 2004 SV-LCD50 Installation and User Guide TFT LCD Color Rear Vision
SV-LCD50 Installation and User Guide Thin-Film Transistor (TFT) Liquid Crystal Display (LCD) Color Rear Vision Monitor Version 1.00 August 2004 SV-LCD50 Installation and User Guide TFT LCD Color Rear Vision
Technical Information Bulletin
 June 4, 2001 #TIB0003 Units Affected: Model Serial Numbers Model Serial Numbers SVT-2PRO T2PDxxxxxxxxx SVTAV AXVDxxxxxxxxx ATLDxxxxxxxxx BJIDMAxxxxxxx SVT-2PROJ T2PJxxxxxxxxx SVTAVJ BAHJxxxxxxxxx ATLJxxxxxxxxx
PL2410W LCD Monitor USER'S GUIDE.
 PL2410W LCD Monitor USER'S GUIDE www.planar.com Content Operation Instructions...1 Safety Precautions...2 First Setup...3 Front View of the Product...4 Rear View of the Product...5 Quick Installation...6
Electric Wall/Ceiling Projection Screen Saker Series User s Guide
 Electric Wall/Ceiling Projection Screen Saker Series User s Guide Important Safety & Warning Precautions Make sure to read this user s guide and follow the procedures below. Caution: The screen s Black
Transformer. Owner s Manual INSTALLERS: PLEASE LEAVE THIS MANUAL WITH THE OWNER.
 Transformer Owner s Manual INSTALLERS: PLEASE LEAVE THIS MANUAL WITH THE OWNER. APPLY S/N STICKER HERE LIMITED ONE YEAR WARRANTY ON SCREEN INNOVATIONS PRODUCTS Screen Innovations warrants its products,
PLL1920M LED LCD Monitor
 PLL1920M LED LCD Monitor USER'S GUIDE www.planar.com Content Operation Instructions...1 Safety Precautions...2 First Setup...3 Front View of the Product...4 Rear View of the Product...5 Installation...6
2000i. Projector Replacement Guide. for Projector Replacement Kits. NEC MT1060R ( ) and NEC MT860R ( ) Interactive Whiteboard
 and NEC MT860R ( ) Interactive Whiteboard") 2000i Interactive Whiteboard Projector Replacement Guide for Projector Replacement Kits NEC MT1060R (03-00043) and NEC MT860R (03-00041) 99-00496-00 Rev A0 FCC Warning This equipment has been tested and
2000i Interactive Whiteboard Projector Replacement Guide for Projector Replacement Kits NEC MT1060R (03-00043) and NEC MT860R (03-00041) 99-00496-00 Rev A0 FCC Warning This equipment has been tested and
Quick Release Roof-Mount Kit MB700
 Quick Release Roof-Mount Kit MB700 Owner s Manual Thank you for purchasing a KING product! The KING Quick Release Roof-Mount provides a convenient way to securely mount your KING antenna to your vehicle,
Electric Wall/Ceiling Projection Screen Saker Plus Series User s Guide
 Electric Wall/Ceiling Projection Screen Saker Plus Series User s Guide Important Safety & Warning Precautions Make sure to read this user s guide and follow the procedures below. Caution: The screen s
INSTALLATION INSTRUCTIONS FOR. MODEL 2230LED
 INSTALLATION INSTRUCTIONS FOR MODEL 2230LED www.sportablescoreboards.com 1 Table of Contents MODEL 2230LED... 3 8 X 4 INDOOR SCOREBOARD... 3 THE SCOREBOARD SYSTEM SHOULD INCLUDE THE FOLLOWING PARTS:...
TO THE INSTALLER: BE SURE TO LEAVE THIS MANUAL WITH THE OWNER.
 Fixed Frame Screen Owner s Manual To the Owner Installation Instructions Screen Care CFS-010517 Maintenance TO THE INSTALLER: BE SURE TO LEAVE THIS MANUAL WITH THE OWNER. Printed in U.S.A. Stewart Filmscreen
TIMETRAX SYNC RF WIRELESS DIGITAL CLOCK Installation Instructions
 Installation Instructions OVERVIEW Thank you for choosing a TimeTrax Sync RF Wireless Clock System. The TimeTrax RF Wireless Clock System receives dependable, accurate time from the TimeTrax Sync RF Wireless
HTP1502W1 Remote Controlled Multicolor Lighting System
 Page 1 of 8 CHATSWORTH, CALIFORNIA 91311 USA www.cyron.com HTP1502W1 Remote Controlled Multicolor Lighting System Thank you for purchasing CYRON HTP1502W1 LED Lighting System. This system will bring the
Electric Motorized Projection Screen Spectrum Tab-Tension Series User s Guide
 Electric Motorized Projection Screen Spectrum Tab-Tension Series User s Guide Important Safety Precautions Make sure to read this user s guide and follow the procedures below prior to screen operation.
Modulate Magnetic Kit 10-01
 Modulate Magnetic Kit 10-01 MOD-10-01-M MOD-10-01-M-OCE Modulate Fabric Banner kits feature unique angles and shapes, are portable and now are even easier to configure to achieve your dream space! Modulate
WID-DL74 WID-DL74 BLP WID. Designed for. Installation guide for workitdesk interactive table for. BrightLink Pro
 WID-DL74 WID-DL74 BLP WID Designed for BrightLink Pro Installation guide for workitdesk interactive table BrightLink Pro for Mounting the table unit 1 Unpack boxes 1 of 4 (Mobile base) and 2 of 4 (Motorized
2178-L/S Series Fiber Optic Splice Case with Gasket
 2178-L/S Series Fiber Optic Splice Case with Gasket Instructions for: 2178-S Splice Case 2178-LS Splice Case 2178-LL Splice Case 2181-LS Cable Addition Kit May 1997 34-7041-9949-5-A 1 Table of Contents
Transformer. Owner s Manual INSTALLERS: PLEASE LEAVE THIS MANUAL WITH THE OWNER.
 Transformer Owner s Manual INSTALLERS: PLEASE LEAVE THIS MANUAL WITH THE OWNER. APPLY S/N STICKER HERE LIMITED ONE YEAR WARRANTY ON SCREEN INNOVATIONS PRODUCTS Screen Innovations warrants its products,
A7 Owner's Manual ii
 Owner s Manual Table of Contents Introduction...1 Unpacking...2 Components...3 Assembling...4 Placing Stereo Loudspeakers...6 Connecting...7 Specifications...8 Warranty...9 030519 A7 Owner's Manual ii
MITS Series T5 QUICK GUIDE. Simulated laparoscope. LCD monitor On/off switch Work area light switches Ports for trocars and or.
 The 3 Dmed MITS Series T5 QUICK GUIDE Simulated laparoscope (3- Dmed SimScope ) LCD monitor On/off switch Work area light switches Ports for trocars and or instruments Power cord inserts in rear Access
HE INSTRUCTION MANUAL
 Outdoor Antenna Kit Model Number: HE170351 INSTRUCTION MANUAL OUTDOOR ANTENNA KIT Warranty Details REGISTER YOUR PURCHASE AT www.aldi.com.au/en/about-aldi/product-registration/ TO KEEP UP-TO-DATE WITH
Sphinx II. Owner s Manual. Tube Hybrid Integrated Power Amplifier. Rogue Audio, Inc. 3 Marian Lane Brodheadsville, PA Issue date: 08/01/16
 Sphinx II Tube Hybrid Integrated Power Amplifier Owner s Manual Rogue Audio, Inc. 3 Marian Lane Brodheadsville, PA 18322 Issue date: 08/01/16 TABLE OF CONTENTS 1) Introduction 2 2) Unpacking the Sphinx
TV55. Owner s Manual. Indoor/Outdoor Amplified TV Antenna
 Owner s Manual Indoor/Outdoor Amplified TV Antenna Safety Precautions Warning! Use extreme caution when installing or removing an outdoor antenna that is located close to overhead wires such as power lines,
TracVision R6DX Installation Guide
 TracVision R6DX Installation Guide These instructions explain how to install the TracVision R6DX satellite TV antenna system on an RV or motor coach. Complete instructions on how to use the system are
Install Guide Incredible Technologies, Inc. All Rights Reserved
 Install Guide 2015 Incredible Technologies, Inc. All Rights Reserved Preface Using this Guide The following icons are used to highlight specific areas of interest and to indicate when extreme caution is
Satellite Dish Installation Manual (Ver. 2) 1
 1") Satellite Dish Installation Manual Provided by DiscoverNet, Inc. Satellite Dish Installation Manual (Ver. 2) 1 Table of Contents Section 1: Introduction Page 3 Section 2: Recommended Tools and Materials
Satellite Dish Installation Manual Provided by DiscoverNet, Inc. Satellite Dish Installation Manual (Ver. 2) 1 Table of Contents Section 1: Introduction Page 3 Section 2: Recommended Tools and Materials
Luxus A / SR-1 Electriscreen
 Luxus A / SR-1 Electriscreen O W N E R S M A N U A L To the Owner Installation Instructions Operating the Screen LXSR-0903 Maintenance T O THE INSTALLER: BE SURE TO LEAVE THIS MANUAL WITH THE OWNER. Printed
Installation Note. Option GHz Operation Upgrade Kit. For 8753E and 8753ES Network Analyzers. Applicable Upgrade Kit Model Number
 Installation Note Option 006 6 GHz Operation Upgrade Kit For 8753E and 8753ES Network Analyzers Network Analyzer Model Number Applicable Upgrade Kit Model Number 8753E 8753EU Option 006 8753ES 8753ESU
Important Safety & Warning Precautions
 Electric Motorized Projection Screen VMAX 2 Series User s Guide Important Safety & Warning Precautions Make sure to read this user s guide and follow the procedure below. Caution: The screen s Black Top
Table of Contents. One-Year Limited Warranty
 QUICK START GUIDE Table of Contents Warranty Usage & Details Warranty... 3 Frame Assembly... 4 Attaching Fabrics... 5 Frame Mounting... 6 Build Options... 7 Components & Accessories Accessories... 16 Framework...
PowerBook G4 Aluminum 12" GHz LCD panel upgrade
 PowerBook G4 Aluminum 12" 1-1.5 GHz LCD panel upgrade Upgrade a 1400x1050 LCD panel. Written By: martin ifixit CC BY-NC-SA www.ifixit.com Page 1 of 18 INTRODUCTION The original LCD 1024x768 resolution
T5-RM HD MITS. User Manual. 3-Dmed LEARNING THROUGH SIMULATION
 T5-RM HD MITS User Manual 3-Dmed LEARNING THROUGH SIMULATION T5-RM HD Minimally Invasive Training System Thank you for purchasing the T5-RM HD MITS from 3-Dmed Each has been fully tested prior to shipment
3M Locator Plate N
 M Locator Plate 44-107N Instructions for the assembly of.100 x.100 preassembled socket connectors 1.0 General The M Locator Plate 44-107N is designed to aid in the assembly of the preassembled socket connector
Modulate Magnetic Kit 10-07
 Modulate Magnetic Kit 10-07 MOD-10-07-M MOD-10-07-M-OCE Modulate Fabric Banner kits feature unique angles and shapes, are portable and now are even easier to configure to achieve your dream space! Modulate
Desk Mount Articulating Dual Monitor Arm with Cable Management & Height Adjust
 Desk Mount Articulating Dual Monitor Arm with Cable Management & Height Adjust ARMDUAL *actual product may vary from photos DE: Bedienungsanleitung - de.startech.com FR: Guide de l'utilisateur - fr.startech.com
INSTALLATION INSTRUCTIONS MODEL VSBX-236 LED 3 X 8 INDOOR SCOREBOARD
 1 INSTALLATION INSTRUCTIONS MODEL VSBX-236 LED 3 X 8 INDOOR SCOREBOARD NOTE TO INSTALLERS: PLEASE RETURN THIS MANUAL TO THE INDIVIDUAL IN CHARGE OF THE SCOREBOARD UPON COMPLETION OF INSTALLATION. The scoreboard
UltraTwist. Product Description. Instruction Guide
 UltraTwist Instruction Guide English 7EN111103-01 2009-07-06 Applies to the following models: UltraTwist Slim Prod. No. 3126045 UltraTwist Wide Prod. No. 3126047 UltraTwist Slim UltraTwist Wide Product
Contents. Table of Contents. Yvette Installation and Care Guide Table of Contents. Table of Contents 1. Section 1 WASP Setup 5
 Table of Contents Yvette Installation and Care Guide Table of Contents 1 Contents Table of Contents 1 Section 1 WASP Setup 5 Section 1.1 Yvette Crate Content... 6 Section 1.2 WASP... 7 Zone of Neutrality:
Check what you have received against the component checklist and hardware above.
 SA46S SA46W SA46B SA46PB Component Checklist Installation Instructions SYSTEMA Systema Monitor Arm 460mm HARDWARE Display Mounting Spacers (x4) Display Mounting Screws Arm Assembly VESA monitor head M4
Operating Manual. Automated Gear. Apollo Design Technology, Inc Fourier Drive Fort Wayne, IN USA
 Operating Manual Automated Gear Apollo Design Technology, Inc. 4130 Fourier Drive Fort Wayne, IN 46818 USA PH: +01(260)497-9191 FX: +01(260)497-9192 www.apollodesign.net 11-25-09 5-6 POWERING UP THE RIGHT
Website: Tel: ADDRESS: 6475 Las Positas Rd. Livermore, CA Item No. E5B/E5S Installation Guide
 Website: www.flexispot.com Tel: -855-4-808 ADDRESS: 6475 Las Positas Rd. Livermore, CA 9455 Item No. E5B/E5S Installation Guide Specifications Step Column 3 Max. Weight Capacity 0 Ibs (00 kg) Speed 38mm/s
Warning and Safety Information. FCC Information
 Installation Manual Warning and Safety Information FCC Information This device complies with FCC Rules Part 15 Operation and is subject to the following two conditions: (1) This device may not cause harmful
OWNERS MANUAL. Revision /01/ Lightronics Inc. 509 Central Drive Virginia Beach, VA Tel
 OWNERS MANUAL Revision 1.8 09/01/2002 OWNERS MANUAL Page 2 of 12 AR-1202 UNIT DESCRIPTION The AR-1202 consists of a processor and 12 dimmer channels of 2.4KW each. Each dimmer channel is protected by a
INSTALLATION INSTRUCTIONS
 INSTALLATION INSTRUCTIONS PARTS REQUIRED Parts in the box Single monitor Dual monitor M2 M8 M/Flex + (package contents will depend on configuration ordered) Tools required for installation 6.0 mm Hex Key
Assembly Instructions Clearlight Infrared Sauna: CE-C
 1 2 Assembly Instructions Clearlight Infrared Sauna: CE-C Part List...4 Pre-Assembly Instructions...5 Assembly Instructions...6-8 Control Panel Instructions...9 Color Light Therapy Instructions...10 Using
PVS (PERSONAL VEIWING SYSTEM) INSTRUCTION MANUAL
 INSTRUCTION MANUAL") PVS (PERSONAL VEIWING SYSTEM) INSTRUCTION MANUAL Important: read this setup manual before unpacking units. Cardio Theater Inc. Service 1-800-776-6695 Sales 1-800-CARDIO-1 www.cardiotheater.com Introduction
PVS (PERSONAL VEIWING SYSTEM) INSTRUCTION MANUAL Important: read this setup manual before unpacking units. Cardio Theater Inc. Service 1-800-776-6695 Sales 1-800-CARDIO-1 www.cardiotheater.com Introduction
Check what you have received against the component checklist and hardware above.
 SSS SSPW SSW SSPB SSB Component Checklist Installation Instructions SYSTEMA Systema Monitor Spring Arm HARDWARE Display Mounting Spacers (x4) 3/4mm Allen Keys Display Mounting Screws M4 x 14mm (x1) Silver
2178 Fiber Optic Splice Case and 2181 Cable Addition Kit
 2178 Fiber Optic Splice Case and 2181 Cable Addition Kit Instructions January 1994 Issue 1, 34-7029-6387-6 1 2 Contents: 1.0 General... 4 2.0 Specifications... 4 3.0 Kit Contents... 5 SECTION 1: 2178 Splice
velocity standard 07 velocity features and benefits: dimensions: additional information:
 velocity standard 07 V-S-07 Chic and robust - a highly-structural portable 10 x10 exhibit that emphasizes your identity and message seamlessly with a combinaton of fabric graphics, rigid accents and accessories.
APSPB PUSH BUTTON ZERO Installation Manual
 APSPB PUSH BUTTON ZERO Installation Manual CARDINAL SCALE MFG. CO. 8527-0579-0M Rev A 203 E. Daugherty, Webb City, MO 64870 USA Printed in USA 12/14 Ph: 417-673-4631 Fax: 417-673-2153 www.detectoscale.com
DEEPFRAME BASIC KIT- USER MANUAL VERSION ORIGINAL USER MANUAL
 DEEPFRAME BASIC KIT- USER MANUAL VERSION 1.0 - ORIGINAL USER MANUAL new type of mixed reality display that enables digital content to appear as a hologram on top of reality seen 1 Content Security precautions
1-Touch Vibratory Sieve Shaker SS-10
 1-Touch Vibratory Sieve Shaker SS-10 Safety Instructions WARNING!! This machine operates on electric current. Improper operation could result in electrical shock, electrocution, or an explosion! 1. ALWAYS
Backlight Replacement
 Installation Instructions Backlight Replacement Catalog Numbers 2711P-RL7C, 2711P-RL7C2, 2711P-RL10C, 2711P-RL10C2, 2711P-RL12C, 2711P-RL12C2, 2711P-RL15C Topic Page About This Publication 1 Important
Extender for HDMI. gefentoolbox.com GTB-HDBT-POL GTB-HDBT-POL-BLK. User Manual
 Extender for HDMI w/pol GTB-HDBT-POL GTB-HDBT-POL-BLK User Manual gefentoolbox.com ASKING FOR ASSISTANCE Technical Support: Telephone (818) 772-9100 (800) 545-6900 Fax (818) 772-9120 Technical Support
75 Elliptical Antenna System
 Instruction and Assembly Manual 75 Elliptical Antenna System 7291 NW 74th Street Miami, FL 33166 GlobeCast Technical Service: (888) 988-5288 Manufactured By: 2002 Channel Master LLC Printed in U.S.A. 8000915-02
1.8 METER SERIES 1183 Az/El MOUNT ANTENNA SYSTEM
 REVISION G January 11, 2002 ASSEMBLY MANUAL 1.8 METER SERIES 1183 Az/El MOUNT ANTENNA SYSTEM PRODELIN CORPORATION 1500 Prodelin Drive Newton NC 28658 1.8 METER SERIES 1183 Az/El MOUNT ANTENNA SYSTEM G
OWNER'S MANUAL SIGNAL COMMANDER
 OWNER'S MANUAL SIGNAL COMMANDER THIS MANUAL CONTAINS INSTRUCTIONS FOR: LPDA 200 - INSTALLATION - OPERATION - TROUBLESHOOTING - EXPLODED PARTS DRAWING - WARRANTY AntennaTek, Inc. 425 S. Bowen, #4 Longmont,
velocity standard 08 velocity features and benefits: dimensions:
 velocity standard 08 V-S-08 Chic and robust - a highly-structural portable 10 x20 exhibit that emphasizes your identity and message seamlessly with a combinaton of fabric graphics, rigid accents and accessories.
Electric Motorized Projection Screen Spectrum Series
 Electric Motorized Projection Screen Spectrum Series User s Guide 1 Important Safety & Warning Precautions Make sure to read this user s guide and follow the procedure below. Caution: The screen s Black
CABLE MANAGEMENT PRODUCTS Cable Managers & Accessories
 CABLE MANAGEMENT PRODUCTS Cable Managers & Accessories Evolution Cable Management Page 5-3 Velocity Cable Management Page 5-8 Velocity Standard Pack Page 5-12 Vertical Cable Management Page 5-13 Global
IPad 4 REPAIR GUIDE. Version Edition
 IPad 4 REPAIR GUIDE Version 1 2016 Edition IPad 4 REPAIR GUIDE LCD AND DIGITIZER REPLACEMENT RiAna Soto Repair Training Specialist rsoto@cellairis.com FOR EVERY REPAIR MAKE SURE TO COMPLETE, INITIAL, AND
Revella Gazebo. Item# L-GZ806PST-A2
 Revella Gazebo Item# L-GZ806PST-A2 Congratulations on your purchase of Revella Gazebo. Our clear, easy to follow, step-by-step instructions will guide you through the assembly process from start to finish.
CH1 CH2 CH3 CH4. Master /Fade CH5. 600s CH6. 60s SC1 SC2 SC4 SC3 SC5. SC6 Off/Pro. AL Fade 6 Pro. User guide
 1 1 CH1 CH2 1 1 CH4 CH 1 CH3 6s Master /Fade CH6 1 SC1 6s SC4 SC2 SC SC3 SC6 Off/Pro AL Fade 6 Pro User guide CONTENTS INTRODUCTION...2 Welcome 2 Safety 2 Supplied items 3 INSTALLATION...4 Mounting 4
USER MANUAL. GOLDMUND LOGOS 1N-2N SPEAKER SYSTEM Active Speaker
 USER MANUAL GOLDMUND LOGOS 1N-2N SPEAKER SYSTEM Active Speaker Thank you for purchasing the Goldmund LOGOS 1N-2N SPEAKER SYSTEM The Goldmund Logos line fully incorporates the technological expertise developed
Introduction. Introduction
 Introduction Introduction Note: In this user guide Pronto is used for both ProntoPro and Pronto remote controls. RFX6000 is compatible with TSU3000 and TSU6000. About the RFX6000 Most remote control systems
2000 Series Weather Stations Analog Temperature / RH Sensor Upgrade Kit PRODUCT MANUAL KIT # 3613WDU
 2000 Series Weather Stations Analog Temperature / RH Sensor Upgrade Kit PRODUCT MANUAL KIT # 3613WDU 1 The 3613WDU Analog Temperature / RH Sensor Upgrade Kit is used to upgrade Watchdog 2000 Series Weather
NEPTUNE PROJECTION SCREEN PRO-LINE MANUAL SCREEN NEPTUNE PRO-LINE MNAUAL SCREEN SPRING ROLL LOCKING SYSTEM DEFINITE ASPECT UNIQUE APPEARANCE DURABLE
 NEPTUNE PRO-LINE MANUAL SCREEN QS Neptune pro-line manual screen combines comfortable viewing and simplicity in use. It satisfies the most exacting viewers with clear black border for definite aspect.
PRJTPFL inch PRJTPFL inch PRJTPFL inch. Fixed Wall Mount Projector Screen. Universal Home/Office Projector Viewing Display
 PRJTPFL102-100 - inch PRJTPFL112-110 - inch PRJTPFL122-120 - inch Fixed Wall Mount Projector Screen Universal Home/Office Projector Viewing Display Be sure to read this manual before use so you will know
7 LCD Color Monitor 8 LCD Color Monitor OWNER S MANUAL
 7 LCD Color Monitor 8 LCD Color Monitor OWNER S MANUAL INTRODUCTION OHM720, OHM820 The Clarion OHM720/OHM820 is a full-featured 7 /8 LCD Color Monitor that can be used as a stand-alone monitor, or can
Indoor/Outdoor Security System with Quad Monitor User s Manual
 Indoor/Outdoor Security System with Quad Monitor User s Manual 4919539 Important! Please read this booklet carefully before installing or using these units. WARNING - These units should ONLY be opened
HCS - HES Cabling Systems
 HCS - HES Cabling Systems Installation Manual for HCS High-Capacity Fiber-Optic Rack-Mount Cabinets Be sure to read and completely understand this procedure before applying product. Be sure to select the
monolight Q-400 INSTRUCTIONS INSTRUCTIONS
 monolight Q-400 INSTRUCTIONS INSTRUCTIONS Introduction Congratulations on your purchase of the Angler Silver 18 softbox! The Angler Q-400 Monolight can be used for everything from professional wedding
EchoPanel EchoCloud Installation Guide
 Note: Please read the entire before application. The installation guide is intended to provide installers with helpful information regarding s prior to installing the material. Kirei accepts no responsibility
#YourGearUpgraded. TV Stand Model EGTV1 INSTRUCTION MANUAL
 #YourGearUpgraded TV Stand Model EGTV1 INSTRUCTION MANUAL IMPORTANT SAFETY INSTRUCTIONS. READ ENTIRE MANUAL PRIOR TO USE. SAVE These INSTRUCTIONS Yea, the boring stuff...... but read it, so you don t jack
V74 INSTRUCTIONS INSTALLATION VESA 700X400 FIXED WALL MOUNT ISSUE 002
 V74 VESA 700X400 FIXED WALL MOUNT INSTALLATION INSTRUCTIONS ISSUE 002 SAFETY DISCLAIMER IMPORTANT SAFETY INSTRUCTIONS BELOW WARNING: Failure to provide adequate structural strengthening, prior to installation
DEFINITIVE TECHNOLOG REFERENCE: MYTHOS 9 CODIC: EN ANGLAIS UNIQUEMENT
 TCO MARQUE: DEFINITIVE TECHNOLOG REFERENCE: MYTHOS 9 CODIC: 4087488 EN ANGLAIS UNIQUEMENT Definitive Technology Mythos Nine Loudspeakers Thank You Thank you for choosing the Definitive Technology Mythos