i3projector 3303W UM USER MANUAL
|
|
|
- Louise Bennett
- 6 years ago
- Views:
Transcription

1 i3projector i3projector 3303W UM USER MANUAL
2 Table of Contents... 2 Usage Notice... 3 Safety Information... 3 Precautions... 4 Introduction... 6 Package Overview... 6 Product Overview... 7 Main Unit... 7 Control Panel... 8 Interface... 9 Remote Control Installation Connecting the Projector...11 Connect a Desktop/Laptop Computer.11 Connect to Video Sources...12 Powering the Projector On / Off...13 Powering On the Projector Powering Off the Projector Warning Indicator Adjusting the Projected Image...15 Adjusting the Projector s Height Adjusting the Projector s Focus Adjusting Projection Image Size (Diagonal) User Controls Control Panel & Remote Control...19 Control Panel Remote Control On-screen Display Menus...22 How to operate Picture Screen Setting Volume Options Options Lamp Settings D Interactive LAN Multimedia Accessing Multimedia Files...41 How to access Multimedia mode Replace the Lamp...48 Appendices Installing and Cleaning the Optional Dust Filter...50 Compatibility Modes...51 VGA Analog HDMI Digital RS232 Commands and Protocol Function List...55 RS232 Port Setting RS232 Signals Connection Commands Set List List of specifications...59 Wall Mount Installation...61 Regulation & Safety Notices
3 Safety Information Usage Notice The lightning flash with arrow head within an equilateral triangle is intended to alert the user to the presence of uninsulated dangerous voltage within the product s enclosure that may be of sufficient magnitude to constitute a risk of electric shock to persons. The exclamation point within an equilateral triangle is intended to alert the user to the presence of important operating and maintenance (servicing) instructions in the literature accompanying the appliance. WARNING: TO REDUCE THE RISK OF FIRE OR ELECTRIC SHOCK, DO NOT EXPOSE THIS APPLIANCE TO RAIN OR MOISTURE. DANGEROUS HIGH VOLTAGES ARE PRESENT INSIDE THE ENCLOSURE. DO NOT OPEN THE CABINET. REFER SERVICING TO QUALIFIED PERSONNEL ONLY. Class B emissions limits This Class B digital apparatus meets all requirements of the Canadian Interference-Causing Equipment Regulations. Important Safety Instruction 1. Do not block any ventilation openings. To ensure reliable operation of the projector and to protect from over heating, it is recommended to install the projector in a location that does not block ventilation. As an example, do not place the projector on a crowded coffee table, sofa, bed, etc. Do not put the projector in an enclosure such as a book case or a cabinet that restricts air flow. 2. Do not use the projector near water or moisture. To reduce the risk of fire and/or electric shock, do not expose the projector to rain or moisture. 3. Do not install near heat sources such as radiators, heaters, stoves or any other apparatus such as amplifiers that emits heat. 4. Clean only with dry cloth. 5. Only use attachments/accessories specified by the manufacturer. 6. Do not use the unit if it has been physically damaged or abused. Physical damage/abuse would be (but not limited to): Unit has been dropped. Power supply cord or plug has been damaged. Liquid has been spilled on to the projector. Projector has been exposed to rain or moisture. Something has fallen in the projector or something is loose inside. Do not attempt to service the unit yourself. Opening or removing covers may expose you to dangerous voltages or other hazards. 7. Do not let objects or liquids enter the projector. They may touch dangerous voltage points and short out parts that could result in fire or electric shock. 8. The unit should only be repaired by appropriate service personnel. i3projector manual 3303W UM 3
4 Precautions Please follow all warnings, precautions and maintenance as recommended in this user s guide. Warning- Do not look into the projector s lens when the lamp is on. The bright light may hurt and damage your eyes. Warning- To reduce the risk of fire or electric shock, do not expose this projector to rain or moisture. Warning- Please do not open or disassemble the projector as this may cause electric shock. Warning- Before replacing the lamp, please have the projector completely cooled down. Operate as described on Pages Warning- This projector will automatically detect the service life of its lamp. When the projecor shows a warning message, the lamp must be replaced immediately. When service life of the lamp expires, the lamp module must be replaced. Otherwise, the projector cannot be switched on. To replace the lamp, please follow the steps stated in Replace the Lamp on Pages Warning- After replacement of the lamp module, please reset the lamp hour counter (see Page 49). Warning- When switching the projector off, please ensure the cooling cycle has been completed before disconnecting power. Allow 90 seconds for the projector to cool down. Warning- When service life of the lamp is about to expire, the Lamp Warning: Exceed Service Life message will be shown on the screen. Please contact the local dealer or service center to replace the lamp as soon as possible. 4
5 Usage Notice Do: Turn off and unplug the power plug from the AC outlet before cleaning the product. Use a soft dry cloth with mild detergent to clean the display housing. Disconnect the power plug from AC outlet if the product is not being used for a long period of time. Do not: Block the slots and openings on the unit provided for ventilation. Use abrasive cleaners, waxes or solvents to clean the unit. Do not use under the following conditions: - In extremely hot, cold or humid environments. Ensure that the ambient room temperature is within 5-40 C. Relative Humidity is 5-40 C, 80% (Max.), non-condensing. - In areas susceptible to excessive dust and dirt. - Near any appliance generating a strong magnetic field. - In direct sunlight. i3projector manual 3303W UM 5
6 RGB1 RGB2 Video HDMI1 HDMI2 Package Overview Unpack and inspect the box contents to ensure all parts listed below are in the box. If something is missing, please contact your nearest customer service center. Projector Power Cord VGA Cable (*) Due to different applications in each country, some regions may have different accessories. 2 AAA Batteries IR Remote Control CD-ROM (User s Manual) 6
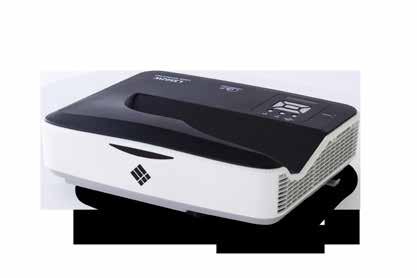
7 Introduction Product Overview Main Unit The interface is subject to model s specifications Control Panel 2. Focus Switch 3. Ventilation (inlet) 4. IR Receiver 5. Ventilation (outlet) 6. Speaker 7. Power Socket 8. Input / Output Connections 9. Lens 10. IR Camera i3projector manual 3303W UM 7
8 Control Panel Power LED 2. Enter 3. Temp LED 4. Lamp LED 5. Menu 6. Signal source 7. Four Directional Select Keys 8. Power/Standby button 9. IR Receiver 8
9 Introduction Interface USB RJ Monitor loop through only support in VGA1- In/YPbPr. 1. USB Connector (For interactivity) 2. VGA-Out/VGA2-In Connector 3. RS-232 Connector (9-pin DIN Type) 4. VGA1-In/YPbPr Connector (PC Analog Signal/Component Video Input/HDTV/YPbPr) 5. Composite Video Input Connector 6. HDMI2 Input Connector 7. HDMI1 Input Connector 8. Audio Input Connector (3.5mm mini jack) 9. Composite Audio Input (right) Connector 10. Composite Audio Input (left) Connector 11. Audio Input Connector (microphone connector) 12. Audio Output Connector (3.5mm mini Jack) 13. Power Socket 14. Kensington TM Lock Port 15. USB Type A Connector 16. RJ45 Connector 17. Laser Curtain i3projector manual 3303W UM 9
10 Remote Control The specific interfaces are selected in terms of the specifications of types LED Indicator 2. Power On/Off 3. Enter 4. Four Directional Key 5. Menu 6. Exit 7. Zoom + 8. Reset 9. Auto Adjustment 10. Input 11. Zoom Volume +/- 13. Keystone +/- 14. Image 15. Blank 16. Aspect ratio 17. VGA1 18. HDMI1 19. VGA2 20. HDMI2 21. Video 22. Freeze 23. Numbered keypad (for password input)
11 MOLEX IInstallation Connecting the Projector Connect a Desktop/Laptop Computer 4 Remote keys vary with projector types E62405SP R Due to application discrepancies in different countries/ regions, certain regions may include different accessories External Display Microphone Audio Output Router / Network Switch 1... RS232 Cable 2... USB Cable 3...VGA Cable 4... HDMI Cable 5...Audio Input Cable 6... Power Cable 7...Audio Output Cable 8...Audio Input Cable 9...RJ45 Cable VGA Output Cable i3projector manual 3303W UM 11
12 Connect to Video Sources DVD player, STB (Set-top Box), HDTV receiver Remote keys vary with projector types E62405SP R Due to application discrepancies in different countries/ regions, certain regions may include different accessories Composite Video Output Microphone Audio Output Pin to 3 RCA Component/HDTV Adapter 2... HDMI Cable 3...Audio Cable/RCA 4... Audio Cable 5... Power Cable 6...Composite Video Cable 7...Audio Cable/RCA 8...Audio Input Cable 12
13 IInstallation When the projector is in standby mode (<0.5W), the VGA output and the transmitted audio will be deactivated. Powering the Projector On / Off Powering On the Projector 1. Securely connect the power cord and signal cable. When connected, the POWER/STANDBY LED will turn Red. 2. Turn on the lamp by pressing button either on the projector or on the remote. At this moment, the POWER/ STANDBY LED will now turn Blue. 3. Turn on and connect the source that you want to display on the screen (computer, notebook, video player, etc). The projector will detect the source automatically. If not, press menu button and go to OPTIONS, make sure Auto Source is enabled. If you connect multiple sources at the same time, press the INPUT button on the control panel or direct source keys on the remote control to switch between inputs. 1 POWER/STANDBY ON(B) STANDBY(R) TEMP L Turn on the projector first and then select the signal sources. MENU i3projector manual 3303W UM 13
14 Powering Off the Projector 1. Press the button on the remote control or on the control panel to turn off the projector. The following message will be displayed on the screen. Press the button again to confirm otherwise the message will disappear after 15 seconds. When you press the button for the second time, the fan will start cooling the system and will shut down. 2. The cooling fans continue to operate for about 35 seconds for cooling cycle and the POWER/STANDBY LED will Flash Blue. When the POWER/STANDBY LED lights solid Red, the projector has entered standby mode. If you wish to turn the projector back on, you must wait until the projector has completed the cooling cycle and has entered standby mode. Once in standby mode, simply press button to restart the projector. 3. Disconnect the power cord from the electrical outlet and the projector. 4. Do not turn on the projector immediately following a power off procedure. Warning Indicator Contact the nearest service center if the projector displays these symptoms. When the warning indicators (see below) come on, the projector will automatically shutdown: LAMP LED indicator lights in solid Red. TEMP LED flash light in Red, this indicates the projector has overheated. Under normal conditions, the projector can be switched back on. Unplug the power cord from the projector, wait for 30 seconds and try again. If the warning indicator light up again, please contact your nearest service center for assistance. 14
15 IInstallation Adjusting the Projected Image Adjusting the Projector s Height The projector is equipped with Adjustable feet for adjusting the image height. 1. Locate the adjustable feet you wish to modify on the underside of the projector. 2. Rotate the adjustable ring clockwise to raise the projector or counter clockwise to lower it. Repeat with the remaining feet as needed. Tilt-Adjustment Feet Tilt-Adjustment Ring i3projector manual 3303W UM 15
. Focus Lever 16 www.")
16 Adjusting the Projector s Focus To focus the image, slide the focus lever to left/right until the image is clear. WXGA series: The projector will focus at distances from to 2.06 ft. (0.457 to meter). Focus Lever 16
17 IInstallation Adjusting Projection Image Size (Diagonal) WXGA series: Projection Image Size from 80 to 110 (2.032 to meters). B A D=Throw distance B=Offset cm A=Throw distance cm D Screen Size Projection Projection Diagonal of Screen cm Distance (D) Distance (A) V-Offset (B) W (Width) H (Height) cm cm cm i3projector manual 3303W UM 17
18 Diagonal of Screen Screen Size cm Projection Distance (D) Projection Distance (A) V-Offset (B) W (Width) H (Height) cm cm cm
19 User Installation User Controls controls Control Panel & Remote Control Control Panel Using the Control Panel POWER Enter INPUT MENU Four Directional Select Keys LAMP LED TEMP LED ON/STANDBY LED Press Power to turn ON/OFF the projector. Press Enter to confirm your selected item. Press INPUT to select signal source. Press MENU to launch the on-screen display (OSD) menu. To exit OSD, press MENU again. Press to select item. This indicates the lamp status of the projector. This indicates the lamp status of the projector. This indicates the status of the projector. i3projector manual 3303W UM 19
20 Remote Control Using the Remote Control LED Power LED Indicator. Press Power to turn ON/OFF the projector. Exit Zoom + Reset Zoom - Enter Input Auto Four Directional Select Keys Keystone +/- Volume +/- Aspect Menu VGA1 Press Exit to close the OSD menu. Zoom in the display of the projector Reset the adjustments to default setting. Zoom out the display of the projector. Confirm your selected item. Press Source to select an input signal. Automatically synchronizes the projector to the input source. Use to select items or make adjustments to your selection. Correct image keystone caused by tilting the projector. Adjust the Volume. Use this function to choose your desired aspect ratio. Press Menu to launch the on-screen display (OSD) menu. To exit OSD, press Menu again. Press VGA1 to choose VGA IN 1 connector. 20

21 User Installation User Controls controls Using the Remote Control Blank screen HDMI1 HDMI2 VGA2 Video Freeze screen Image Momentarily turns off/on the audio and video. Press HDMI1 to choose HDMI IN 1 connector. Press HDMI2 to choose HDMI IN 2 connector. Press VGA2 to choose VGA IN 2 connector. Press Video to choose Composite video source. Pause the screen image. Press again to resume the screen image. Select the color mode from Bright, PC, Movie, Game and User. i3projector manual 3303W UM 21
22 On-screen Display Menus The Projector has multilingual On-screen Display menus that allow you to make image adjustments and change a variety of settings. How to operate 1. To open the OSD menu, press Menu on the Remote Control or Projector Keypad. 2 When OSD is displayed, use the keys to select any item in the main menu. While making a selection on a particular page, press the or Enter key to enter sub menu. 3. Use the keys to select the desired item and adjust the settings using the key. 4. Select the next item to be adjusted in the sub menu and adjust as described above. 5. Press Enter to confirm, and the screen will return to the main menu. 6. To exit, press Menu again. The OSD menu will close and the projector will automatically save the new settings. Main Menu Sub Menu Settings 22
23 User Installation User Controls controls Picture Color Mode There are many factory presets optimized for various types of images. Use the or button to select the item. Bright: For brightness optimization. PC: For meeting presentation. Movie: For playing video content. Game: For game content. User: Memorize user s settings. Wall Color Use this function to obtain an optimized screen image according to the wall color. You can select from White, Light Yellow, Light Blue, Pink, and Dark Green. Brightness Adjust the brightness of the image. Press the button to darken image. Press the button to darken image. Contrast The Contrast controls the difference between the lightest and darkest parts of the picture. Adjusting the contrast changes the amount of black and white in the image. Press the button to decrease the contrast. Press the button to increase the contrast. i3projector manual 3303W UM 23
24 Sharpness, Saturation and Hue functions are only supported under video mode. Sharpness Adjust the sharpness of the image. Press the button to decrease the sharpness. Press the button to increase the sharpness. Saturation Adjust a video image from black and white to fully saturated color. Press the button to decrease the amount of saturation in the image. Press the button to increase the amount of saturation in the image. Hue Adjust the color balance of red and green. Press the button to increase the amount of green in the image. Press the button to increase the amount of red in the image. Gamma This allows you to adjust the gamma value to obtain the better image contrast for the input. 24
25 User Installation User Controls controls Screen H. Position and V. Position ranges will depend on input source. Aspect Ratio Auto: Keep the image with original width-height ratio and maximize the image to fit native horizontal or vertical pixels. 4:3: The image will be scaled to fit the screen and displayed using a 4:3 ratio. 16:9: The image will be scaled to fit the width of the screen and the height adjusted to display the image using a 16:9 ratio. 16:10: The image will be scaled to fit the width of the screen and the height adjusted to display the image using a 16:10 ratio. (only for SSI 1080p). UWHD: The image will be scaled to fit the width of the screen and the height adjusted to display the image using a 16:6 ratio (only for Ultrawide). Phase Synchronize the signal timing of the display with the graphic card. If the image appears to be unstable or flickers, use this function to correct it. Clock Adjust to achieve an optimal image when there is a vertical flicker in the image. H. Position Press the button to move the image left. Press the button to move the image right. i3projector manual 3303W UM 25
26 V. Position Press the button to move the image down. Press the button to move the image up. Digital Zoom Press the button to reduce the size of an image. Press the button to magnify an image on the projection screen. V Keystone Press the or button to adjust image distortion vertically. If the image looks trapezoidal, this option can help make the image rectangular. Ceiling Mount Front: The image is projected straight on the screen. Front Ceiling: This is the default selection. When selected, the image will turn upside down. Rear: When selected, the image will appear reversed. Rear Ceiling: When selected, the image will appear reversed in upside down position. 26

27 User Installation User Controls controls Setting Language Choose the multilingual OSD menu. Press the or button into the sub menu and then use the or button to select your preferred language. Press on the remote control to finalize the selection. Menu Location Choose the menu location on the display screen. Closed Caption Use this function to enable close caption menu. Select an appropriate closed captions option: Off, CC1, CC2, CC3, and CC4. VGA Output (Standby) Choose On to enable VGA OUT connection. i3projector manual 3303W UM 27
28 LAN (Standby) Choose On to enable LAN connection. Choose Off to disable LAN connection. VGA B (Function) Input: Choose Input to let the VGA port works as a VGA input function. Output: Choose Output to enable the VGA Out function once the projector is powered on. Test Pattern Display a test pattern. Reset Choose Yes to return the parameters on all menus to the factory default settings. 28

29 User Installation User Controls controls Volume Speaker Choose On to enable the speaker. Choose Off to disable the speaker. Line Out Choose On to enable the line out function. Choose Off to disable the line out function. Microphone Choose On to enable the microphone. Choose Off to disable the microphone. Mute Choose On to turn mute on. Choose Off to turn mute off. Volume Press the button to decrease the volume. Press the button to increase the volume. Microphone Volume Press the button to decrease the microphone volume. Press the button to increase the microphone volume. i3projector manual 3303W UM 29


30 Options For successful logo capture, please ensure that the on-screen image does not exceed the projector s native resolution. (WXGA:1280x800). Logo Capture is not available when 3D is enabled. Before active this function, it is recommended that Aspect Ratio is set to the Auto. Logo Use this function to set the desired startup screen. If changes are made they will take effect the next time the projector is powered on. Default: The default startup screen. User: Use stored picture from Logo Capture function. Logo Capture Press button to capture an image of the picture currently displayed on screen. Auto Source On: The projector will search for other signals if the current input signal is lost. Off: The projector will only search current input connection. Input Press button to enable/disable input sources. The projector will not search for inputs that are not selected. 30
31 User Installation User Controls controls Dynamic Black is available when Color Mode is set to Movie. Dynamic Black is not available when 3D or Interactive is enabled. When Dynamic Black is available, Lamp Power Mode selection is not available. Auto Power Off (Min) Sets the countdown timer interval. The countdown timer will start, when there is no signal being sent to the projector. The projector will automatically power off when the countdown has finished (in minutes). Lamp Settings Refer to page 32. High Altitude On: The built-in fans run at high speed. Select this option when using the projector at altitudes above 2500 feet/762 meters or higher. Off: The built-in fans automatically run at a variable speed according to the internal temperature. Filters Remind (Hour) Filters Remind (Hour): Set the filter reminder time. Cleaning Up Remind: Select Yes to reset the dust filter hour counter after replacing or cleaning the dust filter. Information Display the projector information for model name, SNID, source, resolution, software version, and aspect ratio on the screen. i3projector manual 3303W UM 31

32 Options Lamp Settings Lamp Hours Used (Normal) Display the projection time of normal mode. Lamp Hours Used (ECO) Display the projection time of ECO mode. Lamp Power Mode Normal: Normal mode. ECO: Use this function to dim the projector lamp which will lower power consumption and extend the lamp life. Clear Lamp Hours Choose Yes to reset the lamp hour counter after replacing the lamp. 32
33 User Installation User Controls controls 3D Frame Sequential is supported the DLP Link 3D input signals from VGA / HDMI connector. Frame Sequential / Field Sequential are supported the HQFS 3D input signals from Composite/S- Video connector connector. Frame Packing / Side-by- Side(Half) / Top and Bottom are supported from HDMI 1.4a 3D input signals. 3D Auto: When a HDMI 1.4a 3D timing identification signal is detected, the 3D image is selected automatically. Choose On to enable 3D function. Choose Off to disable 3D function. 3D Invert If you see a discrete or overlapping image while wearing DLP 3D glasses, you may need to execute Invert to get best match of left/right image sequence to get the correct image. 3D Format Use this feature to select the 3D format. Options are: Frame Packing, Side-by-Side (Half), Top and Bottom, Frame Sequential, and Field Sequential. 1080p@24 Use this feature to select 96 or 144Hz refresh rate as using 3D glasses in 24 frame packing. i3projector manual 3303W UM 33

34 Interactive The Interactive function is available when displaying graphic source from HDMI/VGA input. Other sources are not supported. If 3D or Dynamic Black function is enabling, Interactive feature is disabling. Interaction function: Please specify that the Interaction function is only for USTi model. The Interaction function is not available in the UST model. Interactive Settings Choose On to enable Interactive function. Choose Off to disable Interactive function. You need to unplug the Mini USB cable that connects NB/desktop with the projector before using the Interactive function. After you complete the Interactive Settings in OSD, use Mini USB cable to connect NB/desktop with the projector. 34
35 User Installation User Controls controls LAN Status Display the network connection status. DHCP Configure the DHCP settings. On: Choose On to let the projector to obtain an IP address automatically from your network. Off: Choose Off to assign IP, Subnet Mask, Gateway, and DNS configuration manually. IP Address Display an IP address. Subnet Mask Display the subnet mask number. Gateway Display the default gateway of the network connected to the projector. DNS Display the DNS number. MAC Address Display the MAC address. i3projector manual 3303W UM 35
36 Group Name Display the group name. Projector Name Display the projector name. Location Display the projector location. Contact Display the contact information. 36

![Based on network web-page for the input-string in [tools] tab, the limitation for Input-Length is in the below list ( space and the other punctuation key included): Category](/docs-images/75/71617660/images/37-1.jpg "Item Input-Length (characters) Crestron Control IP Address 15 IP ID 2 Port 5 Projector Name 10 2. Then choose apply and press button to complete the configuration process. 3.")
 (N/A) IP Address 15 Subnet Mask 15 Default Gateway 15 DNS Server 15 Enabled (N/A) New Password 15 Confirm 15 Enabled (N/A) New")
37 User Installation User Controls controls How to use web browser to control your projector 1. Turn on DHCP to allow a DHCP server to automatically assign an IP, or manually enter the required network information. 4. Based on network web-page for the input-string in [tools] tab, the limitation for Input-Length is in the below list ( space and the other punctuation key included): Category Item Input-Length (characters) Crestron Control IP Address 15 IP ID 2 Port 5 Projector Name Then choose apply and press button to complete the configuration process. 3. Open your web browser and type in IP Address from the OSD LAN screen then the web page will display as below: Projector Network Configuration User Password Admin Password Location 9 Assigned To 9 DHCP (Enabled) (N/A) IP Address 15 Subnet Mask 15 Default Gateway 15 DNS Server 15 Enabled (N/A) New Password 15 Confirm 15 Enabled (N/A) New Password 15 Confirm 15 When you used the projector IP address, you will can not link to your service server. i3projector manual 3303W UM 37


38 When making a direct connection from your computer to the projector Step 1: Find an IP Address ( ) from LAN function of projector. Step 2: Select apply and press Enter button to submit function or press menu key to exit. Step 3: To open Network Connections, click Start, click Control Panel, click Network and Internet Connections, and then click Network Connections. Click the connection you want to configure, and then, under Network Tasks, click Change settings of this connection. Step 4: On the General tab, under This connection uses the following items, click Internet Protocol (TCP/IP), and then click Properties. Step 6: To open Internet Options, click IE web browser, click Internet Options, click the Connections tab and click LAN Settings.... Step 7: The Local Area Network (LAN) Setting dialog box appears. In the Proxy Server area, cancel the Use a proxy server for your LAN check box, then click OK button twice. Step 5: Click Use the following IP address, and type in as below: 1) IP address: ) Subnet mask: ) Default gateway: Step 8: Open your IE and type in the IP address of in the URL then press Enter key. 38
.")

39 User Installation User Controls controls Crestron RoomView Control Tool Crestron RoomView provides a central monitoring station for 250+ control systems on a single Ethernet network (more are possible, the number depends on the combination of IP ID and IP address). Crestron RoomView monitors each projector, including projector s online status, system power, lamp life, network setting and hardware faults, plus any custom attribute as defined by the Administrator. The Administrator can add, delete, or edit room information, contact information and events, which are logged automatically by the software for all users. (Operation UI as following image) 1. Main Screen 2. Edit Room i3projector manual 3303W UM 39


40 3. Edit Attribute 4. Edit Event For further information, please visit: &
41 Accessing Multimedia Files Multimedia This projector supports two methods to project the media files (photos, videos, music, documents) stored on following devices: a. via Wireless dongle (optional) - wirelessly access the media files stored on your mobile phone, tablet PC, notebook, or desktop. b. via USB flash drive - directly access the media files stored in the device. How to access Multimedia mode 1. Plug a wireless dongle or a USB flash drive into the USB connector at the back of projector. E62405SP R 2. Press INPUT on the remote control or on the control panel to turn on the projector. When the Input menu appears, press the keys to select Multimedia and the Enter key to confirm. i3projector manual 3303W UM 41
 or Play Store (Android). 3.")
42 Mobile Display To access the media files stored on your mobile device or tablet PC, do the folllowing: 1. On Multimedia menu, select Mobile/Tablet. 2. On your mobile device or tablet PC, download EZview application App Store (ios) or Play Store (Android). 3. Enable your mobile device or tablet PC WiFi function, and search the AP name listed in the Wi-Fi network list. 4. On the initial connection, you will be prompted to enter a password. Enter the password. 5. Launch EZview application and enter the PCTOOL password. 6. Wait until the connection is established. The media files on your mobile device or tablet PC can be accessed using the projector. 42

43 Multimedia Laptop Display To access the media files stored on your laptop/notebook, do the folllowing: 1. On Multimedia menu, select Laptop. 2. Enable your laptop/notebook WiFi function, and search the AP name listed in the Wi-Fi network list. 3. On the initial connection, you will be prompted to enter a password. Enter the password. 4. Open your web browser and enter the IP address. Then select Wifi on the left side of the screen and install application required by the operation system. 5. Launch EZview application and enter the control code shown on the right-bottom side of the screen. i3projector manual 3303W UM 43
44 6. Wait until the connection is established. The media files on your laptop/notebook can be accessed using the projector. Desktop Display To access the media files stored on your desktop, do the folllowing: 1. On Multimedia menu, select Desktop. 2. Open your web browser and enter the IP address. Then select Wifi on the left side of the screen and install application required by the operation system. 44
45 Multimedia 3. Launch EZview application and enter the control code shown on the right-bottom side of the screen. 4. Wait until the connection is established. The media files on your desktop can be accessed using the projector. USB Storage Display To access the media files stored on your USB flash drive, do the folllowing: Supported File Format Multimedia Category Photo Music Video Document File Format BMP, JPG, PNG MP3, WMA AVI, MOV, MP4, RM, RMVB, DAT, MPG, ISO, TS, MKV, VOB, and WMV WORD, EXCEL, PPT, PDF 1. On Multimedia menu, select USB Disk. 2. Use the keys to select the file category and press the Enter key. i3projector manual 3303W UM 45
46 3. Use the keys to select the file to view/play and press the Enter key to confirm. Configuring Multimedia Settings To change the settings, do the folllowing: 1. On Multimedia menu, select Settings. 46
47 Multimedia 2. Use the keys to select the desired menu option and press the Enter key to enter the submenu. System: Select this option to view the firmware version and update firmware. Video: Select this option to change the display ratio and set the repeat mode. Photo: Select this option to change the display ratio, slideshow pattern, and slideshow duration. Music: Select this option to set the repeat mode. WiFi: Select this option to configure the Wi-Fi connection. 3. Use the keys to select the adjust/select the setting and press the Enter key to confirm. i3projector manual 3303W UM 47
48 Replace the Lamp This projector will automatically detect the service life of its lamp. When service life of the lamp is about to expired, a warning message will be displayed. When you see this message, please contact the local dealer or service center to replace the lamp as soon as possible. Please be sure that the projector has been cooled down for at least 30 minutes before replacement of the lamp. Warning: If the projector is installed on the ceiling, please handle carefully when you open the lamp cover. If the projector is installed on the ceiling, we suggest that you wear safety glasses when replacing the lamp. Always handle carefully to prevent any loose component from falling off the projector. Warning: The lamp Component may be hot! Replace the lamp after it is cooled down! Warning: To reduce the risk of personal injury, please prevent the lamp module from falling down and avoid touching the lamp. If the lamp falls down, it may be broken up, which may cause injury. 48
49 Installation Appendices Apendices The screws on the latern and the lamp shall not be removed. If the lamp cover is not reinstalled on the projector yet, the projector cannot be switched on Do not touch the glass area of the lamp. Oil on hands may cause the lamp to break up. If you accidentally touch the lamp module, please clean it with dry cloth. 1 5 Cleaning procedure for air filter: 1. Press button to power off the projector. 2. Cool down the projector for at least 30 minutes. 3. Pull off the power cable. 4. Press the release button, and pull up the lamp cover of the main components Lift up and remove the lamp cover Remove the 2 screws on the lamp module Pull up the Lamp Handle 4, and pull out the lamp module carefully and slowly. 5 Follow the aforesaid steps in the reverse order to install the lamp module. 8. After the lamp module is replaced, switch on the projector and reset the lamp hour counter. To reset the lamp, please finish the following steps: (i) Press to open the Service menu. (ii) Select Reset Lamp Hours. (iii) Press OK to confirm the selection. i3projector manual 3303W UM 49
50 Installing and Cleaning the Optional Dust Filter We recommend that you clean the dust filter according to the level of dust in the environment. Make sure the dust filter is never obstructed by retaining dust, and always allow enough air to flow through easily. The optional dust filter should be used in dusty environments. If the dust filter is installed, a proper maintenance will prevent overheating and projector malfunction Air Filter Cleaning Procedure: 1. Turn off the projector. 2. Disconnect the power cord. 3. Pull out the lock, and remove the Component of the dust filter, as shown in the illustration Carefully remove the air filter. Then using vacuum to clean or change the filter directly. Follow the aforesaid steps in the reverse order to install the filter. 2 To install the filter, please return to the previous step. 5. Turn on the projector and reset the filter usage counter after the dust filter is replaced. 50
51 Compatibility Modes VGA Analog a. PC Signal Modes VGA Resolution Installation Appendices Apendices V.Frequency [Hz] H.Frequency [KHz] 640x x x x x IBM 720x SVGA 800x x x x x x Apple, Mac II 832x XGA 1024x x x x x Apple, Mac II 1152x SXGA QuadVGA 1280x x x x x SXGA+ 1400x UXGA 1600x i3projector manual 3303W UM 51
52 b. Extended Wide timing Modes WXGA Resolution V.Frequency [Hz] H.Frequency [KHz] 1280x x x x x WSXGA+ 1680x c. Component Signal Modes 480i 576i Resolution 720x480 (1440x480) 720x576 (1440x576) V.Frequency [Hz] H.Frequency [KHz] 59.94(29.97) (25) p 720x p 720x p 1280x p 1280x i 1920x (30) i 1920x (25) p 1920x / p 1920x p 1920x
53 Installation Appendices Apendices HDMI Digital a. PC Signal Modes VGA Resolution V.Frequency [Hz] H.Frequency [KHz] 640x x x x x IBM 720x SVGA 800x x x x x x Apple, Mac II 832x XGA 1024x x x x x Apple, Mac II 1152x SXGA QuadVGA 1280x x x x x SXGA+ 1400x UXGA 1600x i3projector manual 3303W UM 53
54 b. Extended Wide timing Modes WXGA Resolution V.Frequency [Hz] H.Frequency [KHz] 1280x x x x x WSXGA+ 1680x c. HDMI - Video Signal Modes Resolution V.Frequency [Hz] H.Frequency [KHz] 640x480p 640x / i 576i 720x480 (1440x480) 720x576 (1440x576) 59.94(29.97) (25) p 720x p 720x p 1280x p 1280x i 1920x (30) i 1920x (25) p 1920x / p 1920x p 1920x d. HDMI 1.4a mandatory 3D timing- Video Signal Modes Frame Packing Side-by-Side Top-and- Bottom Resolution V.Frequency [Hz] 720p p 59.94/ p 23.98/ i i 59.94/60 720p p 59.94/ p 23.98/24 H.Frequency [KHz] 54
55 RS232 Port Setting Items Installation Appendices Apendices RS232 Commands and Protocol Function List Communication Method Bits per seconds Data bits Parity Stop bits 1 Flow control Method Asynchronous Communication 8 bits None None RS232 shell is grounded. RS232 Signals Connection Computer COM Port (D-Sub 9pin connector) Projector COM Port (D-Sub 9pin connector) i3projector manual 3303W UM 55
56 Command Type Command Description Commands Set List ASCII Code Header Msg ID Command Space Value Read / Write IR / Keypad Power # ~ 1 Write IR / Keypad Emulate Remote # ~ 10 Write Projector Return Comment 0 : Off 1 : On 1 : Up 2 : Left 3 : Right 4 : Down 5 : Menu 6 : Source 7 : Keystone+ 8 : Keystone- 9 : Volume+ 10 : Volume- IR / Keypad Resync # Write VGA only IR / Keypad AV Mute (Blank) # ~ 1 Write IR / Keypad Freeze # ~ 1 Write IR / Keypad Input Source # ~ 6 Write Picture Color Mode # ~ 5 Write 0 : Off 1 : On 0 : Unfreeze 1 : Freeze 1 : VGA 1 2 : VGA 2 3 : HDMI 1 4 : HDMI 2 5 : Video 6 : Multimedia 1 : Bright 2 : PC 3 : Movie 4 : Game 5 : User Picture Brightness # ~ 100 Write Picture Contrast # ~ 100 Write Picture Sharpness # ~ 31 Write Video only Screen Aspect Ratio # ~ 4 Write 1 : Auto 2 : 4:3 3 : 16:9 4 : 16:10 / Ultra Wide Screen Zoom # ~ 1 Write 0 : Zoom- 1 : Zoom+ Screen Keystone # ~ 40 Write 56
57 Installation Appendices Apendices Screen Ceiling Mount # ~ 4 Write 1 : Front 2 : Rear 3 : Front Ceiling 4 : Rear Ceiling Setting Language # ~ 18 Write 1 : English 2 : German 3 : Swedish 4 : French 5 : Arabic 6 : Dutch 7 : Norwegian 8 : Danish 9 : Simplified Chinese 10 : Polish 11 : Korean 12 : Russian 13 : Spanish 14 : Traditional Chinese 15 : Italian 16 : Portuguese 17 : Turkish 18 : Japanese 1 : Top Left 2 : Top Right Setting Menu Location # ~ 5 Write 3 : Center 4 : Bottom Left 5 : Bottom Right Setting Reset # Write Volume Mute # ~ 1 Write 0 : Off 1 : On Volume Volume # ~ 30 Write Volume Microphone Volume # ~ 30 Write Options Auto Power Off # (min) ~ 120 Write Step = 5 Options High Altitude # ~ 1 Write 0 : Off 1 : On Picture Screen Options Color Mode Read Aspect Ratio Read Input Source (curr. src) # Read Okn # Read Okn # Read Okn n : 1/2/3/4/5 = Bright / PC / Movie / Game / User n : 1/2/3/4 = Auto / 4:3 / 16:9 / 16:10 n : 0/1/2/3/4/5/6 = None / VGA1 / VGA2 / HDMI1 / HDMI2 / Video / Multimedia i3projector manual 3303W UM 57
58 Options Sofware Version # Read Okddd ddd : FW version Options Information # Read Okabbbb ccdddee a : Power Status / b : LD Hour / c : Input Source / d : Firmware Version / e : Color mode 58
59 Installation Appendices Apendices List of specifications Item Specification Model i3projector 3303W Resolution WXGA Graphics Card DMD Dimensions 0.65 Projector Technology DLP Projector Lens Fixed Lens, f/2.4 Lighting Technology Philips Smart Energy-Saving Lamp Brightness Typical: 3500 lumens, Minimum: 3150 lumens Typical 1800:1, Mim 1600:1. (Native) Contrast Typical 10000:1 Mim 8000:1. (High Contrast Ratio mode) Supported resolution Up to 60Hz (CEA 861) Throw Ratio 0.27 Weight (KG) 4.5KG Dimensions 383mm(W) x 310mm(D) x 103mm(H) (excluding foot) Light Power 260W Light Life 3000 Hours / 4000 Hours (ECO Mode) Total Power (W) 320W Standby Power (W) <0.5W Audio Output 10W Operating Noise 34dB / 29dB (ECO Mode) Input Terminals VGA and Y/Pb/Pr X1: D-sub female 15 pin terminal (blue) HDMI VGA Audio MIC Composite Video Composite Audio X2: Standard HDMI terminal 1)Support HDMI input with HDMI 1.4a compliant. 2)Supports High bandwidth Digital Content Protection HDCP Standard 1.3 of December 2006 X1: Stereo mini jack X1: Stereo mini jack X1: RCA (yellow) X2: RCA for both left and right i3projector manual 3303W UM 59
60 USB-A Output Terminals Audio VGA Other Terminals Mini USB-B RS232 RJ45 X1: for Pen Drive and provide 5V/0.5A X1: Stereo mini jack(green) X1: D-sub female 15 pin terminal (black) (Support VGA in function) Mini USB type B (for FW download) DB9 Male terminal RJ45 for LAN control Based on IS021118: the nominal value represents average value of the product during mass production. The minimum factory value of the product is 80% of the nominal value. 60
61 Wall Mount Installation Installation Appendices Apendices If you wish to use a third party ceiling mount kit, please ensure the screws used to attach a mount to the projector meet the following specifications: Screw type: M4*4 Minimum screw length: 10mm Please note that damage resulting from incorrect installation will void the warranty. Warning: 1. If you buy a ceiling mount from another company, please be sure to use the correct screw size. Screw size will vary depending on the thickness of the mounting plate. 2. Be sure to keep at least 10 cm gap between the ceiling and the bottom of the projector. 3. Avoid installing the projector near a heat source Unit: mm i3projector manual 3303W UM 61
62 Regulation & Safety Notices This appendix lists the general notices of your projector. FCC notice This device has been tested and found to comply with the limits for a Class B digital device pursuant to Part 15 of the FCC rules. These limits are designed to provide reasonable protection against harmful interference in a residential installation. This device generates, uses and can radiate radio frequency energy and, if not installed and used in accordance with the instructions, may cause harmful interference to radio communications. However, there is no guarantee that interference will not occur in a particular installation. If this device does cause harmful interference to radio or television reception, which can be determined by turning the device off and on, the user is encouraged to try to correct the interference by one or more of the following measures: Reorient or relocate the receiving antenna. Increase the separation between the device and receiver. Connect the device into an outlet on a circuit different from that to which the receiver is connected. Consult the dealer or an experienced radio/television technician for help. Notice: Shielded cables All connections to other computing devices must be made using shielded cables to maintain compliance with FCC regulations. Caution Changes or modifications not expressly approved by the manufacturer could void the user s authority, which is granted by the Federal Communications Commission, to operate this projector. 62
63 Operation conditions Installation Appendices Apendices This device complies with Part 15 of the FCC Rules. Operation is subject to the following two conditions: 1. This device may not cause harmful interference and 2. This device must accept any interference received, including interference that may cause undesired operation. Notice: Canadian users This Class B digital apparatus complies with Canadian ICES-003. Remarque à l intention des utilisateurs canadiens Cet appareil numerique de la classe B est conforme a la norme NMB-003 du Canada. Declaration of Conformity for EU countries EMC Directive 2004/108/EC (including amendments) Low Voltage Directive 2006/95/EC R & TTE Directive 1999/5/EC (if product has RF function) Disposal instructions Do not throw this electronic device into the trash when discarding. To minimize pollution and ensure utmost protection of the global environment, please recycle it. i3projector manual 3303W UM 63
64 AUTHORISED RESELLER
P12 Projector User Guide. mimio.boxlight.com
 P12 Projector User Guide mimio.boxlight.com Table of Contents Table of Contents...2 Usage Notice...3 Safety Information...3 Precautions...4 Introduction...6 Package Overview...6 Product Overview...7 Main
Laser Short Throw Projector User Manual
 Laser Short Throw Projector User Manual Table of Contents Table of Contents...2 Usage Notice...3 Safety Information...3 Precautions...4 Introduction...6 Package Overview...6 Product Overview...7 Main Unit...
Table of Contents Table of Contents... 1 Usage Notice... 2 Introduction... 4 Installation User Controls Appendices...
 Table of Contents Table of Contents... 1 Usage Notice... 2 Precautions... 2 Introduction... 4 Product Features... 4 Package Overview... 5 Product Overview... 6 Main Unit... 6 Control Panel... 7 Connection
Nureva interactive panoramic projector. User manual
 Nureva interactive panoramic projector User manual Contents Input/output connections.... 2 Control panel... 2 Remote control.... 3. Projector on-screen display menu... 4 Picture 5 Screen 7 Settings 8 Volume
Table of Contents. English. Table of Contents... 1 Usage Notice Introduction Installation User Controls Appendices...
 Table of Contents Table of Contents... 1 Usage Notice... 2 Precautions... 2 Introduction... 4 Product Features... 4 Package Overview... 5 Product Overview... 6 Main Unit... 6 Control Panel... 7 Connection
Table of Contents Table of Contents... 1 Usage Notice... 2 Introduction... 4 Installation User Controls Appendices...
 Table of Contents Table of Contents... 1 Usage Notice... 2 Precautions... 2 Introduction... 4 Product Features... 4 Package Overview... 5 Product Overview... 6 Main Unit... 6 Control Panel... 7 Connection
Table of Contents... 1 Usage Notice Introduction Installation Connecting the Projector...10 Powering On/Off the Projector...
 Table of Contents Table of Contents... 1 Usage Notice... 2 Precautions...2 Introduction... 4 Product Features...4 Package Overview...5 Product Overview...6 Main Unit...6 Control Panel...7 Connection Ports...8
USER MANUAL. 27 Full HD Widescreen LED Monitor L27ADS
 USER MANUAL 27 Full HD Widescreen LED Monitor L27ADS TABLE OF CONTENTS 1 Getting Started 2 Control Panel/ Back Panel 3 On Screen Display 4 Technical Specs 5 Care & Maintenance 6 Troubleshooting 7 Safety
P12 Projector User Guide. mimio.boxlight.com
 P12 Projector User Guide mimio.boxlight.com Table of Contents Table of Contents...2 Usage Notice...3 Safety Information...3 Precautions...4 Introduction...6 Package Overview...6 Product Overview...7 Main
USER MANUAL. 22" Class Slim HD Widescreen Monitor L215DS
 USER MANUAL 22" Class Slim HD Widescreen Monitor L215DS TABLE OF CONTENTS 1 Getting Started Package Includes Installation 2 Control Panel / Back Panel Control Panel Back Panel 3 On Screen Display 4 Technical
17 19 PROFESSIONAL LCD COLOUR MONITOR ART
 17 19 PROFESSIONAL LCD COLOUR MONITOR ART. 41657-41659 Via Don Arrigoni, 5 24020 Rovetta S. Lorenzo (Bergamo) http://www.comelit.eu e-mail:export.department@comelit.it WARNING: TO REDUCE THE RISK OF FIRE
Table of Contents Table of Contents... 1 Usage Notice... 2 Introduction... 4 Installation User Controls Appendices...
 Table of Contents Table of Contents... 1 Usage Notice... 2 Precautions... 2 Introduction... 4 Product Features... 4 Package Overview... 5 Product Overview... 6 Main Unit... 6 Control Panel... 7 Connection
USER MANUAL. 27 Full HD Widescreen LED Monitor L270E
 USER MANUAL 27 Full HD Widescreen LED Monitor L270E TABLE OF CONTENTS 1 Getting Started 2 Control Panel/ Back Panel 3 On Screen Display 4 Technical Specs 5 Care & Maintenance 6 Troubleshooting 7 Safety
X6 X7. Reference Guide
 X6 X7 Reference Guide Table of Contents Table of Contents... 1 Usage Notice... 2 Precautions...2 Important Operating Considerations for Safety...4 Introduction... 5 Product Features...5 Package Overview...6
USER MANUAL Full HD Widescreen LED Monitor L215IPS
 USER MANUAL 21.5 Full HD Widescreen LED Monitor L215IPS TABLE OF CONTENTS 1 Getting Started 2 Control Panel/ Back Panel 3 On Screen Display 4 Technical Specs 5 Care & Maintenance 6 Troubleshooting 7 Safety
Table of Contents. English. Usage Notice. Introduction. Installation. User Controls. Appendices. Precautions... 2
 Table of Contents Usage Notice Precautions... 2 Introduction Product Features... 4 Package Overview... 5 Product Overview... 6 Main Unit... 6 Control Panel... 7 Connection Ports... 8 IR Remote Control...
Usage Notice Precautions Follow all warnings, precautions and maintenance as recommended in this user s guide to maximize the life of your unit. Warni
 Table of Contents Table of Contents... 1 Usage Notice... 2 Precautions... 2 Introduction... 4 Product Features... 4 Package Overview... 5 Product Overview... 6 Main Unit... 6 Panel Control... 7 Connection
USER MANUAL Full HD Widescreen LED Monitor L215ADS
 USER MANUAL 21.5 Full HD Widescreen LED Monitor L215ADS TABLE OF CONTENTS 1 Getting Started 2 Control Panel/ Back Panel 3 On Screen Display 4 Technical Specs 5 Care & Maintenance 6 Troubleshooting 7 Safety
USER MANUAL. 28" 4K Ultra HD Monitor L28TN4K
 USER MANUAL 28" 4K Ultra HD Monitor L28TN4K TABLE OF CONTENTS 1 Getting Started 2 Control Panel/ Back Panel 3 On Screen Display 4 Technical Specs 5 Care & Maintenance 6 Troubleshooting 7 Safety Info &
YCbCr (480i/576i) and RGBsync. 4 Press Component to change source to component connec tor. This connector supports YPbPr (480p/576p/720p/1080i)
 and RGBsync. 4 Press Component to change source to component connec tor. This connector supports YPbPr (480p/576p/720p/1080i)") Introduction Product Features This product is an XGA single chip 0.7 DLP TM projector. Outstanding features include: u True XGA, 1024 x 768 addressable pixels u Single chip DLP TM technology u NTSC3.58/NTSC4.43/PAL/SECAM
Introduction Product Features This product is an XGA single chip 0.7 DLP TM projector. Outstanding features include: u True XGA, 1024 x 768 addressable pixels u Single chip DLP TM technology u NTSC3.58/NTSC4.43/PAL/SECAM
1... English. Table of Contents... 1 Usage Notice Introduction Installation User Controls Appendices Precautions...
 Table of Contents Table of Contents... 1 Usage Notice... 2 Precautions... 2 Introduction... 4 Product Features... 4 Package Overview... 5 Product Overview... 6 Main Unit... 6 Panel Control... 7 Connection
HD Digital MPEG2 Encoder / QAM Modulator
 HD Digital MPEG2 Encoder / QAM Modulator HDMI In QAM Out series Get Going Guide ZvPro 800 Series is a one or two-channel unencrypted HDMI-to-QAM MPEG 2 Encoder / QAM Modulator, all in a compact package
LCD VALUE SERIES (32 inches)
") LCD VALUE SERIES (32 inches) http://www.orionimages.com All contents of this document may change without prior notice, and actual product appearance may differ from that depicted herein 1. SAFETY INSTRUCTION
LCD VALUE SERIES (32 inches) http://www.orionimages.com All contents of this document may change without prior notice, and actual product appearance may differ from that depicted herein 1. SAFETY INSTRUCTION
USER MANUAL Full HD Widescreen LED Monitor L236VA
 USER MANUAL 23.6 Full HD Widescreen LED Monitor L236VA TABLE OF CONTENTS 1 Getting Started 2 Control Panel/ Back Panel 3 On Screen Display 4 Technical Specs 5 Care & Maintenance 6 Troubleshooting 7 Safety
HD Digital MPEG2 Encoder / QAM Modulator
 HD Digital MPEG2 Encoder / QAM Modulator YPrPb VGA In QAM Out series Get Going Guide ZvPro 600 Series is a one or two-channel Component or VGA-to-QAM MPEG 2 Encoder/ Modulator, all in a compact package
HD Digital MPEG2 Encoder / QAM Modulator Get Going Guide
 series HD Digital MPEG2 Encoder / QAM Modulator Get Going Guide HDb2640 HDb2620 HDb2540 HDb2520 The HDbridge 2000 Series is a combination HD MPEG 2 Encoder and frequency-agile QAM Modulator, all in a 1RU
EW400. Plug and Play Projection. Native WXGA, 4000 ANSI Lumens. USB plug and play presenting. Up to 6000 hours lamp life and 70% energy saving
 EW400 Plug and Play Projection Native WXGA, 4000 ANSI Lumens USB plug and play presenting Up to 6000 hours lamp life and 70% energy saving Crestron RoomView RJ45 control and monitoring EW400 Stylish yet
Product, Compact Projection EX632. Native XGA. Up to 6000 hours lamp life. Crestron RoomView RJ45 control and monitoring.
 EX632 Product, Compact Projection Native XGA Up to 6000 hours lamp life Crestron RoomView RJ45 control and monitoring 3500 ANSI lumens EX632 Stylish yet easy to use, the EX632 is a great XGA multi functional
MONOPRICE. 27" UHD IPS 4K Ultra Slim Aluminum Monitor. Quick User's Guide P/N 24658
 MONOPRICE 27" UHD IPS 4K Ultra Slim Aluminum Monitor P/N 24658 Quick User's Guide SAFETY WARNINGS AND GUIDELINES Please read this entire manual before using this device, paying extra attention to these
EH320USTi. 1080p ultra short throw interactive projection. TouchBeam finger touch interactive. Bright projection 4000 ANSI lumens
 EH320USTi 1080p ultra short throw interactive projection TouchBeam finger touch interactive Bright projection 4000 ANSI lumens Full HD 1080p resolution, 2x HDMI input and 16W audio Crestron RoomView RJ45
TFT LCD MONITOR USER MANUAL. L80AP and L101AP
 TFT LCD MONITOR USER MANUAL L80AP - 8.0 and L101AP - 10.1 Table Of Contents Table of contents/ Warning.... 2 Precautions...3 About this user manual and products / Items included in the delivery..... 4
W320UST. Ultra Short Throw Projector. Bright projection 4000 ANSI lumens. WXGA resolution, 20,000:1 contrast ratio. 2x HDMI input and 16W audio
 W320UST Bright projection 4000 ANSI lumens Ultra Short Throw Projector WXGA resolution, 20,000:1 contrast ratio 2x HDMI input and 16W audio Crestron RoomView RJ45 control and monitoring W320UST The W320UST,
Precautions About the Product... 3 Package Overview... 4
 English 1 Table of Contents Usage Notice Precautions... 2 Introduction About the Product... 3 Package Overview... 4 Installation Product Overview... 5 Connecting the Projection Display... 8 Powering On/Off
Table of Contents... 1 Usage Notice... 2 Precautions... 2 Introduction... 4 Product Features... 4 Package Overview... 5 Product Overview...
 T l charg sur www.lampe-videoprojecteur.info Table of Contents Table of Contents... 1 Usage Notice... 2 Precautions... 2 Introduction... 4 Product Features... 4 Package Overview... 5 Product Overview...
AUTO - SCANNING WITH DIGITAL CONTROL LCD COLOR MONITOR FS-L1903C. User manual (Rev.01) SMITHS HEIMANN
 SMITHS HEIMANN") AUTO - SCANNING WITH DIGITAL CONTROL LCD COLOR MONITOR FS-L1903C User manual (Rev.01) SMITHS HEIMANN www.smithsdetection.com Table of Contents Safety Instructions... 5 Accessories... 8 Power Connections...
AUTO - SCANNING WITH DIGITAL CONTROL LCD COLOR MONITOR FS-L1903C User manual (Rev.01) SMITHS HEIMANN www.smithsdetection.com Table of Contents Safety Instructions... 5 Accessories... 8 Power Connections...
PXL2760MW LED LCD Monitor
 PXL2760MW LED LCD Monitor USER'S GUIDE www.planar.com Content Operation Instructions...1 Safety Precautions...2 Package Overview...3 First Setup...4 Front View of the Product...5 Rear View of the Product...6
X320USTi. Ultra Short Throw Interactive Projection. Bright projection 4000 ANSI lumens. TouchBeam finger touch interactive
 X320USTi Bright projection 4000 ANSI lumens Ultra Short Throw Interactive Projection TouchBeam finger touch interactive XGA resolution, 2x HDMI input and 16W audio Crestron RoomView RJ45 control and monitoring
EH320UST. 1080p Ultra Short Throw Projector. Bright projection 4000 ANSI lumens. Full HD 1080p resolution, 20,000:1 contrast ratio
 EH320UST Bright projection 4000 ANSI lumens 1080p Ultra Short Throw Projector Full HD 1080p resolution, 20,000:1 contrast ratio 2x HDMI input and 16W audio Crestron RoomView RJ45 control and monitoring
22" Touchscreen LED Monitor USER'S GUIDE
 22" Touchscreen LED Monitor USER'S GUIDE Content Operation Instructions...1 Unpacking Instructions...2 Safety Precautions...2 Front View of the Product...3 Rear View of the Product...4 Quick Installation...5
X316ST. Short throw projection. Bright projection 3400 ANSI lumens. XGA resolution, 20,000:1 contrast ratio, HDMI input
 X316ST Short throw projection Bright projection 3400 ANSI lumens XGA resolution, 20,000:1 contrast ratio, HDMI input Low ownership costs - up to 8,000 hours² lamp life Crestron RoomView RJ45 control and
USER MANUAL. 27" 2K QHD LED Monitor L27HAS2K
 USER MANUAL 27" 2K QHD LED Monitor L27HAS2K TABLE OF CONTENTS 1 Getting Started 2 Control Panel/ Back Panel 3 On Screen Display 4 Technical Specs 5 Troubleshooting 6 Safety Info & FCC warning 1 GETTING
28 4K LED monitor. User Manual M284K
 28 4K LED monitor User Manual M284K CONTENTS Safety Information... 2 What s included..... 4 Getting Started....... 8 Troubleshooting.... 14 Specification.... 15 2 of 15 SAFETY INFORMATION Read these instructions
PLL1920M LED LCD Monitor
 PLL1920M LED LCD Monitor USER'S GUIDE www.planar.com Content Operation Instructions...1 Safety Precautions...2 First Setup...3 Front View of the Product...4 Rear View of the Product...5 Installation...6
2.0 Wall Mount TV Soundbar Instruction Manual
 8010275 2.0 Wall Mount TV Soundbar Instruction Manual Read all of the instructions before using this soundbar and keep the manual in a safe place for future reference. Safety Information CA UT IO N RISK
PLL2710W LED LCD Monitor
 PLL2710W LED LCD Monitor USER'S GUIDE www.planar.com Content Operation Instructions...1 Safety Precautions...2 Package Overview...3 First Setup...4 Front View of the Product...5 Rear View of the Product...6
Table of Contents Table of Contents... 1 Usage Notice... 2 Introduction... 4 Installation User Controls Appendices...
 Table of Contents Table of Contents... 1 Usage Notice... 2 Precautions... 2 Introduction... 4 Product Features... 4 Package Overview... 5 Product Overview... 6 Main Unit... 6 Control Panel... 7 Connection
X320UST. Ultra Short Throw Projector. Bright projection 4000 ANSI lumens. XGA resolution, 20,000:1 contrast ratio. 2x HDMI input and 16W audio
 X320UST Ultra Short Throw Projector Bright projection 4000 ANSI lumens XGA resolution, 20,000:1 contrast ratio 2x HDMI input and 16W audio Crestron RoomView RJ45 control and monitoring X320UST The X320UST,
Large shadow-free images from a short distance, powerful 16W built-in speaker
 W319USTir Ultra Short Throw Interactive Projection IR pen interactive technology WXGA, super bright 3300 lumens Large shadow-free images from a short distance, powerful 16W built-in speaker Multiple connections
Large shadow-free images from a short distance, powerful 16W built-in speaker
 W319USTi TouchBeam finger touch interactive Ultra Short Throw Interactive Projection WXGA, super bright 3300 lumens Large shadow-free images from a short distance, powerful 16W built-in speaker Multiple
DCL9AW. User Manual. English
 DCL9AW User Manual English PRECAUTIONS Information for users applicable in European Union countries 1 Information for users applicable in United States of America 1 Installation 1 Power connection 1 Maintenance
Precautions About the Product... 4 Package Overview Product Overview... 6 Start Your Installation... 8
 2 Table of Contents Usage Notice Precautions... 3 Introduction About the Product... 4 Package Overview... 5 Installation Product Overview... 6 Start Your Installation... 8 User Controls User Control Overview...
EH320USTi. 1080p ultra short throw interactive projection. TouchBeam finger touch interactive. Bright projection 4000 ANSI lumens
 EH320USTi TouchBeam finger touch interactive 1080p ultra short throw interactive projection Bright projection 4000 ANSI lumens Full HD 1080p resolution, 2x HDMI input and 16W audio Crestron RoomView RJ45
W402. Widescreen network projector. Bright projection 4500 ANSI lumens. WXGA resolution, 20,000:1 contrast ratio, HDMI input
 W402 Widescreen network projector Bright projection 4500 ANSI lumens WXGA resolution, 20,000:1 contrast ratio, HDMI input Crestron RoomView RJ45 control and monitoring Lightweight and portable, carry bag
Table of Contents. Table of Contents...1 Usage Notice...2. Appendices Installation User Controls English
 Table of Contents Table of Contents...1 Usage Notice...2 Safety Information...2 Precautions...3 Eye Safety Warnings...5 Product Features...5 Introduction...6 Package Overview...6 Product Overview...7 Main
DX346. Bright projection. Bright projection 3000 ANSI lumens. XGA resolution, 18,000:1 contrast ratio, HDMI input
 DX346 Bright projection Bright projection 3000 ANSI lumens XGA resolution, 18,000:1 contrast ratio, HDMI input Low ownership costs - up to 10,000 hours² lamp life Lightweight and portable DX346 Simple
Table of Contents. Table of Contents...1 Usage Notice...2. Appendices Installation User Controls English
 Table of Contents Table of Contents...1 Usage Notice...2 Safety Information...2 Precautions...3 Eye Safety Warnings...5 Product Features...5 Introduction...7 Package Overview...7 Product Overview...8 Main
X319UST. Ultra Short Throw Projector. Powerful 16W built-in speaker. XGA, super bright 3200 lumens. Large shadow-free images from a short distance
 X319UST Ultra Short Throw Projector Powerful 16W built-in speaker XGA, super bright 3200 lumens Large shadow-free images from a short distance Multiple connections including two HDMI inputs, RJ45 control
EH341. Full HD 1080p, Bright and Portable. Bright vivid colours 3500 ANSI lumens. High contrast - 20,000:1 contrast ratio. Full HD 1080p image quality
 EH341 Bright vivid colours 3500 ANSI lumens Full HD 1080p, Bright and Portable High contrast - 20,000:1 contrast ratio Full HD 1080p image quality Easy connectivity - 2x HDMI and MHL support and built-in
THD601DC Set-top box
 THD601DC Set-top box Contents 1. Safety... 1 2. Appearance... 2 3. Rear Panel Connection... 3 4. Remote... 4 5 First Time Set-Up... 7 6. Network Settings... 8 6.1 Available Networks and Checking Current
EH320UST. 1080p Ultra Short Throw Projector. Bright projection 4000 ANSI lumens. Full HD 1080p resolution, 20,000:1 contrast ratio
 EH320UST 1080p Ultra Short Throw Projector Bright projection 4000 ANSI lumens Full HD 1080p resolution, 20,000:1 contrast ratio 2x HDMI input and 16W audio Crestron RoomView RJ45 control and monitoring
W316ST. Short throw projection. Bright projection 3600 ANSI lumens. WXGA resolution, 20,000:1 contrast ratio, HDMI input
 W316ST Short throw projection Bright projection 3600 ANSI lumens WXGA resolution, 20,000:1 contrast ratio, HDMI input Low ownership costs - up to 8,000 hours² lamp life Crestron RoomView RJ45 control and
Operating Instructions
 Operating Instructions SDI Input board Model No. AV-HS04M1 РУССКИЙ FRANÇAIS DEUTSCH ENGLISH ESPAÑOL ITALIANO Before operating this product, please read the instructions carefully and save this manual for
PLL2210MW LED Monitor
 PLL2210MW LED Monitor USER'S GUIDE www.planar.com Content Operation Instructions...1 Safety Precautions...2 First Setup...3 Front View of the Product...4 Rear View of the Product...5 Quick Installation...6
MONOPRICE. 27" WQHD Monitor. User's Manual P/N 24659
 MONOPRICE 27" WQHD Monitor P/N 24659 User's Manual CONTENTS SAFETY WARNINGS AND GUIDELINES... 3 FEATURES... 4 CUSTOMER SERVICE... 4 PACKAGE CONTENTS... 4 PRODUCT OVERVIEW... 5 Front... 5 Rear... 5 Rear
Dell 1510X Projector. User s Guide
 Dell 1510X Projector User s Guide Notes, Notices, and Cautions NOTE: A NOTE indicates important information that helps you make better use of your projector. NOTICE: A NOTICE indicates either potential
DALLAS. User Manual. 151 NE State Hwy 300, Ste A Belfair, WA
 DALLAS User Manual 151 NE State Hwy 300, Ste A Belfair, WA 98528 360.464.2119 www.boxlight.com Table of Contents Table of Contents 1 Usage Notice 2 Precautions... 2 Regulation & Safety Notices... 4 Introduction
FCC Compliance Statement
 FCC Compliance Statement This device complies with part 15 of the FCC Rules. Operation is subject to the following two conditions: 1. This device may not cause harmful interference, and 2. This device
DLP PROJECTOR FEATURES USER S GUIDE OUTLINE. 1. High Brightness. 2. High Resolution. 3. Compact Size, Feather Weight for Portability
 DLP PROJECTOR USER S GUIDE Thank you for purchasing the DLP TM Projector. Please read this user s guide to ensure correct use of the device. Save this user s guide for future reference. OUTLINE This DLP
HD Digital Set-Top Box Quick Start Guide
 HD Digital Set-Top Box Quick Start Guide Eagle Communications HD Digital Set-Top Box Important Safety Instructions WARNING TO REDUCE THE RISK OF FIRE OR ELECTRIC SHOCK, DO NOT EXPOSE THIS PRODUCT TO RAIN
Optoma DLP Projector
 Optoma DLP Projector Specification: Native Resolution XGA 1024 x 768 Display Technology Single 0.55 XGA DC3 DMD chip DLP Technology by Texas Instruments Brightness - BRIGHT mode 3000 ANSI Lumens Contrast
Warning...1 Safety Precaution...3
 PL1910W Contents Preface...1 Warning...1 Safety Precaution......3 Installation...4 Introduction...4 Features...4 Unpacking...5 Attaching the Base...6 Removing the Base...7 Preparing The Monitor For Wall-Mounting...8
Evolution Digital HD Set-Top Box Important Safety Instructions
 Evolution Digital HD Set-Top Box Important Safety Instructions 1. Read these instructions. 2. Keep these instructions. 3. Heed all warnings. 4. Follow all instructions. 5. Do not use this apparatus near
LA1500R USER S GUIDE.
 LA1500R USER S GUIDE www.planar.com The information contained in this document is subject to change without notice. This document contains proprietary information that is protected by copyright. All rights
USER MANUAL CAPTIVA DUW350S/DHD400S
 USER MANUAL 020-000816-01 CAPTIVA DUW350S/DHD400S The CD included with this printed manual contains an electronic copy in English. Please read all instructions before using or servicing this product. Le
PL2410W LCD Monitor USER'S GUIDE.
 PL2410W LCD Monitor USER'S GUIDE www.planar.com Content Operation Instructions...1 Safety Precautions...2 First Setup...3 Front View of the Product...4 Rear View of the Product...5 Quick Installation...6
USER MANUAL. VP-435 Component / UXGA HDMI Scaler MODEL: P/N: Rev 13
 KRAMER ELECTRONICS LTD. USER MANUAL MODEL: VP-435 Component / UXGA HDMI Scaler P/N: 2900-000262 Rev 13 Contents 1 Introduction 1 2 Getting Started 2 2.1 Achieving the Best Performance 2 2.2 Safety Instructions
PXL2470MW LED LCD Monitor
 PXL2470MW LED LCD Monitor USER'S GUIDE www.planar.com Content Operation Instructions...1 Unpacking Instructions...2 Safety Precautions...2 Package Overview...3 First Setup...4 Front View of the Product...5
CAUTION RISK OF ELECTRIC SHOCK NO NOT OPEN
 Evolution Digital HD Set-Top Box Important Safety Instructions 1. Read these instructions. 2. Keep these instructions. 3. Heed all warnings. 4. Follow all instructions. 5. Do not use this apparatus near
Table of Contents English. Table of Contents... 1 Usage Notice... 2
 Table of Contents Table of Contents... 1 Usage Notice... 2 Precautions... 2 Introduction... 4 Product Features... 4 Package Overview... 5 Product Overview... 6 Main Unit... 6 Control Panel... 7 Connection
CP-255ID Multi-Format to DVI Scaler
 CP-255ID Multi-Format to DVI Scaler Operation Manual DISCLAIMERS The information in this manual has been carefully checked and is believed to be accurate. Cypress Technology assumes no responsibility
DC162 Digital Visualizer. User Manual. English - 1
 DC162 Digital Visualizer User Manual English - 1 Table of Contents CHAPTER 1 PRECAUTIONS... 5 CHAPTER 2 PACKAGE CONTENT... 7 CHAPTER 3 PRODUCT OVERVIEW... 8 3.1 PRODUCT INTRODUCTION... 8 3.2 I/O CONNECTION...
Winmate Communication INC.
 20.1 Military Grade Display Model: R20L100-RKA2ML User s Manual Winmate Communication INC. May, 2011 1 IMPORTANT SAFETY INSTRUCTIONS Please read these instructions carefully before using the product and
S313. Bright and Portable. Bright projection 3000 ANSI Lumens. Easy connectivity - HDMI input, 2W speaker
 S313 Bright and Portable Bright projection 3000 ANSI Lumens Easy connectivity - HDMI input, 2W speaker Low ownership costs - up to 10,000 hours² lamp life Lightweight and portable, Carry bag included S313
Quick Reference Guide
 Multimedia Projector Quick Reference Guide MODEL 103-011100-01 Projection lens is optional. English Use this book as a reference guide when setting up the projector. For detailed information about installation,
EH415ST. A compact and versatile package. Bright 1080p projection ANSI Lumens. Short throw lens - 100" image from just over a metre away
 EH415ST Bright 1080p projection - 3500 ANSI Lumens A compact and versatile package Short throw lens - 100" image from just over a metre away Support for Crestron, Extron, AMX, PJ-Link and Telnet commands
MONOPRICE. Blackbird 4K HDBaseT Extender Kit. User's Manual P/N 21792
 MONOPRICE Blackbird 4K HDBaseT Extender Kit P/N 21792 User's Manual SAFETY WARNINGS AND GUIDELINES Please read this entire manual before using this device, paying extra attention to these safety warnings
Camera 220C Document Camera User s Guide
 Camera 220C Document Camera User s Guide #401-220C-00 Table of Contents TABLE OF CONTENTS... 0 TABLE OF CONTENTS... 1 COPYRIGHT INFORMATION... 2 CHAPTER 1 PRECAUTIONS... 3 CHAPTER 2 PACKAGE CONTENT...
PX1710M LCD Monitor USER S GUIDE
 PX1710M LCD Monitor USER S GUIDE www.planar.com The information contained in this document is subject to change without notice. This document contains proprietary information that is protected by copyright.
MONOPRICE. BitPath AV HDMI Extender over Single Cat6 Cable, 120m. User's Manual P/N 16228
 MONOPRICE BitPath AV HDMI Extender over Single Cat6 Cable, 120m P/N 16228 User's Manual SAFETY WARNINGS AND GUIDELINES Please read this entire manual before using this device, paying extra attention to
Table of Contents. Table of Contents...1 Usage Notice...2. Appendices Installation User Controls English
 Table of Contents Table of Contents...1 Usage Notice...2 Safety Information...2 Precautions...3 Product Features...5 Introduction...6 Package Overview...6 Product Overview...7 Main Unit... 7 Control Panel...
OPERATING INSTRUCTIONS TOM-0431IP
 OPERATING INSTRUCTIONS TOM-0431IP Table of Contents FCC Information -------------------------------------------------------------------- 2 Safety and Environmental Precautions ------------------------------------------------
S331. Digital only. Bright SVGA projector 3200 ANSI lumens. Accurate colours - srgb. Easy connectivity - 2x HDMI, MHL, 2W speaker
 S331 Digital only Bright SVGA projector 3200 ANSI lumens Accurate colours - srgb Easy connectivity - 2x HDMI, MHL, 2W speaker Lightweight and portable S331 Project bright vibrant presentations effortlessly
SAFETY WARNINGS AND GUIDELINES
 SAFETY WARNINGS AND GUIDELINES Please read this manual thoroughly, paying extra attention to these safety warnings and guidelines: Do not expose this monitor to water or moisture of any kind. Do not handle
DU400. High resolution, compact and powerful. Bright WUXGA projector 4000 ANSI Lumens. Installation flexibility Vertical lens shift and 1.
 DU400 High resolution, compact and powerful Bright WUXGA projector 4000 ANSI Lumens Installation flexibility Vertical lens shift and 1.6x zoom Ultimate Control - Full support for Crestron, Extron, AMX,
Optoma EH1060 / EH1060i RS232 Command Table.
 Optoma EH1060 / EH1060i RS232 Command Table. Baud Rate 9600 Data Bits 8 Parity Check None Stop Bits 1 Flow Control UART16550 FIFO None Disable Lead Code Projector ID Command ID space variable carriage
DISTRIBUTION AMPLIFIER
 MANUAL PART NUMBER: 400-0045-005 DA1907SX 1-IN, 2-OUT VGA/SVGA/XGA/UXGA DISTRIBUTION AMPLIFIER USER S GUIDE TABLE OF CONTENTS Page PRECAUTIONS / SAFETY WARNINGS... 2 GENERAL...2 GUIDELINES FOR RACK-MOUNTING...2
W416. HD ready, compact and powerful. Bright WXGA projector 4500 ANSI Lumens. Installation flexibility Vertical lens shift and 1.
 W416 Bright WXGA projector 4500 ANSI Lumens HD ready, compact and powerful Installation flexibility Vertical lens shift and 1.6x zoom Ultimate Control - Full support for Crestron, Extron, AMX, PJ-Link