DANGER WARNING CAUTION
|
|
|
- Allyson Merilyn Chase
- 6 years ago
- Views:
Transcription
1 N9326
2 Important! DANGER To prevent electric shock, do not immerse in water; wipe clean with damp cloth. WARNING To prevent strangulation with power cord, never place transmitter within reach of child. CAUTION This product cannot replace responsible adult supervision. 2
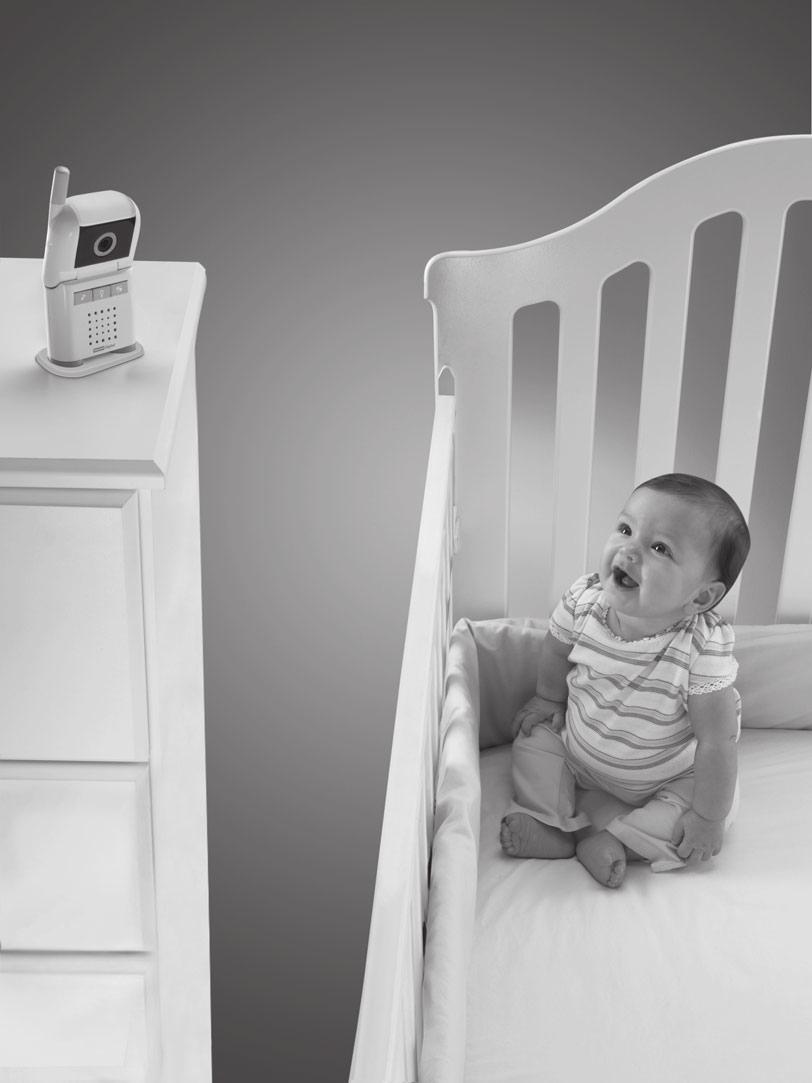
3 Important! For proper setup and use, please read these instructions. Please keep this instruction sheet for future reference, as it contains important information. Transmitter operates on AC current. Receiver operates on AC current (use enclosed AC adaptor) or 3.6V NiMH rechargeable battery pack (included). Before first time use, charge the rechargeable battery pack for four hours. Adult assembly is required for wall mounting. Tools needed for assembly: electric drill, ¼" drill bit, hammer, Phillips screwdriver (tools not included). This product is not intended to be used as a medical monitor and its use should not replace adult supervision. Test sound/audio reception of receiver before first-time use and whenever you change location of the transmitter. Adults Note: Periodically examine this product for damage to the cord, housing or other parts that may result in the risk of fire, electric shock or injury. If the product is damaged, do not use it. Never use extension cords with the AC adaptor. Never use transmitter or receiver near water (i.e. bathtub, sink, wet basement, etc.). Always use transmitter and receiver where there is adequate ventilation. To prevent overheating, keep away from heat sources such as radiators, heat registers, direct sunlight, stoves, amplifiers, fire, excessive heat or other appliances that produce heat. Fisher-Price does not recommend the use of two monitors in one house. Always remember that you are using public airwaves when using your monitor. Conversations, even from rooms near your transmitter, may broadcast to other nursery monitors, radios, cordless telephones or scanners outside your home. To protect the privacy of your home, always turn off the transmitter when not in use. Do not connect to more than the recommended number of power supplies. The AC adaptor is not a toy. Disconnect the AC adaptor from the receiver before cleaning. If this product begins to operate erratically, you may need to reset the electronics. Turn the transmitter power/volume dial off and then back on; press the receiver main power/menu button to turn power off and press again to turn power back on. Carrier Frequency: 2.4 Ghz Product features and decoration may vary from photos. 3


4 Features Receiver 4 Transmitter AC Adaptor/Charger Transmitter Tabletop Stand 4
5 Features Main Power/Menu Button Press to turn receiver main power ON; press again for the main menu; press and hold for approximately five seconds to turn main power OFF. Power L.E.D. Turns on when receiver power is ON. Menu Navigation/Volume Control Button Press up, down or side arrows to scroll through menu options. When the menu is not on the screen, press the side arrows to adjust volume. 4 Speaker Video Screen Video Screen On/Off Button Press to turn the video screen on; press again to turn it off. Sound Lights Shows you baby's sounds. DC Input Jack Insert the AC adaptor/charger pin to use AC power/charge the battery. Camera Lens 10 Power/Volume Dial Rotate to turn transmitter power ON and adjust volume to a comfortable level for baby. 11 Microphone Music, Sounds and Night Light Buttons Music Choose from 5 lullaby songs. Sounds Play nature sounds. Night Light Turn on night light for baby. Power L.E.D. Turns on when transmitter power is ON. Night Light Lights room with a soft glow. 5
6 Wall Mount Parts Wall Mount Bracket Cord Wrap Base Stand Fasteners Shown Actual Size Wall Anchor 4 #8 x 2" Screw 4 6
7 Charging the Battery (Inside the Receiver) DC Input Jack IMPORTANT! Fully charge the receiver (with battery pack inside) for four hours before first-time use. Use only the included AC adaptor charger! Do not use any other adaptor charger. Fit the AC adaptor charger pin into the DC input jack on the receiver. Plug the AC adaptor charger into a standard wall outlet. Notes: If power flow to the wall outlet is controlled by a switch, make sure the switch is ON. Use the AC adaptor charger only in a wall outlet. Do not plug the AC adaptor charger into a ceiling outlet. To connect to a supply that is not in the United States, use an adaptor (not included and sold separately) with the proper configuration for the power outlet. If you are monitoring baby while charging the battery pack, you will see the charging icon on the video screen. 7
 and each time you change location of use.")

8 Testing Sound/Video Reception Test transmitter transmission and receiver reception before installing the wall mount bracket and cord wrap (if used) and each time you change location of use. Power Dial Radio Place the transmitter in the room where you intend to use it. Point the transmitter toward the area you will be monitoring. Adjust the camera angle by rotating the top portion of the transmitter up or down. Turn the power/volume dial ON. Turn on a radio. 8
9 Testing Sound/Video Reception Sound Lights Main Power/Menu Select Button Place the receiver in the room where you intend to use it. Press the main power/menu select button on the front of the receiver to turn power ON. Adjust the receiver location for best reception. When sound is picked up by the receiver, the sound lights will turn on. - One or two lights indicate quieter sounds. - Three or more lights indicate louder sounds. If you cannot see an image on the receiver screen, adjust the transmitter location or camera angle. 9
10 Transmitter Wall Mount Installation WARNING To prevent strangulation with power cord, never place transmitter within reach of child. IMPORTANT! Test the reception of the monitor before installing the wall mount bracket and cord wrap. Use the assistance of one adult to hold the transmitter against the wall in the spot you want to install it. Then, test the reception of the receiver in several locations around your house. Please refer to the Testing Sound/Video Reception section of these instructions. 10
11 Transmitter Wall Mount Installation 6 ft. To provide the greatest viewing range, we recommend you install the wall mount bracket at least six feet from the floor. Make sure the camera lens does not have an obstructed view of your baby. Adjust the camera up or down. Allow adequate ventilation of the transmitter when mounted. Do not mount the transmitter above heating vents or other heat producing sources. Do not mount the transmitter where it can receive direct sunlight. Install the wall mount bracket on a flat section of the wall. The wall mount bracket cannot be corner mounted. Make sure the AC adaptor will reach a wall outlet before installing the wall mount bracket. To prevent entanglement, never use an extension cord. 11
12 Transmitter Wall Mount Installation 1 Wall Mount Bracket Hold the wall mount bracket against the wall in the location you want to install it. Make sure the wall mount bracket is straight. Using a pencil, make a mark on the wall inside the upper hole and lower slot on the wall mount bracket. Set the wall mount bracket aside. 2 Using a ¼" drill bit, drill one hole through each pencil mark you made on the wall. 12
13 Transmitter Wall Mount Installation Wall Anchor 3 Fit a wall anchor into each of the drilled holes. Tap each wall anchor lightly with a hammer until the ends of each wall anchor are even with the surface of the wall. 4 Align the holes on the wall mount bracket with the wall anchors. Insert two screws into the holes in the wall mount bracket and tighten with a Phillips screwdriver. Do not over-tighten. 13
14 Transmitter Wall Mount Installation Wall Mount Bracket Cord Wrap 5 Position the cord wrap against the wall, so that it is centered below the wall mount bracket and as close to the floor as possible. Move the cord wrap approximately ½" towards the wall outlet. Using a pencil, make a mark on the wall inside both holes in the cord wrap. Set the cord wrap aside. 14
15 Transmitter Wall Mount Installation 6 Using a ¼" drill bit, drill one hole through each pencil mark you made on the wall. Wall Anchor 7 Place a wall anchor into each of the drilled holes. Tap each wall anchor lightly with hammer until the ends of each wall anchor are even with the surface of the wall. 15
16 Transmitter Wall Mount Installation Cord Wrap 8 Align the holes on the cord wrap with the wall anchors. Insert two screws into the holes in the cord wrap and tighten with a Phillips screwdriver. Do not over-tighten. Transmitter Slot Base Stand Slot 9 Wall Mount Bracket Put the transmitter into the base stand. Fit the transmitter cord into the slot in the base stand and the wall mount bracket. Slide the stand into the slot on the wall mount bracket. 16
17 Transmitter Wall Mount Installation 6 ft. Groove 10 Cord Wrap IMPORTANT! Make sure the cord is taught between the transmitter and cord wrap. Excess cord can form loops or extend into the crib and present a strangulation hazard. Extend the transmitter cord straight down the wall to the cord wrap. Wrap the transmitter cord around the cord wrap, leaving just enough to reach the wall outlet. Make sure there is no slack in the transmitter cord. Thread the transmitter cord through the groove in the front of the cord wrap. Make sure the transmitter cord is fully inserted in the groove. Plug the transmitter cord into the wall outlet. 17
18 Setup/On Screen Displays MAIN POWER/ MENU SELECT Main Menu First, turn both transmitter and receiver power ON. Then press the main power/ menu select button on the receiver to see the main menu. Press the up, down or side arrows to scroll through menu options. As you scroll, the menu choices highlight and blink on the screen. Press the main power/menu select to choose: Music Sounds Night Light Voice Activated Screen Contrast/Brightness Turn Main Menu Off Hint: The main menu turns off if you do not scroll through choices or make a selection within approximately 15 seconds. Simply press the main power/menu select button again to return to the main menu. You can turn on music or sounds and a night light for baby. You cannot turn on both music and sounds. 18
19 Setup/On Screen Displays Music Turn music off Turn music on and cycle through all five songs Select song number one Select song number two Select song number three Select song number four Select song number five Return to previous menu Exit menu If you turn the music ON the music icons will appear on the bottom of the screen. Sounds Turn sounds off Select nature sounds Select heartbeat sounds Return to previous menu Exit menu If you turn sounds ON one of the sound icons or will appear on the bottom of the screen. 19
20 Setup/On Screen Displays Night Light Turn night light off Turn night light on Return to previous menu Exit menu If you turn the night light on the night light icon will appear on the bottom of the screen. Voice Activated (For Nighttime Use) Video screen turns on for 30 seconds and then turns off. When baby makes noise, video screen automatically turns back on. It will remain on and turn off after 30 seconds from the last sound detected. You can also press any button on the receiver to turn video back on. Video screen does not turn on when baby makes noise. Press the video screen on/off button on the top of the receiver to turn the video screen on and off. Return to previous menu Exit menu 20


21 Setup/On Screen Displays Contrast/Brightness Press left or right side arrows to adjust contrast on the screen. Return to previous menu Exit menu Press left or right side arrows to adjust brightness on the screen. Return to previous menu Exit menu 21
. Indicates battery power is low (and you will hear a tone).")
22 Setup/On Screen Displays Out of Range The out of range warning will flash on the screen and you will hear a tone when the receiver is out of range or the transmitter is turned off. Battery Indicators Indicates receiver is using battery power (only on the menu screen). Indicates battery power is low (and you will hear a tone). Plug in the AC adaptor/charger to use AC power and charge the battery. Indicates receiver is charging. 22
.")
23 Use IMPORTANT! Test the sound and video reception of the monitor before first time use and whenever you change the location of the transmitter (see Testing Sound/Video Reception section of these instructions). Place the transmitter in the same room with child. Fit the transmitter into the tabletop base. Position the camera lens so it is facing child. For the best viewing range, the transmitter should be approximately five feet away from baby. Unwrap and fully extend the power cord for best transmission. Plug the power cord into a standard wall outlet. Use the power cord only in a wall outlet. Do not plug the power cord into a ceiling outlet. Note: The microphone is located on the power cord. Do not place the transmitter microphone within reach of your child or in front of the transmitter. For best results, allow the cord to extend behind the transmitter. Turn the power/volume dial to turn the power ON. The power L.E.D. will light. Press the music button to play lullaby songs. (Press again to turn off the music.) Press the sound button to play nature sounds. (Press again to turn off the sounds.) Press the night light button for a soft, glowing light. (Press again to turn off the night light). 23

 away from the transmitter.")
24 Use To use AC current, unwrap and fully extend the AC adaptor cord (for best reception). Insert the AC adaptor pin into the DC input jack on the receiver and plug into a standard wall outlet. Press the main power/menu button on the receiver to turn the power on. Press the side menu navigation buttons to turn the receiver volume up or down. To monitor baby without video, press the video on/off button at the top of the receiver. To turn video back on, simply press the button again. The receiver can be used to stay in touch with baby around your house or yard. The receiver s range is up to 400 feet (122 meters) away from the transmitter. The out of range warning will flash on the screen and you will hear a tone when the receiver is out of range. To turn off the receiver, press and hold the main power/menu button for approximately five seconds. 24

25 Night Vision Mode When the light in baby s room is too low, the transmitter will automatically switch to night vision mode. The image on the receiver screen will appear in black and white, not color. 25

26 Battery Replacement If you need to replace your NiMH rechargeable battery pack, please contact Fisher-Price Consumer Relations at or call Locate the battery compartment door on the back of the receiver. Loosen the screws in the battery compartment door with a Phillips screwdriver. Remove the battery compartment door. Remove the exhausted battery pack and dispose of it properly. Plug the new rechargeable battery pack into the receiver s battery connector. Then, insert the battery pack in the battery compartment. Replace the battery compartment door and tighten the screws with a Phillips screwdriver. Do not over-tighten. Protect the environment by not disposing of this product with household waste (2002/96/EC). Check your local authority for recycling advice and facilities (Europe only). Battery Safety Information In exceptional circumstances, batteries may leak fluids that can cause a chemical burn injury or ruin your product. To avoid battery leakage: If replacing the battery pack, insert it as indicated inside the battery compartment. Always remove an exhausted battery pack from the product. Dispose of the battery pack safely. Do not dispose of product in a fire. The battery pack inside may explode or leak. Contact Fisher-Price Consumer Relations at service.fisher-price.com or call to purchase a battery pack. Never short-circuit the battery pack terminals. Use only batteries of the same type, as recommended. 26
27 Problem No image on receiver screen Receiver beeps and out of range screen displays Receiver power L.E.D. does not light Problems & Solutions Solution Press the video screen on/off button. You can also change the voice activated setting to. The video screen automatically turns on when baby makes noise. Batteries in receiver are weak or dead. Use AC adaptor as power source and to charge the battery. Transmitter camera lens is obstructed. Adjust the camera angle on the transmitter. Receiver is out of range of transmitter. Move receiver closer to transmitter. Note: Range varies depending on surrounding conditions such as noise levels, physical obstructions and signal interference. Under optimal conditions, the range is up to 400 feet. Transmitter power is off. Turn transmitter power on. Loose power cord connection and transmitter power is off. Check transmitter power cord plug-to-outlet connection. No power to wall outlet and transmitter power is off. Make sure light switch that controls power flow to wall outlet is on. Power is off because circuit breaker for room is off. Make sure house fuses and circuit breakers are on. Receiver power is off. Turn receiver power on. Battery pack in receiver is weak or dead. Use AC adaptor as power source and to charge the battery for four hours. Power is off because circuit breaker for room is off. Make sure house fuses and circuit breakers are on. No power to wall outlet and power is off. Make sure light switch that controls power flow to wall outlet is on. 27
28 Problem Receiver beeps and displays low battery icon on screen Transmitter power L.E.D. does not light You can hear conversations or sounds from other homes Problems & Solutions Solution Battery pack in receiver is weak or dead. Use AC adaptor as power source and to charge the battery for four hours. Transmitter power is off. Turn transmitter power on. Loose power cord connection and transmitter power is off. Check transmitter power cord plug-to-outlet connection. No power to wall outlet and transmitter power is off. Make sure light switch that controls power flow to wall outlet is on. Power is off because circuit breaker for baby s room is off. Make sure house fuses and circuit breakers are on. There is signal interference due to other nursery monitors on same channel or cordless telephone use. You may need to pair the receiver and transmitter. Remove the receiver battery door and press the pairing button with a paperclip. The power LED will blink when the pairing button is released. Then, turn over the transmitter and press the pairing button with a paperclip. The signal L.E.D. on the receiver will flash and you will hear a confirmation tone. Hint: If, after checking all of these solutions, you believe that your transmitter power cord or AC adaptor are damaged, please contact Fisher-Price. 28
29 FCC Statement (United States Only) This equipment has been tested and found to comply with the limits for a Class B digital device, pursuant to part 15 of the FCC rules. These limits are designed to provide reasonable protection against harmful interference in a residential installation. This equipment generates, uses and can radiate radio frequency energy and, if not installed and used in accordance with the instructions, may cause harmful interference to radio communications. However, there is no guarantee that interference will not occur in a particular installation. If this equipment does cause harmful interference to radio or television reception, which can be determined by turning the equipment off and on, the user is encouraged to try to correct the interference by one or more of the following measures: Reorient or relocate the receiving antenna. Increase the separation between the equipment and receiver. Connect the equipment into an outlet on a circuit different from that to which the receiver is connected. Consult the dealer or an experienced radio/tv technician for help. Note: Changes or modifications not expressly approved by the manufacturer responsible for compliance could void the user s authority to operate the equipment. Video Monitor Model Number: N9326 This device complies with Part 15 of the FCC Rules. Operation is subject to the following two conditions: (1) This device may not cause harmful interference and (2) this device must accept any interference received, including interference that may cause undesired operation. Video Monitor Consumer Relations Department 636 Girard Avenue East Aurora, New York 14052, U.S.A To maintain compliance with the FCC's RF exposure guidelines, place the transmitter at least 20 cm from users. Make sure the transmitter is not located near or operated along with any other antenna or transmitter. 29
30 RSS-210 ICES-003 CNR-210 NMB-003 RSS-210 This device complies with RSS-210 of Industry Canada. Operation is subject to the following two conditions: (1) this device may not cause harmful interference and (2) this device must accept any interference received, including interference that may cause undesired operation. ICES-003 This Class B digital apparatus complies with Canadian ICES-003. Operation is subject to the following two conditions: (1) this device may not cause harmful interference and (2) this device must accept any interference received, including interference that may cause undesired operation. CNR-210 Ce dispositif est conforme au CNR-210 d Industrie Canada. L utilisation de ce dispositif est autorisée seulement aux conditions suivantes : (1) il ne doit pas produire de brouillage et (2) l utilisateur du dispositif doit être prêt à accepter tout brouillage radioélectrique reçu, même si ce brouillage est susceptible de compromettre le fonctionnement du dispositif. NMB-003 Cet appareil numérique de la classe B est conforme à la norme NMB-003 du Canada. Cet appareil numérique de la classe B est conforme à la norme NMB-003 du Canada. L utilisation de ce dispositif est autorisée seulement aux conditions suivantes : (1) il ne doit pas produire de brouillage et (2) l utilisateur du dispositif doit être prêt à accepter tout brouillage radioélectrique reçu, même si ce brouillage est susceptible de compromettre le fonctionnement du dispositif. 30
31 One (1) Year Limited Warranty (United States Only) Fisher-Price, Inc., 636 Girard Avenue, East Aurora, New York warrants to the original owner that this product is free from all defects in material and workmanship when used under normal conditions for a period of one (1) year from the date of purchase. Should the product fail to perform properly, we will repair or replace it at our option, free of charge. Purchaser is responsible for shipping the product to Consumer Relations at the address indicated above and for all associated freight and insurance cost. Fisher-Price, Inc. will bear the cost of shipping the repaired or replaced item to you. This warranty is void if the owner repairs or modifies the product. This warranty excludes any liability other than that expressly stated above including but not limited to any incidental or consequential damages. SOME STATES DO NOT ALLOW THE EXCLUSION OR LIMITATION OF INCIDENTAL OR CONSEQUENTIAL DAMAGES, SO THE ABOVE LIMITATION OR EXCLUSION MAY NOT APPLY TO YOU. THIS WARRANTY GIVES YOU SPECIFIC LEGAL RIGHTS, AND YOU MAY ALSO HAVE OTHER RIGHTS WHICH MAY VARY FROM STATE TO STATE. Care Excess dirt in transmitter microphone will hamper transmission of sound. Wipe all parts with a damp cloth. Do not immerse any part of this monitor. 31

32 Fisher-Price, Inc., a subsidiary of Mattel, Inc., East Aurora, New York 14052, U.S.A Mattel, Inc. All Rights Reserved. and designate U.S. trademarks of Mattel, Inc PRINTED IN CHINA N9326a-0920
K ep this inst eep this ins ruction sheet fo truction sheet f r future or futur re e r f e e f r e e r nce enc, e
 DRM39 Keep this instruction sheet for future reference, as it contains important information. 1 CONSUMER ASSISTANCE 1-800-432-5437 (US & Canada) 1300 135 312 (Australia) Fisher-Price, Inc., 636 Girard
TRACK ACTIVITY. SYNC WITH GCC iphone OR ANDROID APP ENTER VIA GCC WEBSITE OR APP
 TRACK ACTIVITY SYNC WITH GCC iphone OR ANDROID APP ENTER VIA GCC WEBSITE OR APP 1 YOUR GCC PULSE. 2 3 4 5 6 7 1 8 9 1. GCC PULSE BUTTON a) Reset button for Standard mode b) Pairing & syncing button for
Lockit Timecode Beetle ACN-BT
 Lockit Timecode Beetle experience quality. Table of contents page 1. Introduction 2 2. Package Contents 2 3. Warranty & Approvals 3 Warranty 3 Approvals 4 www.ambient.de/en 1 1. Introduction The Beetle,
User s Manual VTECH Printed in China Out of the Blue Enterprises LLC. All Rights Reserved
 User s Manual 2009 VTECH Printed in China 91-002395-023-000 2009 Out of the Blue Enterprises LLC. All Rights Reserved. INTRODUCTION There s a super big problem in Fairytale Land! A lonely dragon in search
AITech ProA/V Media Extender 5GHz Digital
 AITech ProA/V Media Extender 5GHz Digital 5 GHz Wireless Digital Media Transmitter and Receiver User Manual Table of Contents 1. Package Contents 2. Panels and Functions AV Sender AV Receiver 3. Setup
User s Manual. Fun Shapes Jewelry Box VTech Printed in China
 User s Manual TM Fun Shapes Jewelry Box 2010 VTech Printed in China 91-001607-000-006 INTRODUCTION Thank you for purchasing the VTech Fun Shapes Jewelry Box TM learning toy! The VTech Fun Shapes Jewelry
HIIT Console OWNER S MANUAL
 HIIT Console OWNER S MANUAL IMPORTANT SAFETY INSTRUCTIONS CONSOLE SAFETY INSTRUCTIONS All connected products/equipment are for fitness and health purposes only. Any readings/values should not be used for
User s Manual. Peek At Me Bunny TM VTech Printed in China
 User s Manual Peek At Me Bunny TM 2011 VTech Printed in China 91-002538-000-006 Dear Parent, Ever notice the look on your baby s face when they learn something new through their own discovery? These self-accomplished
Product Manual. Wired
 Product Manual Wired Box Contents 1. Unimouse 2. User Guide 2 1 /1 Unimouse Functions Scroll lock Left click Scroll Lock/Double click* Right click Base/tilt Wire Back button Forward button Thumb rest Cursor
Setting Up Your Camera
 Setting Up Your Camera Plug in your Camera(s) Indoor LED light Outdoor Micro USB (Optional) Indoor camera stand installation Status Lights on your Camera 82802 (Indoor) 82801 (Outdoor) Colour Status Meaning
UDRC13 ACCESSORY CAMERA Owner s Manual
 UDRC13 ACCESSORY CAMERA Owner s Manual Compatible with UDR444 Wireless Video Surveillance System If any items are missing or damaged, contact our Customer Care Line immediately. Never use damaged products!
DV6819 Quick Reference Guide V1.0. Smart TV Box. Quick Reference Guide. Please do read user manual before you operate the TV box.
 DV6819 Quick Reference Guide V1.0 Smart TV Box Quick Reference Guide Please do read user manual before you operate the TV box. ~ 1 ~ DV6819 Quick Reference Guide V1.0 Safety instruction Please keep the
DCS-2800LH and DCS-H100. User s Manual
 DCS-2800LH and DCS-H100 User s Manual Version 1.0 March 09 th, 2018 Page 1 Table of Contents 1. PRODUCT DESCRIPTION... 3 2. APPEARANCE... 3 3. APPLICATIONS... 4 4. INSTALLATIONS... 5 Page 2 1. PRODUCT
D UTILISATION. Count & Hug Bug TM VTech Printed in China US
 MANUEL User's Manual D UTILISATION Count & Hug Bug TM 2013 VTech Printed in China 91-002823-004 US INTRODUCTION Thank you for purchasing the VTech Count & Hug Bug Learning Toy! The VTech Count & Hug Bug
Dear Parent: Sincerely, Your Friends at VTech. To learn more about Infant Learning and other VTech toys, visit
 Dear Parent: Ever notice the look on your baby s face when they learn something new through their own discovery? These self-accomplished moments are a parent s greatest reward. To help fulfill them, VTech
User s Manual. Spin & Learn Top VTech. Printed in China
 60840 Manual.indd 1 User s Manual Spin & Learn Top 2010 VTech Printed in China 91-002402-007-000 9/23/09 3:24:16 PM 60840 Manual.indd 2 9/23/09 3:24:17 PM INTRODUCTION Thank you for purchasing the VTech
GymConnect Retrofit Module
 GymConnect Retrofit Module Installation and Programming guide Version 1.0 June 8, 2017 Wahoo Fitness LLC 2017 Table of Contents Component identification Introduction Components Installation Programming
User s Manual. Bouncing Colors Turtle VTech. Printed in China Manual.indd 1 4/21/09 9:18:36 PM
 User s Manual Bouncing Colors Turtle 2009 VTech Printed in China 91-002389-000-000 106300 Manual.indd 1 4/21/09 9:18:36 PM Dear Parent, Ever notice the look on your baby s face when they learn something
MONOPRICE. BitPath AV VGA Extender over Single Cat6 Cable, 120m. User's Manual P/N 16226
 MONOPRICE BitPath AV VGA Extender over Single Cat6 Cable, 120m P/N 16226 User's Manual SAFETY WARNINGS AND GUIDELINES Please read this entire manual before using this device, paying extra attention to
Dial & Discover Phone
 User's Manual Dial & Discover Phone 2004 VTech Printed in China 91-02112-000 Dear Parent: Ever notice the look on your baby s face when they learn something new through their own discovery? These self-accomplished
User Instructions. 16 SCB Sync Station.
 User Instructions 16 SCB Sync Station Contents Overview... 1 Specifications... 1 Compliance and approvals... 2 Safety instructions... 3 Set up... 4 How to charge multiple devices... 4 How to synchronize
2.4 GHz WIRELESS SURVEILLANCE SYSTEM
 2.4 GHz WIRELESS SURVEILLANCE SYSTEM Operating Instructions Tested Comply With FCC Standards Model # TBM-18 BEFORE OPERATING THIS PRODUCT, READ, UNDERSTAND, AND FOLLOW THESE INSTRUCTIONS. Be sure to save
Remote Control Set Up and User Guide
 Remote Control Set Up and User Guide TM REMOTE CONTROL USER GUIDE The optional remote control provides the user with added functionality for controlling their blinds. The remote control contains single
User Guide. Smart Wi-Fi LED Bulb with Color-Changing Hue REV1.0.0
 User Guide Smart Wi-Fi LED Bulb with Color-Changing Hue 1910012253 REV1.0.0 Contents About This Guide 1 Introduction 2 Set Up Your Smart Bulb 3 Main Pages 4 Configure Your Smart Bulb 5 Create Scenes 7
User's Manual. Discovery Nursery Farm TM VTech. Printed in China
 User's Manual Discovery Nursery Farm TM 2004 VTech Printed in China 91-02097-002-000 Dear Parent: Ever notice the look on your baby s face when they learn something new through their own discovery? These
Wi-Fi BackupCamera User Manual
 Support www.randmcnally.com/support 800-333-0136 Wi-Fi BackupCamera User Manual BACBACKUPCAMQSG-072417-v003 FCC Compliance Statement This device complies with part 15 of the FCC rules. Operation is subject
Simon 5" TouchScreen Installation Sheet
 Simon 5" TouchScreen Installation Sheet CAUTION: Use static electricity precautions when handling electronic components. CAUTION: Only the cable provided with the device can be used to provide power. Description
Model 570 Fiber Optic
 Model 570 Fiber Optic Transmit Trigger Package The World Leader in Subsurface Imaging December, 2005 Geophysical Survey Systems, Inc. Tel 603.893.1109 Fax 603.889.3984 sales@geophysical.com www.geophysical.com
MONOPRICE. BitPath AV SDI Extender over Single Cat6 Cable, 120m. User's Manual P/N 16227
 MONOPRICE BitPath AV SDI Extender over Single Cat6 Cable, 120m P/N 16227 User's Manual SAFETY WARNINGS AND GUIDELINES Please read this entire manual before using this device, paying extra attention to
LED BANNER. THIS PRODUCT IS NOT A TOY! Please read this entire instruction booklet before using. INSTRUCTION MANUAL
 A. DESCRIPTION LED BANNER THIS PRODUCT IS NOT A TOY! Please read this entire instruction booklet before using. INSTRUCTION MANUAL Thank you for purchasing the LED BANNER. This product is not a toy and
User s Manual. Squirrelly Adventure Tree House TM VTech All rights reserved Printed in China US
 User s Manual Squirrelly Adventure Tree House TM 2017 VTech All rights reserved Printed in China 91-003309-000 US M INTRODUCTION Thank you for purchasing the VTech Go! Go! Smart Animals Squirrelly Adventure
FEATURES AND CONTENTS
 HDMI Wireless Incorporates HDMI technology Model: WTR-3000 3D, 1080P Wireless HDMI Transmission Full band IR Extending function INTRODUCTION Thank you for purchasing WTR-3000 HDMI Wireless sender. Your
Guardian Angel. Handheld Baby Monitoring Kit. Installation Guide. English
 Help Desk / Support Details Swann Technical Support All Countries E-mail: tech@swann.com.au Telephone Helpdesk UNITED STATES toll free 877-274-3695 (Sun-Thurs, 2pm-10.30pm PST) 800-627-2799 (Mon0Fri, 9am-1pm
THE MR. MEN SHOW and DILLYDALE Copyright 2010 THOIP (a Chorion company). All rights reserved.
. All rights reserved.") User s Manual INTERACTIVE E-READING SYSTEM TM THE MR. MEN SHOW and DILLYDALE Copyright 2010 THOIP (a Chorion company). All rights reserved. Dear Parent, At VTech, we know how important reading is for your
User s Manual INTERACTIVE E-READING SYSTEM TM THE MR. MEN SHOW and DILLYDALE Copyright 2010 THOIP (a Chorion company). All rights reserved. Dear Parent, At VTech, we know how important reading is for your
4 PORT HDMI SWITCH
 4 PORT HDMI SWITCH 1518896 IMPORTANT SAFEGUARDS OF HDMI SWITCH PRODUCTS PLEASE READ CAREFULLY THE FOLLOWING SAFEGUARDS THAT ARE APPLICABLE TO YOUR EQUIPMENT 1. Read instructions - All the safety and operating
Automotive 72 Exterior Smart Lighting Kit
 PACKAGE CONTENTS Automotive 72 Exterior Smart Lighting Kit 36 36 8 x Wire Mounting Bracket 16 x Screws 60" Extension Cable 24 ON / OFF 60 Exterior Kit can also function as interior lighting Instruction
Getting started guide
 Getting started guide A wearable sensor unit enabling a fast time to market (STEVAL-WESU1) SCAN ME Version 1.5 (February 2017) Overview 2 1 Getting started: assemble the items 2 Getting started: activate
Home Monitoring. Wired Color Camera. User Manual. For indoor/outdoor use. Do not use in wet locations.
 45231 Home Monitoring Wired Color Camera User Manual For indoor/outdoor use. Do not use in wet locations. www.jascoproducts.com 1-800-654-8483 2 Thank you for purchasing the GE 45231 Wired Color Camera.
Amulet 4. Quick Start Guide
 Amulet 4 Media Recorder Table of Contents Overview 2 Safety Instructions 4 What s Included 6 Front Panel 7 Rear Panel Connecting Video 8 High-Definition TVs 9 Standard-Definition TVs Connecting Audio 11
Quick Start Guide ABOUT THE CAMERA
 User Manual Quick Start Guide ABOUT THE CAMERA A Record Status B Record Switch C Rotating Lens D Battery Slot E Battery Latch F Card Format Button G USB H Format Switch I MicroSD card J Memory Status K
MONOPRICE. BitPath AV 4K 1X4 HDMI Splitter Extender over Single Cat6 with IR, 120m. User's Manual P/N 16286
 MONOPRICE BitPath AV 4K 1X4 HDMI Splitter Extender over Single Cat6 with IR, 120m P/N 16286 User's Manual SAFETY WARNINGS AND GUIDELINES Please read this entire manual before using this device, paying
LINK POWER IR RX IR TX 12V 2A. HDMI Out EL-4KHDBT-RX-40-IR. HDBT In LINK EL-4KHDBT-RX-40-IR. User Manual
 EL-4KHDBT-RX-40-IR LINK HDMI Out POWER IR RX IR TX 12V 2A LINK HDBT In EL-4KHDBT-RX-40-IR User Manual Thank you for purchasing this product. For optimum performance and safety, please read these instructions
HDMI Over CAT5 or CAT6 Extender 4K 60Hz
 HDMI Over CAT5 or CAT6 Extender 4K 60Hz ST121HDBT20L *actual product may vary from photos FR: Guide de l utilisateur - fr.startech.com DE: Bedienungsanleitung - de.startech.com ES: Guía del usuario - es.startech.com
Introduction. Package Contents. Installation Requirements
 Security Camera Security Camera Introduction Introduction Thank you for purchasing the aircam Dome. This Quick Start Guide is designed to guide you through the installation of the aircam Dome and show
X-Series Expansion Cards. X-Video Card
 X-Series Expansion Cards X-Video Card User s Guide v1.0 - February 2006 Warnings FCC warning This equipment has been tested and found to comply with the limits for a Class A digital device, pursuant to
MONOPRICE. Blackbird 4K HDBaseT Extender Kit. User's Manual P/N 21792
 MONOPRICE Blackbird 4K HDBaseT Extender Kit P/N 21792 User's Manual SAFETY WARNINGS AND GUIDELINES Please read this entire manual before using this device, paying extra attention to these safety warnings
Doorphone Video Intercom
 HOME SERIES INSTRUCTION MANUAL Doorphone Video Intercom with Colour 4.3 LCD Monitor EN Getting to know your LCD Screen (Front) 1 2 3 4 5 6 1) LCD Screen - This is where you view your visitor that the intercom
SC-C1M SiriusConnect TM Vehicle Tuner
 SC-C1M SiriusConnect TM Vehicle Tuner For Special Market Applications Installation Guide Congratulations on the Purchase of your new SIRIUS SC-C1 SiriusConnect TM Vehicle Tuner. The SC-C1M is packaged
Kamai 4 Media Receiver. Quick Start Guide
 Kamai 4 Media Receiver Table of Contents Overview 2 Safety Instructions 4 What s Included 6 Front Panel 7 Rear Panel connecting Video 8 High-Definition TVs 9 Standard-Definition TVs connecting Audio 11
MONOPRICE. BitPath AV HDMI Extender over Single Cat6 Cable, 120m. User's Manual P/N 16228
 MONOPRICE BitPath AV HDMI Extender over Single Cat6 Cable, 120m P/N 16228 User's Manual SAFETY WARNINGS AND GUIDELINES Please read this entire manual before using this device, paying extra attention to
Quick Start. About the Camera. Power Button Battery Status Record Button Rotating Lens Record Status Memory Status Resolution Switch
 Product Guide 1 Quick Start About the Camera a b c d e f g h i j k l Power Button Battery Status Record Button Rotating Lens Record Status Memory Status Resolution Switch USB Charge Indicator Battery Latch
CS463-2 EPC Class 1 Gen 2 RFID 4-Port Reader User s Manual
 CS463-2 EPC Class 1 Gen 2 RFID 4-Port Reader User s Manual Version 4.0 CSL: The One-Stop-Shop for RFID Solutions 1 Content 1 CONTENT... 2 2 FCC AND IC STATEMENT... 3 3 INTRODUCTION.6 3.1 CS463-2 RFID 4-PORT
Register your product and get support at SDV5122/27. EN User manual
 Register your product and get support at www.philips.com/welcome SDV5122/27 User manual Contents 1 Important 4 Safety 4 Notice for USA 5 Notice for Canada 5 Recycling 6 English 2 Your SDV5122 7 Overview
MONOPRICE. Blackbird 4K Pro HDBaseT Extender Kit. User's Manual P/N 21609
 MONOPRICE Blackbird 4K Pro HDBaseT Extender Kit P/N 21609 User's Manual SAFETY WARNINGS AND GUIDELINES Please read this entire manual before using this device, paying extra attention to these safety warnings
 Register your product and get support at www.philips.com/welcome SWW1810 User manual 3 Contents 1 Important 4 Safety 4 English 2 Your Wireless HD AV Connect 6 What is in the box 6 3 Overview 7 The transmitter
MONOPRICE. Blackbird 4K HDMI Extender. User's Manual P/N 24281
 MONOPRICE Blackbird 4K HDMI Extender P/N 24281 User's Manual SAFETY WARNINGS AND GUIDELINES Please read this entire manual before using this device, paying extra attention to these safety warnings and
Marshall s Read-to-Me Adventure
 Parent s Guide Marshall s Read-to-Me Adventure 2018 Spin Master PAW Productions Inc. All Rights Reserved. PAW Patrol and all related titles, logos and characters are trademarks of Spin Master Ltd. Nickelodeon
Installation Guide. Wireless Display Receiver
 Wireless Display Receiver Installation Guide Model# SBWD950A This Installation Guide will walk you through the easy steps to set up your ScreenBeam Pro Wireless Display Receiver - Enterprise Edition. During
P6843 P6843 Visit us on line at sher-price.com , For countries outside the United States: CANADA: GREAT BRITAIN:
 Consumer Information P6843 Visit us on line at www.service.fisher-price.com Call our Consumer Relations Department, toll-free at 1-888-892-6123, 9 AM - 7 PM EST Monday through Friday and 11 AM - 5 PM EST
Parent s Guide Bright Lights Soccer Ball
 Parent s Guide Bright Lights Soccer Ball 91-009712-000 INTRODUCTION Thank you for purchasing the Bright Lights Soccer Ball TM by VTech. This soft ball features a friendly smiling face and two hands. Your
Parent s Guide. Learn & Spin Aquarium
 Parent s Guide Learn & Spin Aquarium 91-003449-000 INTRODUCTION Thank you for purchasing the VTech Learn & Spin Aquarium. Your little one will love playing with the spinning ocean animals as the aquarium
Universal Wireless HDTV Adapter
 Universal Wireless HDTV Adapter F7D4555v1 User Manual Table of Contents CHAPTER 1 INTRODUCTION... 1 Package Contents... 1 Features... 1 LEDs... 2 CHAPTER 2 INITIAL INSTALLATION... 4 Requirements... 4 Procedure...
Kamai 6 Media Receiver. Quick Start Guide
 Kamai 6 Media Receiver Table of Contents Overview 2 Safety Instructions 4 What s Included 6 Front Panel 7 Rear Panel Connecting Video 8 High-Definition TVs 9 Standard-Definition TVs Connecting Audio 10
ROLL-A-STRIKE. Assembly Instructions Model CONTACT INFO. Hours. Technical Support Monday to Friday (9am to 5pm EST)
") PATENT - www.eastpointsports.com ROLL-A-STRIKE TM ELECTRONIC BOWLING Assembly Instructions Model --286 CONTACT INFO ASSEMBLY REQUIRED Hours Technical Support Monday to Friday (9am to 5pm EST) Email us
PATENT - www.eastpointsports.com ROLL-A-STRIKE TM ELECTRONIC BOWLING Assembly Instructions Model --286 CONTACT INFO ASSEMBLY REQUIRED Hours Technical Support Monday to Friday (9am to 5pm EST) Email us
Parent s Guide. Zoo Jamz Stompin Fun Drums TM US
 Parent s Guide Zoo Jamz Stompin Fun Drums TM 91-003333-000 US INTRODUCTION Thank you for purchasing the Zoo Jamz Stompin Fun Drums! This drum kit features light-up drum pads so kids can follow along or
Documentation on all Paxton products can be found on our web site -
 11/05/2012 Ins-30202-US Net2 Entry - Monitor Paxton Technical Support 1.800.672.7298 supportus@paxton-access.com Technical help is available: Monday - Friday from 02:00 AM - 8:00 PM (EST) Documentation
Amulet 6. Quick Start Guide
 Amulet 6 Media Recorder Table of Contents Overview 2 Safety Instructions 4 What s Included 6 Front Panel 7 rear Panel Connecting Video 8 High-Definition TVs 9 Standard-Definition TVs Connecting Audio 10
DisplayPort Signal Booster - 4K
 DisplayPort Signal Booster - 4K DPBOOST *actual product may vary from photos FR: Guide de l utilisateur - fr.startech.com DE: Bedienungsanleitung - de.startech.com ES: Guía del usuario - es.startech.com
This document is primarily focused for engineers or other users with a technical profile
 ABSTRACT ibks105 Technical Data AUDIENCE This document is primarily focused for engineers or other users with a technical profile FEATURES Advertising Beacon Device Bluetooth Low Energy Full Eddystone
BOHE-BT/BOHE-BTI Bluetooth Hose End Timer (Tap Timer)
") BOHE-BT/BOHE-BTI Bluetooth Hose End Timer (Tap Timer) FCC certified - Bluetooth certified Completely Waterproof - 3 Year Limited Warranty I N S T R U C T I O N 1 M A N U A L Thank you for purchasing DIG
BOHE-BT/BOHE-BTI Bluetooth Hose End Timer (Tap Timer) FCC certified - Bluetooth certified Completely Waterproof - 3 Year Limited Warranty I N S T R U C T I O N 1 M A N U A L Thank you for purchasing DIG
ENG-44 Field Portable Audio Mixer. Operator s Manual. SignVideo SE Gideon Street - Portland, Oregon
 Field Portable Audio Mixer Operator s Manual SignVideo - 1226 SE Gideon Street - Portland, Oregon 97202 503.236.0000 www.signvideo.com Safety Warning Protect your ears. Always turn down the headphone volume
Defender HD APP User Manual
 Defender HD APP User Manual 1 IMPORTANT! PLEASE READ. THANK YOU Congratulations on your Defender HD purchase! You ve made a great choice to protect what you value most. We take our products performance
User s Manual. Babble & Rattle Microphone TM VTech Printed in China US
 User s Manual Babble & Rattle Microphone TM 2015 VTech Printed in China 91-003172-000 US Dear Parent, Ever notice the look on your baby s face when they learn something new through their own discovery?
1 Remove SCREWS (2) CELL-EXT Cable Assembly Installation Guide. LYNX Touch/QuickConnect Touch Controls. General Information. Remove the 3GL/3GLC
 CELL-EXT Cable Assembly Installation Guide. LYNX Touch/QuickConnect Touch Controls. General Information. Remove the 3GL/3GLC") CELL-EXT Cable Assembly Installation Guide For Documentation and Online Support: http://www.security.honeywell.com/hsc/resources/mywebtech General Information The CELL-EXT cable assembly is used to connect
CELL-EXT Cable Assembly Installation Guide For Documentation and Online Support: http://www.security.honeywell.com/hsc/resources/mywebtech General Information The CELL-EXT cable assembly is used to connect
 Register your product and get support at www.philips.com/welcome SDV8625T/27 User manual Contents 1 Important 4 Safety 4 For indoor use 4 For outdoor use 4 Notice for USA 4 Notice for Canada 5 Recycling
Qianglong Furniture Co., Ltd.
 Qianglong Furniture Co., Ltd. ITEM NO.: 400-12-00K Gaming Chair manual THIS INSTRUCTION BOOKLET CONTAINS IMPORTANT SAFETY INFORMATION. PLEASE READ AND KEEP FOR FUTURE REFERENCE. DO NOT RETURN TO THE STORE
KODAK Video Monitor CFH-V10
 Quick Start Guide CAUTION RISK OF ELECTRIC SHOCK DO NOT OPEN CAUTION TO REDUCE THE RISK OF ELECTRIC SHOCK, DO NOT REMOVE COVER (OR BACK). NO USER SERVICEABLE PARTS INSIDE, REFER SERVICING TO QUALIFIED
Parent s Guide. Animal Adventures Ark TM US
 Parent s Guide Animal Adventures Ark TM 91-003370-002 US INTRODUCTION Thank you for purchasing the VTech Animal Adventures Ark. Welcome aboard the Animal Adventures Ark! Learn how to count from 1-8 by
LCD VALUE SERIES (32 inches)
") LCD VALUE SERIES (32 inches) http://www.orionimages.com All contents of this document may change without prior notice, and actual product appearance may differ from that depicted herein 1. SAFETY INSTRUCTION
LCD VALUE SERIES (32 inches) http://www.orionimages.com All contents of this document may change without prior notice, and actual product appearance may differ from that depicted herein 1. SAFETY INSTRUCTION
T850 Day & Night Security Camera
 T850 Day & Night Security Camera For use with Swann 4500 DVR EN INSTRUCTION MANUAL MT850_091014E Swann 2014 Before you begin Introduction Congratulations on your purchase of this T850 Day & Night Security
Picture Fan. display your photos, graphics & messages
 Picture Fan display your photos, graphics & messages Table of contents Warnings and Cautions....1 FCC Information...5 Location of Parts and Controls....6 Home Screen App Control...7 Picture Fan Operation....8
Electric Motorized Projection Screen PowerMax Tension Series
 Electric Motorized Projection Screen PowerMax Tension Series User s Guide Important Safety & Warning Precautions Make sure to read this user s guide and follow the procedures below. Caution: The screen
VNS2200 Amplifier & Controller Installation Guide
 VNS2200 Amplifier & Controller Installation Guide VNS2200 Amplifier & Controller Installation 1. Determine the installation location for the VNS2200 device. Consider the following when determining the
Comverge PowerPortal In-Home Display (IHD) User Guide for Members of New Hampshire Electric Cooperative
 User Guide for Members of New Hampshire Electric Cooperative") Comverge PowerPortal In-Home Display (IHD) User Guide for Members of New Hampshire Electric Cooperative Table of Contents Table of Contents About the Comverge PowerPortal In-Home Display (IHD)... 2 Safety
Comverge PowerPortal In-Home Display (IHD) User Guide for Members of New Hampshire Electric Cooperative Table of Contents Table of Contents About the Comverge PowerPortal In-Home Display (IHD)... 2 Safety
LITE. TV Antenna DVR with Dual-Band WiFi QUICK START GUIDE
 LITE TV Antenna DVR with Dual-Band WiFi QUICK START GUIDE Quick Start Guide CONTENTS STEP 1: Getting Connected...1 STEP 2: Download/Navigate to the Tablo App...2 STEP 3: Connecting Your Tablo to the Internet...2
User s Guide. 5.8GHz Wireless A/V Signal Sender
 1500332 User s Guide 5.8GHz Wireless A/V Signal Sender Thank you for purchasing your A/V Signal Sender from RadioShack. Please read this user s guide before installing, setting up, and using your new sender.
Important Safety & Warning Precautions
 Electric Motorized Projection Screen VMAX 2 Series User s Guide Important Safety & Warning Precautions Make sure to read this user s guide and follow the procedure below. Caution: The screen s Black Top
DDW36C Advanced Wireless Gateway - Safety and Installation Product Insert. Federal Communications Commission (FCC) Interference Statement
 Interference Statement") DDW36C Advanced Wireless Gateway - Safety and Installation Product Insert Federal Communications Commission (FCC) Interference Statement This equipment has been tested and found to comply with the limits
DDW36C Advanced Wireless Gateway - Safety and Installation Product Insert Federal Communications Commission (FCC) Interference Statement This equipment has been tested and found to comply with the limits
User s Manual. Smart Shots Sports Center VTech Printed in China US
 User s Manual Smart Shots Sports Center 2014 VTech Printed in China 91-002920-006 US INTRODUCTION Thank you for purchasing the VTech Smart Shots Sports Center! Cheer on your little sports star with the
Lil Critters Roll & Discover Ball TM
 User s Manual Lil Critters Roll & Discover Ball TM 2015 VTech Printed in China 91-002989-002 Dear Parent, Ever notice the look on your baby s face when they learn something new through their own discovery?
INSTRUCTION MANUAL SUPER LASER
 INSTRUCTION MANUAL SUPER LASER WARNINGS When using this SUPER LASER, basic safety precautions should always be followed to reduce the risk of fire, electric shock, and personal injury. Follow the instructions
Parent s Guide Spin & Laugh Gearaffe
 Parent s Guide Spin & Laugh Gearaffe 91-003348-000 US INTRODUCTION Thank you for purchasing the GearZooz TM Spin & Laugh Gearaffe TM by VTech. This adorable giraffe features three interactive activities
MONOPRICE. BitPath AV VGA Wireless Transmitter & Receiver Kit, 200m. User's Manual P/N 16224
 MONOPRICE BitPath AV VGA Wireless Transmitter & Receiver Kit, 200m P/N 16224 User's Manual SAFETY WARNINGS AND GUIDELINES Please read this entire manual before using this device, paying extra attention
 Register your product and get support at www.philips.com/welcome SDV5222T/27 User manual Contents 1 Important 4 Safety 4 Notice for USA 4 Notice for Canada 5 Recycling 5 English 2 Your SDV5222T 6 Overview
Digital Tiny Traveler Wireless Baby Monitor for Your Car
 Digital Tiny Traveler Wireless Baby Monitor for Your Car BT53901F-1 USER MANUAL ML-53901F_V1 IF YOU ARE EXPERIENCING ANY ISSUES WITH THE PRODUCT DURING OPERATION, DO NOT RETURN THE PRODUCT TO THE STORE.
In-Ceiling Electric Motorized Front Projection Screen Evanesce Series. User s Guide
 In-Ceiling Electric Motorized Front Projection Screen Evanesce Series User s Guide Important Safety & Warning Precautions Make sure to read this user s guide and follow the procedures below. Caution: The
Quintet SL. Owner s Manual
 Quintet SL Owner s Manual QUINTET SL SPEAKER SYSTEM IMPORTANT SAFETY INSTRUCTIONS 1. READ these instructions. 2. KEEP these instructions. 3. HEED all warnings. 4. FOLLOW all instructions. 5. DO NOT use
HP Presentation Scanner. Quick Reference Guide
 HP Presentation Scanner Quick Reference Guide 2011 Hewlett-Packard Development Company, L.P. Microsoft, Windows, and Windows Vista are either trademarks or registered trademarks of Microsoft Corporation
INSTRUCTION MANUAL MUSICAL LASER LIGHT SHOW TM
 INSTRUCTION MANUAL MUSICAL LASER LIGHT SHOW TM WARNINGS When using this MUSICAL LASER LIGHT SHOW TM, basic safety precautions should always be followed to reduce the risk of fire, electric shock, and personal
Parent s Guide. Roll & Roar Animal Train TM US
 Parent s Guide Roll & Roar Animal Train TM 91-003372-000 US INTRODUCTION Thank you for purchasing the GearZooz TM Roll & Roar Animal Train TM by VTech! This adorable train will take your little one on