AFETY INSTRUCTIONS...
|
|
|
- Piers Bates
- 5 years ago
- Views:
Transcription

1
2
3 CONTENTS BEFORE USE... 2 SAFETY INSTRUCTIONS... 2 ACCESSORIES... 4 MAIN FEATURES... 8 PARTS DESCRIPTIONS... 9 OPENING AND CLOSING THE FRONT COVER... 9 KEYBOARD AND DISPLAY KEYBOARD LAYOUT DISPLAY LAYOUT USING THE MACHINE SETTING OR CHANGING DATA SETTING MACHINE MODE, PAY CLOSING DATE, SCALE AND DAILY TOTAL TIME (MODE 1) SETTING YEAR, MONTH, DATE, HOUR, AND MINUTE (MODE 2) SETTING LINE SHIFT TIME, IN/OUT AND DAYLIGHT SAVING TIME (MODE 3) LATE-IN, EARLY-OUT, OVERTIME WORKING AND NEXT DAY OVERTIME SYMBOLS 30 REPLACING THE INK RIBBON CASSETTE WALL MOUNTING AND LAID-DOWN POSITION INSTALLATION ERROR CODES CAUTION CODE TROUBLE SHOOTING SPECIFICATIONS
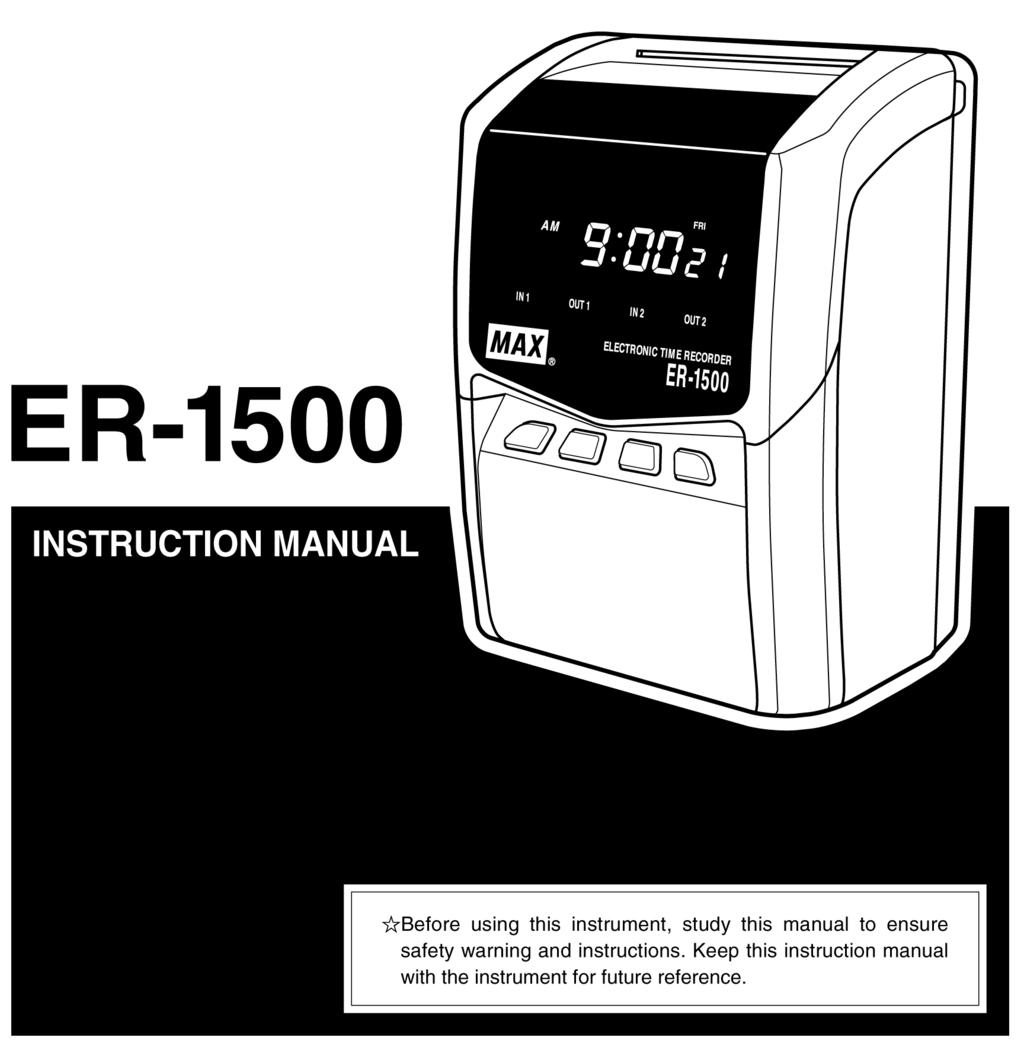
4 BEFORE USE SAFETY INSTRUCTIONS INDICATIONS This instruction manual and the product use various indications to help you use this instrument safely and properly. The following describes those indications. WARNING: Negligence could lead to serious injury death. CAUTION: Negligence could lead to an injury, damage of your property, cause loss of created data. Describes operations that may cause damage to the instrument and require a repair, operations that require resetting the machine, etc., to reste the condition of the instrument. Describes the points of operation and tips. Describes a functional precaution. SYMBOLS Denotes What you should be aware of. Denotes What you must not do. An indication in near this symbol shows a specific prohibition. Denotes What you must do. An indication in this symbol shows a specific instruction. WARNING Clean the power cd plug regularly. Dust on the plug could cause a fire. Obtain power directly from a single plug socket. Avoid connecting many wires to one plug socket. It could lead to a fire. Do not connect/disconnect a power plug with a wet hand. It could cause an electric shock. Do not operate the instrument, if it is out of der. If it is operated in an out-of-der state, such as it is smoking, emitting an abnmal sound, smelling funny, it could cause a fire electric shock. Disconnect the power plug immediately from the socket and contact your dealer/distribut f a repair. -2-
5 The lithium battery is used inside f memy backup. Never replace the lithium battery by yourself. Contact your dealer/distribut f replacement. -3-

6 CAUTION The data sted in the internal memy the memy card cannot be sted permanently. We will not be responsible f damages and lost profits caused by loss of data attributed to battery consumption, trouble, repair, and so on. Never disassemble modify this instrument. It could cause a fire, electric shock, other problems. Do not insert feign substances such as fingers, pens, wire, paper into this instrument. It could damage the instrument cause a fire. Use crect supply voltage. Other voltage level could damage the instrument. Do not splash water chemicals on the instrument. If water gets inside the instrument, disconnect the power plug immediately from the plug socket and contact your dealer/distribut f a repair. It could damage the instrument cause a fire electric shock. Do not put paper cloth on the instrument. It could cause a fire. Do not place any heavy material on power cd. It could cause damage a fire. Never touch the metallic part of the instrument. Never touch the printer head. It is very hot just after printing and you could get burned. Also, dirt on your hand could cause trouble to the printer head. When the instrument is not going to be operated f a long period of time, be sure to disconnect the power cd from the power socket f your safety. When disconnecting the power cd, be sure to hold the power plug. Do not pull on power cd, the cd could be broken and cause a fire electric shock. ACCESSORIES This instrument comes with the following accessies. Confirm that they are included befe using the machine. 1. Instruction manual 2. Key-Card -4-


7 : 2-pcs. : 1 booklet 3. Screws f wall mounting : 2-pcs. -5-


8 Do not drop hit the instrument. Install this instrument away from the following places: 1. Any place that is not level that is subject to vibration. 2. Any place that has dust high humidity. Keep beverages and liquid containers away from this instrument. 3. Any place that the temperature goes below 0 /104. /32 over Any place that catches direct sunlight is located close to a heat source. Do not insert cards paper other than the specified time cards f this instrument. Do not use time cards that are bent tn. Be sure to use a dry cloth f cleaning. Do not use solvents (alco hol, benzene, thinner, etc.) a damp cloth. Do not re-ink cartridge. Replace with ink ribbon cassette ER-IR100 ER-IR100E. Do not hang this instrument on a wall using anything other than the included plate f wall mounting. -6-
9 The socket outlet should be installed near the instrument and be easily accessible. A 7-minute break is required after continuous printing 150 times. -7-
10 MAIN FEATURES 1. Printing the daily total time f regular wking time overtime Excluding ER-1500E. 2. Can select fully automatic manual operation. 3. Printing regular minutes (1/60) 1/100th of an hour. 4. Printing up to 4 columns (If using daily total printing, up to 5 columns). 5. Up to 150 employees in every time period (If using daily total time, up to 50 employees). 6. Printing the symbols, Late-in:, Early-out: and Overtime: 7. Unique Key-Card security system. 8. Three kinds of installation (Table, Wall, and Laid Down Position). 9.. Three kinds of pay period fmatting (Monthly, Weekly Bi-weekly). 10. Can select Daylight Saving Time (f summer time). 11. Printing past midnight in the same line of the day by Line Shift Time. 12. Built-in lithium battery protects the clock, calendar and program data f 5 years. 13. Twelve / twenty-four hour display fmats. 14. Time / Date / Month / Year are already preset. Some areas countries will be required to reset the time. -8-

11 PARTS DESCRIPTIONS Time card insertion slot Front cover Display External key Wall mounting plate OPENING AND CLOSING THE FRONT COVER Pull as illustrated above. Remove the front cover. -9- Push as illustrated above.

 CLEAR KEY To select the IN1 column.")
12 KEYBOARD AND DISPLAY KEYBOARD LAYOUT ⑤ ⑥ ⑦ ① ② ⑧ ③ ④ ⑨ Functions of keys No. Description Functions ① FORWARD KEY To increase the number when changing settings. ② BACKWARD KEY To decrease the number when changing settings. ③ SET KEY ④ CANCEL KEY To register figures. To return to the start of setting mode without registration. To turn the time on the display upside down. ⑤ (LAID DOWN POSI- To initialize current setting item. TION) CLEAR KEY To select the IN1 column. ⑥ MODE1 KEY To set Machine Mode, Pay Closing Date, scale and Daily Total Time after inserting the Key-Card. (See [7] on page 9)

![inserting (See [8] on page 13) the Key-Card.](/docs-images/90/101814723/images/13-1.jpg "MODE2 KEY To select the IN2 column.")
 and Daylight Saving Time.")
13 To select the OUT1 column. ⑦ To set Year, Month, Date and current Time after inserting (See [8] on page 13) the Key-Card. MODE2 KEY To select the IN2 column. ⑧ MODE3 KEY ⑨ KEY To set Line Shift Time, Wking Time(IN1 OUT2, OST) and Daylight Saving Time. To select the OUT2 column (See [9] on page 14)

14 DISPLAY LAYOUT (A) The symbol appears during setting mode. (B) The symbol appears during the period of Daylight Saving Time. USING THE MACHINE CAUTION Install this instrument on a level place. Do not install on near a place subject to vibration. 1. AUTOMATIC OPERATION ER-1500 shifts the column f printing automatically in the der of IN1, OUT1, IN2 and OUT2 without the user pressing any external keys. 1. Insert time card to the position where automatic feed starts. 2. Time card will be ejected automatically after printing the time. 2. MANUAL OPERATION ER-1500 allows manual operation f shifting the column to be printed on. 1. Select a desired column to print on the time card by pressing IN1, OUT1, IN2 OUT2 key. 2. The symbol appears at the selected column on the display. 3. Insert time card to the position where automatic feed starts. 4. Time card will be ejected automatically after printing the time
 2.")
15 1. Do not keep holding the time card during printing. 2. Do not pull push time card with your hand. 3. Do not cover any of the small holes at both edges on time card. 1. If E-01 appears on the display, the time card has been inserted increctly. (See [13] on page 21) 2. When using Daily Total Time from MODE 1, ER-1500 automatically prints the Total Time in the 5th column after printing the time in the 4th column

16 SETTING OR CHANGING DATA When setting changing any data, the Key-Card initiate the change. Operation 1. Insert the Key-Card. The 2. After setting changing data, insert the Key-Card again. The symbol appears on the display. symbol disappears. Keep the Key-Card in a safe place to prevent it from being damaged, lost used by an unauthized person. If you do not touch any keys f 60 seconds, the symbol disappears automatically must be used to
17 SETTING MACHINE MODE, PAY CLOSING DATE, SCALE AND DAILY TOTAL TIME (MODE 1) General Operating Procedure 1. Insert the Key-Card. The symbol appears on the display to indicate the setting mode is on. 2. IN1 key. The 3. symbol appears at MODE 1 on the display. key to change the items. 4. SET key after changing each item. The display will move to next item in the der of Machine Mode, Pay Closing Date, Scale and Daily Total Time. When the SET key is pressed at the end, the buzzer beeps twice and the display returns to the start of the setting mode. When the SET key is pressed, all time data is deleted and the revised data is set. When the CANCEL key is pressed, the revision is canceled without deleting time data. [The start of setting mode] [Daily Total Time] [Machine Mode] [Pay Closing Date] [The start of setting mode] Code No. [ scale]
18 Items (MODE 1) Initial data Setting range Code No. Machine Mode 1 1 to 6 01 Pay Closing Date 31 Depends on Machine Mode Number Scale 1 1 to 5 03 Daily Total Time If 1 2 is selected f Code No.3 ( scale), the machine doesn t print the Daily Total Time and so Code No. 04 (Daily Total Time) is not shown on the display. 2. ER-1500E does not have the option of the setting of Daily Total Time(Code 04). 3. If the CANCEL key is pressed while setting data, the display returns to the start of the setting mode without registering the changes
19 Specific Setting Procedures 1. Setting Machine Mode (Code No: 01) key to select the desired Machine Mode from the following table. Pay Period 12/24-Hour Fmat Machine Mode Monthly 12H 1 24H 2 12H 3 24H 4 12H 5 24H 6 Weekly Bi-weekly 1. The time is printed only in 24-hour fmat. 2. When setting in the Laid Down Position, only 24-hour fmat is displayed. 2. Setting Pay Closing Date (Code No: 02) After setting Machine Mode, Pay Closing Date is shown on the display. Monthly key to select the Pay Closing Date. When the display shows the desired closing date, press the SET key. fro m t o Weekly key to select the Pay Closing Date (from today to the next 6 days). When the display shows the desired closing date, press the SET key
20 fro m t o Bi-weekly key to select the Pay Closing Date (from today to the next 13 days). When the display shows the desired closing date, press the SET key. fro m t o
21 3. Setting Scale (Code No: 03) After setting Pay Closing Date, Scale is shown on the display. Select the printing style f the time and the Daily Total Time printing. key to select the desired number from the following table. Number Time Printing Style Daily Total Time Capacity of employees 1 Regular minutes (1/60) Nothing /100 of an hour Nothing Regular minutes (1/60) Regular minutes (1/60) /100th of an hour 1/100th of an hour 50 5 Regular minutes (1/60) 1/100 of an hour 50 th th 1. When 1 2 is selected, ER-1500 does not print the Daily Total Time. 2. When using Daily Total Time, the capacity of employees in a day/month is up to ER-1500E cannot set 3, When using 1/100th of an hour as the printing style, ER-1500 prints the minutes as shown on the chart below. [Equivalent Time Chart] Regular minutes 1/100th of an hour Regular minutes 1/100th of an hour Regular minutes 1/100th of an hour (1/60) (1/100) (1/60) (1/100) (1/60) (1/100)
22 Setting Daily Total Time (Code No: 04) Daily Total Time is shown on the display after setting Scale. When 1 2 from CODE 03 ER-1500E is used, this setting is not displayed. Select Regular wk time the Overtime wk as the Style of Daily Total Time. The machine automatically prints the Daily Total Time after printing the time in the 4 th column, using the style that has been selected. Press the Number key to select desired number Style the of Daily Total Time from the following table. 1 Regular wk time 2 Overtime wk 1. If 2(Overtime wk) is set but the Starting time of Overtime Wk is not set in MODE 3, ER-1500 prints 0: as the Daily Total Time in the 5th column. 2. If time is not printed in the 4th column, the Daily Total Time is not printed. 3. ER-1500 cannot calculate Monthly Total Time. [Printing example of daily total] 1. Setting 3 in CODE NO: 03. Time Printing Style = Regular minutes (1/60) Daily Total Time = Regular minutes (1/60)
23 2. Setting 4 in CODE NO: 03. Printing Style of the Time = 1/100th of an hour Daily Total Time = 1/100th of an hour 3. Setting 5 in CODE NO: 03. Time Printing Style = Regular minutes (1/60) Daily Total Time = 1/100th of an hour

24 SETTING YEAR, MONTH, DATE, HOUR, AND MINUTE (MODE 2) Procedure 1. Insert the Key-Card. The 2. OUT1 key. The symbol appears on the display to indicate the setting mode. symbol appears at MODE 2 on the display. key to change the Year, Month, Date, Hour and Minute. SET key after changing each item. When the SET key is pressed at the If C-05 is displayed, press the SET key. (See [14] on page 21.) [The start of setting mode] [Year] [Month/Date] [Hour/Minute] [Example] 1:35 (PM), 21st October, 2002 Procedure [MODE 2] OUT1 key. Current Year is shown on the display. SET key to register the Year. key until the display shows 10 f October. SET key to register the Month. key until the display shows 21. SET key to register the Date. key until the display shows 13. SET key to register the Hour [The start of setting mode] Display
25 key until the display shows 35. SET key to register the Minute. The display returns to the start of setting mode. 1. The symbol appears during Daylight Saving Time when it has been set. 2. In Europe, set Date first and Month second. 3. The clock starts at 00 seconds when the SET key is pressed at the end
26 SETTING LINE SHIFT TIME, IN/OUT AND DAYLIGHT SAVING TIME (MODE 3) Procedure 1. Insert the Key-Card. The symbol appears on the display to indicate the setting mode. 2. IN2 key. The symbol appears at MODE 3 on the display. key to change each item. SET key after changing each item. The display moves to next item in the der of Line Shift Time, IN/OUT, Overtime Start Time (OST) and Daylight Saving Time. When the SET key is pressed at the end, the buzzer beeps twice and the display returns to the start of the setting mode. If C-05 is displayed, press the SET key. (See [14] on page 21) 1. The time is displayed in only 24-hour fmat. 2. Initial data is displayed by pressing the Clear key. [The start of setting mode] [Line Shift Time] [Overtime Start Time (OST)] [OUT2] [IN1] [Starting date of Daylight Saving Time] [OUT1] [IN2] [Ending date of Daylight Saving [The start of setting Time] mode]
27 Items (MODE 3) Initial data Contents of setting LST 3 : 00 Line Shift Time (Day change time) 01 IN 1 --:-- Wking start time (IN 1) 02 OUT 1 --:-- Wking end time (OUT 1) 03 IN 2 --:-- Wking start time (IN 2) 04 OUT 2 --:-- Wking end time (OUT 2) 05 OST --:-- Starting time of Overtime Wk 06 Daylight Saving Time Start --:-- Starting date of Daylight Saving Time 07 Daylight Saving Time End --:-- Ending date of Daylight Saving Time Code No.
 : Starting time of wk : Starting time of lunch :")
![12 : 00 Ending time of lunch : 13 : 00 Ending time of wk : 17 : 00 Starting time of Overtime wk : 17 : 30 Procedure [MODE 3] IN2 key.](/docs-images/90/101814723/images/28-1.jpg "Current Line Shift Time is shown on the display. key until the display shows 4:00. SET key to register the Line Shift Time.")

28 Procedure 1. Setting IN & OUT and starting time of Overtime Wk [Example] Line Shift Time (Day change time) : Starting time of wk : Starting time of lunch : 12 : 00 Ending time of lunch : 13 : 00 Ending time of wk : 17 : 00 Starting time of Overtime wk : 17 : 30 Procedure [MODE 3] IN2 key. Current Line Shift Time is shown on the display. key until the display shows 4:00. SET key to register the Line Shift Time. key until the display shows 9. SET key to register the Hour f IN1. key until the display shows 00. SET key to register the Minute f IN1. key until the display shows 12. SET key to register the Hour f OUT1. key until the display shows 00. SET key to register the Minute f OUT1. key until the display shows 13. SET key to register the Hour f IN2. key until the display shows 00. SET key to register the Minute f IN : 00 9 : 00 Display


29 key until the display shows 17. SET key to register the Hour f OUT2. key until the display shows 00. SET key to register the Minute f OUT2. key until the display shows 17. SET key to register the Hour f OST. key until the display shows 30. SET key to register the Minute f OST
30 2. Setting Daylight Saving Time After setting Starting time of Overtime wk, the display moves to Starting Date of Daylight Saving Time. Setting the day the week of (Position f the month) (Position f the week) (Code No.) When setting the last week of the month, set L f the last week even if the last week is the 4th week. [Example] Starting Date of Daylight Saving Time : Ending Date of Daylight Saving Time : Procedure [MODE 3] After setting Starting time of Overtime Wk, the display moves to Starting Date of Daylight Saving Time. key until the display shows 3 f March. SET key to register the Month. key until the display shows L f the Last week. SET key to register the Week. Move the curs to the position of SUN f the day of the week by pressing the key. SET key to register the day of the week. key until the display shows 10 f October. SET key to register the Month. key until the display shows L f the Last week Sunday of the last Display
31 SET key to register the Week. Move the curs to the position of SUN f the day of the week by pressing the key. SET key to register the day of the week. 1. During the period of Daylight Saving Time, the play. symbol appears on the dis- 2. Once set, Daylight Saving Time will be adjusted automatically from the following year, in accdance with the set data
32 LATE-IN, EARLY-OUT, OVERTIME WORKING AND NEXT DAY OVERTIME SYMBOLS ER-1500 can automatically print the symbols Late-In ( ), Early-Out ( ), Overtime Wk ( ( See [9] on page 15) ) at the right position, in accdance with the set time of IN1 OUT2 (Code No ) and the start time of Overtime Wk (Code No. 06). [Example of using the following data f MODE 3] Items (MODE 3) Data to be used Code No. LST 04 : IN 1 09 : OUT 1 12 : IN 2 13 : OUT 2 17 : OST 17 : (The data used in MODE 1 ) Printing Style of the Time = Regular minutes (1/60) Daily Total Time = Regular minutes (1/60) Style of Daily Total Time = Overtime wk [Printing examples] Note (Note 1) (Note 2) (1) The Daily Total Time should be 0:00, because the fth printing time is not beyond the starting time of Overtime wk. (2) The Daily Total Time is printed after printing in the 4th column
33 - 31 -

34 REPLACING THE INK RIBBON CASSETTE Use only ER-IR100 ER-IR100E ink ribbon cassettes. Replace the ink ribbon cassette using the following procedure, if the printing is too light. CAUTION Never touch the printer head. It is very hot just after printing and you could get burned. Disconnect the power cd from the plug socket. Wash your hands/body immediately with soap if the ink ribbon rubs off on them. Procedure 1. Disconnect the power cd from the plug socket. Open and remove the front cover. 2. Holding (A), (B) and (C) as shown, lift the cassette out. 3. Turn the knob of the new ink ribbon cassette in the direction indicated by the arrow to remove any slack in the ribbon. 4. Insert the cassette properly as illustrated so that ribbon tape is set between the Mask Plate and the Printer Head. Then turn the knob again to remove the slack in the ribbon. 5. Close the front cover and connect the power cd
35 WALL MOUNTING AND LAID-DOWN POSITION INSTALLATION CAUTION If mounting on a wall, make sure the wall is strong enough to hold the mount and recder. Mount ER-1500 by Do not use other materials. the attached wall Disconnect the power cd befe installing on wall. Wall Mounting If hanging ER-1500 on a wall, use the following procedure. 1. Remove screw (A) and the attached wall mounting plate as illustrated. 2. Fix the wall mounting plate to the wall with the included 2 screws (accessies). 3. Install ER-1500 into the wall mounting plate as illustrated. Laid-Down Position 1. Remove the front cover. 2. key f Laid Down Position. 3. The clock display will turn upside down mounting plate.
36 The time on the display shows 24-hour fmat only
37 ERROR CODES Err codes Problem Solution Time card is not inserted far Insert time card to where automatic feed enough to where automatic feed starts. activates. Time card is inserted on the wrong side. Insert time card on the other side. ER-1500 cannot read holes on Check if any holes are covered. time card crectly. Check if time card is bent damaged. 4 printings have been already completed in a day. Improper print was made by manual operation time cards have been (ER-1500 can handle up to time already inserted in a day/month. cards a day/month.) When setting ER-1500, invalid Input crect value. value is input. Automatic feed does not carry Do not hold time card during printing. time card smoothly. Check if time card is bent damaged. Printer malfunction. Try to get nmal printout by disconnecting connecting the power cd. CAUTION CODE Caution Code Problem Solution
38 When you try to revise Machine If you press SET key Mode, Pay Closing Date, Date, All time data is deleted and the LST, 60/100 scale Daily Total Time, all time data is deleted. revised data is registered. If you press CANCEL key The revision is canceled without deleting time data
39 TROUBLE SHOOTING CAUTION Never disassemble the instrument by yourself. Contact your dealer distribut if you could not solve the problem after checking the following table. Problem No display Points to Check Is the power cd connected to the plug socket crectly? No print out on time card Is the ink ribbon cassette inserted crectly? Card insertion obstructed Is the card being inserted on the crect side? Is the card bent damaged? Deviation in the printing Is the card being inserted too strongly? line position Do you pull out the card during the printing process? Do you keep holding the card when it is automatically being pulled inside? Faint printout Is the card damp? Is the ink ribbon being used too long? Is the ink ribbon cassette inserted crectly? See
40 SPECIFICATIONS Product description Power supply Max Electronic Time Recder ER-1500 Nth America AC120V +6% -10% 60Hz Europe AC230V +6% -10% 60Hz Other countries AC V +6% -10% 50/60Hz Outside dimensions 200 (H) 150 (W) 100 (D) mm [7 7/8 (H) 5 7/8 (W) 3 7/8 (D)] Weight 1.7kg (3.75lbs.) Power Consumption Nmal : 5W, Maximum : 30W Clock system Crystal quartz oscillation Monthly tolerance ±15 seconds (Nmal temperature : 25±5 / ) Display Date, Hour, Minute, AM/PM, Day of week, Printed infmation Date, Hour/minute (Up to 4 columns), Daily Total Time Symbol of,,,,., Guarantee in case of power failure Memy backup suppted by an internal battery and a clock function guaranteed over a period of 5 years as accumulated power failure after assembling at facty. Capacity employees Time card / Ink ribbon MAX ER-M time card ER-IR100 ER-IR100E ink ribbon cassette Operating temperature 0 40 Stage temperature / /
41 - 39 -
42 WARNING This equipment has been verified to comply with the limits f a Class B personal digital device, pursuant to Subpart B of Part 15 of FCC Rules. Only peripherals (computer input/output devices, terminals printers, etc.) certified verified to comply with the Class B limits may be attached to this equipment. Operation with non-certified non- verified personal computer and/ peripherals is likely to result in interference to radio and TV reception. The connection of a non-shielded equipment interface cable to this equipment will invalidate the FCC Certification of this device and may cause interference levels which exceed the limits established by the FCC f this equipment. You are cautioned that changes modifications not expressly approved by the party responsible f compliance could void your authity to operate the equipment
43 - 41 -


44 Recycled paper is used f this manual and its recyclable. This instruction manual is subject to change without notice due to functional enhancement. 6-6, NIHONBASHI HAKOZAKI-CHO, CHUO-KU, TOKYO, JAPAN POST CODE: #
45 TELEPHONE: FAX: URL: (GLOBAL Site) (USA Site) Vol PRINTED IN JAPAN
QUARTZ TIME RECORDER. Simplex 300 OPERATION MANUAL
 QUARTZ TIME RECORDER Simplex 300 OPERATION MANUAL TABLE OF CONTENTS 1. 2. 3. 4. 5. 6. 7. 8. 9. PRECAUTIONS FEATURES BEFORE USING THE TIME RECORDER Accessories Features Installing Ribbon Cassette Wall Mounting
1. Power supply 100, 110, 200, 220, 230 V AC (as designated), 50/60 Hz, single phase.
, 50/60 Hz, single phase.") (1) Specifications: 1. Power supply 100, 110, 200, 220, 230 V AC (as designated), 50/60 Hz, single phase. 2. Power consumption Normal 2W (MAX 30W) 3. Standard time signal Quartz oscillation 4. Time accuracy
(1) Specifications: 1. Power supply 100, 110, 200, 220, 230 V AC (as designated), 50/60 Hz, single phase. 2. Power consumption Normal 2W (MAX 30W) 3. Standard time signal Quartz oscillation 4. Time accuracy
WARNING ALL RIGHTS RESERVED 2004 ACROPRINT TIME RECORDER
 USER'S MANUAL WARNING This equipment has been tested and found to comply with the limits for a Class A digital device, pursuant to Part 15 of FCC Rules. These limits are designed to provide reasonable
Electric Motorized Projection Screen Spectrum Tab-Tension Series User s Guide
 Electric Motorized Projection Screen Spectrum Tab-Tension Series User s Guide Important Safety Precautions Make sure to read this user s guide and follow the procedures below prior to screen operation.
USER MANUAL. 27 Full HD Widescreen LED Monitor L27ADS
 USER MANUAL 27 Full HD Widescreen LED Monitor L27ADS TABLE OF CONTENTS 1 Getting Started 2 Control Panel/ Back Panel 3 On Screen Display 4 Technical Specs 5 Care & Maintenance 6 Troubleshooting 7 Safety
) AMANO. ,i CINCINNATI ELECTRONIC TIME RECORDER EX 6000 SERIES
 AMANO. ,i CINCINNATI ELECTRONIC TIME RECORDER EX 6000 SERIES") ) AMANO,i CINCINNATI ELECTRONIC TIME RECORDER EX 6000 SERIES CONTENTS External View 1. 1 Specifications 1 Before Programing EX-6000 series 1 2 How To Program EX-6000 series 1 6 Printing Space (Vertical)
) AMANO,i CINCINNATI ELECTRONIC TIME RECORDER EX 6000 SERIES CONTENTS External View 1. 1 Specifications 1 Before Programing EX-6000 series 1 2 How To Program EX-6000 series 1 6 Printing Space (Vertical)
USER MANUAL. 22" Class Slim HD Widescreen Monitor L215DS
 USER MANUAL 22" Class Slim HD Widescreen Monitor L215DS TABLE OF CONTENTS 1 Getting Started Package Includes Installation 2 Control Panel / Back Panel Control Panel Back Panel 3 On Screen Display 4 Technical
USER MANUAL. 27 Full HD Widescreen LED Monitor L270E
 USER MANUAL 27 Full HD Widescreen LED Monitor L270E TABLE OF CONTENTS 1 Getting Started 2 Control Panel/ Back Panel 3 On Screen Display 4 Technical Specs 5 Care & Maintenance 6 Troubleshooting 7 Safety
USER MANUAL Full HD Widescreen LED Monitor L215ADS
 USER MANUAL 21.5 Full HD Widescreen LED Monitor L215ADS TABLE OF CONTENTS 1 Getting Started 2 Control Panel/ Back Panel 3 On Screen Display 4 Technical Specs 5 Care & Maintenance 6 Troubleshooting 7 Safety
USER MANUAL Full HD Widescreen LED Monitor L215IPS
 USER MANUAL 21.5 Full HD Widescreen LED Monitor L215IPS TABLE OF CONTENTS 1 Getting Started 2 Control Panel/ Back Panel 3 On Screen Display 4 Technical Specs 5 Care & Maintenance 6 Troubleshooting 7 Safety
PLL2210MW LED Monitor
 PLL2210MW LED Monitor USER'S GUIDE www.planar.com Content Operation Instructions...1 Safety Precautions...2 First Setup...3 Front View of the Product...4 Rear View of the Product...5 Quick Installation...6
PLL1920M LED LCD Monitor
 PLL1920M LED LCD Monitor USER'S GUIDE www.planar.com Content Operation Instructions...1 Safety Precautions...2 First Setup...3 Front View of the Product...4 Rear View of the Product...5 Installation...6
PL2410W LCD Monitor USER'S GUIDE.
 PL2410W LCD Monitor USER'S GUIDE www.planar.com Content Operation Instructions...1 Safety Precautions...2 First Setup...3 Front View of the Product...4 Rear View of the Product...5 Quick Installation...6
USER MANUAL Full HD Widescreen LED Monitor L236VA
 USER MANUAL 23.6 Full HD Widescreen LED Monitor L236VA TABLE OF CONTENTS 1 Getting Started 2 Control Panel/ Back Panel 3 On Screen Display 4 Technical Specs 5 Care & Maintenance 6 Troubleshooting 7 Safety
In-Ceiling Electric Motorized Front Projection Screen Evanesce Series. User s Guide
 In-Ceiling Electric Motorized Front Projection Screen Evanesce Series User s Guide Important Safety & Warning Precautions Make sure to read this user s guide and follow the procedures below. Caution: The
ACCESSORIES MANUAL PART NUMBER: PRODUCT REVISION: 1 PNP202. Interconnect Box USER'S GUIDE
 MANUAL PART NUMBER: 400-0109-001 PRODUCT REVISION: 1 PNP202 Interconnect Box USER'S GUIDE INTRODUCTION Your purchase of the PNP202 Interconnect Box is greatly appreciated. We are sure you will find it
LCD MONITOR. 27 Wide LED Monitor User Manual. User Manual P276L
 LCD MONITOR 27 Wide LED Monitor User Manual User Manual P276L Precautions Precautions Warning The following information will help you avoid the risk of electric shock, serious injury or death. Power cord
Electric Motorized Projection Screen PowerMax Tension Series
 Electric Motorized Projection Screen PowerMax Tension Series User s Guide Important Safety & Warning Precautions Make sure to read this user s guide and follow the procedures below. Caution: The screen
LCD VALUE SERIES (32 inches)
") LCD VALUE SERIES (32 inches) http://www.orionimages.com All contents of this document may change without prior notice, and actual product appearance may differ from that depicted herein 1. SAFETY INSTRUCTION
LCD VALUE SERIES (32 inches) http://www.orionimages.com All contents of this document may change without prior notice, and actual product appearance may differ from that depicted herein 1. SAFETY INSTRUCTION
Thank you for purchasing SEIKO SHOOTING TIMER KT-401. Before using your SEIKO SHOOTING TIMER, please read this manual carefully for its proper use
 紙 Thank you for purchasing SEIKO SHOOTING TIMER KT-401. Before using your SEIKO SHOOTING TIMER, please read this manual carefully for its proper use and care. Keep this manual handy for ready reference.
19 / 20.1 / 22 WIDE SCREEN TFT-LCD MONITOR
 19 / 20.1 / 22 WIDE SCREEN TFT-LCD MONITOR V193/ V220 Series V202 Series USER MANUAL www.viewera.com Rev. 2.0 Table of Contents EMC Compliance......1 Important Precautions...2 1. Package contents....3
VMA ACTIVE MATRIX TFT COLOR LCD MONITOR OWNER S MANUAL INSTALLATION GUIDE
 VMA6491 6.4 ACTIVE MATRIX TFT COLOR LCD MONITOR OWNER S MANUAL INSTALLATION GUIDE OWNER S MANUAL WARNING! THE CLARION VMA6491 LCD MONITOR IS DESIGNED FOR REAR SEAT PASSENGER VIEWING ONLY. THIS PRODUCT
User s Manual VTECH Printed in China Out of the Blue Enterprises LLC. All Rights Reserved
 User s Manual 2009 VTECH Printed in China 91-002395-023-000 2009 Out of the Blue Enterprises LLC. All Rights Reserved. INTRODUCTION There s a super big problem in Fairytale Land! A lonely dragon in search
4-PROJECTOR BAR WITH 3 X 9W LEDS AND 1 X 1W FLASH LED USER GUIDE
 4-PROJECTOR BAR WITH 3 X 9W LEDS AND 1 X 1W FLASH LED USER GUIDE 10482 - Version 1 / 04-2016 English LIVESET - LIVESET - 4-Projector bar with 3 x 9W LEDs and 1 x 1W Flash LED 1 - Safety information Important
BELL TIMER OPERATING INSTRUCTIONS
 BELL TIMER OPERATING INSTRUCTIONS Many thanks for purchasing SEIKO Bell Timer. Before putting your SEIKO Bell Timer system to use, please be sure to carefully read through this manual as it has been designed
ACCESSORIES MANUAL PART NUMBER: TNP500. Universal Tilt N Plug Interconnect Box USER'S GUIDE
 MANUAL PART NUMBER: 400-0091-003 TNP500 Universal Tilt N Plug Interconnect Box USER'S GUIDE INTRODUCTION Your purchase of the TNP100 Tilt N Plug Interconnect Box is greatly appreciated. We are sure you
PXL2760MW LED LCD Monitor
 PXL2760MW LED LCD Monitor USER'S GUIDE www.planar.com Content Operation Instructions...1 Safety Precautions...2 Package Overview...3 First Setup...4 Front View of the Product...5 Rear View of the Product...6
ASH - EOC-01. Ethernet Over Coax Adapter User Guide
 ASH - EOC-01 Ethernet Over Coax Adapter User Guide ASH - EOC-01 User s Guide 1 Table of Contents Warning and Safety Information 3 Product Overview 8 Package Contents and Accessories 8 Introduction 9 Indicators
USER MANUAL. 28" 4K Ultra HD Monitor L28TN4K
 USER MANUAL 28" 4K Ultra HD Monitor L28TN4K TABLE OF CONTENTS 1 Getting Started 2 Control Panel/ Back Panel 3 On Screen Display 4 Technical Specs 5 Care & Maintenance 6 Troubleshooting 7 Safety Info &
PLL2710W LED LCD Monitor
 PLL2710W LED LCD Monitor USER'S GUIDE www.planar.com Content Operation Instructions...1 Safety Precautions...2 Package Overview...3 First Setup...4 Front View of the Product...5 Rear View of the Product...6
28 4K LED monitor. User Manual M284K
 28 4K LED monitor User Manual M284K CONTENTS Safety Information... 2 What s included..... 4 Getting Started....... 8 Troubleshooting.... 14 Specification.... 15 2 of 15 SAFETY INFORMATION Read these instructions
ACCESSORIES MANUAL PART NUMBER: PRODUCT REVISION: 1 TNP100. Tilt N Plug Interconnect Box USER'S GUIDE
 MANUAL PART NUMBER: 400-0091-001 PRODUCT REVISION: 1 TNP100 Tilt N Plug Interconnect Box USER'S GUIDE INTRODUCTION Your purchase of the TNP100 Tilt N Plug Interconnect Box is greatly appreciated. We are
CNK JR. SERIES CABLE-NOOK JR. TABLETOP INTERCONNECT BOXES USER'S GUIDE
 MANUAL PART NUMBER: 400-0133-001 PRODUCT REVISION: 0 CNK JR. SERIES CABLE-NOOK JR. TABLETOP INTERCONNECT BOXES USER'S GUIDE TABLE OF CONTENTS Page PRECAUTIONS / SAFETY WARNINGS... 2 GENERAL... 2 INSTALLATION...
User Manual Color video door phone
 User Manual Color video door phone CDV-70AR3 Thank you for purchasing COMMAX products. Please carefully read this User s Guide (in particular, precautions for safety) before using a product and follow
USER MANUAL. 27" 2K QHD LED Monitor L27HAS2K
 USER MANUAL 27" 2K QHD LED Monitor L27HAS2K TABLE OF CONTENTS 1 Getting Started 2 Control Panel/ Back Panel 3 On Screen Display 4 Technical Specs 5 Troubleshooting 6 Safety Info & FCC warning 1 GETTING
TFT LCD MONITOR USER MANUAL. L80AP and L101AP
 TFT LCD MONITOR USER MANUAL L80AP - 8.0 and L101AP - 10.1 Table Of Contents Table of contents/ Warning.... 2 Precautions...3 About this user manual and products / Items included in the delivery..... 4
2.0 Wall Mount TV Soundbar Instruction Manual
 8010275 2.0 Wall Mount TV Soundbar Instruction Manual Read all of the instructions before using this soundbar and keep the manual in a safe place for future reference. Safety Information CA UT IO N RISK
17 19 PROFESSIONAL LCD COLOUR MONITOR ART
 17 19 PROFESSIONAL LCD COLOUR MONITOR ART. 41657-41659 Via Don Arrigoni, 5 24020 Rovetta S. Lorenzo (Bergamo) http://www.comelit.eu e-mail:export.department@comelit.it WARNING: TO REDUCE THE RISK OF FIRE
Operating Instructions
 Operating Instructions Before Use Basic Operations Troubleshooting For safe and correct use, be sure to read the Safety Information in Read This First before using the machine. Introduction This manual
CNK221 CABLE-NOOK JR. INTERCONNECT BOX USER S GUIDE
 MANUAL PART NUMBER: 400-0133-002 CNK221 CABLE-NOOK JR. INTERCONNECT BOX USER S GUIDE TABLE OF CONTENTS Page PRECAUTIONS / SAFETY WARNINGS... 2 GENERAL... 2 INSTALLATION... 2 CLEANING... 2 FCC / CE NOTICE...
Operating Instructions
 Operating Instructions LCDRV700 Digital LCD Color Monitor Please read this manual thoroughly before operating the unit, and keep it for future reference. V1.0 Contents 1. Precautions 2. Features 1 3 3.
Important Safety & Warning Precautions
 Electric Motorized Projection Screen VMAX 2 Series User s Guide Important Safety & Warning Precautions Make sure to read this user s guide and follow the procedure below. Caution: The screen s Black Top
User Manual. Tensioned Screens. Website: Tel:
 User Manual Tensioned Screens Website: www.luxburgvisual.com Email: support@luxburgvisual.com Tel: 0044 207 237 4842 Table of Contents SAFETY INFORMATION... 3 IMPORTANT SAFETY INSTRUCTION... 3 SETTING
TruAlign Time Recorder. Model 800P. Installation & User's Guide
 TruAlign Time Recorder Model 800P Installation & User's Guide This device complies with Part 15 of the FCC Rules. Operation is subject to the following two conditions: (1) this device may not cause harmful
DV6819 Quick Reference Guide V1.0. Smart TV Box. Quick Reference Guide. Please do read user manual before you operate the TV box.
 DV6819 Quick Reference Guide V1.0 Smart TV Box Quick Reference Guide Please do read user manual before you operate the TV box. ~ 1 ~ DV6819 Quick Reference Guide V1.0 Safety instruction Please keep the
Electric Wall/Ceiling Projection Screen Saker Series User s Guide
 Electric Wall/Ceiling Projection Screen Saker Series User s Guide Important Safety & Warning Precautions Make sure to read this user s guide and follow the procedures below. Caution: The screen s Black
Electric Wall/Ceiling Projection Screen Saker Tab-Tension Series User s Guide
 Electric Wall/Ceiling Projection Screen Saker Tab-Tension Series User s Guide Important Safety & Warning Precautions Make sure to read this user s guide and follow the procedures below. Caution: The screen
AUTO - SCANNING WITH DIGITAL CONTROL LCD COLOR MONITOR FS-L1903C. User manual (Rev.01) SMITHS HEIMANN
 SMITHS HEIMANN") AUTO - SCANNING WITH DIGITAL CONTROL LCD COLOR MONITOR FS-L1903C User manual (Rev.01) SMITHS HEIMANN www.smithsdetection.com Table of Contents Safety Instructions... 5 Accessories... 8 Power Connections...
AUTO - SCANNING WITH DIGITAL CONTROL LCD COLOR MONITOR FS-L1903C User manual (Rev.01) SMITHS HEIMANN www.smithsdetection.com Table of Contents Safety Instructions... 5 Accessories... 8 Power Connections...
28 & 32 & 40 & 55 & 65 & 84-INCH TFT-LCD 4K MONITOR
 28 & 32 & 40 & 55 & 65 & 84-INCH TFT-LCD 4K MONITOR INSTRUCTION MANUAL Please read this manual thoroughly before use, and keep it handy for future reference. TABLE OF CONTENTS 1, General information...
22" Touchscreen LED Monitor USER'S GUIDE
 22" Touchscreen LED Monitor USER'S GUIDE Content Operation Instructions...1 Unpacking Instructions...2 Safety Precautions...2 Front View of the Product...3 Rear View of the Product...4 Quick Installation...5
Ambient Weather WS-01 Intelligent Color Changing Temperature Night Light with Ambient Backlight User Manual
 Ambient Weather WS-01 Intelligent Color Changing Temperature Night Light with Ambient Backlight User Manual Table of Contents 1 Introduction... 1 2 Warnings... 2 3 Getting Started... 2 3.1 Parts List...
2nd Edition. Quick Start Guide. getawair.com
 2nd Edition Quick Start Guide getawair.com Stay Healthy Awair tracks toxins and chemicals in your air and gives you personalized recommendations to help you stay safe and healthy. Sensors Fine Dust (PM2.5)
May result in personal injury or property loss. Indicate the behaviors that must be prohibited
 User Manual VXM143U Please read this manual carefully for proper usage before lnstallatlon and use. It is recommended to keep this manual for future check. The pictures in this manual are only for reference.
User Instructions. 16 SCB Sync Station.
 User Instructions 16 SCB Sync Station Contents Overview... 1 Specifications... 1 Compliance and approvals... 2 Safety instructions... 3 Set up... 4 How to charge multiple devices... 4 How to synchronize
Weekly Time Switch. Rated time Time setting range Time division 24 hrs x 7 days 00:00 to 23:59 1min
 Weekly Time Switch Easy Programming with Large LCD Display and Interactive Functions Programming for 24 hrs x 7 days using just five switches. Sixteen program steps available. Power supply freely selectable
TABLE OF CONTENTS Important Safety Instructions Package Content Setting Up the Display Trouble shooting Specifications Product Dimensions
 TABLE OF CONTENTS Important Safety Instructions...1 1.1 Safety precautions and maintenance....1 1.2 Use.......4 1.3 Installation Notes.......7 Package Content...9 2.1 Unpacking...9 2.2 Accessories......10
DDW36C Advanced Wireless Gateway - Safety and Installation Product Insert. Federal Communications Commission (FCC) Interference Statement
 Interference Statement") DDW36C Advanced Wireless Gateway - Safety and Installation Product Insert Federal Communications Commission (FCC) Interference Statement This equipment has been tested and found to comply with the limits
DDW36C Advanced Wireless Gateway - Safety and Installation Product Insert Federal Communications Commission (FCC) Interference Statement This equipment has been tested and found to comply with the limits
DISTRIBUTION AMPLIFIER
 MANUAL PART NUMBER: 400-0045-005 DA1907SX 1-IN, 2-OUT VGA/SVGA/XGA/UXGA DISTRIBUTION AMPLIFIER USER S GUIDE TABLE OF CONTENTS Page PRECAUTIONS / SAFETY WARNINGS... 2 GENERAL...2 GUIDELINES FOR RACK-MOUNTING...2
TVAC20000 User manual
 TVAC20000 User manual Version 01/2010 Original English user manual. Keep for future use. 10 Introduction Dear Customer, Thank you for purchasing this product. This product meets the requirements of the
Winmate Communication INC.
 20.1 Military Grade Display Model: R20L100-RKA2ML User s Manual Winmate Communication INC. May, 2011 1 IMPORTANT SAFETY INSTRUCTIONS Please read these instructions carefully before using the product and
DA1909 COMPUTER VIDEO LINE DRIVER WITH EQUALIZATION USER S GUIDE
 MANUAL PART NUMBER: 400-0108-002 PRODUCT REVISION: 1 COMPUTER VIDEO LINE DRIVER WITH EQUALIZATION USER S GUIDE INTRODUCTION Altinex appreciates your purchase of the Line Driver. We are sure you will find
PXL2470MW LED LCD Monitor
 PXL2470MW LED LCD Monitor USER'S GUIDE www.planar.com Content Operation Instructions...1 Unpacking Instructions...2 Safety Precautions...2 Package Overview...3 First Setup...4 Front View of the Product...5
SC / /205 Passive Audio Adapters User s Guide
 /205 204/205 Passive Audio Adapters User s Guide Welcome! We greatly appreciate your purchase of the /205 Passive Unbalanced to Balanced Audio Adapter. We are sure you will find it reliable and simple
PERFECT Operating and Installation Manual
 PERFECT 2020 Operating and Installation Manual PERFECT 2020 Time recorder Manual for the operation and installation of the time recorder Copyright ISGUS J Schlenker-Grusen GmbH 2001-2007 The company ISGUS
ART 7 SERIES PROFESSIONAL ACTIVE SUBWOOFERS. a new generation of speakers is born and it s ready to rock audiences all over the world
 ART 7 SERIES PROFESSIONAL ACTIVE SUBWOOFERS a new generation of speakers is born and it s ready to rock audiences all over the world SAFETY PRECAUTIONS Before connecting and using the amplifier, please
DCL9AW. User Manual. English
 DCL9AW User Manual English PRECAUTIONS Information for users applicable in European Union countries 1 Information for users applicable in United States of America 1 Installation 1 Power connection 1 Maintenance
ES1000 USER S MANUAL H-3974
 ES1000 USER S MANUAL PAGE 1 OF 37 WARNING This equipment has been tested and found to comply with the limits for a Class A digital device, pursuant to Part 15 of FCC Rules. These limits are designed to
User manual Hardware manual. Casablanca S series S-2000 / S-4000 / S-4100
 User manual Hardware manual Casablanca S series S-2000 / S-4000 / S-4100 The following products carry the CE seal of conformity on the basis of the guidelines 89/336/EWG of the Commission of the European
PNP300 & PNP350 POP N PLUG SLIM INTERCONNECT BOX USER S GUIDE
 The is shown above. MANUAL PART NUMBER: 400-0114-004 & PNP350 POP N PLUG SLIM INTERCONNECT BOX USER S GUIDE TABLE OF CONTENTS Page PRECAUTIONS / SAFETY WARNINGS... 2 GENERAL...2 HANDLING...2 CLEANING...2
Electric Wall/Ceiling Projection Screen Saker Plus Series User s Guide
 Electric Wall/Ceiling Projection Screen Saker Plus Series User s Guide Important Safety & Warning Precautions Make sure to read this user s guide and follow the procedures below. Caution: The screen s
U S E R M A N U A L SMIIRL 2017
 USER MANUAL SMIIRL 2017 1 Plug in your Counter to the power supply Plug in the Counter using the power cable and the adaptor provided. Have a look at the blue label, this is where the ID of your Counter
DH551C/DH550C/DL550C Double Sided Display User Manual
 DH551C/DH550C/DL550C Double Sided Display User Manual Disclaimer BenQ Corporation makes no representations or warranties, either expressed or implied, with respect to the contents of this document. BenQ
TP HDMI OVER ANYWIRE RECEIVER (DC)
") HDMI OVER ANYWIRE RECEIVER (DC) Welcome! Everyone at Altinex greatly appreciates your purchase of the TP315 106. We are confident that you will find it to be reliable and simple to use. If you need support,
HDMI OVER ANYWIRE RECEIVER (DC) Welcome! Everyone at Altinex greatly appreciates your purchase of the TP315 106. We are confident that you will find it to be reliable and simple to use. If you need support,
USERS GUIDE MCX-HTS. HDMI to 3G SDI Converter. Manual Number:
 USERS GUIDE MCX-HTS HDMI to 3G SDI Converter i Manual Number: 151226 SAFETY INSTRUCTIONS Please review the following safety precautions. If this is the first time using this model, then read this manual
TP /351 HDMI Over Coax with IR
 HDMI Over Coax with IR Welcome! We greatly appreciate your purchase of the TP115-350/351 HDMI over Coax Transmitter/Receiver. We are sure you will find it reliable and simple to use. Superior performance
4K LED MONITOR 430LED4K & 550LED4K INSTRUCTION MANUAL. Please read this manual thoroughly before use, and keep it handy for future reference.
 4K LED MONITOR 430LED4K & 550LED4K INSTRUCTION MANUAL Please read this manual thoroughly before use, and keep it handy for future reference. CONTENTS 1. GENERAL INFORMATION...3 2. 3. 1.1. 1.2. 1.3. 2.1.
MANUAL. Model : FitScan BC-1100F Instruction Manual Read this Instruction Manual carefully and keep for future reference.
 MANUAL Model : FitScan BC-1100F Instruction Manual Read this Instruction Manual carefully and keep for future reference. Introduction Thank you for selecting a Tanita Body Composition Monitor. This monitor
600 Series Video Surveillance Monitors
 600 Series Video Surveillance Monitors 32 LED Monitor 43, 50, 55 & 55 4K LED Monitor Models: PMCL632: PMCL643 PMCL650 PMCL655 PMCL655K Contents for Wall Mount Monitor User Manual (10/16)... 1 Important
User Manual Color Video Door Phone
 User Manual Color Video Door Phone CMV-43A Thank you for purchasing COMMAX products. Please carefully read this User s Guide (in particular, precautions for safety) before using a product and follow instructions
KingWash 7QX 7x40w,Zoom 5-60degree. User manual. Please read the instructions carefully before use TABLE OF CONTENTS
 KingWash 7QX 7x40w,Zoom 5-60degree User manual Please read the instructions carefully before use TABLE OF CONTENTS 1. Safety Instructions... 2 2. Technical Specifications... 4 3. How To Control The Unit...
TP HDMI OVER ANYWIRE TRANSMITTER
 HDMI OVER ANYWIRE TRANSMITTER Welcome! Everyone at Altinex greatly appreciates your purchase of the TP315-101. We are confident that you will find it to be reliable and simple to use. If you need support,
UDRC13 ACCESSORY CAMERA Owner s Manual
 UDRC13 ACCESSORY CAMERA Owner s Manual Compatible with UDR444 Wireless Video Surveillance System If any items are missing or damaged, contact our Customer Care Line immediately. Never use damaged products!
MT IN, 2-OUT CAT-5 TO VGA RECEIVER CARD FOR MULTI-TASKER USER S GUIDE
 MANUAL PART NUMBER: 400-0183-002 2-IN, 2-OUT CAT-5 TO VGA RECEIVER CARD FOR MULTI-TASKER USER S GUIDE TABLE OF CONTENTS Page PRECAUTIONS / SAFETY WARNINGS... 2 GENERAL...2 INSTALLATION...2 CLEANING...2
DA IN 1-OUT LINE DRIVER WITH EQUALIZATION + AUDIO USER S GUIDE
 MANUAL PART NUMBER: 400-0430-001 1-IN 1-OUT LINE DRIVER WITH UALIZATION + AUDIO USER S GUIDE TABLE OF CONTENTS Page PRECAUTIONS / SAFETY WARNINGS... 2 GENERAL...2 GUIDELINES FOR RACK-MOUNTING...2 INSTALLATION...2
TR6102HD HDTV/DVD/COMPONENT VIDEO TO RGBHV TRANSCODER USER S GUIDE
 MANUAL PART NUMBER: 400-0031-003 PRODUCT REVISION: 1 HDTV/DVD/COMPONENT VIDEO TO RGBHV TRANSCODER USER S GUIDE INTRODUCTION Thank you for your purchase of the Transcoder. We are certain that you will find
ServerCall Transmitter
 ServerCall Transmitter User Instruction Manual FCC ID : QBTLTK-SCT TRADE NAME: SERVERCALL TRANSMITTER MODEL NO.: LTK-SCT THIS DEVICE COMPLIES WITH PART 15 OF THE FCC RULES. OPERATION IS SUBJECT TO THE
Golf ball tracker. Instruction manual
 Golf ball tracker Instruction manual General Intended use The Prazza golf ball finder is intended for use on the golf course only and should never be used inside the home or any other enclosed environment.the
User Manual Color video door phone
 User Manual Color video door phone CDV-43Q Thank Thank you you for for purchasing purchasing COMMAX COMMAX products. products. Please Please carefully carefully read read this this User s User s Guide
Package Contents Connections and Controls... 5 Front of the active Subwoofer... 5 Rear of the active Subwoofer... 6
 Table of Contents: Safety and Service... 2 Operational Safety... 2 Location... 2 Ambient Temperature... 3 Electromagnetic Compliance... 3 Service... 4 Cleaning... 4 Disposal... 4 Package Contents... 4
Website: Tel: ADDRESS: 6475 Las Positas Rd. Livermore, CA Item No. E5B/E5S Installation Guide
 Website: www.flexispot.com Tel: -855-4-808 ADDRESS: 6475 Las Positas Rd. Livermore, CA 9455 Item No. E5B/E5S Installation Guide Specifications Step Column 3 Max. Weight Capacity 0 Ibs (00 kg) Speed 38mm/s
CM-S23349SV. Vari-Focal IR Bullet Camera
 Vari-Focal IR Bullet Camera User s Guide CM-S23349SV SAFETY PRECAUTIONS WARNING 1. Be sure to use only the standard adapter that is specified in the specification sheet. Using any other adapter could cause
Proximity Card Reader. User s Manual
 Proximity Card Reader User s Manual Table of Contents 1. Important Safety Instructions... 3 2. General... 3 3. Features... 4 4. Specification... 4 5. Identifying Supplied Parts... 5 6. Installation...
Starling Tab-Tension 2 Series
 Electric Wall/Ceiling Projection Screen Starling Tab-Tension 2 Series For: Spectra White FG and CineGrey 5D User s Guide Important Safety & Warning Precautions Make sure to read this user s guide and follow
Watch and Learn Visit upunch.com/resources to view our helpful videos. Or scan this QR Code to get our step-by-step videos right on your phone.
 HN1000/HN3000 Product Manual Watch and Learn Visit upunch.com/resources to view our helpful videos. Or scan this QR Code to get our step-by-step videos right on your phone. CONTENTS 01 INTRODUCTION 2 02
User Manual MODEL: KKW700V. Non-Touch True Display LCD Monitor. Installation Guide. 7 True Display LCD Monitor (VGA Interface)
") Non-Touch True Display LCD Monitor User Manual Installation Guide 7 True Display LCD Monitor (VGA Interface) MODEL: KKW700V i-tech Company LLC TOLL FREE: (888) 483-2418 EMAIL: info@itechlcd.com WEB: www.itechlcd.com
Non-Touch True Display LCD Monitor User Manual Installation Guide 7 True Display LCD Monitor (VGA Interface) MODEL: KKW700V i-tech Company LLC TOLL FREE: (888) 483-2418 EMAIL: info@itechlcd.com WEB: www.itechlcd.com
Outdoor IR Audio Camera
 Outdoor IR Audio Camera User s Guide CM-S22326BW-AD SAFETY PRECAUTIONS WARNING 1. Be sure to use only the standard adapter that is specified in the specification sheet. Using any other adapter could cause
Satellite Radio. Expand Your Factory Radio ISSR bit & 29-bit LAN. Owner s Manual Gateway. add. Harness Connection USB. Port 1 Port.
 Expand Your Factory Radio Harness Connection add Satellite Radio Dip Switches Port 1 Port 2 (See Manual) USB GM 11-bit & 29-bit LAN Owner s Manual Gateway ISSR12 Table of Contents 1. Introduction 2. Precautions
User Manual. Color video door phone CDV-40Q
 User Manual Color video door phone CDV-40Q Thank Thank you you for for purchasing purchasing COMMAX COMMAX products. products. Please Please carefully carefully read read this this User s User sguide Guide(in
User Manual. Color video door phone CDV-70P PM0770P Printed In Korea /
 User Manual Color video door phone CDV-70P 513-11, Sangdaewon-dong, Jungwon-gu, Seongnam-si, Gyeonggi-do, Korea 513-11, Sangdaewon-dong, Jungwon-gu, Seongnam-si, Gyeonggi-do, Korea Business Dept. : +82-31-7393-540~550
/ PAT01 USER MANUAL
 PONOVO POWER CO., LTD No. 139 Jinghai Third Road, BDA, Beijing, China, 100176 Office TEL. +86 (10) 59089666 E-Mail Website Info@relaytest.com www.relaytest.com / www.ponovo.com.cn PAT01 USER MANUAL VERSION: