Copyright. Disclaimer
|
|
|
- Corey Evans
- 5 years ago
- Views:
Transcription
1
2 Copyright LCD Monitor User s Manual 2018 GIGA-BYTE TECHNOLOGY CO., LTD. All rights reserved. The trademarks mentioned in this manual are legally registered to their respective owners. Disclaimer Information in this manual is protected by copyright laws and is the property of GIGABYTE. Changes to the specifications and features in this manual may be made by GIGABYTE without prior notice. No part of this manual may be reproduced, copied, translated, transmitted, or published in any form or by any means without GIGABYTE s prior written permission. In order to assist in the use of this monitor, carefully read the User Guide. For more information, check on our website at:
3 SAFETY INFORMATION Regulatory Notices Federal Communications Commission Statement This device complies with Part 15 of the FCC Rules. Operation is subject to the following two conditions: This device may not cause harmful interference, and This device must accept any interference received including interference that may cause undesired operation. This equipment has been tested and found to comply with the limits for a Class B digital device, pursuant to Part 15 of the FCC Rules. These limits are designed to provide reasonable protection against harmful interference in a residential installation. This equipment generates, uses and can radiate radio frequency energy and, if not installed and used in accordance with manufacturer s instructions, may cause harmful interference to radio communications. However, there is no guarantee that interference will not occur in a particular installation. If this equipment does cause harmful interference to radio or television reception, which can be determined by turning the equipment off and on, the user is encouraged to try to correct the interference by one or more of the following measures: Reorient or relocate the receiving antenna. Increase the separation between the equipment and receiver. Connect the equipment to an outlet on a circuit different from that to which the receiver is connected. Consult the dealer or an experienced radio/tv technician for help. Canadian Department of Communications Statement This digital apparatus does not exceed the Class B limits for radio noise emissions from digital apparatus set out in the Radio Interference Regulations of the Canadian Department of Communications. This class B digital apparatus complies with Canadian ICES
4 European Community Restriction of Hazardous Substances (RoHS) Directive Statement GIGABYTE products have not intended to add and safe from hazardous substances (Cd, Pb, Hg, Cr+6, PBDE and PBB). The parts and components have been carefully selected to meet RoHS requirement. Moreover, we at GIGABYTE are continuing our efforts to develop products that do not use internationally banned toxic chemicals. European Community Waste Electrical & Electronic Equipment (WEEE) Directive Statement GIGABYTE will fulfill the national laws as interpreted from the 2012/19/ EU WEEE (Waste Electrical and Electronic Equipment) directive. The WEEE Directive specifies the treatment, collection, recycling and disposal of electric and electronic devices and their components. Under the Directive, used equipment must be marked, collected separately, and disposed of properly. WEEE Symbol Statement The symbol shown below is on the product or on its packaging, which indicates that this product must not be disposed of with other waste. Instead, the device should be taken to the waste collection centers for activation of the treatment, collection, recycling and disposal procedure. For more information about where you can drop off your waste equipment for recycling, please contact your local government office, your household waste disposal service or where you purchased the product for details of environmentally safe recycling
5 Safety Precautions Read through the following Safety Precautions before using the monitor. Only use the accessories that are provided with the monitor or that which are recommended by the manufacturer. Keep the plastic packaging bag for the product in a place that cannot be reached by children. Before connecting the monitor to the power outlet, make sure that the voltage rating of the power cable is compatible with the power specification in the country where you are located. The power cord plug must be connected to a properly wired and grounded power outlet. Do not touch the plug with wet hands, otherwise easily cause electric shock. Place the monitor in a stable and well-ventilated place. Do not place the monitor near any heat sources such as electric radiators or direct sunlight. The holes or openings on the monitor are for ventilation. Do not cover or block the ventilation holes with any objects. Do not use the monitor near water, drinks, or all types of liquids. Failure to do so may result in electric shock or damage to the monitor. Make sure to unplug the monitor from the power outlet before cleaning. As the screen surface is easy to be scratched, avoid touching the surface with any hard or sharp object. Use a soft lint-free cloth instead of a tissue to wipe the screen. You may use a glass cleaner to clean the monitor if required. However, never spray the cleaner directly onto the screen. Disconnect the power cable if the monitor is not being used for a long period of time. Do not attempt to disassemble or repair the monitor yourself
6 CONTENTS Safety Information...3 Regulatory Notices...3 Safety Precautions...5 Introduction...7 Unpacking...7 Package Contents...9 Product Overview Getting Started Installing the Monitor Base Adjusting the Viewing Angle Installing a Wall-Mount Bracket (Optional) Making Connections Using the Device Turning the Power On/Off Managing the Cables User Comfort Recommendations Selecting the Input Source Operations Quick Menu Configure the Device Settings Appendices Specifications Supported Timing List Troubleshooting Basic Care Notes on USB Charging GIGABYTE Service Information
7 INTRODUCTION Unpacking 1. Open the upper cover of the packaging box. Then observe the unpacking label attached on the inner cover. 2. Making sure the box is in the correct orientation, carefully lay the box on the stable surface. UP 3. Open the inner cover. Openings 4. Grab the EPS foam assembly (through the openings) to pull it out of the box
8 5. Remove the items from the upper EPS foam. 6. Remove the upper EPS foam. Then you can remove the monitor from the lower EPS foam
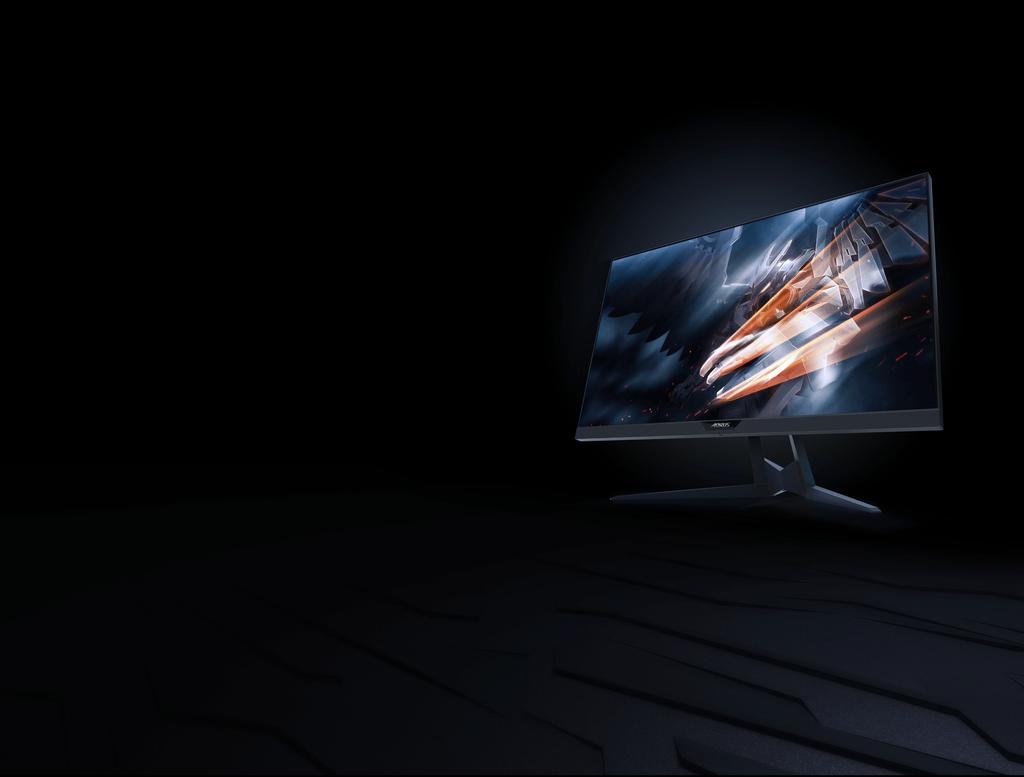
9 AORUS AD27QD LCD Monitor User s Manual Package Contents The following items come with your packaging box. If any of them is missing, please contact your local dealer. Monitor Monitor Base Power Cable HDMI Cable USB Cable DP Cable Multilingual Installation Guide Warranty Card Cable Holder Quick Start Guide Warranty Card CD Note: Please keep the packaging box and packing materials for future transportation of the monitor
10 Product Overview Front View Power LED 2 Control button
11 HDMI-1 HDMI-2 DP USB 3.0 LCD Monitor User s Manual Rear View HDMI-1 HDMI-2 DP USB AC IN jack 2 Kensington lock 3 Headphone jack 4 Microphone jack 5 HDMI ports (x2) 6 DisplayPort 7 USB upstream port 8 USB 3.0 ports (x2)
12 GETTING STARTED Installing the Monitor Base 1. Place the monitor on a flat surface, with the screen facing down. Note: We recommend that you cover the table surface with soft cloth to prevent damage to the monitor. 2. Align the monitor base with the standoff underneath the stand. Then attach the base onto the stand. 3. Tighten the screw to secure the monitor base in place. Note: You can either use a coin or a small flathead screwdriver to tighten the screw
13 4. Lift the monitor to an upright position and place it on a table. Then lower the screen to allow the safety plate to automatically release from its slot
.")
14 Adjusting the Viewing Angle LCD Monitor User s Manual Note: Hold the monitor base so that the screen does not topple when you make the adjustment. Adjusting the Tilt Angle Tilt the screen forward or backward to the desired viewing angle (-5 to 21 ) Adjusting the Swivel Angle Swivel the screen to the left or right for the desired viewing angle (20 )
15 Changing the Screen Orientation 1. Raise the screen to the highest position (130mm). 130 mm Note: Before making the height adjustment, make sure you have removed the safety plate from the stand. 2. Rotate the monitor (90 clockwise) to portrait orientation
16 Installing a Wall-Mount Bracket (Optional) LCD Monitor User s Manual Use only the 100 x 100 mm wall mount kit recommended by the manufacturer. 1. Place the monitor on a flat surface, with the screen facing down. Note: We recommend that you cover the table surface with soft cloth to prevent damage to the monitor. 2. Push the locking clips inward to detach the stand from the monitor. 3. Pull down the stand slightly to disengage the hooks. Then remove the stand
17 HDMI-1 HDMI-2 DP USB 3.0 LCD Monitor User s Manual 4. Attach the mounting bracket to the mounting holes at the rear of the monitor. Then use the screws to secure the bracket in place. 100 mm 100 mm Note: To mount the monitor on the wall, refer to the installation guide that is included in the wall-mount bracket kit
18 Making Connections HDMI-1 HDMI-2 DP USB Keyboard Mouse & USB disk drive 3 5 Computer Power outlet Computer Headphone Microphone 1 Power cable 2 Headphone cable 3 Microphone cable 4 HDMI cable 5 DisplayPort cable 6 USB (A-Male to B-Male) cable 7 USB cable
19 USING THE DEVICE Turning the Power On/Off Power On 1. Connect one end of the power cable to the AC IN jack at the rear of the monitor. 2. Connect other end of the the power cable to a power outlet. 3. Press the Control button to turn on the monitor. The Power LED will light in white, indicating the monitor is ready to use. Note: If the Power LED remains off after you turn on the monitor, please check the LED Indicator setting in the Settings menu. Refer to page 34. Power Off Press the Control button for 2 seconds to turn off the monitor. Note: When the Main menu appears on the screen, you can also turn off the monitor by moving the Control button down ( ). Refer to page
20 Managing the Cables 1. Align the cable clip with the clip holes at the rear of the monitor. 2. Press the cable clip firmly until it is fully seated. Then route the connected cables through the clip. User Comfort Recommendations The following are some tips for comfortable viewing of your monitor: Optimal viewing distances for monitors range from approximately 510 mm to 760 mm (20 to 30 ). A general guideline is to position the monitor such that the top of the screen is at or slightly below your eye-height when you are comfortably seated. Use adequate lighting for the type of work you are performing. Take regular and frequent breaks (at least for 10 minutes) every halfhour. Be sure to periodically look away from your monitor screen and focus on a far object for at least 20 seconds during the breaks. Eye exercise can help reduce eye strain. Repeat these exercises frequently: (1) look up and down (2) slowly roll your eye (3) move your eyes diagonally
21 Selecting the Input Source 1. Move the Control button right ( ) to enter the Input menu. 2. Move the Control button up/ down ( ) to select the desired input source. Then press the Control button to confirm. Input DisplayPort HDMI 1 HDMI2 Select Exit
22 OPERATIONS Quick Menu Hot Key By default, the Control button has been assigned with the specific function. Note: To change the preset hot key function, refer to the Quick Switch section on page 34. To access the hot key function, do the following: Move the Control button up ( ) to enter the Black Equalizer menu. Move the Control button up/down ( ) to adjust Black Equalizer the setting and press the Control button to confirm. 10 Adjust Exit
23 Move the Control button down ( ) to enter the Picture Mode menu. Move the Control button up/down ( ) to select the Picture Mode desired option and press the Control button to confirm. Standard AORUS FPS RTS/RPG Movie Reader Select Exit Move the Control button left ( ) to enter the Volume menu. Move the Control button up/down ( ) to adjust Volume the headphone volume level and press the Control button to confirm. 30 Adjust Exit Move the Control button right ( ) to enter the the Input menu. Refer to the Selecting the Input Source section. Note: To close the menu, move the Control button left ( )
24 Function Key Guide Press the Control button to display the Main menu. SETTING Settings Dashboard DASHBOARD EXIT GAME ASSIST Game Assist Exit POWER OFF Power Off Then use the Control button to select the desired function and configure the related settings. Dashboard When the Main menu appears on the screen, move the Control button left ( ) to enter the Dashboard menu. Dashboard Function Dashboard Location ON OFF Mouse DPI CPU Temperature CPU Frequency CPU Fan Speed CPU Usage Rate GPU Temperature GPU Frequency Select Exit Function: Enable/Disable the function. When enabled, you can select the desired option(s) to be shown on the screen. Dashboard Location: Specify the location of the Dashboard information to be shown on the screen
 on the screen.")


 to enter the Game Assist")
25 Once the Dashboard configuration is complete, it will transfer the system data to the SOC through the USB port and display the value of the selected function(s) on the screen. Mouse DPI: 1600 CPU temperature: 48 C CPU frequency: 3200MHz CPU fan Speed: 758RPM CPU usage Rate : 73% GPU temperature: 54 C GPU frequency: 720MHz GPU fan speed: 1027RPM GPU usage rate: 97% Dashboard Function Dashboard Location ON OFF Mouse DPI CPU Temperature CPU Frequency CPU Fan Speed CPU Usage Rate GPU Temperature GPU Frequency Select Exit Note: Make sure the USB cable is properly connected to the USB upstream port of the monitor and the USB port of your computer. Game Assist When the Main menu appears on the screen, move the Control button right ( ) to enter the Game Assist menu. GameAssist AORUS INFO Gaming Timer OFF Gaming Counter Count Up Crosshair Refresh Rate Count Down Info Location Display Alignment Select Exit


26 AORUS INFO: Configure the FPS (First Person Shooting) game related settings. Select Gaming Timer to select countdown timer mode. To disable this function, set the setting to OFF. Select Gaming Counter or Refresh Rate to enable/disable the gaming counter or real-time refresh rate setting. Select Info Location to specify the location of the information to be shown on the screen. 01: GameAssist AORUS INFO Gaming Timer OFF Gaming Counter Count Up Crosshair Refresh Rate Count Down Info Location Display Alignment Select Exit Crosshair: Select the desired crosshair type to suit your gaming environment. It makes aiming much easier. Display Alignment: When the function is enabled, it displays the alignment lines on the four sides of the screen, providing handy tool for you to line up multiple monitors perfectly
27 Configure the Device Settings When the Main menu appears on the screen, move the Control button up ( ) to enter the Settings menu. Note: Use the Control button to navigate through the menu and make adjustments. Exit Move/Adjust Enter/Confirm Button Guide Gaming Configure the game related settings. Resolution Black Equalizer Aim Stabilizer Overdrive Refresh Rate FreeSync 2560x OFF Balance 60 HZ ON Picture Mode Standard Gaming Picture Display PIP/PBP System Reset All Aim Stabilizer Black Equalizer Super Resolution Low Blue Light Display Mode Overdrive ON OFF FreeSync Exit Move/Adjust Enter/Confirm Item Aim Stabilizer Description When this function is enabled, it reduces the motion blur in a fast moving games. Note: This function is not available under the following conditions: - when the frequency setting is lower than 75Hz. - when the FreeSync, PIP, or PBP function is activated
28 Item Black Equalizer Super Resolution Low Blue Light Display Mode Overdrive FreeSync Description Adjust the brightness of the black areas. Sharpen the low resolution images. Reduce the amount of blue light exposure from the screen. Level 0: No change. Level 1~10: The higher the level, the more blue light will be reduced. Note: Level 10 is optimized setting. It is compliance with TUV Low Blue Light Certification. Select the aspect ratio of the screen. Full: Scale the input image to fill the screen. Ideal for 16:9 aspect images. Aspect: Display the input image without geometric distortion filling as much of the screen as possible. 1:1: Display the input image in its native resolution without scaling. 22 W (16:10): Display the input image as if on a 22 W monitor of 16:10 aspect ratio. 23 W (16:9): Display the input image as if on a 23 W monitor of 16:9 aspect ratio W (16:9): Display the input image as if on a 23.6 W monitor of 16:9 aspect ratio. 24 W (16:9): Display the input image as if on a 24 W monitor of 16:9 aspect ratio. Note: This option is not compatible with FreeSync and PIP/ PBP functions. Improve the response time of the LCD monitor. When this function is enabled, it eliminates the screen lag and tearing while playing games
29 Picture Configure the image related settings. HDR Brightness Contrast Sharpness Gamma Color Temperature OFF Gamma 3 Normal Picture Mode Standard Gaming Picture Display PIP/PBP System Reset All Picture Mode Brightness Contrast Color Vibrance Sharpness Gamma Standard AORUS FPS RTS/RPG Movie Reader Color Temperature srgb Exit Move/Adjust Enter/Confirm Item Picture Mode Brightness Contrast Color Vibrance Sharpness Gamma Description Select the preset picture mode. Standard: For editing documents or browsing websites. AORUS: For playing AORUS GAMER games. FPS: For playing FPS (First Person Shooting) games. RTS/RPG: For playing RTS (Real-Time Strategy) or RPG (Role-Playing Game) games. Movie: For watching movies. Reader: For viewing documents. srgb: For viewing photos and graphics on the computer. Custom 1: Customized picture mode settings. Custom 2: Customized picture mode settings. Custom 3: Customized picture mode settings. Adjust the brightness of the image. Adjust the contrast of the image. Adjust the intensity of the more muted colors. Adjust the sharpness of the image. Adjust the middle level of luminance
30 Item Color Temperature Dynamic Contrast Senseye Demo Reset Picture Description Select the color temperature. Note: Select User Define to customize the color temperature by adjusting the red (R), green (G), or blue (B) level according to your preference. Adjust the black level of the image to achieve the optimum contrast. Split the screen in half (2 windows). The image of Standard mode will appear on the left window and the image under the specified mode will appear on the right window. Reset all Picture settings to the default settings
31 Display Configure the display screen related settings. HDR Brightness Contrast Sharpness Gamma Color Temperature OFF Gamma 3 Normal Picture Mode Standard Gaming Picture Display PIP/PBP System Reset All Input HDMI RGB PC Range Overscan DisplayPort HDMI 1 HDMI 2 Exit Move/Adjust Enter/Confirm Item Input HDMI RGB PC Range Overscan Description Select the input source. Select an appropriate RGB range setting or let the monitor to detect it automatically. Note: This option is only available for HDMI input. When this function is enabled, it slightly enlarges the input image to hide the outermost edges of the image. Note: This option is only available for HDMI input
32 PIP/PBP Configure the multi-picture related settings. HDR Brightness Contrast Sharpness Gamma Color Temperature OFF Gamma 3 Normal Picture Mode Standard Gaming Picture Display OFF PIP PBP PIP/PBP System Reset All Exit Move/Adjust Enter/Confirm Item OFF PIP PBP Description Disable the PIP/PBP function. Split the screen into 2 parts (main window and inset window). Source: Change the input source for the inset window. PIP Size: Adjust the inset window size. Location: Move the inset window position. Display Switch: Swap the two windows. Audio Switch: Select which audio source you want to hear the sound from. Display 1x1 split screen (left and right windows). Source: Change the input source for the right window. Display Switch: Swap the two windows. Audio Switch: Select which audio source you want to hear the sound from. Note: PIP/PBP is not compatible with HDR and FreeSync functions
33 System Configure the system related settings. HDR Brightness Contrast Sharpness Gamma Color Temperature OFF Gamma 3 Normal Picture Mode Standard Gaming Picture Display PIP/PBP System Reset All RGB LED Headphone Audio Source OSD Setting Quick Switch Other Settings OFF Mode 1 Mode 2 Mode 3 Exit Move/Adjust Enter/Confirm Item RGB LED Headphone Audio Source OSD Settings Description When this function is enabled, you can select the preset LED color and effect to be displayed on the rear of the monitor. Configure the headphone settings. Volume: Adjust the volume level. Mute: Enable/Disable the mute function. Specify the audio input source or let the monitor to detect it automatically. Note: If you select Auto detect, the system will check first whether the USB cable is connected or not. If it is connected, the audio input source is set to USB Codec. Configure the on-screen display (OSD) menu related settings. Language: Select an available language for the OSD menu. Display Time: Set the length of time the OSD menu remains on the screen. OSD Transparency: Adjust the OSD menu transparency
34 Item OSD Settings (continue) Description OSD Lock: When this function is enabled, no OSD adjustment is allowed. Note: To disable the OSD lock function, press the Control key. When the message appears on the screen, select Yes to confirm. The button is locked, confirm to unlock OSD. No Yes Quick Switch Assign the function of the hot keys. Available options: Aim Stabilizer, Black Equalizer, Low Blue Light, Volume, Input, Contrast, Brightness, and Picture Mode. The default setting of the hot keys as below: DD Up ( DD Down ( DD Right ( DD Left ( ): Black Equalizer ): Picture Mode ): Input ): Volume Other Settings Resolution Notice: When this function is enabled, the recommended resolution message will appear on the screen when the monitor switches to another input source. Input Auto Switch: When this function is enabled, it automatically switches to an available input source. Auto Power Off: When this function is enabled, the monitor will automatically turn off after a certain amount of time
35 Item Other Settings (continue) Description LED Indicator: By default, the LED indicator is set to ON. DD LED Indicator OFF: Turn off the Power LED. DD LED Indicator ON: The Power LED lights white during operation and lights orange in standby mode. DD LED Indicator Friendly: The Power LED lights orange in standby mode. DD When the power supply is switched off, the Power LED will remain off. DisplayPort Ver.: Set the DisplayPort version to 1.1, 1.2, or 1.2+HDR. Note: To enable the HDR effect for the DP port, you may need to set the DisplayPort version to 1.2+HDR and enable the 10-bit color output in your graphics card. Make sure to configure this option based on the DisplayPort version supported by your graphics card
36 Reset All Restore the monitor to its factory default settings. HDR Brightness Contrast Sharpness Gamma Color Temperature OFF Gamma 3 Normal Picture Mode Standard Gaming Picture Display PIP/PBP System Reset All Exit Move/Adjust Enter/Confirm
37 APPENDICES Specifications Item Panel Size Specifications 27-inch Aspect Ratio 16:9 Resolution 2560 x 1440 Refresh Rate LED Life 144Hz hours (min.) Pixel Pitch x Response Time Brightness Contrast Ratio 4ms 350nits (typ.) / 280nits (min.) 1000:1 (typ.) Dynamic Contrast Ratio 12M:1 (typ.) Color Depth 1.073G Active Display area Viewing Angle Frequency (H) x (V) 178 (H) / 178 (V) 30~144Hz Input/Output Terminals 2x HDMI 2.0 1x DP 1.2 1x Headphone 1x Microphone Power Supply AC 100 ~ 240V at 50/60Hz Power Consumptions On: 75W (Max.) Standby: 0.5W Off: 0.3W Dimensions (W x H x D) Weight 2x USB 3.0 (downstream) 1x USB upstream x x mm (with stand) 8.0kg (Net) Note: Specifications subject to change without notice
38 Supported Timing List Timing List HDMI 2.0 DisplayPort x 60Hz 640 x 67Hz 640 x 72Hz 640 x 75Hz 720 x 70Hz 800 x 56Hz 800 x 60Hz 800 x 72Hz 800 x 75Hz 832 x 75Hz 1024 x 60Hz 1024 x 70Hz 1024 x 75Hz 1152 x 75Hz 1280 x 50Hz 1280 x 60Hz 1280 x 50Hz 1280 x 75Hz 1440 x 60Hz 1680 x 60Hz 1920 x 50Hz 1920 x 60Hz 1920 x 100Hz 1920 x 120Hz 2560 x 60Hz 2560 x 120Hz 2560 x 144Hz
39 Troubleshooting Problem Possible Solution(s) No power Make sure the power cable is properly connected to the power source and the monitor. Check the cable and plug to make sure they are not broken. Make sure the monitor is turned on. No image appears on the screen The image does not fill the entire screen The colors are distorted No sound or volume is low Make sure the monitor and the computer are properly connected and both devices are turned on. Make sure you have selected the correct input source. Refer to page 21 or 31. Adjust the Brightness and Contrast settings. Refer to page 29. Try different Display Mode (aspect ratio) setting. Refer to page 28. Make sure the input signal cable is properly connected. Configure the image related settings. Refer to the Picture section. Make sure the headphone cable is properly connected. Adjust the volume level. Refer to page 23 or 33. Check the Audio Source setting. If the setting is set to USB Codec, make sure the USB cable is properly connected to the monitor and your computer. Refer to page 33. Adjust your computer sound related settings. Note: If the problem persists, please contact our customer service for further assistance
40 Basic Care LCD Monitor User s Manual When the screen becomes dirty, do the following to clean the screen: Wipe the screen with your soft, lint-free cloth to remove any residual dust. Spray or apply the cleaning fluid onto a soft cloth. Then wipe the screen gently with the damp cloth. Note: Make sure that the cloth is damp, but not wet. When wiping, avoid applying excessive pressure on the screen. Acidic or abrasive cleaners can damage the screen. Notes on USB Charging The following devices are not compatible with BC 1.2 of CDP mode. When the Hub is connected to a PC, these devices cannot be charged using the USB cable. Vendor Device PID/VID Apple IPad PID_129A/VID_05AC Samsung Galaxy Tab PID_6860/VID_04E8 Samsung GALAXY TabPro PID_6860/VID_04E8 GIGABYTE Service Information More service information, please visit GIGABYTE official website:
USER MANUAL. 28" 4K Ultra HD Monitor L28TN4K
 USER MANUAL 28" 4K Ultra HD Monitor L28TN4K TABLE OF CONTENTS 1 Getting Started 2 Control Panel/ Back Panel 3 On Screen Display 4 Technical Specs 5 Care & Maintenance 6 Troubleshooting 7 Safety Info &
USER MANUAL. 27" 2K QHD LED Monitor L27HAS2K
 USER MANUAL 27" 2K QHD LED Monitor L27HAS2K TABLE OF CONTENTS 1 Getting Started 2 Control Panel/ Back Panel 3 On Screen Display 4 Technical Specs 5 Troubleshooting 6 Safety Info & FCC warning 1 GETTING
USER MANUAL. 27 Full HD Widescreen LED Monitor L27ADS
 USER MANUAL 27 Full HD Widescreen LED Monitor L27ADS TABLE OF CONTENTS 1 Getting Started 2 Control Panel/ Back Panel 3 On Screen Display 4 Technical Specs 5 Care & Maintenance 6 Troubleshooting 7 Safety
USER MANUAL. 27 Full HD Widescreen LED Monitor L270E
 USER MANUAL 27 Full HD Widescreen LED Monitor L270E TABLE OF CONTENTS 1 Getting Started 2 Control Panel/ Back Panel 3 On Screen Display 4 Technical Specs 5 Care & Maintenance 6 Troubleshooting 7 Safety
DCL9AW. User Manual. English
 DCL9AW User Manual English PRECAUTIONS Information for users applicable in European Union countries 1 Information for users applicable in United States of America 1 Installation 1 Power connection 1 Maintenance
PL2410W LCD Monitor USER'S GUIDE.
 PL2410W LCD Monitor USER'S GUIDE www.planar.com Content Operation Instructions...1 Safety Precautions...2 First Setup...3 Front View of the Product...4 Rear View of the Product...5 Quick Installation...6
USER MANUAL Full HD Widescreen LED Monitor L215ADS
 USER MANUAL 21.5 Full HD Widescreen LED Monitor L215ADS TABLE OF CONTENTS 1 Getting Started 2 Control Panel/ Back Panel 3 On Screen Display 4 Technical Specs 5 Care & Maintenance 6 Troubleshooting 7 Safety
USER MANUAL Full HD Widescreen LED Monitor L215IPS
 USER MANUAL 21.5 Full HD Widescreen LED Monitor L215IPS TABLE OF CONTENTS 1 Getting Started 2 Control Panel/ Back Panel 3 On Screen Display 4 Technical Specs 5 Care & Maintenance 6 Troubleshooting 7 Safety
USER MANUAL Full HD Widescreen LED Monitor L236VA
 USER MANUAL 23.6 Full HD Widescreen LED Monitor L236VA TABLE OF CONTENTS 1 Getting Started 2 Control Panel/ Back Panel 3 On Screen Display 4 Technical Specs 5 Care & Maintenance 6 Troubleshooting 7 Safety
PLL2210MW LED Monitor
 PLL2210MW LED Monitor USER'S GUIDE www.planar.com Content Operation Instructions...1 Safety Precautions...2 First Setup...3 Front View of the Product...4 Rear View of the Product...5 Quick Installation...6
PXL2470MW LED LCD Monitor
 PXL2470MW LED LCD Monitor USER'S GUIDE www.planar.com Content Operation Instructions...1 Unpacking Instructions...2 Safety Precautions...2 Package Overview...3 First Setup...4 Front View of the Product...5
USER MANUAL. 22" Class Slim HD Widescreen Monitor L215DS
 USER MANUAL 22" Class Slim HD Widescreen Monitor L215DS TABLE OF CONTENTS 1 Getting Started Package Includes Installation 2 Control Panel / Back Panel Control Panel Back Panel 3 On Screen Display 4 Technical
PXL2760MW LED LCD Monitor
 PXL2760MW LED LCD Monitor USER'S GUIDE www.planar.com Content Operation Instructions...1 Safety Precautions...2 Package Overview...3 First Setup...4 Front View of the Product...5 Rear View of the Product...6
PLL2710W LED LCD Monitor
 PLL2710W LED LCD Monitor USER'S GUIDE www.planar.com Content Operation Instructions...1 Safety Precautions...2 Package Overview...3 First Setup...4 Front View of the Product...5 Rear View of the Product...6
IPS LED Monitor. (LED Monitor*) OWNER S MANUAL
 OWNER S MANUAL") OWNER S MANUAL IPS LED Monitor (LED Monitor*) * LG LED Monitor applies LCD screen with LED backlights. Please read this manual carefully before operating your set and retain it for future reference. 34UC89G
OWNER S MANUAL IPS LED Monitor (LED Monitor*) * LG LED Monitor applies LCD screen with LED backlights. Please read this manual carefully before operating your set and retain it for future reference. 34UC89G
MONOPRICE. 27" UHD IPS 4K Ultra Slim Aluminum Monitor. Quick User's Guide P/N 24658
 MONOPRICE 27" UHD IPS 4K Ultra Slim Aluminum Monitor P/N 24658 Quick User's Guide SAFETY WARNINGS AND GUIDELINES Please read this entire manual before using this device, paying extra attention to these
DH551C/DH550C/DL550C Double Sided Display User Manual
 DH551C/DH550C/DL550C Double Sided Display User Manual Disclaimer BenQ Corporation makes no representations or warranties, either expressed or implied, with respect to the contents of this document. BenQ
22" Touchscreen LED Monitor USER'S GUIDE
 22" Touchscreen LED Monitor USER'S GUIDE Content Operation Instructions...1 Unpacking Instructions...2 Safety Precautions...2 Front View of the Product...3 Rear View of the Product...4 Quick Installation...5
PLL1920M LED LCD Monitor
 PLL1920M LED LCD Monitor USER'S GUIDE www.planar.com Content Operation Instructions...1 Safety Precautions...2 First Setup...3 Front View of the Product...4 Rear View of the Product...5 Installation...6
17 19 PROFESSIONAL LCD COLOUR MONITOR ART
 17 19 PROFESSIONAL LCD COLOUR MONITOR ART. 41657-41659 Via Don Arrigoni, 5 24020 Rovetta S. Lorenzo (Bergamo) http://www.comelit.eu e-mail:export.department@comelit.it WARNING: TO REDUCE THE RISK OF FIRE
MP 35" Zero-G 100Hz Curved Monitor with AMD FreeSync 2.0
 MP 35" Zero-G 100Hz Curved Monitor with AMD FreeSync 2.0 P/N 31005 User's Manual SAFETY WARNINGS AND GUIDELINES Please read this entire manual before using this device, paying extra attention to these
MP Zero-G 27" WQHD 144Hz TN-LED Monitor with AMD FreeSync
 MP Zero-G 27" WQHD 144Hz TN-LED Monitor with AMD FreeSync P/N 31004 User's Manual SAFETY WARNINGS AND GUIDELINES Please read this entire manual before using this device, paying extra attention to these
MONOPRICE. 27" WQHD Monitor. User's Manual P/N 24659
 MONOPRICE 27" WQHD Monitor P/N 24659 User's Manual CONTENTS SAFETY WARNINGS AND GUIDELINES... 3 FEATURES... 4 CUSTOMER SERVICE... 4 PACKAGE CONTENTS... 4 PRODUCT OVERVIEW... 5 Front... 5 Rear... 5 Rear
LG Gaming Monitor. (LED Monitor*) OWNER S MANUAL
 OWNER S MANUAL") OWNER S MANUAL LG Gaming Monitor (LED Monitor*) * LG LED Monitor applies LCD screen with LED backlights. Please read this manual carefully before operating your set and retain it for future reference.
OWNER S MANUAL LG Gaming Monitor (LED Monitor*) * LG LED Monitor applies LCD screen with LED backlights. Please read this manual carefully before operating your set and retain it for future reference.
LA1500R USER S GUIDE.
 LA1500R USER S GUIDE www.planar.com The information contained in this document is subject to change without notice. This document contains proprietary information that is protected by copyright. All rights
19 / 20.1 / 22 WIDE SCREEN TFT-LCD MONITOR
 19 / 20.1 / 22 WIDE SCREEN TFT-LCD MONITOR V193/ V220 Series V202 Series USER MANUAL www.viewera.com Rev. 2.0 Table of Contents EMC Compliance......1 Important Precautions...2 1. Package contents....3
TABLE OF CONTENTS Important Safety Instructions Package Content Setting Up the Display Trouble shooting Specifications Product Dimensions
 TABLE OF CONTENTS Important Safety Instructions...1 1.1 Safety precautions and maintenance....1 1.2 Use.......4 1.3 Installation Notes.......7 Package Content...9 2.1 Unpacking...9 2.2 Accessories......10
17" & 19" Color TFT LCD Monitor
 17" & 19" Color TFT LCD Monitor KMC-17B & KMC-19B User's Manual for Operation and installation Screen Size : KMC-17B (17" inch TFT LCD) KMC-19B (19" inch TFT LCD) Display Size : KMC-17B (337.920mm X 270.336mm)
LG Gaming Monitor (LED MONITOR*)
") Owner s Manual LG Gaming Monitor (LED MONITOR*) * LG LED Monitor applies LCD screen with LED backlights. Please read this manual carefully before operating your set and retain it for future reference.
Owner s Manual LG Gaming Monitor (LED MONITOR*) * LG LED Monitor applies LCD screen with LED backlights. Please read this manual carefully before operating your set and retain it for future reference.
Wide LCD Monitor. User Manual
 Wide LCD Monitor User Manual PRECAUTIONS Information for users applicable in European Union countries 1 Information for users applicable in United States of America 1 1 Power connection 1 Maintenance 1
TFT LCD MONITOR USER MANUAL. L80AP and L101AP
 TFT LCD MONITOR USER MANUAL L80AP - 8.0 and L101AP - 10.1 Table Of Contents Table of contents/ Warning.... 2 Precautions...3 About this user manual and products / Items included in the delivery..... 4
Warning...1 Safety Precaution...3
 PL1910W Contents Preface...1 Warning...1 Safety Precaution......3 Installation...4 Introduction...4 Features...4 Unpacking...5 Attaching the Base...6 Removing the Base...7 Preparing The Monitor For Wall-Mounting...8
EX Series LCD Monitor User Manual
 EX Series LCD Monitor User Manual Copyright Copyright 2017 by BenQ Corporation. All rights reserved. No part of this publication may be reproduced, transmitted, transcribed, stored in a retrieval system
35 INCH CURVED QHD LED MONITOR
 35 INCH CURVED QHD LED MONITOR eiq-35cmuwq60gafs Thank you for choosing electriq Please read this user manual before using this monitor and keep it safe for future reference. Visit our page www.electriq.co.uk
LCD VALUE SERIES (32 inches)
") LCD VALUE SERIES (32 inches) http://www.orionimages.com All contents of this document may change without prior notice, and actual product appearance may differ from that depicted herein 1. SAFETY INSTRUCTION
LCD VALUE SERIES (32 inches) http://www.orionimages.com All contents of this document may change without prior notice, and actual product appearance may differ from that depicted herein 1. SAFETY INSTRUCTION
INFORMATION TO THE USER
 U.S.FEDERAL COMMUNICATIONS COMMISSION RADIO FREQUENCY INTERFERENCE STATEMENT INFORMATION TO THE USER NOTE: This equipment has been tested and found to comply with the limits for a Class B digital device
XR Series User Manual
 XR Series User Manual Copyright Copyright 2015 by BenQ Corporation. All rights reserved. No part of this publication may be reproduced, transmitted, transcribed, stored in a retrieval system or translated
FCC Compliance Statement
 FCC Compliance Statement This device complies with part 15 of the FCC Rules. Operation is subject to the following two conditions: 1. This device may not cause harmful interference, and 2. This device
MONOPRICE. 32" 4K HDR IPS Ultra Slim Desktop Monitor. User's Manual P/N 27772/30678/30679
 MONOPRICE 32" 4K HDR IPS Ultra Slim Desktop Monitor P/N 27772/30678/30679 User's Manual SAFETY WARNINGS AND GUIDELINES Please read this entire manual before using this device, paying extra attention to
28 & 32 & 40 & 55 & 65 & 84-INCH TFT-LCD 4K MONITOR
 28 & 32 & 40 & 55 & 65 & 84-INCH TFT-LCD 4K MONITOR INSTRUCTION MANUAL Please read this manual thoroughly before use, and keep it handy for future reference. TABLE OF CONTENTS 1, General information...
SAFETY WARNINGS AND GUIDELINES
 SAFETY WARNINGS AND GUIDELINES Please read this manual thoroughly, paying extra attention to these safety warnings and guidelines: Do not expose this monitor to water or moisture of any kind. Do not handle
XL Series User Manual
 XL XL Series User Manual Copyright Copyright 2016 by BenQ Corporation. All rights reserved. No part of this publication may be reproduced, transmitted, transcribed, stored in a retrieval system or translated
Press to turn the monitor ON or OFF. Lights up to indicate the power is turned on. Press to activate the OSD menu.
 Acer LCD Monitor Quick Start Guide (QSG) Important safety instructions Please read the following instructions carefully. 1. To clean the LCD monitor screen: Be sure that your monitor is electrically rated
XL Series User Manual
 XL XL Series User Manual Copyright Copyright 2017 by BenQ Corporation. All rights reserved. No part of this publication may be reproduced, transmitted, transcribed, stored in a retrieval system or translated
28 4K LED monitor. User Manual M284K
 28 4K LED monitor User Manual M284K CONTENTS Safety Information... 2 What s included..... 4 Getting Started....... 8 Troubleshooting.... 14 Specification.... 15 2 of 15 SAFETY INFORMATION Read these instructions
IPS LED Monitor (LED Monitor*)
") OWNER S MANUAL IPS LED Monitor (LED Monitor*) * LG LED Monitor applies LCD screen with LED backlights. Please read this manual carefully before operating your set and retain it for future reference. 38UC99
OWNER S MANUAL IPS LED Monitor (LED Monitor*) * LG LED Monitor applies LCD screen with LED backlights. Please read this manual carefully before operating your set and retain it for future reference. 38UC99
LG Gaming Monitor (LED MONITOR*)
") Owner s Manual LG Gaming Monitor (LED MONITOR*) * LG LED Monitor applies LCD screen with LED backlights. Please read this manual carefully before operating your set and retain it for future reference.
Owner s Manual LG Gaming Monitor (LED MONITOR*) * LG LED Monitor applies LCD screen with LED backlights. Please read this manual carefully before operating your set and retain it for future reference.
EX Series LCD Monitor User Manual
 EX Series LCD Monitor User Manual Copyright Copyright 2018 by BenQ Corporation. All rights reserved. No part of this publication may be reproduced, transmitted, transcribed, stored in a retrieval system
7: 11 8: 11 9: OSD...
 NB27CW/NB27CB In order to continue serving our customers and providing the best products, our product information including our user manuals may receive updates from time to time. Please check our website
VH226 Series LCD Monitor. User Guide
 VH226 Series LCD Monitor User Guide Contents Notices... iii Safety information... iv Care & Cleaning... v Chapter 1: Product introduction 1.1 Welcome!... 1-1 1.2 Package contents... 1-1 1.3 Monitor introduction...
SW Series LCD Monitor User Manual
 SW Series LCD Monitor User Manual Copyright Copyright 2017 by BenQ Corporation. All rights reserved. No part of this publication may be reproduced, transmitted, transcribed, stored in a retrieval system
Table of Contents Precautions... 2
 Table of Contents Precautions... 2 Special notes on LCD monitors... 2 Package contents... 3 Installation instructions... 3 Assembling the monitor... 3 Adjusting the viewing angle... 4 Connecting the devices...
LCD Monitor User Manual BL902TM
 LCD Monitor User Manual BL902TM Copyright Copyright 2011 by BenQ Corporation. All rights reserved. No part of this publication may be reproduced, transmitted, transcribed, stored in a retrieval system
MX299Q LCD Monitor. User Guide
 MX299Q LCD Monitor User Guide Table of contents Notices... iii Safety information... iv Care & Cleaning... v 1.1 Welcome!... 1-1 1.2 Package contents... 1-1 1.3 Monitor introduction... 1-2 1.3.1 Front
I. Safety Prevention Measures
 I. Safety Prevention Measures Please always place this device on a stable surface; otherwise, it may fall and be damaged. The altitude and the tropical environment the adapter fits depend on which adapter
PB238Q Series LCD Monitor. User Guide
 PB238Q Series LCD Monitor User Guide Table of contents Notices... iii Safety information... iv Care & Cleaning... v 1.1 Welcome!... 1-1 1.2 Package contents... 1-1 1.3 Monitor introduction... 1-2 1.3.1
LCD MONITOR. 27 Wide LED Monitor User Manual. User Manual P276L
 LCD MONITOR 27 Wide LED Monitor User Manual User Manual P276L Precautions Precautions Warning The following information will help you avoid the risk of electric shock, serious injury or death. Power cord
I.Safety Prevention Measures
 I.Safety Prevention Measures Please always place this device on a stable surface; otherwise, it may fall and be damaged. The altitude and the tropical environment the adapter fits depend on which adapter
IPS LED Monitor. (LED Monitor*) OWNER S MANUAL
 OWNER S MANUAL") OWNER S MANUAL IPS LED Monitor (LED Monitor*) * LG LED Monitor applies LCD screen with LED backlights. Please read this manual carefully before operating your set and retain it for future reference. 34CB99
OWNER S MANUAL IPS LED Monitor (LED Monitor*) * LG LED Monitor applies LCD screen with LED backlights. Please read this manual carefully before operating your set and retain it for future reference. 34CB99
English. Analog LCD Monitor. AL502 User s Manual
 Analog LCD Monitor AL502 User s Manual TABLE OF CONTENTS FCC compliance statement... 1 DOC compliance notice... 1 Introduction... 2 Features... 2 Unpacking... 3 Screen position adjustment... 4 Connecting
PD Series LCD Monitor User Manual
 PD Series LCD Monitor User Manual Copyright Copyright 2017 by BenQ Corporation. All rights reserved. No part of this publication may be reproduced, transmitted, transcribed, stored in a retrieval system
The Bloomberg 15-inch Compact Display Terminal Technical Information
 The Bloomberg 15-inch Compact Display Terminal Technical Information Description The Bloomberg 15-inch Compact Display Terminal is a high-quality display device that is versatile and ergonomically designed.
1 Introduction and Package Contents
 1 Introduction and Package Contents Introduction Congratulations on your purchase. You can expect only the sharpest and most brilliant color images from this monitor. Featuring easy to use OSD controls
4K LED MONITOR 430LED4K & 550LED4K INSTRUCTION MANUAL. Please read this manual thoroughly before use, and keep it handy for future reference.
 4K LED MONITOR 430LED4K & 550LED4K INSTRUCTION MANUAL Please read this manual thoroughly before use, and keep it handy for future reference. CONTENTS 1. GENERAL INFORMATION...3 2. 3. 1.1. 1.2. 1.3. 2.1.
GN32LD CURVED GAMING MONITOR USER MANUAL
 GN32LD CURVED GAMING MONITOR USER MANUAL Table of Contents Section 1: Safety Precautions...4 Section 2: Box Contents...5 Section 3: Product Overview...6 3.1 Monitor Buttons...6 3.2 Monitor Ports...6 Section
600 Series Video Surveillance Monitors
 600 Series Video Surveillance Monitors 32 LED Monitor 43, 50, 55 & 55 4K LED Monitor Models: PMCL632: PMCL643 PMCL650 PMCL655 PMCL655K Contents for Wall Mount Monitor User Manual (10/16)... 1 Important
AUTO - SCANNING WITH DIGITAL CONTROL LCD COLOR MONITOR FS-L1903C. User manual (Rev.01) SMITHS HEIMANN
 SMITHS HEIMANN") AUTO - SCANNING WITH DIGITAL CONTROL LCD COLOR MONITOR FS-L1903C User manual (Rev.01) SMITHS HEIMANN www.smithsdetection.com Table of Contents Safety Instructions... 5 Accessories... 8 Power Connections...
AUTO - SCANNING WITH DIGITAL CONTROL LCD COLOR MONITOR FS-L1903C User manual (Rev.01) SMITHS HEIMANN www.smithsdetection.com Table of Contents Safety Instructions... 5 Accessories... 8 Power Connections...
SAFETY WARNINGS AND GUIDELINES
 CONTENTS SAFETY WARNINGS AND GUIDELINES... 3 FEATURES... 4 PACKAGE CONTENTS... 4 CONNECTIONS... 5 CONTROLS... 6 SETUP... 7 MONITOR STAND... 7 VIEWING ANGLE ADJUSTMENT... 8 ON-SCREEN DISPLAY (OSD) MENU...
DC162 Digital Visualizer. User Manual. English - 1
 DC162 Digital Visualizer User Manual English - 1 Table of Contents CHAPTER 1 PRECAUTIONS... 5 CHAPTER 2 PACKAGE CONTENT... 7 CHAPTER 3 PRODUCT OVERVIEW... 8 3.1 PRODUCT INTRODUCTION... 8 3.2 I/O CONNECTION...
VE247/VE248/VE249 Series LED Monitor. User Guide
 VE247/VE248/VE249 Series LED Monitor User Guide Contents Notices... iii Safety information... iv Care & Cleaning... v 1.1 Welcome!... 1-1 1.2 Package contents... 1-1 1.3 Monitor introduction... 1-2 1.3.1
XL Series User Manual
 XL XL Series User Manual Copyright Copyright 2017 by BenQ Corporation. All rights reserved. No part of this publication may be reproduced, transmitted, transcribed, stored in a retrieval system or translated
32" LED Television. Initial Assembly B. Main Unit. 1. Fix the Left Base Stand to the main unit using 2 pcs provided screws.
 2 3 4 8047922B 32" LED Television Initial Assembly 8047922 Main accessories: Installation Steps: 1. Fix the Left Base Stand to the main unit using 2 pcs provided screws. 2. Fix the Right Base Stand to
VITEK VTM-TLM191 VTM-TLM240
 VTM-TLM191 VTM-TLM240 19 & 24 Professional LED Monitors with HDMI, VGA, and Looping BNC VITEK FEATURES 19 & 24 Wide Screen LED Display Panel HDMI, VGA, and Looping BNC Composite Video Inputs & Stereo Audio
Owner's Manual IPS LED MONITOR (LED MONITOR*)
") Owner's Manual IPS LED MONITOR (LED MONITOR*) * Disclaimer: LG LED Monitor applies LCD screen with LED backlights. Please read the safety information carefully before using the product. 27MU67 www.lg.com
Owner's Manual IPS LED MONITOR (LED MONITOR*) * Disclaimer: LG LED Monitor applies LCD screen with LED backlights. Please read the safety information carefully before using the product. 27MU67 www.lg.com
HP EliteDisplay LED Backlit Monitors. User Guide
 HP EliteDisplay LED Backlit Monitors User Guide 2013 Hewlett-Packard Development Company, L.P. Microsoft and Windows are U.S. registered trademarks of Microsoft Corporation. The only warranties for HP
PROLITE B2791HSU-B1 HAS + PIVOT FLICKER FREE + BLUE LIGHT
 PROLITE B2791HSU-B1 27 solid Full HD monitor your e will love Looking at a screen for long hours can be quite tiring for the e. But it doesn t have to. The new 27 iiyama ProLite B2791HSU is big enough
2013, 2014 Hewlett-Packard Development Company, L.P.
 User Guide 2013, 2014 Hewlett-Packard Development Company, L.P. The only warranties for HP products and services are set forth in the express warranty statements accompanying such products and services.
H270 LED MONITOR USER MANUAL
 H270 LED MONITOR USER MANUAL In order to continue serving our customers and providing the best products, our product information including our user manuals may receive updates from time to time. Please
1 Introduction and Package Contents
 1 Introduction and Package Contents Introduction Congratulations on your purchase. You can expect only the sharpest and most brilliant color images from this monitor. Featuring easy to use OSD controls
Table of Contents. APPENDIX A...12 TFT LCD Monitor Specifications 12. APPENDIX B...13 APPENDIX C...14 Troubleshooting Procedures 14 PREFACE...
 Table of Contents CHAPTER 1...1 Unpacking 1 Identifying Components 2 The LCD Monitor Front View 2 The LCD Monitor Rear View 3 Adjusting the Tilting Angle 3 Raising Your Monitor to an Upright Position and
User Guide. 20 Widescreen LED Monitor NS-20EM50A13
 User Guide 20 Widescreen LED Monitor NS-20EM50A13 Contents Introduction.....................................................1 Safety Precautions...............................................1 WARNINGS:......................................................
BL Series LCD Monitor User Manual
 BL Series LCD Monitor User Manual Copyright Copyright 2014 by BenQ Corporation. All rights reserved. No part of this publication may be reproduced, transmitted, transcribed, stored in a retrieval system
E Series LCD Monitor User Manual
 E Series LCD Monitor User Manual Copyright Copyright 2017 by BenQ Corporation. All rights reserved. No part of this publication may be reproduced, transmitted, transcribed, stored in a retrieval system
VS208 Series. LCD Monitor. User Guide
 VS208 Series LCD Monitor User Guide Table of contents Notices... iii Safety information... iv Care & Cleaning... v 1.1 Welcome!... 1-1 1.2 Package contents... 1-1 1.3 Assembling the monitor base... 1-2
MONOPRICE. BitPath AV VGA Extender over Single Cat6 Cable, 120m. User's Manual P/N 16226
 MONOPRICE BitPath AV VGA Extender over Single Cat6 Cable, 120m P/N 16226 User's Manual SAFETY WARNINGS AND GUIDELINES Please read this entire manual before using this device, paying extra attention to
INSTRUCTIONAL MANUAL FOR LCD ZOOM MICROSCOPE
 INSTRUCTIONAL MANUAL FOR LCD ZOOM MICROSCOPE ? 8 LCD Screen? 10.4 LCD Screen LCD Zoom Microscope Instruction Manual Please read the Instruction Manual carefully before installation and keep it for future
P XGA TFT Monitor. User s Manual
 P6151 15 XGA TFT Monitor User s Manual Disclaimers This manual has been carefully checked and believed to contain accurate information. Axiomtek Co., Ltd. assumes no responsibility for any infringements
High Performance Security Display Devices LCD15HDMI/LCD17HDMI/LCD19HDMI. SECURITY RATED 15, 17 & 19 LCD MONITORS w/ 2xBNC, HDMI AUDIO & 3D COMB FILTER
 LCD15HDMI/LCD17HDMI/LCD19HDMI SECURITY RATED 15, 17 & 19 LCD MONITORS w/ 2xBNC, HDMI AUDIO & 3D COMB FILTER High Performance Security Display Devices 3625 Cincinnati Avenue, Rocklin, CA 95765 855-388-7422
GW2760HS LCD Monitor User Manual
 GW2760HS LCD Monitor User Manual Copyright Copyright 2012 by BenQ Corporation. All rights reserved. No part of this publication may be reproduced, transmitted, transcribed, stored in a retrieval system
BL Series LCD Monitor User Manual
 BL Series LCD Monitor User Manual Copyright Copyright 2016 by BenQ Corporation. All rights reserved. No part of this publication may be reproduced, transmitted, transcribed, stored in a retrieval system
AcerView 56c. Color Monitor. User s Manual. 15 (38cm) CRT Size, 13.7 (34.8cm) Max. Viewable Area
 CRT Size, 13.7 (34.8cm) Max. Viewable Area") AcerView 56c Color Monitor 15 (38cm) CRT Size, 13.7 (34.8cm) Max. Viewable Area User s Manual Copyright Copyright 1998 by Acer Peripherals, Incorporated. All rights reserved. No part of this publication
AcerView 56c Color Monitor 15 (38cm) CRT Size, 13.7 (34.8cm) Max. Viewable Area User s Manual Copyright Copyright 1998 by Acer Peripherals, Incorporated. All rights reserved. No part of this publication
P-2 Installing the monitor (continued) Carry out as necessary
 Carry out as necessary") P-2 Installing the monitor (continued) Carry out as necessary Using the monitor without the bezel MDT552S satisfies the UL requirements as long as it is used with the bezel attached. When using the monitor
P-2 Installing the monitor (continued) Carry out as necessary Using the monitor without the bezel MDT552S satisfies the UL requirements as long as it is used with the bezel attached. When using the monitor
MONOPRICE. BitPath AV HDMI Extender over Single Cat6 Cable, 120m. User's Manual P/N 16228
 MONOPRICE BitPath AV HDMI Extender over Single Cat6 Cable, 120m P/N 16228 User's Manual SAFETY WARNINGS AND GUIDELINES Please read this entire manual before using this device, paying extra attention to
PREFACE. FCC Compliance Statement
 FCC Compliance Statement PREFACE This device complies with part 15 of the FCC Rules. Opeartion is subjected to the following two conditions: 1. This device may not cause harmful interference, and 2. This
LCD Monitor User Manual EW2430 EW2730
 LCD Monitor User Manual EW2430 EW2730 Copyright Copyright 2011 by BenQ Corporation. All rights reserved. No part of this publication may be reproduced, transmitted, transcribed, stored in a retrieval system
1 Introduction and Package Contents
 1 Introduction and Package Contents Introduction Congratulations on your purchase. You can expect only the sharpest and most brilliant color images from this monitor. Featuring easy to use OSD controls
Diamond View DV180. Colour LCD Monitor (45.9 cm) LCD Panel Size. User s Manual
 LCD Panel Size. User s Manual") Diamond View DV180 Colour LCD Monitor 18.1 (45.9 cm) LCD Panel Size User s Manual TABLE OF CONTENTS 1. 2. 3. 4. 5. 6. 7. 8. SAFETY INSTRUCTIONS AND MAINTENANCE... 3 INTRODUCTION... 4 UNPACKING THE MONITOR...
Diamond View DV180 Colour LCD Monitor 18.1 (45.9 cm) LCD Panel Size User s Manual TABLE OF CONTENTS 1. 2. 3. 4. 5. 6. 7. 8. SAFETY INSTRUCTIONS AND MAINTENANCE... 3 INTRODUCTION... 4 UNPACKING THE MONITOR...
Dell D3218HN. User s Guide. Regulatory model: D3218HNo
 Dell D3218HN User s Guide Regulatory model: D3218HNo Notes, cautions, and warnings NOTE: A NOTE indicates important information that helps you make better use of your computer. CAUTION: A CAUTION indicates
E Series LCD Monitor User Manual
 E Series LCD Monitor User Manual Copyright Copyright 2016 by BenQ Corporation. All rights reserved. No part of this publication may be reproduced, transmitted, transcribed, stored in a retrieval system
MG278 Series LCD Monitor. User Guide
 MG278 Series LCD Monitor User Guide Table of contents Notices... iii Safety information... iv Care & Cleaning... vi 1.1 Welcome!... 1-1 1.2 Package contents... 1-1 1.3 Assembling the monitor... 1-2 1.4