Integrated Amplifier OWNER S MANUAL
|
|
|
- Amelia Flynn
- 5 years ago
- Views:
Transcription


1 AB Integrated Amplifier OWNER S MANUA

2 A iving Tradition in Sound A piano comes into this world through the perfect synergy of advanced technical skill and artistry. Such a piano can create sound that truly reflects the player s feelings. The final stage in piano production is called voicing. It is here that the instrument is given its soul. A highly skilled expert concentrates his mind and sensitivity on the sound of each key, finely adjusting the dynamic feel of the hammers, bringing the tone and vibrancy of all 88 keys together perfectly; a truly stunning achievement. It is a quality of sound that can only be determined by an astute, sensitive ear. We apply this very same concept to the manufacture of our audio products. The technician performs exhaustive listening tests and every component is considered, in order to finally achieve the ideal sound. Yamaha s tradition of audio quality stretches back over 125 years, and continues to live on in all Yamaha products today. 2 En


 in 1955-1965.")


")


3 Excellence in Audio Achievement First HiFi System introduced in 1920 We introduced numerous HiFi components (turntables, FM/AM tuners, integrated amplifiers, preamplifiers, power amplifiers and speakers) in Natural Sound Speaker Series introduced in 1967 NS-20 Monitor Speaker NS-20 CA-1000 CA-1000 Integrated Amplifier Featuring A-Class operation, the CA-1000 set the standard for integrated amplifiers. NS-690 Natural Sound Speaker NS-1000M Monitor Speaker A truly legendary speaker still revered by HiFi enthusiasts. B-1 Power Amplifier An innovative power amp that used vertical FETs in all stages. C-2 Control Amplifier Received top prize at the Milan International Music and HiFi Show. NS-10M Studio Monitor Speaker Became of the most popular studio monitors in the world. A-1 Integrated Amplifier PX-2 Turntable Yamaha s first straight arm turntable. NS-690 B-1 PX-2 B-6 NS-1000M C-2 NS-10M A-1 B-6 Power Amplifier Pyramid-shaped power amplifier. GT-2000/ Turntable First CD Player (CD-1) introduced in 1983 B-2x Power Amplifier MX Power Amplifier and CX Control Amplifier Redefined the capabilities of separate components. AX-1 Integrated Amplifier MX B-2x CX NP-S2000 GT-CD1 CD Player MX-1 Power Amplifier and CX-1 Preamplifier Soavo-1 and Soavo-2 Natural Sound Speaker Systems A-S2000 Integrated Amplifier and CD-S2000 CD Player NP-S2000 Network Player A-S3000 Integrated Amplifier and CD-S3000 CD Player Soavo-1 A-S3000 CD-S En
4 Full floating and balanced circuit design achieves the full potential of analogue amplification An entirely new floating and balanced power amplifier achieves complete symmetry and permits full balanced transmission (amplification) from the input jack to just before the speaker jack. Full-stage balanced signal transmission The integrated amplifier offers full stage balanced transmission, combining high power output with good sound texture and outstanding S/N performance. Parallel volume and tone control arge power supply with four separate circuits eft-right symmetrical design with rigid, stable construction Discrete phono amplifier High-quality headphone amplifier with low-impedance drive Supplied accessories Please check that you have received all of the following parts. Remote control Batteries (AAA, R03, UM-4) ( 2) Power cable SAFETY BROCHURE Contents Controls and functions... 6 Connections Specifications Troubleshooting About this manual y indicates a tip for your operation. Photographs and illustrations are for explanatory purposes, and may differ from the actual unit. Read the SAFETY BROCHURE before using this unit. 4 En

5 Controls and functions In this chapter, you will learn the controls and functions of A-S En
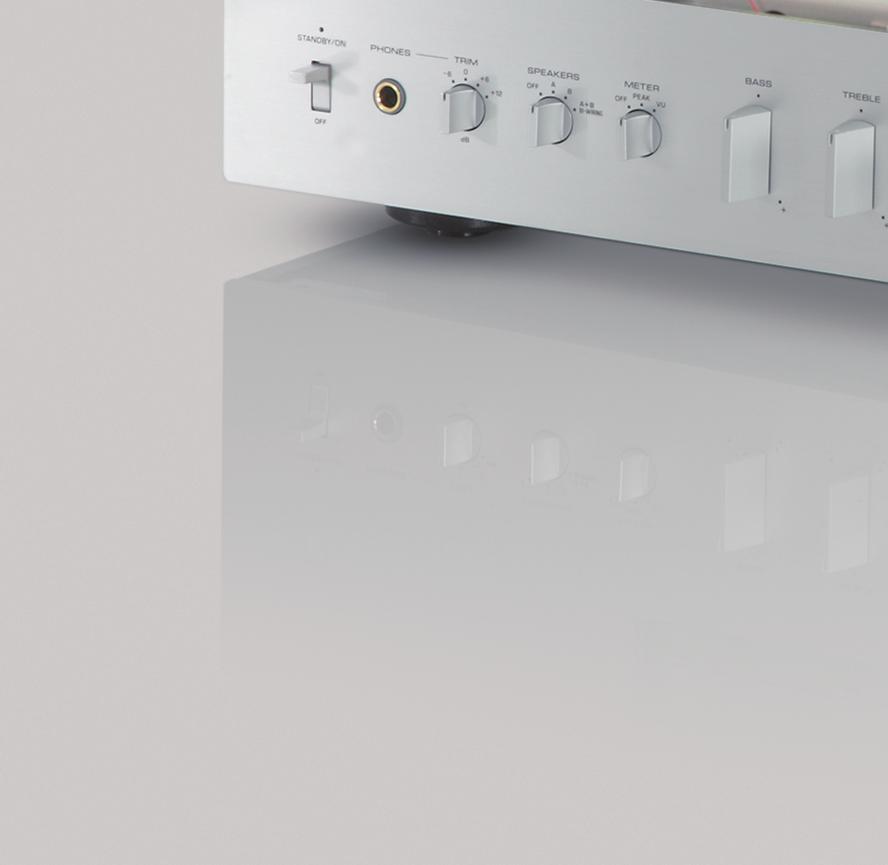
6 CONTROS AND FUNCTIONS Controls and functions Front panel (pages 6 to 9) STANDBY/ON PHONES TRIM SPEAKERS OFF A B AB BI-WIRING METER OFF PEAK VU BASS TREBE BAANCE INE 2 INE 1 INPUT BA CD TUNER MAIN DIRECT PHONO OFF db R : 1 STANDBY/ON, OFF switch Turns on or off this unit. STANDBY/ON (upper position): In this position, you can select STANDBY or ON, using the p AMP key on the remote control. OFF (lower position): The power of this unit is turned off. Notes When you turn on this unit, it will take a few seconds before this unit can reproduce sound. If you disconnect the power cable from the AC outlet and connect it again when this unit is in STANDBY mode, the power of the unit is turned on. If the unit is not to be operated for a long time, set the STANDBY/ON, OFF switch to OFF. 2 STANDBY/ON indicator it brightly: Shows that the power of the unit is ON. In this condition, you can switch the unit to STANDBY mode by pressing the p AMP key on the remote control. it dimly: Shows that the unit is in STANDBY mode. In this condition, you can switch the unit on by pressing the p AMP key on the remote control. Off: Shows that the power of the unit is OFF. In this condition, you can turn the power on only by pressing the STANDBY/ON, OFF switch on the front panel. 3 PHONES jack Outputs audio for private listening with headphones. Notes When headphones are plugged in: Both speaker sets connected to the SPEAKERS /R CH terminals are turned off. No signals are output at the PRE OUT jacks. You cannot select MAIN DIRECT as the input source. If headphones are plugged into the PHONES jack while MAIN DIRECT is selected as the input source, no audio is output at the PHONES jack. 6 En
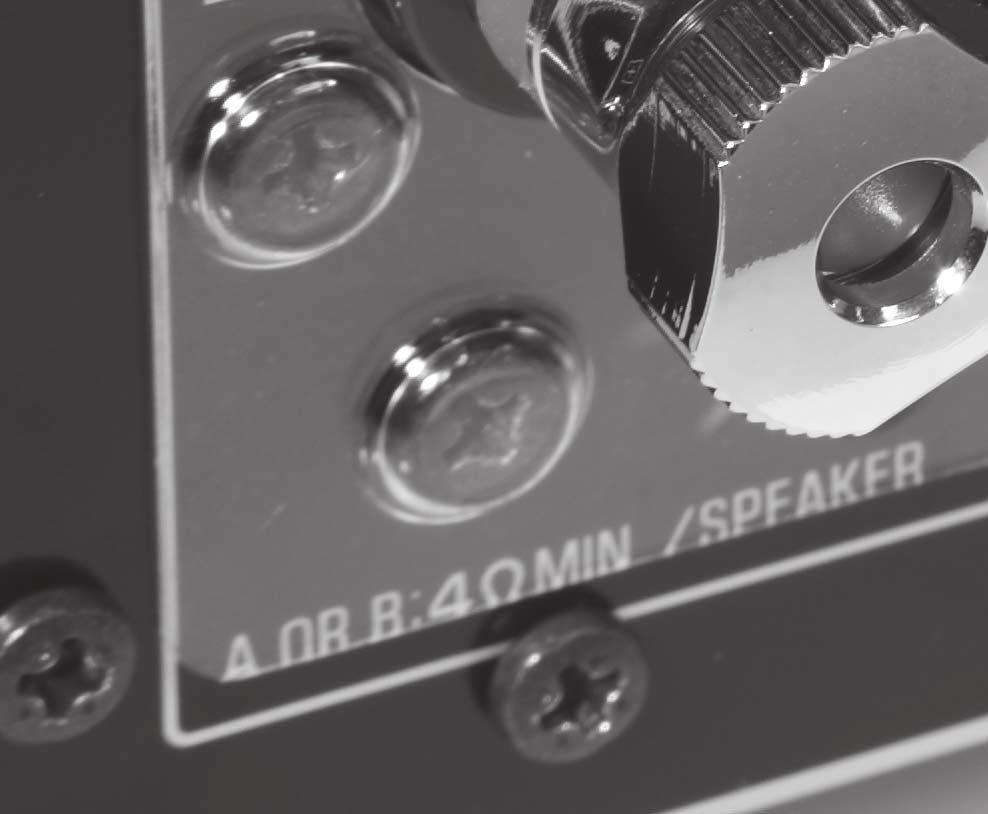
7 PHONO MM MC VOUME AUDIO MUTE 6 METER selector Switches the display of the meter to OFF, PEAK or VU. OFF: Turns off the meter and the illumination. PEAK: Switches the meter to a peak level meter. The peak level meter shows a momentarily highest audio output level. VU: Switches the meter to a VU (Volume Unit) level meter. The VU level meter shows an effective audio output value that is similar to human senses. 7 Meter displays (EFT/RIGHT) Show the audio output level of the left (EFT) and right (RIGHT) channels in VU or PEAK meter mode. The VU or PEAK meter can be selected by the METER selector. 8 BASS control Increases or decreases the low frequency response. The 0 position produces a flat response. Control range: 10 db to 10 db 9 TREBE control Increases or decreases the high frequency response. The 0 position produces a flat response. Control range: 10 db to 10 db 4 TRIM selector Adjusts the volume level when headphones are plugged in to avoid sudden changes in volume. Choices: 6 db, 0 db, 6 db, 12 db 5 SPEAKERS selector Turns on or off the sets of speakers connected to the SPEAKERS /R CH A and/or B terminals on the rear panel, as follows. OFF: Both sets of speakers are off. A/B: The set of speakers connected to the A or B terminals is on. AB BI-WIRING: Both sets of speakers are on. 0 BAANCE control Adjusts the audio output balance of the left and right speakers to compensate for sound imbalances caused by speaker locations or listening room conditions. Notes When both the BASS and TREBE controls are set to the 0 position, audio signal bypasses the tone control circuitry. The BASS, TREBE and BAANCE controls do not affect the signals input at the MAIN IN jacks and signals output at the INE 2 REC jacks. Caution If you use two sets (A and B), the impedance of each speaker must be 8 Ω or higher. 7 En
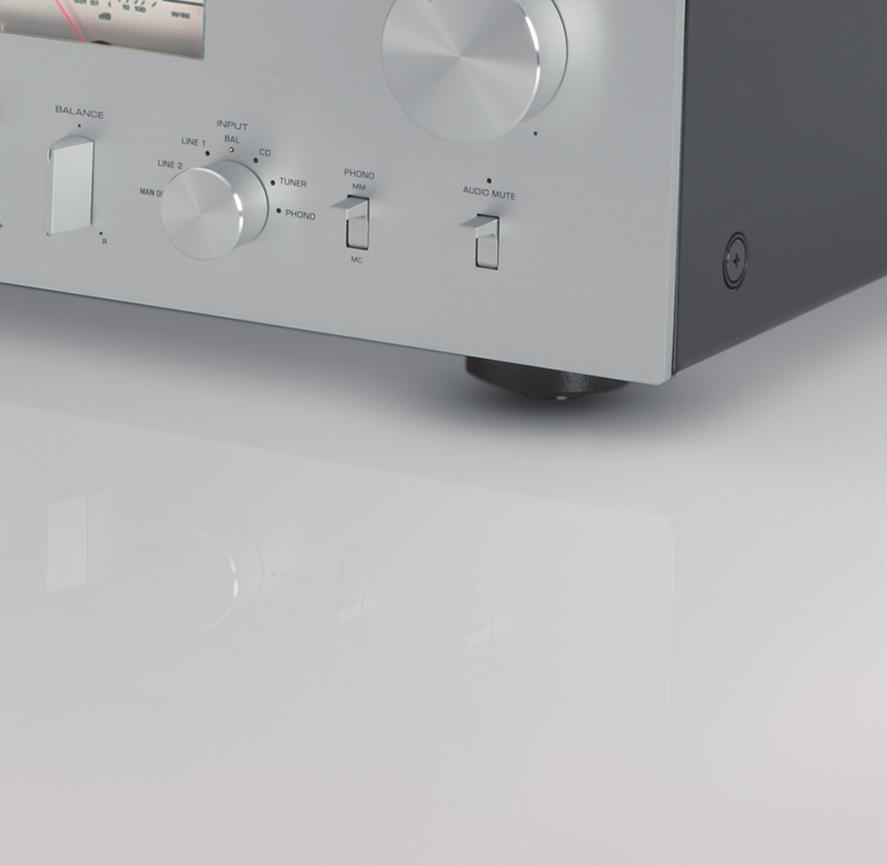
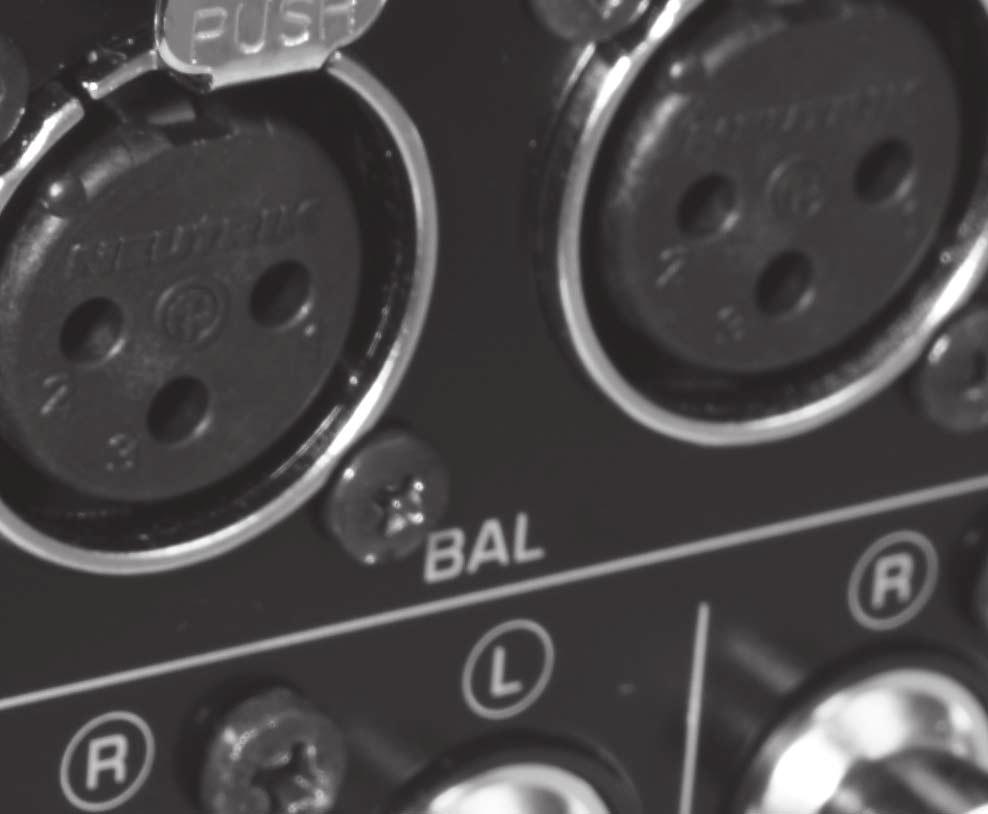
8 Controls and functions Front panel (pages 6 to 9) STANDBY/ON PHONES TRIM SPEAKERS OFF A B AB BI-WIRING METER OFF PEAK VU BASS TREBE BAANCE INE 2 INE 1 INPUT BA CD TUNER MAIN DIRECT PHONO OFF db R A B A Remote control sensor Receives signals from the remote control. B INPUT selector/indicator Selects the input source to be played back. The indicator of the input source selected with the INPUT selector lights. The audio signals of the selected input source are also output at the INE 2 REC jacks. MAIN DIRECT: Selects the component connected to the MAIN IN jacks. When MAIN DIRECT is selected as the input source, the audio signals are not output at the PRE OUT, INE 2 REC and PHONES jacks. INE 1/INE 2: Selects the component connected to the INE 1 or INE 2 jacks. BA: Selects the component connected to the BA jacks (balanced XR jacks). CD: Selects the CD player connected to the CD jacks (unbalanced RCA jacks). TUNER: Selects the tuner connected to the TUNER jacks. PHONO: Selects the turntable connected to the PHONO jacks. Note When INE 2 is selected, the audio signals are not output at the INE 2 REC jacks. 8 En
9 VOUME PHONO MM AUDIO MUTE MC C D E F C PHONO switch Selects the type of cartridge of the turntable connected to the PHONO jacks on the rear panel. MM: Choose this setting if the connected turntable uses an moving magnet (MM) cartridge. MC: Choose this setting if the connected turntable uses an moving coil (MC) cartridge. y When you replace the cartridge, be sure to turn off this unit. D AUDIO MUTE switch Press downward to reduce the current volume level by approximately 20 db. Press again to restore the audio output to the previous volume level. y You can also rotate the VOUME control on the front panel or press the VOUME or key on the remote control to resume the audio output. E AUDIO MUTE indicator ights when the mute function is turned on with the AUDIO MUTE switch. F VOUME control Controls the volume level. This does not affect the output level at the INE 2 REC jacks. Note The VOUME control does not affect when you select MAIN DIRECT as the input source. Adjust the volume level using the volume control on the external amplifier connected to the MAIN IN jacks. 9 En
10 Controls and functions Rear panel 1 2 INPUT ATTENUATOR PHASE NORMA (EIA) SPEAKERS R CH R BYPASS ATT. (-6dB) NORMA INV. HOT COD INE2 GND A R REC R PRE OUT BA R R R B TUNER CD INE 1 PB MAIN IN R GND PHONO A OR B:4 MIN. /SPEAKER AB:8 MIN. /SPEAKER See page 16 for connection information. 1 BA (balanced) input jacks One set of balanced input jacks is provided. Set the ATTENUATOR selector and PHASE selector appropriately for the playback component that is connected. For details on these switches, refer to page PRE OUT jacks y The PRE OUT jacks output the same channel signal as the SPEAKERS /R CH terminals. When you connect a stereo cable to the PRE OUT jacks to drive the speakers using an external amplifier, it is not necessary to use the SPEAKERS /R CH terminals. The signal output at the PRE OUT jacks are affected by the BASS and TREBE control settings. 3 SPEAKERS /R CH terminals 4 TUNER input jacks 5 PHONO input jacks 6 CD input jacks 7 GND (Ground) terminal 8 INE 1 input jacks 9 INE 2 jacks PB (playback) input jacks and REC (recording) output jacks are provided. 0 MAIN IN jacks Use these jacks to connect an external component equipped with a volume control. y When you select MAIN DIRECT as the input source, the volume level is fixed. Adjust the volume level using the volume control on the external amplifier connected to the MAIN IN jacks when you select MAIN DIRECT as the input source. For the connection to the MAIN IN jacks, see pages 16 and En
11 A B C D AUTO POWER STANDBY TRIGGER REMOTE SYSTEM CONNECTOR ON OFF IN IN OUT SPEAKERS CH A B AC IN A OR B:4 MIN. /SPEAKER AB:8 MIN. /SPEAKER 3 E F A AUTO POWER STANDBY switch ON: The unit enters STANDBY mode automatically if not operated for 8 hours. OFF: The unit does not enter STANDBY mode automatically. B TRIGGER IN jack Use this jack to connect an external component for the trigger function. For details on the connection, see page 22. C REMOTE IN/OUT jacks Use these jacks to connect an external component for remote control. For details on the connection, see page 21. D SYSTEM CONNECTOR Use this connector to connect a product testing device for servicing. E AC IN inlet Use this inlet to plug in the supplied power cable. For details on the connection, see page 19. F Foot The feet of this unit include built-in spikes. Using the spikes can reduce the effect of vibrations on the set. When using the spikes, remove the transport tape, then remove the magnet foot by pulling it. Transport tape Caution Spike Magnet foot Take care that the magnet foot is not accidentally swallowed by small children. When using the feet s built-in spikes, the spikes may scratch the shelf or floor on which this unit is installed. Use the magnet feet or appropriate supports when placing this unit on expensive furniture, etc. y If this unit is unstable, you can adjust the foot height by rotating it. 11 En
12 Controls and functions Remote control AMP OPEN/COSE BA CD INE 1 INE 2 PHONO MAIN DIRECT CD TUNER BAND PRESET SOURCE AYER VOUME Infrared signal transmitter Outputs infrared control signals. 2 p AMP key Turns this unit ON or switches it to STANDBY mode. For details on STANDBY mode, see Front panel (page 6). 3 Input select keys Selects the input source to be played back. The audio signals of the selected input source are output at the INE 2 REC jacks. y When INE 2 is selected as the input source, the audio signals are not output at the INE 2 REC jacks. BA: Selects the component connected to the BA jacks (balanced XR jacks). INE: Selects the component connected to the INE 1 or INE 2 jacks. PHONO: Selects the turntable connected to the PHONO jacks. MAIN DIRECT: Selects the component connected to the MAIN IN jacks. When MAIN DIRECT is selected as the input source, the audio signals are not output at the PRE OUT, INE 2 REC and PHONES jacks. CD: Selects the CD player connected to the CD jacks (unbalanced RCA jacks). TUNER: Selects the tuner connected to the TUNER jacks 4 Yamaha tuner control buttons Control functions of Yamaha tuner. Refer to the owner s manual of your tuner for details. Note Some Yamaha tuners cannot be controlled by this remote control. MUTE 9 12 En
13 5 p CD key Turns the Yamaha CD player ON or switches it to STANDBY mode. 6 OPEN/COSE key Opens/closes the disc tray of the Yamaha CD player. Refer to the owner s manual of your CD player for details. Note Some Yamaha CD players do not support the p CD key and/ or OPEN/COSE key of this remote control. 7 Yamaha CD player control keys Control various functions of Yamaha CD player. Refer to the owner s manual of your CD player for details. (Play): Starts playback. (Pause): Pauses playback. Press the or to resume playback. (Stop): Stops playback. / (Skip): Skips to the next track, or skips back to the beginning of the current track. SOURCE: Selects the source to be played on the Yamaha CD player. The playback source changes each time this key is pressed. AYER: Switches the playback layer of a hybrid SA- CD between SA-CD and CD. 8 VOUME / keys Control the volume level. Note The VOUME keys do not affect when you select MAIN DIRECT as the input source. Adjust the volume level on the external amplifier connected to the MAIN IN jacks. 9 MUTE key Reduces the current volume level by approximately 20 db. Press again to restore the audio output to the previous volume level. Pressing the VOUME or key also cancels muting. 13 En
14 Controls and functions Installing batteries in the remote control Operating range of the remote control 1 Remove the battery compartment cover. 2 Insert the two batteries (AAA, R03, UM-4) according to the polarity markings ( and ) on the inside of the battery compartment. Approximately 6 m (20 ft) y The remote control transmits a directional infrared beam. Be sure to aim the remote control directly at the remote control sensor on the front panel of this unit during operation. 3 Reinstall the battery compartment cover En


15 Connections In this section, you will make connections between A-S2100, speakers, and source components.
16 Connections Speakers A (R channel) Tuner CD player or network player with XR jacks CD player with RCA jacks - INPUT ATTENUATOR PHASE SPEAKERS R CH R BYPASS ATT. (-6dB) NORMA INV. A BA R R R B TUNER CD INE1 R GND PHONO A OR B:4 MIN./SPEAKER AB:8 MIN. /SPEAKER - Ground Speakers B (R channel) Turntable BD player, etc. Notes Do not let the bare speaker wires touch each other or do not let them touch any metal part of this unit. This could damage this unit and/or the speakers. All connections must be correct: (left) to, R (right) to R, to, and to. If the connections are faulty, no sound will be heard from the speakers, and if the polarity of the speaker connections is incorrect, the sound will be unnatural and lack bass. Also, refer to the owner s manual for each of your components. Use RCA unbalanced cables to connect other components except speakers. Use XR balanced cables to connect a CD player or network player with XR balanced output jacks to the BA jacks of this unit. Connect your turntable to the GND terminal to reduce noise in the signal. However, you may hear less noise without the connection to the GND terminal for some turntables. 16 En
17 - External amplifier or active subwoofer Speakers A ( channel) TOR PHASE NORMA (EIA) AUTO POWER STANDBY TRIGGER REMOTE SYSTEM CONNECTOR TT. -6dB) NORMA INV. HOT GND ON OFF IN IN OUT - COD INE2 SPEAKERS CH R REC R PRE OUT A R INE 1 PB MAIN IN B AC IN GND A OR B:4 MIN. /SPEAKER AB:8 MIN. /SPEAKER CD recorder, tape deck, etc. Preamplifier, AV receiver, etc. Speakers B ( channel) Notes Because the power amplifier of A-S2100 is of the floating balanced type, the following types of connections are not possible. Connecting with the left channel terminal and the right channel terminal as well as terminals (Fig. 1). Connecting with the left channel terminal and the right channel terminal inverted (cross connection, Fig. 2). Deliberately connecting with the left/right channel terminals and metal part on the rear panel of this unit, as well as accidentally touching them. Do not connect your active subwoofer to the SPEAKERS /R CH terminal. Connect it to the PRE OUT jacks of this unit. Do not connect a component with no volume control, such as a CD player, to the MAIN IN jacks, as the volume level of the signals input to the MAIN IN jacks is fixed. If such equipment is connected, a sound may burst, and the unit and/or speaker may be damaged. R Fig. 1 Fig. 2 R 17 En
18 Connections Connecting the speakers 1 Remove approximately 10 mm of insulation from the end of each speaker cable and twist the exposed wires of the cable together to prevent short circuits. Connecting the banana plug (Except for Europe models) First, tighten the knob and then insert the banana plug into the end of the corresponding terminal. 10 mm Banana plug Hole for banana plug: 3.95 mm dia. 2 Unscrew the knob and then insert the bare wire into the hole. Connecting the Y-shaped lug 1 Unscrew the knob and then sandwich the Y- shaped lug between the ring part and base. Hole for speaker cable: 6.0 mm dia. Slide Y-shaped lug 3 Tighten the knob. Terminal screw for Y-shaped lug: 5.8 mm dia. 2 Tighten the knob. Caution When loosening the knob of the speaker terminal, do not rotate it excessively. The knob may come off and pose the danger of being swallowed by a child. Notes Touching the speaker terminal with a metallic rack may cause short circuit and damage this unit. When installing the unit in a rack, maintain a sufficient clearance to prevent the speaker terminals from touching the rack. To reduce the risk of electric shock, do not touch the speaker terminal when the unit is turned on. 18 En
19 Bi-wire connection The bi-wire connection separates the woofer from the combined midrange and tweeter section. A bi-wire compatible speaker has four binding post terminals. These two sets of terminals allow the speaker to be split into two independent sections. This split connects the mid and high frequency drivers to one set of terminals and the low frequency driver to the other pair. Connecting the power cable Plug the power cable into the AC IN inlet when all connections are complete, and then plug in the power cable to the AC outlet. Rear panel of A-S2100 AC IN Example of a bi-wiring connection (R channel) Rear panel of A-S2100 Speaker SPEAKERS R CH A B Supplied power cable A OR B:4 MIN. /SPEAKER AB:8 MIN. /SPEAKER Caution To use the bi-wire connections, the impedance of each speaker must be 8 Ω or higher. Note Remove the shorting bars or bridges to separate the PF (low pass filter) and HPF (high pass filter) crossovers. y To use the bi-wire connections, switch the SPEAKERS selector on the front panel to the AB BI-WIRING position. to an AC outlet 19 En
20 Connections Connecting to the BA jacks Connect your CD player or network player with the XR balanced output jacks. Set the ATTENUATOR selector and PHASE selector located above the BA jacks according to the component to be connected. ATTENUATOR selector: Select the allowable input level for the XR balanced input jacks. If sound from the connected component is distorted, set the ATTENUATOR selector to ATT. (-6 db). PHASE selector: Select the assignment of the HOT pin of the XR balanced input jacks (pin 2 HOT or pin 3 HOT). NORMA (pin 2 HOT) XR connectors: When connecting, be sure to match the pins and insert the connector of the male XR balanced cable until you hear a click. When disconnecting, pull out the male XR balanced cable while holding down the lever of the BA jack. Female XR connector Male XR connector ever BA jack 2: hot 1: ground Note To select the component connected to the BA jacks, set the input source to BA. 3: cold INV. (pin 3 HOT) 2: cold 1: ground 3: hot Refer to the owner s manual supplied with the connected component and verify the assignment of the HOT pin of its XR balanced output jacks. y Yamaha CD players are set to NORMA (pin 2 HOT). 20 En
21 Operating this unit from another room If you connect an infrared receiver and transmitter to the REMOTE IN/OUT jacks of this unit, you can operate the unit and/or external component using the supplied remote control located in another room. Rear panel of A-S2100 TRIGGER REMOTE SYSTEM CONNECTOR IN IN OUT Remote connection between Yamaha components When you have another Yamaha component supporting remote connection, as this unit does, an infrared transmitter is not necessary. You can transmit remote signals by connecting an infrared receiver and the REMOTE IN jack of the other component to the REMOTE IN/OUT jacks of this unit, using cables with monaural miniplugs. Up to three Yamaha components (including this unit) can be connected. Rear panel of A-S2100 TRIGGER REMOTE SYSTEM CONNECTOR IN IN OUT Infrared receiver Infrared transmitter Infrared receiver Monaural mini-plug cable REMOTE IN OUT Remote control External component (CD player, etc.) Remote control Yamaha component (up to three components including this unit) 21 En
22 SPEAKERS R CH A OR B:4 MIN. /SPEAKER AB:8 MIN. /SPEAKER R R TUNER R PHONO INPUT ATTENUATOR BYPASS BA R R CD PHASE NORMA INV. GND INE 1 NORMA (EIA) HOT 2 1 GND 3 - COD INE2 R REC PB R PRE OUT MAIN IN AUTO POWER STANDBY ON OFF SPEAKERS CH A OR B:4 MIN. /SPEAKER AB:8 MIN. /SPEAKER TRIGGER REMOTE SYSTEM CONNECTOR IN IN OUT AC IN Connections Connecting a component supporting the trigger function such as a Yamaha AV receiver The operations of this unit can be controlled in synchronization with the operations of the connected component, such as a Yamaha AV receiver (power ON/ STANDBY or MAIN DIRECT input selection). Connect the PRE OUT jacks and the TRIGGER OUT jack of the Yamaha AV receiver to this unit as illustrated below: Rear panel of A-S2100 (-6dB) ATT. A A B B MAIN IN TRIGGER IN RCA stereo cable Monaural mini-plug cable PRE OUT TRIGGER OUT When the power of the connected component is turned on, this unit turns on and the input is set to MAIN DIRECT automatically. When MAIN DIRECT is selected as the input source, this unit enters STANDBY mode if the power of the connected component is turned off. Note Yamaha AV receiver, etc. with PRE OUT and TRIGGER OUT jacks To enable synchronization, turn off this unit before connecting the component to the MAIN IN jacks. The synchronization cannot be activated when the STANDBY/ON, OFF switch of the unit has been set to OFF. 22 En

23 Specifications In this section, you will find technical specifications for A-S2100.
24 Specifications POWER SECTION Rated Output Power [U.S.A, Canada, Taiwan, China, Korea, Australia, U.K. and Europe models] (8, 20 Hz to 20 khz, 0.07% THD) W 90 W (4, 20 Hz to 20 khz, 0.07% THD) W 150 W [Asia model] (8, 20 Hz to 20 khz, 0.07% THD) W 90 W (6, 20 Hz to 20 khz, 0.07% THD) W 110 W Dynamic Power (IHF) W W W W W W W W Dynamic Headroom ( db Maximum Output Power [U.K. and Europe models only] (1 khz, 0.7% THD, 4 ) W 160 W Maximum Effective Output Power (JEITA) [Taiwan, China, Korea, Asia and U.K. models only] (1 khz, 10% THD, 8 ) W 120 W (1 khz, 10% THD, 4 ) W 190 W IEC Output Power [U.K. and Europe models only] (1 khz, 0.02% THD, 8 ) W 95 W Power Bandwidth (MAIN /R, 0.1% THD, 45 W, 8 ) Hz to 50 khz Damping Factor (1 khz, or higher Maximum Input Signal Voltage PHONO MM (1 khz, 0.5% THD) mvrms PHONO MC (1 khz, 0.5% THD) mvrms CD, etc. (1 khz, 0.5% THD) Vrms BA (1 khz, 0.5% THD) (BYPASS) Vrms (ATT. -6 db) Vrms Rated Output Voltage/Output Impedance REC OUT mvrms/1.5 k PRE OUT Vrms/1.5 k Frequency Response CD, etc. (5 Hz to 100 khz)... 0/ 3dB CD, etc. (20 Hz to 20 khz)... 0/ 0.3 db RIAA Equalization Deviation PHONO MM... ±0.5 db PHONO MC... ±0.5 db Total Harmonic Distortion Plus Noise PHONO MM to REC OUT (20 Hz to 20 khz, 1.2 Vrms % PHONO MC to REC OUT (20 Hz to 20 khz, 1.2 Vrms % BA to SPEAKERS OUT (20 Hz to 20 khz, 50 W/8 ) % CD, etc. to SPEAKERS OUT (20 Hz to 20 khz, 50 W/8 ) % Signal to Noise Ratio (IHF-A Network) PHONO MM (5 mvrms, Input shorted) db PHONO MC (500 µvrms, Input shorted) db CD, etc. (200 mvrms, Input shorted) db Residual Noise (IHF-A Network) µvrms CONTRO SECTION Input Sensitivity/Input Impedance CD, etc mvrms/47 k PHONO MM mvrms/47 k PHONO MC µvrms/50 MAIN IN Vrms/47 k BA mvrms/100 k Headphone Jack Rated Output Power CD, etc. (1 khz, 32, 0.2% THD) mw 50 mw Channel Separation CD, etc. (Input, 5.1 k Terminated, 1 khz/10 khz)... 74/54 db or higher PHONO MM (Input shorted, 1 khz/10 khz, Vol.: 30 db)... 90/77 db or higher PHONO MC (Input shorted, 1 khz/10 khz, Vol.: 30 db)... 66/77 db or higher Tone Control Characteristics BASS Boost/Cut (50 Hz)... ±9 db Turnover Frequency Hz TREBE Boost/Cut (20 khz)... ±9 db Turnover Frequency khz GENERA Power Supply [U.S.A and Canada models]... AC 120 V, 60 Hz [Taiwan model]... AC 110 V, 60 Hz [China model]... AC 220 V, 50 Hz [Korea model]... AC 220 V, 60 Hz [Australia model]... AC 240 V, 50 Hz [U.K. and Europe models]... AC 230 V, 50 Hz [Asia model]... AC V, 50/60 Hz Power Consumption [Asia model] W [Other models] W Standby Power Consumption W Dimensions (W H D) mm (17-1/8 6-1/8 18-1/4 ) Weight kg (51.6 lbs) * Specifications are subject to change without notice. 24 En
25 Block diagram FRONT PANE PHONES SPEAKERS METER TRIM OFF/A/B/AB OFF/PEAK/VU PHONO MM/MC AUDIO MUTE BASS TREBE BAANCE IR REMOTE INPUT VOUME REAR PANE TRIGGER IN IR IN IR OUT PROTECTION CONTRO CPU CPU/OGIC, etc. Standby power PRE OUT (REC) INE2 OUT REC OUT BUFFER MAIN IN INE2 INE1 TUNER CD COD (-) MM//MC MM EQ AMP PHONO MC HEAD AMP HOT () COD (-) UNBAANCE BAANCE CONVERTER BA HOT () BAANCE GAIN SE Phase change (normal / inv.) INPUT SEECTOR POWER REAY SUB TRANSFORMER METER MOTOR VO REAY INDEPENDENT REGUATED POWER SUPPY (for AUDIO) FOR MC AMP FOR MM EQ AMP FOR After Vol Amp FOR Input Amp FOR VOUME2 (Rch) FOR VOUME1 (ch) TONE CONTRO ATT.UINT3 ATT.UINT2 ATT.UINT1 FAT (DEFEAT) TONE CONTRO ATT.UINT3 ATT.UINT2 ATT.UINT1 FAT (DEFEAT) VOUME BUFFER AMP BUFFER AMP PRE OUT BUFFER MAIN TRANSFORMER POWER AMP PRE STAGE R CH R CH CH CH FOATING POWER SUPPY og amplifier Peak / VU DRIVER METER CIRCUIT OW IMPEDANCE DRIVE HEADPHONE AMP. FOATING BAANCE SPEAKER DRIVER MOSFET FOATING BAANCE SPEAKER DRIVER MOSFET FOATING BAANCE POWER AMPIFIER SP A ch SP B ch SPEAKER OUT CH A B HEAD PHONE METER METER UNIT To POWER AMP R CH 25 En
26 Specifications Tone control characteristics Response (db) k 2k 3k 5k 10k 20k 30k 50k 100k Frequency (Hz) Total harmonic distortion THD N Ratio (%) kHz 20Hz kHz Measured (W) 26 En
27 Total harmonic distortion (PHONO) THD N Ratio (%) Hz 1kHz 20kHz µ 200µ 500µ 1m 2m 5m 10m 20m Generator evel (Vrms) 50m 100m 200m 500m En
28 Troubleshooting Refer to the chart below if this unit does not function properly. If the problem you are experiencing is not listed below or if the instructions below do not help, turn off this unit, disconnect the power cable, and contact the nearest authorized Yamaha dealer or service center. Problem Cause Remedy See page This unit fails to turn on. The power cable is not connected to the AC IN inlet on the rear panel or not plugged in the AC wall outlet. Connect the power cable firmly. 19 The protection circuitry has been activated because of a short circuit, etc. Check that the speaker wires are not touching each other or shorting out against the rear panel of this unit, and then turn the power of this unit back on. 18 This unit has been exposed to a strong external electric shock (such as lightning or strong static electricity). Turn off this unit, disconnect the power cable, plug it back in after 30 seconds, and then use it normally. The STANDBY/ON indicator on the front panel flashes. The protection circuitry has been activated because of a short circuit, etc. Check that the speaker wires are not touching each other or shorting out against the rear panel of this unit, and then turn the power of this unit back on. 18 There is a problem with the internal circuitries of this unit. Disconnect the power cable and contact the nearest authorized Yamaha dealer or service center. The INPUT indicator on the front panel flashes and the volume is turned down when you turn on this unit. The protection circuitry has been activated because of a short circuit, etc. Check that the speaker wires are not touching each other or shorting out against the rear panel of this unit, and then turn the power of this unit back on. 18 No sound. Incorrect input or output cable connections. Connect the cables properly. If the problem persists, the cables may be defective. 16 No appropriate input source has been selected. Select an appropriate input source with the INPUT selector on the front panel (or one of the input selector keys on the remote control). 8, 12 The SPEAKERS selector is set to OFF. Switch the SPEAKERS selector to the appropriate position. 7 Speaker connections are not secure. Secure the connections. 18 The sound suddenly goes off. The protection circuitry has been activated because of a short circuit, etc. Check that the speaker wires are not touching each other or shorting out against the rear panel of this unit, and then turn the power of this unit back on. 18 The volume level cannot be adjusted. MAIN DIRECT is selected as the input source. Adjust the volume on the connected component. Or connect external component to input jacks other than MAIN IN and select the corresponding input source. 8, 9 Only the speaker on one side can be heard. Incorrect cable connections. Incorrect setting for the BAANCE control. Connect the cables properly. If the problem persists, the cables may be defective. Set the BAANCE control to the appropriate position There is a lack of bass and no ambience. The and wires are connected in reverse at the amplifier or the speakers. Connect the speaker wires to the correct and phase. 16 A humming sound is heard. Incorrect cable connections. Connect the audio cable plugs firmly. If the problem persists, the cables may be defective. 16 No connection from the turntable to the GND terminal. Connect the turntable to the GND terminal of this unit En
29 Problem Cause Remedy See page The sound from the component connected to the BA jack is degraded. The sound level is higher than the maximum input level for the XR balanced input jacks. If the output level of the connected component is double, set the ATTENUATOR selector located above the input jacks to ATT. (-6 db). 20 Bass is not spatial when BA (balanced input) is selected. The polarity is incorrect. Select the correct polarity with the PHASE selector. 20 The sound is degraded when listening with the headphones connected to the CD player connected to this unit. The power of this unit is turned off. Turn on the power of this unit. The volume level is low while playing a record. Incorrect setting for the PHONO switch on the front panel. Switch the PHONO switch to the MM or MC position according to the type of magnetic cartridge of the turntable. 9 The remote control does not work or function properly. Wrong distance or angle. The remote control functions within a maximum range of 6 m (20 ft) and no more than 30 degrees offaxis from the front panel. 14 Direct sunlight or lighting (from an inverter type of fluorescent lamp, etc.) is striking the remote control sensor of this unit. Reposition this unit. 8 The batteries are weak. Replace all batteries. 14 Taking care of this unit Polish finish on the side panels Use of Yamaha Unicon cloth (sold separately) is recommended. For heavy dirt, use Yamaha Piano Unicon (sold separately). For puschasing, contact your nearest authorized Yamaha dealer or service center. Other finish When you wipe this unit, do not use chemical solvents (alcohol, thinner, etc.), which might damage the finish. Use a clean, dry cloth. For heavy dirt, dampen a soft cloth in detergent diluted with water, wring it out, and clean this unit with the cloth. 29 En
30
31
32 2014 Yamaha Corporation Printed in Malaysia VAA8480
Pre-Amplifier. Owner s Manual
 Pre-Amplifier Owner s Manual Thank you and congratulations on your purchase of this Yamaha product. You can enjoy the high-quality stereo sound of this preamplifier at home. This Owner s Manual describes
X D M PREAMP MIXER
 User Instructions X D M - 3 5 2 PREAMP MIXER Thank you for purchasing this American DJ product. The XDM-352 is ready to be used, there is no assembly required. Please read the following instructions before
508 Phono Preamplifier. Boulder Amplifiers, Inc. 255 S. Taylor Ave. Louisville, CO (303) /1/2018 Rev. 1.
 /1/2018 Rev. 1.") 508 Phono Preamplifier 6/1/2018 Rev. 1.0 P/N: 91053 Boulder Amplifiers, Inc. 255 S. Taylor Ave. Louisville, CO 80027 (303) 449-8220 www.boulderamp.com About About Boulder Amplifiers, Inc. Boulder was founded
508 Phono Preamplifier 6/1/2018 Rev. 1.0 P/N: 91053 Boulder Amplifiers, Inc. 255 S. Taylor Ave. Louisville, CO 80027 (303) 449-8220 www.boulderamp.com About About Boulder Amplifiers, Inc. Boulder was founded
Introduction Front Panel Functions Rear Panel Functions Precautions Placement & Ventilation... 5
 Contents Introduction... 2 Front Panel Functions... 3 Rear Panel Functions... 3 Precautions... 5 Placement & Ventilation... 5 Installation & Operation... 5 Care & Maintenance... 7 Troubleshooting... 8
Stereo Cassette Deck
 3-858-050-11(1) Stereo Cassette Deck Operating Instructions 199 by Sony Corporation 3-858-050-11 (1) WARNING To prevent fire or shock hazard, do not expose the unit to rain or moisture. To avoid electrical
NS-B750. Speaker Enceinte OWNER S MANUAL MODE D EMPLOI BEDIENUNGSANLEITUNG MANUAL DE INSTRUCCIONES
 TG Speaker Enceinte OWNER S MANUAL MODE D EMPLOI BEDIENUNGSANLEITUNG MANUAL DE INSTRUCCIONES PRECAUTIONS Read this before using the speaker. To assure the finest performance, please read this manual carefully.
XDM-2221 SKILZ professional preamp mixer USER INSTRUCTIONS
 XDM-2221 SKILZ professional preamp mixer USER INSTRUCTIONS djs wanted. XDM-2221 SKILZ The Ultimate DJ Scratch Mixer! Main Features 2 phono, 2 line, 2 auxiliaries, & 1 microphone input Hamster Switch for
PREAMPLIFIER INTRODUCTION INSTRUCTIONS FOR USE. Thank you for purchasing the Musical Fidelity A3 CR remote control preamplifier.
 INTRODUCTION A3 CR PREAMPLIFIER INSTRUCTIONS FOR USE Thank you for purchasing the Musical Fidelity A3 CR remote control preamplifier. Used properly and carefully, it should give you many years of outstanding
CP1 OAD. Owner s Manual. Stereo Control Preamplifier. Ultrafidelity
 OAD Ultrafidelity CP1 Stereo Control Preamplifier Owner s Manual Contents Section Page No. Introduction........................................................................ 1 Warnings.................................................................................
PLAYMATE PROFESSIONAL STEREO 19 MIXER, USB/SD CARD AND BLUETOOTH PLAYER. User Guide and Reference Manual. page 1
 PLAYMATE PROFESSIONAL STEREO 19 MIXER, USB/SD CARD AND BLUETOOTH PLAYER User Guide and Reference Manual page 1 INTRODUCTION Congratulations and thank you for purchasing the NewHank Playmate mixer. This
SATRI AMPLIFIER AMP-51R. Owner s Manual
 SATRI AMPLIFIER AMP-51R Owner s Manual contents SAFETY INSTRUCTIONS 4 INTRODUCTION 6 OVERVIEW (FRONT PANEL) 8 OVERVIEW (REAR PANEL) 9 OVERVIEW (REMOTE CONTROL) 1 1 OPERATION 12 TROUBLESHOOTING 13 SPECIFICATION
Owners Manual PERREAUX
 éloquence Phono Preamplifier Owners Manual PERREAUX 1 The éloquence phono preamplifier Designed and Manufactured in Dunedin, New Zealand Table of Contents INTRODUCTION... 3 Unpacking... 4 Fitting Instructions...
Stereo Cassette Deck
 3-864-650-12(1) Stereo Cassette Deck Operating Instructions TC-TX333 1998 by Sony Corporation WARNING To prevent fire or shock hazard, do not expose the unit to rain or moisture. To avoid electrical shock,
Specifications PYLE PRO MIXERS. warranty registration card PYD1010/1015/1020. Model No. Serial # (if available) Date of Purchase
 Date of Purchase") Specifications PYD1010/1015/1020 Input Sensitivity/Impedance Distortion Mic Phono 1-2 Line 1-6 1.5 mv/600 Ohms 3.0 mv/50k Ohms 150.0 mv/27k Ohms Mic Phono Line 0.50% 0.08% 0.05% Output Level Master Zone
Specifications PYD1010/1015/1020 Input Sensitivity/Impedance Distortion Mic Phono 1-2 Line 1-6 1.5 mv/600 Ohms 3.0 mv/50k Ohms 150.0 mv/27k Ohms Mic Phono Line 0.50% 0.08% 0.05% Output Level Master Zone
Owner s Manual. Introduction. Features. Contents Front and rear panel... 2 Control panel... 2 Input/output panel... 6 Rear panel...
 ED MIXER Owner s Manual Introduction Thank you for purchasing the Yamaha EMX4 Powered Mixer. The EMX4 has the following features. In order to take full advantage of the EMX4 and enjoy long and trouble-free
Operating Manual. Mark Levinson Nº28 Preamplifier. Madrigal Audio Laboratories, Inc. 15
 Operating Manual Mark Levinson Nº28 Preamplifier Madrigal Audio Laboratories, Inc. 15 WARNING: TO REDUCE THE RISK OF FIRE OR ELECTRIC SHOCK, DO NOT EXPOSE THIS APPLIANCE TO RAIN OR MOISTURE. CAUTION RISK
MANUAL DE INICIO RÁPIDO ESPAÑOL ( 7 10 ) GUIDE D UTILISATION RAPIDE FRANÇAIS ( ) MANUALE RAPIDO DI UTILIZZAZIONE ITALIANO ( )
 GUIDE D UTILISATION RAPIDE FRANÇAIS ( ) MANUALE RAPIDO DI UTILIZZAZIONE ITALIANO ( )") QUICKSTART GUIDE ENGLISH ( 6 ) MANUAL DE INICIO RÁPIDO ESPAÑOL ( ) GUIDE D UTILISATION RAPIDE FRANÇAIS ( 4 ) MANUALE RAPIDO DI UTILIZZAZIONE ITALIANO ( 5 ) KURZANLEITUNG DEUTSCH ( 22 ) INTRODUCTION Welcome
QUICKSTART GUIDE ENGLISH ( 6 ) MANUAL DE INICIO RÁPIDO ESPAÑOL ( ) GUIDE D UTILISATION RAPIDE FRANÇAIS ( 4 ) MANUALE RAPIDO DI UTILIZZAZIONE ITALIANO ( 5 ) KURZANLEITUNG DEUTSCH ( 22 ) INTRODUCTION Welcome
MIXING CONSOLE. Owner s Manual. Keep This Manual For Future Reference.
 MIXING CSOE Owner s Manual Keep This Manual For Future eference. E i Precautions. Avoid excessive heat, humidity, dust and vibration Keep the unit away from locations where it is likely to be exposed to
Owner's Manual PPA-1 Phono Preamp
 Owner's Manual PPA-1 Phono Preamp Contents Legal Notifications 2 Warranty Information 2 Installation and Usage Tips 3 Connections and Controls 3 Front panel Rear panel Connecting the PPA-1 to Your System
CPH-10 SUBWOOFER OWNERS MANUAL
 CPH-10 SUBWOOFER OWNERS MANUAL www.artcoustic.com Welcome to the world of Artcoustic! Congratulations with your purchase of the Artcoustic CPH-10 Subwoofer. The CPH-10 has an efficient design, producing
QUICKSTART GUIDE ENGLISH ( 1 4 ) GUÍA DE INICIO RÁPIDO ESPAÑOL ( 5 8 ) GUIDE D UTILISATION SIMPLIFIÉ FRANÇAIS ( 9 12 )
 GUÍA DE INICIO RÁPIDO ESPAÑOL ( 5 8 ) GUIDE D UTILISATION SIMPLIFIÉ FRANÇAIS ( 9 12 )") PROFESSIONAL 3-CHANNEL SCRATCH MIXER QUICKSTART GUIDE ENGLISH ( 1 4 ) GUÍA DE INICIO RÁPIDO ESPAÑOL ( 5 8 ) GUIDE D UTILISATION SIMPLIFIÉ FRANÇAIS ( 9 12 ) GUIDA RAPIDA ITALIANO ( 13 16 ) KURZANLEITUNG
PROFESSIONAL 3-CHANNEL SCRATCH MIXER QUICKSTART GUIDE ENGLISH ( 1 4 ) GUÍA DE INICIO RÁPIDO ESPAÑOL ( 5 8 ) GUIDE D UTILISATION SIMPLIFIÉ FRANÇAIS ( 9 12 ) GUIDA RAPIDA ITALIANO ( 13 16 ) KURZANLEITUNG
SA-3 OWNER S MANUAL. (954) STANTON MAGNETICS, INC PROFESSIONAL DJ MIXER
 STANTON MAGNETICS, INC PROFESSIONAL DJ MIXER") SA3_manual_FINAL 2/18/0 2:26 PM Page 1 2003, Stanton Magnetics, INC SA-3 PROFESSIONAL DJ MIXER OWNER S MANUAL STANTON MAGNETICS, INC info@stantonmagnetics.com (94) 689-8833 www.stantondj.com SA3_manual_FINAL
SA3_manual_FINAL 2/18/0 2:26 PM Page 1 2003, Stanton Magnetics, INC SA-3 PROFESSIONAL DJ MIXER OWNER S MANUAL STANTON MAGNETICS, INC info@stantonmagnetics.com (94) 689-8833 www.stantondj.com SA3_manual_FINAL
music hall pa2.2 INSTRUCTION MANUAL music hall
 music hall pa2.2 INSTRUCTION MANUAL music hall http://www.musichallaudio.com CONGRATULATIONS ON YOUR PURCHASE You have selected an exceptional phono preamplifier. Each component used in the construction
CONSONANCE PREAMPLIFIER OWNER S MANUAL
 CONSONANCE PREAMPLIFIER OWNER S MANUAL TABLE OF CONTENTS Introduction Initial Inspection Features Installation Input Impedance Adjustments Preamplifier Internal View Impedance Adjustment Diagram Overall
SRP-V110. Table of Contents AUDIO MIXER
 --9-1 (1) AUDIO MIXE SP-V11 Table of Contents Operating instructions Before operating the unit, please read this manual and the supplied WANING thoroughly and retain it for future reference. Precautions
Stereo Cassette Deck
 3-864-773-11(1) Stereo Cassette Deck Operating Instructions TC-SD1 1998 by Sony Corporation WARNING WARNING To prevent fire or shock hazard, do not expose the unit to rain or moisture. To avoid electrical
Mapletree Audio Design
 Ultra 4C Preamplifier Mapletree Audio Design Ultra 4C Stereo Phono/Line Preamplifier PS 2D Power Supply User s Manual Rev. Mar. 22, 2019 Mapletree Audio Design R. R. 1, Seeley's Bay, Ontario, Canada, K0H
BP2-MM/MC Phono Preamplifier Owner s Manual
 BP2-MM/MC Phono Preamplifier Owner s Manual Important Safety Instructions The lightning flash with arrowhead symbol within an equilateral triangle, is intended to alert the user to the presence of un-insulated
USER MANUAL GOLDMUND PH3 Phono Preamplifier
 USER MANUAL GOLDMUND PH3 Phono Preamplifier Congratulations. Thank you for purchasing the Goldmund PH3 Phono Preamplifier. You have acquired the best Phono Preamplifier ever made for professional and domestic
PROFESSIONAL 2-CHANNEL MIXER WITH EFFECTS LOOP
 PROFESSIONAL 2-CHANNEL MIXER WITH EFFECTS LOOP QUICKSTART GUIDE ENGLISH ( 1 4 ) GUÍA DE INICIO RÁPIDO ESPAÑOL ( 5 8 ) GUIDE D UTILISATION SIMPLIFIÉ FRANÇAIS ( 9 12 ) GUIDA RAPIDA ITALIANO ( 13 16 ) KURZANLEITUNG
IMPORTANT SAFETY INSTRUCTIONS
 IMPORTANT SAFETY INSTRUCTIONS When using this electronic device, basic precautions should always be taken, including the following: 1. Read all instructions before using the product. 2. Do not use this
INTEGRATED AMPLIFIER INSTRUCTIONS FOR USE
 INTEGRATED AMPLIFIER INSTRUCTIONS FOR USE Thank you for purchasing the Musical Fidelity Amplifier. Used properly and carefully, it should give you many years of outstanding musical reproduction. The is
DJ SET ORDERCODE D1210
 DJ SET ORDERCODE D1210 Congratulations! You have bought a great, innovative product from DAP Audio. The DAP Audio DJ Set brings excitement to any venue. Whether you want simple plug-&-play action or a
+41 * 2 db. GENERAL The Shure M675 Broadcast Production Master is designed for use in conjunction with a Shure M67 or
 2 2 2 HARTREY AVE., EVANSTON, IL. 6 0 2 0 4 U.S.A. GENERAL The Shure M675 Broadcast Production Master is designed for use in conjunction with a Shure M67 or M67-2E Professional Microphone Mixer, M63 Audio
Oxygen ORDERCODE D2150
 Oxygen ORDERCODE D2150 Congratulations! You have bought a great, innovative product from DAP Audio. The DAP Audio Oxygen brings excitement to any venue. Whether you want simple plug-&-play action or a
MIXING CONSOLE. Owner s Manual. Keep This Manual For Future Reference.
 MIXING CSOE Owner s Manual Keep This Manual For Future eference. E WANING: THIS APPAATUS MU E EATHED IMPOTANT THE WIES IN THIS MAINS EAD AE COOUED IN ACCODANCE WITH THE FOOWING CODE: GEEN-AND-YEOW : EATH
Operating Manual. A 2554 Club DJ Audio Mixer
 www.altronics.com.au A 2554 Club DJ Audio Mixer edback Distributed by Altronic Distributors Pty. td. Phone: 1300 780 999 Fax: 1300 790 999 Internet: www.altronics.com.au IMPOTANT NOTE Please read these
RX-V596RDS. Natural Sound AV Receiver Ampli-tuner audio-vidéo
 G B RX-V596RDS Natural Sound AV Receiver Ampli-tuner audio-vidéo OWNER S MANUAL MODE D EMPLOI BEDIENUNGSANLEITUNG BRUKSANVISNING MANUALE DI ISTRUZIONI MANUAL DE INSTRUCCIONES GEBRUIKSAANWIJZING CAUTION:
~ Instruction Manual ~
 ~ DJ-5 Professional Preamp mixer ~ 0 0 0 0 10 10 10 10 EVE MASTE GAIN GAIN 0 10 CUE EVE CH 1 CH 2 CUE PAN INE INE POWE FADE STAT FADE STAT HEADPHONES ~ Instruction Manual ~ ~ Important Safety Instructions
110LP MOON Series. Phono Preamplifier. Owner s Manual
 Phono Preamplifier Owner s Manual Owner s Manual I Table of Contents Introduction 4 Unpacking 5 Installation & Placement 5 Circuit Board Layout s 6 Internal Adjustments 7 Rear Panel Connections 8 Operating
R e c e i v e r. Receiver
 R e c e i v e r Receiver > Eight channels > Eight configurable inputs > Three independent zones > Integrated 7-channel amplifier with massive toroidal transformer and thermal/dc protection > AM/FM tuner
DM900 BLUE DOG OWNER S MANUAL
 Professional Disc Jockey Products DM900 BLUE DOG OWNER S MANUAL NUMARK INDUSTRIES 11 Helmsman Road, North Kingstown, RI 02852 http://www.numark.com CONGRATULATIONS! You have purchased the DM900 Blue Dog
CR-6 MIXER USER MANUAL ENGLISH. Order Code: MIXE01
 CR-6 MIXER P R O F E S S I O N A L 1 9 R A C K M I X E R Order Code: MIXE01 w w w. p r o l i g h t. c o. u k USER MANUAL ENGLISH WARNING FOR YOUR OWN SAFETY, PLEASE READ THIS USER MANUAL CAREFULLY BEFORE
INSTRUCTIONS FOR USE Pro-Ject Phono Box DS2 USB
 INSTRUCTIONS FOR USE Pro-Ject Phono Box DS2 USB Dear music lover, thank you for purchasing a Pro-Ject Audio phono amplifier. In order to achieve maximum performance and reliability you should study these
T L Audio. User Manual C1 VALVE COMPRESSOR. Tony Larking Professional Sales Limited, Letchworth, England.
 T L Audio User Manual C1 VALVE COMPRESSOR Tony Larking Professional Sales Limited, Letchworth, England. Tel: 01462 490600. International +44 1462 490600. Fax: 01462 490700. International +44 1462 490700.
Sphinx II. Owner s Manual. Tube Hybrid Integrated Power Amplifier. Rogue Audio, Inc. 3 Marian Lane Brodheadsville, PA Issue date: 08/01/16
 Sphinx II Tube Hybrid Integrated Power Amplifier Owner s Manual Rogue Audio, Inc. 3 Marian Lane Brodheadsville, PA 18322 Issue date: 08/01/16 TABLE OF CONTENTS 1) Introduction 2 2) Unpacking the Sphinx
Boulder 1010 Preamplifier
 Boulder 1010 Preamplifier Owners Manual 10/1/03 Boulder Amplifiers, Inc. 3235 Prairie Ave. Boulder, CO 80301 www.boulderamp.com APPENDIX RECORDING BOULDER LINK PROGRAMMING REMOTE CONTROL OPERATION GETTING
BP2-MM MM Phono Preamplifier Owner s Manual
 BP2-MM MM Phono Preamplifier Owner s Manual Important Safety Instructions The lightning flash with arrowhead symbol within an equilateral triangle, is intended to alert the user to the presence of un-insulated
USER MANUAL Goldmund PH3.8 Phono Preamplifier
 USER MANUAL Goldmund PH3.8 Phono Preamplifier Congratulations. Thank you for purchasing the Goldmund PH3.8 Phono Preamplifier. You have acquired the best Phono Preamplifier ever made for professional and
Recording to Tape (Analogue or Digital)...10
...10") c o n t e n t s DUAL MIC-PRE Green Dual Mic Pre (introduction).............................4 Section (i): Setting Up Power Connections...........................................4 Power Supply................................................5
c o n t e n t s DUAL MIC-PRE Green Dual Mic Pre (introduction).............................4 Section (i): Setting Up Power Connections...........................................4 Power Supply................................................5
INSTRUCTIONS FOR USE Pro-Ject Tube Box DS2
 INSTRUCTIONS FOR USE Pro-Ject Tube Box DS2 Dear music lover, Thank you for purchasing this tube phono preamplifier from Pro-Ject Audio Systems. In order to achieve maximum performance and reliability you
ORPHEUS ZERO U S E R M A N U A L
 ORPHEUS ZERO U S E R M A N U A L I N T R O D U C T I O N FEATURES Class 1 product CD drive (ORPHEUS ZERO Drive) or player (ORPHEUS ZERO Player) Multiple formats reader : CD, CD-R, CD-RW Software controlled
TV CHANNEL INSTALLATION
 LCD TV TV CHANNEL ATION Immediately after unpacking and plugging in your new television, run the auto program function to set up the TV for the broadcast or cable channels available in your area. If you
PT-600A INTEGRATED STEREO AMPLIFIER
 EMOTE SENSO POWE PT-600A INTEGATED STEEO AMPIFIE BASS TEBE 0 0 2 2 2 2 4 4 4 4 6 6 6 6 8 8 8 8 10 10 10 10 PHONES PECAUTIONS Thank you for purchasing this HI-FI product. Taking time to read these operating
The performance of a lifetime. Owner s Manual MOON 110LP v2 Phono Preamplifier
 The performance of a lifetime Owner s Manual MOON 110LP v2 Phono Preamplifier MOON by Simaudio simaudio.com Simaudio Ltd 1345 Newton Road, Boucherville, Québec J4B 5H2 CANADA Date Code: 20180831 01 INTRODUCTION
INSTRUCTIONS FOR USE Pro-Ject Tube Box DS2
 INSTRUCTIONS FOR USE Pro-Ject Tube Box DS2 Dear music lover, Thank you for purchasing a tube phono preamplifier from Pro-Ject Audio Systems. In order to achieve maximum performance and reliability you
PH 1.1 Phono Preamplifier Owner s Manual
 PH 1.1 Phono Preamplifier Owner s Manual Nerve Audio, Inc. 822 SW 75th Way Gainesville, FL 32607 INTRODUCTION Thank you for your purchase!! The Nerve Audio PH-1.1 represents our statement about the quality-versus-value
SB60 airsound BASE USER S GUIDE. version 1.0
 SB60 airsound BASE USER S GUIDE version.0 CONTENTS WELCOME PACKAGE CONTENTS The AirSOUND BASE SB60 AirSOUND BASE Controls & Indicators GETING STARTED 4 Remote control Sound Source / Setting memory FRONT
Caspian M2 Integrated Amplifier User Manual. Roksan Audio Ltd
 Caspian User Manual Roksan Audio Ltd Jubilee Close Townsend Lane London NW9 8TR Tel: +44 (0)20 8900 6801 Fax: +44 (0)20 82052644 Email: info@roksan.co.uk Web: www.roksan.co.uk INTRODUCTION Congratulations
VMA ACTIVE MATRIX TFT COLOR LCD MONITOR OWNER S MANUAL INSTALLATION GUIDE
 VMA6491 6.4 ACTIVE MATRIX TFT COLOR LCD MONITOR OWNER S MANUAL INSTALLATION GUIDE OWNER S MANUAL WARNING! THE CLARION VMA6491 LCD MONITOR IS DESIGNED FOR REAR SEAT PASSENGER VIEWING ONLY. THIS PRODUCT
PH60B Phono Stage. User Guide
 PH60B Phono Stage User Guide is a division of Radial Engineering Ltd. 1588 Kebet Way, Port Coquitlam BC, Canada V3C 5M5 (604) 942-1001 info@hafler.com www.hafler.com PH60B Phono stage USER GUIDE Table
FD Trinitron Colour Television
 R 4-205-569-32(1) FD Trinitron Television Instruction Manual GB KV-14LM1U 2000 by Sony Corporation NOTICE FOR CUSTOMERS IN THE UNITED KINGDOM A moulded plug complying with BS1363 is fitted to this equipment
MANUAL ENGLISH Core Club Ordercode: D2314
 MANUAL ENGLISH Core Club Ordercode: Highlite International B.V. Vestastraat 2 6468 EX Kerkrade the Netherlands Table of contents Warning... 2 Unpacking Instructions... 2 Safety Instructions... 2 Operating
INSTRUCTIONS FOR USE Pro-Ject Tube Box DS2
 INSTRUCTIONS FOR USE Pro-Ject Tube Box DS2 Dear music lover, Thank you for purchasing a tube phono preamplifier from Pro-Ject Audio Systems. In order to achieve maximum performance and reliability you
Stereo Cassette Deck
 4-231-016-11(1) Stereo Cassette Deck Operating Instructions TC-TX595 2000 by Sony Corporation This system is equipped with the Dolby* -type noise reduction system. * Manufactured under license from Dolby
Technical Specifications
 INSTALLATION SHEET AND OPERATORS MANUAL General Description: The is a mixer/preamplifier that includes 6 channels that each include a microphone input at screw terminals and an aux input at an RCA jack.
MX-206 Stereo Microphone Mixer. Operating Manual
 MX-206 Stereo Microphone Mixer Operating Manual ASHLY AUDIO INC. 847 Holt Road Webster, NY 14580-9103 Phone: (585) 872-0010 Toll-Free: (800) 828-6308 Fax: (585) 872-0739 www.ashly.com Operating Manual
ModWright Instruments, Inc. PH 150 Tube Phono Stage Owner s Manual
 ModWright Instruments, Inc. PH 150 Tube Phono Stage Owner s Manual Manufactured by ModWright Instruments, Inc. 21919 399th St., Amboy, WA 98601 USA www.modwright.com 1 CAUTIONS: Do not operate or power
PROFESSIONAL DJ MIXER OWNER S MANUAL. STANTON MAGNETICS, INC
 M.303 PROFESSIONAL DJ MIXER OWNER S MANUAL STANTON MAGNETICS, INC information@stantondj.com www.stantondj.com WELCOME! Thank you for making Stanton your first choice in professional DJ mixers. This innovative
English. User Manual sub8 Subwoofer SUBWOOFER. Supporting your digital lifestyle
 English User Manual sub8 Subwoofer U SUBWOOFER Supporting your digital lifestyle Table of Contents Important Safety Precautions........ 2 Introduction / What s in the Box?...... 3 Front & Rear Panels............
operating instructions integrated amplifiers EVOLUTION A3.2, A5.2 / T preamplifiers EVOLUTION PA3.2, PA5.2
 operating instructions integrated amplifiers EVOLUTION A3.2, A5.2 / T preamplifiers EVOLUTION PA3.2, PA5.2 Dear customer, thank you for purchasing this AVM product. you own now a versatile, excellent sounding
DSP-AX3200 AV AMPLIFIER AMPLIFICATEUR AUDIO-VIDEO
 GB DSP-AX3200 AV AMPLIFIER AMPLIFICATEUR AUDIO-VIDEO OWNER S MANUAL MODE D EMPLOI BEDIENUNGSANLEITUNG BRUKSANVISNING MANUALE DI ISTRUZIONI MANUAL DE INSTRUCCIONES GEBRUIKSAANWIJZING CAUTION: READ THIS
Stereo Cassette Deck
 -86-7-() Stereo Cassette Deck Operating Instructions EN TC-WE55 TC-WE5 TC-WR68 998 by Sony Corporation WARNING To prevent fire or shock hazard, do not expose the unit to rain or moisture. NOTICE FOR THE
SX7 e l e c t r o n i c c r o s s o v e r
 electronic crossover 1999 anzar Audio Inc owner s manual troubleshooting If you experience Electronic crossover does not turn on Check that: emote Turn-On wire has 12V 12V wire has 12V Ground wire is properly
YHT-30 QUICK-CONNECT GUIDE
 YHT-30 QUICK-CONNECT GUIDE YHT-30 QUICK-CONNECT GUIDE INTRODUCTION Yamaha developed the YHT-30 A/V Home Theater package to turn your home into a theater. In addition to enhancing the sound of a video source,
Table of Contents. Read This First.2. Introduction by Jim Fosgate...3. Unpacking..4. Tubes and Tube shield Installation 5. Product Placement...
 Owner s Manual Table of Contents Read This First.2 Introduction by Jim Fosgate...3 Unpacking..4 Tubes and Tube shield Installation 5 Product Placement...6 Connecting your Fosgate Signature..7 Phono stage
DISTRIBUTION AMPLIFIER
 MANUAL PART NUMBER: 400-0045-005 DA1907SX 1-IN, 2-OUT VGA/SVGA/XGA/UXGA DISTRIBUTION AMPLIFIER USER S GUIDE TABLE OF CONTENTS Page PRECAUTIONS / SAFETY WARNINGS... 2 GENERAL...2 GUIDELINES FOR RACK-MOUNTING...2
Stereo Cassette Deck
 3-867-730-11(1) Stereo Cassette Deck Operating Instructions TC-TX373 1999 by Sony Corporation 2 This system is equipped with the Dolby* -type noise reduction system. * Dolby noise reduction manufactured
After Ref.No:
 Ref.No:171.130 Safety Instructions 1. Read Instructions-All the safety and operating instructions should be read before this product is operated. 2. Retain Instruction- The safety and operating instruction
MIC CUE MIC 1 MIC 2 TREBLE BASS MIC1/2 Tone Controls GROUND
 /V-/ Hz Your PYRAMID Series Performance Mixer is a sophisticated control center, perfect for mixing sound from multiple playback sources such as microphones, tuners, CD players, turntables or the audio
There is a button to select either the AES/EBU or S/PDIF input for the D/A converter, which is located on the rear panel.
 4 RB-DAC1 Digital to Analogue Converter Introduction Fig 4-1: RB-DAC1 Front Panel Using 24 bit, 96kHz capable devices, the RB-DAC1 Digital to Analogue Converter is a 1U rack-mount which produces a stereo
C22 Stereophonic Preamplifier Owner s Manual
 McIntosh Laboratory, Inc. 2 Chambers Street Binghamton, New York C22 Stereophonic Preamplifier Owner s Manual 13903-2699 Phone: 607-723-3512 www.mcintoshlabs.com 2 The lightning flash with arrowhead, within
Stereo Box Pre Box Amp Box Amp Box Mono Switch Box. Tuner Box Dock Box F / V Phono Box MM Record Box USB Phono Box II
 Overview Box Program Stereo Box Pre Box Amp Box Amp Box Mono Switch Box Tuner Box Dock Box F / V Phono Box MM Record Box USB Phono Box II Phono Box II USB Phono Box SE II Tube Box II Tube Box SE II Head
MULTI CHANNEL AV RECEIVERSTR-DH750/STR- DH550
 MULTI CHANNEL AV RECEIVERSTR-DH750/STR- DH550 PROTECTOR The receiver will automatically turn off after a few seconds. Check the followings: There may be an electrical surge or power failure. Unplug the
Pre1. Balanced Control Preamplifier. User's Guide and Operating Information
 Pre1 Balanced Control Preamplifier User's Guide and Operating Information Bel Canto Design 212 Third Avenue North Suite 345 Minneapolis, MN 55401 Phone: (612) 317.4550 Fax: (612) 359.9358 Email: Info@BelCantoDesign.com
Professional Fidelity Mastering Grade Listening
 Professional Fidelity Mastering Grade Listening Director ON SOURCE VOLUME VOLTAiR 120V DC Audio Rail DAC Preamplifier This User Manual is optimized for Acrobat Reader. Interactive buttons may not appear
bel canto SEP2 Single Ended Triode Tube Preamplifier User's Guide and Operating Information
 bel canto SEP2 Single Ended Triode Tube Preamplifier User's Guide and Operating Information Bel Canto Design 212 Third Avenue North, Suite 274 Minneapolis, MN 55401 USA Phone: 612 317.4550 Fax: 612.359.9358
Concert Series ORDERCODE D3470 ORDERCODE D3471 ORDERCODE D3472 D3470 D3471 D3472
 Concert Series ORDERCODE D3470 ORDERCODE D3471 ORDERCODE D3472 D3470 D3471 D3472 Congratulations! You have bought a great, innovative product from DAP Audio. The DAP Audio Concert Series brings excitement
YHT-23 QUICK-CONNECT GUIDE
 YHT-23 QUICK-CONNECT GUIDE YHT-23 QUICK-CONNECT GUIDE INTODUCTION Yamaha developed the YHT-23 A/V Home Theater package to turn your home into a theater. In addition to enhancing the sound of a video source,
JX-S333 AV SELECTOR SELECTEUR AV SELECTOR AV INSTRUCTIONS MANUEL D INSTRUCTIONS MANUAL DE INSTRUCCIONES LNT A ENGLISH INTRODUCTION
 AV SELECTOR SELECTEUR AV SELECTOR AV JX-S333 2 3 4 SOURCE SELECT POWER STANDBY/ON 2 3 4 SOURCE SELECT INSTRUCTIONS MANUEL D INSTRUCTIONS MANUAL DE INSTRUCCIONES ENGLISH ADVANCED OTHERS OPERATION ESPAÑOL
ALLNIC AUDIO H 1500 II PLUS PHONO STAGE
 ALLNIC AUDIO H 1500 II PLUS PHONO STAGE OWNER S MANUAL ALLNIC AUDIO H-1500 II PLUS PHONO STAGE Thank you for purchasing this Allnic Audio H 1500 II PLUS Phono Stage. We are certain your trust in Allnic
A y r e. K-1x Preamplifier. Owner s Manual
 A y r e K-1x Preamplifier Owner s Manual Table of Contents Welcome to Ayre........................... 2 Installation and Operation......................... 3 Optimizing the Phono Stage........................
DCX-24 ORDERCODE D2020
 DCX-24 ORDERCODE D2020 Congratulations! You have bought a great, innovative product from DAP Audio. The DAP Audio DCX-24 brings excitement to any venue. Whether you want simple plug-&-play action or a
CM4-BT. Compact Mixer with Bluetooth UK User Manual
 CM4-BT Compact Mixer with Bluetooth 170.804UK User Manual Caution: Please read this manual carefully before operating Damage caused by misuse is not covered by the warranty Introduction: Thank you for
CDM10: Channel USB Mixer. Item ref: UK User Manual
 CDM10:4 19 4 Channel USB Mixer Item ref: 171.135UK User Manual Caution: Please read this manual carefully before operating Damage caused by misuse is not covered by the warranty Introduction Thank you
INSTRUCTIONS FOR USE Pro-Ject A/D Phono Box S
 INSTRUCTIONS FOR USE Pro-Ject A/D Phono Box S Dear music lover, thank you for purchasing an A/D Phono Box S from Pro-Ject Audio Systems. In order to achieve maximum performance and reliability you should
PH-1. Italian MM & MC Phono Preamplifier OWNER S MANUAL
 PH-1 Italian MM & MC Phono Preamplifier OWNER S MANUAL IMPORTANT SAFETY INFORMATION CAUTION: TO REDUCE THE RISK OF ELECTRIC SHOCK, DO NOT REMOVE COVER (OR BACK). NO USER-SERVICEABLE PARTS INSIDE. REFER
RX-6000VBK / RX-6008VBK
 MENU ENTER STANDBY SOURCE NAME SOURCE NAME THEATER LIVE CLUB DANCE CLUB HALL PAVILLION ON DIGITAL AUTO D I G I T A L ADJUST SETTING MEMORY AUDIO/VIDEO CONTROL RECEIVER RX-6000VBK / RX-6008VBK SLEEP POWER
ENG-44 Field Portable Audio Mixer. Operator s Manual. SignVideo SE Gideon Street - Portland, Oregon
 Field Portable Audio Mixer Operator s Manual SignVideo - 1226 SE Gideon Street - Portland, Oregon 97202 503.236.0000 www.signvideo.com Safety Warning Protect your ears. Always turn down the headphone volume
Instruction Manual By Digital & Analog
 FEMTO Instruction Manual By Digital & Analog www.calyxaudio.com 1 Thank you for purchasing FEMTO Music is the most important messenger of human emotion as well as a meaning of its expression since human