User Manual. Version 1.3 Revised 05/17/17
|
|
|
- Jennifer Franklin
- 5 years ago
- Views:
Transcription


1 User Manual Version 1.3 Revised 05/17/17
2 table of CONTENTS Dimensions 1 Safety Information 2 Fixture overview 4 Introduction 5 AC power 5 Power voltage 5 Power cables 5 Relaying power to other devices 6 Data link 6 Connecting the data link 6 Tips for reliable data transmission 6 Physical installation 7 Fastening the fixture to a flat surface 7 Setup 8 Control panel and menu navigation 8 DMX address setting 8 Control Mode 8 Static Color options 9 Auto Show options 10 Master / Slave 10 Personality 11 Dimmer Speed 11 Key-Lock 11 Calibration 11 Refresh rate 11 LCD brightness 11 Information 11 Software type 11 Usage time 11 Temperature 11 UID 11 Factory reset 11 DMX protocol 12 Onboard control menus 15 Specifications 16 Limited Warranty 17
3 Dimensions All dimensions are in millimeters 1.0
4 WARNING! Read the safety precautions in this section before installing, powering, operating or servicing this product The following symbols are used to identify important safety information on the product and in this manual: DANGER! Safety hazard. Risk of severe injury or death. DANGER! Hazardous voltage. Risk of lethal or severe electric shock. WARNING! Fire hazard. WARNING! LED light emission. Risk of eye injury. WARNING! Burn hazard. Hot surface. Do not touch. WARNING! Wear protective eyewear. WARNING! Refer to user manual. Warning! Risk Group 3 (high risk) LED product according to EN Do not look into the beam at a distance of less than 3 meters from the front surface of the product. Do not view the light output with optical instruments or any device that may concentrate the beam. This product is for professional use only. It is not for household use. This product presents risks of severe injury or death due to fire and burn hazards, electric shock and falls. Read this manual before installing, powering or servicing the fixture, follow the safety precautions listed below and observe all warnings in this manual and printed on the fixture. If you have questions about how to operate the fixture safely, please contact your supplier. PROTECTION FROM ELECTRIC SHOCK ldisconnect the fixture from AC power before removing or installing any cover or part and when not in use. lalways ground (earth) the fixture electrically. luse only a source of AC power that complies with local building and electrical codes and has both overload and ground-fault (earth-fault) protection. lbefore using the fixture, check that all power distribution equipment and cables are in perfect condition and rated for the current requirements of all connected devices. lpower input and through out cables must be rated 20 A minimum, have three conductors 1.5 mm² (16 AWG) minimum conductor size and an outer cable diameter of 5-15 mm. Cables must be hard usage type (SJT or equivalent) and heat-resistant to 90 C minimum. luse only PowerCON TRUE cable connectors to connect to power input sockets. Use only PowerCON TRUE cable connectors to connect to power through put sockets. lisolate the fixture from power immediately if the power plug or any seal, cover, cable, or other component is damaged, defective, deformed, wet or showing signs of overheating. Do not reapply power until repairs have been completed. 2.0
5 Do not expose the fixture to rain or moisture lrefer any service operation not described in this manual to a qualified technician. lsocket outlets used to supply fixture fixtures with power or external power switches must be located near the fixtures and easily accessible so that the fixtures can easily be disconnected from power. PROTECTION FROM BURNS AND FIRE ldo not operate the fixture if the ambient temperature (Ta) exceeds 40 C. lthe exterior of the fixture becomes hot during use. Avoid contact by persons and materials. Allow the fixture to cool for at least 10 minutes before handling. lkeep all combustible materials (e.g. fabric, wood, paper) at least 100 mm away from the head. lkeep flammable materials well away from the fixture. lensure that there is free and unobstructed airflow around the fixture. ldo not illuminate surfaces within 200 mm of the fixture. ldo not attempt to bypass thermostatic switches or fuses. lif you relay power from one fixture to another using power throughput sockets, do not connect more than ten fixture fixtures in total to each other in an interconnected chain. lconnect only other fixture fixtures to fixture power throughput sockets. Do not connect any other type of device to these sockets. ldo not connect any other type of device to these sockets. ldo not stick filters, masks or other materials onto any optical component. ldo not modify the fixture in any way not described in this manual ldo not use fixture on a dimmer PROTECTION FROM INJURY ldo not look continuously at LEDs from a distance of less than 3 meters from the front surface of the fixture without protective eyewear such as shade 4-5 welding goggles. At less than this distance, the LED emission can cause eye injury or irritation. At distances of 3 meters and above, light output is harmless to the naked eye provided that the eye s natural aversion response is not overcome. ldo not look at LEDs with magnifiers, telescopes, binoculars or similar optical instruments that may concentrate the light output. lensure that persons are not looking at the LEDs from within 3 meters when the product lights up suddenly. This can happen when power is applied, when the product receives a DMX signal, or when SERVICE menu items are selected. lfasten the fixture securely to a fixed surface or structure when in use. The fixture is not portable when installed. lensure that any supporting structure and/or hardware used can hold at least 10 times the weight of all the devices they support. lallow enough clearance around the head to ensure that it cannot collide with an object or another fixture when it moves. lcheck that all external covers and rigging hardware are securely fastened. lblock access below the work area and work from a stable platform whenever installing, servicing or moving the fixture. ldo not operate the fixture with missing or damaged covers, shields or any optical component. 3.0
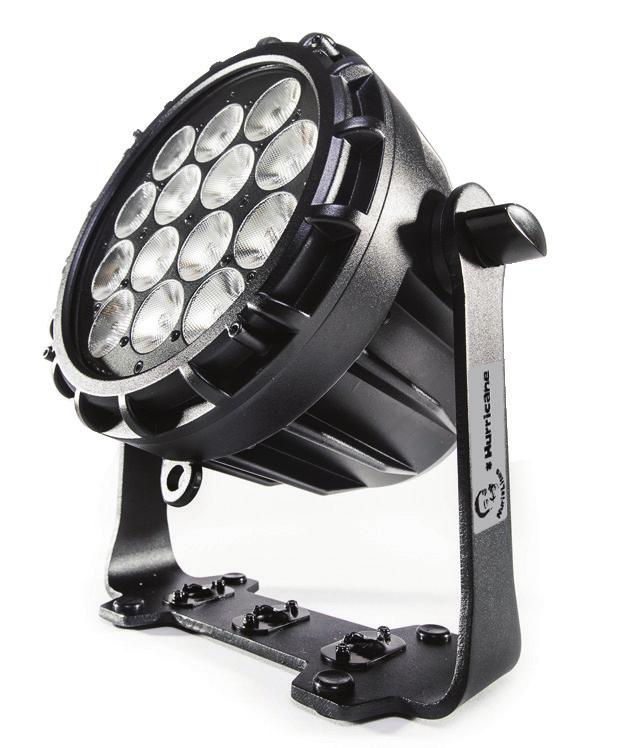
6 fixture overview 5P DMX input 3P DMX input (optional) 5P DMX output 3P DMX input (optional) AC mains power input AC mains power throughput Control buttons LCD Display Safety cable attachment point G Clamp with Quicklock # (optional) Omega bracket with Quicklock # (optional) 4.0
7 Introduction Outdoor RGBW LED Fixture UNIQUE BRACKET DESIGN TOURING PROOF SMOOTH RGBW COLOR MIXING IP65 RATING SILENT OPERATION SMOOTH PROJECTION POWERCON TRUE IN & OUT RDM READY Using for the first time Warning! Read Safety Information on page 2 before installing, powering, operating or servicing the fixture. Before applying power to the fixture: lcheck that the local AC mains power source is within the fixture s power voltage and frequency ranges. lsee Power cables and power plug on page 7. Install a PowerCON TRUE power input connector on a suitable power cable. AC power Warning! Read Safety Information starting on page 2 before connecting the fixtures to AC mains power. Warning! For protection from electric shock, the fixture must be grounded (earthed). The power distributioncircuit must be equipped with a fuse or circuit breaker and ground-fault (earth-fault) protection. Warning! Socket outlets or external power switches used to supply the fixture with power must be locatednear the fixture and easily accessible so that the fixtures can easily be disconnected from power. Important! Do not insert or remove live PowerCON TRUE connectors to apply or cut power, as this may cause arcingat the terminals that will damage the connectors. Important! Do not use an external dimming system to supply power to the fixture, as this may cause damage to the fixture that is not covered by the product warranty. The fixture can be hard-wired to a electrical installation if you want to install it permanently, or a power plug that is suitable for the local power outlets can be installed on the power cable. power voltage Warning! Check that the voltage range specified on the fixtures serial number label matches the local AC mains power voltage before applying power to the fixture. The fixtures accepts AC mains power at V nominal, 50/60 Hz. Do not apply AC mains power to the fixture at any other voltage than specified. 5.0
8 powercables Power input and throughput cables must have a 20 A minimum rating, have three conductors with a minimum conductor size of 1.5 mm² (16 AWG) and an outer cable diameter of 5-15 mm. Cables must have a hard usage type jacket (SJT or equivalent) and be heat- resistant to a 90 C minimum. In the EU, the cable must be HAR approved or equivalent. If you install a power plug on the power cable, install a grounding-type (earthed) plug that has 20 A minimum rating. Follow the plug manufacturer s instructions. Table 1 shows the standard wire color-coding schemes and some possible pin identification schemes; if the pins are not clearly identified, or if you have any doubts Wire Color (EU models) Wire Color (US models) Conductor Symbol Screw (US) Brown Black Live L Yellow or Brass Blue White Neutral N Silver Yellow/Green Green Ground (earth) or Green Wire color-coding and power connections Relaying power to other devices Warning! Do not connect more than ten fixtures in total to an AC mains power, in one interconnected chain. Power can be relayed to another device via the light-grey PowerCON TRUE throughput socket. If you daisy chain the fixtures so that they all draw from the AC mains power via the first fixture, certain points must be respected: A heavy duty, three-conductor, 16 AWG or 1.5 mm2 cable with SJT or equivalent cable jacket must be used to connect the first fixture to AC mains power. PowerCON TRUE connectors must be used to draw the AC mains power from the fixtures power throughput sockets and yellow PowerCON TRUE connectors must be used to supply power at the fixture s power input sockets. No matter what the AC mains power voltage is, do not connect more than ten fixture fixtures in total (i.e. including the first fixture) to the AC mains power in one interconnected daisy chain using power input and through out connectors. DATA LINK A DMX 512 data link is required in order to control a fixture via DMX. The fixture has 5-pin XLR connectors for DMX data input and output. The pin-out on all connectors is pin 1 = shield, pin 2 = cold (-), and pin 3 = hot (+) Pins 4 and 5 in the 5-pin XLR connectors are not used. tips for reliable data transmission To connect the fixture to data: 1. Connect the DMX data output from the controller to the closest fixture s male 5-pin XLR DMX input connector. 2. Connect the DMX output of the fixture closest to the controller to the DMX input of the next fixture and continue connecting fixtures, output to input. 6.0
9 Physical installation Warning! The fixture must either be fastened to a flat surface such as a stage or wall, or clamped to a truss or similar structure in any orientation using a rigging clamp. Warning! The fixture can cause injury or damage it if falls, attach an approved safety cable to one of the safety cable attachment points on the base (see Fixture overview on page 6). Ensure that all illuminated surfaces are at a minimum distance of 200 mm. from the fixture. All combustible materials (wood, fabric, paper, etc.) must be at a minimum distance of 100 mm. from the head. Additionally, make sure there is free airflow around the fixture and that there are no flammable materials nearby. Fastening the fixture to a flat surface The fixture can be fastened to a fixed flat surface that is oriented at any angle. Check that the surface can support at least 10 times the weight of all fixtures and equipment to be installed on it. Warning! The supporting surface must be hard and flat or air vents in the base may be blocked, which will cause overheating. Fasten the fixture securely. Do not stand it on a surface or leave it where it can move or fall over. Attach a securely anchored safety cable to the safety cable attachment point (see Fixture overview on page 4) if the fixture is to be installed in any location where it may fall and cause injury or damage if the primary attachment fails. 1. Block access under the work area. Working from a stable platform, hang the fixture on the truss with the arrow on the base facing towards the illuminated area. Tighten the rigging clamp. 2. In case of clamp failure, avoid injury or damage with a secondary attachment such as an approved safety cable that is rated for the weight of the fixture. Connect the safety cable using one of the attachment points at the edges of the base (see Fixture overview on page 4). Do not use any other part of the fixture as a safety cable attachment point. 7.0
10 SETUP Warning! Read Safety Information on page 2 before installing, powering, operating the fixture. Control panel and menu navigation The onboard control panel and backlit graphic display are used to set the fixture s DMX address, configure individual fixture settings (personality), read out data and execute service utilities. See Onboard control menus on page 14 for a complete list of menus and commands. Using the control buttons To enter the menu select [MODE]. Press [UP] and [DOWN] to scroll within a menu or adjust values. To enter a menu, select a function or apply a selection, press [ENTER]. To escape a function or move back one level in the menu structure, press [MODE]. Holding down the "UP" and "DOWN" button for more than 3 seconds, the MENU display rotated 180. DMX address setting The DMX address, also known as the start channel, is the first channel used to receive instructions from the controller. For independent control, each fixture must be assigned its own control channels. The DMX address is configured using the DMX ADDRESS menu in the control panel. When setting the DMX address, press [ENTER] before you can change the address. In order to check if there is a DMX signal present on the fixture you can easy see that via the big DOT on the main screen and also when the backlight function is switched to off. The fixture is fully RDM ready. So when you are using a RDM ready console you can address the unit and read out its complete status. For RDM functions please refer to the ANSI/ESTA E standard Control mode DMX control mode is selected in the CONTROL MODE menu. The fixture has 6 DMX control modes: 4ch 6ch 7ch 11ch Dimmer RGBW Strobe CCT Macro color Effect Dimmer /Effect speed Function set Hue Saturation Value Intensity HSV HSI 8.0
11 Static Color options There are three options for static color: FIXED Color Several options from combinated RGBW values. Use Up and Down to scroll through the options. R = Red RB = Red & Blue BW = Red & White G = Green GB = Green & Blue RGW = Red, Green & White B = Blue RGB = Red, Green & Blue RBW = Red, Blue & White W = White RW = Red & White GBW = Green, Blue & White RG = Red & Green GW = Green & White RGBW = Red, Green, Blue & White White Presets Easy color choice between 2000K (warm white) to 8000K (cold white) 2000K = 255 Red 135 Green 0 Blue 35 White 3000K = 255 Red 165 Green 0 Blue 135 White 4000K = 255 Red 180 Green 28 Blue 220 White 5000K = 255 Red 200 Green 80 Blue 255 White 6000K = 255 Red 220 Green 120 Blue 255 White 7000K = 255 Red 230 Green 145 Blue 255 White 8000K = 255 Red 235 Green 165 Blue 255 White Manual Color Mix your own color with each RGBW value seperately. Red < > Dimmer Red Green < > Dimmer Green Blue < > Dimmer Blue White < > Dimmer White 9.0
12 Auto show The auto function gives 10 auto programs and 10 custom programs RGBW color combinations which are working without any DMX console. Hit [ENTER] to adjust the speed of the Auto program from ) Auto 1 Auto program 1 11) Program 1 pre-program 1 2) Auto 2 Auto program 2 12) Program 2 pre-program 2 3) Auto 3 Auto program 3 13) Program 3 pre-program 3 4) Auto 4 Auto program 4 14) Program 4 pre-program 4 5) Auto 5 Auto program 5 15) Program 5 pre-program 5 6) Auto 6 Auto program 6 16) Program 6 pre-program 6 7) Auto 7 Auto program 7 17) Program 7 pre-program 7 8) Auto 8 Auto program 8 18) Program 8 pre-program 8 9) Auto 9 Auto program 9 19) Program 9 pre-program 9 10) Auto 10 (AUTO program 1-10 cycle) 20) Program 10 pre-program 10 Master/Slave You can choose between master or slave functioning. The selected mode is visible in the homescreen. If no DMX signal is available the fixture will automatically go to slave mode. 10.0
13 personality Here you can set all functions for the fixture. Dimmer Speed Normal (normal dimming speed ) Smooth (slowest dimming speed) KEY-Lock Locks all the button functions. Standard unlocking password is (MODE+UP+MODE+DOWN+MODE+UP+MODE+DOWN+ENTER) Calibration MANUAL calibration mode ON/OFF Refresh rate Controls the Flicker frequency of the fixture LCD brightness Set the LCD display brightness (1-10) Information Software type Shows software version (Vx.x) Usage time Use of time and use time reset (password) Temperature LED board current temperature UID Shows the unique ID for the RDM protocoll. <0x02E20002xxxx> Factory reset Resets the fixture to its factory default settings. 11.0
14 dmx protocols HSV Function Value Setting Remark 1 Hue % 2 Saturation % 3 Value % Note: In HSV mode, Hue stands for the visible light, such as red, yellow, and cyan, etc. Saturation refers to the dominance of hue in the color; when saturation is at 100%, then the color is at its purest. Value is the color's brightness; when value is at 100%, then the color is at its brightest. HSI Function Value Setting Remark 1 Hue % 2 Saturation % 3 Intensity % 4 CH Function Value Setting Remark 1 Red % 2 Green % 3 Blue % 4 White % 6 CH Function Value Setting Remark 1 Dimmer % 2 Red % 3 Green % 4 Blue % 5 White % 6 Shutter Strobe 1 (fast slow) Strobe 2: opening pulse (fast slow) Strobe 3: closing pulse (fast slow) Strobe 4: random strobe (fast slow) Strobe 5: random opening pulse (fast slow) Strobe 6:random closing pulse (fast slow) Strobe 7: burst pulse (fast slow) Strobe 8: random burst pulse (fast slow) Strobe 9:sine wave (fast slow) Strobe 10: burst (fast slow) 12.0
15 dmx protocols 7 CH Function Value Setting Remark 1 Dimmer % 2 Red % 3 Green % 4 Blue % 5 White % 6 Shutter 7 CCT Strobe 1 (fast slow) Strobe 2: opening pulse (fast slow) Strobe 3: closing pulse (fast slow) Strobe 4: random strobe (fast slow) Strobe 5: random opening pulse (fast slow) Strobe 6:random closing pulse (fast slow) Strobe 7: burst pulse (fast slow) Strobe 8: random burst pulse (fast slow) Strobe 9:sine wave (fast slow) Strobe 10: burst (fast slow) No function 8000K K 13.0
16 11 CH Function Value Setting Remark 1 Dimmer % 2 Red % 3 Green % 4 Blue % 5 White % Shutter CCT Color wheel Strobe 1 (fast slow) Strobe 2: opening pulse (fast slow) Strobe 3: closing pulse (fast slow) Strobe 4: random strobe (fast slow) Strobe 5: random opening pulse (fast slow) Strobe 6:random closing pulse (fast slow) Strobe 7: burst pulse (fast slow) Strobe 8: random burst pulse (fast slow) Strobe 9:sine wave (fast slow) Strobe 10: burst (fast slow) No function 8000K K No Function Color wheel rotation effect 9 Auto program No function Auto program 1 Auto program 2... Auto program 10 ( AUTO 1-10 cycle) Custom program 1 Custom program 2... Custom program Speed No function AUTO Speed or Dimmer Speed 11 Fixture control settings No function Manual calibration output mode 1 Raw color output mode 1 No function Normal dimming, speed of changes unrestricted 1 No function Smooth dimming, speed of changes restricted slightly 1 No function 600 Hz Refresh rate Hz Refresh rate Hz Refresh rate Hz Refresh rate 1 No Function illuminate display 1, value must be held for 3 seconds to activate. 14.0
17 Onboard control menus NO. Main Menu Menu level 2 Menu level 3 Remark 1 DMX ADDRESS <001> Default CONTROL MODE 3 PERSONALITY 4CH 6CH 7CH 11CH HSV HSI Dimmer Speed Normal Smooth 1. Red, 2.Green, 3.Blue, 4.White 1. Dimmer, 2.Red, 3.Green, 4.Blue, 5.White, 6.Strobe 1. Dimmer, 2.Red, 3.Green, 4.Blue, 5.White, 6.Strobe, 7.CCT 1. Dimmer, 2.Red, 3.Green, 4.Blue, 5.White 6.Strobe, 7.CCT, 8.Macro color, 9.Effect, 10.Speed, 11.Function set 1. Hue 2.Saturation 3.Value 1. Hue 2.Saturation 3.Intensity Default : 11CH Default : Normal Key-Lock ON/OFF Default : OFF Calibration No Calibration Red (0-255) Manual Green (0-255) Blue (0-255) Default : NO CALIBRATION Refresh rate 600/1200/2400/4800 Default : 600 LCD brightness Level(1-10) Fixed color R RG RW RBW G RB GW GBW B GB BW RGBW W RGB RGW Default : RGBW 4 STATIC COLOR White presets 2000K/3000K/4000K/5000K/6000K/7000K/8000 Default : 6000K Manual color Red (0-255) Green (0-255) Blue (0-255) White (0-255) Default : Red:255, Green:255 Blue:255, White:255 5 AUTO AUTO (1-10) Speed 0-20 Programe (1-10 ) Default : AUTO 1 6 EDITOR Programe (01-10) Red (0-255) Green (0-255) Scene Blue (0-255) (01-30) White (0-255) Strobe (0-20) Time (0-255) Fade (0-255) Programe 10 has 90 Scenes 7 INFO Software type V X. XX Usage time Temperature UID 8 FACTORY RESET LOAD TOTAL Xxxx hours RESET XXX 0x02E2000xxxxx Use time reset (password) 15.0
18 Specifications Physical Length Width Height Weight 259mm 179mm 290mm 3.8 kg without accessories Dynamic Efects beam angle 15 Optics Light source Control and Programming Control DMX channels Setting and addressing Protocol Control and Programming Color Housing Protection rating Installation Orientation 14 pcs high-power LED(RGBW) DMX 4 / 6 / 7 / 11 / HSV / HSI Control panel with backlit LCD graphic display RDM, USITT DMX512-A Black High strength die-casting aluminum IP 65 (if rubber covers are placed correctly when connectors are not used) Any Minimum distance to combustible materials Minimum distance to illuminated surfaces Connections 100 mm. from fixture 200 mm. from fixture AC power input PowerCON TRUE input socket AC power throughput PowerCON TRUE output socket DMX data in/out 5 pin locking XLR (3 pin optional) Electrical AC power Maximum total power consumption Power supply unit Power consumption, all efects static, zero light output Power consumption V nominal, 50/60 Hz 105 W Auto-ranging electronic switch mode <15 W 120 V, 60 Hz 104 W, PF * V, 50 Hz 102 W, PF * * PF = power factor. Measurements made at nominal voltage with all LEDs at full intensity. Allow for a deviation of +/- 10%. Cooling Maximum ambient temperature (Ta max.) Minimum ambient temperature (Ta min.) Total heat dissipation (calculated, +/- 10%) Passive 40 C 5 C 820 BTU/hr. 16.0
19 Limited Warranty Nuri*Lites LED fixtures (the Product) are warranted by TMB against defective materials or workmanship for a period of one (1) year from the date of original sale by TMB. TMB s warranty shall be restricted to the repair or replacement of any part that proves to be defective and for which a claim is submitted to TMB before the expiration of the applicable warranty periods. This Limited Warranty is void if the defects of the Product are the result of: Opening the casing, repair, or adjustment by anyone other than TMB or persons specifically authorized by TMB Accident, physical abuse, mishandling, or misapplication of the product. Damage due to lightning, earthquake, flood, terrorism, war, or act of God. TMB will not assume responsibility for any labor expended, or materials used, to replace and/or repair the Product without TMB s prior written authorization. Any repair of the Product in the field, and any associated labor charges, must be authorized in advance by TMB. Freight costs on warranty repairs are split 50/50: Customer pays to ship defective product to TMB; TMB pays to ship repaired product, ground freight, back to Customer. This warranty DOES NOT cover consequential damages or costs of any kind. A Return Merchandise Authorization (RMA) Number must be obtained from TMB prior to return of any defective merchandise for warranty or non-warranty repair. For all repairs please contact TMB Tech Support Repair using the contact information below or TechSupportRepairNA@tmb.com. US UK 527 Park Ave., San Fernando, CA Armstrong Way, Southall, UB2 4SD England Tel: Tel. +44 (0) Fax: Fax +44 (0) tmb-info@tmb.com tmb-info@tmb.com Return Procedure Returned merchandise must be sent prepaid and in the original packing, call tags will not be issued. Package must be clearly labeled with a Return Merchandise Authorization Number (RMA #). Products returned without an RMA # will be refused. Please contact TMB and request RMA # prior to shipping the fixture. Be prepared to provide the model number, serial number and a brief description of the cause for the return. Be sure to properly pack fixture, any shipping damage resulting from inadequate packaging is the customer s responsibility. TMB reserves the right to use its own discretion to repair or replace product(s). As a suggestion, proper UPS packing or double-boxing is always a safe method to use. Note: If you are given an RMA #, please include the following information on a piece of paper inside the box: 1) Your name 2) Your address 3) Your phone number 4) The RMA # 5) A brief description of the symptoms TMB 24/7 Technical Support US/Canada: Toll Free: (877.TMB.DUDE) UK: +44 (0) Toll Free: techsupport@tmb.com 17.0
ARES. manual
 ARES manual WWW.CLF-LIGHTING.COM V1.0 APRIL 2017 table of CONTENTS Dimensions 1 Safety Information 2 Fixture overview 4 Introduction 5 AC power 5 Power voltage 5 Power cables 6 Relaying power to other
ARES XS. manual ARES XS
 ARES XS manual ARES XS WWW.CLF-LIGHTING.COM V1.0 JANUARY 2017 table of CONTENTS Dimensions 1 Safety Information 2 Fixture overview 4 Introduction 5 AC power 5 Power voltage 5 Power cables 6 Relaying power
LED WASH RGBW XL. manual
 LED WASH RGBW XL manual WWW.CLF-LIGHTING.COM V1.0 JANUARY 2017 table of CONTENTS Dimensions 1 Safety Information 2 Fixture overview 4 Introduction 5 AC power 5 Power voltage 5 Power cables 5 Relaying power
IMS MK2 Simple Universe Drive
 IMS MK2 Simple Universe Drive Operation Manual TMB 24/7 Technical Support US/Canada: +1 818.794.1286 Toll Free: 1 877.862.3833 (877.TMB.DUDE) UK: +44 (0)20.8574.9739 Toll Free: 0800.652.5418 e-mail: techsupport@tmb.com
IMS Mk2 Universe Drive IP65 Quick Start Guide TMB 24/7 Technical Support
 IMS Mk2 Universe Drive IP65 Quick Start Guide TMB 24/7 Technical Support US/Canada: +1 818.794.1286 Toll Free: 1 877.862.3833 (877.TMB.DUDE) UK: +44 (0)20.8574.9739 Toll Free: 0800.652.5418 e-mail: techsupport@tmb.com
User Manual. Version 1.4
 User Manual Version 1.4 Revised 05/17/17 1.BEFORE YOU BEGIN What is included 1 x Fixture 1 x Power cable with plug 1 x User Manual Unpacking Instructions Immediately upon receiving a fixture, carefully
ProPlex Digital RGB Drive PortableMount TMB 24/7 Technical Support
 ProPlex Digital RGB Drive PortableMount TMB 24/7 Technical Support US/Canada: +1 818.794.1286 Toll Free: 1 877.862.3833 (877.TMB.DUDE) UK: +44 (0)20.8574.9739 Toll Free: 0800.652.5418 e-mail: techsupport@tmb.com
Spectra Flood Q40. Exterior Fixture User Manual. Order code: LEDJ Version LEDJ284N - 15 Version
 Spectra Flood Q40 Exterior Fixture User Manual Order code: LEDJ284-40 Version LEDJ284N - 15 Version Safety advice WARNING FOR YOUR OWN SAFETY, PLEASE READ THIS USER MANUAL CAREFULLY BEFORE YOUR INITIAL
Stratos Duo RGB. User Manual. Order code: EQLED371
 Stratos Duo RGB User Manual Order code: EQLED1 Safety advice WARNING FOR YOUR OWN SAFETY, PLEASE READ THIS USER MANUAL CAREFULLY BEFORE YOUR INITIAL START-UP! Before your initial start-up, please make
Cyclo Series. user manual. MartinArchitectural
 Cyclo Series user manual MartinArchitectural Measurements are in millimeters 63 Cyclo 02 88 Cyclo 03 1000 81 1190 88 Cyclo 04 98 88 2002 Martin Professional A/S, Denmark. All rights reserved. No part of
FloppyDrive 3x2 24V and 12V PortableMount USER MANUAL
 FloppyDrive 3x2 24V and 12V PortableMount USER MANUAL TMB 24/7 Technical Support US/Canada: +1 818.794.1286 Toll Free: 1 877.862.3833 (877.TMB.DUDE) UK: +44 (0)20.8574.9739 Toll Free: 0800.652.5418 e-mail:
ORDER CODE: EQLED65 USER MANUAL
 www.prolight.co.uk ORDER CODE: EQLED65 USER MANUAL Safety WARNING FOR YOUR OWN SAFETY, PLEASE READ THIS USER MANUAL CAREFULLY BEFORE YOUR INITIAL START-UP! CAUTION! Keep this equipment away from rain,
Dragonfly Quad. User Manual V1.4. Order code: EQLED101
 Dragonfly Quad User Manual V1.4 Order code: EQLED101 Safety advice WARNING FOR YOUR OWN SAFETY, PLEASE READ THIS USER MANUAL CAREFULLY BEFORE YOUR INITIAL START-UP! Before your initial start-up, please
LED Thunder S-150 Code 1097
 LED Thunder S-150 Code 1097 User Manual 1 1 SAFETY INSTRUCTIONS This device has left the factory in perfect condition. In order to maintain this condition and to ensure a safe operation, it is absolutely
Fusion 120 Zoom. User Manual. Order code: EQLED068
 Fusion 120 Zoom User Manual Order code: EQLED068 Safety advice WARNING FOR YOUR OWN SAFETY, PLEASE READ THIS USER MANUAL CAREFULLY BEFORE YOUR INITIAL START-UP! Before your initial start-up, please make
PAR 2 RGBW Zoom User Manual
 PAR 2 RGBW Zoom User Manual Professional Entertainment Technology 2013-2014 Martin Professional. Information subject to change without notice. Martin Professional and all affiliated companies disclaim
CLF Manuals CLF Colour Par CLF Colour 12 Par CLF Colour Par 12 Version 1.0 November 2012 Version 1.0 1
 CLF Manuals CLF Colour Par 12 CLF Colour Par 12 Version 1.0 November 2012 1 1.BEFORE YOU BEGIN What is included Ø 1 x Fixture Ø 1 x Power cable with plug Ø 1 x User Manua Unpacking Instructions Immediately
LEDWash RGBW USER MANUAL
 LEDWash RGBW USER MANUAL 1 1.BEFORE YOU BEGIN What is included Ø 1 x Fixture Ø 1 x Power cable with plug Ø 1 x User Manua Unpacking Instructions Immediately upon receiving a fixture, carefully unpack the
ALO 030 MKII. 30 Watt DMX LED scanner. User manual
 ALO 030 MKII 30 Watt DMX LED scanner User manual Safety instructions WARNING! Always keep this device away from moisture and rain! Hazardous electrical shocks may occur! WARNING! Only connect this device
LED WASH LIGHT( 4 1) USER MANUAL
 USER MANUAL") LED WASH LIGHT( 4 in 1) USER MANUAL 1 1.BEFORE YOU BEGIN What is included ò1 x Fixture ò1 x Power cable with plug ò1 x User Manual Unpacking Instructions Immediately upon receiving a fixture, carefully
LED WASH LIGHT( 4 in 1) USER MANUAL 1 1.BEFORE YOU BEGIN What is included ò1 x Fixture ò1 x Power cable with plug ò1 x User Manual Unpacking Instructions Immediately upon receiving a fixture, carefully
STROBE 1 5x5 User Manual
 STROBE 1 5x5 User Manual Professional Entertainment Technology 2013 Martin Professional A/S. Information subject to change without notice. Martin Professional A/S and all affiliated companies disclaim
USER MANUAL Table of Contents
 USER MANUA Table of Contents Safety Information. 3 Specifications.. 4 Main Power Connection.. 5 DMX-512 Connection...... 5 DMX Profile... 7 Main Control Menu... 8 Rigging the Fixture.10 Cleaning & Maintenance...10
LED-BANK4 USER MANUAL. COLORbank 4
 LED-BANK4 COLORbank 4 USER MANUAL CHAUVET, 3000 N 29 th Ct, Hollywood, FL 33020 U.S.A (800) 762-084 (954) 929-5 FAX (954) 929-5560 www.chauvetlighting.com 2006-04-8/6:44 Table of Content BEFORE YOU BEGIN...
LED Beam Moving Head. TWIST-150LED Order No INSTRUCTION MANUAL
 LED Beam Moving Head TWIST-150LED Order No. 38.7970 INSTRUCTION MANUAL MONACOR INTERNATIONAL GmbH & Co. KG Zum Falsch 36 28307 Bremen Germany www.monacor.com 01.30.11.2016 ELECTRONICS FOR SPECIALISTS ELECTRONICS
HEX16 Strip User Manual
 User Manual www.showtech.com.au 1 Table of Contents 1. Safety instructions 3 1.1 Overhead rigging.4 1.2 Power Connection..5 1.3 Cleaning and Maintenance..6 2. Menu Navigation..7 3. DMX Allocation..9 4.
User Manual. 360W LED Moving Zoom KEEP THIS MANUAL FOR FUTURE NEEDS. 36pcs10W 4 in 1 RGBW LEDs
 User Manual 360W LED Moving Zoom 36pcs10W 4 in 1 RGBW LEDs KEEP THIS MANUAL FOR FUTURE NEEDS 1. Dispacking Thank you for choosing our moving head. For your own safety, please read this manual before installing
LED-PAR200B USER MANUAL. COLORsplash 200B
 LED-PAR00B COLORsplash 00B USER MANUAL CHAUVET, 3000 N 9 th Ct, Hollywood, FL 3300 U.S.A (800) 76-084 (954) 99-5 FAX (954) 99-5560 www.chauvetlighting.com 006-07-06/0:3 TABLE OF CONTENT TABLE OF CONTENT...
Spectra Batten (Order code: LEDJ95)
") www.prolight.co.uk Spectra Batten (Order code: LEDJ95) Safety WARNING FOR YOUR OWN SAFETY, PLEASE READ THIS USER MANUAL CAREFULLY BEFORE YOUR INITIAL START-UP! CAUTION! Keep this equipment away from rain,
www.prolight.co.uk Spectra Batten (Order code: LEDJ95) Safety WARNING FOR YOUR OWN SAFETY, PLEASE READ THIS USER MANUAL CAREFULLY BEFORE YOUR INITIAL START-UP! CAUTION! Keep this equipment away from rain,
TABLE OF CONTENTS. Page 2 of 16 COLORband PiX IP User Manual (Rev. 1)
") User Manual TABLE OF CONTENTS 1. Before You Begin...3 What Is Included... 3 Unpacking Instructions... 3 Claims... 3 Text Conventions... 3 Icons... 3 Disclaimer... 3 Product at a Glance... 4 Safety Notes...
User Manual TABLE OF CONTENTS 1. Before You Begin...3 What Is Included... 3 Unpacking Instructions... 3 Claims... 3 Text Conventions... 3 Icons... 3 Disclaimer... 3 Product at a Glance... 4 Safety Notes...
KingWash 7QX 7x40w,Zoom 5-60degree. User manual. Please read the instructions carefully before use TABLE OF CONTENTS
 KingWash 7QX 7x40w,Zoom 5-60degree User manual Please read the instructions carefully before use TABLE OF CONTENTS 1. Safety Instructions... 2 2. Technical Specifications... 4 3. How To Control The Unit...
Commander 384. w w w. p r o l i g h t. c o. u k U S E R M A N U A L
 Commander 384 w w w. p r o l i g h t. c o. u k U S E R M A N U A L 1, Before you begin 1.1: Safety warnings...2 3 1.2: What is included...4 1.3: Unpacking instructions...4 2, Introduction 2.1: Features...4
Stage Wash 7x 10W LED Moving Head (RGBW)
") Stage Wash 7x 10W LED Moving Head (RGBW) P/N 612870 User's Manual CONTENTS SAFETY WARNINGS AND GUIDELINES... 3 INTRODUCTION... 4 FEATURES... 5 CUSTOMER SERVICE... 5 PACKAGE CONTENTS... 6 PRODUCT OVERVIEW...
Stage Wash 7x 10W LED Moving Head (RGBW) P/N 612870 User's Manual CONTENTS SAFETY WARNINGS AND GUIDELINES... 3 INTRODUCTION... 4 FEATURES... 5 CUSTOMER SERVICE... 5 PACKAGE CONTENTS... 6 PRODUCT OVERVIEW...
Page 1 of 6 FXLD618FRP2I4 LED FIXTURE Version 0.2 OWNERS MANUAL 10/04/17
 Page 1 of 6 FEATURES AND SPECIFICATIONS LEDS: 18, 6W each (Warm White, Cool White, 2in1) Beam angle: 25º or 45 Control system: DMX512 + Stand Alone Modes DMX channels: 1/2/3/4/5 DMX connectors: 3 pin XLR
SHOWLINE SL PUNCHLITE 220 LED LUMINAIRE SPECIFICATIONS.
 SHOWLINE SL PUNCHLITE 220 LED LUMINAIRE SPECIFICATIONS. GENERAL. A.) Overview. 1.) The luminaire shall be a color mixing luminaire employing nine (19) homogenized red, green, blue, and white LED engines.
RUSH MH 6 Wash. User Manual
 RUSH MH 6 Wash User Manual 2015-2016 Martin Professional ApS. Information subject to change without notice. Martin Professional and all affiliated companies disclaim liability for any injury, damage, direct
USER MANUAL Table of Contents
 USER MANUA Table of Contents Safety Information.. 3 Specifications.. 4 Main Power Connection.. 5 DMX-512 Connection... 5 Main Control Menu... 6 DMX Profile... 8 Rigging the Fixture....10 Cleaning & Maintenance...10
TRANSCENSION 6-CHANNEL DMX DIMMER PACK (order code: BOTE40) USER MANUAL
 USER MANUAL") www.prolight.co.uk TRANSCENSION 6-CHANNEL PACK (order code: BOTE40) USER MANUAL SAFETY WARNING FOR YOUR OWN SAFETY, PLEASE READ THIS USER MANUAL CAREFULLY BEFORE YOUR INITIAL START-UP! CAUTION! Keep this
www.prolight.co.uk TRANSCENSION 6-CHANNEL PACK (order code: BOTE40) USER MANUAL SAFETY WARNING FOR YOUR OWN SAFETY, PLEASE READ THIS USER MANUAL CAREFULLY BEFORE YOUR INITIAL START-UP! CAUTION! Keep this
PRODUCT SPECIFICATIONS
 FOS Beam 150W 1 PRODUCT SPECIFICATIONS TECHNICAL SPECIFICATION Voltage: 100/240 Volt AC, 50/60 Hz. Power Consumption: 250 Watt. Light Source: 150 Watt LED, 6800K Beam angle: 2 Colors: 11 dichroic color
PRODUCT SPECIFICATIONS
 FOS Spot 150W 1 PRODUCT SPECIFICATIONS TECHNICAL SPECIFICATION Voltage: 100/240 Volt AC, 50/60 Hz. Power Consumption: 250 Watt. Light Source: 150 Watt LEDs, 7500K. Beam angle: 14. Colors: 8 colors + White
LED Spot 300W. Please read this user manual before your operation
 LED Spot 300W Please read this user manual before your operation 1. Introduction 2. General Guideline 3. Safety Instructions 4. Cleaning and Maintenance 5. Technical Parameters 6. DMX Channels 7. Remark
DMX LED light effect with 4 lenses
 DMX LED light effect with 4 lenses User manual 1 Safety precautions WARNING: This unit may cause serious injury to the eyes when used incorrectly. It is therefore strongly advised to read this user manual
aorun manual V2.0 MARCH 2018
 aorun manual V2.0 MARCH 2018 table of CONTENTS Dimensions 2 Safety instruction 5 Physical installation 6 Control panel 8 Menu navigation 9 DMX Protocols 12 DMX protocol CH14 12 DMX protocol CH16 15 DMX
BROTHER, BROTHER & SONS
 AREA SOFT BROTHER, BROTHER & SONS ApS INTRO Brother, Brother & Sons ApS The information in this manual is subject to change without notice. Go to www.brothers-sons.dk for the latest version. Brother, Brother
Fixture One XLR Signal Cable One Omega Clamp - Two Safety Chain One User Manual - One
 TABLE OF CONTENTS 1. INTRODUCTION AND UNPACKING 1 2. SAFTEY INSTRUCTIONS 1-2 3. OPERATION INSTRUCTIONS 2-3 4. MOUNTING AND INSTALLATION 3-4 5. DMX-512 CONTROL CONNECTIONS 4-5 6. MENU NAVIGATION 5 7. PHOTOMETRIC
Operating Manual. Automated Gear. Apollo Design Technology, Inc Fourier Drive Fort Wayne, IN USA
 Operating Manual Automated Gear Apollo Design Technology, Inc. 4130 Fourier Drive Fort Wayne, IN 46818 USA PH: +01(260)497-9191 FX: +01(260)497-9192 www.apollodesign.net 11-25-09 5-6 POWERING UP THE RIGHT
1. Before you Begin Introduction Setup Operation Technical Information Technical Specifications...
 User Manual TABLE OF CONTENTS 1. Before you Begin... 3 What is Included... 3 Unpacking Instructions... 3 Text Conventions... 3 Icons... 3 Safety Notes... 4 2. Introduction... 5 Product Overview... 5 3.
MH 2 Wash User Manual
 MH 2 Wash User Manual Professional Entertainment Technology 2013-2014 Martin Professional ApS. Information subject to change without notice. Martin Professional and all affiliated companies disclaim liability
SHOWLINE SL PAR 155 LED LUMINAIRE SPECIFICATIONS.
 SHOWLINE SL PAR 155 LED LUMINAIRE SPECIFICATIONS. GENERAL. A.) Overview. 1.) The luminaire shall be a color mixing luminaire employing nine (9) homogenized red, green, blue, and white LED engines. The
MAC Aura XB. User manual
 MAC Aura XB TM User manual Dimensions All dimensions are in millimeters 116 116 140 390 138 360 332 249 71 222 Min. c/c 330 270 270 302 2011-2014 Martin Professional ApS. Information subject to change
TABLE OF CONTENTS PART 5 APPENDIX TROUBLE SHOOTING MAINTENANCE A CTIVATE THE PASSWORD...13.
 TABLE OF CONTENTS PART PRODUCT (GENERAL)....--PRODUCT INTRODUCTION....--PRODUCT FEATURES....--TECHNICAL SPECIFICATIONS....4--PHOTOMETRIC DATA....5--SAFETY WARNING...4. PART INSTALLATION...5..--MOUNTING...5..--POWER
TABLE OF CONTENTS. Page 2 of 12 MotionFaçade LED User Manual (Rev. 10)
") User Manual TABLE OF CONTENTS 1. Before You Begin...3 What Is Included... 3 Unpacking Instructions... 3 Claims... 3 Text Conventions... 3 Icons... 3 Document Information... 3 Product at a Glance... 4 Safety
User Manual TABLE OF CONTENTS 1. Before You Begin...3 What Is Included... 3 Unpacking Instructions... 3 Claims... 3 Text Conventions... 3 Icons... 3 Document Information... 3 Product at a Glance... 4 Safety
VRL PAR-1745 Par Lamp
 1 Table of Content Part I General Information 1.1 Introduction...3 1.2 Safety Information.. 3 1.3 Unpacking..4 1.4 Specifications....4 1.5 Features.. 4 1.6 Panel review 4 Part II Installation and Operation
Cyclo DMX HO High Output. user manual
 Cyclo DMX HO High Output user manual Dimensions Measurements are in millimeters 1200 850 94 130 Ø4 Ø5 Ø13 Cyclo 03 DMX HO and Cyclo 04 DMX HO 2005 Martin Professional A/S, Denmark. All rights reserved.
Mover Beam 7 CKU (US) / CKE (EU) USER MANUAL
 / CKE (EU) USER MANUAL") Mover Beam 7 CKU01-5030 (US) / CKE01-5030 (EU) USER MANUAL Introduction Thank you for purchasing the ColorKey Mover Beam 7. Please read these instructions carefully before use. Operating this fixture according
Mover Beam 7 CKU01-5030 (US) / CKE01-5030 (EU) USER MANUAL Introduction Thank you for purchasing the ColorKey Mover Beam 7. Please read these instructions carefully before use. Operating this fixture according
LED IP65 Slimline Par RGBWA +UV 7x12W
 VIS0495.4 LED IP65 Slimline Par RGBWA +UV 7x12W User Manual KEEP THIS MANUAL FOR FURTHER NEEDS Key Features: 7 x RGBAW + UV HEX 12W LED IP65 Weatherproof Die-Cast Housing Slimline, Compact & Stylish Design
1440/2880 HP RGB+WW+CW
 office Nano*Pix 1440/2880 HP RGB+WW+CW User Manual Rev 7/2014 V4.4 Specifications subject to change without notice. Seite 1 Product Description Thank you for choosing this LDDE Nano*Pix 1440 HP / 2880
ENGLISH Spectral M800 MKII
 MANUAL ENGLISH Spectral M800 MKII V1 Highlite International B.V. Vestastraat 2 6468 EX Kerkrade the Netherlands Table of contents Warning... 3 Safety Instructions... 3 Operating Determinations... 5 Rigging...
ArtFox Lighting. LED Beam Wash 19E. User manual. 6. Fixture Cleaning. Please read the instructions carefully before use
 6. Fixture Cleaning ArtFox Lighting LED Beam Wash 19E The cleaning of internal and external optical lenses and/or mirrors must be carried out periodically to optimize light output. Cleaning frequency depends
Atomic 3000 LED User Manual
 Atomic 3000 LED User Manual Dimensions All dimensions are in millimeters 442 424 160 245 234 Ø332 Ø270 4 x 90 106 Ø13 106 57 2001-2015 Martin Professional ApS. Information subject to change without notice.
SquareLED - Aura Bar & Matrix Beam Light 100
 SquareLED - Aura Bar & Matrix Beam Light 100 1. SAFETY INSTRUCTIONS Please read these instructions carefully they include the important information about the installation usage and maintenance of this
www. eklights.com Guangzhou Liangyi Lighting Equipments Co.,Ltd. 37 Gongyedadao, Xinhua, Huadu, Guangzhou PC:510800
 Guangzhou Liangyi Lighting Equipments Co.,Ltd. 37 Gongyedadao, Xinhua, Huadu, Guangzhou PC:510800 Tel: (020)666 090 88-8002 Fax: (020) 868 670 11 www. eklights.com USER MANUAL CONTENTS SAFETY DIMENSION
ENGLISH LED Octostrip Set MKII V1
 MANUAL ENGLISH LED Octostrip Set MKII V1 Highlite International B.V. Vestastraat 2 6468 EX Kerkrade the Netherlands Table of contents Warning... 3 Safety Instructions... 3 Operating Determinations... 5
MANUAL. ENGLISH NanoQ 19 Q4 IP Ordercode: Highlite International B.V. Vestastraat EX Kerkrade the Netherlands
 MANUAL ENGLISH V1 Highlite International B.V. Vestastraat 2 6468 EX Kerkrade the Netherlands Table of contents Warning... 3 Safety Instructions... 3 Operating Determinations... 5 Rigging... 5 Connection
Stage Flood QCL 24x10W, Stage Flood Inst QCL 24x10W LED floodlight. user manual
 Stage Flood QCL 24x10W, Stage Flood Inst QCL 24x10W LED floodlight user manual Musikhaus Thomann e.k. Treppendorf 30 96138 Burgebrach Germany Telephone: +49 (0) 9546 9223-0 E-mail: info@thomann.de Internet:
FiberSource 1 User Manual
 FiberSource 1 User Manual 2015 Martin Professional ApS. Information subject to change without notice. Martin Professional and all affiliated companies disclaim liability for any injury, damage, direct
Hex-color RGBAW+UV LED strip light
 Hex-color RGBAW+UV LED strip light 2 19 SAFETY / GENERAL INSTRUCTIONS INTRODUCTION Features Specifications OVERVIEW : CONNECTIONS Rear view DIMENSIONS INSTALLATION Mounting FUNCTIONS AND SETTINGS Function
Exterior Projection 500. User Manual
 Exterior Projection 500 User Manual Dimensions 140 94 169 307 401 290 200 Ø53 82 90 60 Ø13 9 All dimensions are in millimeters 2013-2018 HARMAN Professional Denmark ApS. Information subject to change without
EDITION NOTES. Document Revision
 User Manual EDITION NOTES The STRIKE 1 User Manual includes a description, safety precautions, installation, programming, operation and maintenance instructions for the STRIKE 1 as of the release date
WaferPar HEX 12 CKU (US) / CKE (EU) USER MANUAL
 / CKE (EU) USER MANUAL") WaferPar HEX 12 CKU01-2140 (US) / CKE01-2140 (EU) USER MANUAL Introduction Thank you for purchasing the ColorKey WaferPar HEX 12. Please read these instructions carefully before use. Operating this fixture
WaferPar HEX 12 CKU01-2140 (US) / CKE01-2140 (EU) USER MANUAL Introduction Thank you for purchasing the ColorKey WaferPar HEX 12. Please read these instructions carefully before use. Operating this fixture
SHOWLINE SL BEAM 100 LED LUMINAIRE SPECIFICATIONS.
 SHOWLINE SL BEAM 100 LED LUMINAIRE SPECIFICATIONS. GENERAL. A.) Overview. 1.) The luminaire shall be a motorized colour mixing luminaire employing seven (7) homogenized red, green, blue, and white LED
RD RACK MOUNT DIMMER OWNERS MANUAL VERSION /09/2011
 RD - 122 RACK MOUNT DIMMER OWNERS MANUAL VERSION 1.3 03/09/2011 Page 2 of 14 TABLE OF CONTENTS UNIT DESCRIPTION AND FUNCTIONS 3 POWER REQUIREMENTS 3 INSTALLATION 3 PLACEMENT 3 POWER CONNECTIONS 3 OUTPUT
COLORtube EQ Controller
 COLORtube EQ LED-EQ COLORtube EQ Controller LED-EQC USER MANUAL 32-band audio spectrum visualizer using LED tubes CHAUVET, 3000 N 29 th Ct, Hollywood, FL 33020 U.S.A (800) 762-1084 (954) 929-1115 FAX (954)
Owner Handbook Saturn Quad Beam. Owner Handbook. Saturn Quad Beam
 Owner Handbook 1 use & maintenance You must read these warnings carefully because they include important safety information about the installation, operation and maintenance of this product. Follow all
RIO TRI PAR MICROH. Information. Technical 104 F(40 C) 9.6 in (245 mm) Width. 9.6 in (245 mm) Height. 8.0 in (205 mm) Weight
 9.6 in (245 mm) Width. 9.6 in (245 mm) Height. 8.0 in (205 mm) Weight") Technical Technical Information Specifications Weight & Dimensions Length 9.6 in (245 mm) Width 9.6 in (245 mm) Height 8.0 in (205 mm) Weight 9 lbs (4.5 kg) Power Auto-ranging 00~240 V, 50/60 Hz Power
Technical Technical Information Specifications Weight & Dimensions Length 9.6 in (245 mm) Width 9.6 in (245 mm) Height 8.0 in (205 mm) Weight 9 lbs (4.5 kg) Power Auto-ranging 00~240 V, 50/60 Hz Power
Led Dynamic DMX Tri Curtain Manual
 Led Dynamic DMX Tri Curtain Manual Welcome to use the LED dynamic DMX Tri curtain, please read following Safety Notes as well as those in User Manual carefully before connection, installing, operation
1. BEFORE YOU BEGIN INTRODUCTION SETUP... 7
 User Manual TABLE OF CONTENTS 1. BEFORE YOU BEGIN... 3 WHAT IS INCLUDED... 3 UNPACKING INSTRUCTIONS... 3 MANUAL CONVENTIONS... 3 ICONS... 3 SAFETY NOTES... 4 2. INTRODUCTION... 5 PRODUCT OVERVIEW... 6
WaferPar QUAD-W 7 CKU (US) / CKE (EU) USER MANUAL
 / CKE (EU) USER MANUAL") WaferPar QUAD-W 7 CKU01-2110 (US) / CKE01-2110 (EU) USER MANUAL Introduction Thank you for purchasing the ColorKey WaferPar QUAD-W 7. Please read these instructions carefully before use. Operating this
WaferPar QUAD-W 7 CKU01-2110 (US) / CKE01-2110 (EU) USER MANUAL Introduction Thank you for purchasing the ColorKey WaferPar QUAD-W 7. Please read these instructions carefully before use. Operating this
TABLE OF CONTENTS. 1. Before you Begin... 3 What is Included... 3 Unpacking Instructions... 3 Text Conventions... 3 Icons... 3 Safety Notes...
 User Manual TABLE OF CONTENTS 1. Before you Begin... 3 What is Included... 3 Unpacking Instructions... 3 Text Conventions... 3 Icons... 3 Safety Notes... 4 2. Introduction... 5 Product Overview... 5 3.
User Instructions. Warning! To prevent or reduce the risk of electrical shock or fire, do not expose this unit to rain or moisture.
 General Information User Instructions Unpacking: Thank you for purchasing the by American DJ. Every has been thoroughly tested and has been shipped in perfect operating condition. Carefully check the shipping
OWNERS MANUAL. Revision /01/ Lightronics Inc. 509 Central Drive Virginia Beach, VA Tel
 OWNERS MANUAL Revision 1.8 09/01/2002 OWNERS MANUAL Page 2 of 12 AR-1202 UNIT DESCRIPTION The AR-1202 consists of a processor and 12 dimmer channels of 2.4KW each. Each dimmer channel is protected by a
USER MANUAL Table of Contents
 USER MANUA Table of Contents Safety Information. 3 Specifications.. 4 Main Power Connection..5 DMX-512 Connection...... 5 Main Control Menu... 6 DMX Profile... 9 Rigging the Fixture.10 Cleaning & Maintenance...10
TABLE OF CONTENTS INTRODUCTION
 1 TABLE OF CONTENTS INTRODUCTION... 2 MAIN FEATURES... 3 UNPACKING... 3 SAFETY WARNING... 3 PANEL REVIEW... 4 INSTALLATION AND SETTING... 4 1. MULTI-FIXTURES CONNECTION... 4 2. LAMP BODY INSTALLATION...
SHOWLINE SL BAR 640 LINEAR WASH LUMINAIRE SPECIFICATIONS.
 GENERAL. A.) Overview. SHOWLINE SL BAR 640 LINEAR WASH LUMINAIRE SPECIFICATIONS. 1.) The luminaire shall be a color mixing luminaire employing twenty-four (24) red, green, blue, and white LED engines.
X 5 / XC 5 LED STROBE
 X 5 / XC 5 LED STROBE X 5 / XC 5 LED Strobe dimensions 2 All dimensions in mm. Drawing not to scale. X 5 / XC 5 LED STROBE USER MANUAL REV. 3d ETL 2014 SGM TM. Information subject to change without notice.
1. Safety Instructions Installation Features Remote Control Operation Menu Operation DMX Table 5
 www.lightemotion.com.au DERBY2 2-in-1 Laser and Derby Effect. User s instruction manual This manual contains important information about the safe installation and use of this product Please read this instruction
1. BEFORE YOU BEGIN INTRODUCTION CONTROL FEATURES... 5 Additional Features... 5 PRODUCT OVERVIEW SETUP... 6
 User Manual TABLE OF CONTENTS 1. BEFORE YOU BEGIN... 3 WHAT IS INCLUDED... 3 UNPACKING INSTRUCTIONS... 3 MANUAL CONVENTIONS... 3 ICONS... 3 SAFETY INSTRUCTIONS... 4 2. INTRODUCTION... 5 CONTROL FEATURES...
1. Before You Begin... 3
 User Manual TABLE OF CONTENTS 1. Before You Begin... 3 What Is Included... 3 Unpacking Instructions... 3 Claims... 3 Text Conventions... 3 Symbols... 3 Disclaimer... 3 Product at a Glance... 4 Safety Notes...
This device is a lighting effect for professional use on stages, in discotheques, theatres, etc..
 At first, thank you for purchasing QUADRO 24. For the sake of safety and regular operation of this projector, please read this manual carefully before using and operating it, lest incur any personal injury
SHOWLINE SL NITRO 510C LED STROBE LUMINAIRE SPECIFICATIONS.
 GENERAL. A.) Overview. SHOWLINE SL NITRO 510C LED STROBE LUMINAIRE SPECIFICATIONS. The luminaire shall be an LED strobe luminaire employing five hundred and twenty eight (528) red, green, blue and white
Outdoor Stage PAR 12 3W Tri LED PAR. user manual
 Outdoor Stage PAR 12 3W Tri LED PAR user manual Musikhaus Thomann Thomann GmbH Hans-Thomann-Straße 1 96138 Burgebrach Germany Telephone: +49 (0) 9546 9223-0 E-mail: info@thomann.de Internet: www.thomann.de
USER MANUAL Table of Contents
 USER MANUAL Table of Contents Safety Information. 3 Specifications.. 4 Main Power Connection.. 5 DMX-512 Connection...... 5 Main Control Menu... 6 Fixture Addressing... 6 Manual Mode...7 Save Scene...7
RUSH Scanner 1 LED User Manual
 RUSH Scanner 1 LED User Manual 2016 Martin Professional ApS. Information subject to change without notice. Martin Professional and all affiliated companies disclaim liability for any injury, damage, direct
Introduction: The Dekker is part of American DJ s continuing pursuit for creating high quality affordable intelligent fixtures.
 Introduction Unpacking: Thank you for purchasing the by American DJ. Every has been thoroughly tested and has been shipped in perfect operating condition. Carefully check the shipping carton for damage
PRODUCT SPECIFICATIONS
 FOS RGB Fan 1 PRODUCT SPECIFICATIONS TECHNICAL SPECIFICATION Voltage: 110/240 Volt AC, 50/60 Hz. Power Consumption: 180 Watt. Light Source: 792x 0,2 Watt RGB SMD 5050 LEDs. Effects: LEDs are separated
TABLE OF CONTENTS. Page 2 of 25 COLORband PiX-M User Manual (Rev. 1)
") User Manual TABLE OF CONTENTS 1. Before You Begin...3 What Is Included... 3 Unpacking Instructions... 3 Claims... 3 Text Conventions... 3 Symbols... 3 Disclaimer... 3 Product at a Glance... 4 Safety Notes...
User Manual TABLE OF CONTENTS 1. Before You Begin...3 What Is Included... 3 Unpacking Instructions... 3 Claims... 3 Text Conventions... 3 Symbols... 3 Disclaimer... 3 Product at a Glance... 4 Safety Notes...
BEAM MOVING HEAD YODN Lamp. 132W 2R MOVING HEAD Brightness / Stability USER MANUAL. Version 1.0 beta
 BEAM MOVING HEAD YODN Lamp W R MOVING HEAD Brightness / Stability This product manual contains important information about the safe installation and use of this projector. Please read and follow these
Outdoor Stage PAR 12 4W Quad IR RGBW, 12 3W Quad IR UV LED PAR. user manual
 Outdoor Stage PAR 12 4W Quad IR RGBW, 12 3W Quad IR UV LED PAR user manual Musikhaus Thomann Thomann GmbH Hans-Thomann-Straße 1 96138 Burgebrach Germany Telephone: +49 (0) 9546 9223-0 E-mail: info@thomann.de
Operation Manual Flare software version 8.8 Flare Jr software version 9.3C
 Operation Manual Flare software version 8.8 Flare Jr software version 9.3C PRELIMINARY Solaris Flare / Flare Jr. user manual version 9.0 040815 PRELIMINARY 1 TABLE OF CONTENTS 1. INTRODUCTION... 3 Product
SPECIFICATIONS: Model: Supply Voltage: LED: Weight: Size: Fuse: Power Consumption: Working Position: Duty Cycle: DMX Channels:
 STEALTH WASH ZOOM Introduction: The Stealth Wash Zoom is a unique DMX intelligent moving head unit. The Stealth Wash Zoom has 3 operating modes; sound active mode, show mode, or controlled via DMX controller.
ENGLISH Helios 200 COB Q4
 MANUAL ENGLISH Helios 200 COB Q4 V3 Highlite International B.V. Vestastraat 2 6468 EX Kerkrade the Netherlands Table of contents Warning... 2 Safety Instructions... 2 Operating Determinations... 4 Rigging...