Register your product and get support at EN User manual ES Manual del usuario FR Manuel d utilisation
|
|
|
- Nicholas Neal
- 6 years ago
- Views:
Transcription


1 Register your product and get support at EN User manual ES Manual del usuario FR Manuel d utilisation EN For further assistance, call the customer support service in your country. To obtain assistance, contact Philips customer care center; In the U.S.A., Canada, Puerto Rico, or the U.S. Virgin Islands México D.F. and área metropolitana; Interior de la republica; ES Para obtener más información, llame al servicio de soporte a cliente de su país. Para obtener asistencia, comuníquese con centro de atención al cliente de Philips; En los Estados Unidos, en Canadá, Puerto Rico o en las Islas Vírgenes de los Estados Unidos; México D.F. y área metropolitana; Interior de la republica; FR Pour obtenir de l aide supplémentaire, communiquez avec le centre de service à la clientèle de votre pays. Pour obtenir de l aide, communiquez avec le centre de service à la clientèle Philips au; Dans le États-Unis, au Canada, à Puerto Rico ou aux Îles Vierges américaines;
2 Contents Notice... 3 Welcome... 9 The new standard in Smart TVs... 9 Get the most out of your new TV Connections and setup Connecting an antenna, cable, or satellite box Connecting external equipment with a composite AV video cable Connecting external equipment with an HDMI cable Connecting headphones or analog sound bar to the TV Connecting headphones to the Roku TV Enhanced Remote Control Connecting an AV receiver or digital sound bar Preparing for Internet connectivity AC power Remote control batteries Roku TV Remote control Panel buttons Single button Three buttons Game-pad style joystick Seven buttons Guided Setup Starting Guided Setup Completing Guided Setup Network connection Activation Connect your devices Home screen Personalize your Home screen Benefits of connecting Connecting brings out your TV s full potential! Page ii
3 What is streaming? What if I didn t connect my TV? Setting up Antenna TV Why do I have to set up the TV tuner? How do I set up the TV tuner? Using your TV Status light Standby mode energy savings Watching broadcast TV channels Changing channels Surfing favorite channels Viewing program information Adjusting settings Pausing Live TV Requirements Enabling Live TV Pause Using Live TV Pause Notes about Live TV Pause More Ways to Watch (U.S. only) Opting in to More Ways to Watch Using More Ways to Watch Switching TV inputs Auto-detecting devices Adjusting audio/video settings Playing content from USB storage devices Auto player launch Playing content from local network media servers Using your TV in a hotel or dorm room Enhanced Remote Control (select models only) Finding your Enhanced Remote Control Changing and previewing the Enhanced Remote Control finder sound Re-pairing your Enhanced Remote Control Checking the Enhanced Remote Control battery level Adjusting TV settings Settings menu Options menu Page iii
4 Options menu settings Accessibility (U.S. only) Accessibility menu settings Video description through Secondary Audio Program (SAP) Advanced audio settings (select models only)...66 Advanced audio settings menu options...66 Advanced picture settings Advanced picture settings menu options Expert Picture Settings (4K models only) Changing privacy settings Advertising Microphone My Feed Movies Coming Soon Movies, TV shows, and people Searching for something to watch How do I search? I found a show, now what? Follow on Roku Recent Searches Using the Roku Channel Store Customizing your TV Rearrange tiles Edit broadcast TV channel lineup Rename inputs Remove unwanted tiles Change themes Change sound effects volume Configure power settings Power on settings Auto power savings Standby LED On/Off Configure accessibility (U.S. models only) Captions mode Captions style Audio Guide settings Page iv
5 Changing caption settings (Canada only) Configure parental controls Creating a parental control PIN Blocking Movie Store, TV Store, and News (U.S. models only) Blocking Broadcast TV shows What happens when a TV show is blocked? Changing the parental control PIN Resetting parental controls More settings Changing network settings Changing time settings Scanning for broadcast TV channels again Setting the HDMI mode (4K models only) Using the TV in a home theater Turning off the speakers Changing the audio mode Setting up a digital audio connection Controlling other devices through CEC Restarting the TV Resetting the TV Reset audio/video settings Factory reset everything What if I can t access the Factory Reset option? Network connection reset Changing your Roku Channel Store PIN preference Getting system updates Checking for updates on a connected TV Getting updates on a non-connected TV Other devices Screen Mirroring your phone or tablet Getting and using the Roku mobile app Private Listening on the Roku mobile app Using a universal remote FAQ Warranty Page v

6 Page 1
 allows the mounting of the TV on the wall.")
7 Wall mount bracket kit Brand Model # Screw dimension SANUS AST16 M4 x (35mm) Your TV meets the VESA standard for wall mounting. Consult with your local dealer for a wall mount bracket which is compatible with your TV model. The recommended wall mount bracket kit (sold separately) allows the mounting of the TV on the wall. For detailed information on installing the wall mount, refer to the wall mount Instruction book. P&F USA is not responsible for any damage to the product or injury to yourself or others if you elect to install the TV wall mount bracket or mount the TV onto the bracket on your own. The wall mount bracket must be installed by experts. P&F USA is not liable for these types of accidents or injuries noted below. Install the wall mount bracket on a sturdy vertical wall. If installed onto a ceiling or slanted wall, the TV and wall mount bracket may fall which could result in a severe injury. Do not use screws that are longer or shorter than their specified length. If screws too long are used this may cause mechanical or electrical damage inside the TV set. If screws too short are used this may cause the TV set to fall. Do not fasten the screws by excessive force. This may damage the product or cause the product to fall, leading to an injury. For safety reasons use 2 people to mount the TV onto a wall mounting bracket. Do not mount the TV onto the wall mounting bracket while your TV is plugged in or turned on. It may result in an electrical shock injury. When installing the unit on the wall, allow this much space. Top : inches (30cm) Left and right side : 5.9 inches (15cm) Bottom : 3.9 inches (10cm) Page 2
8 Notice Trademarks are the property of Koninklijke Philips N.V. or their respective owners. P&F USA reserves the right to change products at any time without being obliged to adjust earlier supplies accordingly. The material in this manual is believed adequate for the intended use of the system. If the product or its individual modules or procedures are used for purposes other than those specified herein, confirmation of their validity and suitability must be obtained. P&F USA warrants that the material itself does not infringe any United States patents. No further warranty is expressed or implied. P&F USA cannot be held responsible neither for any errors in the content of this document nor for any problems as a result of the content in this document. Errors reported to P&F USA will be adapted and published on the P&F USA support website as soon as possible. Pixel characteristics This LCD product has a high number of color pixels. Although it has effective pixels of % or more, black dots or bright points of light (red, green or blue) may appear constantly on the screen. This is a structural property of the display (within common industry standards) and is not a malfunction. Warranty No components are user serviceable. Do not open or remove covers to the inside of the product. Repairs may only be done by service centers and official repair shops. Failure to do so shall void any warranty, stated or implied. Any operation expressly prohibited in this manual, any adjustments or assembly procedures not recommended or authorized in this manual shall void the warranty. Federal communications commission notice This equipment has been tested and found to comply with the limits for a Class B digital device, pursuant to part 15 of the FCC Rules. These limits are designed to provide reasonable protection against harmful interference in a residential installation. This equipment generates, uses and can radiate radio frequency energy and, if not installed and used in accordance with the instructions, may cause harmful interference to radio communications. However, there is no guarantee that interference will not occur in a particular installation. If this equipment does cause harmful interference to radio or television reception, which can be determined by turning the equipment off and on, the user is encouraged to try to correct the interference by one or more of the following measures: Reorient or relocate the receiving antenna. Increase the separation between the equipment and the receiver. Page 3
9 Connect the equipment into an outlet on a circuit different from that to which the receiver is connected. Consult the dealer or an experienced radio or television technician for help. Declaration of conformity Trade name : PHILIPS Responsible party : P&F USA, Inc. Model : 32PFL4902 Address : PO Box 2248, Alpharetta, GA U.S.A. Telephone number : Modifications This apparatus may generate or use radio frequency energy. Changes or modifications to this apparatus may cause harmful interference. Any modifications to the apparatus must be approved by P&F USA. The user could lose the authority to operate this apparatus if an unauthorized change or modification is made. Cables Connections to this device must be made with shielded cables with metallic RFI / EMI connector hoods to maintain compliance with FCC Rules and regulations. Canadian notice CAN ICES-3 (B)/NMB-3 (B) Analog and digital television receiving apparatus, Canada BETS-7 /NTMR-7. The following FCC/IC RSS applies to the wireless LAN adapter included in this product. FCC caution: Any changes or modifications not expressly approved by the party responsible for compliance could void the user s authority to operate this equipment. This transmitter must not be co-located or operating in conjunction with any other antenna or transmitter. Country code statement For product available in the USA market, only channel 1 ~~1 1 can be operated. Selection of other channels is not possible. To maintain compliance with FCC RF exposure requirements, use only belt-clips, holsters or similar accessories that do not contain metallic components in its assembly. The use of accessories that do not satisfy these requirements may not comply with FCC RF exposure requirements and should be avoided. This device complies with industry Canada license-exempt RSS standard(s). Operation is subject to the following two conditions: (1) this device may not cause interference and (2) this device must accept any interference, including interference that may cause undesired operation of the device. Page 4


10 Positioning the TV Large screen TVs are heavy. 2 people are required to carry and handle a large screen TV. Make sure to hold the upper and bottom frames of the unit firmly as illustrated. Install the unit in a horizontal and stable position. Do not install the unit in direct sunlight or in a place subject to dust or strong vibration. Depending on the environment, the temperature of this unit may increase slightly. This is not a malfunction. When installing this unit in a temperate environment, avoid a place with rapid temperature changes. - Operating temperature: 41 F (5 C) to 104 F (40 C) This unit should not be used in a tropical environment as it has not been evaluated under such conditions. No objects should be placed directly on or under this unit, especially lighted candles or other flaming objects. Depending on your external devices, noise or disturbance of the picture and / or sound may be generated if the unit is placed too close to them. In this case, please ensure enough space between the external devices and the unit. Do not insert the AC power cord into the power socket outlet before all the connections are made. Ensure that you always have easy access to the AC power cord and outlet to disconnect the TV from the AC outlet. Before you move the TV, disconnect attached cables to prevent damage to connectors, especially the TV tuner. Be sure to unplug the AC power plug from the AC outlet before moving or carrying the unit. When moving the TV and then setting it down, please be careful not to pinch the AC power cord under the unit. Do not place this unit in an area where it may be exposed to water, oil or grease such as: near a bathtub, basin, kitchen sink, washing tub, swimming pool, kitchen exhaust fan, etc., or in a damp basement. Page 5

11 Regulatory notices WARNING : To prevent injury, this apparatus must be securely attached to the furniture / wall in accordance with the instructions. Tipping, shaking or rocking the unit may cause injury / death. WARNING : Never place a TV in an unstable location. A TV may fall, causing serious personal injury or death. Many injuries, particularly to children, can be avoided by taking simple precautions such as: - Using cabinets or stands recommended by the manufacturer of the TV. - Only using furniture that can safely support the TV. - Ensuring the TV is not overhanging the edge of the supporting furniture. - Not placing the TV on tall furniture (for example, cupboards or bookcases) without anchoring both the furniture and the TV to a suitable support. - Not placing the TV on cloth or other materials that may be located between the TV and supporting furniture. - Educating the children about the dangers of climbing on furniture to reach the TV or its controls. If your existing TV is being retained and relocated, the same considerations as above should be applied. Do not place the unit on the furniture that is capable of being tilted by a child and an adult leaning, pulling, standing or climbing on it. A falling unit can cause serious injury or even death. In order to avoid interruption of ventilation, this unit should not be placed in built-in equipment such as a book cabinet, rack, etc., and the vents of this unit should not be covered with anything such as a tablecloth, curtain, newspaper, etc. Make sure that there is enough ventilation space (4inches / 10cm or more) around this unit. Press y to turn the unit on and go into standby mode. To completely turn off the unit, you must unplug the AC power plug from the AC power outlet. Disconnect the AC power plug to shut the unit off when trouble is found or not in use. The AC plug shall remain readily available. Page 6

12 Never use a gas duster on this TV. The gas trapped inside of this unit may cause ignition and explosion. Environmental care The packaging of this product is intended to be recycled. Contact your local authorities for information about how to recycle the packaging. For product recycling information, please visit - End of life directives Philips pays a lot of attention to produce environmental-friendly products in green focal areas. Your new TV contains materials which can be recycled and reused. At the end of its life, specialized companies can dismantle the discarded TV to concentrate the reusable materials and to minimize the amount of materials to be disposed of. Please ensure you dispose of your old TV according to local regulations. #Batteries usage CAUTION : Danger of explosion if battery is incorrectly replaced.replace only with the same or equivalent type. WARNING : Batteries (battery pack or battery installed) should not be exposed to excessive heat such as sunshine, fire or the like. Do not mix old and new batteries. Do not mix alkaline, standard (carbon-zinc) or rechargeable (ni-cad,ni-mh,li-ion, etc.) batteries. Disposal of used batteries The batteries supplied do not contain the heavy metals mercury and cadmium, however in certain localities, disposing batteries with household waste is not permitted. Please ensure you dispose of batteries according to local regulations. Preparing to move / ship the unit Please pack the unit properly by following the diagram on the carton (as noted below). To avoid damage to the screen, do not pack the stand on the same side as the TV screen, refer to the illustration above. Page 7

13 Copyright All other registered and unregistered trademarks are the property of their respective owners. The terms HDMI and HDMI High-Definition Multimedia Interface, and the HDMI Logo are trademarks or registered trademarks of HDMI Licensing Administrator, Inc. in the United States and other countries. Manufactured under license from Dolby Laboratories. Dolby, Dolby Audio, and the double-d symbol are trademarks of Dolby Laboratories. Portions of this software are copyright The FreeType Project ( The American Academy of Pediatrics discourages television viewing for children younger than two years of age. Some features may require an always-on broadband internet connection, firmware update and/or a minimum bandwidth. Internet services vary by location. P&F USA Inc. / P&F MEXICANA, S.A.de C.V. do not warrant access to the portal or to any of the services, content, software and advertising.p&f USA Inc./P&F MEXICANA, S.A. de C.V. or third party content/service providers may, in their sole discretion, add or remove access to any specific services, content, software and advertising at any time.although P&F USA Inc. / P&F MEXICANA, S.A. de C.V. will strive to provide a good selection of services, content or software, P&F USA Inc./ P&F MEXICANA, S.A. de C.V. do not warrant continued access to any specific services, and content or software. Page 8
14 Welcome Congratulations on the purchase of your new Roku TV! Discover the joy of endless entertainment. After it s set up, you ll be able to access a world of streaming content channels that may include paid subscription channels like Netflix or free channels like YouTube, Crackle, CNET and literally thousands more. Important: Your TV receives automatic updates from time to time, enabling new content and features. This User Guide describes Roku TV version 7.6. To determine the current version of your Roku TV, go to Settings > System > About after you complete Guided Setup. The new standard in Smart TVs Welcome to TV like you ve most likely never seen before a home screen that you can personalize with your favorite devices and streaming channels. Choose from hundreds of thousands of streaming movies and TV episodes, plus music, sports, kids, family, international and much more. You should never run out of things to watch. Note: A paid subscription or other payments may be required for some channel content. Channel availability is subject to change and varies by country. Page 9
15 Get the most out of your new TV Follow these simple steps to get the most out of your new TV. 1. Connect to the Internet It s simple, it s easy, and it will unlock a world of entertainment. All you need is a network connection. There are hundreds of free streaming channels, paid subscription services like Netflix and Spotify, convenient ways to rent or buy a favorite film or show with Google Play and Cineplex and more. 2. Pick your favorite streaming channels Find the entertainment you love. From the latest blockbuster movies to your favorite TV shows, with tons of live sports, a broad selection of music streaming channels, popular programming in a dozen international languages, 24x7 live news and so much more, your new Roku TV has your sweet spot. A paid subscription or other payments may be required for some channels. 3. Pick your favorite TV channels Designate any number of channels as your favorites, and then easily switch between surfing all channels or just your favorites. 4. Discover More Ways To Watch (select models only) Enable this optional feature, and then watch for alerts showing the streaming channels that offer the program you re currently watching and, if applicable, the entire series, as well as other programs with similar themes. 5. Personalize your Home screen Put your favorite broadcast TV, streaming channels, gaming console and other devices front-and-center on the Home screen. No more flipping through inputs or wading through complicated menus. You can even customize the names of each input and move tiles around so your most-often used devices and streaming channels are only a click away. 6. Search for your favorite movie, TV show, actor, or director Once you re connected to the internet, you can easily search across top streaming channels by movie or TV show title, actor or director all from one place. Search results are organized by price so you can see the best priced option. A paid subscription or other payments may be required for some channels. 7. Pause live TV Pause, resume, fast forward, and rewind TV shows. Simply connect your own USB drive with 16GB or bigger capacity to the TV and pause live TV for up to 90 minutes. Page 10
16 Note: Live TV Pause is available on digital TV shows received on the TV s antenna input only, and only when the TV is linked to a valid Roku account. 8. Send your personal media to the big screen Send personal photos, videos, and music from your compatible smartphone or tablet to the TV screen in just a few taps. Plus, with certain channels, such as Netflix and YouTube, you can send movies, shows, sport highlights, and more directly to your TV. Note: The Roku mobile app for Microsoft Windows mobile devices does not cast videos. 9. Follow movies coming soon Use My Feed to choose from and follow a list of upcoming movies, and then watch for alerts each time one of your followed movies becomes available or changes price. 10. Take charge with a smartphone or tablet Control your TV with the included remote or from your compatible smartphone or tablet with the free mobile app for ios, Android, and Microsoft Windows mobile devices *. Browse channels, view My Feed, listen to audio from streaming programs, and even search with voice via the free mobile app. Note: Voice search, Mobile listening, and My Feed are not available in the Roku mobile app for Microsoft Windows devices. Mirror your compatible smartphone or tablet on your TV. Share videos, photos, web pages, and more from compatible devices. 11. Connect your Roku TV to networks found in hotels and college dorms. You can temporarily link the TV to your smartphone or table to agree to any terms, enter codes, or provide required information before you can get Internet access. Note: Using your Roku TV on a restricted public network requires wireless availability and use of your network-connected smartphone, tablet, or computer to authenticate access to your account. You must use your Roku TV remote control to initiate the connection process. Streaming content might be limited due to your geographic location or because of restrictions imposed by the network host. Go to support.roku.com for device compatibility information. Let s get started. * IOS is a trademark or registered trademark of Cisco in the U.S. and other countries and is used under license. Android is a trademark of Google Inc. Windows is a registered trademark of Microsoft Corporation in the United States and other countries. Page 11
17 Connections and setup Refer to your TV s Quick Start Guide or other provided documentation to for modelspecific information about attaching the base or a wall mount and making connections to AC power and to your other audio/video components. The following information applies to all Roku TV models. Connecting an antenna, cable, or satellite box If you are using an antenna, CATV cable without a set-top box, or a cable or satellite box that has only an antenna output, connect a 75-ohm coaxial cable (not provided) from the device to the ANT/CABLE input on the TV. Tip: If you are using an antenna with a 300 ohm twin-lead cable, you need to use a 300-to-75 ohm adapter (not provided) to adapt the twin-lead cable to a connection that is compatible with the TV s antenna input. Tip: If you receive your TV stations through a set top box from a cable or satellite TV provider, connect it to the TV using the best connection method available. From most to least desirable: HDMI input Digital HD and SD video AV input analog SD video Antenna input analog SD video using NTSC Connecting external equipment with a composite AV video cable If the best connection available on your component is AV or composite video output, connect it to the TV using a composite AV cable (not provided). Composite AV cables typically have three RCA-type plugs on each end, color coded as follows: Yellow: Video Red: Audio, right channel White or black: Audio, left channel Connect each plug to the corresponding connector on the component and on the TV. Page 12
18 Note: Select models have an AV Input that looks like a headphone jack. Use the breakout cable (included) to adapt this input to the three RCA-type plugs on your composite cable. Connecting external equipment with an HDMI cable If possible, connect your devices using HDMI cables (not provided). They help to provide the best video quality and also carry audio signals, so that only one cable is needed. For better picture quality, we recommend that you use cables designated as High Speed HDMI Cables. Tip: You might need to configure the component to send its signal through its HDMI connector. The connector labeled HDMI IN (ARC) has the additional ability to use the audio return channel to send digital audio to a receiver or sound bar, as explained in Connecting an AV receiver or digital sound bar. Connecting headphones or analog sound bar to the TV You can connect headphones or an analog sound bar (not provided) to the TV s headphone jack. Tip: Inserting a plug in the headphone jack disables the sound from the TV s built-in speakers. Warning: Loud noise can damage your hearing. When using headphones, use the lowest volume setting on your headphones that still lets you hear the sound. Select models also have an audio line out connection that is not affected by TV volume or mute settings and does not disable the TV speakers. Use this connection when you want to use your amplifier or sound bar to control the TV volume. To turn off the TV s built-in speakers, in the Home screen menu, navigate to Settings > Audio > TV speakers and change the setting. Connecting headphones to the Roku TV Enhanced Remote Control Select Roku TVs come with the Roku TV Enhanced Remote Control. On these models, you can connect headphones to the jack on the left side of the Enhanced Remote Control. Tip: Inserting a plug in the remote control headphone jack disables the sound from the TV s built-in speakers or attached receiver or sound bar. The volume and mute controls Page 13
19 on the right side of the remote control adjust the volume level of the connected headphones. Warning: Loud noise can damage your hearing. When using headphones, use the lowest volume setting on your headphones that still lets you hear the sound. You might notice that connecting headphones to your remote control shortens the remote s battery life somewhat. Connecting an AV receiver or digital sound bar You can enjoy Dolby Audio multichannel sound from your TV if you connect a digital amplifier or sound bar (not provided) in either of two ways: Digital optical audio out (S/PDIF) Connect a TOSLINK optical cable (not provided) from the TV to the Optical input on your receiver or sound bar. HDMI ARC Connect an HDMI cable (not provided) from the HDMI (ARC) connector to the HDMI input on your receiver or sound bar. This connection uses the Audio Return Channel (ARC) feature of the HDMI specification to output sound from the TV to a compatible device. To use this feature, you must configure the TV to enable HDMI ARC, as explained in Enable HDMI ARC. Preparing for Internet connectivity If you want to watch streaming content and take advantage of the cool features of your Roku TV, connect it to the Internet through a wireless modem/router or a wireless access point (not provided). The TV has a built-in wireless LAN adapter. Note: The TV supports only its internal wireless network adapter it does not support the use of a USB network adapter. Select 4K models have wired in addition to wireless network connectivity. To use the wired network connection, connect an RJ-45 Ethernet cable (not provided) from the jack on the back of your TV to your network router or switch. The wired connection supports both 10 Base-T and 100 Base-T Ethernet. Page 14
20 AC power Plug your TV into a power outlet. You can tell that the TV has power because the status light on the front of the TV lights up when the TV is off. Status light explains how the status indicator shows what is happening with the TV. Remote control batteries Open the back of your Roku TV remote control and insert the included batteries, observing the proper orientation as indicated in the battery compartment. Reattach the back cover. Page 15


21 Roku TV Remote control Use the following information to identify the buttons on your Roku TV remote control. Note: Certain remote control buttons and features vary by model. Your remote control might not have all buttons or features listed. If your remote control has a headphone jack on its left side, then you have a Roku TV Enhanced Remote Control, which has additional capabilities as noted below. Button Function Description POWER Turns TV on and off. BACK Menu: Goes back to previous menu/screen. Home screen tile: Moves highlight back to the Home screen option. Watching Antenna TV or a TV input: Returns to Home screen. Playing streaming content: Stops playing stream and returns to the previous menu or screen. Browsing streaming content: Goes to the previous level in the content tree. HOME Immediately returns to the Home screen. PAD LEFT/RIGHT/UP/DOWN moves the highlight in the corresponding direction. OK selects the highlighted option. While watching TV: UP/DOWN changes channel. LEFT displays the channel list. LEFT/RIGHT while in the channel list switches between All Channels and Favorite Channels. OK while in the channel list selects the highlighted channel. While watching live TV, displays the program information banner. VOICE SEARCH GAME MODE Select models with Roku TV Enhanced Remote Control. Displays the Voice Search prompt. Say the name of a movie, TV show, actor, or director to search across top channels. For more information, see Searching for something to watch. Select models. Displays a banner showing the current Game mode or Not available at this time. Subsequent presses toggle Game mode. When On, the TV performs less image processing and has less input lag, producing a better experience with action games. Available only for HDMI and AV inputs. Page 16

22 Button Function Description INSTANT REPLAY SLEEP MEDIA PLAYBACK CONTROLS OPTIONS Select models. Streaming programs that support this feature and broadcast TV if Live TV Pause is enabled, jumps back a few seconds with each press and resumes playing. Broadcast TV if Live TV Pause is disabled, jumps to previous channel. When using an on-screen keyboard, backspaces in the text you are entering. Select models. Displays a banner showing the remaining sleep time, if any, or Sleep timer is off. Subsequent presses cycle among the preset sleep time intervals. Once set, the sleep timer remains in effect regardless of what you are watching. Rewind, pause, play, and fast forward streaming content and broadcast TV (if Live TV Pause is enabled). Press REWIND or FAST FORWARD one, two, or three times to control the speed of the operation. REWIND and FAST FORWARD also jump backward and forward one page at a time when viewing long lists, such as your channel list. Displays additional options when available. PRESET CHANNEL SHORTCUT VOLUME/MUTE Dedicated buttons show the logo of a preset streaming content provider. Pressing a button: Displays the streaming channel s main page if you have already added the channel to your Home screen. Displays the streaming channel s sign-up page if you have not already added the channel. Increases/decreases volume and mutes the TV sound. Note: If the TV is muted, pressing VOLUME UP unmutes. Pressing VOLUME DOWN does not unmute the sound. Page 17
23 Button Function Description HEADPHONE Select models with Roku TV Enhanced Remote Control. Connect headphones to listen privately. Plugging in headphones mutes the TV speakers. Panel buttons Your TV has a set of panel buttons that perform simple control functions. The TV panel buttons are not a substitute for the remote control, as they do not give you access to all TV functions. Depending on model, your TV model has one of several different panel button designs. Choose the one that applies to your TV from the following list: Single button Three buttons Game-pad style joystick Seven buttons Single button If your TV has this style of panel button, you can perform the following functions: Turn TV on: short press Display the Input List: short press when TV is on Select the next input in the Input List: short press while the TV is showing the Input List Dismiss the Input List without changing inputs: no press Turn TV off: long press Short press = less than two seconds Long press = more than two seconds No press: = no press within two seconds Page 18

24 Three buttons If your TV has this style of panel buttons, you can perform the following functions: Turn TV on: middle button, short or long press Volume up: right button when Input List is not active Volume down: left button when Input List is not active Display Input List: middle button, short press when TV is on Highlight next input in the Input List: right button when Input List is active Highlight previous input in the Input List: left button when Input List is active Select highlighted item in the Input List: middle button, short press, or no press Turn TV off: middle button, long press Short press = less than two seconds Long press = more than two seconds No press: = no press within four seconds Game-pad style joystick If your TV has this style of panel button, you can perform the following functions: Press in: toggle between power ON and Standby Press up or down: increase/decrease the volume Press left or right: switch inputs Seven buttons If your TV has this style of panel buttons, you can perform the following functions. Note that the order of the buttons might vary from model to model. Examine the panel button labels to determine your TV model s layout. Input: Selects among TV inputs. Each press moves down one item. Pressing Channel + or Channel moves the highlight up or down. Pausing for a few moments selects the highlighted input. Channel +: Moves the highlighted item up in the current menu. Channel : Moves the highlighted item down in the current menu. Volume +: Increases the volume. Volume : Decreases the volume. Mute: Mutes and unmutes the sound. Power: Turns the power on and off. Page 19
25 Guided Setup With the preliminaries out of the way, it s time to turn on your TV. As the TV starts for the first time, it leads you through Guided Setup, which configures the TV before you start to use it. During Guided Setup, you ll: Answer a few questions Provide network connection information Get a software update Link your TV to your Roku account. Connect devices such as a DVD player, game console, or cable box. Starting Guided Setup To start Guided Setup, press the POWER button on the remote control to turn on your TV. Note: Guided Setup runs only once, the first time you turn on your TV. If you need to run Guided Setup again, you ll have to perform a factory reset, as explained in Factory reset everything. When you first turn on your TV, it will take a few seconds to get itself ready. You ll notice the following things happening: 1. The status light blinks every time the TV is busy doing something; in this case it s powering up and getting ready for you. 2. The power-on screen appears and the status light blinks slowly for a few more seconds. The power-on screen shows a brand logo while the TV starts up. 3. After a few seconds, Guided Setup starts. Page 20
26 Completing Guided Setup Follow these steps to complete Guided Setup. At this point, you should be seeing the Language screen. 1. Only on models that have the Roku TV Enhanced Remote Control: A few moments after the Let s get started screen appears, Guided Setup starts the pairing process for the Enhanced Remote Control. (You ll know if you have this type of remote because it will have a headphone jack on its left side.) If the remote control does not pair automatically, follow the instructions on the screen to complete the pairing process. Tip: On TVs sold in the United States, if you are blind or visually impaired, you can activate Audio Guide, a text-to-speech screen reader to help you navigate the TV s menus and commands. To enable the Audio Guide, press the button on the remote control four times in rapid succession. Repeat to disable Audio Guide. (The button is located directly below the directional pad on the right side of the Roku remote control.) Note: If you enabled Audio Guide, choosing any language other than English disables it. 2. Press the DOWN button on the remote control to highlight your preferred language, and then press OK or the RIGHT arrow button. Page 21
27 3. Some models have a country selection screen: If you don t see this screen, skip ahead to the next step. If you see this screen, select your country. Note: If you enabled Audio Guide, choosing any country other than United States disables it. 4. Press OK or the RIGHT arrow on the remote control to go to the next screen: Note: Some models show the title Set up environment instead of First things first. 5. Press OK to select Set up for home use. This is the right choice for enjoying your TV at home. It provides energy saving options as well as access to all features of the TV. Note: Store mode configures the TV for retail display and is not recommended for any other use. In store mode, some features of the TV are missing or limited. To switch from one mode to the other, you have to perform a factory reset as explained in Factory reset everything, and then repeat Guided Setup. Page 22
28 Network connection After you select Set up for home use, the TV prompts you to make a network connection. If your TV has both wired and wireless connections, you ll see the following screen. 6. Only models that display the Connect to the Internet screen: Make a selection: Wireless connection Highlight Set up new wireless connection and press OK. The TV prompts you through wireless setup. Skip ahead to the next step for help with the process. Wired connection Highlight Connect to wired network and press OK. The TV immediately attempts to connect to your wired network, your local network, and then the Internet. Go to Step 9 to continue with Guided Setup. Connect to the Internet later If you don t want to connect to the Internet right now, you can skip this step and use the TV to watch broadcasts, play games, and watch DVDs. When you re ready to connect, it s easy. We ll show you how in Benefits of connecting. Note: If you decide not to connect, Guided Setup skips ahead to setting up the devices that you ve connected to your TV. Jump ahead to Connect your devices to complete Guided Setup. 7. On models that have wireless only, or models with both wired and wireless and you ve selected Wireless: The TV scans for the wireless networks within range and displays them in order, with the strongest signals first. In addition to your own wireless signal, the TV might pick up signals from your neighbors. Page 23
29 Press the UP or DOWN arrows to highlight the name of your wireless network, and then press OK to select it. Note: Some networks, such as those often found in dorm rooms, hotels, and other public places, require you to read and agree to terms, enter a code, or provide identifying information before letting you connect to the Internet. If your Roku TV detects that you are connecting to such a network, it prompts you through the connection process using your compatible smartphone or tablet to provide the needed information. For more information, see Using your TV in a hotel or dorm room. Other options Connect to the Internet later If you don t want to connect to the Internet right now, you can skip this step and use the TV to watch broadcasts, play games, and watch DVDs. When you re ready to connect, it s easy. We ll show you how in Benefits of connecting. Note: If you decide not to connect, Guided Setup skips ahead to setting up the devices that you ve connected to your TV. Jump ahead to Connect your devices to continue. Scan again / Scan again to see all networks The name of this option depends on the number of wireless networks within range. o Scan again appears if the list already shows all available wireless networks within range. If you don t see your wireless network name in the list, you might need to adjust the location of your wireless router or the TV, turn on your router, or make other changes. When everything is ready, select Scan again to see if your network name now appears in the list. o Scan again to see all networks appears if there are more wireless networks than the strongest ones it initially listed. If you don t see your wireless network name in the list, this option displays the complete list. If you still Page 24
 address of your Roku TV.")

30 don t see your network name, you might have your router configured to provide wireless service as a private network. Note: Highlighting either of these options displays an informational panel with the unique media access control (MAC) address of your Roku TV. You will need the MAC address if your wireless router is configured to use MAC address filtering. Private network If your wireless network name is hidden, it won t appear in the list. Select Private network to display an on-screen keyboard, and use it to enter your network name. Unless you changed the factory-set network name, you can find the name (also called SSID) on a label on the router. Tip: Wireless networks that are password-protected display a padlock icon adjacent to the name. This icon enables you to know that you are going to be prompted to enter a password after you select that network. 8. Only if you select a password protected wireless network: An on-screen keyboard appears. Use the keyboard to enter the network password. After you submit your wireless network password, the TV displays progress messages as it connects to your wireless network, your local network, and the Internet. Page 25
31 9. Only if your TV cannot get the correct time zone and current time from your network service provider: Use the UP and DOWN arrows to highlight your time zone, and then press OK. Tip: Your TV needs to know the local time zone so that it can correctly display information about the program you are currently watching. If the TV is unable to automatically determine the local time zone, it prompts you to choose your time zone from a list. As soon as the TV is able to connect to the Internet, it downloads and installs its first software update, and then restarts. Tip: Your TV automatically checks for updates periodically. These updates provide new features and improve your overall experience with the TV. After an update, you might notice that some options have moved, and that there are new options or features. This User Guide describes version 7.6. To determine your current Roku TV software version, go to Settings > System > About after you complete Guided Setup. You can download an updated User Guide that matches your Roku TV software version from the Roku TV web site. Page 26

32 Activation After the TV restarts, it displays the Activation screen: 10. Using a compatible computer, tablet, or smartphone with an Internet connection, go to the web address displayed on the screen and enter the code that appears on your screen. After you log in or create your Roku account, the link page suggests that you select some streaming channels. After you confirm your selections, the TV gets an acknowledgement, and then adds your preexisting and newlyselected streaming channels to your Roku TV. This process is automatic and takes a few moments a little longer if you already have a lot of streaming channels to add. Tip: Streaming channels from all Roku streaming devices associated with your account are synchronized periodically, so that Why do I need a Roku Account? You need a Roku account for several reasons. It links you, your Roku TV, and your other Roku streaming devices to the Roku Channel Store and billing service. Streaming content providers know that it s OK to send content you request to your Roku TV. Roku can automatically send updates to your device. You need a Roku account to activate your device and access entertainment across thousands of streaming channels. Roku accounts are free, and while a valid credit card number is not required to create your account, providing your credit card information makes renting and purchasing entertainment from the Roku Channel Store fast and convenient. all of your Roku streaming devices have the same set of streaming channels (subject to compatibility with the device). Page 27

33 Connect your devices Next, Guided Setup helps you set up the external devices that you want to use with it, such as a cable box, Blu-ray player, or game console. 11. Press the OK or RIGHT arrow to proceed: Page 28

34 12. Connect all the devices you plan to use with your TV, turn them all on, and then select Everything is plugged in and turned on. The TV now takes you step by step through each of its inputs and asks what kind of device you have connected. On each input that has a connected and active device, you can see its picture and hear its sound. 13. Press the UP or DOWN arrows to highlight the label you want to associate with the input. If you are not using the input, select Nothing, and the input won t appear on the Home screen. 14. While setting up your devices, rather than using the predefined names and icons, you can set a custom name and icon. To do so, scroll up or down to highlight Set custom name & icon, and then press OK. Follow the instructions on the screen to enter a name and select an icon for the input. See Rename inputs for more information. 15. Repeat the previous step for each input. You re done with Guided Setup. Page 29
35 Note: Some Roku TVs, depending on where you live and other factors, show you an introductory video filled with some great hints and tips. If you re not interested in viewing this video, press on the remote control to exit to the Roku TV Home screen. When you finish Guided Setup, and whenever you press Home screen greets you. on the remote control, the From here, you can explore everything your TV has to offer. Press the arrow buttons to move around, and press OK to select a highlighted item. We ve designed the TV to encourage you to explore, and you can probably figure out most of the capabilities and settings on your own. If you have any questions or difficulties, you can find answers and solutions in this guide. If you find yourself a long way from the Home screen, you can always get back right away by pressing one button:. Page 30

36 Home screen The following illustrations show typical Home screen, which vary depending on location, connected mode, selected theme, number of TV inputs, and streaming channels and apps added. Note: A paid subscription or other payments may be required for some channel content. Channel availability is subject to change and varies by country. Not all content is available in countries or regions where Roku products are sold. Typical connected Home screen, United States Typical connected Home screen, Canada 1. Home menu shows options available to you when you are on the Home screen. 2. Highlighted option press OK on the remote control to select. 3. TV input tiles select an input to watch the connected device. 4. Streaming channel and app tiles select a tile to go to the indicated streaming channel or application. 5. Options hint press on the remote control for options when this symbol is present. Page 31

37 6. Next screen hint press the RIGHT arrow button on the remote control to see the next screen. Typical non-connected Home screen 1. Home menu shows options available to you when you are on the Home screen. 2. Highlighted option press OK on the remote control to select. 3. TV input tiles select an input to watch the connected device. 4. Options hint press on the remote control for options when this symbol is present. 5. Next screen hint press the RIGHT arrow button on the remote control to see the next screen. Personalize your Home screen There are many things you can do to personalize your Home screen and make it just right for you and your family: Only in connected mode: Add streaming channels by using the Streaming Channels menu option to browse the Roku Channel Store. Only in connected mode: Change the screen theme by going to Settings > Themes to find and pick one to suit your mood. Only in connected mode on U.S. models: Hide Movie Store, TV Store, or News as explained in Configure parental controls. Remove a tile by highlighting it and pressing. Then highlight Remove input or Remove channel and press OK. Move a tile by highlighting it and pressing. Then highlight Move input or Move channel and press OK. Use the arrow buttons to move the tile, and then press OK to lock it in its new location. Rename a TV input tile by highlighting it and pressing. Then highlight Rename input and press OK. Highlight a new name in the list, and then press OK to assign that name to the tile. Page 32
38 Rather than using the predefined names and icons, you can set a custom name and icon. To do so, scroll up or down to highlight Set custom name & icon, and then press OK. Follow the instructions on the screen to enter a name and select an icon for the input. Page 33
39 Benefits of connecting Connecting brings out your TV s full potential! Make any night a movie night Thousands of movies to choose from, across all major streaming movie channels like Netflix, Cineplex Store, Crackle, and more *. You ll never run out of something new to watch. Get in the groove Stream endless hours of music from free and subscription-based channels like Spotify and VEVO. With almost instant access to thousands of music artists, your favorite beats are just as close as your remote. Explore your passions In addition to popular streaming channels like YouTube, NHL, Sky News and Cineplex Store, your Roku TV also offers hundreds of streaming channels to fuel your passions including fitness, cooking, religion, outdoors, International programming and much more. Enjoy FREE trials of popular channels Your Roku TV comes loaded with special offers, including free trials (if eligible) from popular streaming channels Netflix, Spotify, DailyBurn Fitness, and many more. REMEMBER THAT YOU MUST CANCEL BEFORE THE FREE TRIAL ENDS TO AVOID SUBSCRIPTION FEES. Take advantage of awesome features Live TV Pause lets you connect a USB drive (not provided) and pause live TV for up to 90 minutes. After pausing, you can play, fast-forward, rewind, and pause again to any point within the rolling 90 minute window. More Ways to Watch on select models, gives you recommendations about the show you are watching on the Antenna TV, HDMI, or AV input, and gives you options to stream the current show from the beginning, the entire season, or the entire series, and recommends * A paid subscription or other payments may be required for some channels. Channel availability is subject to change and varies by country. Not all content is available in countries or regions where Roku products are sold. Page 34
40 other shows with similar themes. It also uses the shows you watch to display ads that are more relevant to you. Mobile Private Listening on the Roku mobile app lets you listen to streaming programs on headphones (not provided) plugged into your mobile device *. Automatic Media Player Launch automatically starts the Roku Media Player when you insert a USB drive (not included) with a recognizable file system (such as FAT16/32, NTFS, HFS+ or EXT2/3). What is streaming? Streaming is viewing or listening to video or audio content that is sent over the Internet, or located on a network-connected media server or on a USB device plugged into the TV s USB port. With streaming, you can buy or rent most programs on demand, when it s convenient for you. When streaming, you can play, pause, rewind, and fast forward most of what you are watching. You can also replay the last few seconds again, or turn on closed captions. Tip: Some content cannot be paused or skipped. For example, if you are viewing live programming or a program that is supported by ads, you generally are not allowed to skip the ads. Your Roku TV lets you choose from thousands of streaming channels that offer a huge selection of entertainment: Thousands of movies and TV episodes Unlimited music, live and on-demand Tons of live and on-demand sports Commercial-free kids programming International programming in 22 languages 24x7 news and in-depth news commentary Many streaming channels are free. Some streaming channels, like Cineplex and Amazon Video, let you purchase or rent the latest movie releases or popular TV series. Some channels such as Netflix or Spotify charge a monthly subscription fee and others are available at no additional cost if you subscribe to a companion service through your cable or satellite provider. For example, HBO subscribers with participating broadcast TV provider accounts can add the HBO Go channel and watch it at no additional cost. * Available only on Roku mobile app for IOS and Android. This feature works with streaming content only. It is not available when watching Antenna TV or HDMI inputs. Page 35
41 cable or satellite provider. For example, HBO subscribers with participating broadcast TV provider accounts can add the HBO Go channel and watch it at no additional cost. If you have an existing subscription to a service like Netflix or Spotify, you can just sign in with your existing user name and password. To play streaming content that is available on the Internet, you add streaming channels to your Home screen. To add a streaming channel to your Home screen, use the Streaming Channels option on the Home screen menu to go to the Roku Channel Store, and then select the streaming channel you want to add. The streaming channel is then added to your Home screen, and you can watch it at any time. For more information on using the Roku Channel Store feature, see Using the Roku Channel Store. Note: A paid subscription or other payments may be required for some channels. Channel availability is subject to change and varies by country. Not all content is available in countries or regions where Roku products are sold. What if I didn t connect my TV? What if you went through Guided Setup and chose Connect to the Internet later? No worries. Your Roku TV makes it easy to connect whenever you want. As you move around the Home screen, you ll see several places where you can start the connection process. For example: Now and then you ll see a message appear on the panel to the right of the Home screen offering a Connect Now option. Simply highlight and select the Connect Now option to get started. Use the Connect and activate now option in the Settings menu. From the Home screen menu, select Settings, then Network, and then Connect and activate now. If you want to start over from the beginning, use the Settings menu to do a Factory reset, and then go through Guided Setup again. This time, choose your home network when prompted. Page 36
42 Setting up Antenna TV In addition to the other entertainment possibilities of your Roku TV, you may also want to watch broadcast channels. On your Roku TV, you watch broadcast TV in much the same way you watch other entertainment choices. You select a tile in this case, the Antenna TV tile from the Home screen. The first time you select the Antenna TV tile, you have to set up the TV tuner. Setting up the TV tuner scans for active channels and adds them to your broadcast TV channel list. Why do I have to set up the TV tuner? Not everyone needs to use the TV tuner. For example, you might have a set top box provided by a cable or satellite company that receives all of your channels. Most of these set top boxes use an HDMI connection. More and more people are watching only streaming TV and do not have a TV antenna or cable/satellite service. If you don t need the TV tuner, you can bypass setting it up and instead remove it from the Home screen as explained in Remove unwanted tiles. When you set up Antenna TV, the TV scans the signals on its antenna input for channels with a good signal, and adds those to the channel list, skipping dead channels and channels with a very weak signal. The TV lets you add two analog channels, even if they have no signal, for the purpose of using an older set top box, VCR, or game console that can only output a signal on analog channel 3 or 4. Typically, you ll only need one of these channels, but both are provided to make setup simpler. You can hide the one you don t want as explained in Edit broadcast TV channel lineup. Page 37
43 How do I set up the TV tuner? 1. Make sure your antenna (not provided) or TV cable is connected to the TV s ANT/CABLE input. 2. On the Home screen, select the Antenna TV tile. 3. Read the simple on-screen instructions, and then select Start finding channels. 4. If prompted, select your time zone. You ll only need to do this if the TV can t figure out your time zone from your Internet connection. Why does the TV need my time zone? The TV needs to know your time zone so that it can correctly display time information about the program you are currently watching. 5. When prompted, select whether to add analog channels 3 and 4 (to enable you to connect older set top boxes, VCRs, or game consoles). Page 38
44 6. Wait while your TV scans for broadcast (antenna TV) stations and then cable TV channels. Scanning for channels can take several minutes. Tip: If you get cable TV service through a set-top box (and don t have your cable connected directly TV s ANT input), you can save time by skipping the cable TV portion of the channel scan. Page 39

45 7. When the channel scans finish, the TV shows the number of channels it added. 8. Only in connected mode, you have the option of setting up Live TV Pause. Pausing Live TV explains how to set up and use this feature. If you don t want to set up Live TV Pause, or if this option is not available to you, select Done to start watching Live TV. Tip: Repeat the channel scan from time to time to make sure you are receiving all of the latest channels. Broadcasters add and remove channels, move channels to different parts of the spectrum, and change the power levels of their channels periodically. Your antenna reception and picture quality depend on the position of your antenna and on your location relative to the antennas of broadcasters in your area. Note: You ll have to repeat the channel scan if you remove and re-add the Antenna TV tile from the Home screen or perform a factory reset. To repeat the channel scan, go to Settings > TV inputs > Antenna TV > Scan again for channels > Start finding channels. Now, you re ready to watch broadcast TV! While you re watching, try the following: Press the UP and DOWN arrows to change channels. Press the LEFT arrow to display the channel list and then use the UP and DOWN arrows to select a channel to watch. Or press REWIND or FAST FORWARD to jump through the channel list a page at a time. Surf favorite channels. Press OK to display information about the current program. Press to switch to the previously tuned channel. Press to see options for picture and sound settings. Only on models that have the Enhanced Remote Control: Press to start Voice Search, and then say the name of a movie, TV show, actor, or director. The TV shows you the result of your search across top channels and lists the streaming channels that offer the requested content. Page 40
46 Note: If or are not available on your remote control, you can use these features in the Roku mobile app. For more information, see Getting and using the Roku mobile app. Page 41
47 Using your TV This section provides information on using the day-to-day features of your TV. Status light Your TV has a single status light on the front panel. It goes on and off and blinks in different ways depending on the status of the TV, as shown in the following table: TV condition Status indicator Meaning On (screen is active) Screensaver (screen is active) Off Off Screen is communicating that TV is on. Screen is communicating that TV is on. Off (no power) Off TV is not connected to power. Off (standby) Starting up from off state On (receiving update from USB) Remote control command received Network connection lost Powering down to standby mode On Slow pulsing blink until startup completes Slow pulsing blink until update completes Dims on/off once Two short blinks, pause, repeat Slow pulsing blink until the TV reaches standby. TV is connected to power and is ready to use. TV is doing something. TV is doing something. TV has received your command. TV was connected and paired with a Roku account and now has no network connection. TV is doing something. Page 42
48 Standby mode energy savings When you turn off your TV, it remains in a higher power mode for a few minutes, after which it goes into a very low power standby mode. If you turn on the TV again before it has entered the very low power mode, it turns on immediately. After the TV goes into the lower power standby mode, it takes a few seconds longer to start up. Watching broadcast TV channels To watch broadcast TV, select the Antenna TV tile in the Home screen. Your TV remembers the last channel you watched and starts with that channel playing. Changing channels To change channels, you can do any of the following: Press the UP arrow to change to the next higher channel. Press the DOWN arrow to change to the next lower channel. Press the LEFT arrow to display the channel list, and then press the UP and DOWN arrows to move the highlight through the list one channel at a time. Or press REWIND and FAST FORWARD to move the highlight through the list one page at a time. When you ve highlighted the channel you want to watch, press OK. (If you decide you don t want to change channels, press the BACK button). Press to jump to the previous channel. Press again to return to the channel you were watching before you pressed. Note: If is not available on your remote control, you can use this feature in the Roku mobile app. For more information, see Getting and using the Roku mobile app. Page 43
49 Surfing favorite channels You can quickly change from surfing among all channels or only your favorite channels. First, you have to mark one or more channels as your favorites. Mark your favorite channels You can make any channel a favorite whenever you re watching the Antenna TV input. 1. Press the LEFT arrow to display the channel list. Notice that the words All channels appear at the top of the channel list. 2. Scroll up or down to highlight a channel that you want to make a favorite. 3. Press the button. At this point, you ll see two options: Add to favorites Back 4. With Add to favorites highlighted, press OK. A symbol appears adjacent to the channel to indicate that it is now a favorite. 5. Repeat these steps to add more favorite channels. Note: Repeating the tuner channel scan erases your favorite channels. Surf only your favorite channels After you ve marked one or more channels as favorites, you can switch to your favorite channels whenever you re watching the Antenna TV input. 1. Press the LEFT arrow to display the channel list. 2. Press the LEFT or RIGHT arrow once to switch to Favorites. Notice that the word Favorites appears at the top of the channel list. 3. Highlight a channel and press OK to select one of the channels in the Favorites channel list, or wait a few moments until the channel list disappears. 4. Press the UP or DOWN arrow to change to the previous or next favorite channel. Each channel you select in this way is a favorite channel. Your channel surfing is limited to favorite channels only. Your favorite channel list remains in effect even if you turn off or unplug your TV, until you switch back to all channels. Note that when you press OK to view the program information banner, a appears below the channel number. symbol Page 44
50 Surf all channels again You can switch back to all channels whenever you re watching the Antenna TV input. 1. Press the LEFT arrow to display the channel list. 2. Press the LEFT or RIGHT arrow once to switch to All channels. Notice that the words All channels appear at the top of the channel list. 3. Highlight a channel and press OK to select one of the channels in the All channels list, or wait a few moments until the channel list disappears. 4. Press the UP or DOWN button on your remote to change to the previous or next channel among all your available channels. You can surf among all channels in your channel list. Note that even when All channels is selected, if you re watching one of your favorite channels when you press OK to view the program information banner, a symbol appears below the channel number. Remove a channel from your favorites You can remove a channel from your favorites whenever you re watching the Antenna TV input. 1. Press the LEFT arrow to display either channel list All channels or Favorites. 2. Scroll up or down to highlight a favorite channel that you want to remove from your favorites. 3. Press the button on your remote. At this point, you ll see two options: Remove from favorites Back 4. With Remove from favorites highlighted, press OK. The symbol adjacent to the channel disappears. 5. Repeat these steps to remove other channels from Favorites. Page 45

51 Viewing program information To view information about the current program, press OK. The TV displays a banner at the bottom of the screen with as much information as is available in the program data stream, as shown in the following example. Program information banner Program information, subject to availability within the broadcast information, includes: Channel number Channel call sign Favorite channel icon Signal strength Program title Start time, end time, and graph of program length showing current position Content rating Video resolution (480i, 480p, 720p, 1080i, 1080p, 4K) Frame rate (24Hz, 30Hz, 60Hz for television sources, 60Hz, 70Hz, 72Hz, 75Hz for computer sources) Audio format (Mono, Stereo, Dolby Audio logo) Audio features (SAP/MTS) Only on select 4K models: HDR or Dolby Vision * logo (HDMI and streaming sources) Closed captioning (CC) Current time Program description. If the entire description does not fit, press OK to expand the size of the banner and see the entire description. Tip: If you ve set up Live TV Pause and you re watching broadcast TV, you ll also see a progress bar showing the current playback position within the rolling 90-minute pause time. For more information, see Pausing Live TV. * The Dolby Vision logo appears only on Dolby Vision -certified models when displaying Dolby Vision content. Page 46
52 Adjusting settings Press to display the Options menu. Press the UP and DOWN arrows to highlight an option, and then press the LEFT and RIGHT arrows to change the setting. Adjusting TV settings explains each of the settings in detail. Pausing Live TV Using Live TV Pause, your Roku TV gives you the ability to pause, play, fast forward, and rewind digital broadcast TV. You can pause live TV for up to 90 minutes. Requirements To use this feature, you need to: 1. Connect your TV to the Internet. If you didn t connect during Guided Setup, see What if I didn t connect my TV?. 2. Provide your own dedicated USB drive with the following minimum specifications. 16 GB 15 Mbps read/write speed USB 2.0 compliant A USB flash drive (thumb drive) meeting the minimum requirements is highly recommended. However, using a larger drive does not extend the 90 minute pause time. IMPORTANT: All existing content on your USB drive is erased when you enable this feature. 3. Enable Live TV Pause. Enabling Live TV Pause You can enable Live TV Pause in several ways: Go to Settings > TV inputs > Antenna TV > Live TV Pause, and then select Enable. After completing a channel scan, select Set up Live TV Pause from the available options. Press the Play/Pause button on the Roku remote while watching a digital broadcast TV channel. Highlight the Antenna TV tile on the Home screen, press on the remote control, and then select Enable Live TV Pause. Page 47

53 After starting Live TV Pause setup in any of these ways, the TV prompts you through the steps needed to enable this feature. Setup takes only a few moments. Note: Use of a USB hub is not supported. Using Live TV Pause If you have used the Roku remote control to watch streaming channels, using Live TV Pause should be very familiar to you. While watching a digital broadcast TV channel, press the PLAY/PAUSE button to pause or play the content. After the TV program has been paused for 90 minutes, the TV resumes playing. After watching a channel for a while, press REWIND to jump back up to the point where you first started watching the channel, up to 90 minutes. After pausing or rewinding, press FAST FORWARD to jump ahead up to the point where you are once again watching the live TV program. Press FAST FORWARD or REWIND repeatedly to cycle through 1x, 2x, and 3x skip speeds. Press the INSTANT REPLAY button to play back the last several seconds of the program. When the program is paused, press the LEFT and RIGHT arrow keys to move forward and backward through the program approximately 10 seconds per press. Small frames appear across the screen to identify your location in the program. Note: If is not available on your remote control, you can use this feature in the Roku mobile app. For more information, see Getting and using the Roku mobile app. Whenever you use any of the Live TV Pause features, the TV momentarily displays a progress bar: 1. Time at current playback position. Page 48
54 2. Current playback position 3. Extent of pause time, representing the amount of time this channel has been buffered, up to 90 minutes minute mark, representing the maximum extent of pause time. 5. Current time. The progress bar also displays tick marks at each half hour point, to help you locate the boundaries where one show ends and a new one begins. Notes about Live TV Pause You can use Live TV Pause only with digital broadcast and cable channels received through the TV s Antenna input (ATSC and Clear QAM channels). Changing channels erases and restarts the Live TV Pause buffer. Returning to the Home screen, selecting another input, or turning off the TV erases and resets the Live TV Pause buffer. Removing the USB drive erases the Live TV Pause buffer. More Ways to Watch (U.S. only) More Ways to Watch is available only on TV sold in the United States. To determine whether your TV has this feature, from the Home screen, press the UP or DOWN arrow to highlight Settings, and then examine the Settings menu for a More Ways to Watch option. More Ways to Watch gives you recommendations about the shows you re watching on the Antenna TV, HDMI, or AV input. Before you can get these recommendations, you must opt into More Ways to Watch. Not every show will provide recommendations for more ways to watch. For details about what you ll see when a recommendation appears, see Using More Ways to Watch. When you get a recommendation, you ll see a notification at the bottom of your TV screen, and depending on the recommendation, you ll see one or more of the following options: Watch from beginning Recommends streaming channels where you can watch the current show from the beginning. More episodes Recommends streaming channels where you can watch more episodes or entire seasons of the current show. More like this Recommends other shows on streaming channels that have similar characteristics to the show you are watching. Together with these features, More Ways to Watch makes the ads more relevant to you based on the shows you watch. Page 49

55 Opting in to More Ways to Watch More Ways to Watch uses Automatic Content Recognition (ACR) technology to collect information about what you watch through your Antenna TV, or on devices like media players and cable boxes connected to the HDMI or AV inputs. Opting in to More Ways to Watch means that you give permission to analyze the programs you watch for the purpose of making recommendations, as well showing ads that are more relevant to you. More Ways to Watch is disabled when you first set up your TV or when your TV updates its software to include this feature. Then, the first time you select Antenna TV, an HDMI input, or AV input, your TV offers to enable More Ways to Watch. If you decide to enable it at this time, you re all set to enjoy its recommendations. If you decide not to enable More Ways to Watch at this first opportunity, you can enable it later. Or, if you decide you d rather not use the feature after you ve enabled it, you can disable it, but be aware that previously collected information is retained and not deleted. Page 50

56 Disable More Ways to Watch If you decided you want to disable More Ways to Watch, follow these steps: 1. From the Home screen, go to Settings > More Ways to Watch. 2. Navigate to the right to highlight Enable More Ways to Watch. 3. Press OK on the remote control to clear the check box. Disable Auto Notifications If you want to keep More Ways to Watch enabled, but you do not want to see notifications popping up while you are watching shows, you can disable notifications. To do so, follow these steps: 1. From the Home screen, go to Settings > More Ways to Watch. 2. Navigate to the right to highlight Enable More Ways to Watch. 3. Press DOWN on the remote control to highlight Enable auto notifications. 4. Press OK on the remote control to clear the check box. Using More Ways to Watch Now that you ve opted into More Ways to Watch, you are ready to start enjoying its capabilities. As you use this feature, be aware that you ll only see suggestions on your TV under the following circumstances: You ve enabled More Ways to Watch on your TV. The program you re watching contains the information needed to identify it. Note that some programs, such as the daily news, typically do not activate More Ways to Watch. At least one participating streaming channel offers the movie or TV show you are watching, or other episodes, or more shows like the one you are watching. If all of these conditions are met, then a few seconds after you start watching a program you can view the suggestions. A few more tips: If you ve also enabled auto notifications, you ll see a More Ways to Watch notification at the bottom of the screen for a few seconds. This is a handy reminder that your TV is ready to show you More Ways to Watch. Page 51


57 If you miss the notification, you can check the program information banner that appears when you press OK while watching a TV channel, HDMI, or AV source. If your TV has suggestions, you ll see the More Ways to Watch notification in the banner. Regardless of which More Ways to Watch prompt appears, press the RIGHT arrow to see available options, if any. The options you ll see depend on the type of show you re watching and the available ways there are to watch, so you might see any or all of the following: Watch from beginning Displays streaming channels on which the same TV show or movie is available. Generally, this option does not appear on first run programs, because streaming content is not available until a later date. More episodes Displays streaming channels where you can find other episodes of the TV show you are watching. Does not apply to movies. More like this Other TV shows or movies with a similar theme. Press the DOWN arrow to select an option, and then press the RIGHT arrow to select the channel you want to use to watch from the beginning or watch more episodes, or the other TV show or movie with a similar theme. In each case, assuming you ve already added the channel and signed in as needed, More Ways to Watch takes you directly to the place in within the streaming channel where you can select and watch the program. Keep these points in mind as you use More Ways to Watch: Streaming channels you ve already installed appear first in the list of suggestions. If more than a few streaming channels provide More Ways to Watch, you ll see a More option. Select this option to see a scrolling list of available channels. When you select a streaming channel, you leave the program you are currently watching. Page 52

58 If you ve used the Live TV Pause feature to pause the program, your paused program buffer is deleted. In other words, you cannot return to a broadcast channel and resume watching where you left off. If there are more providers than will fit in the initial More Ways to Watch screen, select See all providers to see the full list: Switching TV inputs Switch to a TV input to access the device connected to that input, for example, a Bluray player. Switching inputs is as simple as highlighting the input s tile in the Home screen, and pressing OK. The video signal on the input, if any, appears on the screen. Tip: To learn how to add, remove, rename, and rearrange the tiles on your Home screen, see Customizing your TV. Auto-detecting devices Your TV automatically detects when you connect a new device to an HDMI input and turn on its power. The input is automatically added to the Home screen if it isn t already present. Page 53
59 Adjusting audio/video settings While watching video content on any input, press to display the Options menu. Press the UP and DOWN arrows to highlight an option, and then press the LEFT and RIGHT arrows to change the setting. To learn about each of the audio and video settings, see Adjusting TV settings. Playing content from USB storage devices Only in connected mode, your Home screen has the Roku Media Player tile. Otherwise, the Home screen has the USB Media Player tile. You can play personal music, video, and photo files from a personal USB flash drive or hard disk connected to the TV s USB port. To use this feature, first make sure your media files are compatible with the Roku/USB Media Player. To see the latest list of supported formats, view Help in the Media Player *. The Roku/USB Media Player displays supported file types only, and hides file types it knows it cannot play. For more information about playing back your personal videos, music, and photos, go to the following link on the Roku web site: go.roku.com/rokumediaplayer Auto player launch Only in connected mode, you can set your TV to automatically open the Roku Media Player when you connect a USB drive with a recognizable file system (such as FAT16/32, NTFS, HFS+ or EXT2/3). To configure this setting, from the Home screen, navigate to Settings > System > USB media. At this point, the following options are available: Auto-launch Choose Prompt, On, or Off, as desired. o Prompt (default) Display a prompt each time a recognized USB drive is connected. The prompt provides options to launch the Roku Media Player as well as to change future auto-play behavior. o On Always launch the Roku Media Player whenever you connect a recognized USB drive. o Off Never launch the Roku Media Player automatically. Launch channel Choose the app you want to use to play back media files. * There are many variants of each supported media format. Some variants may not play at all or may have issues or inconsistencies during playback. Page 54
60 Playing content from local network media servers If you have connected your TV to a network, it can play personal video, music, and photo files from a media server on your local network. Media servers include personal computers running media server software such as Plex or Windows Media Player, network file storage systems that have built-in media server software, and other devices that implement the specifications of the Digital Living Network Alliance. Some servers do not fully implement the DLNA specification but are UPNP (Universal Plug and Play) compatible. The Roku Media Player will connect to them as well. Some media servers can convert files into Roku compatible formats. DRM-protected content is not supported. Using your TV in a hotel or dorm room Hotels, school dorms, conference facilities, and similar locations with public wireless Internet access often require you to interact with a web page to authenticate your access. These restricted public networks are commonly known as captive portal networks. When you select a network of this type, the TV automatically detects that additional information is needed and prompts you through using another wireless device to supply the requested information. Tips: Using your Roku TV on a hotel or dorm room network requires wireless availability and use of your network-connected smartphone, tablet, or computer to authenticate access to your wireless access point. Your TV must already be running software version 7.0 or later. You can find the version number by navigating from the Home screen to Settings > System > About. If it is running an earlier software version, you must use a non-restricted network to link and activate the TV, and then update the software to version 7.0. Be sure to bring your Roku TV remote control, because the Remote feature of the Roku mobile app may not work when connected to a hotel or dorm room network. Content might be limited or unavailable if you try to connect outside your home country due to geo-filtering. Page 55

61 To connect your TV to a restricted network: 1. Either during Guided Setup or after using the Settings > Network menu to set up a new connection, the TV automatically detects that you are connecting to a restricted network and displays the following prompt: Tip: Your TV can connect to a restricted network only if Device connect is enabled in Settings > System > Advanced system settings. (Device connect is enabled by default, but if you have disabled it, the TV cannot complete the connection.) Note: Device connect is not present if the TV is in non-connected mode. 2. After selecting the correct network, highlight I am at a hotel or college dorm, and then press OK. The TV prompts you to use your smartphone, tablet, or laptop to complete the connection. 3. Use a phone, tablet, or wireless-enabled computer to detect wireless networks. In most cases, you can simply open the device s Wi-Fi Settings or Network Settings screen to start scanning. Page 56
62 Note: The phone, tablet, or computer must be on the same wireless network to which you are connecting the TV. 4. Connect to the network named on your TV screen. The actual network name varies. Note: The previous step connects your smartphone, tablet, or computer directly to the TV. No connection charges apply and the connection does not impact your device s data plan. 5. The wireless connection process prompts you for a password. Enter the password as shown on the TV screen. The actual password varies. 6. Start the web browser on your smartphone, tablet, or computer. When you attempt to open any web page, the restricted connection will prompt you for whatever information it needs. In most cases, you must agree to terms and conditions, provide identifying information, or enter a password, PIN, or room number to proceed. The information requested depends on the organization that controls the wireless connection. 7. After you enter the requested information, the TV automatically proceeds to complete its connection and resumes normal operation. 8. If the TV prompts you to link to your Roku account, use your smartphone, tablet, or computer to complete the pairing operation and activate your Roku TV. Enhanced Remote Control (select models only) Only on TVs with the Roku Enhanced Remote Control: The following topics explain how to get the most out of your TV when it includes an Enhanced Remote Control. Finding your Enhanced Remote Control When your remote control has found its way down into the sofa cushions or your dog has hidden it in the corner, you can use the Find Remote feature to find out where it s hiding. This feature has a limited range, and is designed to find your remote somewhere in the same room as the TV. Select Find Remote on the Settings > Remote menu to see brief instructions on how to activate the Find Remote feature. Note, however, that selecting this option doesn t actually activate the feature. Here are the complete instructions: Page 57

63 Activate Find Remote If your TV has a game controller-style control on the back right side of the TV, press the Left or Right pad to open the Inputs menu, and then press the Right pad once to scroll down to Find Remote. If your TV has a column of labeled panel buttons on the left or right edge of the TV, press the INPUT button to open the Inputs menu, and then press the INPUT button again until you highlight Find Remote. A moment or two after highlighting Find Remote, the remote control starts emitting your selected Find Remote sound to let you know where it is hiding. The sound automatically stops after a minute, or after you find the remote and press any button. Changing and previewing the Enhanced Remote Control finder sound If you prefer to customize the sound your remote control makes when you use the Find Remote feature, navigate to Settings > Remote > Change remote finder sound. Select the sound you want to use from the available settings. To preview the sound you have chosen, select Preview remote finder sound, and then hold down the OK button on the remote control to play the sound. When you release the OK button, the sound will stop. Note: When you preview the remote finder sound, the sound comes from the TV speakers,not from the remote control. To hear the sound you have chosen through the remote control, activate the Remote Finder as explained in Finding your remote control. Page 58
64 Re-pairing your Enhanced Remote Control The Enhanced Remote Control operates with wireless radio-frequency signals and must be paired with your TV. You paired it initially when you set up your TV during Guided Setup. But if your remote control loses its pairing with the TV for some reason, you can easily re-pair it using either of the following methods: 1. Remove the battery cover from the back of the remote control. 2. Press and hold down the pairing button for 3 seconds or longer, until the adjacent LED lights up. 3. Do one of the following: Turn on the TV using the power button on the TV side or back panel. Pairing occurs as the TV starts up. Use the Roku mobile app or a different remote control to navigate to Settings > Remote > Pair remote. Tip: If the remote fails to pair with the TV, try installing new batteries. Also, it s helpful to hold the remote within two to three feet of the TV to ensure successful pairing. Checking the Enhanced Remote Control battery level You can check the condition of the batteries in your Enhanced Remote Control at any time by navigating to Settings > Remote control > Battery level. The resulting screen displays not only the battery level, but also other information that can be useful when you need technical support with your remote control. Tip: When you first turn on the TV, an battery level indicator appears in the upper right corner of the screen for a few seconds. Page 59
65 Adjusting TV settings You can adjust most picture and sound settings while you are watching a program by pressing to open the Options menu. There are some additional picture and sound settings in the Settings menu. In most cases, the changes you make apply only to the input you are using. Antenna TV, the separate HDMI inputs, and the AV input each have their own settings that the TV remembers when you return to that input. The TV also separately remembers the settings you specify while viewing streaming content. Settings menu Use the Settings menu to adjust overall TV settings. Press and then navigate to Settings > TV picture settings. to go to the Home screen, You can adjust the following overall TV picture settings from the Settings screen: TV brightness Provide a better viewing experience in darker or brighter rooms. Increases or decreases the TV s general brightness across all TV inputs. Note: This setting is identical to the TV brightness setting you can access in the Options menu while watching a program. HDR notification On select models only: Controls whether the TV displays a notification in the upper right corner of the screen for a few seconds when HDR or Dolby Vision content begins to play. o On The TV displays a notification when HDR or Dolby Vision content begins to play. o Off The TV does not display a notification when HDR or Dolby Vision content begins to play. Note: This setting does not affect the HDR or Dolby Vision notification that always appears in the program information banner. Press OK while watching a show to open the program information banner. Page 60
66 120 Hz On select models only: Enables a higher picture refresh rate. o On the TV uses a higher refresh rate, which produces less motion blur. o Off the TV uses a 60Hz refresh rate. Note: The 120 Hz setting is also available in each input s Options menu, but is not an input-specific setting. The current setting of the control applies to all inputs. Settings per input Lists each TV input. Select an input, and then press to display the Options menu where you can adjust the input s settings while watching a live picture and listening to the sound from that input. Tip: You don t have to go to the Settings menu first you can display an input s Options menu and adjust its settings whenever you are watching the input by pressing. Options menu The Options menu for each TV input provides many settings for controlling the appearance of the picture and the quality of the audio. To view the Options menu, press whenever you are watching a TV input or streaming a video. The Options menu is a panel that appears over the left side of the screen: Typical Options menu To adjust the settings on the Options menu, press the UP or DOWN arrow to highlight a setting, and then press the LEFT or RIGHT arrow to change the setting. You ll see the changes you make right away in picture appearance or audio quality. Tip: When you highlight a setting, the header text explains the effect of its current value. When you begin to adjust a setting, the other options are hidden so you can see more of the screen. Even though the other settings are hidden, you can move the highlight up or Page 61
67 down to adjust the other settings. As soon as you press the UP or DOWN arrow, the other settings become visible again. Options menu settings TV brightness Affects the overall brightness of the picture. This setting applies across the entire TV; that is, to all TV inputs and is identical to the TV brightness setting under Settings > TV picture settings. Picture mode Provides picture presets for various viewing preferences. This setting applies to the currently-selected input only. Picture size Adjusts the aspect ratio of the picture, enabling you to view a picture in its original format, or zoom or stretch it to fill the screen. The Auto setting has been found to produce the best picture in most cases. Audio effect Adjusts the sound quality output from the TV speakers. This setting applies across the entire TV; that is, to all TV inputs. It does not affect the sound quality for headphones, HDMI (ARC), or SPDIF (TOSLINK) connectors. Sleep timer Sets a timer that turns off the TV after the specific amount of time. This setting remains in effect even if you stop watching the current input. Closed captioning Controls when you see captions. This setting is only offered for Antenna TV, the AV input, and streaming videos. Any set value remains in effect across only these inputs. o Antenna TV Set captions to off, always on, on only when the TV sound is muted, or on only during instant replay (when Live TV Pause has been enabled). o AV input Set captions to off, always on, or on only when the TV sound is muted. o Streaming video channel For streaming content that provides closed captions, set captions to off, always on, on only when the TV sound is muted, or on only during instant replay (for streaming content that supports instant replay). Note that some streaming channels have other methods for turning captions on and off. In these cases, the Closed captioning option does not appear on the Options menu. Note: If is not available on your remote control, you can use this feature in the Roku mobile app. For more information, see Getting and using the Roku mobile app. Captioning track On non-u.s. models only: Selects which caption track to display when Closed Captioning is on. This setting remains in effect on all inputs that provide captions. Note: On U.S. models, you can find the Captioning track setting under Accessibility. Page 62
68 SAP Selects whether to play a secondary audio program or multichannel television sound, and which choice to play. This setting applies only to Antenna TV on digital channels. 120 Hz Only on select models: Enables a higher picture refresh rate that reduces motion blur. If Off, refresh rate is 60 Hz. This setting applies to all TV inputs. Note: Only on select models: The 120 Hz setting is also available in the main Settings menu on the TV picture settings screen. The current setting of the control is identical in both places. Advanced audio settings Only on select models: Shows the Advanced audio settings menu. Advanced picture settings Shows the Advanced picture settings menu. Tip: To dismiss the Options menu, just wait a few seconds without pressing any buttons. Or press again to dismiss the menu immediately. Page 63
69 Accessibility (U.S. only) The Accessibility menu is present only on TVs sold in the United States. The settings on the Accessibility menu enable you to change the TV s accessibility settings without leaving the program you are watching. These settings are also available on the Home screen under Settings > Accessibility. To enable the Audio Guide, press the button on the remote control four times in rapid succession. Repeat to disable the Audio Guide. (The button is located directly below the directional pad on the right side of the Roku remote control.) Accessibility menu settings Audio Guide Turn the Audio Guide on or off. The Audio Guide is a text-tospeech screen reader that helps blind and low-vision users navigate the Roku user interface and on screen menus. When enabled, the Audio Guide reads out text, menus, and other on-screen items. Tip: If Shortcut is enabled, you can enable or disable the Audio Guide by pressing the Option button four times in quick succession. Speech rate Choose the speed at which the TV speaks Audio Guide prompts. Volume Set the volume of the Audio Guide in relation to the main TV volume. Shortcut Enable or disable the shortcut feature. When disabled, pressing the Option button four times in quick succession does not enable or disable the Audio Guide. Closed captioning Controls when you see captions. This setting is only offered for Antenna TV, the AV input, and streaming videos. Any set value remains in effect across only these inputs. Page 64
70 o Antenna TV Set captions to off, always on, on only when the TV sound is muted, or on only during instant replay (when Live TV Pause has been enabled). o AV input Set captions to off, always on, or on only when the TV sound is muted. o Streaming video channel For streaming content that provides closed captions, set captions to off, always on, on only when the TV sound is muted, or on only during instant replay (for streaming content that supports instant replay). Note that some streaming channels have other methods for turning captions on and off. In these cases, the Closed captioning option does not appear on the Options menu. Note: If is not available on your remote control, you can use this feature in the Roku mobile app. For more information, see Getting and using the Roku mobile app. Captioning track Selects which caption track to display when Closed Captioning is on. This setting remains in effect on all inputs that provide captions. SAP Selects whether to play a secondary audio program or multichannel television sound, and which choice to play. This setting applies only to Antenna TV on digital channels. Video description through Secondary Audio Program (SAP) Video description is audio descriptions of the action in a program, to help individuals who are blind or visually impaired enjoy the program. You enable video description by selecting one of the Secondary Audio Program (SAP) options. To hear video description narrations in programs that have them, turn on SAP. If there are multiple SAP options for a channel, such as Spanish and French, try each one to determine which setting carries the video description track. Note: Broadcasters provide video descriptions only on a small number of programs. If you are unable to hear video descriptions after following these instructions, the program you are viewing does not provide them. For more details about video description, go to Page 65

71 Advanced audio settings (select models only) The Advanced audio settings menu for each TV input provides settings for fine tuning sound quality. All of the settings in this menu apply only to the currently-selected input. To use the Advanced sound settings menu, first press to display the Options menu. Then select Advanced sound settings. Advanced audio settings menu options Audio effect Select from among various preset audio modes to improve speech, make music sound its best, boost bass or treble, or simulate a theater. Use Reset audio settings, described below, to return the input s current settings to their original values. Virtual surround When on, virtual surround simulates surround sound from multiple speakers. Sometimes, the effect interferes with dialog clarity. Use the Dialog clarity option to compensate. Dialog clarity Available only when Virtual surround is On. Choose among Low, Medium, and High settings to improve the clarity of dialog when you are using the virtual surround feature. Reset audio settings Returns Virtual surround and Dialog clarity to their default settings for the selected Audio effect. Page 66
72 Advanced picture settings The Advanced picture settings menu for each TV input provides settings for fine tuning the appearance of the picture. All of the settings in this menu apply only to the currentlyselected input. To use the Advanced picture settings menu, first press to display the Options menu. Then select Advanced picture settings. Typical Advanced picture settings menu Advanced picture settings menu options Picture mode Provides picture presets for various viewing preferences. This setting duplicates the one on the Options menu. When you change the Picture mode, other picture settings adjust accordingly. For example, setting the Picture mode to Vivid sets Brightness, Contrast, Sharpness, and other values to produce a very vibrant picture. Setting Picture mode to Movie changes the settings to produce a picture suitable for enjoying movies in a darkened room. If you make changes to the individual picture settings for example, Contrast, or Sharpness these settings are saved for the current input and the current picture mode. In this way, you can set HDMI 1 input s Movie picture mode to use different settings than the HDMI 2 input s Movie picture mode and Antenna TV s Movie picture mode. Use Reset picture settings, described below, to return the input s selected picture mode to its original values. Local dimming or Local contrast Only on select models: Sets the amount of dimming multiple local areas of the screen s backlight intensity. This setting can make dark areas darker without affecting the brightness of light areas. This option is disabled when Game mode is enabled. Page 67
73 Dynamic contrast Only on select models: Automatically adjusts the backlight level to achieve the optimum contrast and prevent excessive differences between light and dark areas of the screen. This option is disabled when Local dimming/local contrast is enabled. Backlight - Adjusts the overall light intensity of the screen. On some models, this option is disabled when Dynamic contrast is enabled. Brightness Adjusts the dark level of the black areas of the picture. Contrast Adjusts the white level of the light areas of the picture. Sharpness Adjusts the sharpness of the edges of objects in the picture. Color Adjusts the intensity of colors in the picture. A setting of 0 removes all color and displays a black and white picture. Tint Adjusts the color balance from green to red to obtain accurate colors in the picture. Color temperature Adjusts the overall colors in the picture from Normal to slightly more bluish (Cool) to slightly more reddish (Warm). Action smoothing Only on select models: Adjusts the amount of action smoothing applied to the video signal. A higher setting results in more smoothing, but can cause undesirable picture artifacts in certain types of content. Each Picture mode has a different Action smoothing default setting. Game mode Only on HDMI and AV inputs: Controls whether Game mode is enabled. When On, the TV performs less image processing and has less input lag. When Off, the TV performs more image processing and has more input lag, which is less desirable for action games. Reset picture settings Returns all picture settings for the input s currentlyselected Picture mode to their original values. Tip: To dismiss the Advanced picture settings menu, just wait a few seconds without pressing any buttons. Or press again to dismiss the menu immediately. Expert Picture Settings (4K models only) 4K (UHD) TV models have additional picture settings for demanding home theater enthusiasts. Expert Picture Settings include gamma, noise reduction, 11 point white balance adjustment, and extended color management. You can access Expert Picture Settings only by using the Roku Mobile App on an ios or Android mobile device. For more information, go to the following link on the Roku web site: go.roku.com/expertpicturesettings Page 68
74 Changing privacy settings Note: Privacy settings are not present on TVs operating in non-connected mode. Advertising Only in connected mode, by default your TV uses an advertising identifier to track your TV usage. You can change the privacy settings on your TV in two ways: resetting the advertising identifier and limiting ad tracking. Reset the advertising identifier Resetting the advertising identifier clears the prior usage history that your TV stores, and then begins tracking again. From that point forward, your new usage patterns affect the advertisements you see on your TV. 1. From the Home screen menu, navigate to Settings > Privacy > Advertising. 2. Highlight Reset advertising identifier. Press to view more information about this option. When you finishing reading the information, press OK to close the More Information window. 3. Press OK to reset the advertising identifier, and then press OK again to dismiss the verification message. Limit ad tracking You can limit Roku s tracking of your usage behavior by limiting ad tracking. When you do, your TV will display ads that are not personalized based on your TV s advertising identifier. To limit ad tracking: 1. From the Home screen menu, navigate to Settings > Privacy > Advertising. 2. Highlight Limit ad tracking. Press to view more information about this option. When you finish reading the information, press OK to close the More Information window. 3. Press OK to select the Limit ad tracking check box. Note: If you perform a factory reset and then reconnect your TV, ad tracking is restored until you repeat these steps. Microphone Your Roku TV does not have a built-in microphone. However streaming channel providers can use the microphone on the Roku Enhanced Remote Control (only on select Page 69
75 models) or on your mobile device when the Roku mobile app is running. You can control whether streaming channels have permission to use the microphone. Note: These settings affect only streaming channel access to the microphone. They do not affect your Roku TV s Voice Search feature. Channel microphone access You can control which streaming channels have permission to use the microphone, giving you control over how the microphone is used by each streaming channel. The default setting is Prompt, so no channel will be able to turn on the microphone without your permission. To change microphone access settings: 1. From the Home screen menu, navigate to Settings > Privacy > Microphone. 2. Select Channel microphone access. 3. Chose one of the following settings: Prompt Display a notification each time any streaming channel requests the use of the microphone. When a notification appears, you can choose among Prompt, Always allow, and Never allow on a per-channel basis. Always allow Do not prompt, but always allow any streaming channel to use the microphone. Never allow Do not prompt, but never allow any streaming channel to use the microphone. Channel permissions After granting or denying microphone access on a per-channel basis, you can reset channel permissions to enable them to follow the system-wide setting you specify under Channel microphone access. To reset channel permissions: 1. From the Home screen menu, navigate to Settings > Privacy > Microphone. 2. Select Channel permissions. 3. Highlight Reset channel permissions, and then press OK. Page 70
76 My Feed Only in connected mode, use My Feed to find out when you can watch movies coming soon, and to get updates on movies, TV shows, and actors that you are following. Tip: My Feed is not available if your TV is operating in non-connected mode. Movies Coming Soon My Feed gives you updates on your list of movies that are coming soon to theaters. With My Feed, you ll know when your favorite movie is ready to stream, the channels it is on, and how much it will cost. Select the movies you want to follow by going to My Feed > Movies Coming Soon. You ll then see a list of newly released movies that are not yet available on Roku streaming devices. Select a movie, and then select Follow this movie on Roku. When you return to the main My Feed screen, you ll see banners for each of your newly-followed movies along with banners for movies and TV shows you re already following. Movies, TV shows, and people In addition to following movies coming soon, you can follow any movie, TV show, or actor across top streaming channels. To follow a program, use the Search feature to find the movie, TV show, or name that you want to follow, and then select Follow this movie/tv show/person on Roku. For more information, see Searching for something to watch. Note: The TV takes a bit of time to update your newly-followed shows. Until it finds at least one channel offering the movie, the content banner in My Feed shows Check back later for updates. My Feed alerts you any time a movie or TV show you are following becomes available on another channel and whenever its price changes. A number in parentheses next to My Feed in the Home menu means that My Feed has updated information that you haven t viewed yet. For example, if three of your followed shows have updates, you ll see My Feed (3). Page 71
77 Note: When a movie or TV show you are following becomes available, the streaming channel offering the movie might require that you subscribe or pay a fee to view it. Page 72
78 Searching for something to watch Searching for movies and shows across multiple streaming channels is one of the unique features of your Roku TV. Within a single search operation, you can search by: Movie name TV show name Actor or director name Streaming channel name Game name Tip: Roku Search is not available if your TV is operating in non-connected mode. Note: Roku Search doesn t search across all streaming channels, but searches across lots of popular streaming channels. The actual channels it searches vary by locale, but include popular providers such as Netflix and several others, with more being added all the time. You can check which streaming channels are included in Roku Search by going to the Search screen, clearing all previous searches to reveal the search instructions, and then watching the channel tiles cycle at the bottom of the screen. To search, select Search on the Home screen menu. The Search screen has a keyboard grid and initially displays instructions a set of icons representing search categories and a list of participating provider tiles. Tip: If you don t see the instructions, navigate to the end of the list of recent searches and select Clear recent search selections. Page 73
79 How do I search? To search, use the arrow buttons to navigate the on-screen keyboard, entering a few characters of the search term. With each additional character you enter, you narrow down the search and the search results become more relevant. Only on models that have the Enhanced Remote Control: Press to start Voice Search, and then say the name of a movie, TV show, actor, or director. The TV shows you the result of your search across top channels and lists the streaming channels that offer the requested content. Tip: Use the free Roku mobile app on your compatible smartphone or tablet to make searching even faster. Not only can you use your device s keypad to type, you can search simply by touching the voice search icon and saying the name of the movie, TV show, actor or director, channel, or game. An icon next to each search result shows the category of the result (movie, TV show, actor). Press the RIGHT arrow to move the highlight into the list of search results. Press the UP and DOWN arrows to scroll through the list of search results to highlight the item you want to view. I found a show, now what? Now that you ve highlighted the show, movie, actor, game, or streaming channel you were looking for, press the RIGHT arrow. If your search result was an actor, director, or other item that does not represent a single item of content, you ll see another list to narrow down your search. Continue highlighting results and pressing the RIGHT arrow until you find a single, viewable content item. An HD logo means that the content is available in high-definition. The checked circle adjacent to the title means you have already added the streaming channel. If your search result was a game or a streaming channel, you ll see detailed information, images, and available actions, such as a list of streaming channels and the cost of getting the item or channel. Note: Some channels may require a paid subscription. Page 74
80 Follow on Roku Rather than watch the show you found in Search, you can add it to My Feed and wait until it s available on a particular streaming channel or available at a better price. From the search results screen, select Follow on Roku. Then go to My Feed periodically to check for updates to each of your followed movies, TV shows, or people. For more information, see My Feed. Recent Searches The next time you use Roku Search, the Search screen displays a list of recent search selections in place of the search instructions. Using the recent search selections list makes it easy to quickly get to a previously found item, for example, to find another movie with the same actor, or another TV show in the same series. Page 75
81 Using the Roku Channel Store The Streaming Channels menu option takes you to the Roku Channel store, where you can add new subscription based and free streaming channels to your TV. Tip: The Streaming Channels menu option is not available if your TV operating in nonconnected mode. Tip: You also can search for streaming channels by using the Search option, as explained in Searching for something to watch. To make it easier to find what you want, the streaming channels in the Roku Channel Store are categorized by topic. Press the UP and DOWN arrows to highlight the category you want, and then press the RIGHT arrow to move the highlight into the grid of streaming channel tiles. When you find a streaming channel you want to add or learn more about, highlight it and press OK to display more details. If the streaming channel you are adding is free, you can select Go to channel to start watching it immediately. If there is a one-time or recurring fee associated with using the streaming channel, you must agree to the terms and conditions, accept the fee, and if you created one when you activated your Roku TV, enter your Roku PIN code to authorize the charges. If you already have a subscription to the streaming channel for example, you already subscribe to Netflix or you receive HBO through your cable TV provider you must complete a different, simple authorization step to add the streaming channel. You only have to complete the authorization or activation step one time, when you initially add the streaming channel. After that, you simply select the streaming channel tile from your Home screen to start watching. (Channel and content availability is subject to change. Charges may apply to your selection.) Tip: New streaming channels are added continuously to the Roku Channel Store, so be sure to check back every now and then for new options. Page 76
82 Note: If you don t remember your PIN, or if want to change whether you need to use a PIN to make purchases on your Roku account, see Changing your Roku Channel Store PIN preference. Page 77

83 Customizing your TV There are several things you can do to personalize your TV. Rearrange tiles Whenever you add a TV input tile, it s added at the top of your Home screen. Whenever you add a new streaming channel from the Roku Channel Store, it s added at the bottom of your Home screen. You can easily rearrange the order of the tiles on the Home screen to suit your viewing preferences. For example, you might want Antenna TV to be the first tile in your Home screen. But if you mostly watch one streaming channel, you might want its tile to be the first one on your Home screen. Rearranging tiles is easy: 1. From the Home screen, highlight one of the tiles you want to move. 2. Press to display a list of options for the type of tile you selected. 3. Select Move input or Move channel. The list of options disappears and the highlighted tile shows arrows indicating how it can be moved Note: A paid subscription or other payments may be required for some channels. Channel availability is subject to change and varies by country. Not all content is available in countries or regions where Roku products are sold. Page 78

84 4. Use the arrow buttons to move the highlighted tile to its new position. As you move the tile, it pushes other tiles out of its way. 5. Press OK to lock the tile into its new position. 6. Repeat these steps to move other tiles until you have arranged your Home screen to your liking. Edit broadcast TV channel lineup When you set up the TV tuner as described in Setting up Antenna TV, the TV adds all the channels with good signals that it could detect in your area. It s likely that you now have more channels than you want in your channel list. To edit the channel lineup, from the Home screen, navigate to Settings > TV inputs > Antenna TV > Edit channel lineup. You ll see a screen listing all of your channels. Adjacent to the list of channels is a miniature TV screen playing the highlighted channel s picture and sound. Highlight each channel you want to hide, and then press OK to hide the channel. Tip: If you need to see or hear the highlighted channel, wait a couple of seconds for the TV to start playing the channel s picture and sound. Also note that if you ve enabled parental controls and the program on the current channel is blocked, you won t see a picture or hear sound while editing the channel lineup. Note: Repeating the tuner channel scan unhides all hidden channels. Page 79
85 Rename inputs Rather than trying to remember that your Blu-ray player is connected to HDMI 1 and your game console is connected to HDMI 3, you can rename the TV inputs to match the connected component. Note: Renaming an input also changes the icon associated with it. To rename an input, you can either: Highlight the input tile in the Home screen, and then press to display a list of options. From the list of options, select Rename input. Then select a new name and icon. or From the Home screen, navigate to Settings > TV inputs. On the TV inputs screen, select the input you want to rename, select Rename, and then choose a new name and icon from the provided list. Rather than using the predefined names and icons, you can set a custom name and icon. To do so, scroll up or down to highlight Set custom name & icon, and then press OK. Follow the instructions on the screen to enter a name and select an icon for the input. Press to return to the Home screen. The new name and icon are now in effect. Remove unwanted tiles It s easy to remove unused TV inputs and unwanted channel or app tiles. For example, if you never use the HDMI 3 input, or if you don t like the weather app you added from the Roku Channel Store, you can remove them from your Home screen. Note: You also can remove the Antenna TV tile if you never use the TV tuner. But be aware that removing the Antenna TV tile also deletes the broadcast TV channel list. You ll have to set up the TV tuner again next time you want to view broadcast TV. Instructions for setting up the TV tuner can be found in Setting up Antenna TV. To remove any tile, highlight the input tile in the Home screen, and then press to display a list of options. From the list of options, select Remove input. In the screen that follows, confirm you want to remove the input. Alternatively, to remove a TV input tile from the Home screen, navigate to Settings > TV inputs. On the TV inputs screen, select the input you want to remove, and then select Remove > Confirm. Then press to return to the Home screen. Page 80
86 Change themes Another way to customize your TV is to change its theme. The theme establishes the look and feel of the TV through colors, designs, and fonts. Tip: Themes are not available when your TV is operating in non-connected mode. Some themes require payment. To change the theme, in the Home screen menu navigate to Settings > Themes. In the Themes screen, choose from the following options: My themes Highlight a theme, and then press OK to switch to that theme. Custom settings Turn Featured themes on or off. When Featured themes is on, the TV automatically switches to featured themes like certain holiday-inspired themes for a limited time whenever Roku makes them available, and then switches back to your selected theme when the featured theme expires. When off, the TV uses your selected theme. Change sound effects volume Sound effects are the noises the TV makes to let you know it received your command. You can change the volume of sound effects or turn them off. To adjust the sound effects volume, in the Home screen menu, navigate to Settings > Audio > Menu volume. Navigate to the right and then change the setting to High, Medium, Low, or Off. Configure power settings Power settings let you set up your TV so that it turns on to the location you choose. Power settings also help your TV save energy by automatically turning it off under certain conditions. Page 81

87 Power on settings Power on settings tell the TV what to do when you turn on the power. To configure the power on settings, from the Home screen menu, navigate to Settings > System > Power > Power on. Highlight the power on location from the list, and then press OK to select it. Auto power savings To help you save energy, your TV can automatically turn itself off after a period of inactivity or a period during which no signal has been detected. It is factory-configured to do both of these things, but you can change these settings if needed. To configure automatic power off, from the Home screen menu navigate to Settings > System > Power > Auto power savings. In the Power settings screen, highlight the following options and press OK to turn them on or off: Reduce power after 15 minutes If no video or audio activity and no user interaction occur for 15 minutes, the TV automatically turns off the screen and sound. Turn off after 4 hours If no video or audio activity and no user interaction occur for 4 hours, the TV goes into standby mode. Standby LED On/Off Normally, the status LED on the front of your TV is lit whenever the TV is in standby mode. If you prefer the status LED to not be lit in standby mode, you can turn it off. To do so, from the Home screen, navigate to Settings > System > Power > Standby LED, and then select Off. After making this change, the status LED still performs all other indication functions. Page 82
88 Configure accessibility (U.S. models only) Accessibility settings enable users with vision or hearing impairment to use the TV more effectively. Accessibility settings are located under Settings > Accessibility. Captions mode Captions mode specifies when closed captions appear. Access caption settings from the Home screen by selecting Settings > Accessibility > Captions mode. At this point, you can choose among the following options: Off No captions appear. On always Captions appear whenever they are available from the program source. On replay Captions appear only when you use the replay feature, and only when you are watching a streaming program that supports instant replay or watching a TV channel after enabling Live TV Pause. On mute Captions appear only when the TV is muted. Tips: You can change the captions mode while watching a program. To do so, press to display the Options menu, and then select Closed Captioning. Some streaming channels require you to enable captions through a setting within their channel even though you have turned on captions everywhere else. Note: Once enabled, the selected captions mode applies to all inputs that support captions and remains enabled until you turn it off. Captions style Captions style lets you control how closed captions look when displayed on your TV. Access caption style settings from the Home screen by selecting Settings > Accessibility > Captions style. At this point, you can choose among the following options: Text style Choose from a list of fonts. As you move the highlight to each font, you can see a sample of the result in an adjacent panel. Text edge effect Choose from a list of edge effect styles, such as raised, depressed, and various shadows. As you move the highlight to each effect, you can see a sample of the result in an adjacent panel. Text size Choose from a list of sizes. As you move the highlight to each size, you can see a sample of the result in an adjacent panel. Page 83
89 Text color - Choose from a list of colors for the text. As you move the highlight to each color, you can see a sample of the result in an adjacent panel. Text opacity - Choose from a list of opacity settings for the text. This setting determines how much the area behind the text shows through the text. A value of 100% blocks all of the content behind the text. As you move the highlight to each setting, you can see a sample of the result in an adjacent panel. Background color - Choose from a list of colors for the background area behind the text. As you move the highlight to each color, you can see a sample of the result in an adjacent panel. Note that you won t see any change unless you set the Background opacity to a value other than Off. Background opacity - Choose from a list of opacity settings for the background of the caption. This setting determines how much the area behind the caption background shows through the background. A value of 100% blocks all of the content behind the background. As you move the highlight to each setting, you can see a sample of the result in an adjacent panel. Window color - Choose from a list of colors for the window rectangle surrounding the entire caption. As you move the highlight to each color, you can see a sample of the result in an adjacent panel. Note that you won t see any change unless you set the Window opacity to a value other than Default or Off. Window opacity - Choose from a list of opacity settings for the window rectangle surrounding the entire caption. This setting determines how much the area behind the caption window shows through the window. A value of 100% blocks all of the content behind the window. As you move the highlight to each setting, you can see a sample of the result in an adjacent panel. Audio Guide settings Audio Guide settings help users who are blind or visually impaired to configure the textto-speech reader, enabling them to operate their TV more easily. Audio Guide uses voice prompts that speak volume and channel changes, menu options, and setting changes. Access Audio Guide settings from the Home screen by navigating to Settings > Accessibility, and then select from the following options in the Audio Guide section: Audio Guide Turn Audio Guide on or off. Speech rate Select one of four speeds at which to hear spoken guide information: Slow, Normal, Fast, or Very Fast. Volume Select the volume at which to hear spoken guide information, relative to the main TV volume. Shortcut Enable or disable the shortcut feature. When enabled (the default), pressing the Option button four times in quick succession enables or disables the Audio Guide. Page 84
90 Changing caption settings (Canada only) On models sold in the United States, you can find caption settings under Settings > Accessibility > Captions mode and Captions style. On models sold in Canada, you can find captions settings under Settings>Captions. Captions mode Off No captions appear. On Captions appear whenever they are available from the program source. Instant replay Captions appear only when you use the replay option, and only when you are watching a streaming program that supports instant replay. When mute Captions appear only when the TV is muted. Tips: You can change the captions mode while watching a program. To do so, press to display the Options menu, and then select Closed Captioning. Some streaming channels require you to enable captions through a setting within their channel even though you have turned on captions everywhere else. Note: Once enabled, the captions mode applies to all inputs that support captions and remains enabled until you turn it off. Other caption settings Text style Choose from a list of fonts. As you move the highlight to each font, you can see a sample of the result in an adjacent panel. Text edge effect Choose from a list of edge effect styles, such as raised, depressed, and various shadows. As you move the highlight to each effect, you can see a sample of the result in an adjacent panel. Text size Choose from a list of sizes. As you move the highlight to each size, you can see a sample of the result in an adjacent panel. Text color - Choose from a list of colors for the text. As you move the highlight to each color, you can see a sample of the result in an adjacent panel. Text opacity - Choose from a list of opacity settings for the text. This setting determines how much the area behind the text shows through the text. A value of 100% blocks all of the content behind the text. As you move the highlight to each setting, you can see a sample of the result in an adjacent panel. Background color - Choose from a list of colors for the background area behind the text. As you move the highlight to each color, you can see a sample of the result in an adjacent panel. Note that you won t see any change unless you set the Background opacity to a value other than Off. Background opacity - Choose from a list of opacity settings for the background of the caption. This setting determines how much the area behind the caption Page 85
91 background shows through the background. A value of 100% blocks all of the content behind the background. As you move the highlight to each setting, you can see a sample of the result in an adjacent panel. Window color - Choose from a list of colors for the window rectangle surrounding the entire caption. As you move the highlight to each color, you can see a sample of the result in an adjacent panel. Note that you won t see any change unless you set the Window opacity to a value other than Default or Off. Window opacity - Choose from a list of opacity settings for the window rectangle surrounding the entire caption. This setting determines how much the area behind the caption window shows through the window. A value of 100% blocks all of the content behind the window. As you move the highlight to each setting, you can see a sample of the result in an adjacent panel. Configure parental controls Parental controls enable you to control whether the members of your household can view certain kinds of broadcast TV programs. When a program or feature is blocked, you can unblock it by entering a parental control PIN that only you know. Note: Parental controls block content from the TV tuner and from streaming options, if any, on the Home screen menu. Parental controls do not block content on other TV inputs or content from streaming channels you add to your TV. Creating a parental control PIN The first time you access the Parental controls screen, you must create a new parental control PIN. Thereafter, whenever you want to change parental control settings, unblock programming that has been blocked, change the PIN, or disable parental controls, you must enter your parental control PIN. Tip: Your parental control PIN has nothing to do with your Roku PIN. You can make them the same if you want this is entirely your choice. To create a new parental control PIN, from the Home screen menu navigate to Settings > Parental controls. The screen displays a numeric keypad. Use the arrow buttons and the OK button to enter a four digit code. Then repeat the process to enter the same PIN again, just to make sure you correctly entered the PIN you want to use. Important: If you forget your parental control PIN, the only way to recover is to perform a factory reset operation, as explained in Factory reset everything. Be sure to write it down in a safe place just in case. Page 86
92 Blocking Movie Store, TV Store, and News (U.S. models only) One of the parental control options is to completely hide the entertainment options that are available directly on the Home screen menu. To hide Home screen entertainment options: 1. From the Home screen menu, navigate to Settings > Parental controls, and then enter your parental control PIN. 2. In the Parental controls screen, highlight Home screen and then select or clear either of these options: Hide Movie Store and TV Store Removes the Movie Store and TV Store options from the Home screen menu. Hide News Removes the News option from the Home screen menu. Tip: To use either of these options after you ve hidden them, you must return to this screen and remove the check mark from the corresponding Hide command. Blocking Broadcast TV shows For broadcast TV, parental controls use information embedded in the broadcast signal to determine whether to allow a program to be displayed. Parents can configure parental controls to block broadcast TV programs that meet or exceed a specific rating, so they cannot be viewed or heard unless the correct parental control PIN is entered. Note: Rating standards differ by country. Enabling parental control of TV shows The first step in blocking TV shows is to enable parental control of TV shows. This setting is provided separately to make it easier for you to turn parental control of TV shows on and off without disturbing their settings. For example, your kids are going to summer camp for two weeks, and while they are gone, you don t want to have to deal with unblocking shows that you want to watch by entering your parental control PIN. All you need to do is clear Enable parental controls, and all TV shows are unblocked. When the kids return, select Enable parental controls again, and all of your parental control settings are restored in a single operation. To enable parental control of TV shows: 1. In the Home screen menu, navigate to Settings > Parental controls, and then enter your parental control PIN. 2. In the Parental controls screen, navigate to TV tuner > Parental control of TV shows. Page 87
93 3. Make sure the check box next to Enable parental controls is checked. If not, highlight it and press OK. Blocking based on US TV ratings Most broadcast US TV shows other than movies contain rating data that enables parental controls to block shows that parents don t want others to view. The ratings are divided into two groups that function independently: Youth group TV-Y, TV-Y7 Main group TV-G, TV-PG, TV-14, TV-MA Within each of these groups, the ratings interact such that if you block a particular level of content, the TV also blocks all content with a higher rating. Conversely, if you unblock a particular level of content, the TV also unblocks all content with a lower rating. For example, if you block TV-PG programs, the TV also blocks TV-14 and TV-MA programs. If you subsequently unblock TV-14 programs, TV-PG programs are also unblocked, but TV- MA programs remain blocked. Similarly, within the main group, content types can be individually blocked. For example, you can block just coarse language in shows with a TV-PG rating. If you do, then the TV also blocks shows with coarse language in the higher ratings (TV-14 and TV-MA). Subsequently unblocking coarse language in TV-14 ratings does not unblock coarse language in TV-MA programs, but it does unblock coarse language in TV-PG programs. To block TV shows based on US television ratings: 1. From the Home screen menu, navigate to Settings > Parental controls, and then enter your parental control PIN. 2. In the Parental controls screen, navigate to TV tuner > TV ratings. Choose among the following settings: Entire ratings Highlight the rating you want to block, and then navigate to the right and select the first option that blocks the entire rating level (and all higher rating levels). Individual content types Highlight the rating that contains the content type you want to block, and then select the content types you want to block from among those listed. Remember that blocking a content type in one rating blocks the equivalent content type in all higher rating levels. Blocking based on US movie ratings Most movies in the US are rated by the Motion Picture Association of America, or MPAA, so the ratings are known as MPAA ratings. TV broadcast signals carry movie rating data that enables parental controls to block shows that parents don t want others to see. The ratings are: G General audiences Page 88
94 PG Parental guidance suggested PG-13 Parents strongly cautioned for children age 13 or younger R Restricted NC-17 Not for age 17 or younger Unlike US TV ratings, there are no individual content types within the ratings. But like TV ratings, blocking movies with a particular rating also blocks movies with a higher rating, and unblocking movies with a particular rating also unblocks movies with a lower rating. Tip: Blocking movies with an NC-17 rating also blocks programs with the now-obsolete X rating, which can still occur in the program data of older movies. To block movies based on MPAA ratings: 1. From the Home screen menu, navigate to Settings > Parental controls, and then enter your parental control PIN. 2. In the Parental controls screen, navigate to TV Tuner > Movie ratings. 3. Select the rating level you want to block. You need only select one rating level, and all higher levels are automatically blocked. Blocking based on Other ratings Your TV can block programs having ratings that had not been defined when the TV was manufactured. It does this by detecting a new Rating Region Table in a program and then downloading the new table and displaying its rating in the Parental controls. When the TV downloads a new Rating Region Table, it adds a new option to the list of rating types: Other ratings. If you see this option in the Parental controls screen, you have tuned to a station that has implemented a new rating table. Once the new rating table has been downloaded to the TV, it remains in the TV until it is factory reset, and you can configure blocking based on the new ratings. New Region Rating Tables can have independent rating levels, or rating levels that interact in the same ways as the built-in US TV and MPAA Movie ratings. Tip: If your TV downloads a new Region Rating Table, you ll have to experiment with its settings to understand how to use it. Blocking based on Canadian English ratings Canadian-English language and third-language programs that are broadcast in Canada are rated by the Action Group on Violence on Television, or AGVOT. TV broadcast signals carry rating data that enables parental controls to block shows that parents don t want others to view based on content containing violence, language, sex, or nudity. The ratings are: C Children under 8 years Page 89
95 C8 Children 8 years and older G Generally suitable for all age groups PG Parental guidance suggested for viewers under 14 years 14+ Generally not suitable for viewers under 14 years 18+ Generally not suitable for viewers under 18 years Blocking content with a particular rating also blocks content with a higher rating, and unblocking content with a particular rating also unblocks movies with a lower rating. To block programs based on AGVOT ratings: 1. From the Home screen menu, navigate to Settings > Parental controls, and then enter your parental control PIN. 2. In the Parental controls screen, navigate to TV tuner > Canadian English ratings. 3. Select the rating level you want to block. You need only select one rating level, and all higher levels are automatically blocked. Blocking based on Canadian French ratings Canadian-French language programs that are broadcast in Canada are rated by the Régie du cinéma du Québec. TV broadcast signals carry rating data that enables parental controls to block shows that parents don t want others to view based on content containing violence, language, sex, or nudity. The ratings are: G Generally suitable for all age groups 8+ Viewers 8 years and older 13+ Viewers 13 years and older 16+ Viewers 16 years and older 18+ Adults only Blocking content with a particular rating also blocks content with a higher rating, and unblocking content with a particular rating also unblocks movies with a lower rating. To block programs based on Canadian-French ratings: 1. From the Home screen menu, navigate to Settings > Parental controls, and then enter your parental control PIN. 2. In the Parental controls screen, navigate to TV tuner > Canadian French ratings. 3. Select the rating level you want to block. You need only select one rating level, and all higher levels are automatically blocked. Blocking unrated programs Some broadcast TV shows and movies are assigned a rating of Unrated. Whether or not such programs contain content that is objectionable to you cannot be determined. However, you can choose to block such programs. Page 90

96 To block all unrated broadcasts: 1. From the Home screen menu, navigate to Settings > Parental controls, and then enter your parental control PIN. 2. In the Parental controls screen, navigate to TV tuner > Block all unrated programs. 3. Highlight Unrated programs and press OK. When blocking is enabled, the adjacent padlock icon changes from unlocked to locked. Tip: Blocking programs that have been assigned a rating of Unrated does not block programs that have no rating assigned to them (for example a broadcast of a local town council meeting). Programs that do not have an assigned rating display Rating NA (for not applicable, meaning a rating is not needed). What happens when a TV show is blocked? After you ve set up parental controls, TV shows and movies can be blocked: When you change channels and the new channel is playing a program whose rating exceeds your settings. When a new show comes on the channel you are watching and its rating exceeds your settings. When a program is blocked by parental control settings, the TV displays a blocked message: Whenever this blocked message appears, both the video and audio of the show are blocked, as well as program data that would normally appear in the area at the bottom of the screen. To watch the blocked program, you need to know the PIN code defined when you enabled parental controls, as explained in Creating a parental control PIN. Page 91

97 1. Press OK to select Unblock and display a PIN pad. 2. Use the arrow buttons to enter your parental control PIN code, and then press OK to select Unblock everything. After unblocking shows that have been blocked, all blocking is disabled for two hours or until you turn off the TV. Changing the parental control PIN To change your parental control PIN: 1. From the Home screen menu, navigate to Settings > Parental controls, and then enter your parental control PIN. 2. In the Parental controls screen, highlight Change PIN. 3. Move the highlight into the adjacent keypad, and then use the arrow buttons and the OK button to enter a four digit code. Then repeat the process to enter the same PIN again, just to make sure you correctly entered the PIN you want to use. Resetting parental controls So now your kids have grown up and gone away to college, and you no longer want to deal with blocked programs. To erase all parental control settings: 1. From the Home screen menu, navigate to Settings > Parental controls, and then enter your parental control PIN. 2. In the Parental controls screen, highlight Reset parental controls. 3. Follow the instructions on the screen to confirm that you want to erase all parental control settings. Page 92
98 Tip: Resetting parental controls also erases your parental control PIN. Page 93
99 More settings This section describes the features and settings of the TV that were not covered in the other parts of this guide. Changing network settings If needed, you can change your network settings at any time. For example, if you change the name of your wireless network (its SSID) or its password, you will need to change your TV s settings so that it can continue to connect. Also, if you decided not to connect to the Internet in Guided Setup, you can use network settings to connect at a later time. To change network settings, from the Home screen menu, navigate to Settings > Network, and then press the RIGHT arrow. At this point, you can choose the following options: Update connection Select your existing network connection type, and then press OK to start the update process. The TV uses your current network information to reconfirm the wireless or wired network connection, the local network connection, and the Internet connection. Set up new connection Select a network connection type, and then select the option to set up a new connection. Follow the on-screen instructions to complete the network connection. For help with each of the steps, see Network connection. Note: Some networks, such as those found in dorm rooms, hotels, and other public places, may require you to read and agree to terms, enter a code, or provide identifying information before letting you connect to the Internet. If the TV detects that you are connecting to such a network, it prompts you through the connection process using your smartphone or tablet to provide the needed information. For more information, see Using your TV in a hotel or dorm room on page 32. Page 94
100 Changing time settings You can change time settings to suit your preferences. You can find the following settings by navigating from the Home screen menu to Settings > System > Time: Sleep timer Set a time delay after which the TV will automatically shut off. This setting reflects the setting you can make in the Options menu from any TV input, as explained in Options menu settings. Note that the sleep timer setting is not input specific. Time zone Select whether to set the time zone automatically or manually, and if set manually, select your current time zone. Typically, a TV connected to the Internet can discover its own time zone automatically, and a TV that is not connected to the Internet must be set manually. Initially, this setting is made when you set up the TV tuner, as explained in Setting up Antenna TV. Correct time zone information is needed to correctly display program data. Clock format Select whether to display time in a 12-hour or 24-hour format, or to turn off time display. This setting is available only on TVs that are connected to the Internet. Non-connected TVs do not display the time. Scanning for broadcast TV channels again There will be times when you need to create a new channel list. For example, you: Change cable providers Reorient your TV antenna Move to a different city with different channels Whenever you need to update your TV channel list, you can repeat the channel scan. Tip: Repeat the channel scan from time to time to make sure you are receiving all of the latest channels. Broadcasters add and remove channels, move channels to different parts of the spectrum, and change the power levels of their channels periodically. Note: Repeating the tuner channel scan erases your favorite channels. and unhides all hidden channels. To repeat the channel scan, from the Home screen menu, navigate to Settings > TV inputs > Antenna TV > Scan again for channels. Then select Start finding channels to begin the channel scan process. The screens and options that appear during this process are identical to those described in How do I set up the TV tuner? Page 95
101 Setting the HDMI mode (4K models only) On 4K (UHD) models, you can independently configure each HDMI input to match the capabilities of the connected device. From the Home screen menu, navigate to Settings > TV inputs, and then select an enabled HDMI input. Next, select HDMI mode and then select one of the following settings: Auto Let the TV determine the best setting. Use this option unless your HDMI device does not correctly communicate its HDMI version compatibility. HDMI 1.4 Configure the input for compatibility with HDMI version 1.4, which supports a maximum refresh rate of 30 Hz at full UHD resolution. Most HDMI devices will work correctly with the TV in this mode. HDMI 2.0 Configure the input for compatibility with HDMI version 2.0, which supports a maximum refresh rate of 60 Hz at full UHD resolution. You must use this mode to view HDR content from the device connected to this HDMI input. However, note that many older HDMI devices do not work correctly when the TV s HDMI input is set to this mode. Using the TV in a home theater Your TV has several features that make it an ideal TV for a home theater. But you might not notice them because they remain in the background until you decide to use them. Turning off the speakers When you use your TV with a sound bar or an external amplifier and speakers, you ll probably want to turn off the internal TV speakers. To turn off the TV s built-in speakers, in the Home screen menu, navigate to Settings > Audio > TV speakers and change the setting. Tip: The TV s internal speakers can be enabled and disabled automatically as needed by system audio control, as described in Enable system audio control Using the headphone jack also turns off the internal speakers. Page 96

102 Changing the audio mode The TV has two audio modes, accessed by navigating in the Home screen menu to Settings >Audio > Audio mode: Stereo Use this setting for internal speakers, headphones, and external stereo amplifiers connected through HDMI ARC, SPDIF optical, or headphone jack. Auto Use this setting to automatically detect the best audio setting based on the audio stream in the content you are watching. If you have connected the TV to an external Dolby Audio compatible amplifier, receiver, or sound bar through HDMI ARC or SPDIF optical, the TV automatically selects the appropriate surround sound capabilities of the device based on the characteristics of the current program. Setting up a digital audio connection You can connect the TV to an external amplifier, receiver, or sound bar by using either of these two connections: HDMI ARC The HDMI Audio Return Channel enables the TV to output digital audio on one of its HDMI connectors. The connected amplifier can also function simultaneously as an input source to the TV, if needed. To use the ARC capability, you must connect an HDMI cable from your amplifier s HDMI ARC connector to the HDMI ARC connector on the TV. You also must: o Be sure your HDMI cable is certified by HDMI. o Enable HDMI ARC under Settings > System > Control other devices (CEC), as explained in Enable HDMI ARC. SPDIF optical The TV has an SPDIF optical connector that outputs a digital audio signal. To use the optical output, connect a TOSLINK optical cable from the amplifier to the Optical or SPDIF connector on the TV. Note: Dolby Audio supporting Dolby Digital Plus format is not available through the SPDIF optical output. This format is only available through the HDMI ARC connection. After making the required HDMI ARC or SPDIF optical connection, go to Settings > Audio > S/PDIF and ARC option and select the audio format to use. Note: In most cases, Auto detect is the best option. Other settings can result in no sound when the content you are viewing does not contain the audio stream type you selected. Page 97
103 Controlling other devices through CEC Consumer Electronics Control (CEC) enables your TV and other CEC-compatible home entertainment components to control one another in various ways. First, the CECcompatible devices must discover one another and report their capabilities. After this, one device can control another according to the features you enable. For example, playing a disc on a Blu-ray player could switch the TV to the Blu-ray player s input. Or, powering off the TV could also power off the Blu-ray player and the home theater receiver. Discover connected CEC devices To discover CEC devices: 1. Make sure that your CEC-compatible components are connected to the TV with a suitable High Speed HDMI Cable that supports HDMI ARC and CEC control. 2. Turn on each component and make sure all components are CEC enabled. Tip: Some manufacturers have their own branded names for CEC functionality, so you might need to read the product documentation to correctly identify the CEC features of the device. 3. On the TV s Home screen menu, navigate to Settings > System > Control other devices (CEC) and then select Search for CEC devices. Press OK to repeat the discovery process, if necessary. When finished, the TV displays a list of CEC devices that are connected to each HDMI input, as well as any devices that had previously been connected. The TV remembers the names of multiple CEC devices even when they are no longer connected. If the list is longer than the allowed space, press to see a complete list in a scrollable window. Enable HDMI ARC HDMI ARC is the audio return channel that is available on one of the TV s HDMI ports. The audio return channel enables you to send a Dolby Audio signal back to a home theater receiver that is also sending an audio and video signal into the TV. Using HDMI ARC reduces the number of cables needed and optionally lets you control the volume and mute state of the receiver by enabling system audio control. HDMI ARC is disabled by default. To enable HDMI ARC, in the Home screen menu, navigate to Settings > System > Control other devices (CEC), and then highlight HDMI ARC. Press OK to enable or disable the feature. Note: Enabling HDMI ARC also enables System audio control. After enabling HDMI ARC, you can disable System audio control if you prefer. Page 98
104 Enable system audio control System audio control enables the TV remote control to change the volume and mute state of an amplifier or sound bar connected through HDMI, and to display the external device s volume and mute status in the TV s on-screen display. The TV automatically turns off its internal speakers and sends volume and mute control signals to an external amplifier when all of the following are true: System audio control is enabled on the TV. The TV is connected to a CEC-compatible amplifier, it is powered on, and CEC discoverability is enabled. The CEC-compatible amplifier s HDMI ARC connector is connected to the TV s HDMI ARC connector with a suitable HDMI cable. When the CEC-compatible amplifier is off, the TV automatically turns on its speakers (unless you have turned them off as described in Turning off the speakers) and resumes local control of volume and mute state. To enable or disable system audio control, in the Home screen menu, navigate to Settings > System > Control other devices (CEC) and highlight System audio control. Press OK to enable or disable the feature. Enable 1-touch play 1-touch play enables a component to control which TV input is active. For example, pressing Play on your Blu-ray player switches the TV to the Blu-ray input. 1-touch play is disabled by default. To enable 1-touch play, in the Home screen menu, navigate to Settings > System > Control other devices (CEC) and highlight 1-touch play. Press OK to enable or disable the feature. Enable system standby The system standby feature causes other components to power off when you power off your TV. Depending on the CEC System Standby implementation, it also might enable connected components to power off your TV when you power off the component. System standby is disabled by default. To enable system standby, in the Home screen menu, navigate to Settings > System > Control other devices (CEC) and highlight System standby. Press OK to enable or disable the feature. Page 99
105 Restarting the TV You can restart the TV when necessary. Restarting has the same effect as unplugging the TV power and then plugging it in again. To restart the TV, navigate to Settings > System > Power, and then select System restart. Highlight Restart, and then press OK to confirm restart. While the TV restarts, the screen goes dark for a few seconds, and then displays the startup screen for a few more seconds. When the restart operation completes, the TV displays the activity you selected in Power on settings. Resetting the TV You can choose to reset only the TV picture and audio settings to their original values, or perform a full factory reset to return the TV to the state it was in when you first unpacked and turned it on. Reset audio/video settings To reset only the TV picture and audio settings to their original values, navigate to Settings > System > Advanced system settings > Factory reset, and then highlight Reset TV audio/video settings. Read the information on the screen to make sure you understand what the reset operation does. To proceed with the reset operation, press PLAY/PAUSE three times in a row. Factory reset everything A full factory reset returns the TV s settings to their original state and removes all personally identifiable information from the TV. When finished, you must repeat Guided Setup, reconnecting to the Internet, re-linking your Roku account, and reloading any streaming channels. You also must repeat Antenna TV setup and input configuration. Factory reset is the recommended choice if you want to transfer the TV to another owner, and it is the only choice if you want to switch from store mode to home mode (if you inadvertently selected store mode during Guided Setup). To perform a factory reset, navigate to Settings > System > Advanced system settings > Factory reset, and then highlight Factory reset everything. Read the information on the screen to make sure you understand what this reset operation does. Page 100
106 To proceed with the full factory reset, use the on-screen number pad to enter the code displayed on the screen, and then select OK to proceed. When the factory reset operation completes, the TV restarts and displays the first Guided Setup screen. What if I can t access the Factory Reset option? It is possible for your TV to get into a state where you cannot access the various menus, including the menu option that lets you perform a factory reset operation. If that happens, you can force the TV to reset by following these steps. Models with a RESET button 1. Using a straightened paper clip or ball-point pen, press and hold the recessed RESET button on the TV connector panel. 2. Continue to hold the RESET button for approximately 12 seconds. When the reset cycle completes, the status indicator comes on dim. 3. Release the RESET button. The TV is now powered off. 4. Turn on the TV and proceed through Guided Setup. See Guided Setup. Models without a RESET button 1. On the TV panel (not the remote control) press and hold down the MUTE and POWER buttons. 2. Unplug the TV power, and then plug it in while continuing to hold down the MUTE and POWER buttons. 3. When you see the startup screen appear on the TV, release the buttons. 4. Turn on the TV and proceed through Guided Setup. See Guided Setup. Network connection reset If you want to remove your network connection information without disturbing other settings, navigate from the Home screen to Settings > System > Advanced systems settings> Network connection reset, and then select Reset connection. When you select this option, the TV removes your wireless network information, including the name of the connection (its SSID) and your wireless password, if any, and then it restarts. After restarting, your TV retains all of its other settings and its association with your Roku account. After resetting your network connection, navigate from the Home screen to Settings > Network > Set up new connection to continue enjoying all of the benefits of your connected TV. Page 101
107 Changing your Roku Channel Store PIN preference When you created your Roku account, you were given the opportunity to create a PIN code and to specify when it must be used. If you created a Channel Store PIN and want to change it, or you don t remember your PIN, or if you didn t create a Channel Store +PIN and want to add one, you can easily make these changes. 1. On a computer, tablet, or smartphone, use your web browser to go to 2. Enter your address and password to sign in. After signing in, the My Account page appears. 3. Under PIN Preference, click Update to open the Choose Your PIN Preferences page. 4. Skip this step if you just want to change your PIN. Otherwise, choose the option your prefer from among those listed: Require a PIN to make purchases or to add any item from the Channel Store. Require a PIN to make purchases. Do not require a PIN to make purchases. 5. If you choose either of the first two options, enter your PIN twice in the appropriate boxes. 6. Click Save Changes to save your changes and return to the My Account page. Note that your current setting is described under PIN Preference. Getting system updates If your TV is operating in connected mode, it will automatically get updates from time to time. You don t need to do anything. But if you are aware that an update is available and you don t want to wait until the TV updates itself, you can manually check for updates. If your TV is operating in non-connected mode, you can still get updates by using a USB flash drive. You can download an updated User Guide that matches your Roku TV software version from the Roku web site at: To determine your current Roku TV software version, go to Settings > System > About, and then press OK or navigate to the right. Page 102
108 Checking for updates on a connected TV If you re one of those people who has to have the latest, most up-to-date features the moment they are available, you can check for updates as often as you want. To check for updates, navigate to Settings > System > System update, and then select Check now. The TV responds either with a message saying that your TV is up to date, or with a message saying that an update is available. Follow the instructions on the screen to install the system update. Note: Sometimes system updates install new system software, and other times they install new features for streaming channels. Therefore, you won t always see a change in the behavior of your TV after a system update. Getting updates on a non-connected TV If your TV is not connected to the Internet, you can still get system updates by using a USB flash drive and a computer with an Internet connection. To get a system update, navigate to Settings > System > System update: The System update screen on a non-connected TV gives you the opportunity to connect your TV to the Internet to automatically receive updates. We recommend this option if it is possible in your situation. To proceed, select Connect to the Internet and follow the instructions in What if I didn t connect my TV?. Page 103

109 Otherwise, if you can t connect to the Internet, select I can t connect, and then follow the instructions on the screen. Here s a summary: 1. On an Internet-connected computer, go to the web site displayed on the System update screen. 2. On the USB Update web page, select the correct brand and model, and then click Next. 3. Click Download Software, and then save the file to the root folder of a standard USB flash drive. 4. When the download finishes, take the USB flash drive to the TV and plug it into the USB port. When you do, the TV validates the files on the flash drive and displays a 12-digit code. 5. Write down the code and the web address, and take this information back to your Internet-connected computer. 6. On the 12-digit code page, enter the code your TV displayed, and then click Next. 7. On the 6-digit code page, write down the 6-digit code that appears, and then take it back to your TV. 8. Using the TV remote control, select Next to move to the next screen, and then use the on-screen keyboard to enter the 6-digit code. When finished, select OK. The system update begins. Do not remove the USB flash drive until the TV restarts. USB flash drive Any normal USB flash drive will work, provided it has a FAT-16 or FAT-32 file system format. (This is the default for most flash drives.) The size of the download is small usually less than 100 MB and so will fit on most any size flash drive you might have. 12- and 6-digit codes The USB update process uses a pair of codes to validate that you are authorized to install an update, and to ensure you are not attempting to install an old, unsupported version of the system software. When the update finishes, the TV restarts. You can check the new version number by navigating to Settings > System > About. Page 104
110 Other devices Screen Mirroring your phone or tablet Your TV has a feature called screen mirroring that lets you mirror your compatible smartphone or tablet on your TV. Share videos, photos, web pages, and more from compatible devices. By default, your TV s screen mirroring mode is set to Prompt. In this mode, when your TV receives a screen mirroring request, it prompts you with the following options, unless you have previously selected Always accept or Always ignore for the device: Always accept Always accept mirrored content from the mobile device without additional prompting in the future for this device. Accept Accept mirrored content from the mobile device this time only. Prompt again next time this device attempts to mirror content. Ignore Do not accept mirrored content from the mobile device at this time. Prompt again next time this device attempts to mirror content. Always ignore Never accept mirrored content from this mobile device. Note: You can manage and change the list of devices that are set to Always accept or Always ignore by navigating from the Home screen to Settings > System > Screen mirroring > Screen mirroring devices. If you prefer to always allow all screen mirroring attempts without prompting, go to Settings > System > Screen mirroring, and then change the Screen mirroring mode to Always allow. If you prefer to never allow screen mirroring from any device, change the Screen mirroring mode to Never allow. For information on which devices may work with screen mirroring and instructions on how to use it, go to the following link on the Roku web site: go.roku.com/screenmirroring Note: Screen Mirroring is only available when your TV is operating in connected mode. Page 105
111 Getting and using the Roku mobile app Roku makes the Roku mobile app free for compatible ios, Android, and Microsoft Windows mobile devices*. The Roku mobile app is an alternative remote control for your Roku TV The Roku mobile app also lets you find and add new Roku Channels, more easily search and find something to watch, and even use your voice to search without typing. Find more information by going to support.roku.com/home and searching for mobile app. Private Listening on the Roku mobile app Another feature of the Roku mobile app is the ability to listen to streaming programs on headphones connected to your device (on compatible Apple and Android devices only). To use this feature, you must be watching or listening to streaming content (not live TV or other TV inputs), and you must have the latest version of the Roku mobile app. For more information, go to the following link on the Roku web site: go.roku.com/privatelistening Using a universal remote In many cases, you can program your cable or satellite universal remote control to also control your TV. You will need to have instructions for programming the remote control handy. Check with your cable or satellite provider for instructions. For details on how to set up the TV to work with universal remote controls, go to the following link on the Roku web site: go.roku.com/universalremote Page 106
112 FAQ For the latest answers to Frequently Asked Questions, visit the Roku support website ( Page 107
113 Legal statement Please note Use of the Roku TV is governed by the Roku TV End User Agreement (see below). In addition, an end user online profile and billing account with Roku, Inc. ( Roku ) on Roku s website ( Roku Account ) is required to stream content via the Internet using your Roku TV. A Roku Account gives you access to movies, television shows, and other audio-visual entertainment in the Roku Channel Store, a storefront of applications provided by Roku via your device s on-screen menu. After your Roku Account is created, you can link your Roku TV to your account. By using the Roku TV, you agree to the following disclaimer. For the avoidance of doubt, the content disclaimer set forth herein shall refer to all content and channels accessible and available on the Roku TV, including those available via the Roku streaming platform, as well as broadcast cable. Due to the various capabilities of the Roku TV, as well as limitations in the available content available therein, certain features, applications, and services may not be available on all Roku TV s, or in all territories. Some features on the Roku TV may also require additional peripheral devices or membership fees that are sold separately. Please visit the Roku, Inc. website for more information on the Roku TV and content availability. The services and availability of content on the Roku TV are subject to change from time to time without prior notice. All content and services accessible through the Roku TV belong to third parties and are protected by copyright, patent, trademark and/or other intellectual property laws. Such content and services are provided solely for your personal noncommercial use. You may not use any content or services in a manner that has not been authorized by the content owner or service provider. Without limiting the foregoing, you may not modify, copy, republish, upload, post, transmit, translate, sell, create derivative works, exploit, or distribute in any manner or medium any content or services displayed through the Roku TV. You expressly acknowledge and agree that your use of the Roku TV is at your sole risk and that the entire risk as to satisfactory quality, performance and accuracy is with you. The Roku TV and all third party content and services are provided as is without warranty of any kind, either express or implied. Roku expressly disclaims all warranties and conditions with respect to the Roku TV content and services, either express or, implied, including but not limited to, warranties of merchantability, of satisfactory quality, fitness for a particular purpose, of accuracy, of quiet enjoyment, and non-infringement of third party rights. Roku does not guarantee the accuracy, validity, timeliness, legality, or completeness of any content or service made available through the Roku TV and does not warrant that the Roku TV, content or services will meet your requirements, or that operation of the Roku TV will be uninterrupted or error-free. Under no circumstances, including negligence, shall Roku be liable, whether in contract or tort, for any direct, indirect, incidental, special or consequential damages, attorney fees, expenses, or any other damages arising out of, or in connection with, any information contained in, or as a result of the use of the device, or any content or service accessed by you or any third party, even if advised of the possibility of such damages. Third party services may be changed, suspended, removed, terminated or interrupted, or access may be disabled at any time, without notice, and Roku makes no representation or warranty that any content or service will remain available for any period of time. Content and services are transmitted by third parties by means of networks and transmission facilities over which Roku has no control. Without limiting the generality of this disclaimer, Roku expressly disclaims any responsibility or liability for any change, interruption, disabling, removal of or suspension of any content or service made available through the Roku TV. Roku, the content providers, or the service providers may impose limits on the use of or access to certain services or content, in any case and without notice or liability. Any questions or requests for service relating to the content or services made available on the Roku TV should be submitted to the respective cable content or service provider or as described in the Roku TV User Guide. In the event of a conflict between the Roku TV End User Agreement and the terms set forth in this Legal Disclaimer, the Roku TV End User Agreement shall prevail and control in all circumstances. END USER LICENSE AGREEMENT (FOR ROKU TV) IMPORTANT: READ THIS AGREEMENT CAREFULLY BEFORE YOU USE A ROKU TV. ALSO REVIEW THE IMPORTANT PRODUCT INFORMATION THAT MAY HAVE BEEN PROVIDED WITH YOUR ROKU TV. Overview This End User License Agreement ( EULA ) between you and Roku, Inc. ( Roku ) governs the use of: (a) your television which uses the Roku platform to play digital content over the Internet ( Television ), and (b) any firmware and software that have been pre-installed on the Television and the firmware and software updates Roku provides to you for the Television (collectively, the Software ). By linking the Television to your account on Roku s website ( Roku Account ) or using the Television, you are agreeing to this EULA. If you are a resident of the European Economic Area, by agreeing to this EULA, you expressly agree to waive your right to withdraw. If you do not agree to this EULA, you do not have the right to use the Television or the Software. If you are within the allowable time period for returns under the applicable return policy, you may return the Television to your seller for a refund, subject to the terms of such return policy. You should perform a factory reset before you return it to erase data that may be stored on the Television. For instructions on how to reset your Television, please visit Page 108
114 In this EULA, Channel means an application in the Roku Channel Store; Content means movies, television shows, music and other audio and visual materials and entertainment; Content Provider means any provider of Content; and Roku Channel Store means the storefront of applications provided by Roku via the Television s on-screen menu. Changes to This EULA Roku may amend this EULA at any time in its discretion. Such amendments shall be effective immediately upon posting of the amended EULA on Roku s website or via the Television or your Roku Account, whichever occurs first. If you have a Roku Account that is linked to your Television, then in its option, Roku may also notify you of the amended EULA by sending a notice to the last address you have provided to Roku. You agree to provide accurate and complete information if and when you set up your Roku Account, and you agree to promptly update your account information (including contact information) to keep it accurate and complete. You can do this at any time by signing in to your Roku Account. Following such posting or notice by any of the methods described above, continued use of your Television or Roku Account means you accept and agree to the amended EULA. If you do not agree to the amended EULA, Roku may not be able to provide updates, upgrades or enhancements to your Television, and you may not be able to continue using your Television or Roku Account. Permitted Use and Restrictions The Television and the Software are for personal, non-commercial use only. Copying or redistribution of any Content delivered via the Television is strictly prohibited and we may prevent or restrict you from copying or re-distributing any elements of the Software or Content using digital rights management or other technologies. The Television and the Software are for use only in those countries where the manufacturer of your Television has authorized its sale. If you are using the Television and the Software outside of these countries, the rights granted under this EULA do not apply. Some of the Content Providers use technologies to verify your geographic location, and you may not be able to use the Television or the Software to access any Content outside of the country or location authorized by Roku or the Content Provider. Except as expressly provided under this EULA, you do not acquire any intellectual property or other proprietary rights in or to the Television, the Software or the Content, including any rights in patents, inventions, improvements, designs, trademarks, database rights or copyrights, nor do you acquire any rights in any confidential information or trade-secrets. All rights not expressly granted to you in this EULA are reserved by Roku or its applicable licensors. You may not remove, obscure, alter or conceal any trademark, logo, copyright or other proprietary notice in or on any Television, Software or Content. The Software is proprietary to Roku or its third party licensors and may be used only with the Television. Subject to this EULA and, where appropriate, the applicable third party licenses, you have a non-exclusive, non-transferable license to run the Software and any updated versions provided to you by Roku, only in and as incorporated in the Television. This is a license and not a sale. You may not (a) copy, assign, sublicense, lease, sell or rent the Software, (b) distribute or otherwise transfer the Software except as incorporated in the Television, provided that, you do not retain any copies of the Software and the recipient reads and agrees to this EULA (including all amendments); (c) modify, adapt, translate, or create derivative works of the Software (except only to the extent any of the foregoing restriction is prohibited by applicable law or as may be permitted by the license terms governing any Separately Licensed Code included with the Software); (d) decompile, disassemble, reverse engineer or otherwise derive source code from the Software, except to the extent such actions cannot be prohibited under applicable law because they are essential to achieve inter-operability of the Software with another software program, and provided that the information obtained by you during such activities is (i) used only to achieve such inter-operability; (ii) not disclosed without Roku s prior written consent; and (iii) not used to create any software that is substantially similar to the Software; (e) defeat, bypass, circumvent or interfere with any security mechanism or access control measures, or (f) have any of the foregoing done for you by a third party. This license does not include the right to receive Software upgrades or updates. Your right to use the Television and the Software will immediately terminate upon your breach of this EULA. Software Updates IN ITS SOLE DISCRETION, ROKU MAY PROVIDE UPDATES TO YOUR TELEVISION VIA THE INTERNET, INCLUDING BUG FIXES AND UPDATES, CHANGES IN THE USER INTERFACE OR HOW YOU ACCESS CONTENT, AND OTHER CHANGES THAT MAY ADD, ALTER OR REMOVE FUNCTIONALITIES AND FEATURES. YOU ACKNOWLEDGE THAT THESE UPDATES: (A) MAY HAPPEN AUTOMATICALLY IN THE BACKGROUND AT ANY TIME (AND THAT THEY CANNOT BE DISABLED BY YOU); AND (B) WILL REQUIRE AN INTERNET CONNECTION AND YOU MAY INCUR ADDITIONAL DATA CHARGES FROM THE PROVIDER OF THE INTERNECT CONNECTION. YOU UNDERSTAND THAT THESE UPDATES ARE NECESSARY TO MAINTAIN COMPATIBILITY WITH OTHER UPDATES TO ROKU S PRODUCTS OR SERVICES AND MAY BE REQUIRED FOR SECURITY REASONS. BY USING THE TELEVISION, YOU HEREBY AGREE TO RECEIVE SUCH UPDATES. Separately Licensed Code Certain software components of the Software are provided under separate third party license terms ( Separately Licensed Code ) and your right to use such components is governed by such license terms. Please visit go.roku.com/seperatelylicensedcode for more information. Voice Search If downloaded to your phone or mobile device, the Roku mobile app allows you to use your voice to search for content on your Television using voice search. When you choose to use voice search, you agree that Roku and/or a third party vendor contracted by Roku have your consent to record, process and store your voice inputs (e.g., a recording and the interpretation of what was said), and use such voice inputs with other information about your Television (e.g., device Page 109
115 identifier) to provide services related to voice search to you, to improve the accuracy and quality of the service, and as described in Roku s Privacy Policy. To learn more about voice search, visit the FAQ pages of Roku s website at NO WARRANTY FROM ROKU; Limitation of LIABILITY YOUR warranty with respect to the Television is provided by THE TELEVISION S MANUFACTURER, and not by Roku. ROKU OFFERS NO WARRANTY TO YOU UNDER THIS EULA. WITHOUT LIMITING THE GENERALITY OF THE FOREGOING DISCLAIMER, TO THE MAXIMUM EXTENT PERMITTED BY APPLICABLE LAW: (A) THE SEPARATELY LICENSED CODE AND THE SOFTWARE ARE PROVIDED AS IS, WITH ALL FAULTS AND WITHOUT WARRANTY OF ANY KIND. ROKU DISCLAIMS ALL OTHER WARRANTIES AND CONDITIONS, INCLUDING THE IMPLIED WARRANTY OF MERCHANTABILITY, SATISFACTORY QUALITY, FITNESS FOR A PARTICULAR PURPOSE AND NON-INFRINGEMENT. ROKU DOES NOT GUARANTEE, REPRESENT, OR WARRANT THAT THE TELEVISION, THE SEPARATELY LICENSED CODE AND THE SOFTWARE WILL BE: (I) SECURE, VIRUS- FREE OR ERROR-FREE, OR (II) FREE FROM ATTACK OR SECURITY INTRUSION. (B) IN NO EVENT SHALL ROKU, ITS DIRECTORS, OFFICERS OR EMPLOYEES BE LIABLE TO YOU FOR PERSONAL INJURY OR PROPERTY DAMAGE, OR ANY SPECIAL, INCIDENTAL, EXEMPLARY, PUNITIVE, INDIRECT OR CONSEQUENTIAL DAMAGES OF ANY KIND ARISING OUT OF ANY TELEVISION, THE SEPARATELY LICENSED CODE, THE SOFTWARE, OR YOUR USE THEREOF; AND (C) YOU AGREE THAT (I) THE TOTAL CUMULATIVE LIABILITY OF ROKU, ITS DIRECTORS, OFFICERS AND EMPLOYEES UNDER THIS EULA, INCLUDING LIABIILTY RELATING TO ALL TELEVISIONS LINKED TO YOUR ROKU ACCOUNT, AND THE SEPARATELY LICENSED CODE AND THE SOFTWARE IN SUCH TELEVISIONS, AND YOUR USE THEREOF, SHALL NOT EXCEED THE AMOUNT SET FORTH IN THE ROKU ACCOUNT TERMS AND CONDITIONS YOU AGREED TO FOR YOUR ROKU ACCOUNT, AND (II) ROKU, ITS DIRECTORS, OFFICERS AND EMPLOYEES SHALL NOT BE LIABLE TO YOU UNDER THIS EULA FOR ANY DIRECT DAMAGES ARISING OUT OF, OR IN CONNECTION WITH THE TELEVISION. THE FOREGOING LIMITATIONS SHALL APPLY EVEN IF THE REMEDY PROVIDED HEREIN FAILS ITS ESSENTIAL PURPOSE AND EVEN IF ROKU, ITS DIRECTORS, OFFICERS OR EMPLOYEES HAVE BEEN ADVISED OF THE POSSIBILITY OF SUCH LIABILITY. SOME JURISDICTIONS DO NOT ALLOW EXCLUSIONS OF CERTAIN WARRANTIES OR LIMITATOINS OF LIABILITY FOR CERTAIN TYPES OF DAMAGES, SO SOME OF THE ABOVE LIMITATIONS IN THIS SECTION MAY NOT APPLY TO YOU. NOTHING IN THESE TERMS OF USE SHALL AFFECT ANY NON-WAIVABLE STATUTORY RIGHTS THAT APPLY TO YOU, AND YOU MAY ALSO HAVE OTHER RIGHTS THAT VARY FROM JURISDICTION TO JURISDICTION. Export Controls You agree not to download any Content or Software, nor otherwise export or re-export any Television or the Software into (or to a national or resident of) Cuba, Iraq, Libya, North Korea, Iran, Syria or any other country as to which the United States or your country has embargoed goods, or to anyone on the U.S. Treasury Department's List of Specially Designated Nationals or the U.S. Commerce Department's Table of Denial Orders or on similar restricted lists published by your government from time to time. By using any Television or the Software, you are representing and warranting that you are not located in, under the control of, or a national or resident of any such country or on any such list. Choice of Law; Dispute Resolution A. If you are a consumer and a resident in any country in the European Economic Area where the sale of the Television is expressly authorized by its manufacturer, this EULA does not apply to you. B. In all other cases, including if you are a resident of the United States (and its possessions and territories) or Canada, you agree that this EULA shall be governed by the laws of the State of California without regard to any conflict of laws principles that may provide the application of the law of another jurisdiction; and: 1. You and Roku agree to be bound by the procedures set forth below to resolve any and all claims between you and Roku arising out of or relating to any aspect of this EULA, whether based in contract, tort, statute, fraud, misrepresentation or any other legal theory, including but not limited to, claims between you and Roku related to the Television and the Software. Each such claim is referred to individually as Claim and collectively as Claims. 2. YOU AND ROKU AGREE THAT, EXCEPT FOR THE CLAIMS IDENTIFIED IN PARAGRAPH 4 OF THIS SECTION BELOW, ANY AND ALL CLAIMS BETWEEN YOU AND ROKU SHALL BE FINALLY SETTLED BY BINDING ARBITRATION. The arbitration shall take place in Santa Clara County, California and shall be administered by the American Arbitration Association ( AAA ) pursuant to the AAA s then-current rules, including (if applicable) the AAA s Supplementary Procedures for Consumer-Related Disputes. Please be aware there is no judge or jury in arbitration. Arbitration procedures are simpler and more limited than the rules applicable in court, and review of the arbitrator s decision by a court is limited. YOU AND ROKU FURTHER AGREE THAT EACH OF YOU MAY BRING CLAIMS AGAINST THE OTHER ONLY ON AN INDIVIDUAL BASIS AND NOT AS A PLAINTIFF OR CLASS MEMBER IN ANY PURPORTED CLASS OR REPRESENTATIVE ACTION OR PROCEEDING. THE ARBITRATOR MAY NOT CONSOLIDATE OR JOIN MORE THAN ONE PERSON S CLAIM AND MAY NOT PRESIDE OVER ANY CONSOLIDATED, REPRESENTATIVE OR CLASS PROCEEDING. ALSO, THE ARBITRATOR MAY AWARD RELIEF (INCLUDING Page 110
116 MONETARY, INJUNCTIVE OR DECLARATORY RELIEF) ONLY ON AN INDIVIDUAL BASIS AND MAY NOT AWARD ANY FORM OF CONSOLIDATED, REPRESENTATIVE OR CLASS-WIDE RELIEF. Notwithstanding any provision in these terms to the contrary, if the class-action waiver in this provision is deemed invalid or unenforceable, or if an arbitration is allowed to proceed on a class basis, then neither you nor Roku are entitled to arbitrate the Claims. This arbitration provision is subject to the Federal Arbitration Act. The arbitrator s award shall be binding on you and Roku, and may be entered in any court of competent jurisdiction. 3. Information on AAA and how arbitration is initiated can be found at or by calling For Claims between You and Roku of $75,000 or less, you will be responsible for the initial arbitration filing fee, up to the amount of the initial filing fee if you were to initiate a lawsuit against Roku based on such Claims in court. If the arbitrator finds such Claims to be non-frivolous, Roku will pay any difference in such filing feesy plus the arbitrator fees. For Claims between You and Roku in excess of $75,000, if you are able to demonstrate that the costs of arbitration will be prohibitive as compared to the costs of litigation, Roku will pay as much of your actual filing fees and the arbitrator fees for the arbitration as the arbitrator deems necessary to prevent the arbitration from being cost-prohibitive as compared to the cost of litigation. 4. This agreement to arbitrate does not apply to any Claim (a) in which a party is attempting to protect its intellectual property rights (such as its patent, copyright, trademark, trade secret, or moral rights, but not including its privacy or publicity rights), or (b) that may be brought in small-claims court. 5. If the agreement to arbitrate in this provision is found to be invalid, unenforceable or inapplicable to a given Claim between You and Roku, then any and all proceedings to resolve such Claim must be brought exclusively in a federal court of competent jurisdiction in the Northern District of California or in a state court in Santa Clara County, California. You hereby irrevocably consent to the exclusive jurisdiction and venue of such courts Day Right to Opt Out: You have the right to opt out of this agreement to arbitrate by sending a written notice of your decision to opt out to the following address: Legal Department, Roku, Inc., 150 Winchester Circle, Los Gatos, CA 95032, USA; provided that, such notice must be postmarked on or before the 30th day after the first to occur of the following events if you do not already have a Roku Account: (a) the date of purchase of Your Television, or (b) the date you create your Roku Account. If you have an existing Roku Account, all devices you choose to link to your Roku Account, and all services provided by Roku which are accessed using these devices, will be subject to this agreement to arbitrate. Your notice should include your full name, your current postal address, telephone number and address, the product name and serial number for Your Television, and a copy of the original proof of purchase for your Television. If you timely send a notice in compliance with this paragraph 6, the agreement to arbitrate will not apply to either you or Roku. If you do not timely send this notice, then you agree to be bound by this agreement to arbitrate. 7. Notwithstanding any provision in this Agreement to the contrary, you agree that, if Roku seeks to delete or materially modify the agreement to arbitrate described herein, any such deletion or modification will not apply to any individual Claim of which you have notified Roku prior to such modification. Miscellaneous Roku may transfer its rights and obligations under this EULA to another organization. You may only transfer your rights or your obligations under this EULA to another person if Roku agrees in writing. This EULA is between you and Roku. No other person shall have any rights to enforce these terms. Each of the paragraphs of this EULA operates separately. If any court or relevant authority decides that any of them are unlawful, the remaining paragraphs will remain in full force and effect. If Roku fails to insist that you perform any of your obligations under this EULA, or if Roku does not enforce its rights against you, or if Roku delays in doing so, that will not mean that Roku has waived its rights against you, or that you do not have to comply with those obligations. If Roku does waive a default by you, Roku will only do so in writing, but that will not mean that Roku will automatically waive any later default by you. Contact Information If you wish to contact Roku, please send your correspondence by mail to Roku, Inc., 150 Winchester Circle, Los Gatos, CA USA, or by to customerservice@roku.com. Last Updated: April 21, 2016 CONTRAT DE LICENCE D UTILISATEUR FINAL (POUR ROKU TV) IMPORTANT : LIRE ATTENTIVEMENT CE CONTRAT AVANT D UTILISER UN TÉLÉVISEUR ROKU TV. PASSER ÉGALEMENT EN REVUE LES RENSEIGNEMENTS IMPORTANTS RELATIFS AU PRODUIT QUI PEUVENT AVOIR ÉTÉ FOURNIS AVEC VOTRE TÉLÉVISEUR ROKU TV. Page 111
117 Aperçu Le présent contrat de licence d utilisateur final («CLUF») conclu entre vous et Roku, Inc. («Roku») régit l utilisation de : (a) votre téléviseur qui se sert de la plateforme Roku pour lire du contenu numérique sur Internet («Téléviseur») et (b) tous les microprogrammes et logiciels qui ont été préinstallés sur le Téléviseur, ainsi que les mises à jour des microprogrammes et logiciels que Roku met à votre disposition pour le Téléviseur (collectivement le «Logiciel»). Lier le Téléviseur à votre compte sur le site Web de Roku («Compte Roku») ou utiliser le Téléviseur signifie que vous acceptez ce CLUF. Si vous résidez sur le territoire économique européen et acceptez ce CLUF, vous acceptez expressément de renoncer à votre droit de rétractation. Si vous n acceptez pas le présent CLUF, vous ne pouvez pas utiliser le Téléviseur ni le Logiciel. Si le délai autorisé pour les retours n est toujours pas échu en vertu de la politique de retour applicable, vous pouvez retourner le Téléviseur à votre vendeur pour obtenir un remboursement, sous réserve des modalités d une telle politique de retour. Vous devez effectuer une réinitialisation d usine avant de retourner l appareil afin d effacer les données pouvant être stockées sur le Téléviseur. Pour obtenir des renseignements sur la façon de réinitialiser votre Téléviseur, veuillez visiter la page Dans le présent CLUF, «Canal» désigne une application de la boutique de canaux Roku; «Contenu» désigne des films, des séries télévisées, de la musique et tout autre contenu et divertissement audiovisuel; «Fournisseur de contenu» désigne tout fournisseur de Contenu et «Boutique de canaux Roku» désigne la vitrine d applications fournies par Roku par l intermédiaire du menu à l écran du Téléviseur. Modifications au présent CLUF Roku peut modifier ce CLUF à tout moment à sa discrétion. Ces modifications entreront en vigueur immédiatement après la publication du CLUF modifié sur le site Web de Roku, le Téléviseur ou votre compte Roku, selon la première éventualité. Si vous disposez d un compte Roku associé à votre Téléviseur, Roku peut également, à sa discrétion, vous informer du CLUF modifié en envoyant un avis à la dernière adresse électronique que vous avez indiqué à Roku. Vous acceptez de fournir des renseignements exacts et complets lorsque vous configurez votre compte Roku et vous vous engagez à mettre rapidement à jour les renseignements de votre compte, y compris vos coordonnées, afin qu ils soient exacts et complets. Vous pouvez le faire à tout moment en vous connectant à votre compte Roku. À la suite d une telle annonce ou d un tel avis par l une des méthodes décrites ci-dessus, continuer à utiliser votre Téléviseur ou votre compte Roku signifie que vous acceptez le CLUF modifié. Si vous n acceptez pas le CLUF modifié, Roku ne sera peut-être pas en mesure de fournir des mises à jour, des mises à niveau ou des améliorations pour votre Téléviseur, et vous pourriez ne plus être en mesure de continuer à utiliser votre Téléviseur ou votre compte Roku. Utilisation autorisée et restrictions Le Téléviseur et le Logiciel sont destinés à un usage personnel et non commercial uniquement. Toute reproduction ou toute redistribution du contenu offert par le Téléviseur est strictement interdite et nous pourrions vous empêcher de copier ou de redistribuer tout élément du Logiciel ou du contenu à l aide d un système de gestion des droits numériques ou d autres technologies. Le Téléviseur et le Logiciel sont uniquement destinés à une utilisation dans les pays dans lesquels le fabricant de votre Téléviseur a autorisé leur vente. Si vous utilisez le Téléviseur et le Logiciel en dehors de ces pays, les droits accordés en vertu du présent CLUF ne s appliquent pas. Certains des Fournisseurs de contenu utilisent des technologies qui permettent de vérifier votre situation géographique et vous pourriez ne pas être en mesure d utiliser le Téléviseur ou le Logiciel pour accéder au Contenu en dehors du pays ou de l emplacement autorisé par Roku ou le Fournisseur de contenu. Sauf dans la mesure expressément indiquée dans le présent CLUF, vous n acquérez aucune propriété intellectuelle ou aucun autre droit de propriété de quelque nature sur le Téléviseur, le Logiciel ou le Contenu, y compris les droits de brevets, les inventions, les améliorations, les conceptions, les marques, les droits de base de données ou les droits d auteur, et vous n acquérez aucun droit sur tout renseignement confidentiel ou secret commercial. Tous les droits qui vous ne sont pas expressément concédés dans le présent CLUF sont réservés par Roku ou ses concédants de licence applicables. Vous ne pouvez pas supprimer, obscurcir, modifier ou dissimuler toute marque, tout logo, tout droit d auteur ou toute autre mention de droit de propriété dans ou sur n importe tout Téléviseur, Logiciel ou Contenu. Le Logiciel est la propriété de Roku ou d une tierce partie licenciée et peut être utilisé uniquement avec le Téléviseur. Sous réserve du présent CLUF et, le cas échéant, des licences applicables de tiers, vous détenez une licence non exclusive et non transférable d utilisation du Logiciel et de toute version mise à jour qui vous est fournie par Roku, seulement dans le Téléviseur et sous la forme qu il incorpore. Ceci constitue une licence et non une vente. Vous ne pouvez pas (a) copier, céder, louer ou vendre le Logiciel ou accorder une sous-licence pour ce dernier; (b) distribuer ou autrement transférer le Logiciel, sauf comme incorporé dans le Téléviseur, pourvu que vous ne conserviez aucune copie du Logiciel et que le destinataire lit et s engage à respecter cet accord de licence (y compris tous les amendements); (c) modifier, adapter, traduire ou créer des œuvres dérivées du Logiciel (sauf dans la mesure où toute restriction qui précède est interdite par la loi applicable ou jugée acceptable par les termes de la licence régissant tout code utilisé avec autorisation fourni avec le Logiciel); (d) décompiler, désassembler, désosser ou autrement extraire le code source du Logiciel, sauf dans la mesure où ces gestes ne peuvent être interdits en vertu de la loi applicable parce qu ils sont essentiels à l interopérabilité du Logiciel avec un autre logiciel, et pourvu que les renseignements obtenus par vous au cours de ces activités sont (i) utilisés uniquement pour réaliser cette interopérabilité; (ii) non divulgués sans le consentement écrit de Roku obtenu préalablement; et (iii) ne sont pas utilisés pour créer un logiciel qui est substantiellement similaire au Logiciel; (e) usurper, contourner ou gêner tout mécanisme de sécurité ou toute mesure de contrôle d accès, ou (f) faire effectuer ce qui précède pour vous par un tiers. Cette licence Page 112
118 n inclut pas le droit de recevoir des mises à jour ou des mises à niveau logicielles. Votre droit d utiliser le Téléviseur et le Logiciel sera immédiatement annulé sur violation du présent CLUF. Mises à jour logicielles À SA SEULE DISCRÉTION, ROKU PEUT FOURNIR DES MISES À JOUR SUR VOTRE TÉLÉVISEUR PAR INTERNET, Y COMPRIS DES CORRECTIFS, DES MISES À JOUR, DES MODIFICATIONS DE L INTERFACE OU DE LA MANIÈRE D ACCÉDER AU CONTENU, ET D AUTRES CHANGEMENTS QUI PEUVENT AJOUTER, ALTÉRER OU SUPPRIMER DES FONCTIONNALITÉS ET DES CARACTÉRISTIQUES. VOUS RECONNAISSEZ QUE CES MISES À JOUR (A) PEUVENT SE PRODUIRE AUTOMATIQUEMENT EN ARRIÈRE-PLAN À TOUT MOMENT (ET QU ELLES NE PEUVENT PAS ÊTRE DÉSACTIVÉES PAR VOUS); ET (B) NÉCESSITENT UNE CONNEXION INTERNET ET QUE VOUS POURRIEZ DEVOIR PAYER DES FRAIS DE DONNÉES SUPPLÉMENTAIRES À VOTRE FOURNISSEUR DE CONNEXION INTERNET. VOUS COMPRENEZ QUE CES MISES À JOUR SONT NÉCESSAIRES POUR MAINTENIR LA COMPATIBILITÉ AVEC LES AUTRES MISES À JOUR DE PRODUITS OU DE SERVICES DE ROKU ET QU ELLES PEUVENT ÊTRE NÉCESSAIRES POUR DES RAISONS DE SÉCURITÉ. EN UTILISANT LE TÉLÉVISEUR, VOUS ACCEPTEZ DE RECEVOIR CES MISES À JOUR. Code sous licence distincte Certains composants du Logiciel sont fournis sous les termes distincts de licence de tiers («Code sous licence distincte») et votre droit d utiliser ces composants est régi par les modalités de cette licence. Veuillez visiter le pour obtenir de plus amples renseignements. Recherche vocale Si vous la téléchargez sur votre téléphone ou appareil mobile, l application mobile Roku vous permet d utiliser votre voix et la recherche vocale pour chercher du contenu sur votre Téléviseur. Lorsque vous choisissez d utiliser la recherche vocale, vous acceptez que Roku et/ou un fournisseur tiers fournisseur engagé par Roku aient votre consentement pour enregistrer, traiter et stocker vos entrées vocales (par exemple, un enregistrement et l interprétation de ce qui a été dit) et utilisent ces entrées vocales avec d autres renseignements sur votre Téléviseur (par exemple, identificateur de périphérique) pour fournir des services liés à la recherche vocale pour vous afin d améliorer la précision et la qualité du service, comme cela est décrit dans la politique de confidentialité de Roku. Pour en savoir plus sur la recherche vocale, visitez les pages de FAQ du site de Roku au AUCUNE GARANTIE DE LA PART DE ROKU; LIMITATION DE RESPONSABILITÉ VOTRE GARANTIE RELATIVE AU TÉLÉVISEUR EST FOURNIE PAR LE FABRICANT DU TÉLÉVISEUR ET NON PAS PAR ROKU. ROKU NE VOUS OFFRE AUCUNE GARANTIE EN VERTU DU PRÉSENT CLUF. SANS RESTREINDRE LA PORTÉE GÉNÉRALE DU PRÉSENT AVIS DE NON-RESPONSABILITÉ, DANS LES LIMITES PERMISES PAR LES LOIS APPLICABLES : (A) LE CODE SOUS LICENCE DISTINCTE ET LE LOGICIEL SONT FOURNIS «TELS QUELS», ERREURS COMPRISES, SANS GARANTIE D AUCUNE SORTE. ROKU RENONCE À TOUTES LES AUTRES GARANTIES ET CONDITIONS, Y COMPRIS LA GARANTIE IMPLICITE DE QUALITÉ MARCHANDE, DE QUALITÉ SATISFAISANTE, D ADÉQUATION À UN USAGE PARTICULIER ET D ABSENCE DE CONTREFAÇON. ROKU NE PEUT GARANTIR, DÉCLARER NI CERTIFIER QUE LE TÉLÉVISEUR, LE CODE SOUS LICENCE DISTINCTE ET LE LOGICIEL SERONT : (I) SÉCURISÉS, SANS VIRUS OU SANS ERREUR, OU (II) DÉNUÉS DE TOUTE ATTAQUE OU INTRUSION DE SÉCURITÉ. (B) EN AUCUN CAS ROKU, SES ADMINISTRATEURS, SES DIRIGEANTS OU SES EMPLOYÉS NE SERONT RESPONSABLES ENVERS VOUS POUR TOUTE LÉSION CORPORELLE OU TOUT DOMMAGE MATÉRIEL, OU TOUT DOMMAGE PARTICULIER, ACCESSOIRE, EXEMPLAIRE, PUNITIF, INDIRECT OU IMMATÉRIEL DE QUELQUE NATURE DÉCOULANT DE TOUT TÉLÉVISEUR, CODE SOUS LICENCE DISTINCTE, LOGICIEL OU DE VOTRE UTILISATION DE CEUX-CI; ET (C) VOUS ACCEPTEZ QUE (I) LA RESPONSABILITÉ CUMULATIVE DE ROKU, DE SES ADMINISTRATEURS, SES DIRIGEANTS OU SES EMPLOYÉS, EN VERTU DU PRÉSENT CLUF, NOTAMMENT SA RESPONSABILITÉ CONCERNANT TOUS LES TÉLÉVISEURS ASSOCIÉS À VOTRE COMPTE ROKU, AINSI QUE LE CODE SOUS LICENCE DISTINCTE ET LE LOGICIEL INSTALLÉ SUR DE TELS TÉLÉVISEURS, ET VOTRE UTILISATION DE CEUX- CI, NE DÉPASSERA PAS LE MONTANT SPÉCIFIÉ DANS LES CONDITIONS GÉNÉRALES DU COMPTE ROKU QUE VOUS AVEZ ACCEPTÉES POUR VOTRE COMPTE ROKU, ET QUE (II) ROKU, SES ADMINISTRATEURS, SES DIRIGEANTS ET SES EMPLOYÉS NE SERONT PAS RESPONSABLES ENVERS VOUS, EN VERTU DU PRÉSENT CLUF, POUR LES DOMMAGES DIRECTS DÉCOULANT DU TÉLÉVISEUR OU EN LIEN AVEC CELUI-CI. LES LIMITATIONS CI-DESSUS S APPLIQUENT MÊME SI LE RECOURS PRÉVU AUX PRÉSENTES ÉCHOUE DANS SON OBJECTIF PRINCIPAL ET MÊME SI ROKU, SES ADMINISTRATEURS, DIRIGEANTS OU SES EMPLOYÉS ONT ÉTÉ AVISÉS DE LA POSSIBILITÉ D UNE TELLE RESPONSABILITÉ. CERTAINS TERRITOIRES N AUTORISENT PAS L EXCLUSION DE CERTAINES GARANTIES OU LA LIMITATION DE RESPONSABILITÉ POUR CERTAINS TYPES DE DOMMAGES, CERTAINES LIMITATIONS MENTIONNÉES DANS CETTE SECTION PEUVENT NE PAS VOUS CONCERNER. RIEN DANS LES PRÉSENTES CONDITIONS D UTILISATION NE DOIT AFFECTER TOUT DROIT ACCORDÉ PAR LA LOI QUI S APPLIQUE À VOUS ET VOUS POURRIEZ AUSSI DISPOSER D AUTRES DROITS QUI VARIENT D UN TERRITOIRE À L AUTRE. Contrôles à l exportation Vous acceptez de ne pas télécharger tout Contenu ou Logiciel, ni autrement exporter ou réexporter tout Téléviseur ou Logiciel dans (ou à un ressortissant ou un résident de) Cuba, Irak, Libye, Corée du Nord, Iran, Syrie ou tout autre pays Page 113
119 contre lequel les États-Unis ou votre pays tient un embargo, ou à toute personne figurant sur la List of Specially Designated Nationals du Treasury Department des États-Unis ou du Table of Denial Orders du Commerce Department des États-Unis ou toute autre liste restreinte similaire publiée par votre gouvernement de temps à autre. En utilisant un Téléviseur ou le Logiciel, vous représentez un pays autre que ceux figurant sur une telle liste et vous garantissez que vous n êtes pas situé dans un tel pays, sous le contrôle d un tel pays, ou que vous n êtes pas un ressortissant ou un résident d un tel pays. Choix de compétence; règlement des litiges A. Si vous êtes un consommateur ou un résident d un pays appartenant au territoire économique européen dans lequel la vente du Téléviseur est expressément autorisée par son fabricant, le présent CLUF ne s applique pas à votre cas. B. Dans tous les autres cas, notamment si vous êtes un résident des États-Unis (et de ses possessions et territoires) ou du Canada, vous acceptez que cet accord de licence soit régi par les lois de l état de la Californie, sans tenir compte de tout conflit de principes de droit qui peut s appliquer à la loi d un autre territoire; et : 1. Vous et Roku acceptez d être liés par les modalités énoncées ci-dessous pour résoudre toute réclamation entre vous et Roku résultant de tout aspect du présent CLUF ou relative à celle-ci, qu elle se fonde sur un contrat, un délit civil, une loi, une fraude, une fausse déclaration ou toute autre théorie juridique, y compris, mais sans s y limiter, à des réclamations entre vous et Roku liées au Téléviseur et au Logiciel. Chaque réclamation est dénommée individuellement en tant que «Réclamation» et collectivement en tant que «Réclamations». 2. VOUS ET ROKU CONSENTEZ À CE QUE TOUTE RÉCLAMATION ENTRE VOUS ET ROKU SOIT TRANCHÉE DE FAÇON DÉFINITIVE PAR ARBITRAGE, À L EXCEPTION DES RÉCLAMATIONS QUI FIGURENT AU PARAGRAPHE 4 CI-APRÈS DE LA PRÉSENTE SECTION. L arbitrage doit avoir lieu dans le comté de Santa Clara, en Californie, et doit être administré par l American Arbitration Association (l «AAA») suivant les règles en vigueur de l AAA, incluant (le cas échéant) les Procédures Additionnelles de l AAA concernant les différends de consommateurs. Soyez informé qu il n y a aucun juge ni jury en arbitrage. Les procédures d arbitrage sont simplifiées et plus limitées que les règles applicables devant les tribunaux et la révision des décisions de l arbitre par un tribunal est limitée. VOUS ET ROKU CONSENTEZ EN OUTRE À CE QUE VOUS ET ROKU PUISSIEZ PRÉSENTER UNE RÉCLAMATION À L ENCONTRE DE L AUTRE PARTIE UNIQUEMENT SUR UNE BASE INDIVIDUELLE ET NON À TITRE DE REQUÉRANT OU DE MEMBRE D UN GROUPE DANS TOUTE ACTION OU TOUT RECOURS COLLECTIF. L ARBITRE NE PEUT CONSOLIDER OU JOINDRE PLUS D UNE RÉCLAMATION PAR PERSONNE ET NE PEUT PRÉSIDER AUCUN RECOURS CONSOLIDÉ OU COLLECTIF. L ARBITRE PEUT ACCORDER TOUTE FORME DE RÉPARATION (INCLUANT UNE RÉPARATION MONÉTAIRE, INJONCTION OU MESURE DÉCLARATOIRE) SUR UNE BASE INDIVIDUELLE SEULEMENT ET NE PEUT ACCORDER AUCUNE FORME DE RÉPARATION CONSOLIDÉE OU COLLECTIVE. Nonobstant toute disposition contraire, si la renonciation au recours collectif prévue au présent paragraphe est jugée invalide ou non exécutoire ou si un arbitrage est autorisé à procéder sur une base collective, ni vous ni Roku ne serez dès lors autorisés à soumettre les Réclamations à l arbitrage. La présente clause d arbitrage est assujettie au Federal Arbitration Act. La décision de l arbitre liera vous et Roku et peut être homologuée par tout tribunal compétent. 3. Vous trouverez les renseignements concernant l AAA et la façon dont l arbitrage est initié à l adresse ou en téléphonant au Pour toute Réclamation entre Vous et Roku de USD et moins, vous serez responsable des frais initiaux de demande d arbitrage, jusqu à concurrence du montant des frais initiaux de la demande que vous auriez été appelé à payer pour une poursuite judiciaire initiée pour ces mêmes Réclamations à l encontre de Roku devant les tribunaux. Si l arbitre juge les Réclamations non frivoles, Roku paiera la différence entre de tels frais plus les fraisy de l arbitrage. Pour toute Réclamation entre vous et Roku qui excède USD, si vous êtes en mesure de démontrer que les frais de l arbitrage sont prohibitifs par rapport aux frais de justice, Roku paiera le montant de vos frais de demande réels et les frais de l arbitrage, jugés nécessaires par l arbitre afin d éviter que les frais d arbitrage ne deviennent prohibitifs par rapport aux frais de justice. 4. Cette convention d arbitrage ne concerne pas toute revendication (a) dans laquelle une partie tente de protéger ses droits de propriété intellectuelle (tels que son brevet, copyright, marque déposée, secret commercial, ou des droits moraux, mais ne comprenant pas sa vie privée ou les droits de publicité ), ou (b) qui peut être intentée devant le tribunal des petites créances. 5. Si cette entente d arbitrage est jugée invalide, non exécutoire ou inapplicable pour une Réclamation donnée entre Vous et Roku, toute procédure visant à résoudre telle Réclamation devra dès lors être présentée exclusivement devant un tribunal fédéral ayant juridiction dans le District Nord de Californie ou un tribunal d État du comté de Santa Clara en Californie. Vous consentez irrévocablement à la juridiction exclusive de ces tribunaux. 6. Droit de retrait de 30 jours : vous avez le droit de vous retirer de cette entente d arbitrage en envoyant un avis écrit de votre décision de vous retirer à l adresse suivante : Legal Department, Roku, Inc., 150 Winchester Circle, Los Gatos, CA 95032, États-Unis; à condition que le cachet d un tel avis soit daté du 30e jour, ou moins, suivant le premier événement se produisant parmi les choix ci-après, si vous ne possédez Page 114
120 pas encore de Compte Roku Account : (a) la date d achat de Votre Téléviseur ou (b) la date de création de votre Compte Roku. Si vous possédez un compte Roku, tous les appareils que vous choisissez de lier à votre compte Roku et tous les services fournis par Roku qui sont accessibles à l aide de ces appareils seront soumis à cette convention d arbitrage. Votre avis doit indiquer votre prénom et nom complets, votre adresse postale, votre numéro de téléphone et votre adresse courriel actuels, le nom du produit et le numéro de série afférent à votre Téléviseur, ainsi qu une copie de la preuve originale de l achat de votre Téléviseur. Si vous envoyez en temps opportun un avis en conformité avec le présent paragraphe 6, la convention d arbitrage ne pourra pas s appliquer à vous-même ou à Roku. Si vous ne transmettez pas cet avis dans les délais impartis, alors vous consentez à être lié par cette entente d arbitrage. 7. Nonobstant toute disposition contraire de cette Entente, vous reconnaissez que si Roku veut supprimer ou modifier substantiellement l entente d arbitrage ci-devant, ladite suppression ou modification ne s appliquera pas à une Réclamation individuelle pour laquelle vous avez avisé Roku préalablement à ladite suppression ou modification. Divers En vertu de ce CLUF, Roku peut transférer ses droits et ses obligations à une autre organisation. Vous pouvez uniquement transférer vos droits ou vos obligations en vertu de ce CLUF à une autre personne si Roku y consent par écrit. Ce CLUF est entre vous et Roku. Aucune autre personne n aura le droit de faire respecter ces conditions. Chacun des paragraphes du présent CLUF a effet séparément. Si un tribunal ou une autre autorité compétente décide que l un d entre eux est illicite, les paragraphes restants resteront en vigueur. Si Roku ne parvient pas à s assurer que vous respectez vos obligations aux termes du présent CLUF ou si Roku n applique pas ses droits contre vous, ou si Roku tarde à le faire, cela ne signifiera pas que Roku a renoncé à ses droits contre vous, ou que vous n avez pas à vous conformer à ces obligations. Si Roku renonce à intenter un recours en cas de manquement de votre part, Roku ne le fera que par écrit, mais cela ne signifiera pas que Roku renoncera automatiquement à tout manquement ultérieur de vous. Coordonnées Si vous désirez communiquer avec Roku, veuillez nous envoyer votre courrier à l adresse suivante Roku, Inc., 150 Winchester Circle, Los Gatos, CA 95032, États-Unis ou par courriel à l adresse customerservice@roku.com. Dernière mise à jour : 21 avril 2016 Dolby Audio Manufactured under license from Dolby Laboratories. Dolby, Dolby Audio, and the double-d symbol are trademarks of Dolby Laboratories. Copyright Dolby Laboratories. All rights reserved. Dolby Vision Dolby, Dolby Vision, and the double-d symbol are trademarks of Dolby Laboratories. Manufactured under license from Dolby Laboratories. Confidential unpublished works. Copyright Dolby Laboratories. All rights reserved. HDMI The terms HDMI and HDMI High-Definition Multimedia Interface, and the HDMI Logo are trademarks or registered trademarks of HDMI Licensing LLC in the United States and other countries. Roku ROKU, ROKU TV and the ROKU logo are the trademarks or registered trademarks of Roku, Inc. All other trademarks and logos herein are the property of their respective owners. Page 115
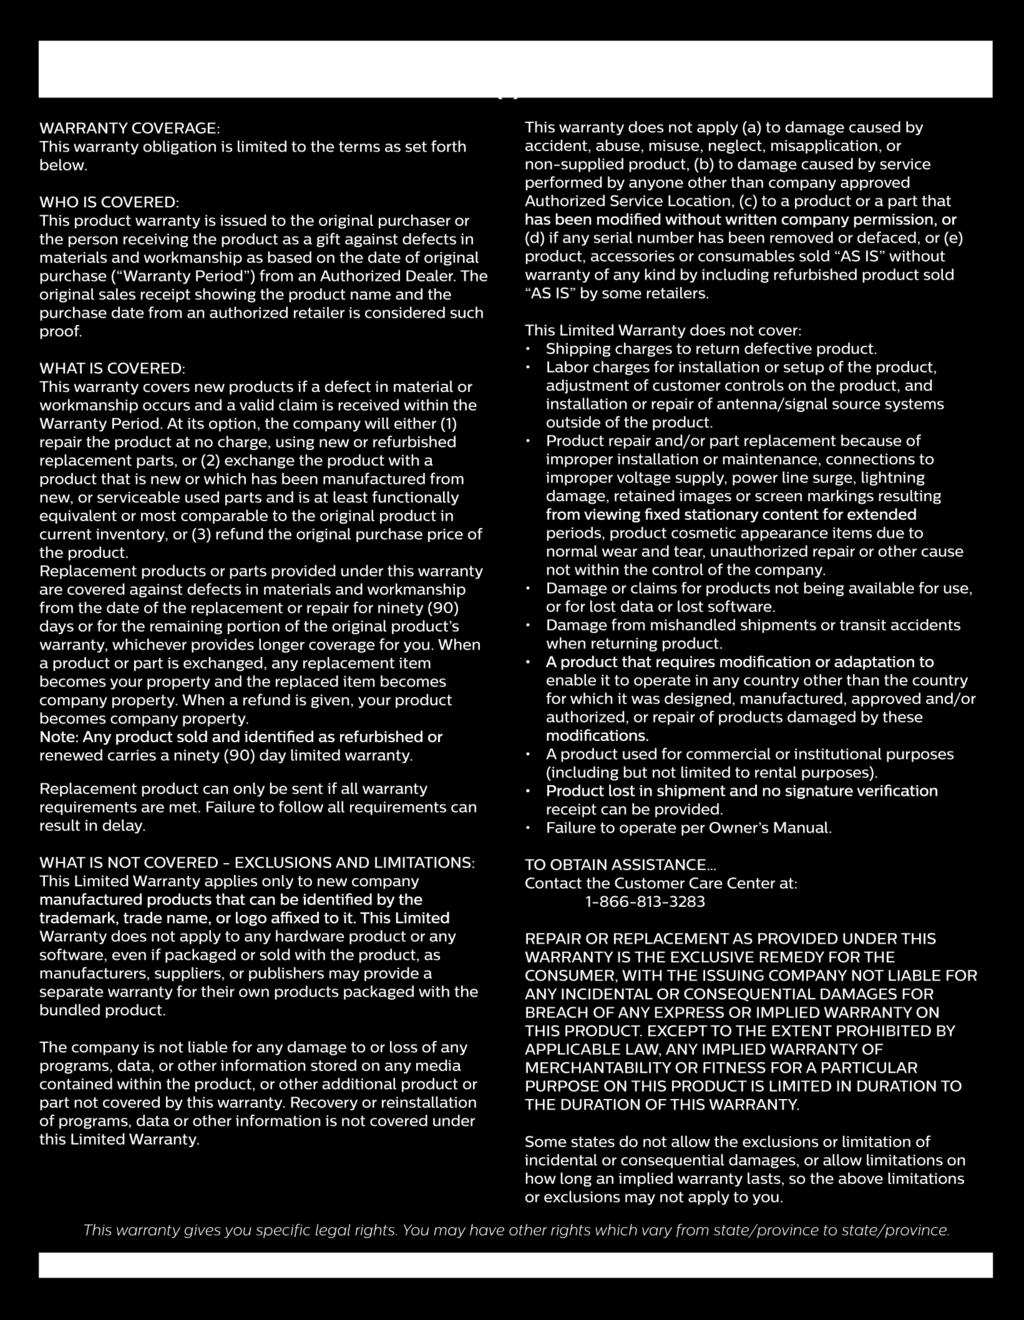
121 Page 116
122 License P&F USA, Inc. hereby offers to deliver, upon request, a copy of the complete corresponding source code for the copyrighted open source code packages, on an AS IS basis, used in this product for which such offer is requested by the respective licenses. This offer is valid up to three years after the product purchase to anyone in receipt of this information. To obtain source code, please contact P&F USA, Inc. You should write to Open Source Team, P&F USA, Inc., PO Box 2248, Alpharetta, GA P&F USA, Inc. disclaims any and all warranties and representations with respect to such software and related source code including quality, reliability, usability, and accuracy, and further disclaim all express, implied, statutory or otherwise, including without limitation,any implied warranties of title, non-infringement, merchantability, or fitness for a particular purpose. P&F USA, Inc. shall not be liable to make any corrections to the open source software or source code or to provide any support or assistance with respect to it. P&F USA, Inc. disclaims any and all liability arising out of or in connection with the use of this software and/or source code. Page 117


123 . P&F USA, Inc. PO Box 2248, Alpharetta, GA U.S.A. P&F Mexicana, S.A. de C.V. Av. La Palma No. 6, Col. San Fernando La Herradura. Huixquilucan, Edo. de México. C.P This product has been manufactured by and is sold under the responsibility of P&F USA, Inc., and P&F USA, Inc. is the warrantor in relation to this product. The Philips trademark and the Philips Shield Emblem are registered trademarks of Koninklijke Philips N.V. used under license. AALU1U2-50FX/AALU0U2-50FX AALV4U2-43FB/AALV1U2-43FL AALV3U2-43FB/AALV0U2-43FL AAL21U2-40FX/AAL20U2-40FX
Roku TV. User Guide. Version 8.0. For U.S. and Canada. English
 Roku TV User Guide Version 8.0 For U.S. and Canada English Illustrations in this guide are provided for reference only and may differ from actual product appearance. Copyright 2018 Roku, Inc. All rights
User Guide. TCL P-Series. For U.S. and Canada. Version 8.0. English
 User Guide TCL P-Series Version 8.0 For U.S. and Canada English Illustrations in this guide are provided for reference only and may differ from actual product appearance. Copyright 2017 Roku, Inc. All
User Guide. TCL 6-Series. For U.S. and Canada. Version 8.0. English
 User Guide TCL 6-Series Version 8.0 For U.S. and Canada English Illustrations in this guide are provided for reference only and may differ from actual product appearance. Copyright 2018 Roku, Inc. All
User Guide. TCL S-Series. For U.S. and Canada. Version 8.0. English
 User Guide TCL S-Series Version 8.0 For U.S. and Canada English Illustrations in this guide are provided for reference only and may differ from actual product appearance. Copyright 2017 Roku, Inc. All
Table of Contents. Welcome The new standard in Smart TVs...4 Get the most out of your new TV...4. Connections and setup... 6
 ES-Y171715 English Copyright Statement Portions 2017 Hisense Company Ltd. All rights reserved. Material in this User Manual is the property of Hisense Company Ltd. and its subsidiaries, and is protected
User Guide. Models: E4SW5017RKU. English. Illustrations in this guide are provided for reference only and may differ from actual product appearance.
 User Guide Models: E4SW5017RKU English Illustrations in this guide are provided for reference only and may differ from actual product appearance. Product design and specification may be changed without
Always there to help you. Register your product and get support at SRP3013. Question? Contact Philips.
 Always there to help you Register your product and get support at www.philips.com/support Question? Contact Philips SRP3013 User manual Contents 1 Your universal remote 2 Introduction 2 Overview of the
Copyright
 Roku TV Copyright The new standard in Smart TVs Get the most out of your new TV Connecting an antenna, cable, or satellite box Connecting external equipment with a composite AV video cable Connecting
Welcome to NEED HELP? DIRECTV offers the best entertainment experience. Use this guide to make the most of it LKR FCC ID : ORS
 NEED HELP? Important Tips Do not unplug your receiver If you unplug it you may miss the most recent updates that improve our service. The DIRECTV receiver is designed to consume very little energy while
HD Digital Set-Top Box Quick Start Guide
 HD Digital Set-Top Box Quick Start Guide Eagle Communications HD Digital Set-Top Box Important Safety Instructions WARNING TO REDUCE THE RISK OF FIRE OR ELECTRIC SHOCK, DO NOT EXPOSE THIS PRODUCT TO RAIN
CAUTION RISK OF ELECTRIC SHOCK NO NOT OPEN
 Evolution Digital HD Set-Top Box Important Safety Instructions 1. Read these instructions. 2. Keep these instructions. 3. Heed all warnings. 4. Follow all instructions. 5. Do not use this apparatus near
Evolution Digital HD Set-Top Box Important Safety Instructions
 Evolution Digital HD Set-Top Box Important Safety Instructions 1. Read these instructions. 2. Keep these instructions. 3. Heed all warnings. 4. Follow all instructions. 5. Do not use this apparatus near
Always there to help you. Register your product and get support at SRP5018. Question? Contact Philips.
 Always there to help you Register your product and get support at www.philips.com/support Question? Contact Philips SRP5018 User manual Contents 1 Your universal remote 2 Introduction 2 Overview of the
IPSTB1200 /IPC3200 Media Client User guide
 IPSTB1200 /IPC3200 Media Client User guide Safety/Compliance Important Safety Instructions Please carefully read these safety and compliance instructions and this entire user guide. Follow all instructions
Hi! Let s get started.
 Hi! Let s get started. What s in the box Roku 2 player Roku 2 enhanced remote Headphones 2 x AA batteries for remote A/V cable (RCA) Power adapter Get to know your Roku 2 A Front view B E Back view C
Hi! Let s get started.
 Hi! Let s get started. What s in the box LT Roku LT player Roku standard remote 2 x AAA batteries for remote A/V cable (RCA) Power adapter Get to know your Roku LT A LT Front view B C F Back view D E
TV Connector user guide
 TV Connector user guide Thank you Thank you for choosing the TV Connector. The intended use of the TV Connector is to connect your hearing aids directly to your TV or audio source. Your TV Connector Hearing
 Register your product and get support at www.philips.com/welcome SWS3435S/27 SWS3435H/37 EN User manual Contents 1 Important 4 Safety 4 English 2 Your SWS3435 6 Overview 6 3 Installation 7 Connect the
USER MANUAL. 27 Full HD Widescreen LED Monitor L270E
 USER MANUAL 27 Full HD Widescreen LED Monitor L270E TABLE OF CONTENTS 1 Getting Started 2 Control Panel/ Back Panel 3 On Screen Display 4 Technical Specs 5 Care & Maintenance 6 Troubleshooting 7 Safety
USER MANUAL. 27 Full HD Widescreen LED Monitor L27ADS
 USER MANUAL 27 Full HD Widescreen LED Monitor L27ADS TABLE OF CONTENTS 1 Getting Started 2 Control Panel/ Back Panel 3 On Screen Display 4 Technical Specs 5 Care & Maintenance 6 Troubleshooting 7 Safety
Quick Start Guide LC-40Q3000U LC-40Q3020U LC-40Q3030U LC-40Q3040U LC-40Q3050U LC-40Q3060U LC-40Q3070U LC-40Q3080U LC-40Q3090U
 ES-M1826C1-1 LC-40Q3000U LC-40Q3020U LC-40Q3030U LC-40Q3040U LC-40Q3050U LC-40Q3060U LC-40Q3070U LC-40Q3080U LC-40Q3090U Quick Start Guide Help SHARP improve the environment by reducing paper waste. For
Remote Control. degraded, causing unreliable operation. The recommended effective distance for remote operation is about 16 feet (5 meters).
.") Media Streaming Sound Bar RTS736W User Manual Remote Control using the remote control Point the remote control at the REMOTE SENSOR located on the unit (see Front Panel illustration for precise location).
Media Streaming Sound Bar RTS736W User Manual Remote Control using the remote control Point the remote control at the REMOTE SENSOR located on the unit (see Front Panel illustration for precise location).
E32 Series User Guide
 PACKAGE CONTENTS E32 Series User Guide SCEPTRE Display x 1 TV Foot x 2 Screws x 4 Power Cord x 1 (attached) Warranty Card x 1 Display Remote Control (AAA Batteries included) x 1 User Guide x 1 (Complete
OPERATING INSTRUCTIONS TOM-0431IP
 OPERATING INSTRUCTIONS TOM-0431IP Table of Contents FCC Information -------------------------------------------------------------------- 2 Safety and Environmental Precautions ------------------------------------------------
THD601DC Set-top box
 THD601DC Set-top box Contents 1. Safety... 1 2. Appearance... 2 3. Rear Panel Connection... 3 4. Remote... 4 5 First Time Set-Up... 7 6. Network Settings... 8 6.1 Available Networks and Checking Current
ATTACHING & REMOVING THE BASE
 TV53DB ATTACHING & REMOVING THE BASE 1. To install or remove the neck, screw in or remove the 4 screws indicated in the picture. 2. To install the base, place the display unit flat on a table. Afterwards
SMART Hi-Fi AUDIO *MFL * SJ8 SIMPLE MANUAL. Wireless Multi-room Sound Bar
 ENGLISH SIMPLE MANUAL SJ8 SMART Hi-Fi AUDIO Wireless Multi-room Sound Bar Please read this manual carefully before operating your set and retain it for future reference. To view the instructions of advanced
USER MANUAL Full HD Widescreen LED Monitor L215IPS
 USER MANUAL 21.5 Full HD Widescreen LED Monitor L215IPS TABLE OF CONTENTS 1 Getting Started 2 Control Panel/ Back Panel 3 On Screen Display 4 Technical Specs 5 Care & Maintenance 6 Troubleshooting 7 Safety
VF-STB IP Appliance User Guide
 VF-STB IP Appliance User Guide Copyright 2007 Video Furnace, Inc. All Rights Reserved. Copyright 2002-2007 Video Furnace, Inc. All Rights Reserved This document refers to the current published version
USER MANUAL. 27" 2K QHD LED Monitor L27HAS2K
 USER MANUAL 27" 2K QHD LED Monitor L27HAS2K TABLE OF CONTENTS 1 Getting Started 2 Control Panel/ Back Panel 3 On Screen Display 4 Technical Specs 5 Troubleshooting 6 Safety Info & FCC warning 1 GETTING
USER MANUAL Full HD Widescreen LED Monitor L215ADS
 USER MANUAL 21.5 Full HD Widescreen LED Monitor L215ADS TABLE OF CONTENTS 1 Getting Started 2 Control Panel/ Back Panel 3 On Screen Display 4 Technical Specs 5 Care & Maintenance 6 Troubleshooting 7 Safety
Welcome to W light up your life
 USER GUIDE 1 Welcome to light up your life Dear Vision Communications Customer, Thank you for choosing LightWave TV from Vision. LightWave TV will open a whole new world of TV entertainment for you and
Owner s Guide CONGRATULATIONS
 Owner s Guide Version 7.0 Models: 32R2 32 Class (31.51 Diag.) 40R5 40 Class (40.00 Diag.) 43R5 43 Class (42.51 Diag.) 50R5 50 Class (49.50 Diag.) Serial No. CONGRATULATIONS Thank you for purchasing this
Bonded MoCA 2.0 Network Adapter
 Coaxial-to-Ethernet ConversionKit Bonded MoCA 2.0 Network Adapter Model#KB-M2B-01 User Guide Table of Contents Table of Contents 1 Getting Started 2 Introduction 2 Package Contents 3 Requirements 3 Features
Register your product and get support at SDV5122/27. EN User manual
 Register your product and get support at www.philips.com/welcome SDV5122/27 User manual Contents 1 Important 4 Safety 4 Notice for USA 5 Notice for Canada 5 Recycling 6 English 2 Your SDV5122 7 Overview
TV Connector user guide
 TV Connector user guide Thank you Thank you for choosing the TV Connector. The intended use of the TV Connector is to connect your hearing aids directly to your TV or audio source. Your TV Connector Hearing
Instruction Guide. The TV Jockey Computer Monitor TV Tuner with Remote COMP2VGATVGB. The Professionals Source For Hard-to-Find Computer Parts
 VIDEO ADAPTER The TV Jockey Computer Monitor TV Tuner with Remote COMP2VGATVGB Instruction Guide * Actual product may vary from photo The Professionals Source For Hard-to-Find Computer Parts FCC COMPLIANCE
Automotive 72 Exterior Smart Lighting Kit
 PACKAGE CONTENTS Automotive 72 Exterior Smart Lighting Kit 36 36 8 x Wire Mounting Bracket 16 x Screws 60" Extension Cable 24 ON / OFF 60 Exterior Kit can also function as interior lighting Instruction
17 19 PROFESSIONAL LCD COLOUR MONITOR ART
 17 19 PROFESSIONAL LCD COLOUR MONITOR ART. 41657-41659 Via Don Arrigoni, 5 24020 Rovetta S. Lorenzo (Bergamo) http://www.comelit.eu e-mail:export.department@comelit.it WARNING: TO REDUCE THE RISK OF FIRE
Congratulations on your mcable purchase! The mcable delivers the best possible picture to your HD or 4K TV by up-converting 480p and 720p content to
 1 USER GUIDE Congratulations on your mcable purchase! The mcable delivers the best possible picture to your HD or 4K TV by up-converting 480p and 720p content to 1080p, up-converting 1080p content to near-native
HD Digital MPEG2 Encoder / QAM Modulator
 HD Digital MPEG2 Encoder / QAM Modulator HDMI In QAM Out series Get Going Guide ZvPro 800 Series is a one or two-channel unencrypted HDMI-to-QAM MPEG 2 Encoder / QAM Modulator, all in a compact package
E-MANUAL. Thank you for purchasing this Samsung product. To receive more complete service, please register your product at.
 E-MANUAL Thank you for purchasing this Samsung product. To receive more complete service, please register your product at www.samsung.com/register Model Serial No. Contents Quick Guides Using Smart Hub
LITE. TV Antenna DVR with Dual-Band WiFi QUICK START GUIDE
 LITE TV Antenna DVR with Dual-Band WiFi QUICK START GUIDE Quick Start Guide CONTENTS STEP 1: Getting Connected...1 STEP 2: Download/Navigate to the Tablo App...2 STEP 3: Connecting Your Tablo to the Internet...2
E246 Series User Guide
 E246 Series User Guide IMPORTANT SAFETY INSTRUCTIONS Electricity is used to perform many useful functions, but it can also cause personal injuries and property damage if improperly handled. This product
HD Digital MPEG2 Encoder / QAM Modulator
 HD Digital MPEG2 Encoder / QAM Modulator YPrPb VGA In QAM Out series Get Going Guide ZvPro 600 Series is a one or two-channel Component or VGA-to-QAM MPEG 2 Encoder/ Modulator, all in a compact package
User s Manual. Welcome. About the product. Safety Notice
 Welcome Thank you for purchasing this product. Please read this manual thoroughly before use and retain it for future reference. We are confident you will enjoy this product and its many functions. About
Inside the Box. Touchscreen LCD 1 WAN 2 LAN. Reset Button. Power Connector. Stylus
 Inside the Box Touchscreen LCD 1 WAN 2 LAN Reset Button Power Connector Stylus 12V, 1A Power Adapter Ethernet Cable The setup process consists of a few simple steps: 1) Connect Almond to the Internet in
U65 Series User Guide
 U65 Series User Guide IMPORTANT SAFETY INSTRUCTIONS Electricity is used to perform many useful functions, but it can also cause personal injuries and property damage if improperly handled. This product
E-MANUAL. Thank you for purchasing this Samsung product. To receive more complete service, please register your product at.
 E-MANUAL Thank you for purchasing this Samsung product. To receive more complete service, please register your product at www.samsung.com/register Model Serial No. Contents Quick Guides Connecting the
USER MANUAL. 28" 4K Ultra HD Monitor L28TN4K
 USER MANUAL 28" 4K Ultra HD Monitor L28TN4K TABLE OF CONTENTS 1 Getting Started 2 Control Panel/ Back Panel 3 On Screen Display 4 Technical Specs 5 Care & Maintenance 6 Troubleshooting 7 Safety Info &
 Register your product and get support at www.philips.com/welcome SWW1810 User manual 3 Contents 1 Important 4 Safety 4 English 2 Your Wireless HD AV Connect 6 What is in the box 6 3 Overview 7 The transmitter
Quick Reference TV guide. Getting Started. with Cogeco Digital TV.
 Quick Reference TV guide Getting Started with Cogeco Digital TV. Welcome to Cogeco Digital TV At Cogeco, we put you first in everything we do. Our goal is to give you a TV experience unlike any other from
USER MANUAL Full HD Widescreen LED Monitor L236VA
 USER MANUAL 23.6 Full HD Widescreen LED Monitor L236VA TABLE OF CONTENTS 1 Getting Started 2 Control Panel/ Back Panel 3 On Screen Display 4 Technical Specs 5 Care & Maintenance 6 Troubleshooting 7 Safety
E-MANUAL. Thank you for purchasing this Samsung product. To receive more complete service, please register your product at.
 E-MANUAL Thank you for purchasing this Samsung product. To receive more complete service, please register your product at www.samsung.com/register Model Serial No. Contents Quick Guides Connecting the
WELCOME! WHAT S IN THE BOX: WHAT S IN THE BOX:
 QUICK START GUIDE WELCOME! Thank you for buying the Slingbox TM SOLO. Follow these instructions to connect your new Slingbox and start watching your TV anywhere on your laptop or mobile*. For more information
LCD VALUE SERIES (32 inches)
") LCD VALUE SERIES (32 inches) http://www.orionimages.com All contents of this document may change without prior notice, and actual product appearance may differ from that depicted herein 1. SAFETY INSTRUCTION
LCD VALUE SERIES (32 inches) http://www.orionimages.com All contents of this document may change without prior notice, and actual product appearance may differ from that depicted herein 1. SAFETY INSTRUCTION
AVTuner PVR Quick Installation Guide
 AVTuner PVR Quick Installation Guide Introducing the AVTuner PVR The AVTuner PVR allows you to watch, record, pause live TV and capture high resolution video on your computer. Features and Benefits Up
ZXV10 B760H ZXV10 B760E RichMedia Box User Guide
 ZTE CORPORATION NO.55,Hi-techRoadSouth,ShenZhen,P.R.China Postcode:518057 Tel: (86) 755 26771900 800-9830-9830 Fax: (86) 755 26772236 URL: http://support.zte.com.cn E-mail: doc@zte.com.cn ZXV10 B760H ZXV10
2.4 GHz WIRELESS VIDEO SENDER SYSTEM MODEL: VS6234
 2.4 GHz WIRELESS VIDEO SENDER SYSTEM MODEL: VS6234 Please read this manual thoroughly before operating this system OPERATING INSTRUCTIONS 03/02 1 SAFETY INSTRUCTIONS CAUTION! RISK OF ELECTRIC SHOCK. DO
AITech ProA/V Media Extender 5GHz Digital
 AITech ProA/V Media Extender 5GHz Digital 5 GHz Wireless Digital Media Transmitter and Receiver User Manual Table of Contents 1. Package Contents 2. Panels and Functions AV Sender AV Receiver 3. Setup
Satellite Radio. Expand Your Factory Radio ISSR bit & 29-bit LAN. Owner s Manual Gateway. add. Harness Connection USB. Port 1 Port.
 Expand Your Factory Radio Harness Connection add Satellite Radio Dip Switches Port 1 Port 2 (See Manual) USB GM 11-bit & 29-bit LAN Owner s Manual Gateway ISSR12 Table of Contents 1. Introduction 2. Precautions
HD Digital MPEG2 Encoder / QAM Modulator Get Going Guide
 series HD Digital MPEG2 Encoder / QAM Modulator Get Going Guide HDb2640 HDb2620 HDb2540 HDb2520 The HDbridge 2000 Series is a combination HD MPEG 2 Encoder and frequency-agile QAM Modulator, all in a 1RU
KODAK Video Monitor CFH-V10
 Quick Start Guide CAUTION RISK OF ELECTRIC SHOCK DO NOT OPEN CAUTION TO REDUCE THE RISK OF ELECTRIC SHOCK, DO NOT REMOVE COVER (OR BACK). NO USER SERVICEABLE PARTS INSIDE, REFER SERVICING TO QUALIFIED
Televisions 4000 series 32PFL4901 Register your product and get support at EN User Manual ES Manual del Usuario
 Televisions 4000 series 32PFL4901 Register your product and get support at www.philips.com/welcome EN User Manual ES Manual del Usuario FR Manuel d Utilisation EN For further assistance, call the customer
X50 Series User Guide
 X50 Series User Guide IMPORTANT SAFETY INSTRUCTIONS Electricity is used to perform many useful functions, but it can also cause personal injuries and property damage if improperly handled. This product
INTRODUCTION GoNowTV
 INTRODUCTION Congratulations on you purchasing the GoNowTV! You are now a member of the GoNowTV family! This unit is among the latest generation of media players on the market. This device enhances your
2.0 Wall Mount TV Soundbar Instruction Manual
 8010275 2.0 Wall Mount TV Soundbar Instruction Manual Read all of the instructions before using this soundbar and keep the manual in a safe place for future reference. Safety Information CA UT IO N RISK
IMPORTANT: before using your new Sparkup, watch the tutorial at or read the following instructions.
 User's Guide IMPORTANT: before using your new Sparkup, watch the tutorial at www.sparkupreader.com or read the following instructions. Need Support? 1-866-322-4675 support@sparkupreader.com WELCOME TO
E-MANUAL. Thank you for purchasing this Samsung product. To receive more complete service, please register your product at.
 E-MANUAL Thank you for purchasing this Samsung product. To receive more complete service, please register your product at www.samsung.com/register Model Serial No. Contents Quick Guides Connecting the
39" 1080p LCD Television PLCD3992A
 PROSCAN 39" 1080p LCD Television PLCD3992A Contents Contents Caution Safety Information Unit and Accessories Product Feature 2 3 4 4 Introduction 5-9 1. Front View 5 2. Rear View 6 3. Instruction for
SmartBox. User Manual. Turn your TV into a SmartTV! Plug n play. Wireless Dual Band
 SmartBox User Manual Turn your TV into a SmartTV! Wireless Dual Band Plug n play TV Remote Guide 5 4 1. ON / Stand by 2. Select package 1 6 2 3 7 3. 4. Favourite channels Electronic Program Guide (EPG
 Register your product and get support at www.philips.com/welcome SDV3132/27 EN User manual Contents 1 Important 4 Safety 4 Notice for USA 4 Notice for Canada 4 Recycling 4 English 2 Welcome 5 3 Set up
CGA0101 Wireless Cable Gateway Quick Installation Guide
 Package Contents CGA0101 cable modem * 1 Quick Installation Guide * 1 RJ-45 CAT 5e cable * 1 Rear Panel and Hardware Connection 12 V/1.5 A Power Adaptor * 1 Telephone cord * 1 This chapter describes the
USER MANUAL. 22" Class Slim HD Widescreen Monitor L215DS
 USER MANUAL 22" Class Slim HD Widescreen Monitor L215DS TABLE OF CONTENTS 1 Getting Started Package Includes Installation 2 Control Panel / Back Panel Control Panel Back Panel 3 On Screen Display 4 Technical
User Instructions. 16 SCB Sync Station.
 User Instructions 16 SCB Sync Station Contents Overview... 1 Specifications... 1 Compliance and approvals... 2 Safety instructions... 3 Set up... 4 How to charge multiple devices... 4 How to synchronize
Televisions 5000 series 55PFL5402 Register your product and get support at EN User manual ES Manual del usuario
 Televisions 5000 series 55PFL5402 Register your product and get support at www.philips.com/welcome EN User manual ES Manual del usuario FR Manuel d utilisation EN For further assistance, call the customer
Wireless Sound Bar *MFL * SIMPLE MANUAL
 ENGLISH SIMPLE MANUAL Wireless Sound Bar To view the instructions of advanced features, visit http://www.lg.com and then download Owner s Manual. Some of the content in this manual may differ from your
 Register your product and get support at www.philips.com/welcome SDV5222T/27 User manual Contents 1 Important 4 Safety 4 Notice for USA 4 Notice for Canada 5 Recycling 5 English 2 Your SDV5222T 6 Overview
Universal Wireless HDTV Adapter
 Universal Wireless HDTV Adapter F7D4555v1 User Manual Table of Contents CHAPTER 1 INTRODUCTION... 1 Package Contents... 1 Features... 1 LEDs... 2 CHAPTER 2 INITIAL INSTALLATION... 4 Requirements... 4 Procedure...
DV6819 Quick Reference Guide V1.0. Smart TV Box. Quick Reference Guide. Please do read user manual before you operate the TV box.
 DV6819 Quick Reference Guide V1.0 Smart TV Box Quick Reference Guide Please do read user manual before you operate the TV box. ~ 1 ~ DV6819 Quick Reference Guide V1.0 Safety instruction Please keep the
Expand Your Factory Radio add Satellite Radio Harness Connection
 Expand Your Factory Radio Harness Connection add Satellite Radio Dip Switches Port 1 Port 2 (See Manual) USB Honda/Acura Owner s Manual GateWay Owner s Manual Media ISSR12 GateWay PXAMG 01-22-13 Table
TV CHANNEL INSTALLATION
 LCD TV TV CHANNEL ATION Immediately after unpacking and plugging in your new television, run the auto program function to set up the TV for the broadcast or cable channels available in your area. If you
INSTALLATION MANUAL VIP 1903 / VIP 1903 T VIP 1963 / VIP 1963 T
 INSTALLATION MANUAL VIP 1903 / VIP 1903 T VIP 1963 / VIP 1963 T We Declaration of Conformity Motorola Mobility, Inc. 101 Tournament Drive Horsham Pennsylvania 19044 USA declare under our sole responsibility
Hi! Let s get started.
 Hi! Let s get started. 55US5800 What s in the box TL Roku TV TV stands Power cable 4 x TV stand screws (ST4X20mm) 2 x AAA batteries for remote TV remote What you need Make the most of your Smart TV Phillips
Celect Communications. Complete TV Users Guide
 Celect Communications Complete TV Users Guide 1 Contents Setting up your Remote... 4 Remote Guide... 5 Using the Guide Button... 8 Searching...10 Reminders...12 DVR Guide...13 Important Note...26 TV Main
32" LED Television. Initial Assembly B. Main Unit. 1. Fix the Left Base Stand to the main unit using 2 pcs provided screws.
 2 3 4 8047922B 32" LED Television Initial Assembly 8047922 Main accessories: Installation Steps: 1. Fix the Left Base Stand to the main unit using 2 pcs provided screws. 2. Fix the Right Base Stand to
TelergyT-503. User s Guide. How to use this T-503 set-top box
 TelergyT-503 User s Guide How to use this T-503 set-top box IMPORTANT SAFETY INSTRUCTIONS Read and follow these instructions. Heed all warnings. Do not use this apparatus near water. Clean only with dry
Complete TV Users Guide
 Celect Communications Complete TV Users Guide Connected Your pathway to the world 1 2 Contents Setting up your Remote... 4 Remote Guide... 5 Using the Guide Button... 8 Searching...10 Reminders...12 DVR
PLL1920M LED LCD Monitor
 PLL1920M LED LCD Monitor USER'S GUIDE www.planar.com Content Operation Instructions...1 Safety Precautions...2 First Setup...3 Front View of the Product...4 Rear View of the Product...5 Installation...6
User Guide. Interton TV Streamer
 User Guide Interton TV Streamer Welcome Congratulations on your purchase of a Interton TV Streamer. Interton TV Streamer will provide you with high quality streamed audio from your TV, HiFi stereo, personal
Installation Manual VIP 1003
 Installation Manual VIP 1003 We Caring for the Environment by Recycling When you see this symbol on a Motorola product, do not dispose of the product with residential or commercial waste. Recycling your
Instructions for use. TV Adapter 2.0
 Instructions for use TV Adapter 2.0 Thank you Thank you for choosing our product as your means to better hearing. To support your efforts, we have put great care and attention into making sure that your
Televisions 5000 series 50PFL5901 Register your product and get support at EN User Manual ES Manual del Usuario
 Televisions 5000 series 50PFL5901 Register your product and get support at www.philips.com/welcome EN User Manual ES Manual del Usuario FR Manuel d Utilisation EN For further assistance, call the customer
E246 Series User Guide
 E246 Series User Guide PACKAGE CONTENTS SCEPTRE Display x 1 Display Base x 1 Display Neck x 1 Screws x 6 (ST3 x 10mm) Warranty Card x 1 Power Cord x 1 (Attached) Display Remote Control (AAA Batteries included)
55" Curved Ultra HD LED TV User s Guide for Model TU5587B v For the most up-to-date version of this User s Guide, go to
 55" Curved Ultra HD LED TV User s Guide for Model TU5587B v1922-01 For the most up-to-date version of this User s Guide, go to www.gpx.com Safety Instructions & Warnings CAUTION RISK OF ELECTRIC SHOCK
Televisions 5000 series 55PFL5901 Register your product and get support at EN User Manual ES Manual del Usuario
 Televisions 5000 series 55PFL5901 Register your product and get support at www.philips.com/welcome EN User Manual ES Manual del Usuario FR Manuel d Utilisation EN For further assistance, call the customer
USER S MANUAL MANUEL DE L UTILISATEUR MANUAL DEL USUARIO EW39T4LZ
 USER S MANUAL MANUEL DE L UTILISATEUR MANUAL DEL USUARIO EW39T4LZ Contents Contents Caution Safety Information Unit and Accessories Product Feature 2 3 4 4 Introduction 5-9 1. Front View 5 2. Rear View
Introduction. Important Safety Instructions
 Introduction Congratulations on purchasing your Eviant Portable Digital TV. On June 12, 2009 the conversion to digital television broadcasting will be complete all throughout the United States and Puerto
Wireless Sound Bar *MFL * SIMPLE MANUAL
 ENGLISH SIMPLE MANUAL Wireless Sound Bar Please read this manual carefully before operating your set and retain it for future reference. To view the instructions of advanced features, visit http://www.lg.com
E325 Series User Guide
 E325 Series User Guide PACKAGE CONTENTS SCEPTRE Display x 1 Display Base x 1 Thick Threaded Screws x 3 Thin Threaded Screws x 4 Circular Metal Plate x 1 Black Plastic Ring x 1 Power Cord x 1 (Attached)