Table of Contents. 5 Specifications. 1 Introduction. 2 Installation & Setup. 3 Operation. 4 Maintenance. TAW-HD800 User's Manual
|
|
|
- Marilynn Mason
- 5 years ago
- Views:
Transcription
1 TAW-HD800 User's Manual Table of Contents 1 Introduction The Projector Purchaser's Record and Servicing Installation & Setup 3 Operation Quick Setup Installation Considerations HardwareSetup Mounting PowerConnection... 2-l4 Source Connections Serial Port Connections OpticalAlignrnent Source Setup MemorySetup ACON Setup Overview Projector Basics Source Selection Setup Memories DisplayAdjustments Convergence Registration Utility Features Multi-projector Functions Maintenance Warnings and Guidelines Cleaning Troubleshooting Specifications Specifications ASR/ASILogicDiagrams.....,...C-l Keypad Reference...,.. E-1 ThrowDistanceTables... F-1
2 Section 1 Introduction 1.1 The Projector Functional Description The TAW-HD800 is an ultra high resolution graphics projector compatible with virtually all input sources. Its superior performance and high quality projected image place it well above other projection systems in its class. Features of the TAW-HD800 include: automatic lock to inputs between 15 khz and 95 khz a projected display size from 67 inches to 25 feet (diagonal) high brightness projection 205 ANSI lumens a multi-use full ftinction keypad customizable control an intuitive menu driven, multi-language interface with on-line help external computer control capability ASR and ASI which reduce the need for manual display adjustments Color corrected, high resolution HD145 lenses Aggressive gamma correction for exceptional linear gray scale tracking. The projector accepts data/graphics and video input signals from a variety of sources for projection onto flat, curved, or rear projection screens. System inputs are processed to provide separate red, green, and blue image components for projection through the projector's three front lenses. The three primary color components converge on the projection screen to provide a high quality display output. Sophisticated processor-based logic and control circuitry provide many of the automatic features which are designed into the TAW-HD800. This circuitry interfaces with the keypad to provide projector control by the user. Control functions include: turning the projector on or off switching input sources adjusting all display settings such as contrast, brightness, and size correcting for undesirable display effects and input noise displaying projector operating status screens and help information controlling the projector's operating settings controlling audio output Should projector servicing be required, the keypad is used by service personnel to make service adjustments and alignments. In some cases the projector may be serviced without accessing the projector's internal circuitry. 1-1

, screen size and type, room lighting, and ventilation.")
3 Installation Careful consideration should be given as to how and where the projection system is installed. Although the projector offers high performance, the final display quality could be compromised if the projector is not installed properly. This subsection discusses the considerations you should make before proceeding with a final installation. These considerations include the installation type (floor, ceiling, rear), screen size and type, room lighting, and ventilation. Choose the installation type which suits your needs: front or rear screen, floor mount or ceiling mount. Front Screen, Floor Mount Installation Rear Screen. Floor Mount Installation 2-1


4 INSTALLATION & SETUP Screen Type Screen type is a very important factor when designing a projection system. Inexperienced users or installers should always consult their dealer when deciding on screen type. The following guidelines may be helpful to understand the differences between screen types. Front Screen Installations There are two basic screen types: flat and curved. The choice between a flat screen versus a curved screen is dependant on audience viewing angle and screen gain. There is always a tradeoff between viewing angle and gain. Viewing angles for both screen types are illustrated in Figures 2-1 and 2-2. Flat screens offer a gain of about I with a viewing angle just less than 180. Incident light reflects equally in all directions so the audience can see the display from various angles. Because of the lower gain, flat screens are more effective when ambient lighting is reduced. Figure 2-1. Audience Coverage with Flat Screen Figure 2-2. Audience Coverage with Curved Screen Curved screens have gains larger than 3 and viewing angles much less than 180. Most curved screens have different horizontal and vertical viewing angles. Incident light does not reflect equally in all directions. The reflected light concentrates in a conical volume or "viewing cone". Audiences within the viewing cone see a brighter image than that from an equal area on a flat screen. Audiences outside the viewing cone see a dimmer image. 2-2
5 INSTALLATION & SETUP Screen Size and Throw Distance To summarize, curved screens are better suited for brightly lit rooms where the audience is situated within the viewing cone. Flat screens are best suited when a wide viewing angle is required and ambient room lighting (near the screen) is low. Curved screens are NOT recommended in a home theater enviroment. Note: Screen Gain is defined in Appendix A, Glossary. Rear Screen Installations There are two basic types of rear screens: diffused and optical. A diffused screen has a surface which spreads the light striking it. Purely diffused screens have a gain of less than I. The main advantage of the diffused screen is its wide viewing angle, similar to that of a flat screen for front screen projection. Optical screens take light from the projector and redirect it to increase the light intensity at the front of the screen. This reduces it in other areas. A viewing cone, similar to that of a curved front screen installation, is created. To summarize, optical screens are better suited for brightly lit rooms where the audience is situated within the viewing cone. Diffused screens are best suited when a wide viewing angle is required but there is low ambient room lighting. Screen size and throw distance are interrelated. As screen size increases, the distance between the projector and the screen also increases. During projection room design, make sure that the room can accommodate the required position of the projector for the screen size you need. Screen Size Screen size may be from 67 inches to 25 feet diagonal (1.7 to 7.6 meters). Choose a screen size which is appropriate for your application. If the projector will be used to display text information it is important that the image size allows the audience to clearly resolve all text. The eye usually sees a letter clearly if eye-to-text distance is less than 150 times the height of the letter. Small text, located too far from the eye, may not be legible at a distance even though it is projected sharply and clearly on the screen. To fill a screen with an image, the aspect ratio of the screen must be equal to the aspect ratio of the image. The aspect ratio of an image is the ratio of its width to its height. Standard video from a VCR has a 4:3 or 1.33:1 aspect ratio. For example, to display a VCR output with a 4:3 aspect ratio onto a 10 foot (3m) high screen, the width of the screen must be at least 13.3 feet (4m). Note: Screen she is often specified as diagonal size. Screens specified by diagonal size have aspect ratios of 4:3. Screens with other aspect ratios are not typically specified by diagonal size
6 INSTALLATION & SETUP Lighting Throw Distance The throw distance (projector-to-screen distance) must be determined for every new installation. Throw distance, the distance between the projector's center lens and the center of the screen, is based on screen size. As screen size increases, the distance between the projector and the screen increases. Make sure that the room can accommodate the required position of the projector for the chosen screen size. Once your screen size is known you can determine the required throw distance using the calculation below. You can also use the Throw Distance Tables in Appendix F. Throw Distance = 1.1 x Screen Width + 6" The HD-800 has a short throw HD-145 lens allowing it to be placed closer to the screen and further from the audience than most CRT projectors. Notes: 1) Calculated values are for reference only. It is good practice to simulate the setup to determine the necessary throw distance. 2) The above calculation applies only if standard lenses are used. 3) Display size is affected by input signal frequency. Once the projector is set, use the Size junction to fine tune display she. Proper lighting is another important factor when designing a projection room. Visiting a movie theatre can give you an idea of what makes a good projection environment. All walls, floors and furnishings are dull colored and nonreflectively finished. Every effort should be made to create the best environment for your system. When designing a projection room, try to avoid white, reflective ceilings and non-directional lighting such as fluorescent lights. The white ceiling spreads the light which makes the room appear brighter. You want to keep the lighting and reflections to a minimum. If it is not possible to keep fluorescent lights off, consider using parabolic reflectors ("egg crates") to direct light down to the floor and away from the ceiling. Spot lighting (incandescent) is a better way to obtain illumination. Installing light dimmers or rheostats allows you to control your lighting environment. Outside windows are undesirable in any projection environment. A small crack between curtains on a sunny day can severely wash-out a projected image. Make sure that curtains are opaque and tightly fitted. Some curtains are designed to provide up to 100 percent blockage of outside light. Pay close attention to the curtain material facing inside the room. It should contain a non-reflective finish. Even with all lighting removed it is still possible that reflections within the room can degrade the image. Light from the projection screen should be absorbed by the ceilings, walls and floors so that it will not be reflected back to the screen. Again, reflective surfaces should be kept to a minimum. 2-5


7 INSTALLATION & SETUP To minimize the effects caused by unwanted light from door and aisle ways, carefully choose the position of your projector and screen. Figure 2-3 shows an installation where poor screen placement has allowed too much unwanted light to enter the screen. In Figure 2-4, the screen and the projector are positioned so that unwanted light is minimized. window Figure 2-3. Poor Screen Placement window Other Considerations: Here are some other considerations and tips which can help you improve the design of your projection system. Proper ventilation is important. The ambient temperature should be kept constant and below 35 C (95 F). Keep the projector away from heating and/or air conditioning vents. Changes in temperature can cause drifts in the projector circuitry which may affect performance. Keep the projector away from devices which radiate electromagnetic energy such as motors and transformers. Common sources of these are slide projectors, speakers, power amplifiers, elevators, etc. Keep 35 mm slide projectors at least 2 feet away from the projector. Even if both are not used at the same time, the magnetic fields created by the slide projector can cause permanent magnetization of the projector. 2-6

8 INSTALLATION & SETUP For rear screen applications, less space is required if a mirror is used to fold the optical path. Choose the right screen size for your application: As screen size increases, magnification increases which reduces brightness. This reduces the contrast ratio which affects legibility. Sharp defined edges become soft and fuzzy. Consider whether screen size is more important. Installing a large screen in a small room is similar to watching television close up; too large a screen can overpower a room. A good rule of thumb is to be no closer than 1.5 times the width of the screen. Larger screens require greater attention to lighting conditions. When laying out your projection room, consider positioning the projector and screen in a manner which will achieve maximum audience coverage and space efficiency. For example, placing the screen along the larger wall in a rectangular room will reduce audience coverage. Figure 2-5 shows two examples of how audience coverage is maximized. SQUARE ROOMS Corner placement of screen yields best audience coverage. RECTANGULAR ROOMS Screen placement along short wall yields best audience coverage. Figure 2-5. Screen Locations for Maximum Audience Coverage Keypad This section explains: how to convert the keypad from a built-in keypad to a remote keypad, how to change keypad protocol and backlit settings, and how to determine if reverse scan setup is required. The projector includes a multi-use full-function keypad which may be configured for use as a built-in, IR remote, or wired remote keypad. The keypad is configured at the factory for built-in use. It is located below the front top cover. You can use the keypad as it is or re-configure it for remote operation. You can also "hard wire" the keypad to be a protocol A or protocol B keypad (see section 3.7, Utility Features for information about keypad protocols). 2-7


9 INSTALLATION & SETUP Follow the steps below to convert the keypad to a remote keypad and change its protocol setting. Step 1 Unplug the projector then lift the front top cover to access the builtin keypad. To lift the cover, grasp it above the red and blue lenses then lift it until the keypad is exposed. The keypad is mounted to a securing bracket located above the lens assemblies. Loosen the two bracket wing nuts then move the keypad away from the bracket. See Figure 2-6. Step 2 Locate the battery compartment at the back side of the keypad. Squeeze the latch to open the ~ door. See Figure 2-7. Figure 2-6. Built-in Keypad Access Figure 2-7. Battery Compartment If converting the keypad to an IR remote, unplug the cable connector. Locate the jumper wires next to the cable connector location. See Figure 2-8. The jumper wires control the keypad's operating settings. Figure 2-8. Jumper Settings 2-8
10 INSTALLATION & SETUP JPI This jumper setting is important if the keypad is configured for remote operation. There are two keypad protocols: A and B. These protocols are available to allow two projectors in the same room to be independently controlled by separate remote keypads. The protocol setting of the keypad must match that set in the projector's Keypad Options menu ( "3 (D CD ). For more information about keypad protocols, refer to the Remote Control Options entry in section 3.7, Utility Features. JP2 This jumper must always be set between pins I and 2 as shown; otherwise, the projector will not respond correctly to keypad commands. JP3 This jumper must always be set between pins I and 2 as shown; otherwise, the backlit feature will be disabled and the projector will not respond correctly to keypad commands. JP4 The JP4 jumper setting sets the keypad type. If you are converting the keypad to an IR remote, move the JP4 jumper from between pins 2 and 3 to between pins I and 2. Step 3 For an IR remote keypad, place four AA size, 1.5V alkaline batteries in the compartment ensuring that the +/- orientation of each battery is correct. Position the compartment door into place. For a wired remote keypad, an optional accessory cable (# P) is required. Plug the cable into the cable connector then position the door into place. Plug the cable jack into the remote jack input on the projector. WARNING: DO NOT INSTALL BATTERIES IN THE KEYPAD IF A BUILT-IN OR WIRED REMOTE CABLE IS ATTACHED TO IT. THIS MAY CAUSE THE BATTERIES TO EXPLODE. Keypad Operating Settings The keypad includes its own memory to store keypad operating settings. With a few simple keystrokes you can over-ride the "hard wire" protocol setting (explained earlier) and enable or disable the backlit feature. Keypad battery life is increased if the backlit feature is disabled. The new operating settings are stored in the keypad until the batteries are replaced (IR remote keypad) or the keypad connection cable is unplugged (wired or built-in keypad). 2-9

11 INSTALLATION & SETUP If the keypad is configured for IR remote operation, make sure the batteries are installed. If it is configured for built-in or wired remote operation, make sure its extension cable is properly connected to the projector. Perform the following keystroke sequences to change its operating settings: To toggle the keypad's protocol setting (A or B), Press [*] [BRITE] [TINT] [DETAIL] [1] To toggle the backlit feature (enable or disable), Press [*] [BRITE] [TINT] [DETAIL] [3] Reverse Scan ~ To return all configuration settings to the jumper settings, Press [*] [BRITE] [TINT] [DETAIL] [0] Note: The projector will not respond to keypad commands if you press Press [*] [BRITE] [TINT] [DETAIL] [2 ]. If pressed accidentally, Press [*] [BRITE] [TINT] [DETAIL] [0] clear all keystroke settings. If the projector is not installed in a front screen, floor mount configuration, reverse scan setup may be required. Reverse scan setup must be performed by a qualified TAW service technician. Refer to Table 2-2 to determine if reverse scan setup is required. Contact your dealer for assistance. Table 2-2. Operating Configurations
12 MOUNTING Front Screen The projector should be mounted after the system design has been established and reverse scan setup (if required) is complete. Floor Mount Mount the projector on a secured table or cart. Position the projector at the chosen room location with the projector pointing towards the center of the projection screen. The angle of projection, combined with the tilt angle of the screen should direct the reflected image towards the center of the audience. The difference between the projection angle and the screen tilt angle (within a common reference) should be less than 15. Refer to Figure 2-9. Screen tilt Screen Tilt Figure 2-9. Floor Mount Installation You can adjust projection angle and level by adjusting the height of the projector legs. See Figure Figure Leg Adjustment 2-13
13 INSTALLATION & SETUP Ceiling Mount Mounting the projector to the ceiling requires the use of a projector ceiling mount fixture. The fixture is shipped from the factory in kit form (with assembly instructions) for assembly and installation by the dealer/installer. For more information, contact your dealer or TAW. Position the projector so that it is pointing toward the center of the projection screen. The angle of projection combined with the tilt angle of the screen should direct the reflected image towards the center of the audience. The difference between the projection angle and the screen tilt angle (within a common reference) should be less than 15. Refer to Figure Figure Ceiling Mount Installation Screen tilt firraan Tilt Rear Screen Installations Instructions for adjusting projection angle are provided with TAW. When installing a rear screen system, the vertical positioning of the projector is dependant on the type of rear screen being used. There are two basic types of rear screens: optical and diffused. Optical Rear Screen Systems If the system includes an optical rear screen, mount the projector along the center axis of the screen as shown in Figure Projection Angle = 0 degrees 90 degree Figure Optical Rear Screen Installation 2-12
14
15 2.5 Power To apply power to the projector, Connection plug the AC line cord into the line input socket located at the front panel of the projector. Plug the three prong end of the line cord in a grounded AC outlet. Input voltage to the projector must be between 90 and 264 V AC, 50 or 60 Hz. The power source must supply 650 watts of power to the projector. 2.6 Source The projector includes a built-in RGB input interface for connection with an Connections external RGB source and audio equipment. The interface is located in the slot 1 position at the rear of the projector as shown in Figure This interface is not removable. Other optional interface modules are available to increase the total number of inputs and accommodate other signal types. These include an RGB Input Module, an RGB Loop Thru Module, a Composite/S- Video Module, an Image Shifter Module, an HDTV Input Module, and a PC Analog Input Module. Anyone of these can be installed in slot 2. A Marquee Multi-Standard Decoder may also be installed to add four additional inputs to the system ("slots" 3 to 6). To further increase the number of inputs, a signal switcher may be connected to the RGB interface in slot 1 to add 8 more sources to the system (9 switcher inputs replace one RGB input). Other switchers may be connected to the first switcher for more inputs. Brief descriptions of the above mentioned optional modules are given in Appendix G, Interfaces. For additional details, contact your dealer and TAW. 2-14
16 The built-in RGB interface in slot 1 allows connection of a single RGB source having one of the following sync types: sync on green, composite sync, or separate H & V sync. To connect a source, connect the red, green, and blue outputs to the RED, GREEN, and BLUE inputs on the interface. If the source uses sync on green, no additional cables are required. If the source provides a composite sync output, connect it to the HOR/COMP input. If the source provides separate horizontal and vertical sync outputs, connect the horizontal sync signal to the HOR/COMP input, and connect the vertical sync input to the VERT input. Interconnection cables must be terminated with BNC connectors. See Figure To control audio levels in an audio/visual system, pre-amplified (line level) audio inputs are connected to the left and right channel audio inputs on the interface. Audio outputs are then connected to external audio amplification equipment for sound output. All audio connection cables require standard RCA type phono plugs. 2.7 Serial Port Serial port connections are required when: Connections the projector is to be controlled by a computer/controller. The projector's serial ports are located on the back panel. See Figure

17 INSTALLATION & SETUP If the projector is to be controlled by a computer or controller which has an RS-232 serial port, connect an RS-232 serial cable between the computer and the projector serial port labelled "IN". After the connection is made, set the serial port baud rate as described in the Projector Setup entry in section 3.7, Utilities. Notes: 1) All serial connections require a 9 pin D connector at the projector end. Refer to Appendix D for cable wiring requirements. 2) For computer/controller control, PC software is required. 3) The RS-232 serial port labelled -OUT- is provided for projector networking applications. 2.8 Optical Optical alignment is required when the throw distance changes or the projector Alignment cannot be focused using the focus controls. The projector is optically aligned at the factory for use with a 6 foot diagonal screen and a throw distance of 80 inches (2 metres). If the throw distance has changed since the last setup, proceed as follows: Notes: 1) The projector must be warmed up for at least 45 minutes prior to performing optical alignment. 2) Optical alignment is both a mechanical and electrical adjustment. Electrical adjustments are stored in the current setup memory. After alignment is complete, setup memories which were previously set up (if any) must be set up again. Memory setup is explained in section It is recommended that optical alignment be performed using the projector's Guided Mechanical Setup tutorial. This tutorial displays step-by-step instructions during the alignment. The instructions in this section require use of the Guided Mechanical Setup tutorial. To access and use the Guided Mechanical Setup tutorial, turn on the projector ( ~ ) then press ~ at presentation level. The Help menu is displayed. Next press []) to select Guided Mechanical Setup. The first page of the guide will be displayed on the projection screen. When using the guide, press ~ to display the next page, press ~ to display the previous page. When complete, press ~ to end Help. Step 1) If you have not already done so, calculate the throw distance and set the projector position as explained in section 2.4, Mounting. Turn power off before moving the projector. 2-16
18 Step 2) Locate the front top cover of the projector. See Figure Next, position your hands above the red and blue lenses then grasp the cover. Gently lift it until it is released from its securing latch. Slide the cover away from the projector as shown in Figure 2-20 below. Also remove the black decorative foam piece at the front of the lenses (removal is optional). Remove the large allen head driver from the tool kit provided with the projector. The driver is used for lens alignment. Examine the lenses and the lens hardware. See Figure Each lens consists of two sections: a rear section and a front section. The rear section sets the optical focus at the center of the image. This section is secured to the lens body by a wing nut at the top rear of the lens assembly. The front section sets the focus at the corners; it is secured to the rear section by a wing nut at the top front of the lens assembly. 2-17
19 The lenses are secured to the projector frame by a top plate as shown. During optical alignment, the securing bolts must be loosened and tightened as instructed. Each securing bolt is labelled (A-D) to assist you. Each CRT is attached to its lens by 3 socket head alien screws located at each lens mounting plate. For each lens, the upper right screw (when facing the lens) adjusts the focus between the top and bottom of the picture, and the lower left screw adjusts the focus between the left and right sides of the picture. See Figure Step 3).. Loosen the rear wing nut on the green lens. Rotate the lens using the wing nut until the picture is focused in the center. Tighten the rear wing nut. Step 4).. Step 5).. Loosen the front wing nut on the green lens. Rotate the front lens barrel until the picture is focused in the corners. Tighten the front wing nut. Steps 6 to 8 require that you look directly into the lenses for adjustment. Before you continue, press [dwn] arrow key to reduce contrast to a low level (less than 10%). WARNING: DO NOT LOOK INTO THE LENSES IF CONTRAST IS SET TO NORMAL VIEWING LEVEL. Step 6).. Step 7).. Step 8).. Step 9).. Look directly into the red lens. Press [up] [dwn], [left] or [right] arrow keys to center the displayed crosshatch on the face of the picture tube. Look directly into the green lens. [up] [dwn], [left] or [right] arrow keys to center the displayed crosshatch on the face of the picture tube. Look directly into the blue lens. Press[up] [dwn], [left] or [right] arrow keys to center the displayed crosshatch on the face of the picture tube. Press [up] arrow key to increase contrast to a normal viewing level.

 A red image is displayed. Loosen the rear wing nut on the red lens.")
 Loosen the front wing nut on the red lens. Rotate the front lens barrel until the picture is focused in the corners.")
 Loosen the front wing nut on the blue lens. Rotate the front lens barrel until the picture is focused in the corners.")
![Tighten the front wing nut. Step 16) Press [up] arrow or [dwn] arrow to adjust for best electrical focus at the center of the picture.](/docs-images/89/100769697/images/20-4.jpg "Step 17) Loosen the four bolts labelled\"a\" Step 18) Loosen the two bolts labelled B\". Step 19) A red and green crosshatch is displayed.")
20 Step 10) Pivot the projector and move it side to side as necessary to display a symmetrical crosshatch centered left-to-right on the screen. The pivot point should be at the rear wing nut of the green lens to avoid changing the throw distance. Step 11) Tilt the projector until the center horizontal line is level and centered with the screen. Adjust the feet of the projector or ceiling mount as required Step 12) A red image is displayed. Loosen the rear wing nut on the red lens. Rotate the lens using the wing nut until the picture is focused in the center. Tighten the rear wing nut. Step 13) Loosen the front wing nut on the red lens. Rotate the front lens barrel until the picture is focused in the corners. Tighten the front wing nut. Step 14) A blue image is displayed. Loosen the rear wing nut on the blue lens. Rotate the lens using the wing nut until the picture is focused in the center. Tighten the rear wing nut. Step 15) Loosen the front wing nut on the blue lens. Rotate the front lens barrel until the picture is focused in the corners. Tighten the front wing nut. Step 16) Press [up] arrow or [dwn] arrow to adjust for best electrical focus at the center of the picture. Step 17) Loosen the four bolts labelled"a" Step 18) Loosen the two bolts labelled B". Step 19) A red and green crosshatch is displayed. Move the red lens until the left and right edges of the red crosshatch match the green. Step 20) Tighten the two bolts labelled B". 2-19
21 Step 21) Loosen the two bolts labelled "D Step 22) Step 23) A blue and green crosshatch is displayed. Move the blue lens until the left and right edges of the blue crosshatch match the green. Tighten the two bolts labelled "D". Step 24) Step 25) Step 26) Step 27) Step 28) Step 29) A green image is displayed. Loosen the rear wing nut on the green lens and slightly defocus the center of the picture. Adjust the large allen head bolt located at the upper right comer of the green lens mounting plate. Turn the bolt head until the top and bottom areas of the picture are equally defocused. You may need to adjust the lens' rear wing nut to keep the center defocused. Rotate the green lens using the rear wing nut until the picture is focused in the center. Tighten the rear wing nut. If necessary, loosen the front wing nut, rotate the front lens barrel to readjust the focus in the comers, then re-tighten the wing nut. A red image is displayed. Loosen the rear wing nut on the red lens and slightly defocus the center of the picture. Adjust the large alien head bolt located at the upper right comer of the red lens mounting plate. Turn the bolt head until the top and bottom areas of the picture are equally defocused. You may need to adjust the lens' rear wing nut to keep the center defocused. Adjust the large allen head bolt located at the lower left comer of the red lens mounting plate. Turn the bolt head until the left and right sides of the picture are equally defocused. You may need to adjust the lens' rear wing nut to keep the center defocused. 2-20
22 Step 30) Step 31) Step 32) Step 33) Step 34) Rotate the red lens using the rear wing nut until the picture is focused in the center. Tighten the rear wing nut. If necessary, loosen the front wing nut, rotate the front lens barrel to readjust the focus in the corners, then re-tighten the wing nut. A blue image is displayed. Loosen the rear wing nut on the blue lens and slightly defocus the center of the picture. Adjust the large alien head bolt located at the upper right corner of the blue lens mounting plate. Turn the bolt head until the top and bottom areas of the picture are equally defocused. You may need to adjust the lens' rear wing nut to keep the center defocused. Adjust the large allen head bolt located at the lower left comer of the blue lens mounting plate. Turn the bolt head until the left and right sides of the picture are equally defocused. Rotate the blue lens using the rear wing nut until the picture is focused in the center. Tighten the rear wing nut. Readjust comer focus if necessary (see step 15). If necessary, loosen the front wing nut, rotate the front lens barrel to readjust the focus in the comers, then retighten the wing nut. Step 35) Tighten the bolts labelled" A". Optical alignment is now complete. If you had removed the foam insert, reinstall it now. Install the front top cover. Proceed to set up each source by following the source setup procedure in section 2.9, Source Setup 2.9 Source Setup. This section gives step-by-step instructions for quick setup of the projector for a selected external source. For a complete setup, repeat these steps as required for each source connected to the projector. Before starting, ensure that the projector is optically and mechanically aligned. If optical alignment is required, follow the setup instructions in section 2.8, Optical Alignment. Select the source to be set up using the Source command and make sure it is visible on the projection screen. 2-23
23 INSTALLATION & SETUP Here is a brief summary of the setup memory, ASR, and ASI discussions in Section 3. About Setup Memories... The projector has 80 setup memories for storing display settings of different sources. Multiple setup memories are required since display settings usually vary amongst sources. There are two types of setup memories: Input and Recall. Both memory types store the same parameters. The only difference is that Input memories store display settings for a particular physical input (e.g., switcher 0, slot 1) while Recall memories can be used with any input. At anyone time, one setup memory is the current setup memory. The display settings in the current setup memory are used for the current display. When a source is selected by entering its input number, the Input memory for the selected input becomes the current setup memory*. If a Recall memory is selected, it becomes the current setup memory*. Display adjustments are automatically saved in the setup memory which is current at the time of adjustment (unless the setup memory is locked). To display the Recall memories stored in the projector, press [UTIL] [3]. Press [UTIL] [4] to display the Input memories. (Unused setup memories are not displayed). * Note: If the ASR feature (explained below) is turned on during setup memory selection, the selected memory may not be the current setup memory. About AS! and ASR... ASI (Automatic Source Interpolation) is a feature which automatically adjusts display settings based on the settings of other setup memories stored in the projector. When a setup memory is first created, ASI automatically generates its initial display settings. These settings will be created by copying another setup memory or by interpolating multiple setup memories. ASI is activated when:.a new setup memory is created..an ASR is performed and its logic has activated an ASI..An" ASI with Save" is specified by the user (see section 3.7). ASR (Automatic Source Recall) is a feature which, when turned on for a given input, provides automatic Recall memory selection or ASI adjustment. ASR processing can activate when: 1) a change in scan frequencies is detected at the input, 2) an input is selected, 3) a Recall memory is selected, or 4) a channel is selected. This feature is primarily intended for use when many different sources must share the same input (via a third party switcher, for example) or when a signal source can output several different scan frequencies (e.g., a SVGA card). When a source switch is made, the projector may automatically select a Recall memory with matching scan frequencies or create the display settings based on the settings in other setup memories. (Refer to Appendix C for ASI/ASR logic diagrams.) 2-24
24 INSTALLATION& SETUP Input Memory Setup Follow these steps to prepare an Input memory for a source. Note: To assure proper setup of an existing Input memory, ASR must be off (default)for the memory. Step 1 Connect the source to the input to be set up, then select the input using the Source command. For example, if the source is connected to slot 1 of the projector, press [SOURCE] [0] [1]. If the Input memory did not previously exist, it will be created automatically, Step 2 The source should be displayed on the projection screen. If much adjustment is required, press [UTIL] [1] [2] to perform an ASI with Save. The display appearance may improve based on the settings stored in other setup memories. (If the Input memory is new, ASI with Save will have already been performed when the input was selected.) Step 3 Make display adjustments as required. Adjustment changes will automatically be saved in the Input memory. RecallMemory" Setup Follow these steps to prepare a Recall memory. Step 1 Select the input connected to the source. For example, if the source is connected to switcher 1, slot 5, press [SOURCE] [1] [5]. The source should be displayed on the projection screen. Note: To assure proper setup of a Recall memory, ASR must be off (default) for the current input. Step 2 Select a Recall memory as the current setup memory. For example, to make Recall memory 03 the current setup memory, press [RECALL] [0] [3]. If the Recall.. memory did not previously exist, it will be created automatically. Step 3 If much adjustment is required, press [UTIL] [1] [2] to perform an "ASI with Save", (If the Recall memory is new, ASI with Save will have already been performed when the memory was selected.) Step 4 Make display adjustments as required. Adjustment changes will automatically be saved in the Recall memory. 2-25
25 INSTALLATION & SETUP ASI lmprovement If the projector will be used with many sources, or new sources will be frequently added to the system, it is recommended that five or six setup accuracy improves as more setup memories are created and stored, and the variations amongst horizontal and vertical scan frequencies increases. For example, if you always use the same input and you never use Recall memories (thus only one setup memory has ever been created), ASI will not be effective. However, if many Input and Recall memories have been used and adjusted for a variety of sources, the projector has more "knowledge" in its database for performing an ASI. As this "knowledge" increases, ASI accuracy improves. An easy way to add setup memories at various scan frequencies is to use the projector's internal frequency generator. The internal frequency generator can display a test pattern using the scan frequencies you select. When display adjustments are made, the display settings are stored in the current setup memory. Prepare a Recall memory using the generator as follows: Step 1 Select a Recall memory to be the current setup memory. For example, to make Recall memory 90 the current setup memory, PRESS [RECALL] [9] [0] (Recall memory numbers may be any number from 01 to 99). If the selected Recall memory did not previously exist, it will be created automatically. Step 2 Press [UTIL] [1] [6] to access the Internal Frequency Selection menu. Items one to six contain six preset scan frequencies. It is recommended that Recall memories be created for each. To make a selection, enter an item number or use [UP] and [DWN] arrow keys to move the cursor bar to the item you want, then press [ENTER]. Note: If item 6 is selected, the maximum horizontal frequency (95 khz) will be used. Note: It is recommended that Recall memories for the two extreme frequencies be set up first (items 1 and 6). When other Recall memories are created, their initial display settings will be based on the settings already stored in memory. Step 3 At this point, a test pattern is displayed. Make display adjustments as required. All display settings will be stored in the Recall memory. To create another Recall memory, repeat the above steps. To return to the external source, press [EXIT] while only the test pattern is displayed. (You may notice that as new Recall memories are created, fewer display adjustments are required. This is because ASI is using other setup memories to create the initial settings of the new memories.)
26 ASR Setup) This subsection provides two examples of how the ASR feature may by used and set up. ASR Example # 1 Refer to the system illustrated in Figure A computer is connected to slot 1 of the projector as shown. The graphics adapter in the computer can operate at different frequency modes to accommodate various software applications. The ASR feature may be used until when the frequency mode of the computer changes, the projector setup also changes to match that of the new mode. To prepare setup memories for the above system, follow these steps: Step 1 Select the input using the Source command. Press [source] [0] [1] to select projector slot 1. Step 2 Press 0 twice to display the Current Input Parameters status page. Check to see if ASR is off for the current input. If it is on, press [UTIL] [1] [4] to turn ASR off for the input. (It is usually easier to prepare setup memories when ASR is turned off.) Step 3 At the computer, switch to an application which uses one of the graphics adapter operating modes. Select an unused Recall memory as the current setup memory. For example, to make Recall memory 01 the current setup memory, press [RECALL] [0] [1]. Make display adjustments as required. The display settings for the current graphics mode will be stored in the Recall memory. Repeat this step for the remaining graphics adapter operating modes, storing adjustments for them in Recall memories 02, 03 and 04. It is recommended that the two extreme frequencies be set up first. 2-27
27 2-28
28 INSTALLATION & SETUP 2-29
29 Section 3 Operation 3.1 Overview This section explains how to operate the projector once it has been installed and is ready for use. If you have not yet set up the projector, refer to Section 2, Installation and Setup. Before using the projector for the first time, it is recommended that you read through this section of the manual. Although the projector is easy to use, there are many advanced features which allow you to enhance performance and operation. By understanding these features, and how to use them, you will soon be able to take full advantage of the projector's extensive capabilities. Organization of this section is as follows: 3.1 Overview 3.2 Projector Basics 3.3 Source Selection 3.4 Setup Memories 3.5 Display Adjustments 3.6 Convergence Registration 3.7 Utility Features 3.8 Multi-projector Functions 3.2 Projector Basics Notice that the projector has no knobs or moving parts to make adjustments or change control settings. This is because all user adjustments are digitally controlled via the projector's keypad. Adjustment settings are retained in the projector's internal memory, even when the projector is unplugged. Keypads).. Four types of keypads may be used with the projector: built-in, IR remote, wired remote, and Presenter's. The projector includes a multi-use, full function, backlit keypad which is factory configured for use as a built-in keypad. It can easily be reconfigured for use as an IR remote keypad or a wired remote keypad. Use the keypad type which is most appropriate for your application. Notes: 1) For information on how to reconfigure the keypad, refer to section 2.3, Hardware Setup. 2) To convert the keypad to a wired remote keypad, an optional accessory cable (#O3-OO1106-D2P) is required. 3) Additional keypads are available from your dealer and TAW. 3-1

30 FIGURE 3-1 Built-in Keypad When the keypad is configured for built-in use (factory default), it is connected to the projector by a 3 foot extension cable, located below the front top cover. This configuration is intended for initial setup of the projector and applications where it is desirable to keep the keypad with the projector. The keypad can be accessed as follows: Locate the front top cover of the projector. Position your hands above the red and blue lenses then grasp the cover. Lift the cover until the keypad is exposed. Slide the cover away from the projector. The keypad is mounted to a securing bracket located above the lens assemblies as shown in Figure 3-1. The built-in keypad can slide out of it securing bracket but it is recommended that it remain in place for use. When finished using the keypad, position thefigure 3-1. Built-in Keypad Access front top cover back in place. IR Remote Keypad When the keypad is configured for IR remote operation, you can control the projector from a distance without a wired connection to the projector. The keypad includes a battery powered infrared (IR) transmitter. Wired Remote Keypad When the keypad is configured as a wired remote keypad, you can control the projector from a distance by way of a 25 ft extension cable (accessory cable required). Wired remote keypad operation is recommended when:.the location of the keypad with respect to the projector or screen is inadequate for IR remote keypad operation, the projector is in a lighting environment which is unsuitable for IR remote keypad operation, or there are multiple projectors in the same room and you want each projector to be controlled by its own remote keypad. Presenter's Keypad (optiona/) The Presenter's Keypad is similar to the IR remote keypad (above) except that it is not a full function keypad; it contains only frequently used keys. Presenters may find this keypad is easier to use than a full function keypad. For more information about the Presenter's Keypad, call your dealer or TAW. 3-2

31 TAW-HD

32 Keypad Usage The keypad is used the same way you would use a remote keypad supplied with a TV or VCR. There are only a few general key press rules to keep in mind: 3-4
33 3-5
34 2. Guided Mechanical Setup The Guided Mechanical Setup tutorial provides step-by-step instructions for mechanical and optical setup of the projector. This setup is necessary during initial installation and also when the screen size changes, the throw distance changes, or the display image does not focus using the focus control. For more details, refer to section 2.8, Optical Alignment. 3. Source Selection Guide The Source Selection Guide explains various source selection methods. 4. Keypad Guide The Keypad Guide explains how to use the keypad. 6. Using Help Using Help provides instructions on how to use the help system
35
36
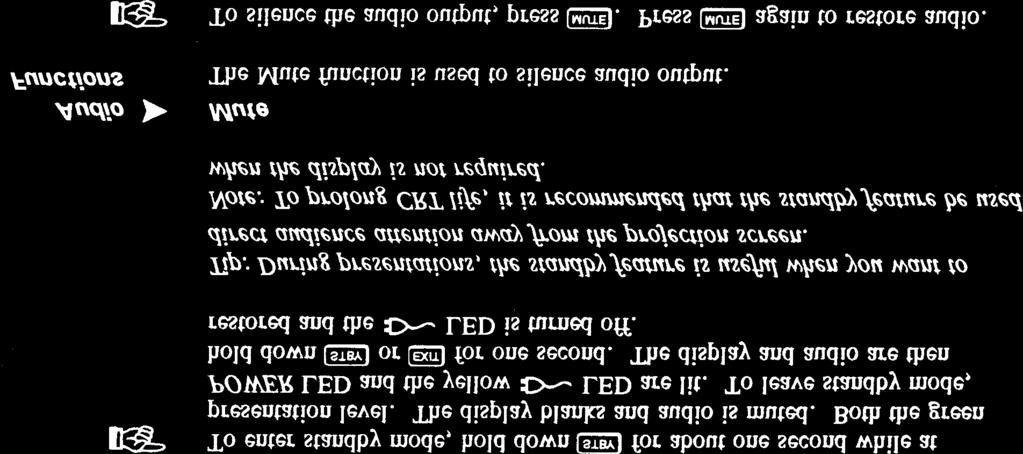
37 Page 1 displays general projector information and operating settings which include identity, software version, keypad type, scan configuration, auto power-up setting. message display setting, switchers (numbers) connected, installed options, and mute setting. Operating settings are explained in the following entries in this section. Page 2 displays current input parameters. These parameters (defined later in this section), relate specifically to the currently selected input. Page 3 lists the display settings currently in use. Note: If the current setup memory is locked or an ASI has occurred, the display settings shown may not be identical to those stored in the setup memory. 3-9
38 OPERATION 3.3 Source Selection The projector includes a built-in RGB input interface to accept a single input. With optional accessories such as a Focus Enhancements Quad Scan, the number of inputs can be significantly increased. Because of this large capability, three source selection methods are available: Input Selection, Direct Channel Selection, 'and Up/Down Channel Selection. Sources are selected at presentation level. The TAW-HD800 comes with one source standard, RGBHV 3, 4 or 5 wire sync BNC connectors. Optional S video, composite or 15 pin DIN VGA can be purchased. Please contact your distributor or TAW. ~---
39 Note: The switcher shown in the above figure can be a Quad Scan video processor or other third party video processor/switcher. =
40
41

42 OPERATION Setup Memories The projector has 80 setup memories which store display settings. Multiple setup memories are needed because display settings are usually different for different sources. For example, the display settings (brightness, contrast, convergence, etc.) when using a VCR may be very different than the settings for a high resolution computer output. When display adjustments are made, the new settings are automatically saved in one of the projector's setup memories. There are two types of setup memories: Input and Recall. Both memory types store the same parameters. The only difference is that Input memories store display settings for a particular physical input (e.g., switcher 0, slot I) while Recall memories can be used with any input. At anyone time, one setup memory is the current setup memory. The display settings in the current setup memory are used for the current display. When a source is selected by entering its input number, the Input memory for the selected input becomes the current setup memory (unless ASR is on and is triggered). If a Recall memory is selected, it becomes the current setup memory. Display adjustments are automatically saved in the setup memory which is current at the time of adjustment (unless the setup memory is locked - explained later). Input Memories As mentioned above, Input memories store display settings for each physical input (i.e., switcher 0, slot 1). When an input is selected, the Input memory for that input becomes the current setup memory and its display settings are used (unless ASR is on and is triggered). If the input is being selected for the first time, a new Input memory is created. Recall Memories Recall memories provide an alternative to using the display settings stored in the Input memory of the selected source. For example, you may want to temporarily disconnect a computer connected to the projector's RGB input and in its place, connect another computer with different signal characteristics. Since the connection is only temporary you don't want to change the display settings stored in the Input memory. Instead, you can select a Recall memory which has the settings you want for the new input. If there are many devices which will be sharing the same input, many Recall memories can be created to store the display settings for each. On the other hand, if there are many sources on different inputs with exactly the same signal characteristics, it may be possible for them to share the same Recall memory 3-14

43 OPERATION 3-15
44
45 OPERATION 3.5 DISPLAY ADJUSTMENTS Detail There is no Detail adjustment. Sharpness has already been factory optimized. Color & Tint 1) There is no color adjustment when using RGBHV input 01. Use the Video Processor to adjust color and Tint. 2) The Color function also allows you to turn on or off the red, green and/or blue color components of the picture. 3-17
46
47 OPERATION 3-19
48 OPERATION 3-20
49 OPERATION 3-21
50 OPERATION 3-22
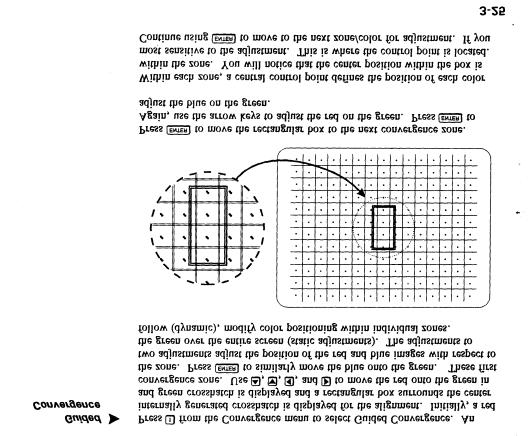
51 OPERATION

52 OPERATION 3-24

53 OPERATION
54

55 OPERATION 3-27
56 OPERATION 3-30 (2-28 & 2-29 intentionally omitted
57 OPERA TION

58 3-32
59
60
61
62 OPERATION
63 OPERATION
64
65
66 OPERATION 3-40
67 OPERATION Remote Jack This setting determines how the projector responds to devices connected to the REMOTE jack on the projector's rear panel. This jack can accept input from a wired keypad or remote IR sensor. Four settings are available: A or B, A, B, and Off. If set to A, the projector will only respond if the keypad using the REMOTE jack is set for protocol A operation. If set to B, the projector will only respond if the keypad using the REMOTE jack is set for protocol B operation. If set to "A or B", the projector will respond to both protocol settings for keypads using the REMOTE jack. If set to Off, the REMOTE iack is disabled. This item contains the projector's identification number. The projector's identification number allows IR remote control of a single projector in a multi-projector installation. To set the projector identification number, select item 1 then enter a three digit number from 000 to 999. If there is only one projector in the installation, 000 is the recommended projector number. For more information about multi-projector control, refer to section 3.8, Multiprojector Functions. Baud Rate This item contains the projector's RS-232 serial port baud rate. The RS-232 serial port, located at the back of the projector, provides a means to control the projector using a computer or another projector. The serial port baud rate setting must match the operating baud rate of the controlling device. Baud rate may be set to 300, 600, 1200, 2400, 4800, or To set the baud rate, select item 2 from the menu until the desired baud rate is displayed. Notes: 1) If unsure of your computer's baud rate setting, refer to the system documentation provided with the computer. 2) For information about cable connections between devices, refer to Appendix D... Clock/Events'" Clock/Events allows you to set the projector's real-time clock/calender and program up to twelve individual projector control events to be automatically executed at specified times or intervals.
68 3-42
69 OPERATION
70 OPERATION 3-44

71 OPERATION
72
73 Section 4 Maintenance 4.1 Warnings and Guidelines The TAW projection system is CSA approved and is designed for safe and reliable operation. However, safe operation cannot simply be assured by design; installers, maintainers, and users must maintain a safe operating environment for the system. This section covers warnings and guide lines which promote the safe usage of the projector. Please read through and understand these warnings and guidelines. Labels and Markings Observe and follow all warnings and instructions marked on the projector. The exclamation point within the equilateral triangle is intended to alert the user to the presence of important operating and maintenance (servicing) instructions in the literature accompanying the projector. The lightning flash with arrowhead symbol, within the equilateral triangle is intended to alert the user to the presence of uninsulated "dangerous voltage" within the projector's enclosure that may be of sufficient magnitude to constitute a risk of electric shock to persons. Projector Location... Operate the projector in an environment which meets the operating range specifications in Section 5. Do not operate the projector close to water -for example, near a swimming pool. Do not place the projector on an unstable cart, stand or table. If the projector is to be ceiling mounted, only use an TAW approved ceiling mount fixture. The projector and cart combination should be used with care. Quick stops, excessive force, and uneven surfaces may cause the projector and cart combination to overturn. Only use attachments or accessories recommended by TAW. Use of others may result in the risk of fire, shock or personal injury. Power Cord and Attachments Do not allow anything to rest on the power cord. Locate the projector where the cord cannot be abused by persons walking on it or objects rolling over it. 4-1
74 Operate the projector at the voltage indicated on the line voltage indicator. Do not overload power outlets and extension cords as this can result in fire or shock hazards. The projector is equipped with a three wire plug having a third {grounding) pin. This is a safety feature. If you are unable to insert the plug into the outlet, contact an electrician to have the outlet replaced. Do not defeat the safety purpose of the grounding-type plug. Slots and openings in the projector provide ventilation. To ensure reliable operation of the projector and to prevent overheating, these openings must never be blocked or covered. The projector should never be placed near or over a radiator or heat register. The projector should not be placed in an enclosure unless proper ventilation is provided. Do not push objects of any kind into the projector through the ventilation openings. They may touch dangerous voltages or short-out parts resulting in a fire or shock hazard. Do not spill liquids of any kind into the projector. Should an accidental spill occur, immediately unplug the projector and have it serviced by a qualified service technician. If any of the following conditions exist, unplug the projector from the power outlet and refer service to qualified service personnel.! The power cord has been damaged.! Liquid has been spilled into the projector.! The projector has been exposed to excessive moisture.! The projector does not operate normally.! The projector has been dropped or the case has been damaged.! Projector performance has " deteriorated. Do not attempt to service the projector yourself. All servicing must be performed by a qualified TAW service technician. If replacement parts are required, it is important that only TAW approved parts are used. Other parts may result in fire, electric shock or risk of personal injury. WARNING: THE PROJECTOR IS INTERNALLY SHIELDED TO PROTECT THE USER FROM EXPOSURE TO SOFT X-RAY RADIATION. IMPROPER SERVICING OR SHIELD REMOVAL MAY RESULT IN PERSONAL INJURY. Clean the projector when required. Before cleaning, always unplug the projector from the power outlet. To avoid the risk of scratching the lenses, only clean the lenses if absolutely required. A small amount of dust on the lenses will have very little effect on picture quality. If the lenses must be cleaned, use a DRY soft cotton cloth. Rub gently in a left-right motion. 4-2

75 Clean the case with a soft dampened cloth. Use a mild commercial cleaner. Do not use liquid or aerosol cleaners.
76
77 = MAINTENANCE

78 4-7
79 TAW-HD800 Note: Due to constant research, specifications are subject to change without notice. High definition F1.1 hybrid lens 10 line pairs per rom 8" air coupled (HD 145 color corrected) electromagnetic focus CRTs Scheimpflug adjustment for top, bottom, and side to side focus as well as contrast are optimized x 2000 addressability 1350 x 1100 ANSI pixels Usable brightness per industry standard 205 ANSI lumens Electronic geometry circuits separately correct top, bottom and sides for flat, curved or rear screens from 67" to 25 feet diagonal Keystone circuitry to correct pictures for angles up to +/- 150 vertically from screen axis Color temperature adjustment for precise setup S and C vertical and horizontal linearity Top, bottom and side blanking Input Level: 0.5 to 1.0 volts p-p, 750 ohm 1 % terminated... Automatically switches to separate sync, composite sync, or sync on green Separate sync is automatically accepted in either polarity Gamma correction circuitry provided for improved video performance 100 MHz bandwidth (-3 db) Accommodates 4 nanosecond pixels and digital clock rates over 250 MHz Keyed clamp, better than 1 % Horizontal: 1.0% maximum Vertical: 1.0% maximum 5-1
80 SmartlockTM circuitry for quick lock-in and ultra steady images Vertical Deflection Frequency Range: 38 Hz to 95 Hz autolock Size adjustable from 15% overscan to 15% underscan {less above 90 khz) [J Retrace Time: less than 300 microseconds Horizontal Deflection Frequency Range: 15 khz to 110 khz autolock Size automatically regulated over frequency range from 10% overscan to 15% underscan (less above 90 khz) Retrace Time: will accept horizontal blanking times of 2.0 to 6.5 microseconds 34.9 KV regulated to better than +/-1 % 90 V AC to 264 V AC universal input Line Frequency: 50 to 60 Hz nominal Power: 650 watts maximum Power factor corrected Built-in RGB input. Optional interface modules install in interface slot [J Built-in RS-232 for computer control, with loop-thru for connection of multiple projectors HDTV compatible plus 1080 P. Quad Scan video processor allows seven inputs including HDTV pass thru. Multi-language software (user selectable) Menu driven interface with on-screen help Built-in set up tutorials Auto power up after power interruption Six built-in test patterns Internal frequency generator Modular design provides ease of servicing Most service adjustments are made using the keypad Maximum Operating Range Temperature: 0 to 35 C Humidity: 0 to 90% non-condensing Altitude: 0 to 3000m (0-10,000 ft.) Storage Temperature: -30 C to 65 C Heat Dissipation 2450 BTU/Hr (approximate) 5-2
 Multi-use, backlit, full function keypad Tool Kit A variety of input interface modules including an RGB Input Module, an RGB Loop Thru Module, a")
81 Can be ceiling mounted on its optional ceiling mount or placed on the floor or coffee table. 144 lbs /65 kg 194 lbs / 88 kg (shipping weight) Multi-use, backlit, full function keypad Tool Kit A variety of input interface modules including an RGB Input Module, an RGB Loop Thru Module, a Composite/S-Video Module, a HDTV Input Module, and a PC Analog Input Module Image Shifter Module which slowly moves the image to lengthen the life of the CRT phosphors while maintaining a high brightness picture Ceiling mount and rear screen equipment Contact your dealer or TAW for more information about the above products and accessories. Also refer to Appendix G, Interfaces. FCC Class A, DHHS and HWC requirements, EN55022 Class B CSA/UL/EN EU Directives 73/23/EEC, 89/336/EEC (CE marked) One year parts and labor (see back inside cover) 5-3
INSTALATION PROCEDURE
 INSTALLATION PROCEDURE Overview The most difficult part of an installation is in knowing where to start and the most important part is starting in the proper start. There are a few very important items
PLL2210MW LED Monitor
 PLL2210MW LED Monitor USER'S GUIDE www.planar.com Content Operation Instructions...1 Safety Precautions...2 First Setup...3 Front View of the Product...4 Rear View of the Product...5 Quick Installation...6
DISTRIBUTION AMPLIFIER
 MANUAL PART NUMBER: 400-0045-005 DA1907SX 1-IN, 2-OUT VGA/SVGA/XGA/UXGA DISTRIBUTION AMPLIFIER USER S GUIDE TABLE OF CONTENTS Page PRECAUTIONS / SAFETY WARNINGS... 2 GENERAL...2 GUIDELINES FOR RACK-MOUNTING...2
PROFESSIONAL D-ILA PROJECTOR DLA-G11
 PROFESSIONAL D-ILA PROJECTOR DLA-G11 A new digital projector that projects true S-XGA images with breakthrough D-ILA technology Large-size projection images with all the sharpness and clarity of a small-screen
PROFESSIONAL D-ILA PROJECTOR DLA-G11
 PROFESSIONAL D-ILA PROJECTOR DLA-G11 A new digital projector that projects true S-XGA images with breakthrough D-ILA technology Large-size projection images with all the sharpness and clarity of a small-screen
USER MANUAL. 22" Class Slim HD Widescreen Monitor L215DS
 USER MANUAL 22" Class Slim HD Widescreen Monitor L215DS TABLE OF CONTENTS 1 Getting Started Package Includes Installation 2 Control Panel / Back Panel Control Panel Back Panel 3 On Screen Display 4 Technical
D-ILA PROJECTOR DLA-G15 DLA-S15
 D-ILA PROJECTOR DLA-G15 Outstanding Projection Im Breakthrough D-ILA projector offers high-contrast 350:1, 1500 ANSI lumen brightness and S-XGA resolution Large-size projection images with all the sharpness
PL2410W LCD Monitor USER'S GUIDE.
 PL2410W LCD Monitor USER'S GUIDE www.planar.com Content Operation Instructions...1 Safety Precautions...2 First Setup...3 Front View of the Product...4 Rear View of the Product...5 Quick Installation...6
P-2 Installing the monitor (continued) Carry out as necessary
 Carry out as necessary") P-2 Installing the monitor (continued) Carry out as necessary Using the monitor without the bezel MDT552S satisfies the UL requirements as long as it is used with the bezel attached. When using the monitor
P-2 Installing the monitor (continued) Carry out as necessary Using the monitor without the bezel MDT552S satisfies the UL requirements as long as it is used with the bezel attached. When using the monitor
K Service Source. Apple High-Res Monochrome Monitor
 K Service Source Apple High-Res Monochrome Monitor K Service Source Specifications Apple High-Resolution Monochrome Monitor Specifications Characteristics - 1 Characteristics Picture Tube 12-in. diagonal
2013, 2014 Hewlett-Packard Development Company, L.P.
 User Guide 2013, 2014 Hewlett-Packard Development Company, L.P. The only warranties for HP products and services are set forth in the express warranty statements accompanying such products and services.
Quick Reference Guide
 Multimedia Projector Quick Reference Guide MODEL 103-011100-01 Projection lens is optional. English Use this book as a reference guide when setting up the projector. For detailed information about installation,
USER MANUAL. 27 Full HD Widescreen LED Monitor L27ADS
 USER MANUAL 27 Full HD Widescreen LED Monitor L27ADS TABLE OF CONTENTS 1 Getting Started 2 Control Panel/ Back Panel 3 On Screen Display 4 Technical Specs 5 Care & Maintenance 6 Troubleshooting 7 Safety
PLL1920M LED LCD Monitor
 PLL1920M LED LCD Monitor USER'S GUIDE www.planar.com Content Operation Instructions...1 Safety Precautions...2 First Setup...3 Front View of the Product...4 Rear View of the Product...5 Installation...6
Winmate Communication INC.
 20.1 Military Grade Display Model: R20L100-RKA2ML User s Manual Winmate Communication INC. May, 2011 1 IMPORTANT SAFETY INSTRUCTIONS Please read these instructions carefully before using the product and
USER MANUAL. 28" 4K Ultra HD Monitor L28TN4K
 USER MANUAL 28" 4K Ultra HD Monitor L28TN4K TABLE OF CONTENTS 1 Getting Started 2 Control Panel/ Back Panel 3 On Screen Display 4 Technical Specs 5 Care & Maintenance 6 Troubleshooting 7 Safety Info &
K Service Source. Apple High-Res Monochrome Monitor
 K Service Source Apple High-Res Monochrome Monitor K Service Source Specifications Apple High-Resolution Monochrome Monitor Specifications Characteristics - 1 Characteristics Picture Tube 12-in. diagonal
D-ILA PROJECTOR DLA-G15 DLA-S15
 D-ILA PROJECTOR Outstanding Projection Im Breakthrough D-ILA projector offers high-contrast 350:1, 1500 ANSI lumen brightness and S-XGA resolution Large-size projection images with all the sharpness and
USER MANUAL Full HD Widescreen LED Monitor L236VA
 USER MANUAL 23.6 Full HD Widescreen LED Monitor L236VA TABLE OF CONTENTS 1 Getting Started 2 Control Panel/ Back Panel 3 On Screen Display 4 Technical Specs 5 Care & Maintenance 6 Troubleshooting 7 Safety
USER S MANUAL (1/2) (Functions and connections)
 (Functions and connections)") English USER S MANUAL (1/2) (Functions and connections) WIDE PLASMA DISPLAY P42VCA30W/P42VCA30E WITH OPTIONAL VIDEOBOARD (P-TE1100/P-TE1110/P-TE1120/P-TE1130) HE4VS01W/HE4VS01E WITH OPTIONAL VIDEOBOARD
English USER S MANUAL (1/2) (Functions and connections) WIDE PLASMA DISPLAY P42VCA30W/P42VCA30E WITH OPTIONAL VIDEOBOARD (P-TE1100/P-TE1110/P-TE1120/P-TE1130) HE4VS01W/HE4VS01E WITH OPTIONAL VIDEOBOARD
USER MANUAL Full HD Widescreen LED Monitor L215ADS
 USER MANUAL 21.5 Full HD Widescreen LED Monitor L215ADS TABLE OF CONTENTS 1 Getting Started 2 Control Panel/ Back Panel 3 On Screen Display 4 Technical Specs 5 Care & Maintenance 6 Troubleshooting 7 Safety
USER MANUAL Full HD Widescreen LED Monitor L215IPS
 USER MANUAL 21.5 Full HD Widescreen LED Monitor L215IPS TABLE OF CONTENTS 1 Getting Started 2 Control Panel/ Back Panel 3 On Screen Display 4 Technical Specs 5 Care & Maintenance 6 Troubleshooting 7 Safety
Table of Contents. User s Manual 1 INTRODUCTION 2 SOURCE SETUPS 3 OPERATION 4 MAINTENANCE & TROUBLESHOOTING 5 SPECIFICATIONS RPMX/CX50/CX60/CX67
 RPMX/CX50/CX60/CX67 User s Manual Table of Contents 1 INTRODUCTION 2 SOURCE SETUPS 3 OPERATION 4 MAINTENANCE & TROUBLESHOOTING Contents 1.1 Overview... 1-1 1.2 Components... 1-2 1.3 Purchase Record and
PXL2760MW LED LCD Monitor
 PXL2760MW LED LCD Monitor USER'S GUIDE www.planar.com Content Operation Instructions...1 Safety Precautions...2 Package Overview...3 First Setup...4 Front View of the Product...5 Rear View of the Product...6
PLL2710W LED LCD Monitor
 PLL2710W LED LCD Monitor USER'S GUIDE www.planar.com Content Operation Instructions...1 Safety Precautions...2 Package Overview...3 First Setup...4 Front View of the Product...5 Rear View of the Product...6
28 4K LED monitor. User Manual M284K
 28 4K LED monitor User Manual M284K CONTENTS Safety Information... 2 What s included..... 4 Getting Started....... 8 Troubleshooting.... 14 Specification.... 15 2 of 15 SAFETY INFORMATION Read these instructions
Hi-Rez Projections Inc. 20 Main St. Ashland, MA MP8 CRT Installation
 Hi-Rez Projections Inc. 20 Main St. Ashland, MA 01721 508-881-1613 www.hometheater1.com MP8 CRT Installation Table of Contents Overview...1 Precautions...1 Components...1 CAUTIONS Before Beginning...2
USER S MANUAL. Deuce HD User's Manual WORLD HEADQUARTERS
 USER S MANUAL WORLD HEADQUARTERS Artel Video Systems 5B Lyberty Way Westford, MA 01886 Tel: (978) 263-5775 Fax: (978) 263-9755 Email: info@artel.com Web: www.artel.com P/N 1219 Rev. F Copyright 2016 USER
Q-TV2. User Manual. for Screens
 Q-TV2 User Manual for 30-42 Screens Contents Introduction 02 Safety Guidelines 03 Getting started 03 Potential Uses 04 Carton Contents 05 Q-TV2 Controls 05 Remote Fixings 06 Fixing Rails 07 Fitting Q-TV2
PXL2470MW LED LCD Monitor
 PXL2470MW LED LCD Monitor USER'S GUIDE www.planar.com Content Operation Instructions...1 Unpacking Instructions...2 Safety Precautions...2 Package Overview...3 First Setup...4 Front View of the Product...5
USER MANUAL. 27 Full HD Widescreen LED Monitor L270E
 USER MANUAL 27 Full HD Widescreen LED Monitor L270E TABLE OF CONTENTS 1 Getting Started 2 Control Panel/ Back Panel 3 On Screen Display 4 Technical Specs 5 Care & Maintenance 6 Troubleshooting 7 Safety
Table of Contents. User s Manual 1 INTRODUCTION 2 INSTALLATION & 3 OPERATION 4 MAINTENANCE 5 TROUBLESHOOTING 6 SPECIFICATIONS APPENDICES
 RPMSP & CSP70 Dual UHP Series User s Manual Table of Contents 1 INTRODUCTION 2 INSTALLATION & SETUP 3 OPERATION 1.1 Projector Overview... 1-1 1.2 Components... 1-2 1.3 Purchase Record and Servicing...
AC334A. VGA-Video Ultimate BLACK BOX Remote Control. Back Panel View. Side View MOUSE DC IN BLACK BOX ZOOM/FREEZE POWER
 AC334A BLACK BOX 724-746-5500 VGA-Video Ultimate BLACK BOX 724-746-5500 Zoom Position PAL ZOOM/FREEZE POWER FREEZE ZOOM NTSC/PAL SIZE RESET POWER Size Power Remote Control DC IN MOUSE MIC IN AUDIO OUT
HD Digital Set-Top Box Quick Start Guide
 HD Digital Set-Top Box Quick Start Guide Eagle Communications HD Digital Set-Top Box Important Safety Instructions WARNING TO REDUCE THE RISK OF FIRE OR ELECTRIC SHOCK, DO NOT EXPOSE THIS PRODUCT TO RAIN
110LP MOON Series. Phono Preamplifier. Owner s Manual
 Phono Preamplifier Owner s Manual Owner s Manual I Table of Contents Introduction 4 Unpacking 5 Installation & Placement 5 Circuit Board Layout s 6 Internal Adjustments 7 Rear Panel Connections 8 Operating
PLV-Z2 ROLL THE FILM FOR THE FUTURE!
 ROLL THE FILM FOR THE FUTURE! With the new PLV-Z2, SANYO has introduced a home cinema projector that is sure to capture the hearts of all home cinema fans. The latest technology, outstanding image quality,
Displays Open Frame Monitor Model Number: AND-TFT-150Bxx
 Displays 15.0 Open Frame Monitor Model Number: AND-TFT-150Bxx The AND-TFT-150Bxx 15.0 Open Frame Monitor series are rugged, high performance Industrial LCD Monitors, designed for commercial and industrial
USER MANUAL. 27" 2K QHD LED Monitor L27HAS2K
 USER MANUAL 27" 2K QHD LED Monitor L27HAS2K TABLE OF CONTENTS 1 Getting Started 2 Control Panel/ Back Panel 3 On Screen Display 4 Technical Specs 5 Troubleshooting 6 Safety Info & FCC warning 1 GETTING
TR6102HD HDTV/DVD/COMPONENT VIDEO TO RGBHV TRANSCODER USER S GUIDE
 MANUAL PART NUMBER: 400-0031-003 PRODUCT REVISION: 1 HDTV/DVD/COMPONENT VIDEO TO RGBHV TRANSCODER USER S GUIDE INTRODUCTION Thank you for your purchase of the Transcoder. We are certain that you will find
PT-DW750W/DW750LW PT-DW750B/DW750LB
 S P E C F I L E Product Number : Product Name : DLP Projectors PT-DW750W/DW750LW PT-DW750B/DW750LB. Specifications and appearance are subject to change without notice. 1/18 Specifications Main unit Power
Introduction...2. Features...2 Safety Precautions...2. Installation...4
 PE1900 Contents Introduction...2 Features...2 Safety Precautions...2 Installation...4 Unpacking the Display...4 Locations and Functions of Controls...4 Connections...5 Using Your Display...7 Turning the
Quick Setup Guide. DCX-500i / DCX-1000i / DCX-1500i Projectors with WC-Pro Scaler. Preliminary
 Quick Setup Guide DCX-500i / DCX-1000i / DCX-1500i Projectors with WC-Pro Scaler Preliminary Table of Contents Introduction... 1 Connecting the Projector... 1 Installing the Primary Lens... 2 Connecting
OPERATING GUIDE. HIGHlite 660 series. High Brightness Digital Video Projector 16:9 widescreen display. Rev A June A
 OPERATING GUIDE HIGHlite 660 series High Brightness Digital Video Projector 16:9 widescreen display 111-9714A Digital Projection HIGHlite 660 series CONTENTS Operating Guide CONTENTS About this Guide...
MP 35" Zero-G 100Hz Curved Monitor with AMD FreeSync 2.0
 MP 35" Zero-G 100Hz Curved Monitor with AMD FreeSync 2.0 P/N 31005 User's Manual SAFETY WARNINGS AND GUIDELINES Please read this entire manual before using this device, paying extra attention to these
ESI VLS-2000 Video Line Scaler
 ESI VLS-2000 Video Line Scaler Operating Manual Version 1.2 October 3, 2003 ESI VLS-2000 Video Line Scaler Operating Manual Page 1 TABLE OF CONTENTS 1. INTRODUCTION...4 2. INSTALLATION AND SETUP...5 2.1.Connections...5
General. zoom ring. focus ring. Size of liquid. Color. foot adjust levers. Projection. Computer In. Mouse/Com. Power
 Projector Specifications status lights control panel speakers zoom ring focus ring General Type of display Size of liquid crystal panels Poly-silicon Thin Film Transistor (TFT), active matrix Diagonal:
PT-LW330 S P E C F I L E. LCD Projectors. As of April Specifications and appearance are subject to change without notice. 1/9.
 S P E C F I L E Product Number : Product Name : LCD Projectors As of April 2014. Specifications and appearance are subject to change without notice. 19 Specifications Main unit Power supply Power consumption
Home Cinema Projector LPX-500
 LPX-5 NEW PRODUCT BULLETIN Home Cinema Projector LPX-5 LCD projector designed exclusively for home cinema use featuring 16:9 widescreen display capability, high contrast film-like picture quality, Yamaha
PT-LB300 S P E C F I L E. LCD Projectors. As of April Specifications and appearance are subject to change without notice. 1/8.
 S P E C F I L E Product Number : Product Name : As of April 2014. Specifications and appearance are subject to change without notice. 18 Specifications Main unit Power supply Power consumption LCD panel
OPTICAL POWER METER WITH SMART DETECTOR HEAD
 OPTICAL POWER METER WITH SMART DETECTOR HEAD Features Fast response (over 1000 readouts/s) Wavelengths: 440 to 900 nm for visible (VIS) and 800 to 1700 nm for infrared (IR) NIST traceable Built-in attenuator
22" Touchscreen LED Monitor USER'S GUIDE
 22" Touchscreen LED Monitor USER'S GUIDE Content Operation Instructions...1 Unpacking Instructions...2 Safety Precautions...2 Front View of the Product...3 Rear View of the Product...4 Quick Installation...5
SAFETY WARNINGS AND GUIDELINES
 SAFETY WARNINGS AND GUIDELINES Please read this manual thoroughly, paying extra attention to these safety warnings and guidelines: Do not expose this monitor to water or moisture of any kind. Do not handle
INSTRUCTIONAL MANUAL FOR LCD ZOOM MICROSCOPE
 INSTRUCTIONAL MANUAL FOR LCD ZOOM MICROSCOPE ? 8 LCD Screen? 10.4 LCD Screen LCD Zoom Microscope Instruction Manual Please read the Instruction Manual carefully before installation and keep it for future
The Extron MGP 464 is a powerful, highly effective tool for advanced A/V communications and presentations. It has the
 MGP 464: How to Get the Most from the MGP 464 for Successful Presentations The Extron MGP 464 is a powerful, highly effective tool for advanced A/V communications and presentations. It has the ability
PT-LB382 S P E C F I L E. LCD Projectors. As of July Specifications and appearance are subject to change without notice. 1/9.
 S P E C F I L E Product Number : Product Name : LCD Projectors As of July 2015. Specifications and appearance are subject to change without notice. 19 Specifications Main unit Power supply Power consumption
Ultra Short-throw Projectors <LV-WX300UST >
 Ultra Short-throw Projectors Outline of product This new ultra short-throw projector belongs to a class of DLP portable projectors that can be used in a wide variety of scenarios including
TABLE OF CONTENTS. Safety Summary
 TABLE OF CONTENTS Safety Summary iii Introduction 1 Image Resolution 1 Compatibility 1 Unpacking the Projector 1 Usage Guidelines 4 If You Need Assistance 4 Warranty 4 Setting up the Projector 5 Connecting
PT-DX820W/DX820LW PT-DX820B/DX820LB
 S P E C F I L E Product Number : Product Name : DLP Projectors PT-DX820W/DX820LW PT-DX820B/DX820LB As of May 2018. Specifications and appearance are subject to change without notice. 1/16 Specifications
NewScope-7A Operating Manual
 2016 SIMMCONN Labs, LLC All rights reserved NewScope-7A Operating Manual Preliminary May 13, 2017 NewScope-7A Operating Manual 1 Introduction... 3 1.1 Kit compatibility... 3 2 Initial Inspection... 3 3
Acer LCD TV AT2001 User's Guide
 Acer LCD TV AT2001 User's Guide Copyright 2005. Acer Incorporated. All Rights Reserved. Acer AT2001 User' s Guide Original Issue: May 2005 Acer and the Acer logo are registered trademarks of Acer Incorporated.
Video Scaler Pro with RS-232
 Video Scaler Pro with RS-232 - ID# 783 Operation Manual Introduction Features The Video Scaler Pro with RS-232 is designed to convert Composite S-Video and YCbCr signals to a variety of computer and HDTV
PT-DZ780W/DZ780LW PT-DZ780B/DZ780LB
 S P E C F I L E Product Number : Product Name : DLP Projectors PT-DZ780W/DZ780LW PT-DZ780B/DZ780LB. Specifications and appearance are subject to change without notice. 1/18 Specifications Main unit Power
(English)
") 009-0279-00 (English) SAFETY SUMMARY: Please read these instructions before using your LitePro 610 or 620. Failure to comply could result in fire, electrical shock, personal injury or equipment damage.
009-0279-00 (English) SAFETY SUMMARY: Please read these instructions before using your LitePro 610 or 620. Failure to comply could result in fire, electrical shock, personal injury or equipment damage.
ACUBRITE 23 SS. Manual. Stainless Steel Chassis 23" LCD Display. Content
 ACUBRITE 23 SS Stainless Steel Chassis 23" LCD Display Manual Introduction... 2 Hardware Installation... 2 The Display Timing... 5 The Display Outline Dimensions... 6 The Display Controls... 7 The Screen
PT-DZ780W/DZ780LW PT-DZ780B/DZ780LB
 S P E C F I L E Product Number : Product Name : DLP Projectors PT-DZ780W/DZ780LW PT-DZ780B/DZ780LB As of April 2015. Specifications and appearance are subject to change without notice. 1/18 Specifications
MP Zero-G 27" WQHD 144Hz TN-LED Monitor with AMD FreeSync
 MP Zero-G 27" WQHD 144Hz TN-LED Monitor with AMD FreeSync P/N 31004 User's Manual SAFETY WARNINGS AND GUIDELINES Please read this entire manual before using this device, paying extra attention to these
Assembling and Mounting the Presentation Display, Speakers, Speaker Screens, and Table Door
 CHAPTER 8 Assembling and Mounting the Presentation Display, Speakers, Speaker Screens, and Table Door July 13, 2012, This document provides you with the procedures you perform to assemble and mount the
FLAT DISPLAY TECHNOLOGY
 15.0 Open Frame Monitor Model Number: LOF1506xx This product is RoHS compliant SPEC No.: SAS-1008002 Version: 0.0 Issue Date: September 6, 2010 1. Introduction: 1.1 About the Product The LOF1506xx 15.0
PB2220/ PB2120 FEATURES DLP PROJECTOR USER S GUIDE OUTLINE
 DLP PROJECTOR PB2220/ PB2120 USER S GUIDE Thank you for purchasing the BenQ DLP Projector. Please read this user s guide to ensure correct use of the device. Save this user s guide for future reference.
TeamWork Kits Installation Guide
 TX 0 RX COM +5V APARATUS US TeamWork Kits Installation Guide TeamWork 400 and TeamWork 600 Kits The TeamWork 400 and TeamWork 600 kits consist of an HDMI switcher, system controller, Cable Cubby, and cables
isync HD & isync Pro Quick Reference Guide isync HD isync Pro Digital Video Processor and Video/Audio Switcher
 isync HD & isync Pro Digital Video Processor and Video/Audio Switcher Quick Reference Guide isync HD Key Digital, led by digital video pioneer Mike Tsinberg, develops and manufactures high quality, cutting-edge
AC335A. VGA-Video Ultimate Plus BLACK BOX Back Panel View. Remote Control. Side View MOUSE DC IN OVERLAY
 AC335A BLACK BOX 724-746-5500 VGA-Video Ultimate Plus Position OVERLAY MIX POWER FREEZE ZOOM NTSC/PAL SIZE GENLOCK POWER DC IN MOUSE MIC IN AUDIO OUT VGA IN/OUT (MAC) Remote Control Back Panel View RGB
6.4 Chassis Monitor Model Number: LCM0642xx. SPEC No.: SAS Version: 0.0 Issue Date: April 16, Introduction:
 6.4 Chassis Monitor Model Number: LCM0642xx This product is RoHS compliant SPEC No.: SAS-0908003 Version: 0.0 Issue Date: April 16, 2010 1. Introduction: 1.1 About the Product The LCM0642xx 6.4 Chassis
Product Number : LW373 Product Name : As of October Specifications and appearance are subject to change without notice.
 S P E C F I L E Product Number : Product Name : LCD Projectors As of October 2016. Specifications and appearance are subject to change without notice. 19 Specifications Main unit Power supply Power consumption
2D/3D Multi-Projector Stacking Processor. User Manual AF5D-21
 2D/3D Multi-Projector Stacking Processor User Manual AF5D-21 Thank you for choosing AF5D-21 passive 3D processor. AF5D-21 is an advanced dual channel passive 3D processor with 10 bits high end scaler and
ASSEMBLY AND CALIBRATION
 CineMax Kit ASSEMBLY AND CALIBRATION www.cineversum.com Ref: T9003000 Rev: 01 Part. No.: R599766 Changes CineVERSUM provides this manual as is without warranty of any kind, either expressed or implied,
RPMX/RPMSP-D132U RPMSP-D180U
 RPMX/RPMSP-D132U RPMSP-D180U USER MANUAL 020-100245-03 RPMX/RPMSP-D132U RPMSP-D180U USER MANUAL 020-100245-03 NOTICE This equipment has been tested and found to comply with the limits for a Class A digital
STRAND LIGHTING 200F 7-INCH TUNGSTEN LED TELEVISION FRESNEL SPECIFICATION.
 STRAND LIGHTING 200F 7-INCH TUNGSTEN LED TELEVISION FRESNEL SPECIFICATION. GENERAL. A.) Overview. 1) The Television Fresnel fixture shall be purpose designed for television and studio lighting applications.
Part names (continued) Remote control
 Remote control") Introduction Part names (continued) Remote control (1) STANDBY ( 25) (1) (2) ON ( 25) (3) (3) ID - 1 / 2 / 3 / 4 s ( 18) (4) (4) COMPUTER 1 ( 27) (7) (5) COMPUTER 2 * (8) (6) COMPUTER 3 * (10) (13) (7)
Introduction Part names (continued) Remote control (1) STANDBY ( 25) (1) (2) ON ( 25) (3) (3) ID - 1 / 2 / 3 / 4 s ( 18) (4) (4) COMPUTER 1 ( 27) (7) (5) COMPUTER 2 * (8) (6) COMPUTER 3 * (10) (13) (7)
XL6600U & XL6500U XGA PROJECTOR
 XL6600U & XL6500U XGA PROJECTOR XL6600U & XL6500U PROJECTORS XL6600U & XL6500U XGA Projector What is XL6600U/XL6500U?...3 Key Selling Points...3 Why Mitsubishi Digital Projectors?...4 Product Specifications...5
PT-TW340 S P E C F I L E. LCD Projectors. As of May Specifications and appearance are subject to change without notice. 1/8.
 S P E C F I L E Product Number : Product Name : LCD Projectors As of May 2014. Specifications and appearance are subject to change without notice. 18 Specifications Main unit Power supply Power consumption
Kramer Electronics, Ltd. USER MANUAL. Models: VS-162AV, 16x16 Audio-Video Matrix Switcher VS-162AVRCA, 16x16 Audio-Video Matrix Switcher
 Kramer Electronics, Ltd. USER MANUAL Models: VS-162AV, 16x16 Audio-Video Matrix Switcher VS-162AVRCA, 16x16 Audio-Video Matrix Switcher Contents Contents 1 Introduction 1 2 Getting Started 1 3 Overview
Precautions About the Product... 4 Package Overview Product Overview... 6 Start Your Installation... 8
 2 Table of Contents Usage Notice Precautions... 3 Introduction About the Product... 4 Package Overview... 5 Installation Product Overview... 6 Start Your Installation... 8 User Controls User Control Overview...
Altman Lighting AP-150 RGBW Par Specification
 1.01 COLOR MIXING LED WASH FIXTURE A. General 1. The fixture shall be Red, Green, Blue, and White LED luminaire with motorized zoom and DMX control. The fixture shall be the AP-150 RGBW by Altman Stage
DA1909 COMPUTER VIDEO LINE DRIVER WITH EQUALIZATION USER S GUIDE
 MANUAL PART NUMBER: 400-0108-002 PRODUCT REVISION: 1 COMPUTER VIDEO LINE DRIVER WITH EQUALIZATION USER S GUIDE INTRODUCTION Altinex appreciates your purchase of the Line Driver. We are sure you will find
TABLE OF CONTENTS. Safety Summary
 TABLE OF CONTENTS Safety Summary iii Introduction 1 Image Resolution 1 Compatibility 2 Unpacking the Projector 2 Usage Guidelines 4 If You Need Assistance 4 Warranty 4 Setting up the Projector 5 Connecting
Informational Blog: Video Guides: User Forums:
 Disclaimer This user manual is provided as a free service by FixYourDLP.com. FixYourDLP is in no way responsible for the content of this manual, nor do we guarantee its accuracy. FixYourDLP does not make
Altman Lighting Spectra Cyc 50 Specification
 1.01 CYCLORAMA LIGHTING A. General 1. The fixture shall be a compact, lightweight color-mixing LED asymmetrical wash fixture with 8 or 16 bit DMX control of intensity and color. The fixture shall be the
PT-TX400 S P E C F I L E. LCD Projectors. As of December Specifications and appearance are subject to change without notice.
 S P E C F I L E Product Number : Product Name : LCD Projectors As of December 2015. Specifications and appearance are subject to change without notice. 18 Specifications Main unit Power supply Power consumption
Kramer Electronics, Ltd. USER MANUAL. Model: VS x 1 Sequential Video Audio Switcher
 Kramer Electronics, Ltd. USER MANUAL Model: VS-120 20 x 1 Sequential Video Audio Switcher Contents Contents 1 Introduction 1 2 Getting Started 1 2.1 Quick Start 2 3 Overview 3 4 Installing the VS-120 in
19 / 20.1 / 22 WIDE SCREEN TFT-LCD MONITOR
 19 / 20.1 / 22 WIDE SCREEN TFT-LCD MONITOR V193/ V220 Series V202 Series USER MANUAL www.viewera.com Rev. 2.0 Table of Contents EMC Compliance......1 Important Precautions...2 1. Package contents....3
Table of Contents. English. Table of Contents... 1 Usage Notice Introduction Installation User Controls Appendices...
 Table of Contents Table of Contents... 1 Usage Notice... 2 Precautions... 2 Introduction... 4 Product Features... 4 Package Overview... 5 Product Overview... 6 Main Unit... 6 Control Panel... 7 Connection
User s Guide L1718S. LCD Computer Monitor
 User s Guide L1718S LCD Computer Monitor Make sure to read the Important Precautions before using this product. Keep the User's Guide(CD) in an accessible place for furture reference. Have the model and
DLP PROJECTOR FEATURES USER S GUIDE OUTLINE. 1. High Brightness. 2. High Resolution. 3. Compact Size, Feather Weight for Portability
 DLP PROJECTOR USER S GUIDE Thank you for purchasing the DLP TM Projector. Please read this user s guide to ensure correct use of the device. Save this user s guide for future reference. OUTLINE This DLP
Sharp Electronics Corporation Consumer Electronics Group, Sharp Plaza, Mahwah, NJ Call us toll free at BE-SHARP
 Sharp Electronics Corporation Consumer Electronics Group, Sharp Plaza, Mahwah, NJ 07430-2135 conlcd@sharpsec.com Call us toll free at 1-800-BE-SHARP www.sharpusa.com 2003 Sharp Electronics Corporation
USER MANUAL. HIGHlite Laser 3D Series INSTALLATION AND QUICK-START GUIDE CONNECTION GUIDE OPERATING GUIDE REFERENCE GUIDE
 HIGHlite Laser 3D Series High Brightness Digital Video Projector USER MANUAL INSTALLATION AND QUICK-START GUIDE CONNECTION GUIDE OPERATING GUIDE REFERENCE GUIDE 114-913B Digital Projection HIGHlite Laser
TeamWork Installation Guide
 C G G 00-0V/ A MAX TX RX +V APARATUS US 0 TeamWork Installation Guide TeamWork TeamWork is a fully customizable collaboration system comprised of an switcher, Show Me cables, a control processor, and a
DA IN 1-OUT LINE DRIVER WITH EQUALIZATION + AUDIO USER S GUIDE
 MANUAL PART NUMBER: 400-0430-001 1-IN 1-OUT LINE DRIVER WITH UALIZATION + AUDIO USER S GUIDE TABLE OF CONTENTS Page PRECAUTIONS / SAFETY WARNINGS... 2 GENERAL...2 GUIDELINES FOR RACK-MOUNTING...2 INSTALLATION...2
WDP02 Wireless FHD Kit User Manual
 WDP02 Wireless FHD Kit User Manual Copyright Copyright 2015 by BenQ Corporation. All rights reserved. No part of this publication may be reproduced, transmitted, transcribed, stored in a retrieval system
QIP7232 P2. Hybrid QAM/IP High-definition Set-top. Quick Start Guide
 QIP7232 P2 Hybrid QAM/IP High-definition Set-top Quick Start Guide Before You Begin Introduction Congratulations on receiving a Motorola QIP7232 Hybrid QAM/IP High-definition Set-top. This document will