10-in-1 Remote Control
|
|
|
- August Eaton
- 5 years ago
- Views:
Transcription

1 4 C 10-in-1 Remote Control KH in-1 Remote Control Operating manual Univerzalni daljinski upravljalec Navodila za uporabo Univerzalni daljinski upravljač Upute za uporabu KOMPERNASS GMBH BURGSTRASSE 21 D BOCHUM ID-Nr.: KH /10-V3

2 KH 2158
3 INDEX PAGE Important safety instructions 2 Device summary 3 Initial use 4 Unpacking the device/checking the package contents 4 Inserting the batteries 4 Operating components 5 LCD display 5 Buttons 6 SETUP - System settings 9 Code Setup (Programming the remote control) 11 Programming by brand code search 11 Programming by manual code input 12 Programming by automatic code search 12 System-Setup 14 Setting the time 14 Setting the date 14 Adjust contrast 15 Background Illumination 15 Setting the global volume/mute switching 15 Setting the lock function 16 System reset 17 Timer Setup 17 Sleep timer 17 Event timer 17 Learn Setup 18 Code learn function 19 Macro Setup 20 Favourites channel 21 Volume control 23 Vol +/, (Mute switching) 23 For operation 23 All OFF 23 Cleaning and storage 24 Faults / Remedies 24 Disposal 25 Technical data 25 Note regarding conformity 26 Importer 26 Warranty & Service 26
4 Universal remote control KH2158 This documentation is copyright protected. All rights including those of photographic reproduction, duplication and distribution by means of particular methods (for example data processing, data carriers and data networks), wholly or partially as well as substantive and technical changes are reserved. Read the operating instructions carefully before using the device for the first time and preserve this booklet for later reference. Pass this manual on to whoever might acquire the device at a future date. Important safety instructions Proper use Children may only operate the remote control under adult supervision. The universal remote control can replace a maximum of ten remote controls. It can only be used for entertainment electronics with infrared receivers. The functions of the Universal remote control essentially correspond to those of the original remote control. The universal remote control is intended for private use. It is not suitable for commercial use. Any other use is considered improper use. The manufacturer accepts no responsibility for damage caused by improper handling or unauthorized reconstruction. Warning A warning of this danger level signifies a possible dangerous situation. If the dangerous situation is not avoided it can lead to injuries. The directives in this warning are there to avoid personal injuries. Important A warning of this danger level signifies possible property damage. If the situation is not avoided it can lead to property damage. The directives in this warning are there to avoid property damage. Note A note signifies additional information that assists in the handling of the device. Warning of injury danger as a result of improper handling of batteries! Batteries must be handled with special care. Take note of the following safety instructions: Keep batteries well away from children. Children can put batteries into their mouths and swallow them. If a battery is swallowed medical assistance must be sought IM- MEDIATELY. Do not throw batteries into a fire. Never subject batteries to high temperatures
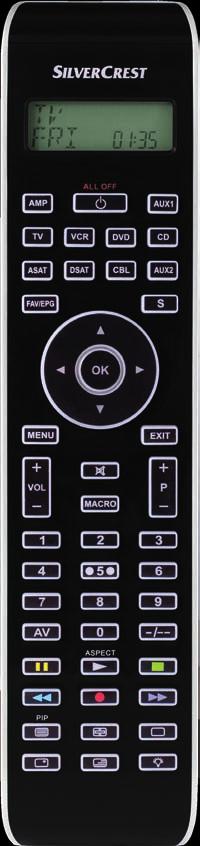
5 Explosion hazard! Non-rechargeable batteries must never be recharged. Do not open the batteries or short-circuit them. Battery acid leaking from a battery can cause inflammation of the skin. In event of contact with the skin, rinse with large amounts of water. If the liquid comes into contact with your eyes, rinse thoroughly with water, do not rub and immediately consult a doctor. Attention! The Universal remote control contains an infrared diode of laser class 1. In order to avoid eye injuries do not look at the diode with optical devices. Damage to the device If the device is defective, do not attempt to repair it yourself. In case of damage, contact the manufacturer or the manufacturer's service hotline (see Warranty information). If liquid escapes from the device or if the device has been otherwise damaged, it must be inspected by the manufacturer or the manufacturer's service hotline. Contact the manufacturer or the manufacturer's service hotline (see Warranty information). Take the batteries out of the battery compartment as soon as they are depleted. If you will not be using the device for a long period of time, remove the batteries to prevent them from discharging. Always change all batteries at the same time and always use batteries of the same type. Device summary q LCD display w /ALL OFF button e Device buttons r S button t Arrow buttons y EXIT button u P +/ buttons i MACRO button o Number buttons a Button for one or two digit programme numbers s Teletext function buttons d Illumination button f AV button g Record/Playback buttons h Mute switching j VOL +/ buttons k MENU button l OK button 1( FAV / EPG button 2) Infrared sender/receiver 2! Battery compartment cover - 3 -
6 Tips: The functions described here pertain to the theoretically ideal circumstance that the button structure of the respective original remote control is identical to this universal remote control. This only occurs, however, in rare cases. If, therefore, not all of the original remote control's functions can be reproduced it is not due to a dificiency in the Universal remote control. All the brand names used in these instructions or in the accompanying code list are trademarks of the corresponding companies. Initial use Unpacking the device/checking the package contents Warning! Keep the plastic packaging well away from small children. There is a risk of suffocation! Unpack the device and accessories. Check the package contents - Universal remote control (URC), - Operating instructions, - Manufacturers directory with device code list: - 2 x 1,5 V Batteries, type AAA/LR03 (Micro) Note: Transport damage If you notice any transport damage contact the manufacturer or the manufacturer's Service-Hotline (see warranty information). Inserting the batteries Attention! The Universal remote control must only be operated with 1.5 Volt batteries (Type AAA, LR03). Carry out the battery change as quickly as possible. Preset settings will remain saved for approx. 1 minute. If new batteries have not been installed within this time all of the settings will have to be carried out again. The time of day and date will, however, be lost in either case
7 1. Open the battery compartment cover 2! in the direction of the arrow. 2. Insert the batteries as shown in the diagram and close the battery compartment. The LCD display q is activated as long as batteries are installed. The following diagram shows the LCD display q after the batteries have been installed or changed. Note: If no LCD display q is visible check the polarity of the batteries or install new ones. Operating components LCD display The LCD display q is divided into fields. Text field 2@ Here is shown the currently selected device, for example DVD, TV VCR etc. Infrared symbol 2# Every time a button is pressed, with which an infrared signal is to be sent the Infrared symbol illuminates. Code/Time field 2$ Here is shown the device code of the relevent selected device or the time of day. With the time of day indicator ":" the numbers blink in the middle. Day of the week field 2% Here you can read the English shortened form of the current day of the week after you have entered the date
8 MON Tue WED THU FRI SAT SUN = Monday = Tuesday = Wednesday = Thursday = Friday = Saturday = Sunday Standard display: The standard readout of the LCD display q consists of the details for the relevent device, for example, "TV", the initial for the day of the week and the time of day indicator. Buttons Note: All the functions described here can, of course, only be used if they are supported by the device being controlled. /ALL OFF button. w Switch device on/off. hold down for approx. 5 seconds to switch all devices on/off. Device buttons e The device buttons are used to select the device that should be operated. Television Video recorder Accessory unit 1 Cable receiver CD player Analogue satellite receiver Audio amplifier DVD player Digital satellite receiver Accessory unit 2 The mentioned button allocation is not compulsory. You can, for example, also save the code for the video recorder on the TV slot
9 "S" button r Hold down for 3 seconds to access the SETUP menu, press briefly to superimpose the date and/or to open access to additional functions such as EPG or PIP. Arrow buttons t Move up, right, left and down in menus. EXIT button y Move a level backward in the menu. P +/ buttons u Change the reception channel. MACRO button i MACRO button i followed by a number button o 1-6 activates a previously saved chain of commands. Number buttons o Enter programme and device code numbers. Button for one/two digit programme numbers a For two digit programme numbers (depending on the device type) first press the a button then via the number buttons o enter the programme number. When pressed again the display becomes single digit once more. Teletext function buttons s In teletext operation the buttons have the following functions: Access the teletext function. In normal TV operation first press the S button r followed by the button to control the PIP function (picture in picture) of your television set. Stop automatic paging forward for multi-page teletexts. Enlarge page presentation Screen text and TV image one upon the other To end the teletext function
10 Note: The teletext function is only available in the European TV mode and your TV device must have a teletext module. In addition the P +/- buttons u control the following teletext functions: P + Leaf one page forward P Leaf one page backwards Record/playback buttons f The playback buttons f control devices such as DVD/CD players and video recorders: ASPECT Start playback Image format switching with TV operation. Record Stop Playback/Record/Wind Pause playback Rewind Wind forward AV button g Switch to the AV input. Mute switching h Switch sound on/off. VOL+/ buttons j Set volume (Volume). MENU button k Access the menu of the controlled device. OK button l You can confirm a menu selection with the OK button. FAV/EPG button 1( Press the FAV/EPG button to access your previously programmed favourite station. To access the electronic programme guide of the target device first press briefly the S button r and then the FAV/EPG button
11 SETUP - System settings In the system settings you undertake the following: Programming the remote control to the devices to be controlled Setting the time of day, date, display contrast, background illumination, volume, lock function as well as system reset. Timer settings The "learning" of designated button commands Setting up Macros Assigning favourites On the following page you can see a summary of the menu structure
12 - 10 -
13 Code Setup (Programming the remote control) 3 Programming methods are available for the remote control: Programming by brand code search, by automatic code search and by direct code input (manual). First you should use the brand code search since this method is the fastest way of programming if the manufacturer of your device is itemized in the code list. As second is recommended the direct code input followed by the automatic code search. Programming by brand code search With this method you select the brand and code direct via the LCD display q. Observe the following operational references to programme the remote control: 1. Press the device button e for the device that you want to programme the remote control. 2. Hold down the S button r for a little longer than 3 seconds. Carry out entries in the menu quickly because after approx. 15 seconds without an entry the menu will be ended. 3. In the LCD display q "CODE SETUP" appears. Press the OK button l. "ENTER CODE" now appears in the LCD display q. With the buttons t select "BRAND CODE" and confirm with the OK button l. 4. Now appears the alphabetical first brand name from the list of pre-programmed devices. 5. With the 34 buttons t select the various brand names. 6. To make access easier you can skip directly to specific letters of the alphabet with the number buttons o: 2 => A 3 => D 4 => G 5 => J 6 => M 7 => P 8 => T 9 => W Example With button number 5 the display skips to the letter "J". The first brand is "JVC"*. If, for example, you own a "Kenwood"* brand device, continue leafing with the 4 button t until this brand name appears. (* All brand names used here are trademarks of the corresponding manufacturer.) 7. The majority of manufacturers use several different codes for the remote control. You must now ascertain which of the available codes is best suited to your device. On the right underneath the brand name the relevent code will be shown in the LCD display q. 8. Point the remote control to the relevent device and press the function buttons to test the code (except t, OK l, EXIT y, or the number buttons o)
14 9. If most of the buttons function press the OK button l to save the setting. In the LCD display q "OK" appears. Subsequently the menu will close automatically. 10. If, however, none or only a few of the buttons function select with the 5 or 6 button t the next code and test again as described in step With the EXIT button y you will move one level upwards in the menu. Repeat these operational steps for all devices that you would like to control with the remote control. Programming by manual code input In this mode the remote control can be programmed by direct input of a code number. You can obtain the necessary code number from the enclosed manufacturers directory with device code list. In the event that the new code is invalid the last valid programmed code will be restored. 1. Press the device button e for the device that you want to programme the remote control. 2. Hold down the S button r for a little longer than 3 seconds. 3. In the LCD display q "CODE SETUP" appears. Press the OK button l. "ENTER CODE" now appears in the LCD display q. To access this function press the OK button l. 4. In the LCD display q appears the presently used code for the selected device. Now the first digit of the code blinks and waits for your code input. Enter the new four digit code via the number buttons o. 5. If the entered CODE is valid the code will be saved. In the LCD display q "OK" appears briefly. Subsequently the menu will close automatically. In the event of failure the LCD display q shows briefly "ERROR" and waits for a new code entry. Then you repeat step With the EXIT button y you will move one level upwards in the menu. Programming by automatic code search This process can take several minutes per device since all codes for the selected device have to be gone through. Therefore this method should only be used when the device cannot be programmed via brand code search or direct code input or if your device is not listed at all in the manufacturers directory with device code list. Follow the steps listed below to carry out programming by means of the automatic code search
15 1. Press the device button e for the device that is to be controlled (i.e. VCR). 2. Switch the device that is to be controlled with the remote control on. With VCR/DVD/CD devices please insert a tape and/or disc. 3. Hold down the S button r for a little longer than 3 seconds. 4. In the LCD display q "CODE SETUP" appears. Press the OK button l. "ENTER CODE" now appears in the LCD display q. Press the or button t until "SEARCH CODE" is shown in the LCD display q. Point the remote control to the device and then press the OK button l to access the mode "automatic code search". 5. The search begins. Thereby the device sends, one after the other, the code numbers in ascending order. The infrared symbol 2# indicates this. 6. When the device reacts by switching off press immediately the OK button l to save the relevent code. The LCD display q shows briefly "OK". 7. Check to see if the majority of your device's functions can now be controlled with the remote contol. If yes you have most probably found the correct code. In the event that a few functions are not working you can start the automatic code search again beginning with step 1. Note: However, with a renewed code search, point the URC first to the target device after the previously found inadequate code has run its course. 8. However if the device does not react any more you probably did not press the OK button l quick enough in step 6. Then press repeatedly the EXIT button y to exit the menu and return to the standard display. 9. Now hold down the device button e of the device for which you have just sought the relevent code. Below on the right in the LCD display q will thereby be shown the relevent code. Make a note of this number. 10. Then proceed as described in the preceding chapter "Programming by manual code entry" and check to see if the code with the next lowest number combination will function. Tips: 1. When code search is activated all buttons except OK l and EXIT y are ignored. 2. If the automatic search has reached the end of the code list it stops there. The display then returns to "SEARCH CODE"
16 System-Setup Setting the time The LCD display q shows you the time of day. You set this as follows: 1. Hold down the S button r for a little longer than 3 seconds. The notice "CODE SETUP" appears. If appox. 15 seconds passes without an entry the device exits the menu and returns to the standard display. 2. With the or button t select "SYSTEM SETUP" and confirm with the OK button l. 3. In the LCD display q "TIME SETUP" appears. Confirm with the OK button l. The LCD display q now shows "TIME" and the time format (24 HR) blinks. 4. With the or button t you can switch to the other time format (12 HR). After which the time display for the time of day will show an A or P before the time. A stands fpr AM = ante meridium (Morning, 0:00 o clock midnight to 12:00 o clock midday). P stands for PM = post meridium (Afternoon and evening, 12:00 o clock midday to 0:00 o clock midnight). Press the OK button l to confirm. 5. Now the hour indicator blinks. With the or button t select the hour number for the present time of day and press the OK button l. 6. Now the minute indicator blinks. With the or button t select the minute number for the present time of day and press the OK button l to save. The "TIME SETUP" notice appears again. 7. To exit this or the following menus press repeatedly the EXIT button y until the standard display appears in the LCD display q. Setting the date The LCD display q shows you the date when you press the S button r. You set the date in this way: 1. Hold down the S button r for a little longer than 3 seconds. The notice "CODE SETUP" appears. 2. With the or button t select "SYSTEM SETUP" and confirm with the OK button l. 3. In the LCD display q "TIME SETUP" appears. Press the button t to change to "DATE SETUP". Confirm with the OK button l. 4. In the display the year "2010" blinks. With the or button t you can change the year and confirm with the OK button l. With the or button t you can change the now blinking month and confirm with the OK button l. Now the day indicator blinks which you can also change with the or button t. 5. To save press the OK button l. The "DATE SETUP" notice appears again
17 Adjust contrast You can set the display's contrast as follows: 1. Hold down the S button r for a little longer than 3 seconds. The notice "CODE SETUP" appears. 2. With the or button t select "SYSTEM SETUP" and confirm with the OK button l. 3. With the or button t select "CONTRAST SETUP" and confirm with the OK button l. 4. In the LCD display q the contrast value now blinks which you can set with the or button t. Display readout: 0 = highest contrast: 15 = lowest contrast 5. With the OK button l you can save the desired setting. The notice "CONTRAST SETUP" appears again. Background Illumination You can set how long the LCD display s q background and the button illuminations remain alight after completion of the operation.. Thereby taking into account that the longer the illumination remains lit the shorter the battery life will be. 1. Hold down the S button r for a little longer than 3 seconds. The notice "CODE SETUP" appears. 2. With the or button t select "SYSTEM SETUP" and confirm with the OK button l. 3. With the or button t select "BACKLIT SETUP" and confirm with the OK button l. 4. In the LCD display q now blinks the second count for the length of time that the light is to be left on which you can set with the buttons t from 0 to 60. If you select "0" the background illumination will shut off completely. 5. With the OK button l you can save the desired setting. The notice "BACKLIT SETUP" appears again. Setting the global volume/mute switching So that you don t always have to first press a device button for the volume control and mute switching, for these functions the URC always only responds to an individual device, by default the television set. You can determine this target device yourself. 1. Hold the S button r down for a little longer than 3 seconds. The notice CODE SETUP appears. 2. With the or button t select SYSTEM SETUP and confirm with the OK button l. 3. With the or button t select VOL/MUTE SETUP and confirm with the OK button l. 4. The LCD display q shows ALL VOL SET. Press the OK button l, the display changes to ALL VOL MODE. 5. Now press the device button e for the device that is to be controlled by the global volume control
18 6. If the specified device is equipped with a volume control, SUCCESS will be displayed briefly and the menu will close. From now on the volume control functions on the device just specified. 7. If this device is not equipped with its own volume control the URC will not allow this selection and shows VOLUME ERROR. Even then the menu will close. The volume control will then continue to function on the former device. You can also deactivate the global volume control for specific devices. 1. For this purpose select in the VOL/MUTE SETUP with the or button t the function MODE VOL SET and confirm with the OK button l. 2. Now press the device button e for the device that is to be excluded from the global volume control. The LCD display q shows SUCCESS and the global volume control is deactivated if the URC is working in the operational mode of one of the selected devices. You can also cancel the settings again in VOL/MUTE SETUP. 1. For this purpose select in the VOL/MUTE SETUP with the or button t the function VOL/MUTE RESET and confirm with the OK button l. 2. The LCD display q prompts you, with CONFIRM RESET, to a confirmation which is done by pressing the OK button l. Press the OK button l If you want to delete the settings, the SUCCESS indicator then confirms the deletion. Otherwise you press the EXIT button y to abort the deletion. Note: If you press, in this menu, the EXIT button y the entire menu will close immediately. Setting the lock function With the lock function you can block access to all setup menus. 1. Hold down the S button r for a little longer than 3 seconds. 2. With the or button t select SYSTEM SETUP and confirm with the OK button l. 3. With the or button t select LOCK SETUP and confirm with the OK button l. The LCD display q shows the current settings. 4. With the or button t now select between LOCK (Block) or UNLOCK (Unblock). 5. With the OK button l you save the setting. In the LCD display q LOCK SETUP then appears again
19 System reset Via this function you can reset the URC to its factory default settings. Thereby all settings made by you will be deleted. 1. Hold down the S button r for a little longer than 3 seconds. The notice "CODE SETUP" appears. 2. With the or button t select "SYSTEM SETUP" and confirm with the OK button l. 3. With the or button t select "SYSTEM RESET" and confirm with the OK button l. 4. In the LCD display q now appears "CONFIRM RESET". Confirm the reset with the OK button l. Then the LCD display q shows SUCCESS RESET. All settings are now deleted and the menu is closed. Otherwise you can exit the menu by pressing the EXIT button y. Then the settings remain preserved. Timer Setup The URC offers 2 timer modes, sleep timer and event timer. Sleep timer 1. Press the device button e for the device that is to be controlled (i.e. VCR). 2. Hold down the S button r for a little longer than 3 seconds. The notice "CODE SETUP" appears. 3. Press the or button t until "TIMER SETUP" is shown. Press the OK button l "TIMER SLEEP" appears in the LCD display q. Confirm the selection of this function with the OK button l. 4. Now, below to the right in the LCD display q blinks the minutes for the remaining time of the selected device. Set with the or button t the desired value from 1 to 99 minutes. Press the OK button l to confirm. With programmed sleep-timer the LCD display q shows zz on the right next to the time. 5. Position the remote control in such a way that your infrared signal can reach the device to be switched off. After expiration of the set time the remote control will switch the device off. 6. If you now press the S button r SL is shown in the display q below on the left. Event timer The remote control has 4 event timers available via which you are allowed to send out specific series of button combinations at designated times. 1. Hold down the S button r for a little longer than 3 seconds. The notice "CODE SETUP" appears. 2. With the or button t select "TIMER SETUP" and confirm with the OK button l. "TIMER SLEEP" appears in the LCD display q. With the or button t select the desired memory slot "TIMER SETUP 1" to "TIMER SETUP 4" and confirm with the OK button l
20 3. Now the hour of the time of day, to which the desired button combinations are to be carried out, blinks. Set with the or button t the desired hour and press for confirmation the OK button l. 4. Now the minutes of the time of day, to which the desired button combinations are to be carried out, blinks. Set with the or button t the desired minutes and press for confirmation the OK button l. 5. In the LCD display q you will see "TIMER X KEY" (X stands for the desired timer). Now press the desired device button e followed by the desired sequence of the button commands. 6. Press the S button r to save your entry and to return to the timer menu. 7. Procede in a similar manner in order to, if required, programme the other timer memory slots also. 8. With programmed event timer the LCD display q shows the timer symbol on the right next to the time. Tips: 1. Per timer memory slot a maximum of 14 buttons can be programmed. After entry of the 14th button the sequence will be automatically saved and "FULL" is shown in the LCD display q. 2. In this menu also the device will return to the standard display after approx. 15 seconds without an entry. Learn Setup The Universal remote control (URC) can learn and save button signals of an original remote control. If the URC does not work after applying the programming methods already described or cannot carry out all commands please attempt to teach the URC with the help of the original remote control. Use new batteries for the URC and the original remote control. Maintain a distance of at least one metre from other light sources. The light sources could disrupt the infrared transmission. Place the URC and the original remote control at a distance of 20 to 50 mm from each other on an even surface so that the infrared diodes 2) are facing each other. Tips: 1. Do not use the following buttons for the learn function: all device buttons e, MACRO i, S button r, EXIT y. 2. Press briefly the button of the original RC. When SUC- CESS appears in the LCD display q the button command has been successfully learnt. However, if LEARN ERROR (Failure) appears you must repeat the procedure. 3. If when teaching, during the notice "LEARNING", no button is pressed on the original RC after 25 seconds the learn menu will end. This mode can not be ended by pressing a button on the URC
21 4. The memory can accommodate 150 button commands. If the memory is full the LCD display q shows "LEARN FULL" and the learn mode will end. 5. With the EXIT button y you return to the previous status (except with a notice of "LEARN KEY" and/or "LEARN- ING"). Code learn function 1. Press the device button e for the device that the URC should learn a button code. 2. Hold down the S button r for a little longer than 3 seconds. The notice "CODE SETUP" appears. 3. With the or button t select the menu "LEARN SETUP" and then press the OK button l. 4. In the LCD display q "LEARN SET" appears. Then press the OK button l. In the LCD display q "LEARN KEY" appears. 5. First press the button on the URC that is to be taught. In the LCD display q "LEARNING" appears. The URC now waits for the infrared signal from the original remote control. Note: Should the notice not change to "LEARNING" you have selected a button for which no button code can be taught. 6. Point the infrared sensors 2) of both remote controls towards each other. 7. Now hold down the desired button of the original remote control until "SUCCESS" or "LEARN ERROR" appears in the display q of the URC. 8. If in the LCD display q "SUCCESS" appears (process successful), you can teach further buttons begining with step 5. If "LEARN ERROR" appears (process unsuccessful) repeat the process in any case from step To stop the learning process press, during the display LEARN SET, repeatedly the EXIT button y until the standard display is show in the LCD display q. During the notice "LEARN KEY" and/or "LEARNING" simply allow 30 seconds to pass without any operation then the device will end the menu. Delete All programmed buttons 1. Hold down the S button r for a little longer than 3 seconds. The notice "CODE SETUP" appears. 2. With the or button t select the menu "LEARN SETUP" and then press the OK button l. In the LCD display q "LEARN SET" appears. 3. With the or button t select "LEARN CLEAR" (taught delete) and confirm with the OK button l. In the LCD display q "CONFIRM CLEAR" (confirm delete) appears. 4. Confirm with the OK button l. In the LCD display q "SUCCESS" appears. All programmed buttons are deleted. Finally the menu will automatically end
22 Note: When the LCD display shows CONFIRM CLEAR you can stop the deletion with the EXIT button y. Macro Setup With the MACRO function up to 16 button commands can be carried out with the press of a single button, that is to say, several previously saved control commands can be deleted with one MACRO button. There are 6 Macro memory slots available for you. To programme a Macro For Macro programming proceed as follows: 1. Hold down the S button r for a little longer than 3 seconds. The notice "CODE SETUP" appears. 2. With the or button t select "MACRO SETUP" and confirm with the OK button l. In the display "MACRO SETUP 1" appears. 3. With the or button t select the memory slot to be programmed (MACRO SETUP 1-6) and confirm with the OK button l. 4. In the LCD display q "MACRO STEP" appears. Now press, one after the other, the desired buttons (max. 16). The sequence should begin with a device button e. 5. By default the Macro commands are sent in intervals of 1 every second. Since many devices react sluggishly it is possible that the sequence of the Macro commands are sent too quickly to the device. Then you have the option of programming, before a button command, a pause of between 5-21 seconds. For this purpose press, if necessary repeatedly, the MACRO button i. Below and to the right the LCD display q shows the current pause length in seconds. 6. When the maximum number of button commands is reached the LCD display q shows "FULL". 7. Save the entry with the S button r. In the LCD display q "MACRO SETUP" appears. 8. If, with the selection of the Macros to be programmed (step 3), you select a memory slot that is already occupied the existing Macro will be overwritten. 9. Repeat the process from step 3 to create further Macros. 10. With the EXIT button y you move a level upwards in the menu except during the entry of the button commands. Tips: 1. A maximum of 16 button commands can be saved in a Macro. After input of the 16th button command, FULL appears in the LCD display q. 2. To exit the mode without saving allow approx. 15 seconds to pass without an entry. 3. In the mode "MACRO STEP" you can only return to the previous status with the S button r
23 Example: You want to save a command chain in a Macro. We begin in the mode "MACRO STEP". Desired command chain: Switch on TV => PAUSE => switch to the AV input => switch on DVD => PAUSE => Playback DVD. In the mode "MACRO STEP", for this you enter the following button commands: => => (Pause time) => => => => (Pause time) => Execute a Macro To execute a pre-programmed Macro proceed as follows: 1. Press the MACRO button i. 2. With the corresponding number button o you access the desired Macro (1-6). Example: If Macro 3 is to be implemented press first the Macro button i and then, within 5 seconds, the number button " ". To delete all Macros To delete all pre-programmed Macros proceed as follows: 1. Hold down the S button r for a little longer than 3 seconds. The notice "CODE SETUP" appears. 2. With the or button t select "MACRO SETUP" and confirm with the OK button l. In the display "MACRO SETUP 1" appears. 3. With the or button t select "MACRO CLEAR" and confirm with the OK button l. 4. In the LCD display q "CONFIRM CLEAR" (confirm delete) appears. Confirm the delete process with the OK button l. The LCD display q shows "SUCCESS". All Macros are now deleted and the menu will end. Tips: 1. When the LCD display q shows "CONFIRM CLEAR" you can stop the delete process with the EXIT button y. 2. Individual Macros can not be deleted they can only be overwritten. Favourites channel Note: With this function you can save your preferred stations as favourites. To programme favourites Your favourite stations are saved as follows: 1. Press the device button e for the device that you want to save a favourite. 2. Hold down the S button r for a little longer than 3 seconds. The notice "CODE SETUP" appears
24 3. With the or button t select "FAV CH SETUP" and confirm with the OK button l. In the display "FAV CH SETUP 1" appears. 4. With the or button t select the memory slot to be programmed (FAV CH SETUP 1-4) and confirm with the OK button l. 5. In the LCD display q "FAV CH STEP" appears. Now press, one after the other, the buttons (max. 4) for access to your desired favourite stations. 6. When the maximum number of button commands is reached the LCD display q shows "FULL". 7. Save the entry with the S button r. In the LCD display q "FAV CH SETUP" appears. 8. If, with the selection of the favourites to be programmed (step 4), you select a memory slot that is already occupied the existing favourite will be overwritten. 9. Repeat the steps to apply further favourites. 10. With the EXIT button y you move a level backwards in the menu except during the entry of the button commands. Note: The input of the channel numbers can vary according to the model and brand of the selected devices. If necessary, with multi-digit channel numbers you must first press the button a. To access favourites To access a pre-programmed favourite press the FAV/EPG button 1( followed by the corresponding number button for the desired memory slot (1-4). Delete All FAV channels To delete all pre-programmed favourites proceed as follows: 1. Hold down the S button r for a little longer than 3 seconds. 2. With the or button t select "FAV CH SETUP" and confirm with the OK button l. In the display "FAV CH SETUP 1" appears. 3. With the or button t select "FAV CH CLEAR" and confirm with the OK button l. 4. In the LCD display q "CONFIRM CLEAR" (confirm delete) appears. Confirm the delete process with the OK button l. The LCD display q shows "SUCCESS". All favourites are now deleted and the menu will end. Tips: 1. When the LCD display q shows "CONFIRM CLEAR" you can stop the delete process with the EXIT button y. 2. Individual favourites can not be deleted they can only be overwritten
25 Volume control Vol +/, (Mute switching) Press the "VOL+" button to increase the volume. With the "VOL " button you reduce the volume. To mute the sound press the -button h. A further press of this button turns the sound back on. When you activate the VOL +/ buttons j on the URC basically the volume adjustment on the TV device is addressed, regardless thereof, which device button e was pressed previously. However, this does not apply to the following devices: AMP, DVD, ASAT, DSAT and CBL since it can be assumed that these devices are equipped with their own volume control. For operation >>To operate one of the programmed devices with the URC first press the corresponding device button e. Then point the URC to this device and press the desired button. > >Put the number buttons o exactly as you do with the original remote control. Before you make a two digit entry press, if necessary, the button a. > >Press the FAV/EPG button 1( to start the electronic programme guide of a device equipped with this function. > >If you press the S button r the date is superimposed for 10 seconds in the LCD display q below and on the right. > >Whilst you hold down one of the device buttons e the active code for this device will be superimposed below to the right in the LCD display q. > >Via the MENU button k you access the dialogue for the setting of the respective target device. > >Press the illumination button d to switch the display and button illuminations on and/or off. All OFF Tips: With the button ALL OFF (all off) w all devices that are switched on can be automatically switched off. This function can switch on again devices that have already been switched off (depending on the device). For this hold down the ALL OFF button w for approx. 5 seconds. This will only function under the following circumstances: 1. A visible connection exists between all the devices and the URC. 2. Automatic code search, brand code search and MACRO function are not active. 3. All target devices must be suitable for remote control switch off
26 To again switch on all devices automatically hold down once more the button w until all devices are switched on. Cleaning and storage Attention! Ensure that moisture cannot permeate into the device during cleaning! Otherwise there is the danger of causing irreparable damage to the device! >>Clean the housing of the device exclusively with a soft moist cloth and a mild dishwashing detergent. >>Store the device exclusively in an environment that complies with the specifications given in the technical data. >>Before storing remove the batteries so that they will not cause damage to the device if, during storage, they happen to leak. Faults / Remedies Your device does not react to the URC. >>Check the batteries. They must have enough voltage and be properly installed. > >Firstly have you pressed the correct device button e for the desired target device? >>Check to see that the correct code is programmed in for the target device (see section "Code Setup"). The URC is transmitting the commands incorrectly. > >Press the corresponding device button e to set the URC to the correct mode. >>The batteries must have enough voltage and be properly installed. >>It is possible that you are using the wrong code. Start the brand code search, the automatic code search or the direct code input (manual). The URC does not change the station on the device. > >Press the corresponding device button e to set the URC to the correct mode. >>In the event that the original RC does not have a "-/- -" button, change the programme with the P +/ buttons u or the number buttons o. >>If this also does not work the child protection for the target device could be activated. Some buttons on the URC do not function properly. >>It is possible that your URC does not have all of the functions that are on the device's original remote control. >>It is possible that you have not programmed in the optimal code. Search for a code that supports more of the target device's functions
27 The URC stops reacting after a button is pressed. >>The batteries must have enough voltage and be properly installed. >>Point the URC towards your device. The LCD display q shows nothing. >>The batteries must have enough voltage and be properly installed. >>The contrast could be set too low. Increase the contrast setting. Disposal Do not dispose of the device in your normal domestic waste. This product is subject to the European directive 2002/96/EC. Universal remote control Have the universal remote control or parts of it disposed of by a professional disposal company or by your communal disposal facility. Observe the currently applicable regulations. In case of doubt contact your disposal facility. Batteries/rechargeable batteries Used batteries/rechargeable batteries may not be disposed of in household waste. Batteries can contain poisons which are damaging to the environment. Therefore, dispose of the batteries/rechargeable batteries in accordance with statutory regulations. Every consumer is legally obliged to surrender batteries/ rechargeable batteries to a community collection centre in their district or to a dealer. The purpose of this obligation is to ensure that batteries are disposed of in a nonpolluting manner. Only dispose of batteries when they are fully discharged. Dispose of packaging materials in an environmentally responsible manner. Technical data Controllable devices: 10 Dimensions L x W x H: 217 x 50 x 22 mm Weight : 102 g (without batteries) Infrared LED: Laser class 1 Power supply Batteries: 2 x 1.5 V, type AAA/LR03 (micro) (supplied) Operating temperature: C Storage temperature : C Humidity: 5-90 % (No condensation)
28 Note regarding conformity This device satisfies the fundamental requirements and other relevant regulations of the EMC Directive 2004/108/EC. Importer KOMPERNASS GMBH BURGSTRASSE BOCHUM, GERMANY Warranty & Service You receive a 3-year warranty for this appliance as of the purchase date. This appliance has been manufactured with care and meticulously examined before delivery. Please retain your receipt as proof of purchase. In the case of a warranty claim, please make contact by telephone with our service department. Only in this way can a post-free despatch for your goods be assured. The warranty covers only claims for material and manufacturing defects, but not for transport damage, wearing parts or for damage to fragile components, e.g. buttons or batteries. This product is for private use only and is not intended for commercial use. The warranty is void in the case of abusive and improper handling, use of force and internal modifications not carried out by our authorized Service Centre. Your statutory rights are not restricted in any way by this warranty. The warranty period is not extended through repairs made under warranty. This applies also for replaced or repaired parts. Any damages or deficiencies found on purchase must be reported as soon as possible after unpacking, at the latest two days after purchase. On expiry of the warranty, all repairs carried out are subject to payment. DES UK LTD Tel.: ( 0.10 / minute) support.uk@kompernass.com
29 KAZALO VSEBINE STRAN Pomembni varnostni napotki 28 Sestavni deli naprave 29 Pred prvo uporabo 30 Razpakiranje in kontrola vsebine kompleta 30 Vstavljanje baterij 30 Upravljalni elementi 31 LC-zaslon 31 Tipke 32 SETUP - sistemske nastavitve 35 Code Setup (programiranje daljinskega upravljanja) 37 Programiranje z iskanjem kode znamke 37 Programiranje z ročnim vnosom kode 38 Programiranje z avtomatskim iskanjem kode 38 Sistemske nastavitve - System Setup 39 Nastavitev urnega časa 39 Nastavitev datuma 40 Nastavitev kontrasta 40 Osvetljeno ozadje 40 Nastavitev globalne glasnosti zvoka/odklop zvoka 41 Nastavitev funkcije zapore 42 Ponastavitev sistema - System Reset 42 Nastavitev časovnika - Timer Setup 42 Časovnik izklopa - Sleep Timer 42 Časovniki dogodkov 43 Nastavitev funkcije učenja - Learn Setup 44 Funkcija učenja kode 44 Makro Setup 45 Najljubši kanali 47 Nastavljanje glasnosti 48 Vol +/, (odklop zvoka) 48 O uporabi 48 IZKLOP vseh naprav 49 Čiščenje in shranjevanje 49 Napake/odprava 49 Odstranitev 50 Tehnični podatki 51 Napotek o skladnosti 51 Uvoznik 51 Garancija in servis 52
30 Univerzalni daljinski upravljalnik KH2158 Ta dokumentacija je zaščitena z avtorskimi pravicami. Vse pravice, tudi pravica fotomehaničnega predvajanja, razmnoževanja in distribucije s pomočjo posebnih postopkov (na primer v obliki obdelave podatkov, s podatkovnimi nosilci ter podatkovnimi omrežji), tudi delno, ter vsebinske in tehnične spremembe so pridržane. Pred prvo uporabo ta navodila pozorno preberite in jih shranite za poznejšo uporabo. Ob predaji naprave tretji osebi zraven priložite tudi navodila za uporabo. Pomembni varnostni napotki Predvidena uporaba Otroci smejo daljinski upravljalnik uporabljati le pod nadzorom odraslih oseb. Univerzalni daljinski upravljalnik lahko nadomesti največ deset daljinskih upravljalnikov. Uporabljati ga je mogoče le z napravami zabavne elektronike, ki imajo infrardeči sprejemnik. Funkcije univerzalnega daljinskega upravljalnika načeloma ustrezajo funkcijam originalnih daljinskih upravljalnikov. Univerzalni daljinski upravljalnik je namenjen za zasebno uporabo. Ni primeren za uporabo v poslovne namene. Vsaka drugačna uporaba je nepredvidena. Za škodo, nastalo zaradi nepredvidene uporabe ali lastnoročne predelave, proizvajalec ne prevzema nobenega jamstva oz. garancije. Opozorilo Opozorilo na tej stopnji nevarnosti označuje možno nevarno situacijo. Če se nevarni situaciji ne izognete, to lahko privede do poškodb. Sledite navodilom pri tem opozorilu, da preprečite poškodbe oseb. Pozor Opozorilo te stopnje nevarnosti označuje možno materialno škodo. Če se nevarni situaciji ne izognete, to lahko privede do materialne škode. Sledite navodilom pri tem opozorilu, da preprečite materialno škodo. Napotek Oznaka napotek označuje dodatne informacije, ki vam olajšajo rokovanje z napravo. Opozorilo pred nevarnostjo poškodb zaradi napačnega rokovanja z baterijami! Z baterijami je potrebno ravnati posebej previdno. Upoštevajte naslednja navodila za varno uporabo: Baterije ne smejo zaiti v otroške roke. Otroci bi baterije lahko dali v usta in jih pogoltnili. Če pride do zaužitja baterije, je treba takoj poiskati zdravniško pomoč
31 Baterij ne vrzite v ogenj. Baterij ne izpostavljajte visokim temperaturam. Nevarnost eksplozije! Baterij ni dovoljeno polniti. Baterij ne odpirajte in z njimi ne povzročajte kratkega stika. Kislina, ki se izteka iz baterije, lahko draži kožo. Če pride v stik s kožo, mesto sperite z veliko vode. Če tekočina zaide v oči, jih temeljito sperite z veliko vode, ne drgnite in pojdite takoj k zdravniku. Pozor! Univerzalni daljinski upravljalnik ima infrardečo diodo laserskega razreda 1. Ne opazujte je z optičnimi napravami, da ne pride do poškodb oči. Poškodovan izdelek Če izdelek ne deluje, ga ne poskušajte popravljati sami. V primeru okvar se obrnite na proizvajalca ali pokličite njegov servis (okvare garancijsko kartico). Če v izdelek steče tekočina ali je drugače poškodovan, ga mora preveriti proizvajalec ali njegov servis. Pokličite proizvajalca ali njegov telefonski servis (glejte navodila o garanciji). Baterije vzemite iz predalčka na izdelku takoj, ko se izpraznijo. Če izdelka ne boste uporabljali dlje časa, baterije vzemite iz njega, da se ne izpraznijo. Baterije po potrebi zmeraj zamenjajte vse naenkrat in nikoli ne vstavljajte istočasno baterij različnega tipa. Sestavni deli naprave q LC-zaslon w Tipka /ALL OFF e Tipke za naprave r S-tipka t Puščične tipke y Tipka EXIT u Tipki P +/ i Tipka MACRO o Številske tipke a Tipka za enomestne ali dvomestne številke programov s Tipke za funkcije videoteksta d Tipka za osvetlitev f Tipka AV g Tipke za snemanje/predvajanje h Odklop zvoka j Tipki VOL +/ k Tipka MENU l Tipka OK 1( Tipka FAV/EPG 2) Infrardeči oddajnik/sprejemnik 2! Pokrov predalčka za baterije
32 Napotki: Tukaj opisane funkcije se nanašajo na teoretično možen, idealen primer, da je struktura tipk posameznih originalnih daljinskih upravljalnikov identična strukturi tega univerzalnega daljinskega upravljalnika. Vendar se to zgodi le redkokdaj. Če torej ne morete izvajati vseh funkcij originalnega daljinskega upravljalnika, to ne pomeni, da ima univerzalni daljinski upravljalnik napako. Vse blagovne znamke, ki so navedene v teh navodilih ali v priloženem seznamu kod, so trgovske znamke njihovih podjetij. Pred prvo uporabo Razpakiranje in kontrola vsebine kompleta Opozorilo! Otrokom onemogočite dostop do embalažnih folij. Obstaja nevarnost zadušitve. Razpakirajte izdelek in dodatke. Preverite vsebino kompleta - univerzalni daljinski upravljalnik (UDU), - navodila za uporabo, - seznam proizvajalcev s seznamom kod naprav - 2 x 1,5 V baterija, tip AAA/LR03 (Micro) Napotek: poškodbe med transportom Če opazite poškodbe, nastale med transportom, se obrnite na proizvajalca ali njegov telefonski servis (glejte navodila o garanciji). Vstavljanje baterij Pozor! Univerzalni daljinski upravljalnik se lahko uporablja le z 1,5 V baterijami (velikosti AAA, LR03). Menjavo baterij izvedite hitro. Izvedene nastavitve se shranijo za približno 1 minuto. Če v tem času ne vstavite novih baterij, morate vse nastavitve izvesti ponovno. Urni čas in datum se vsekakor izbrišeta
33 1. Pokrov predalčka za baterije 2! odprite v smeri puščice. 2. Baterije vstavite, kot kaže slika, in predal zaprite. LC-zaslon q je aktiviran, kakor dolgo sta bateriji vstavljeni. Naslednja slika prikazuje LC-zaslon q, potem ko ste vstavili ali zamenjali baterije. Napotek: Če LC-zaslon q ni viden, preverite polarnost baterij ali vstavite nove baterije. Upravljalni elementi LC-zaslon LC-zaslon q je razdeljen v polja. Besedilno polje 2@ Tukaj se prikaže trenutno izbrana naprava, na primer DVD, TV ali VCR itd. Simbol za infrardeči signal 2# Po vsakem pritisku na tipko, ko izdelek pošlje infrardeči signal, zasveti simbol zanj. Polje za kodo/čas 2$ Tukaj se prikaže koda naprave za trenutno izbrano napravo ali pa urni čas. Pri prikazu časa utripa : med številkami. Polje za dan v tednu 2% Tukaj lahko odčitate angl. kratico za aktualni dan v tednu, potem ko ste vnesli datum. MON = Monday = ponedeljek TUE = Tuesday = torek WED = Wednesday = sreda THU = Thursday = četrtek
34 FRI = Friday = petek SAT = Saturday = sobota SUN = Sunday = nedelja Standardni prikaz: Standardni prikaz na LC-zaslonu q obsega podatke o trenutni napravi, npr. TV, kratico za dan v tednu in prikaz časa. Tipke Napotek: Vse tukaj navedene funkcije seveda lahko uporabljate le, če jih naprava, ki jo želite upravljati, tudi resnično omogoča. Tipka /ALL OFF w Vklop/izklop naprave; držite pritisnjeno okrog 5 sekund, da vklopite/izklopite vse naprave. Tipke za naprave e S tipkami za naprave določite napravo za upravljanje. Televizijski sprejemnik Videorekorder Dodatna naprava 1 Kabelski sprejemnik CD-predvajalnik Analogni satelitski sprejemnik Avdio ojačevalnik DVD-predvajalnik Digitalni satelitski sprejemnik Dodatna naprava 2 Navedena dodelitev tipk ni obvezna. Na mestu za TV lahko torej npr. shranite tudi kodo za videorekorder. Tipka S r Držite jo pritisnjeno 3 sekunde, da prikličete meni za nastavitve, na kratko jo pritisnite, da prikažete datum oz. uvedete priklic dodatnih funkcij, kot so EPG ali PIP
35 Puščične tipke t Tipke za premikanje navzgor, na desno, navzdol in na levo v menijih. Tipka EXIT y Prehod v meniju za en nivo nazaj. Tipki CH +/ u Menjava kanala za sprejem. Tipka MACRO i Tipka MACRO i, ki ji sledi katera od številskih tipk o 1-4, aktivira prej shranjeno verigo ukazov. Številske tipke o Tipke za vnos številk programov in kod naprav. Tipka za enomestne/dvomestne številke programov a Za dvomestne številke programov (odvisno od tipa naprave) najprej pritisnite tipko a, potem pa s pomočjo številskih tipk o vnesite številko programa. Ob ponovnem pritisku bo prikaz zopet enomesten. Tipke za funkcije videoteksta s Med uporabo videoteksta imajo tipke naslednje funkcije: Priklic videoteksta Med normalnim delovanjem televizorja najprej pritisnite tipko S r, potem pa tipko, da lahko upravljate funkcijo PIP (slika na sliki) pri vašem televizijskem aparatu. Tipka samodejno zaustavi menjavo podstrani teleteksta oz. videoteksta. Povečana predstavitev strani Besedilo in TV-slika istočasno Izključitev videoteksta
36 Napotki: Funkcija videotekst je na razpolago le v evropskem TVnačinu in vaš televizor mora imeti modul za videotekst. Poleg tega tipke P +/- u krmilijo naslednje funkcije videoteksta: P + Prehod na naslednjo stran P Prehod na prejšnjo stran Tipke za snemanje/predvajanje f Tipke za predvajanje f upravljajo naprave kot DVD/ CD-predvajalnik in videorekorder: ASPECT: Začetek predvajanja Preklop formata slike pri TV-upravljanju Posnetek Zaustavitev predvajanja/snemanja/ previjanja Zaustavitev predvajanja Previjanje nazaj Previjanje naprej Tipka AV g Preklopi na AV-vhod. Odklop zvoka h Z njo vklopite oz. izklopite zvok. Tipki VOL+/ j Nastavljanje glasnosti (Volume). Tipka MENU k Priklic menija za upravljano napravo. Tipka OK l S tipko za potrditev (OK) potrdite izbiro v meniju. Tipka FAV/EPG 1( Pritisnite tipko FAV/EPG za priklic prej programiranih najljubših oddajnikov. Za priklic elektronskega vodiča ciljne naprave najprej na kratko pritisnite tipko S r, potem pa še tipko FAV/EPG
37 SETUP - sistemske nastavitve V sistemskih nastavitvah lahko izvajate naslednje korake: Programiranje daljinskega upravljalnika za upravljanje posameznih naprav Nastavitev urnega časa, datuma, kontrasta zaslona, osvetljave ozadja, glasnosti zvoka, funkcije zapore in ponastavitve sistema Nastavitve časovnika Učenje določenih ukazov pri tipkah Ustvarjanje makrov Določanje favoritov Na naslednji strani najdete pregled menijske strukture
38 - 36 -
39 Code Setup (programiranje daljinskega upravljanja) Za daljinski upravljalnik so na razpolago 3 metode programiranja: programiranje z iskanjem kode znamke, z avtomatskim iskanjem kode in direktnim vnosom kode (ročno). Najprej uporabite iskanje kode znamke, ker je to najhitrejša metoda programiranja, če je proizvajalec vaše naprave na seznamu kod. Kot druga možnost je najbolje kodo vnesti direktno, na koncu pa se lahko odločite za avtomatsko iskanje kode. Programiranje z iskanjem kode znamke Pri tej metodi znamko in kodo izbirate neposredno s pomočjo LC-zaslona q. Pri programiranju daljinskega upravljalnika sledite spodnjim navodilom za upravljanje: 1. Pritisnite tipko e za napravo, za katero želite programirati daljinski upravljalnik. 2. Držite S-tipko r pritisnjeno za malce dlje kot 3 sekunde. Vnose v meniju izvajajte dovolj hitro, ker se meni po preteku 15 sekund brez vnosa konča. 3. Na LC-zaslonu q se pojavi CODE SETUP. Pritisnite tipko OK l. Na LC-zaslonu q se sedaj pojavi ENTER CODE. S tipkama t izberite BRAND CODE in izbiro potrdite s tipko OK l. 4. Pojavi se prvo ime znamke po abecedi iz seznama predprogramiranih naprav. 5. S tipkami 34 t izbirajte med različnimi znamkami. 6. Za lažji dostop lahko s številskimi tipkami o preskočite neposredno na določeno začetno črko: 2 => A 3 => D 4 => G 5 => J 6 => M 7 => P 8 => T 9 => W Primer: S tipko 5 prikaz preskoči na J. Prva znamka je JVC *. Če imate na primer napravo znamke Kenwood *, s tipko 4 t iščite naprej, dokler se ne pojavi ime te blagovne znamke. (* Vse znamke v teh navodilih so trgovske znamke ustreznih podjetij.) 7. Večina proizvajalcev uporablja več različnih kod za daljinski upravljalnik. Ugotoviti morate, katera od razpoložljivih kod je najbolj primerna za vašo napravo. Desno pod imenom znamke se prikaže trenutna koda na LC-zaslonu q. 8. Daljinski upravljalnik usmerite na aktualno napravo in pritisnite funkcijske tipke, da kodo preverite (razen t, OK l, EXIT y ali številske tipke o). 9. Če večina tipk deluje, pritisnite tipko OK l, da nastavitev shranite. NA LC-zaslonu q se pojavi napis OK. Potem se meni samodejno konča. 10. Če ne deluje nobena ali le malo tipk, s tipko 5 ali 6 t izberite naslednjo kodo in jo preverite, kot je opisano pod
40 11. S tipko EXIT y se premaknete navzgor za en nivo v meniju. Te korake ponovite za vse naprave, ki jih želite upravljati z daljinskim upravljalnikom. Programiranje z ročnim vnosom kode V tem načinu lahko daljinski upravljalnik programirate z neposrednim vnosom številke kode. Potrebno številko kode poiščite v priloženem seznamu proizvajalcev s seznamom kod naprav. Če nova koda ni veljavna, se ponovno vzpostavi nazadnje programirana, veljavna koda. 1. Pritisnite tipko e za napravo, za katero želite programirati daljinski upravljalnik. 2. Držite S-tipko r pritisnjeno za malce dlje kot 3 sekunde. 3. Na LC-zaslonu q se pojavi CODE SETUP. Pritisnite tipko OK l. Na LC-zaslonu q se sedaj pojavi ENTER CODE. Za priklic te funkcije pritisnite tipko OK l. 4. Na LC-zaslonu q se prikaže koda, ki se trenutno uporablja za izbrano napravo. Sedaj utripa prvo mesto številke kode in čaka na vaš vnos kode. Novo štirimestno kodo vnesite s številskimi tipkami o. 5. Če je vnesena koda (CODE) veljavna, se shrani. Na LC-zaslonu q se na kratko pojavi OK. Potem se meni samodejno konča. V primeru napačne kode se na LC-zaslonu q na kratko pojavi ERROR (napaka) in kodo lahko vnesete še enkrat. Ponovite korak S tipko EXIT y se premaknete navzgor za en nivo v meniju. Programiranje z avtomatskim iskanjem kode Ta postopek lahko odvisno od naprave traja več minut, ker je treba preveriti vse kode za izbrano napravo. Zato to metodo uporabljajte le, če naprave ne morete programirati z iskanjem kode znamke ali z direktnim vnosom kode ali če vaša naprava sploh ni navedena na seznamu proizvajalcev s kodami naprav. Sledite spodaj navedenim korakom za izvedbo programiranja s pomočjo avtomatskega iskanja kode. 1. Prtisnite tipko e za napravo za upravljanje (npr. VCR). 2. Vklopite napravo, ki jo želite upravljati z daljinskim upravljalnikom. Pri napravah VCR/DVD/CD vstavite trak oz. ploščo. 3. Držite S-tipko r pritisnjeno za malce dlje kot 3 sekunde. 4. Na LC-zaslonu q se pojavi CODE SETUP. Pritisnite tipko OK l. Na LC-zaslonu q se sedaj pojavi ENTER CODE. Pritisnite tipko ali t, da se na LC-zaslonu q pojavi SEARCH CODE. Daljinski upravljalnik usmerite na napravo in potem pritisnite tipko OK l za priklic načina avtomatsko iskanje kode
41 5. Iskanje se začne. Pri tem naprava zaporedoma pošilja številke kod v naraščajočem vrstnem redu. Simbol za infrardeči signal 2# to tudi prikazuje. 6. Če se naprava odzove z izklopom, takoj pritisnite tipko OK l, da trenutno kodo shranite. LC-zaslon q na kratko prikaže OK. 7. Preverite, ali se večino funkcij vaše naprave sedaj da upravljati z daljinskim upravljalnikom. Če se da, ste verjetno našli pravilno kodo. Če katere od funkcij ne delujejo, lahko avtomatsko iskanje kode ponovno zaženete in začnete pri koraku 1. Napotek: Ob ponovnem iskanju kode dalj. upravljalnik na ciljno napravo usmerite šele potem, ko je prej najdena, nezadostna koda že šla skozi. 8. Če pa se naprava ne odzove več, v koraku 6 najbrž niste dovolj hitro pritisnili na tipko OK l. V tem primeru večkrat pritisnite tipko EXIT y, da zapustite meni in se povrnete l standardnemu prikazu. 9. Sedaj držite pritisnjeno tipko e za napravo, za katero ravnokar iščete primerno kodo. Spodaj desno na LC-zaslonu q se pri tem pokaže trenutna koda. To številko si zapomnite. 10. Potem postopajte, kot je opisano v prejšnjem poglavju Programiranje z ročnim vnosom kode in preverite, ali koda deluje za naslednjo najnižjo kombinacijo številk. Napotki: 1. Pri aktiviranem iskanju kode so vse tipke razen OK l in EXIT y neuporabne. 2. Ko je avtomatski postopek iskanja dosegel konec seznama, se tam zaustavi. Prikaz se povrne na SEARCH CODE. Sistemske nastavitve - System Setup Nastavitev urnega časa LC-zaslon q vam prikaže urni čas. Tega nastavite tako: 1. Držite S-tipko r pritisnjeno za malce dlje kot 3 sekunde. Pojavi se prikaz CODE SETUP. Če 15 sekund ne naredite nobenega vnosa, naprava meni zapusti in se povrne na standardni prikaz. 2. S tipko ali t izberite SYSTEM SETUP in izbiro potrdite s tipko OK l. 3. Na LC-zaslonu q se pojavi TIME SETUP. Potrdite s tipko OK l. LC-zaslon q sedaj prikazuje TIME in časovni format (24 HR) utripa. 4. S tipko ali t lahko preklopite na drugi časovni format (12 HR). Pozneje se pri prikazu časa pred prikazom trenutnega urnega časa pojavi A ali P. A pomeni AM = ante meridium (dopoldne, od 0:
42 h do 12:00 h). P pomeni PM = post meridium (popoldne, od 12:00 h do 0:00 h). Pritisnite tipko OK l v potrditev. 5. Sedaj utripa prikaz ur. S tipko ali t izberite število ur za trenutni čas in pritisnite tipko OK l. 6. Sedaj utripa prikaz minut. S tipko ali t izberite število minut za trenutni čas in pritisnite tipko OK l za shranjevanje. Ponovno se pojavi prikaz TIME SETUP. 7. Za zapustitev tega ali naslednjega menija, tipko EXIT y pritisnite tako pogosto, da se na LC-zaslonu q pojavi standardni prikaz. Nastavitev datuma LC-zaslon q vam prikaže datum, ko pritisnete S-tipko r. Tako nastavite datum: 1. Držite S-tipko r pritisnjeno za malce dlje kot 3 sekunde. Pojavi se prikaz CODE SETUP. 2. S tipko ali t izberite SYSTEM SETUP in izbiro potrdite s tipko OK l. 3. Na LC-zaslonu q se pojavi TIME SETUP. Pritisnite tipko t za prehod na DATE SETUP. Potrdite s tipko OK l. 4. Na zaslonu utripa prikaz leta S tipko ali t lahko spremenite leto in izbiro potrdite s tipko OK l. S tipko ali t lahko spremenite utripajoč prikaz meseca in izbiro potrdite s tipko OK l. Sedaj utripa prikaz dneva, ki ga ravno tako lahko spremenite s tipko ali t. 5. Za shranjevanje pritisnite tipko OK l. Ponovni se pojavi prikaz DATE SETUP. Nastavitev kontrasta Kontrast zaslona lahko nastavite, kot sledi: 1. Držite S-tipko r pritisnjeno za malce dlje kot 3 sekunde. Pojavi se prikaz CODE SETUP. 2. S tipko ali t izberite SYSTEM SETUP in izbiro potrdite s tipko OK l. 3. S tipko ali t izberite CONTRAST SETUP in izbiro potrdite s tipko OK l. 4. Na LC-zaslonu q sedaj utripa vrednost kontrasta, ki jo lahko nastavite s tipko ali t: Prikaz na zaslonu: 0 = najvišji kontrast: 15 = najnižji kontrast 5. S tipko OK l želeno nastavitev shranite. Ponovno se pojavi prikaz CONTRAST SETUP. Osvetljeno ozadje Nastavite lahko, kako dolgo naj ozadje LC-zaslona q in tipk po koncu uporabe ostane osvetljeno. Pri tem upoštevajte, da daljša osvetljenost skrajša življenjsko dobo baterij
43 1. Držite S-tipko r pritisnjeno za malce dlje kot 3 sekunde. Pojavi se prikaz CODE SETUP. 2. S tipko ali t izberite SYSTEM SETUP in izbiro potrdite s tipko OK l. 3. S tipko ali t izberite BACKLIT SETUP in izbiro potrdite s tipko OK l. 4. Na LC-zaslonu q sedaj utripa število sekund za trajanje dodatne osvetljave, nastavite ga lahko s tipkami t od 0 do 60. Če izberete 0, se osvetljava ozadja čisto odklopi. 5. S tipko OK l želeno nastavitev shranite. Ponovni se pojavi prikaz BACKLIT SETUP. Nastavitev globalne glasnosti zvoka/odklop zvoka Da vam pri nastavljanju glasnosti in odklopu zvoka ni treba zmeraj pritiskati tipk na napravi, dalj. upravljalnik pri teh funkcijah zmeraj upravlja eno samo napravo, standardno je to televizor. To ciljno napravo lahko določite. 1. Držite S-tipko r pritisnjeno za malce dlje kot 3 sekunde. Pojavi se prikaz CODE SETUP. 2. S tipko ali t izberite SYSTEM SETUP in izbiro potrdite s tipko OK l. 3. S tipko ali t izberite VOL/MUTE SETUP in izbiro potrdite s tipko OK l. 4. LC-zaslon q prikazuje ALL VOL SET. Pritisnite tipko OK l, prikaz preide na ALL VOL MODE. 5. Sedaj pritisnite tipko e za napravo, pri kateri naj poteka globalno nastavljanje glasnosti. 6. Če ima vnesena naprava lastno nastavljanje glasnosti, se na kratko prikaže SUCCESS (= uspeh) in meni se zaključi. Nastavljanje glasnosti se od tega trenutka lahko izvaja za to nastavljeno napravo. 7. Če ta naprava nima lastnega nastavljanja glasnosti, dalj. upravljalnik ne omogoča njene izbire in prikaže VOLUME ERROR (= napaka). Tudi v tem primeru se meni konča. Nastavljanje glasnosti je potem še naprej možno le za dosedanjo nastavljeno napravo. Globalno nastavljanje glasnosti lahko pri določenih napravah tudi deaktivirate. 1. V ta namen v meniju VOL/MUTE SETUP s tipko ali t izberite funkcijo MODE VOL SET in izbiro potrdite s tipko OK l. 2. Sedaj pritisnite tipko e za napravo, pri kateri naj globalno nastavljanje glasnosti ne poteka. LC-zaslon q prikazuje SUCCESS in globalno nastavljanje glasnosti je deaktivirano, kadar dalj. upravljalnik deluje v načinu ene od izbranih naprav. Nastavitve pod VOL/MUTE SETUP lahko tudi ponovno odpravite
44 1. V ta namen v meniju VOL/MUTE SETUP s tipko ali t izberite funkcijo VOL/MUTE RESET in izbiro potrdite s tipko OK l. 2. LC-zaslon q vas s prikazom CONFIRM RESET poziva k potrditvi s tipko OK l. Pritisnite tipko OK l, če nastavitve želite izbrisati, napis SUCCESS bo vaše brisanje potrdil. Ali pa pritisnite tipko EXIT y, da brisanje prekinete. Napotek: Če v tem meniju pritisnete tipko EXIT y, se meni v celoti konča. Nastavitev funkcije zapore S funkcijo zapore lahko blokirate dostop do vseh menijev za nastavitve. 1. Držite S-tipko r pritisnjeno za malce dlje kot 3 sekunde. 2. S tipko ali t izberite SYSTEM SETUP in izbiro potrdite s tipko OK l. 3. S tipko ali t izberite LOCK SETUP in izbiro potrdite s tipko OK l. LC-zaslon q prikazuje aktualno nastavitev. 4. S tipko ali t sedaj izberite med LOCK (zapora vklopljena) ali UNLOCK (zapora izklopljena). 5. S tipko OK l nastavitev shranite. Na LC-zaslonu q se potem ponovno pojavi LOCK SETUP. Ponastavitev sistema - System Reset S to funkcijo lahko univ. dalj. upravljalnik prestavite nazaj v stanje pri dobavi. Pri tem se izbrišejo vse nastavitve, ki ste jih naredili. 1. Držite S-tipko r pritisnjeno za malce dlje kot 3 sekunde. Pojavi se prikaz CODE SETUP. 2. S tipko ali t izberite SYSTEM SETUP in izbiro potrdite s tipko OK l. 3. S tipko ali t izberite SYSTEM RESET in izbiro potrdite s tipko OK l. 4. Na LC-zaslonu q se sedaj pojavi CONFIRM RESET. Ponastavitev potrdite s tipko OK l. Nato LC-zaslon q prikazuje SUCCESS RESET. Vse nastavitve so sedaj izbrisane in meni se zaključi. Ali pa meni zapustite tako, da pritisnete tipko EXIT y. V tem primeru se nastavitve ohranijo. Nastavitev časovnika - Timer Setup Univ. dalj. upravljalnik (UDU) nudi 2 načina časovnika, časovnik izklopa in časovnik za dogodke. Časovnik izklopa - Sleep Timer 1. Prtisnite tipko e za napravo za upravljanje (npr. VCR). 2. Držite S-tipko r pritisnjeno za malce dlje kot 3 sekunde. Pojavi se prikaz CODE SETUP
45 3. Pritisnite tipko ali t, da se prikaže TIMER SETUP. Pritisnite tipko OK l, da se pojavi TIMER SLEEP na LC-zaslonu q. Izbiro te funkcije potrdite s tipko OK l. 4. Sedaj spodaj desno na LC-zaslonu q utripa število minut za preostali čas delovanja izbrane naprave. S tipko ali tipko t nastavite želeno vrednost od 1 do 99 minut. Pritisnite tipko OK l v potrditev. Pri programiranem časovniku izklopa LC-zaslon q prikaže zz desno poleg časa. 5. Daljinski upravljalnik usmerite tako, da njegovi infrardeči signali lahko dosežejo napravo za izklop. Po poteku nastavljenega časa daljinski upravljalnik napravo izklopi. 6. Če sedaj pritisnete tipko S r, se levo spodaj na LC-zaslonu q prikaže SL. Časovniki dogodkov Daljinski upravljalnik ima 4 časovnike dogodkov, s pomočjo katerih lahko določena zaporedja kombinacij tipk aktivirate ob določenem času. 1. Držite S-tipko r pritisnjeno za malce dlje kot 3 sekunde. Pojavi se prikaz CODE SETUP. 2. S tipko ali t izberite TIMER SETUP in izbiro potrdite s tipko OK l. Pojavi se TIMER SLEEP na LCzaslonu q. S tipko ali t izberite želeno pomnilniško mesto TIMER SETUP 1 do TIMER SETUP 4 in izbiro potrdite s tipko OK l. 3. Sedaj utripa število ur za čas, ob katerem naj se izvede želena kombinacija tipk. S tipko ali t nastavite želeno uro in potrdite s pritiskom na tipko OK l. 4. Sedaj utripa število minut za čas, ob katerem naj se izvede želena kombinacija tipk. S tipko ali t nastavite želeno minuto in potrdite s pritiskom na tipko OK l. 5. Na LC-zaslonu q odčitajte TIMER X KEY (X pomeni želeni časovnik). Sedaj pritisnite želeno tipko naprave e, ki ji sledi želeno zaporedje ukazov tipk. 6. Pritisnite S-tipko r, da shranite svoje vnose in se povrnete na pregled časovnikov. 7. Postopajte enako pri programiranju nadaljnjih pomnilniških mest časovnikov. 8. Pri programiranem časovniku dogodkov LC-zaslon q prikazuje simbol časovnika desno poleg časa. Napotki: 1. Za vsako pomnilniško mesto časovnikov lahko sprogramirate največ 14 tipk. Po vnosu 14. tipke se zaporedje samodejno shrani in napis FULL se pojavi na LC-zaslonu q. 2. Tudi v tem meniju se naprava po okrog 15 sekundah brez vnašanja povrne na standardni prikaz
46 Nastavitev funkcije učenja - Learn Setup Univerzalni daljinski upravljalnik (UDU) se lahko nauči signalov tipk originalnega upravljalnika naprave in jih shrani. Če UDU po zgoraj opisanih metodah programiranja ne deluje ali ne izvaja vseh ukazov, poskusite z učenjem signalov s pomočjo originalnih upravljalnikov. V UDU in originalni daljinski upravljalnik vstavite nove baterije. Do drugih virov svetlobe se oddaljite na najmanj en meter razdalje. Omenjena svetloba lahko moti prenos infrardečega valovanja. UDU in originalni daljinski upravljalnik položite na ravno podlago, enega proti drugemu v razdalji 20 do 50 mm in sicer tako, da sta infrardeči diodi 2) usmerjeni ena proti drugi. Napotki: 1. Za funkcijo učenja ne uporabljajte naslednjih tipk: vse tipke naprav e, MACRO i, S-tipko r, EXIT y. 2. Na kratko pritisnite tipko originalnega dalj. upravljalnika. Če se na LC-zaslonu q pojavi napis SUCCESS, se je naprava ukaza tipk uspešno naučila. Če pa se pojavi LEARN ERROR (napaka), morate postopek ponoviti. 3. Če pri učenju med prikazom LEARNING (učenje) po 30 sekundah ne pritisnete nobene tipke originalnega DU, se meni za učenje konča. Tega načina se ne da zaključiti s pritiskom na tipko na univ. dalj. upravljalniku. 4. Pomnilnik lahko shrani vsega skupaj 150 ukazov tipk. Ko je pomnilnik poln, LC-zaslon q prikaže LEARN FULL in način učenja se zaključi. 5. S tipko EXIT y se povrnete v prejšnji status (izjema je prikaz LEARN KEY oz. LEARNING ). Funkcija učenja kode 1. Pritisnite tipko e za napravo, za katero naj bi se UDU naučil kodo. 2. Držite S-tipko r pritisnjeno za malce dlje kot 3 sekunde. Pojavi se prikaz CODE SETUP. 3. S tipko ali t izberite meni LEARN SETUP (učenje) in potem pritisnite tipko OK l. 4. Na LC-zaslonu q se pojavi LEARN SET. Potem pritisnite tipko OK l. Na LC-zaslonu q se pojavi LEARN KEY (izberite tipko). 5. Najprej na UDU pritisnite tipko za učenje. Na LC-zaslonu q se prikaže LEARNING. UDU sedaj čaka na infrardeči signal originalnega daljinskega upravljalnika. Napotek: Če prikaz ne preide na LEARNING, ste izbrali tipko, za katero učenje kode ni možno
47 6. Infrardeča senzorja 2) obeh daljinskih upravljalnikov usmerite drug proti drugemu. 7. Želeno tipko originalnega upravljalnika držite pritisnjeno tako dolgo, da se na LC-zaslonu q UDU-ja pojavi sporočilo SUCCESS ali LEARN ERROR. 8. Če se na LC-zaslonu q pojavi SUCCESS (postopek uspešen), lahko nadaljujete z učenjem nadaljnjih tipk, pri čemer začnite s korakom 5. Če se pojavi sporočilo LEARN ERROR (postopek neuspešen), postopek ponovite od koraka 5 naprej. 9. Za prekinitev postopka učenja med prikazom LEARN SET tipko EXIT y pritisnite tako pogosto, da se na LCzaslonu q pojavi standardni prikaz.. Med prikazom LEARN KEY oz. LEARNING preprosto počakajte 30 sekund, ker potem naprava meni zaključi. Brisanje vseh programiranih tipk 1. Držite S-tipko r pritisnjeno za malce dlje kot 3 sekunde. Pojavi se prikaz CODE SETUP. 2. S tipko ali t izberite meni LEARN SETUP (učenje) in potem pritisnite tipko OK l. Na LC-zaslonu q se pojavi LEARN SET. 3. S tipko ali t izberite LEARN CLEAR (izbriši naučeno) in izbiro potrdite s tipko OK l. Na LC-zaslonu q se pojavi CONFIRM CLEAR (potrjeno brisanje). 4. Potrdite s tipko OK l. Na LC-zaslonu q se pojavi SU- CCESS. Vse programirane tipke so izbrisane. Napotek: Če LC-zaslon prikazuje CONFIRM CLEAR, brisanje lahko prekinete s tipko EXIT y. Makro Setup S funkcijo MAKRO lahko izvedete do 16 ukazov tipk z enim samim pritiskom na tipko, z eno samo tipko za MAKRO lahko torej sprožite več poprej shranjenih upravljalnih ukazov. Za makre so vam na razpolago 6 programska mesta. Programiranje makra Pri programiranju makrov postopajte, kot sledi: 1. Držite S-tipko r pritisnjeno za malce dlje kot 3 sekunde. Pojavi se prikaz CODE SETUP. 2. S tipko ali t izberite MACRO SETUP in izbiro potrdite s tipko OK l. Na zaslonu se prikaže MACRO SETUP S tipko ali t izberite pomnilniško mesto za programiranje (MACRO SETUP 1-6) in izbiro potrdite s tipko OK l. 4. Na LC-zaslonu q se pojavi MACRO STEP. Sedaj eno za drugo pritisnite želene tipke (najv. 16). Zaporedje naj se zmeraj začne s tipko za napravo e. 5. Standardno se makro ukazi oddajajo v razmiku po 1 sekundo. Ker se nekatere naprave ne odzivajo dovolj
48 hitro, se lahko zgodi, da se zaporedje makro ukazov prehitro pošilja. V tem primeru lahko pred ukazom tipke programirate pavzo 5 21 sekund. V ta namen po potrebi večkrat pritisnite tipko MACRO i. Desno spodaj LCzaslon q prikazuje trenutno dolžino pavze v sekundah. 6. Ko je doseženo največje možno število ukazov tipk, LC-zaslon q prikaže FULL. 7. Vnos shranite z S-tipko r. Na LC-zaslonu q se prikaže MACRO SETUP. 8. Če pri izbiranju makrov za programiranje (3. korak) izberete še zasedeno pomnilniško mesto, se obstoječi makro prepiše. 9. Ponovite postopek od koraka 3 naprej in ustvarite nov makro. 10. S tipko EXIT y zaidete en nivo v meniju višje, razen pri vnašanju ukazov za tipke. Napotki: 1. V enem makru lahko shranite največ 16 ukazov tipk. Po vnosu 16. ukaza tipke se na LC-zaslonu q pojavi napis FULL. 2. Za zapustitev načina brez shranjevanja, počakajte 15 sekund brez vnašanja. 3. V načinu MACRO STEP se v prejšnji status lahko povrnete le z S-tipko r. Primer: V makru želite shraniti verigo ukazov. Začeli bomo v načinu MACRO STEP. Želena veriga ukazov: TV vklop => PAVZA => preklop na AV-vhod => DVD vklop => PAVZA => DVD predvajanje. V načinu MACRO STEP v ta namen vnesite naslednje ukaze tipk: => => (trajanje pavze) => => => => (trajanje pavze) => Izvajanje makrov Za izvajanje programiranega makra postopajte, kot sledi: 1. Pritisnite tipko i za MACRO. 2. Z ustrezno številsko tipko o prikličite želeni makro (1 6). Primer: Če naj se izvede makro 3, najprej pritisnite tipko MACRO i in potem v roku 5 sekund še številsko tipko. Brisanje vseh makrov Za brisanje vseh programiranih makrov postopajte, kot sledi: 1. Držite S-tipko r pritisnjeno za malce dlje kot 3 sekunde. Pojavi se prikaz CODE SETUP. 2. S tipko ali t izberite MACRO SETUP in izbiro potrdite s tipko OK l. Na zaslonu se prikaže MACRO SETUP S tipko ali t izberite MACRO CLEAR in izbiro potrdite s tipko OK l
49 4. Na LC-zaslonu q se pojavi CONFIRM CLEAR (potrjeno brisanje). Postopek brisanja potrdite s tipko OK l. LC-zaslon q na kratko prikaže SUCCESS. Vsi makri so sedaj izbrisani, meni se zaključi. Napotki: 1. Če LC-zaslon q prikazuje CONFIRM CLEAR, brisanje lahko prekinete s tipko EXIT y. 2. Posameznih makrov ne morete izbrisati, lahko jih le prepišete. Najljubši kanali Napotek: S to funkcijo lahko svoje najljubše oddajnike shranite kot favorite. Programiranje favoritov Svoje najljubše oddajnike lahko shranite, kot sledi: 1. Pritisnite tipko e za napravo, za katero želite shraniti favorita. 2. Držite S-tipko r pritisnjeno za malce dlje kot 3 sekunde. Pojavi se prikaz CODE SETUP. 3. S tipko ali t izberite FAV CH SETUP in izbiro potrdite s tipko OK l. Na zaslonu se prikaže FAV CH SETUP S tipko ali t izberite pomnilniško mesto za programiranje (FAV CH SETUP 1-4) in izbiro potrdite s tipko OK l. 5. Na LC-zaslonu q se pojavi FAV CH STEP. Eno za drugo pritisnite tipke (najv. 4) za priklic svojega želenega oddajnika. 6. Ko je doseženo največje možno število ukazov tipk, LC-zaslon q prikaže FULL. 7. Vnos shranite z S-tipko r. Na LC-zaslonu q se prikaže FAV CH SETUP. 8. Če pri izbiranju favoritov za programiranje (4. korak) izberete še zasedeno pomnilniško mesto, se obstoječi favorit prepiše. 9. Za shranjevanje dodatnih favoritov zgornje korake ponovite. 10. S tipko EXIT y zaidete en nivo v meniju nižje, razen pri vnašanju ukazov za tipke. Napotek: Vnos številk za kanale se lahko razlikuje pri različnih modelih in znamkah izbrane naprave. Pri večmestnih številkah kanalov morate morebiti najprej pritisniti tipko a. Priklic favoritov Za priklic katerega od prej programiranih favoritov, pritisnite tipko FAV/EPG 1(, potem pa še ustrezno številsko tipko za želeno pomnilniško mesto (1-4)
50 Brisanje vseh FAV-kanalov Za brisanje vseh programiranih favoritov postopajte, kot sledi: 1. Držite S-tipko r pritisnjeno za malce dlje kot 3 sekunde. 2. S tipko ali t izberite FAV CH SETUP in izbiro potrdite s tipko OK l. Na zaslonu se prikaže FAV CH SETUP S tipko ali t izberite FAV CH CLEAR in izbiro potrdite s tipko OK l. 4. Na LC-zaslonu q se pojavi CONFIRM CLEAR (potrjeno brisanje). Postopek brisanja potrdite s tipko OK l. LC-zaslon q na kratko prikaže SUCCESS. Vsi favoriti so izbrisani, meni se zaključi. Napotki: 1. Če LC-zaslon q prikazuje CONFIRM CLEAR, brisanje lahko prekinete s tipko EXIT y. 2. Posameznih favoritov ne morete izbrisati, lahko jih le prepišete. Nastavljanje glasnosti Vol +/, (odklop zvoka) Pritisnite tipko "VOL +" za zvišanje glasnosti zvoka. S tipko "VOL " glasnost zmanjšate. Za izklop zvoka pritisnite tipko h. Če to tipko pritisnete še enkrat, se zvok vklopi. Če pritisnete tipki VOL +/ j na UDU, se načeloma aktivira nastavljanje glasnosti pri televizijskem sprejemniku, neodvisno od tega, katero tipko naprave e ste prej pritisnili. Vendar pa to ne velja za naprave AMP, DVD, ASAT, DSAT in CBL, ker je zelo verjetno, da imajo te naprave svoje lastno nastavljanje glasnosti. O uporabi >>Za upravljanje programirane naprave z univerzalnim daljinskim upravljalnikom (UDU) najprej pritisnite ustrezno tipko za napravo e. Potem UDU usmerite na to napravo in pritisnite želeno tipko. > >Številske tipke o uporabite ravno tako, kot pri uporabi originalnega daljinskega upravljalnika. Pred vnosom dvomestnega števila po potrebi pritisnite tipko a. > >Pritisnite tipko FAV/EPG 1(, da zaženete elektronskega vodiča po programih naprave, opremljene s to funkcijo. > >Ko pritisnete tipko S r, se spodaj desno na LC-zaslonu q za 10 sekund prikaže datum. > >Če katero od tipk za naprave e držite pritisnjeno, se spodaj desno na LC-zaslonu q pojavi koda, aktivna za to napravo. > >S pomočjo tipke MENU k prikličete dialog za nastavitve ustrezne ciljne naprave
51 > >Pritisnite tipko za osvetlitev d, da vklopite oz. izklopite osvetljavo zaslona in tipk. IZKLOP vseh naprav Napotki: S tipko ALL OFF (izklop vseh naprav) w lahko avtomatsko izklopite vse vklopljene naprave. S to funkcijo lahko vse vklopljene naprave ponovno vklopite (odvisno od naprave). V ta namen tipko ALL OFF w držite pritisnjeno okrog 5 sekund. To je možno le pod naslednjimi pogoji: 1. Med UDU in vsemi napravami obstaja vidna povezava. 2. Avtomatsko iskanje kode, iskanje kode znamke in funkcija MAKRO niso aktivni. 3. Vse ciljne naprave morajo omogočati izključitev z daljinskim upravljalnikom. Za avtomatski vklop vseh naprav ponovno držite tipko w pritisnjeno, dokler niso vklopljene vse naprave. Čiščenje in shranjevanje Pozor! Pazite na to, da pri čiščenju v napravo ne zaide vlaga! Drugače obstaja nevarnost nepopravljive poškodbe naprave! >>Ohišje naprave očistite izključno z rahlo vlažno krpo in blagim čistilom. >>Napravo hranite izključno v okolju, ki ustreza navedbam v tehničnih podatkih. >>Pred shranitvijo odstranite baterije, da te ne bi poškodovale naprave, če bi med shranjevanjem iztekale. Napake/odprava Vaša naprava se ne odziva na UDU. >>Preverite baterije. Imeti morajo dovolj napetosti in biti pravilno vstavljene. > >Ste najprej pritisnili pravo tipko e za želeno ciljno napravo? >>Preverite, ali je za ciljno napravo programirana pravilna koda (glejte poglavje Code Setup ). UDU ukazov ne prenaša pravilno. > >Pritisnite ustrezno tipko naprave e, da UDU prestavite v pravilen način. >>Baterije morajo imeti dovolj napetosti in biti pravilno vstavljene. >>Mogoče uporabljate napačno kodo. Zaženite iskanje kode znamke, avtomatsko iskanje kode ali direkten vnos kode (ročno)
52 UDU ne menjava oddajnikov pri napravi. > >Pritisnite ustrezno tipko naprave e, da UDU prestavite v pravilen način. >>Če originalni dalj. upr. nima tipke "-/- -", programe zamenjajte s tipkama P +/ u ali s številskimi tipkami o. >>Če tudi to ne deluje, je morda pri ciljni napravi aktivna varnostna zaščita za otroke. Nekatere tipke UDU ne delujejo pravilno. >>Vaš UDU mogoče nima vseh funkcij originalnega daljinskega upravljalnika naprave. >>Mogoče niste programirali optimalne kode. Poiščite kodo, ki podpira več funkcij ciljne naprave. UDU se ne odziva več, potem ko ste pritisnili eno tipko. >>Baterije morajo imeti dovolj napetosti in biti pravilno vstavljene. >>UDU usmerite na napravo. LC-zaslon q ne prikazuje ničesar. >>Baterije morajo imeti dovolj napetosti in biti pravilno vstavljene. >>Kontrast je morebiti nastavljen prenizko. Povišajte nastavitev kontrasta. Odstranitev Naprave nikakor ne odvrzite v normalne gospodinjske odpadke. Za ta izdelek velja evropska direktiva 2002/96/EC. Univerzalni daljinski upravljalnik Univerzalni daljinski upravljalnik ali njegove dele oddajte pri podjetju, registriranem za predelavo odpadkov, ali pri svojem komunalnem podjetju za predelavo odpadkov. Upoštevajte trenutno veljavne predpise. V primeru dvoma se obrnite na svoje podjetje za predelavo odpadkov. Baterije/akumulatorji Baterij/akumulatorjev ne smete odvreči v hišne smeti. Baterije lahko vsebujejo strupene snovi, ki so škodljive za okolje. Zato baterije/akumulatorje obvezno odstranite v skladu z veljavnimi zakonskimi določili. Vsak potrošnik je po zakonu dolžan, baterije/akumulatorje oddajati na ustreznem zbirališču v svoji občini/ četrti ali v trgovini. Ta obveza služi temu, da se baterije/ akumulatorji lahko oddajo za okolju prijazno odstranjevanje. Baterije/akumulatorje oddajajte le v izpraznjenem stanju. Vse embalažne materiale oddajte v reciklažo
53 Tehnični podatki Naprave za upravljanje: 10 Mere D x Š x V: 217 x 50 x 22 mm Teža: 102 g (brez baterij) Infrardeča LED: laserski razred 1 Napajanje z elektriko iz baterije: 2 bateriji po 1,5 V vrste AAA/LR03 (micro) (v obsegu dobave) Obratovalna temperatura: C Temperatura skladiščenja: C Vlaga: 5 90 % (brez kondenzacije) Napotek o skladnosti Ta naprava izpolnjuje temeljne zahteve in druge ustrezne predpise Direktive o elektromagnetni združljivosti 2004/108/EC. Uvoznik KOMPERNASS GMBH BURGSTRASSE BOCHUM, NEMČIJA
54 Garancija in servis Ta naprava ima 3 leta garancije od datuma nakupa. Naprava je bila skrbno proizvedena in pred dobavo natančno preverjena. Prosimo, da blagajniški račun shranite kot dokazilo o nakupu. V primeru uveljavljanja garancije se po telefonu obrnite na svojo servisno službo. Samo tako je zagotovljeno brezplačno pošiljanje vašega izdelka. Garancija velja samo za napake pri materialu ali proizvodnji, ne pa tudi za poškodbe pri transportu, potrošne dele ali poškodbe lomljivih delov, npr. stikal ali akumulatorjev. Izdelek je namenjen izključno za zasebno in ne za obrtno uporabo. V primeru zlorabe ali nepravilnega ravnanja, pri uporabi sile ter pri posegih, ki jih ni izvedla naša po-oblaščena servisna poslovalnica, garancija preneha veljati. Vaših zakonskih pravic ta garancija ne omejuje. Garancijske dobe jamstvo ne podaljša. To velja tudi za zamenjane in popravljene dele. Morebitne poškodbe in pomanjkljivosti, ki so bile prisotne že pri nakupu, je treba javiti takoj po razpakiranju, najpozneje pa dva dni po dnevu nakupa. Popravila, potrebna po poteku garancijske dobe, je treba plačati. Birotehnika Phone: +386 (0) Fax: +386 (0) support.si@kompernass.com
55 SADRŽAJ STRANA Važne sigurnosne napomene 54 Pregled uređaja 55 Puštanje u rad 56 Raspakiranje uređaja/kontrola obima isporuke 56 Umetanje baterija 56 Elementi za rukovanje 57 LCD-zaslon 57 Tipke 58 SETUP - sistemske postavke 61 Code Setup (Programiranje daljinskog upravljača) 63 Programiranje pomoću pretrage kodova marke 63 Programiranje ručnim unosom kodova 64 Programiranje automatskom pretragom kodova 64 System-Setup 66 Podešavanje točnog vremena 66 Podešavanje datuma 66 Podešavanje kontrasta 67 Osvjetljenje pozadine 67 Podešavanje globalne glasnoće/ potpunog utišavanja glasnoće 67 Podešavanje lock-funkcije 68 System-Reset 69 Timer Setup 69 Timer za spavanje 69 Timer događaja 69 Setup za učenje 70 Funkcija učenja kodova 71 Makro Setup 72 Kanal sa favoritima 74 Reguliranje glasnoće 75 Vol +/, (potpuno utišavanje zvuka) 75 U vezi sa posluživanjem 75 Sve ISKLJ 76 Čišćenje i čuvanje 76 Smetnje / Pomoć 76 Zbrinjavanje 77 Tehnički podaci 78 Napomena u vezi sa konformitetom 78 Uvoznik 78 Jamstvo & servis
56 Univerzalni daljinski upravljač KH2158 Ova dokumentacija je zaštićena autorskim pravima. Sva prava, uključujući pravo na fotomehaničku reprodukciju, umnožavanje i publiciranje posebnim postupcima (na primjer obradom podataka, nosačima podataka i mrežama sa podacima), čak i djelomično, kao i prava na sadržajne i tehničke promjene su pridržana. Upute za rukovanje prije prve upotrebe pažljivo pročitajte i sačuvajte ih za kasnije korištenje. Ukoliko uređaj dajete trećim osobama, priložite i ove upute. Važne sigurnosne napomene Uporaba u skladu sa namjenom Djeca sa daljinskim upravljačem smiju rukovati isključivo pod nadzorom odraslih osoba. Univerzalni daljinski upravljač može zamijeniti maksimalno deset daljinskih upravljača. On može biti upotrebljen isključivo za uređaje zabavne elektronike koji raspolažu sa infracrvenim signalnim prijemnikom. Funkcije univerzalnog daljinskog upravljača uglavnom odgovaraju funkcijama originalnih daljinskih upravljača. Univerzalan daljinski upravljač je namijenjen za privatnu uporabu. On nije prikladan za komercijalnu uporabu. Svaki drugi vid korištenja smatra se nenamjenskim. Za štete nastale uslijed nenamjenskog korištenja uređaja ili pregrađivanja uređaja na vlastitu ruku proizvođač ne preuzima nikakvu odgovornost. Upozorenje Upozoravajuća napomena ovog stupnja opasnosti označava moguću opasnu situaciju. Ukoliko opasna situacija ne bude izbjegnuta, to može dovesti do ozljeda. Poštujte naputke ove upozoravajuće napomene, kako biste izbjegli ozljeđivanje osoba. Pažnja Upozoravajuća napomena ovog stupnja opasnosti označava moguću predmetnu štetu. Ukoliko ova situacija ne bude izbjegnuta, to može dovesti do nastanka predmetne štete. Poštujte naputke ove upozoravajuće napomene, kako biste izbjegli nastanak predmetne štete. Napomena Napomena označava dodatne informacije, koje olakšavaju rukovanje sa uređajem. Upozorenje od opasnosti ozljeđivanja uslijed pogrešnog rukovanja baterijama! Sa baterijama morate ophoditi uz posebnu pažnju. Obratite pažnju na slijedeće sigurnosne napomene:
57 Baterije ne smiju dospjeti u dječje ruke. Djeca bi baterije mogla staviti u usta i progutati. Ukoliko je došlo do gutanja baterije, neizostavno mora biti zatražena liječnička pomoć. Baterije ne bacajte u vatru. Baterije ne izložite visokim temperaturama. Opasnost od eksplozije! Baterije ne smiju biti ponovo napunjene. Baterije ne otvarati ili izazvati kratki spoj. Baterijska kiselina, koja izlazi iz baterije, može dovesti do nadražaja kože. U slučaju kontakta sa kožom isperite sa velikom količinom vode. Ako tekućina dospije u oči, temeljito isperite sa vodom, ne ribajte i odmah potražite liječničku pomoć. Pažnja! Univerzalni daljinski upravljač raspolaže infracrvenu diodu laserske klase 1. Ne promatrajte je uz pomoć optičkih uređaja, kako biste izbjegli oštećenja oka. Oštećenja na uređaju Ukoliko je uređaj defektan, ne pokušavajte ga popravljati na vlastitu ruku. U slučaju štete kontaktirajte proizvođača ili njegovu dežurnu telefonsku liniju za podršku (vidi jamstvenu karticu). Ukoliko je u unutrašnjost uređaja dospjela tekućina ili je došlo do druge vrste oštećenja uređaja, isti mora biti prekontroliran od strane proizvođača ili njegove dežurne telefonske linije za podršku. Stupite u vezu sa proizvođačem ili sa njegovom servisnom telefonskom linijom za kupce (vidi napomene u jamstvenom listu). Izvadite baterije iz pretinca za baterije, čim se one istroše. Ako uređaj duže vrijeme ne koristite, izvadite baterije, kako biste izbjegli pražnjenje. Uvijek izvršite zamjenu svih baterija istovremeno i nikada ne miješajte baterije različitog tipa. Pregled uređaja q LCD-prikaz w Tipka /ALL OFF e Tipke uređaja r S-tipka t Tipke sa strelicama y Tipka EXIT u Tipke P +/ i Tipka MACRO o Brojčane tipke a Tipka za jedno- ili dvoznamenkaste brojeve programa s Funkcijske tipke za videotekst d Tipka za osvjetljenje f Tipka AV g Tipke za snimanje/reprodukciju h Potpuno utišavanje glasnoće
58 j Tipke VOL +/ k Tipka MENU l Tipka OK 1( Tipka FAV / EPG 2) Infracrveno-pošiljatelj/primalac 2! Poklopac pretinca za baterije Napomena: Ovdje opisane funkcije se odnose na teoretski idealan slučaj, kada je tipkovna struktura originalnog daljinskog upravljača identična sa strukturom univerzalnog daljinskog upravljača. To se međutim događa samo u vrlo rijetkim slučajevima. Ukoliko ne mogu biti izvedene sve funkcije originalnog daljinskog upravljača, to ne predstavlja nedostatak univerzalnog daljinskog upravljača. Sve oznake marke korištene u ovim uputama ili u priloženoj listi sa kodovima predstavljaju trgovačke oznake odgovarajućih poduzeća. Puštanje u rad Raspakiranje uređaja/kontrola obima isporuke Upozorenje! Od djece držite podalje i folije ambalaže. Postoji opasnost od gušenja. Ispakirajte uređaj i dijelove opreme. Prekontrolirajte obim isporuke - Univerzalni daljinski upravljač (UDU), - Upute za rukovanje, - Spisak proizvođača sa listom kodova uređaja - 2 x 1,5 V baterije tipa AAA/LR03 (Micro) Napomena: Transportne štete Ukoliko ustanovite transportno oštećenje, obratite se proizvođaču ili njegovoj servisnoj dežurnoj telefonskoj liniji (vidi napomene u jamstvenom listu). Umetanje baterija Pažnja! Univerzalni daljinski upravljač smije biti pogonjen isključivo sa 1,5 V baterijama (veličine AAA, LR03). Zamjenu baterija izvedite brzo. Izvršena podešenja ostaju memorirana po prilici jednu minutu. Ukoliko u tome roku niste umetnuli nove baterije, sva podešenja moraju ponovo biti izvršena. Točno vrijeme i datum će međutim u svakom slučaju biti izgubljeni

59 1. Poklopac pretinca za baterije 2! u smjeru strelice otvorite. 2. Baterije umetnite na prikazani način i zatvorite pretinac za baterije. LCD-zaslon q je aktiviran, dok su baterije umetnute. Slijedeća slika pokazuje LCD-zaslon q, nakon umetanja ili zamjene baterija. Napomena: Ako LCD-zaslon q ne postane vidljiv, prekontrolirajte polaritet baterija ili umetnite nove baterije. Elementi za rukovanje LCD-zaslon LCD-zaslon q je podijeljen u polja. Polje za tekst 2@ Ovdje je prikazan aktualno odabrani uređaj, na primjer DVD, TV, VCR etc. Infracrveni simbol 2# Prilikom svakog pritiska tipke, kod kojeg dolazi do slanja infracrvenog signala, infracrveni simbol će zasvijetliti
Integrated Remote Commander
 3-244-192-12 (1) Integrated Remote Commander Operating Instructions RM-VL1000 2002 Sony Corporation WARNING To prevent fire or shock hazard, do not expose the unit to rain or moisture. To avoid electrical
PREPROGRAMMED FOR YOUR SET-TOP BOX
 New Knoxville Telephone NKTELCO, Inc. Goldstar Communications 301 W. South Street PO Box 219 New Knoxville, OH 45871 PREPROGRAMMED FOR YOUR SET-TOP BOX ADB Remote Functions 1 New Knoxville Telephone 301
universal Remote remote Multi-Brand Use Compatible with today s most popular brands. Consolidates up to 3 remotes
 RCU310_US_IB_REVB 4/10/03 16:43 Page 1 U N I V E R S A L Remote universal Compatible with today s most popular brands. Consolidates up to 3 remotes Dedicated MENU key for DVD navigation remote See back
FV400 DIGITAL TV RECEIVER WITH MODULATOR INSTRUCTION MANUAL
 FV400 DIGITAL TV RECEIVER WITH MODULATOR INSTRUCTION MANUAL Please read this instruction manual carefully before using your receiver Table of Contents Introduction-----------------------------------------------------------------------------
LCD Thermometer / Clock S No. 1253
 Installation and Operating Manual LCD Thermometer / Clock S No. 1253 The 3 fold thermometer with crystal clock is purpose build for the mounting in caravans, boats and intervention vehicles. Please read
Operating Manual. Basic Control BC16. two-channel for eco moon
 Operating Manual Basic Control BC16 two-channel for eco moon Dear Customer, Thank you for choosing a WALTRON daytime lighting controller. Your daytime lighting controller is a high-quality product that
24 HD Ready 1080p Digital LCD TV. Instruction Manual L24DIGB10
 24 HD Ready 1080p Digital LCD TV Instruction Manual L24DIGB10 Contents Preparation... 4 Unpacking the TV...4 Installing / Removing the Base Stand...5 Front / Top / Side View and Controls...6 Rear View
Daily use, 6 How to bring up and use the menus on the screen. First-time setup, 15 See what the first-time setup sequence consists of.
 DVB HD Guide Contents 3 Introducing the module and remote control, 4 Find out how to use your remote control with the DVB Module. Daily use, 6 How to bring up and use the menus on the screen. See programme
Satellite Receiver. Chapter REMOTE CONTROL USING THE MENUS USING TEXT FIELDS. About Your Satellite Receiver. What you ll find in this chapter:
 Satellite Receiver About Your Satellite Receiver Chapter What you ll find in this chapter: REMOTE CONTROL USING THE MENUS USING THE MENUS USING TEXT FIELDS 3 Chapter 2 Remote Control REMOTE CONTROL The
Owner's Manual DIGITAL TO ANALOG BROADCAST CONVERTER WITH REMOTE CONTROL. Model: CVD508 PLEASE READ BEFORE OPERATING THIS EQUIPMENT.
 Size: 148.5(W) x 210(H)mm (A5) DIGITAL TO ANALOG BROADCAST CONVERTER WITH REMOTE CONTROL Owner's Manual PLEASE READ BEFORE OPERATING THIS EQUIPMENT. Model: CVD508 FCC NOTICE: To assure continued compliance,
Golf ball tracker. Instruction manual
 Golf ball tracker Instruction manual General Intended use The Prazza golf ball finder is intended for use on the golf course only and should never be used inside the home or any other enclosed environment.the
EC5415B. B-Tronic EasyControl. Assembly and Operating Instructions. Wall/hand-held transmitter, 15-channel, bidirectional
 B-Tronic EasyControl EC5415B en Assembly and Operating Instructions Wall/hand-held transmitter, 15-channel, bidirectional Important information for: Fitters / Electricians / Users Please forward accordingly!
Table of Contents Safety Precautions 1.1 Safety Precautions... Introduction to the Product 2.1 Features Important Information
 best, and Table of Contents Safety Precautions 1.1 Safety Precautions..... 1 Introduction to the Product 2.1 Features..... 3 2.2 Important Information... 4 2.3 The Device and Accessories... 5 Functional
Xpresionn Digital Terrestrial Receiver. User Guide
 Xpresionn 2150 Digital Terrestrial Receiver User Guide GENERAL INFORMATION...3 A) SAFETY PRECAUTIONS...3 B) MAIN FEATURES...4 C) CONTENTS OF THE PACKAGING...4 D) REMOTE CONTROL...5 INSTALLATION...6 A)
OPERATING YOUR SYSTEM WITH MX-850
 OPERATING YOUR SYSTEM WITH MX-850 This remote control was Custom Programmed for you by: For questions about your Custom Programming call: Custom Programming of a complex home theater and/or a multi-room
Talking set-top box instruction manual
 Talking set-top box instruction manual Model number: GDB20TTS IMPORTANT: Please read all instructions carefully before use and keep for future reference. Introduction Thank you for buying this product.
DIGITAL SET TOP BOX STB 7017 INSTRUCTION MANUAL
 DIGITAL SET TOP BOX STB7017 INSTRUCTION MANUAL STB 7017 CHANNEL After Sales Support Now you have purchased a Tevion product you can rest assured in the knowledge that as well as your 3 year parts and labour
19 HD Ready Digital LCD TV with DVD Player
 19 HD Ready Digital LCD TV with DVD Player Instruction Manual L19DVDP10 L19DVDB20 Logik L19DVDP10_B20_IB_100914_Zell.indd 1 14/09/2010 3:02 PM Logik L19DVDP10_B20_IB_100914_Zell.indd 2 14/09/2010 3:02
BeoVision MX Guide
 BeoVision MX 4200 Guide BeoVision Avant Guide The information on the CD-rom can also be found on the Bang & Olufsen web-site; www.bang-olufsen.com or you can contact your retailer. An explanation of symbols
LP20. Installation & User Guide. Dual Channel Programmer. Part number 25039DR
 Dual Channel Programmer Part number 25039DR! For GREENSTAR CDi, GREENSTAR i JUNIOR and GREENSTAR Si MODELS also GREENSTAR i SYSTEM and GREENSTAR CDi SYSTEM MODEL(only when used with the optional integral
Converts any TV to Digital. MFR-300 User Guide
 Converts any TV to Digital MFR-300 User Guide Introduction Thank you for choosing this TVonics Freeview box. Record the serial number in the space provided below (the serial number can be found on the
The Parts of The System
 2 The Parts of The System THE RECEIVER FRONT PANEL UP DOWN POWER SMART CARD DOOR Behind this door is a slot for a future smart card. No smart card is included with this receiver. UP AND DOWN ARROW BUTTONS
ST9100C User Guide. Features
 Features Easy to use slider and buttons combined with LoT Technology and an OK button, allows you to confi rm changes and stay in control. PLEASE RESPECT YOUR ENVIRONMENT! Take care to dispose of this
Peak Atlas IT. RJ45 Network Cable Analyser Model UTP05. Designed and manufactured with pride in the UK. User Guide
 GB05-7 Peak Atlas IT RJ45 Network Cable Analyser Model UTP05 Designed and manufactured with pride in the UK User Guide Peak Electronic Design Limited 2001/2013 In the interests of development, information
Atlas SCR. User Guide. Thyristor and Triac Analyser Model SCR100
 Atlas SCR Thyristor and Triac Analyser Model SCR100 User Guide Peak Electronic Design Limited 2004/2008 In the interests of development, information in this guide is subject to change without notice -
SCS318. User Instructions. SCS318 comprising of SCS317 7 Day Wireless Programmable Room Thermostat and SSR303 Receiver
 SCS318 User Instructions SCS318 comprising of SCS317 7 Day Wireless Programmable Room Thermostat and SSR303 Receiver Programmable room thermostats are widely recognised as one of the best ways in which
Standard Digital Terminal High-Definition Digital Terminal. User Guide
 Standard Digital Terminal High-Definition Digital Terminal User Guide ILL-GDA-STD-001-0709 IN THIS GUIDE IMPORTANT RULES FOR SAFE OPERATION... 4 AVAILABLE ILLICO TERMINALS... 5 REMOTE CONTROLS... 17 CONNECTIONS...
TV CHANNEL INSTALLATION
 LCD TV TV CHANNEL ATION Immediately after unpacking and plugging in your new television, run the auto program function to set up the TV for the broadcast or cable channels available in your area. If you
INSTRUCTIONS FOR USE Pro-Ject Tuner Box S
 INSTRUCTIONS FOR USE Pro-Ject Tuner Box S Dear music lover, thank you for purchasing a Pro-Ject Audio Systems FM-tuner. In order to achieve maximum performance and reliability you should study these instructions
User s Guide. 5.8GHz Wireless A/V Signal Sender
 1500332 User s Guide 5.8GHz Wireless A/V Signal Sender Thank you for purchasing your A/V Signal Sender from RadioShack. Please read this user s guide before installing, setting up, and using your new sender.
OWNER'S MANUAL MODEL: DTV-2000 STANDBY/ON
 OWNER'S MANUAL MODEL: DTV-2000 STANDBY/ON CH+ CH- TABLE OF CONTENTS SAFETY PRECAUTIONS IMPORTANT SAFETY INSTRUCTIONS and FEATURES ACCESSORIES and LOADING BATTERIES REMOTE CONTROL UNIT FRONT PANEL and REAR
ROLL-A-STRIKE. Assembly Instructions Model CONTACT INFO. Hours. Technical Support Monday to Friday (9am to 5pm EST)
") PATENT - www.eastpointsports.com ROLL-A-STRIKE TM ELECTRONIC BOWLING Assembly Instructions Model --286 CONTACT INFO ASSEMBLY REQUIRED Hours Technical Support Monday to Friday (9am to 5pm EST) Email us
PATENT - www.eastpointsports.com ROLL-A-STRIKE TM ELECTRONIC BOWLING Assembly Instructions Model --286 CONTACT INFO ASSEMBLY REQUIRED Hours Technical Support Monday to Friday (9am to 5pm EST) Email us
RT505TX Programmable. The RT505TX can be used with any of these receivers RXBC605 RXWBC605 RXVBC605 RXST MHz
 RT505TX T RT505 T505TX TX RT505TX RT505TX RT505TX 5TX Programmable Room o Thermostat RXBC605 RXRT505 RXWBC605 RXST625 RXVBC605 The RT505TX can be used with any of these receivers 868MHz RT505TX RT505TX
FD Trinitron Colour Television
 R 4-205-569-32(1) FD Trinitron Television Instruction Manual GB KV-14LM1U 2000 by Sony Corporation NOTICE FOR CUSTOMERS IN THE UNITED KINGDOM A moulded plug complying with BS1363 is fitted to this equipment
Wilkes Repair: wilkes.net River Street, Wilkesboro, NC COMMUNICATIONS
 1 Wilkes COMMUNICATIONS 336.973.3103 877.973.3104 Repair: 336.973.4000 Email: wilkesinfo@wilkes.net wilkes.net 1400 River Street, Wilkesboro, NC 28697 2 Table of Contents REMOTE CONTROL DIAGRAM 4 PLAYBACK
HD Guide. User Manual
 HD Guide. User Manual You ve decided you want better TV. Here s how to enjoy it. Welcome to Shaw HD TV. To get the most out of your experience, it s best to know absolutely everything the service offers.
Crown FX PAR 77 LED spotlight. user manual
 Crown FX PAR 77 LED spotlight user manual Musikhaus Thomann Thomann GmbH Hans-Thomann-Straße 1 96138 Burgebrach Germany Telephone: +49 (0) 9546 9223-0 E-mail: info@thomann.de Internet: www.thomann.de 06.02.2018,
ST625TX Digital Room Thermostat
 ST625TX Digital Room Thermostat RXBC605 RXST625 RXWBC605 RXVBC605 RXRT505 The ST625TX can be used with any of these receivers 868MHz PRODUCT COMPLIANCE This product complies with the essential requirements
GDB9 INSTRUCTION MANUAL DIGITAL TERRESTRIAL RECEIVER
 GDB9 INSTRUCTION MANUAL DIGITAL TERRESTRIAL RECEIVER Goodmans Support: www.goodmans.co.uk/support Please read these instructions before use and keep for future reference IMPORTANT SAFETY INSTRUCTIONS Thank
16 Amp Electronic 24 Hour/7 Day Time Controller
 16 Amp Electronic 24 Hour/7 Day Time Controller Model: ELU56 Installation & Operating Instructions 1 1. General Information These instructions should be read carefully and retained for further reference
AVS50 USER GUIDE. 2.4GHz Audio/Video Sender System - AVS50
 2.4GHz Audio / Video Sender System AVS50 USER GUIDE 2.4GHz Audio/Video Sender System CONTENTS 1. Introduction... 2 2. Conformity of Use... 3 3. Controls and Connections... 4-5 4. Product Contents... 6
DVB HD T/C/S2. Guide
 DVB HD T/C/S2 Guide Contents 3 Introducing the module and remote control, 4 Find out how to use your remote control with the DVB Module. Daily use, 6 How to bring up and use the menus on the screen. See
Always there to help you. Register your product and get support at SRP3013. Question? Contact Philips.
 Always there to help you Register your product and get support at www.philips.com/support Question? Contact Philips SRP3013 User manual Contents 1 Your universal remote 2 Introduction 2 Overview of the
BT Diverse Repeater. User Guide
 BT Diverse Repeater User Guide Section Welcome to your BT Diverse Repeater Range Extender Extends the range in which you can make and receive calls from your existing DECT base station by up to 50m indoors
Aspect 2 Circuit Digital Scene Control
 Aspect 2 Circuit Digital Scene Control S p e c i f i c a t i o n 2 circuits of trailing edge dimming 500W total between the two circuits Both circuits feature independent overload, short-circuit and open-circuit
Ducasa Digital Programmer
 Ducasa Digital Programmer Hand Held Remote Control Unit Instructions for Operation and Programming (Read these instructions carefully and retain for further reference.) Model: DUCASA REMOTE CONTROLLER
Manual. racing Micro Magic HoTT. ARTR RC sail-boat with HoTT receiver HoTT
 Manual racing Micro Magic HoTT ARTR RC sail-boat with HoTT receiver 2014.HoTT EN 2-20 Index Introduction... 4 Service Centre... 4 Intended use... 5 Package content... 5 Symbols explication... 6 Safety
Programmable Room Thermostat With RF
 Salus RT500RF Manual:89 10/7/10 23:43 Page 1 Programmable Room Thermostat With RF Instruction Manual Model No RT500RF 2 Salus RT500RF Manual:89 10/7/10 23:43 Page 2 PRODUCT COMPLIANCE This product complies
HD-CM HORIZON DIGITAL CABLE METER
 HD-CM OFF! Max RF i/p = +17dBm 75Ω Max AC/DC i/p = 120Vrms MENU INPUT ON HORIZON DIGITAL CABLE METER Horizon Global Electronics Ltd. Unit 3, West Side Flex Meadow Harlow, Essex CM19 5SR Phone: +44(0) 1279
PT-C-HDADE. User Manual. HDMI Audio De-Embedder 4K (60Hz 4:4:4) Model PT-C-HDADE. Designed in Germany
 Model PT-C-HDADE. Designed in Germany") HDMI Audio De-Embedder 4K (60Hz 4:4:4) Model Designed in Germany 2017 PureLink GmbH All rights reserved. VersionV1.0 Preface Read this user manual carefully before using this product. Pictures shown in
HDMI Audio De-Embedder 4K (60Hz 4:4:4) Model Designed in Germany 2017 PureLink GmbH All rights reserved. VersionV1.0 Preface Read this user manual carefully before using this product. Pictures shown in
Master Time Clock MTC Users Manual
 Master Time Clock MTC-6000 Users Manual Midwest Time Control Phone (972)987-4408 Toll Free (888)713-0373 FAX (877)720-9291 www.midwest-time.com sales@midwest-time.com TABLE OF CONTENTS TOPIC PAGE GENERAL
Smart Control SC16 3-Channel for matrix
 Operating Manual Smart Control SC16 3-Channel for matrix Dear Customer, Thank you for choosing a WALTRON daytime lighting controller. Your daytime lighting controller is a high-quality product that was
USER S MANUAL SATELLITE RECEIVER DRD203RW. What is the DSS System?...3. Using the Program Guide...6. Using the Menu System...10
 DRD203RW USER S MANUAL What is the DSS System?...3 Using the Program Guide...6 Using the Menu System...10 Using On-line Help...14 Major Features...16 Setting Up the Remote...36 Connecting the Receiver..42
User s manual. Digitales TV module for NAVIGON English (United Kingdom)
") User s manual Digitales TV module for NAVIGON 8410 English (United Kingdom) August 2009 The crossed-out wheeled bin means that within the European Union the product must be taken to separate collection
User s manual Digitales TV module for NAVIGON 8410 English (United Kingdom) August 2009 The crossed-out wheeled bin means that within the European Union the product must be taken to separate collection
USER GUIDE. Get the most out of your DTC TV service!
 TV USER GUIDE Get the most out of your DTC TV service! 1 800-367-4274 www.dtccom.net TV Customer Care Technical Support 615-529-2955 615-273-8288 Carthage Area Carthage Area 615-588-1277 615-588-1282 www.dtccom.net
Digi-Scart. Digital Terrestrial Receiver. Ref MET802
 Digi-Scart Ref. 441816 Digital Terrestrial Receiver MET802 WARNING - IMPORTANT Before installing your digital terrestrial receiver it is important that you read and understand the instructions completely.
Quick Start Digital Satellite Receiver
 Quick Start Digital Satellite Receiver Support of SD (MPEG2), DVB-S system Standard resolution video output - SCART Compatible with Diseqc 1.0, 1.1, 1.2, and USALS Electronic Program Guide - EPG Multilingual
TV Ears TV Speaker Installation Guide
 TV Ears TV Speaker Installation Guide Safety Instructions 1. Read all instructions completely and heed all warnings. Install in accordance with TV Ears, Inc. s instructions. 2. Keep these instructions
Operating Instructions DTR 200
 Operating Instructions DTR 200 Table of Contents Control elements and functional components.................... 3 Remote control...................... 3 Front side........................... 3 Back side............................
SIM 5 series Lamp Kit
 SIM 5 series Lamp Kit Installation manual R9841842 R59770361/01 04/12/2013 Factory: Barco nv, Simulation Division Noordlaan 5, B-8520 Kuurne Phone: +32 56.36.82.11 Fax: +32 56.36.84.86 Support: www.barco.com/esupport
DVB-T Receiver UFD 570/S
 User's Guide DVB-T Receiver UFD 570/S Order No.: 20210035 2 Foreword Foreword Dear customer, This User's Guide is designed to help you to use the extensive functions of your new DVB-T receiver most effectively.
of Loewe E 2.10_m1 1
 of Loewe E 2.10_m1 1 Attention! After updating the M203 firmware to version 2.00 or higher, we recommend completely resetting the M203 interface by pressing the Disable softkey on setup page #2 for several
Front and Rear Panel Remote Control Connecting to a Television...4. Connecting to an Audio System...5
 Table of Contents Front and Rear Panel... 1 Remote Control...... 2 Connecting to a Television...4 Connecting to an Audio System...5 Connecting to a DVD Recorder or VCR... 6 First Time Installation... 7
Helpline No. UK/ North Ireland Rep. Ireland Web Support Model Number: MD 30615
 Introduction 1 Congratulations on choosing to buy a Tevion product. By doing so you now have the assurance and peace of mind that comes with purchasing a product made by one of Europe s leading manufacturers.
TV Ears Wireless Speaker User Manual
 TV Ears Wireless Speaker User Manual Congratulations! You ve taken the first step toward the TV Ears television experience. TV Ears Wireless System will help you hear TV better. To ensure the best TV listening
IMPORTANT SAFETY INSTRUCTIONS
 IMPORTANT SAFETY INSTRUCTIONS 1. Read, follow and keep these instructions safely. 2. Heed all warnings. 1. Do not use this apparatus near water. 2. Clean only with dry cloth. 3. Do not block any ventilation
Home Roam TV Basic User Manual
 Page1 Home Roam TV Basic User Manual Table of Contents 1. Safety Disclaimer... 2 2. Introduction... 2 3. What s in the Box... 2 4. Specifications... 2 5. Unit Functions... 3 5-1. Transmitter Module...
Evolution Digital HD Set-Top Box Important Safety Instructions
 Evolution Digital HD Set-Top Box Important Safety Instructions 1. Read these instructions. 2. Keep these instructions. 3. Heed all warnings. 4. Follow all instructions. 5. Do not use this apparatus near
1. INTRODUCTION 1.1 Remote Control key guide
 1. INTRODUCTION 1.1 Remote Control key guide 2. PROGRAMMING CONTROL FOR TV DEVICES You can program the remote to control your TV using the following ways: 2.1 Code Input programming 1. Turn on your TV
Celect Communications. Complete TV Users Guide
 Celect Communications Complete TV Users Guide 1 Contents Setting up your Remote... 4 Remote Guide... 5 Using the Guide Button... 8 Searching...10 Reminders...12 DVR Guide...13 Important Note...26 TV Main
User Manual TL-2X1-HDV 2x1 HDMI & VGA Switcher All Rights Reserved Version: TL-2X1-HDV_160630
 User Manual TL-2X1-HDV 2x1 HDMI & VGA Switcher All Rights Reserved Version: TL-2X1-HDV_160630 Preface Read this user manual carefully before using this product. Pictures shown in this manual are for reference
Always there to help you. Register your product and get support at SRP5018. Question? Contact Philips.
 Always there to help you Register your product and get support at www.philips.com/support Question? Contact Philips SRP5018 User manual Contents 1 Your universal remote 2 Introduction 2 Overview of the
Complete TV Users Guide
 Celect Communications Complete TV Users Guide Connected Your pathway to the world 1 2 Contents Setting up your Remote... 4 Remote Guide... 5 Using the Guide Button... 8 Searching...10 Reminders...12 DVR
Operating Instructions
 Operating Instructions LCDRV700 Digital LCD Color Monitor Please read this manual thoroughly before operating the unit, and keep it for future reference. V1.0 Contents 1. Precautions 2. Features 1 3 3.
9I273 01/10/2012 COU-03/0 AUTOMATIC CHANGEOVER UNIT TO BACK-UP AMPLIFIER
 9I273 01/10/2012 COU-03/0 1 CONTENTS 1. SPECIFICATIONS... 3 2. BLOCKS DIAGRAM... 3 3. FRONT VIEW... 4 4. REAR VIEW... 4 5. CONTROL MODULE... 4 6. ZONE CARD (COU-03FC or COU-03EC)... 6 6.1. Diagram... 6
User Manual TL-2X1-HDVC 2x1 HDMI & VGA Switcher with Control All Rights Reserved Version: TL-2X1-HDVC_160630
 User Manual TL-2X1-HDVC 2x1 HDMI & VGA Switcher with Control All Rights Reserved Version: TL-2X1-HDVC_160630 Preface Read this user manual carefully before using this product. Pictures shown in this manual
Rogers 5-Device Universal Remote Control
 45709 URC Guide:Layout 1 07/12/09 10:12 AM Page 1 Rogers 5-Device Universal Remote Control Your Rogers Remote User Guide 45709 URC Guide:Layout 1 07/12/09 10:12 AM Page 2 FEATURES AND FUNCTIONS Let's explore
Please follow the safety instructions in your notebook s directions for use.
 TV Remote Control Tuner Content Safety Instructions... 2 Battery disposal... 2 Summary... 3 TV card... 3 Remote control... 4 Inserting batteries... 4 Button Layout... 5 Changing the transmission/reception
USER MANUAL KGNPRO19VD
 USER MANUAL KGNPRO19VD X P.MODE S.MODE SLEEP AUDIO 1 2 3 4 5 6 7 8 9 A/DTV USB/SD FAV + 0 SOURCE MENU OK INFO EXIT MUTE VOL CH ASPECT TTX TITLE /AUTO DVD.SETU P EPG SU BTITL E D.MENU ZOOM/REC.LIST GOTO
S-Series Digital Thermostat. Instruction Manual Model No ST620RF
 S-Series Digital Thermostat Instruction Manual Model No ST620RF 2 PRODUCT COMPLIANCE SALUS Controls Plc hereby declares that the radio equipment type 868Mhz is in compliance with Directives 1999/5/EC,
USER MANUAL (UK) IMPORTANT! Please read this manual before you connect the receiver! DIGIALITY T-2000 FTA / T-2001 CX
 IMPORTANT! Please read this manual before you connect the receiver! DIGIALITY T-2000 FTA / T-2001 CX") USER MANUAL (UK) IMPORTANT! Please read this manual before you connect the receiver! DIGIALITY T-2000 FTA / T-2001 CX 1 2 DIGIALITY T-2000 FTA / T-2001 CX BASIS USE AND BASIS FUNCTIONS TABLE OF CONTENTS
USER MANUAL (UK) IMPORTANT! Please read this manual before you connect the receiver! DIGIALITY T-2000 FTA / T-2001 CX 1 2 DIGIALITY T-2000 FTA / T-2001 CX BASIS USE AND BASIS FUNCTIONS TABLE OF CONTENTS
UNFOLD THE BASE. Quick Start Guide CONTENTS INSTALLING LCD TV ON THE WALL
 Quick Start Guide English CONTENTS INSTALLING LCD TV ON THE WALL.. UNFOLD THE BASE............... TV CHANNEL INSTALLATION........ PRESENTATION OF THE LCD TV..... ACCESSORIES.................... BATTERY
GHDD1782DVBT Freeview Digital Tapeless Video Recorder User Guide
 GHDD1782DVBT Freeview Digital Tapeless Video Recorder User Guide www.goodmans.co.uk Table of Contents Quick Guide...4 Connecting to a TV set...4 Introduction...5 Getting Started...7 In the box...7 Identification
Manhattan Model: Plaza HDR S 500GB LET S GET STARTED YOUR USER GUIDE
 Manhattan Model: Plaza HDR S 500GB LET S GET STARTED YOUR USER GUIDE WELCOME TO FREESAT We are so pleased you bought this 500GB Manhattan Plaza HDR S Freesat+ HD recorder. Now you can enjoy: Quality state-of-the-art
FXL8 Pro effects looper. user manual
 FXL8 Pro effects looper user manual Musikhaus Thomann e.k. Treppendorf 30 96138 Burgebrach Germany Telephone: +49 (0) 9546 9223-0 E-mail: info@thomann.de Internet: www.thomann.de 15.09.2014, ID: 337603
USER MANUAL KGN1080P32VD
 USER MANUAL KGN1080P32VD USB... Power cord Remote control/batteries Power/Standby button Picture mode button Sound mode button Multi-digits channel buttton P.MODE S.MODE FREEZE SLEEP 1 2 3 4 5 6 7 8 9
Installation Guide. HDMI 4x1 Switcher
 Installation Guide HDMI 4x1 Switcher SY Electronics Ltd, Unit 7, Worrall Street, Salford, Greater Manchester, M5 4TH, United Kingdom Tel: +44 (0) 161 868 3450 Fax: +44 (0) 161 868 3459 The SY-HD-S41 is
DCR NL Digitale Kabelontvanger 2. EN Digital Cable Receiver 61
 DCR 5012 www.philips.com/support NL Digitale Kabelontvanger 2 EN Digital Cable Receiver 61 1 Table of contents 1 Important 62 2 Your Digital Cable Receiver 64 2.1 What s in the box? 65 2.2 What you also
Important Information
 USER S GUIDE colortelevisioncolortelevisionco lortelevisioncolortelevisioncolo rtelevisioncolortelevisioncolort elevisioncolortelevisioncolortel evisioncolortelevisioncolortelev isioncolortelevisioncolortelevisi
HD Digital Set-Top Box Quick Start Guide
 HD Digital Set-Top Box Quick Start Guide Eagle Communications HD Digital Set-Top Box Important Safety Instructions WARNING TO REDUCE THE RISK OF FIRE OR ELECTRIC SHOCK, DO NOT EXPOSE THIS PRODUCT TO RAIN
Be sure to run the vehicle engine while using this unit to avoid battery exhaustion.
 CAUTION: TO REDUCE THE RISK OF ELECTRIC SHOCK DO NOT REMOVE COVER (OR BACK) NO USER-SERVICEABLE PARTS INSIDE REFER SERVICING TO QUALIFIED SERVICE PERSONNE; Please Read all of these instructions regarding
SINCE User Manual 7 DAY PROGRAMMABLE DIGITAL TIMER MODEL PS-100. The best solutions for automation and protection.
 SINCE 1973 User Manual 7 DAY PROGRAMMABLE DIGITAL TIMER MODEL PS-100 The best solutions for automation and protection www.nassarelectronics.com Description The PS-100 is a 7 day programmable digital timer
ATTACHING & REMOVING THE BASE
 TV53DB ATTACHING & REMOVING THE BASE 1. To install or remove the neck, screw in or remove the 4 screws indicated in the picture. 2. To install the base, place the display unit flat on a table. Afterwards
User Guide. Plaza DS 100A freesat digital TV receiver
 User Guide Plaza DS 100A freesat digital TV receiver CONGRATULATIONS on buying a Manhattan Plaza DS 100A freesat receiver. This high performance unit is designed to provide you with the best of digital
Quick Start Guide LC-40Q3000U LC-40Q3020U LC-40Q3030U LC-40Q3040U LC-40Q3050U LC-40Q3060U LC-40Q3070U LC-40Q3080U LC-40Q3090U
 ES-M1826C1-1 LC-40Q3000U LC-40Q3020U LC-40Q3030U LC-40Q3040U LC-40Q3050U LC-40Q3060U LC-40Q3070U LC-40Q3080U LC-40Q3090U Quick Start Guide Help SHARP improve the environment by reducing paper waste. For
Manual. Kingpad mc-edition light-module. Bus system control pad for installation in the Graupner mc-16 / mc-20 / mc-26 / mc-28 transmitter
 EN Manual Kingpad mc-edition light-module Bus system control pad for installation in the Graupner mc-16 / mc-20 / mc-26 / mc-28 transmitter No. 3974.1 Use example Copyright Graupner/SJ GmbH 2 / 16 Index
VLHDMIEXTFIB_2017V1.0
 User Manual VLHDMIEXTFI ll Rights Reserved Version: VLHDMIEXTFI_2017V1.0 Preface Read this user manual carefully before using the product. Pictures are shown in this manual for reference only, different
Owner s Manual LED COMMANDER 16/2
 Owner s Manual LED COMMANDER 16/2 Content Introduction...2 Technical Specification...2 Maintenance and care...2 Notes on safety...3 Features...4 Overview...5 Installation...6 Operation...6 Channel Assignment...7
INSTALLATION & OPERATING INSTRUCTIONS SINGLE/TWO CHANNEL 24HR/7 DAY TIMER. Cat No. TR671/TR672TOP
 SINGLE/TWO CHANNEL 24HR/7 DAY TIMER Cat No. TR671/TR672TOP INSTALLATION & OPERATING INSTRUCTIONS TR671/TR672TOP 24Hr/7 Day 1/2 Channel Digital TOP Module (without Power Supply) Please read the instructions
Re:connect M 203. RS232 Interface Revox. Dominating Entertainment. Revox of Switzerland. E 2.03
 of Re:connect M 203 RS232 Interface Revox Dominating Entertainment. Revox of Switzerland. E 2.03 Attention! After updating the firmware to version 2.00 or higher, we recommend completely resetting the