OPERATOR MANUAL.
|
|
|
- Angelica Melton
- 6 years ago
- Views:
Transcription


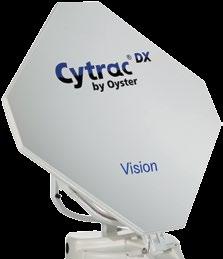
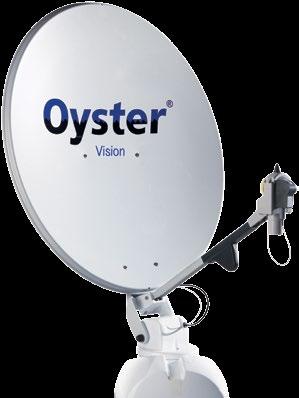
1 OPERATOR MANUAL
2 CONTENTS 1. General information 1.1 Introduction Scope of supply Intended use Safety precautions 5 2. Control elements 2.1 Getting started Switching the system on / off Menu controls 8 3. Operating the system 3.1 Menu tree Automatic search SAT mode Entering the position Satellite swap Manual search Main menu Access to Settings Restarting the system General settings 4.1 Service INFO Language Dimmer Receiver control Automatic satellite swap 5.1 Automatic satellite swap via DiSEqC * Settings at the Vision control unit Enabling DiSEqC at the TV set Service 6.1 Reception in practice aiming the satellite system Reception in remote areas Troubleshooting System Updates via USB stick Appendix 7.1 AUX relay optional switched terminal for TV set Declaration of conformity Notes on the protection of the environment 27 2
3 1. GENERAL INFORMATION 1.1 Introduction These operating instructions describes the functions of the automatic satellite system and how to operate it. Please observe the information on how to install the system provided in the installation instructions supplied with the system. Correct and safe operation of the system can only be ensured if both the installation instructions and the operating instructions are observed. Your automatic satellite system is a smart satellite TV reception system that automatically aims itself at a preset satellite as long as the system is located within the footprint of this satellite. Please ensure that the system always has a clear view to the south. Seen from any location in Europe, all satellites are more or less located in the South. If the satellite's signal beam is interrupted by obstacles such as mountains, buildings or trees, automatic aiming will not work and no TV signal will be received. (See 6.1: "Reception in practice aiming the satellite system") The first pages of these instructions explain the general system features, followed by an explanation of the setup options. Before switching on the system, make sure that the opening antenna does not collide with any obstacles such as branches or the garage door. 1.2 Scope of supply Control panel; control unit; external unit with antenna optional with SKEW pivoting unit for optimised reception. 1.3 Intended use This product has been designed for permanent installation on mobile homes or camper trailers with a permissible maximum speed of 130 km/h. It is designed to automatically aim a vehicle-mounted antenna at a geostationary television satellite transmitting directly to Europe. This requires the vehicle to be at standstill. Power to the system must be supplied by a standard vehicle electric system with a rated voltage of 12/24 V DC. Do not use a switching-mode power supply if the system is to be installed in a camper trailer. Using the equipment for any other than its intended purpose is not permissible. When the system is connected to the on-board electric system, a suitable fuse must be provided in the on-board circuit. 3
4 1. GENERAL INFORMATION The manufacturer has designed your satellite system to be connected to standard on-board electric systems with a rated voltage of 12V / 24V DC. The manufacturer accepts no liability for direct or indirect damages or for consequential damages to the system itself, to battery systems, motor vehicles or other equipment or goods resulting from installation or wiring errors. Please also observe the following instructions from the manufacturer: The system must only be installed on hard vehicle roofs which are sufficiently strong and inherently stable. Observe all relevant and approved guidelines of the automotive industry. The product does not require any regular maintenance. Opening housings and enclosures is not permissible. Inspection and maintenance may only be performed by a qualified professional. Do not wash your mobile home or camper trailer with the mounted satellite system in a single-bay or drivethrough car wash using brushes, and do not use a high-pressure cleaner. Any modification of the overall system by removing individual components or adding other components is not permissible. Using parabolic antennas or LNBs other than the original parts is not permissible. Installation must only be performed by sufficiently qualified personnel. The installation instructions supplied as part of the operating instructions must be followed carefully. If you encounter any problems, or if you are unsure about anything, please contact the manufacturer or an authorised service partner. Retract the system during storms (75 80 km/h; 8 Beaufort). If the vehicle moves or is transported in reverse at speeds exceeding 30 km/h, especially when being transported by truck or train, the antenna must be secured against unintended unfolding by suitable means (see 1.4 Safety precautions, page 5). 4
5 1. GENERAL INFORMATION 1.4 Safety precautions To ensure that your satellite system works properly, it is essential that it is correctly connected to the ignition circuit of your vehicle (see installation instructions). When correctly installed, the antenna automatically returns to and locks into its parking position when the ignition is switched on. If the system does not retract at all or cannot completely retract due to a fault, then it is your responsibility as vehicle operator to check and make sure that the antenna is correctly and completely retracted before driving off. Zündung / Klemme 15 muss angeschlossen werden zum automatischen Einfahren der Antenne bei Fahrzeugstart Ignition switch must be connected for automatic retraction of the antenna at vehicle start Démarrage doit être connecté pour rétracter automatiquement l antenne au démarrage du véhicule Road traffic regulations stipulate that the vehicle operator must verify the vehicle's roadworthiness before each use. This requires the operator to perform a visual inspection of the antenna to make sure that it is fully retracted. Please also note that different legal requirements apply to the operation of electrical and electronic equipment in different countries. As the user of such equipment, you are responsible for ensuring compliance with the applicable laws and regulations. STOP FUNCTION VIA THE CONTROL PANEL AND ISOLATION FROM OPERATING VOLTAGE DURING SERVICE WORK The selector button on the control panel stops the motion of the antenna. In stop mode, no DiSEqC receiver commands or control commands are executed. To cancel the stop mode, use at the control panel to scroll to menu option "Automatic search" and press selector button again or press the On/Off button. This causes the antenna to retract. When servicing the antenna system, make sure that the entire system is disconnected from operating voltage. If the system is reconnected to the power supply, the control panel will display "activate" after pressing the On/ Off switch. Press to confirm. The antenna now unfolds. 5
6 2. CONTROL ELEMENTS 2.1 Getting started All system functions are controlled via the control panel. Vision On / Off You may choose any location you like to install the control panel, but please bear in mind that it is not waterproof. You may still need to remove the protective film from the display. The display of the control panel will show the various operating modes of the system. We recommend you to install the control panel in a location where the display is clearly visible. The display is illuminated, so it is not a problem if it is installed in a very dark location. To ensure safe and reliable operation of the system, please make sure the external unit is in rest mode before disconnecting the control panel. Check that no text is shown in the display this is an indication that the system is in rest mode. Installation, wiring and initial use of your Vision system are explained in a separate manual "Installation instructions". 6
7 2. CONTROL ELEMENTS 2.2 Switching the system on / off Vision On / Off - System starts the search from the last position There are two ways of switching the Vision III antenna system on and off: At the button on the control panel or by switching the receiver on and off. If you wish the system to respond when switching the receiver on or off, then menu item "Receiver control" must be enabled. See chapter 4.4 "Receiver control", page 14. After switching on the system, the antenna unfolds and returns to the last position in which a satellite signal was received. If the vehicle position has changed since, the system will not receive any signals and the automatic search will start. To switch the system off, press button again to retract the system and send it into rest mode. If you would like to stop the antenna motion while it is opening or retracting, simply press stop immediately.. The antenna will Notes: Do not forget to switch off your TV set or, if applicable, the receiver. If the message "Manual search" is displayed after the antenna has opened, and if the system does not commence the search automatically, then the system was being operated in manual mode when it was last switched off. Please refer to section "Automatic search" on page 10 and "Manual search" on page 12. 7
8 2. CONTROL ELEMENTS 2.3 Menu controls Vision On / Off Selector button On / Off The arrow keys and are used to navigate through all levels of the menu. With the aid of these keys you can select a submenu, function or setting. Press to enable the displayed menu item. Within the setting options, you can change the displayed values within set limits by pressing the arrow keys and. Then press to accept the adjusted value and return to the selection level. Use to return to the selection level without saving the data. By selecting menu option "Return" and pressing you can go back up one level in the menu structure. USB PORT Your control panel is fitted with a mini-usb interface and comes with a micro-usb-otg cable adapter. The software of the Vision III control box can be updated using the OTG adapter or a USB stick. For further information about updates see 8
9 3. OPERATING THE SYSTEM 3.1 Menu tree The functions of the keys are explained in section "Menu operation". SAT mode SAT swap Auto Search Manual search Location Main menu General settings Language Dimmer Colour Receiver control Aux-Relays MotorSW Update Upgrade Premium Service info Back Press to display the search satellite of the automatic search Press to select a satellite. 4 satellites can be configured. Press to start the automatic search for the satellite specified in menu option "Search satellite" Manual control of the antenna dish Signal optimisation Selection of a location from a list; reduces the time needed to find the search satellite Press to access the settings levels Press to access the submenu options of the General settings Language menu Display lighting Selection of the display colour scheme Receiver-controlled antenna start: "Auto off"; "Standby"; "Sleep" Basic setting: active, off: reduction of bias-current Update of the system s motor controller circuit board Upgrade of the system to the Premium functionality ("Oyster TV" required) Serial number V III tuner info, antenna type, model variant, FPGA version, control panel version, error number Press to return to main menu Satellite settings Search satellite DiSEqC: On/Off DiSEqC on <> Press to access the submenu options of the "Satellite settings" level Specification of the search satellite for the automatic search View DiSEqC function on/off Satellite change via receiver DiSEqC function on/off DiSEqC V3-ID Viewing or assigning a Vision III DiSEqC ID to a specific satellite, e.g. ASTRA 1 Select satellite DiSEqC V3: <001> Setting the DiSEqC ID number DiSEqC Rec-ID DiSEqC Rec: 001 DiSEqC Data D: * Receiving the receiver DiSEqC ID Display of receiver DiSEqC ID DiSEqC transfer protocol Display of the DiSEqC transfer protocol for diagnostic purposes only Sat. Position Satellite position 1-4 ASTRA 2 Programming the satellite for the SAT swap function Four satellite position can be configured Selection: 16 satellites Back Press to return to main menu 9
10 3. OPERATING THE SYSTEM 3.2 Automatic search After switching the system on with the key, the antenna opens and moves into the position in which a satellite was last received. If no satellite is found, the system starts the automated search for the specified satellite. When the search satellite is found, the search function stops and the TV signal is looped through. A satellite search usually takes less than 1 minute, but may take longer depending on the position of the parked vehicle. If a reference transponder on the satellite fails or if it cannot be received at your current location, the system will start a teach-in routine that may take minutes. If no TV picture appears after this extended search period, you are most likely located in an area where the specified satellite cannot be received or the signal beam is obstructed. In this case, the message "No satellite found" appears in the display of the control device. During the satellite search, the display will alternately show Automatic search and the name of the Search satellite. The automatic search function always assumes that your vehicle is perfectly level. Otherwise, the search might take longer. If the antenna is already open, the automatic search function is started as follows: Press until the message "Automat. search" appears in the display. Press. In general, the satellite receiver must not be connected or switched on to perform a satellite search. 3.3 SAT mode This display indicates that the system is in signal reception mode. Press satellite. to display the currently received 3.4 Entering the position "Enter position" is a selectable option of the main menu. Press button buttons to scroll the list, then press to select your location. to access a list of countries, and use The antenna is then optimally adjusted for the satellite scan from your current location (SKEW* and inclination angle). *System with SKEW option or automatic SKEW function only. 10
11 3. OPERATING THE SYSTEM 3.5 Satellite swap PERFORMING A QUICK SATELLITE SWAP VIA THE CONTROL PANEL Up to four favourite satellites can be configured in the Satellite swap menu. These satellites can then be directly selected using the OK button. The option "SAT position" is used to configure the favourite satellites for the four positions in the "SAT swap" menu. Setting path: "Main menu", "SAT settings" and "SAT position". Here, after setting a position (1 4), you can select a satellite from the satellite list and then save it. CONFIGURING THE SATELLITE FOR THE SAT SWAP FUNCTION Auto Search SAT swap SAT mode Selection of position Manual search Main menu Press to start the automatic search for the satellite specified in menu option "Search satellite" Press to select a satellite. 4 satellites can be configured Press to display the search satellite of the automatic search Selection of a location from a list; reduces the time needed to find the search satellite Manual control of the antenna dish Signal optimisation Press to access the settings levels General settings Press to access the submenu options of the General settings Satellite settings Press to access the submenu options of the "Satellite settings" level Search satellite Satellite position Satellite position 1-4 ASTRA 2 Specification of the search satellite for the automatic search Programming the satellite for the SAT swap function Four satellite positions can be configured 16 satellites can be selected When using the satellite swap feature, the system adjusts the antenna directly to the corresponding satellite position. Direct satellite positions can only be configured if the new position has been previously set and is known to the system. Otherwise, the antenna will perform the same way as it does when doing an "Automatic search". This means that it first moves to X position "0" to start the satellite search from this point. 11
12 3. OPERATING THE SYSTEM 3.6 Manual search If you wish to receive signals from a new satellite that is not yet stored as a search satellite in the control unit, then the manual search function can be used to tune the system to this satellite. First switch your receiver to a preset station transmitted by the satellite selected. At the control device, press repeatedly until "Manual search" appears in the display. Level 1 Sub-level A Sub-level B Manual search Press to access sub-level A and select an option. Press or to select an option Press and to edit the option Note: Press the SAT key the previous level to return to Elevation "up / down" Press to edit the option Azimuth "left / right" Press do edit the option SKEW "LNB angle" Press do edit the option Save store <> exit Press to save the data and return to SAT mode (level 1) Tilt angle Press and to edit the data Press to go back to sub-level A Pan angle (degrees) Press and to edit the data Press to go back to sub-level A LNB skew angle Press and to edit the data Press to go back to sub-level A In this menu you can save the data by pressing OK. "Saved" is shown briefly. Pressing the SAT key does not save the data! In both cases the system will exit the manual programming mode and return to the next upper menu level ("Manual search"). 12
13 3. OPERATING THE SYSTEM 3.7 Main menu Access to Settings The "Main menu" is available in the general menu. In "Main menu", press to access the settings levels. 3.8 Restarting the system As with any other computer-controlled device, it is possible for the software in your system to "crash". This may be caused by external influences, e.g. strong electromagnetic interference, or previously undetected software errors. If you think that your system is responding incorrectly or it is not responding at all, we recommend restarting the microprocessor. This can be done in two different ways and in any system state: If the fuse in the control unit is easily accessible, pull the fuse and put it back into its holder after a few seconds. RESET function: To reset the Vision III control unit, press and hold all four keys (Sat key, both arrow keys and OK) simultaneously for approx. 2 seconds. In both of the cases described above your system will perform an internal restart. If the system is open, it will now retract. After restarting, the system will be in standby mode. It can then be started in the usual way by pressing the button. Note! The vehicle's switched ignition voltage via terminal 15 has ultimate priority. When the ignition is switched on or if the engine is started, the antenna will always close and can only be operated again after the ignition has been switched off. 13
14 4. GENERAL SETTINGS 4.1 Service INFO This menu item provides information for servicing purposes. Serial number V III tuner info Antenna type Model variant FPGA version Control panel version Error number 4.2 Language Selection of the language for the texts displayed on the control device. 4.3 Dimmer Changing the brightness of the background illumination: The brightness of the background illumination can be adjusted between MIN and MAX to your preference. To save power, the illumination is switched off after approx. 1.5 minutes. The backlighting is switched on every time a button is pressed or is extended by the fixed period. 4.4 Receiver control Access via level 1 "Main menu" and "Settings" Receiver control This menu option allows configuring the optional settings for the system control via the receiver. By selecting a mode, you can determine if and how the system is started by the receiver. 14
15 4. GENERAL SETTINGS MODE 1 "AUTO OFF" (DEFAULT SETTING) This mode is recommended for receivers that do never switch off the LNB voltage, or if you wish that the receiver shall not control the antenna. The system can then be switched on and off only with the Sat button on the control panel. MODE 2 "AUTO STANDBY" This mode is recommended if the LNB voltage is switched off when the receiver is in standby mode. The system can then be switched on and off at the satellite receiver and with the SAT button on the control panel. The receiver is switched on: Depending on the model, a receiver may need up to one minute to boot. The antenna will open only after this boot period to search the satellite. The receiver is switched off: The antenna retracts and switches into standby mode. MODE 3 "AUTO SLEEP" This mode is recommended if the LNB voltage is switched off when the receiver is in standby mode. The system can then be switched on and off at the satellite receiver and with the SAT button on the control panel. The receiver is switched on. If the antenna was retracted, it will open and search the satellite selected. If the antenna was already open, it will remain in its position. If no signal is received in this position, the system will search for the satellite selected. The receiver is switched off: The system switches into standby mode but the antenna remains in its current position (Sleep mode). In "Auto Sleep" mode the antenna can only be retracted by pressing the Sat button on the control panel. 15
16 5. AUTOMATIC SATELLITE SWAP 5.1 Automatic satellite swap via DiSEqC * In most cases you will aim your automatic satellite system at one specific satellite only. Of course, your system can also receive many other satellites, allowing you to watch e.g. Dutch, Swiss, French, Spanish or other channels. You can select a satellite manually at any time via the control menu. However, your system can also readjust to a different satellite automatically when you change to the corresponding channel. This may be necessary in countries where the channels are broadcast via different satellites. Using the automatic satellite swap requires some settings to be made at your TV set or receiver, and possibly also at your satellite reception system. If these settings are not defined at all or are incorrect, the automatic satellite swap will not work or a wrong and hence useless satellite will be received. The automatic satellite swap can be performed using the DiSEqC feature (disabled at the factory). The "Automatic satellite swap" of your Oyster / Cytrac / Caro VISION satellite system has been disabled at the factory to avoid problems and malfunctions! If you wish to use this function, you can enable it at any time via the menu system. However, it is then mandatory to adjust the settings of your TV set or receiver and possibly of the satellite reception system as well! 5.2 Settings at the Vision control unit To be able to use the automatic satellite swap by means of the DiSEqC capability of your TV set or receiver, you first need to enable the DiSEqC function in the menu of your antenna system. See page 9 "Operating the system". 5.3 Enabling DiSEqC at the TV set The settings required at the TV set or receiver are usually provided in a menu item called "DiSEqC " or similar. For details please refer to the user manual of your TV set or receiver or contact the dealer. The DiSEqC settings should provide options 1.0, 1.1 and 1.2. We recommend selecting DiSEqC 1.2. You then need to assign a unique ID to each satellite as is already preset at the Vision III control box. The IDs in the TV settings and those in the Vision III control box must be identical (see table on the following page). If your TV set does not permit these settings, please contact your dealer. 16
17 5. AUTOMATIC SATELLITE SWAP Sat ID Rotary switch Satellite name DiSEqC ID 1 1 Astra East Astra East Astra East Hotbird 13.0 East Eutelsat W5 5.0 West Thor / Intelsat West Astra East Eutelsat East Eutelsat East 9 10 A Hispasat 30.0 West 14, B Eutelsat East C Hellas Sat East D Türksat 42.0 East E Intelsat West Eutelsat 8W 8.0 West 8 16 Eutelsat East Amos 2/3 4.0 West Telstar West Astra East Hylas West 22 * DiSEqC is a registered trademark of Eutelsat, 70, rue Balard, F Paris Cedex
18 6. SERVICE 6.1 Reception in practice aiming the satellite system Satellite antennas are aimed at a satellite along three adjustment planes: 1. AZIMUTH ANGLE (COMPASS HEADING) The azimuth angle defines the horizontal setting of the antenna, specifying the angle between North and antenna heading. It depends on the geographic position of the receiver and the satellite selected. For example, Astra 1 (orbital position 19.2 East) has an azimuth of 173 in Berlin but 143 in southern Spain. 2. ELEVATION ANGLE (INCLINATION) The elevation angle indicates the height of the satellite above the horizon. Like the azimuth angle, it depends on the position of the receiver and the satellite selected. In Central Europe, it is typically between 25 to 35, decreasing as you move further North. 3. SKEW ANGLE (POLARISATION DEVIATION) For optimal reception at the fringe of the satellites' footprints in southwestern and southeastern regions, the LNB may have to be rotated to compensate for the polarisation deviation caused by the earth's curvature. Oyster systems are available with the optional SKEW function for automatic LNB adjustment. OBSTACLES IN FRONT OF THE ANTENNA At 42 elevation (southern Spain) a 9 metre high tree that is 10 metres away will not affect reception. At 28 elevation (northern Germany) a 5.3 metre high tree that is 10 metres away will not affect reception metres 28 5,3 metres 10 metres 10 metres 18


19 6. SERVICE 6.2 Reception in remote areas LNB SETTINGS IN DIFFERENT REGIONS: The following settings are needless at Oyster SKEW units. This section describes how to fine-tune the LNB to optimise reception in the fringe of a TV satellite s footprint. This requires loosening the LNB or antenna bolts and turning either component by a specific angle. This is only required in the fringe areas of a satellite s footprint. It should be performed by expert users only. Most satellites broadcasting channels of interest to Central European viewers are aimed at Central Europe. In locations outside this area, the antenna has a sideways view on the satellite. This effect is known as the SKEW angle or polarisation angle and occurs particularly in southern regions such as Portugal, Spain, Morocco, Greece, Turkey, and most extremely on the Canary Islands. The effect is mostly compensated by the receiver s electronics, but sometimes some manual fine-tuning is required by pivoting the LNB (reception head) or the entire flat-panel antenna by some degrees. CYTRAC DX CARO + OYSTER 19
20 6. SERVICE OYSTER : The following definitions apply to the tables and specified angles below: To determine the direction of rotation, the viewer must look at the front face of the antenna as does the LNB, i.e. the viewer must be standing in front of the antenna. The long lines indicate increments of 10. A rotation in CLOCKWISE DIRECTION is positive (+). l A rotation in COUNTERCLOCKWISE DIRECTION is negative (-). A rotation in "+" direction means that the BOTTOM of the LNB is turned to the LEFT. A rotation in " " direction means that the BOTTOM of the LNB is turned to the RIGHT. CARO + / CYTRAC DX : The following definitions apply to the tables and specified angles below: To determine the direction of rotation, the viewer must look into the direction of the satellite, as does the antenna, i.e. the viewer must be standing behind the antenna or on its side. Rotations in CLOCKWISE DIRECTION are negative ( ). Rotations in COUNTERCLOCKWISE DIRECTION are positive (+). A rotation in " " direction means that the BOTTOM of the antenna is turned to the LEFT. A rotation in "+" direction means that the BOTTOM of the antenna is turned to the RIGHT. 20
21 6. SERVICE LNB settings in different regions: Country Eutelsat 5 West Thor 0.8 West Astra East Hotbird 13 East Astra East Astra East Astra East Germany, Austria, Switzerland France Benelux region England Ireland Portugal Southern Spain, Gibraltar Scandinavia Greece Turkey, Ukraine, Belarus Canary Islands Morocco Italy, Sicily Croatia Tunisia, Libya Note: The SKEW angles provided are for reference only. Adjustments of less than 8 are usually not necessary as long as reception is undisturbed. The fine-tuning of the SKEW angle often allows the reception of satellites in areas actually outside of their footprint. The footprints of the individual satellites can be found at com or Both websites provide interesting general information about the channels and footprints of the various satellites. 21
22 6. SERVICE 6.3 Troubleshooting Stop function It must be possible to stop the antenna motion at any time. To stop or interrupt a satellite search, press the OK button (stop function) of the control panel, the power button of the remote of the Oyster TV or the power button of the FeatureBox (only at the Oyster V). After either of these buttons has been pressed no control functions will be executed. Resetting the stop function To cancel the stop function, please press the OK button (stop function) of the control panel, the power button of the remote of the Oyster TV or the power button of the FeatureBox (only at the Oyster V). Error Description No satellite was found during search. The antenna does not retract or unfold properly. The antenna does not react after activation or does not respond to commands. Trouble-shooting Do you have a clear view to the south? Are you inside the footprint of the satellite being searched? Does your position require the LNB's SKEW angle to be adjusted? Is the motion obstructed by obstacles? Is the supply voltage too low (weak battery)? Is the fuse OK? Are all cables properly connected? 22


 a corresponding message is shown.")
23 6. SERVICE 6.4 System Updates via USB stick The system must be connected and supplied with voltage. (It may be necessary to activate the system by pressing the SAT button and then stopping the process after 3 seconds by pressing the OK button). Connecting the USB stick Description Connect the USB stick to the adapter and plug it into the control panel The adapter s USB plug is longer than a standard plug, making it easier to connect it to permanently inst alled control panels. Be sure not to push it in any further than shown in the picture! The USB stick is read out, and the prompt Update? is shown in the display. Abbrechen Starten Press OK to start a system check and the subsequent programming procedure. The case of a fault (e.g. system not compatible with update) a corresponding message is shown. If the USB stick is already plugged in when the control panel is switched on, a different check is started, and the message no UF-file may appear. The message will disappear after approx. 5 seconds, and the procedure will continue as normal. 23

24 6. SERVICE Programming Description First the programme memory (flash) is updated. Then the configuration memory (NVM). After indicating the end of the procedure, system and control panel perform a reset to complete the update. Caution: Do not remove the USB stick or disconnect the system from voltage during the programming procedure!!! FURTHER INFORMATION The latest data for the USB stick are available for download at The downloaded Zip file must be unpacked onto the stick. All files should be saved to the main directory on the stick. The Zip file or USB stick may contain files for several system types. The update feature of the control panel automatically identifies the correct data set. The USB sticks contain a specific variant of the EVI file. This ensures that the individual user settings are retained in the system. The USB stick can be removed any time as long as programming is not in progress. 24
25 7. APPENDIX 7.1 AUX relay optional switched terminal for TV set The Vision III control unit provides a switched terminal to switch the TV set's power supply on and off. This switched terminal is always closed when the Vision system is in operation. It opens when the system is switched off (Standby or Sleep mode). Accordingly, the TV set is always disconnected from the on-board electric system when the Vision system is not in operation, thereby saving standby power. Caution: The switched terminal is not a power supply! The TV set must be supplied with power via a separate cable. Never branch off the power for the TV set from the Vision system's power supply (be sure to observe the installation instructions)! Some TV sets are fitted with an integrated satellite receiver. If such a receiver provides voltage to control the LNB (see receiver control mode 2 or mode 3), this device should not be connected to the switched terminal. Wiring example: TV Battery Vision III Control Unit 25
26 7. APPENDIX 7.2 Declaration of conformity 26
27 7. APPENDIX 7.3 Notes on the protection of the environment EC End-of-Life Vehicle Directive The antenna system is certified and intended for use as an accessory of a motor vehicle. The system may be disposed of together with the vehicle in accordance with the End-of-Life Vehicle Directive ELV, 2000/53/EC. The antenna system does not contain any materials rated as hazardous to the environment according to the directive. We hope your satellite system brings you lots of joyful entertainment hours. Your ten Haaft team 27
28 ten Haaft GmbH Neureutstraße Keltern Germany Telephone: +49 (0) 7231 / Telefax: +49 (0) 7231 / service@ten-haaft.com Office hours: Monday Friday and 8:00 a.m. 12:00 a.m. 12:30 a.m. 4:30 p.m. Release 01/2018 Part number:
Oyster. Oyster TV OPERATOR MANUAL.
 Oyster TV Oyster TV OPERATOR MANUAL www.ten-haaft.com CONTENTS 1. General information 1.1 Introduction 3 1.2 Scope of supply 3 1.3 Intended use 3 1.4 Safety precautions 5 2. Control elements 2.1 Getting
Operating instructions
 Operating instructions Art-Nr.: 3.150.0110 Vision III + Vision III Vision III DX Innovative Mobile Technology Version: 03/2015 Language: English Table of contents General information Introduction 3 Proper
Operating Instructions. Oyster Vision II. Issue: May 2006 Software Version 1.05
 Operating Instructions Oyster Vision II Issue: May 2006 Software Version 1.05 Intended use The intended use of this product is the fixed assembly on mobile homes or trailers (caravans) with a maximum speed
Contents. 1. General Information. 2. Contents. 3. Operating Instruction. 4. Program update. 5. Trouble Shooting. 6. Specifications
 Contents 1. General Information 1-1. Introduction 1-2. Proper use and operation 1-3. Safety Notes 2. Contents 2-1. Accessory Include 2-2. Name of parts 3. Operating Instruction 3-1. Connection Diagram
USER MANUEL. SNIPE 2 Ref R13
 USER MANUEL SNIPE 2 Ref. 0141317R13 Contents 1. General Information 1-1. Introduction 1-2. Proper use and operation 1-3. Safety notes......... 2 3 3 2. Contents 2-1. Accessory included 2-2. Name of parts......
Fully ly Automaticti. Motorised Satellite t TV System. User s manual REV
 REV. 1.0 Fully ly Automaticti Motorised Satellite t TV System User s manual Customer Help Line: 1300 139 255 Support Email: support@satkingpromax.com.au Website: www.satkingpromax.com.au www.satkingpromax.com.au
Digital satellite antenna with control panel. Kronings MobilSat +
 Digital satellite antenna with control panel User s Manual Models: MSP-S / MSP-C SUMMARY 1. Introduction... 2 1.1. Usage... 2 1.2. General notes... 3 1.3. The Control Panel... 3 2. Base functions... 4
Fully ly Automaticti. Motorised Satellite t TV System. User s manual. ver 3.0.
 ver 3.0 Fully ly Automaticti Motorised Satellite t TV System User s manual Customer Help Line: 1300 139 255 Support Email: support@satkingpromax.com.au Website: www.satkingpromax.com.au www.satkingpromax.com.au
Digital satellite antenna with touch screen control panel Mounting instructions User Manual
 Digital satellite antenna with touch screen control panel Mounting instructions User Manual IMPORTANT To exercise the right of the 24 months warranty is mandatory that in the sales document is reported
Operating instructions
 Operating instructions Digital Digital Digital Innovative Mobile Technology 02/2016 language: englisch Table of content Generals Introduction 3 Proper use and operation 5 Safety information 6 Control Instruments
Operating Instructions SAT-Finder plus
 GB Operating Instructions SAT-Finder plus Contents 1. Getting started 1.1 Package contents 1.2 Safety information 1.3 Connecting the SAT-Finder plus 1.4 Start-up process 2. Searching and finding 2.1. Automatic
Be sure to run the vehicle engine while using this unit to avoid battery exhaustion.
 CAUTION: TO REDUCE THE RISK OF ELECTRIC SHOCK DO NOT REMOVE COVER (OR BACK) NO USER-SERVICEABLE PARTS INSIDE REFER SERVICING TO QUALIFIED SERVICE PERSONNE; Please Read all of these instructions regarding
OSD. EXECUTIVE / MiniDome USERS MANUAL. USING THE MOTOSAT DISH POINTING SYSTEM EXECUTIVE / MiniDome OSD
 EXECUTIVE / MiniDome OSD USERS MANUAL USING THE MOTOSAT DISH POINTING SYSTEM EXECUTIVE / MiniDome OSD MotoSAT Corporation Created April 22, 2003 1-800-247-7486 CONGRATULATIONS! on your purchase of your
INSTALLATION AND USER S GUIDE DAS M44HD-CI-CAN
 INSTALLATION AND USER S GUIDE DAS M44HD-CI-CAN Warnings: Important Safety Instructions and Caution Please read all of these instructions regarding your unit and retain them for future reference Read this
END USER MANUAL DAS-M44HD-R
 END USER MANUAL DAS-M44HD-R Warnings: Important Safety Instructions and Caution Please read all of these instructions regarding your unit and retain them for future reference Read this manual fully and
FD Trinitron Colour Television
 R 4-205-569-32(1) FD Trinitron Television Instruction Manual GB KV-14LM1U 2000 by Sony Corporation NOTICE FOR CUSTOMERS IN THE UNITED KINGDOM A moulded plug complying with BS1363 is fitted to this equipment
Chapter 4. Dish Antenna Installation. Installing a DISH 500 Antenna. Finding the Satellites
 These instructions guide you through the installation of a satellite system which includes your receiver (included with this manual), and a DISH Pro DISH 500 antenna system that can be identified by the
Digital satellite antenna with touch screen control panel Mounting instructions User Manual
 Digital satellite antenna with touch screen control panel Mounting instructions User Manual IMPORTANT To exercise the right of the 24 months warranty is mandatory that in the sales document is reported
Horizon Nano-S2. DVB-S2 Signal Meter TEST REPORT
 TEST REPORT DVB-S2 Signal Meter Horizon Doesn t require its own power supply Extremely easy to use Displays signal level and quality Optimized for the measurement of four satellite positions Very fast
MODEL... MXL012/55NZ MXL012/65NZ SIMPLICITY AT IT S BEST SET UP & USER MANUAL REGISTERED COMMUNITY DESIGN NO
 SIMPLICITY AT IT S BEST MODEL... MXL012/55NZ MXL012/65NZ SET UP & USER MANUAL REGISTERED COMMUNITY DESIGN NO.2207746. PATENT PENDING SIMPLICITY AT IT S BEST THANK YOU! For purchasing this product, we trust
USER MANUAL. 27" 2K QHD LED Monitor L27HAS2K
 USER MANUAL 27" 2K QHD LED Monitor L27HAS2K TABLE OF CONTENTS 1 Getting Started 2 Control Panel/ Back Panel 3 On Screen Display 4 Technical Specs 5 Troubleshooting 6 Safety Info & FCC warning 1 GETTING
USER MANUAL. 28" 4K Ultra HD Monitor L28TN4K
 USER MANUAL 28" 4K Ultra HD Monitor L28TN4K TABLE OF CONTENTS 1 Getting Started 2 Control Panel/ Back Panel 3 On Screen Display 4 Technical Specs 5 Care & Maintenance 6 Troubleshooting 7 Safety Info &
USER MANUAL. Travel Vision R6
 www.travel-vision.com USER MANUAL Travel Vision R6 Version 1.0 February 2012 Introduction Congratulations on the purchase of your Travel Vision R6 system. This user manual provides all necessary information
Instructions Manual
 15 19 22 26 32 42 46 55 65 Instructions Manual Table of Contents Safety Guidelines Safety Guidelines 3 Package Contents 4 Ports and Connectors 5 Technical Specifications 6 Installation Guidelines 7 Installation
Instructions for use. UFS 810 English IMPORTANT READ CAREFULLY BEFORE USE
 Instructions for use UFS 810 English IMPORTANT READ CAREFULLY BEFORE USE List of Contents 1 About these instructions...4 1.1 Contents...4 1.2 Markings...4 1.2.1 Pre-requirements for certain functions...4
ATLANTA ASF 2033HD+ DVB-S/S2 METER. User`s Manual
 ATLANTA ASF 2033HD+ DVB-S/S2 METER User`s Manual Buttons and Indicators... 2 How to measure... 3 Main menu... 4 LNB Setting... 4 Edit Satellite... 6 Spectrum Chart... 7 Constellation... 9 Angle Calculation...
KD5500. Automatic Satellite TV Antenna for DISH Programming. Owner s Manual
 Automatic Satellite TV Antenna for DISH Programming KD5500 Owner s Manual 11200 Hampshire Avenue South, Bloomington, MN 55438 PH 952.922.6889 FAX 952.922.8424 kingcontrols.com IMPORTANT! The KING Relay
Satellite Radio. Expand Your Factory Radio ISSR bit & 29-bit LAN. Owner s Manual Gateway. add. Harness Connection USB. Port 1 Port.
 Expand Your Factory Radio Harness Connection add Satellite Radio Dip Switches Port 1 Port 2 (See Manual) USB GM 11-bit & 29-bit LAN Owner s Manual Gateway ISSR12 Table of Contents 1. Introduction 2. Precautions
Owner s Manual. Sat-Meter MSK 15. Order No.:
 Owner s Manual Sat-Meter MSK 15 Order No.: 217 100 13 Thank you for choosing our latest and most innovative satellite meter. It has been designed and manufactured to a very high standard and offers a UNIQUE
INSTRUCTIONS FOR USE Pro-Ject Receiver Box S
 INSTRUCTIONS FOR USE Pro-Ject Receiver Box S Dear music lover, thank you for purchasing a PRO-JECT AUDIO receiver. In order to achieve maximum performance and reliability you should study these instructions
Digital Satellite Module. Guide
 Digital Satellite Module Guide 2 This product fulfils the conditions stated in the EEU directives 89/336 and 73/23. Contents 3 Daily use, 4 Find out how to use the Beo4 remote control with the Digital
Automatic Satellite System. Model KD5500
 Automatic Satellite System for DISH Network Programming Model KD5500 Installation and Operating Instructions Digital TV Solutions for Mobile Markets 11200 Hampshire Avenue South, Bloomington, MN 55438-2453
ASF 2050 COMBO USER MANUAL
 ASF 2050 COMBO USER ASF 2050 COMBO USER 1. BUTTONS AND INDICATORS... 2 2. BASIC FUNCTIONS.... 4 2.1 Satellite... 5 2.2Terrestrial... 24 2.3 Cable... 33 2.4 Saving... 41 2.5 System Setting... 42 2.6 USB
INSTRUCTIONS FOR USE Pro-Ject Tuner Box S
 INSTRUCTIONS FOR USE Pro-Ject Tuner Box S Dear music lover, thank you for purchasing a Pro-Ject Audio Systems FM-tuner. In order to achieve maximum performance and reliability you should study these instructions
Expand Your Factory Radio add Satellite Radio Harness Connection
 Expand Your Factory Radio Harness Connection add Satellite Radio Dip Switches Port 1 Port 2 (See Manual) USB Honda/Acura Owner s Manual GateWay Owner s Manual Media ISSR12 GateWay PXAMG 01-22-13 Table
B2590/65SNZ. Crank-Up. Installation & Operation Instruction Manual NZ Iss 1
 B2590/65SNZ Crank-Up Installation & Operation Instruction Manual 9111410NZ Iss 1 Useful Information Date of Purchase Retailer Installer Serial Number Contents Warranty P3 Safety Precautions P4 Introduction
DIGITAL SET TOP BOX STB 7017 INSTRUCTION MANUAL
 DIGITAL SET TOP BOX STB7017 INSTRUCTION MANUAL STB 7017 CHANNEL After Sales Support Now you have purchased a Tevion product you can rest assured in the knowledge that as well as your 3 year parts and labour
GDB9 INSTRUCTION MANUAL DIGITAL TERRESTRIAL RECEIVER
 GDB9 INSTRUCTION MANUAL DIGITAL TERRESTRIAL RECEIVER Goodmans Support: www.goodmans.co.uk/support Please read these instructions before use and keep for future reference IMPORTANT SAFETY INSTRUCTIONS Thank
Satellite Radio. Owner s Manual. Expand Your Factory Radio. Honda/Acura PXAMG. GateWay. add
 Expand Your Factory Radio Harness Connection add Satellite Radio Dip Switches Port 1 Port 2 (See Manual) USB Honda/Acura Owner s Manual GateWay Owner s Manual Media ISSR12 GateWay PXAMG isimple A Division
User manual. Goodmans Product Information:
 GDB7CA Digital Terrestrial Receiver User manual Goodmans Product Information: www.goodmans.co.uk/support Safety information Mains connection This receiver is suitable for use on A.C. mains supply, 220-240
Safety Information. Camera System. If you back up while looking only at the monitor, you may cause damage or injury. Always back up slowly.
 Table of Contents Introduction...3 Safety Information...4-6 Before Beginning Installation...7 Installation Guide...8 Wiring Camera & Monitor...9-10 Replacement Installation Diagram...11 Clip-On Installation
OWNER S MANUAL MOTORIZED 7 WIDE TFT LCD COLOR MONITOR CNT-701
 OWNER S MANUAL PW MOTORIZED 7 WIDE TFT LCD COLOR MONITOR CNT-701 ANY CHANGES OR MODIFICATIONS IN CONSTRUCTION OF THIS UNIT DEVICE WHICH IS NOT APPROVED BY THE PARTY RESPONSIBLE FOR COMPLIACE COULD VOID
INSTALLATION GUIDE FOR THE MOTOR
 INSTALLATION GUIDE FOR THE MOTOR Motor Horizon-Horizon ref 450907 MET542 This symbol indicates that the product must not be treated as household waste. The harmfull substances possibly contained in the
Integrated Remote Commander
 3-244-192-12 (1) Integrated Remote Commander Operating Instructions RM-VL1000 2002 Sony Corporation WARNING To prevent fire or shock hazard, do not expose the unit to rain or moisture. To avoid electrical
HD Digital Set-Top Box Quick Start Guide
 HD Digital Set-Top Box Quick Start Guide Eagle Communications HD Digital Set-Top Box Important Safety Instructions WARNING TO REDUCE THE RISK OF FIRE OR ELECTRIC SHOCK, DO NOT EXPOSE THIS PRODUCT TO RAIN
USER MANUAL. Travel Vision R6
 www.travel-vision.com USER MANUAL Travel Vision R6 Version 1.1 September 2012 Introduction Congratulations on the purchase of your Travel Vision R6 system. This user manual provides all necessary information
Re:source. Communication Module. SAT Version. Dominating Entertainment. Revox of Switzerland. E2.00
 Re:source Communication Module SAT Version Dominating Entertainment. Revox of Switzerland. E2.00 Please note: Software update! Unlike the software for the Standard communication module, the SAT control
PLL2210MW LED Monitor
 PLL2210MW LED Monitor USER'S GUIDE www.planar.com Content Operation Instructions...1 Safety Precautions...2 First Setup...3 Front View of the Product...4 Rear View of the Product...5 Quick Installation...6
USER MANUAL. 27 Full HD Widescreen LED Monitor L27ADS
 USER MANUAL 27 Full HD Widescreen LED Monitor L27ADS TABLE OF CONTENTS 1 Getting Started 2 Control Panel/ Back Panel 3 On Screen Display 4 Technical Specs 5 Care & Maintenance 6 Troubleshooting 7 Safety
Operating instructions. Digital CI. Innovative Mobile Technology
 Operating instructions Digital CI Innovative Mobile Technology Stand: 08/2008 Sprache: englisch Proper use and operation This product has been designed for use in a fixed installation on mobile homes or
INSTALLING THE MOUNT
 INSTALLING THE MOUNT Assemble the H-H Mount as the following diagram. Ensure the mounting tube indicates 0.If not. sit it to exactly 0 using the manual buttons on the bottom of the mount. The cable must
TRANSCENSION 6-CHANNEL DMX DIMMER PACK (order code: BOTE40) USER MANUAL
 USER MANUAL") www.prolight.co.uk TRANSCENSION 6-CHANNEL PACK (order code: BOTE40) USER MANUAL SAFETY WARNING FOR YOUR OWN SAFETY, PLEASE READ THIS USER MANUAL CAREFULLY BEFORE YOUR INITIAL START-UP! CAUTION! Keep this
www.prolight.co.uk TRANSCENSION 6-CHANNEL PACK (order code: BOTE40) USER MANUAL SAFETY WARNING FOR YOUR OWN SAFETY, PLEASE READ THIS USER MANUAL CAREFULLY BEFORE YOUR INITIAL START-UP! CAUTION! Keep this
In-Motion Automatic Satellite System. Model V30
 In-Motion Automatic Satellite System with built-in DVB for positive satellite identification Model V30 Installation and Operating Instructions Satellite Solutions for Mobile Markets 11200 Hampshire Avenue
Classroom Setup... 2 PC... 2 Document Camera... 3 DVD... 4 Auxiliary... 5
 Classroom Setup... 2 PC... 2 Document Camera... 3 DVD... 4 Auxiliary... 5 Lecture Capture Setup... 6 Pause and Resume... 6 Considerations... 6 Video Conferencing Setup... 7 Camera Control... 8 Preview
USER MANUAL. 27 Full HD Widescreen LED Monitor L270E
 USER MANUAL 27 Full HD Widescreen LED Monitor L270E TABLE OF CONTENTS 1 Getting Started 2 Control Panel/ Back Panel 3 On Screen Display 4 Technical Specs 5 Care & Maintenance 6 Troubleshooting 7 Safety
Receiver Description and Installation
 Receiver Front Panel Smart Card Door Behind this door is a slot for a future smart card. No smart card is included with this receiver. Arrow Buttons Use the ARROW buttons to change channels on the nearby
32" LED Television. Initial Assembly B. Main Unit. 1. Fix the Left Base Stand to the main unit using 2 pcs provided screws.
 2 3 4 8047922B 32" LED Television Initial Assembly 8047922 Main accessories: Installation Steps: 1. Fix the Left Base Stand to the main unit using 2 pcs provided screws. 2. Fix the Right Base Stand to
IMPORTANT SAFETY INSTRUCTIONS
 IMPORTANT SAFETY INSTRUCTIONS 1. Read, follow and keep these instructions safely. 2. Heed all warnings. 1. Do not use this apparatus near water. 2. Clean only with dry cloth. 3. Do not block any ventilation
UC1000 Universal Controller
 UC1000 Universal Controller Makes the KING Quest Satellite Antenna System compatible with DIRECTV DISH Bell TV Please read the! BEFORE YOU START! section on the inside of this cover before using the UC1000
Commander 384. w w w. p r o l i g h t. c o. u k U S E R M A N U A L
 Commander 384 w w w. p r o l i g h t. c o. u k U S E R M A N U A L 1, Before you begin 1.1: Safety warnings...2 3 1.2: What is included...4 1.3: Unpacking instructions...4 2, Introduction 2.1: Features...4
of Loewe E 2.10_m1 1
 of Loewe E 2.10_m1 1 Attention! After updating the M203 firmware to version 2.00 or higher, we recommend completely resetting the M203 interface by pressing the Disable softkey on setup page #2 for several
Mobile Satellite TV Antenna With FastFind Remote Operating Manual
 TM Mobile Satellite TV Antenna With FastFind Remote Operating Manual Made in the USA 1. INTRODUCTION and BACKGROUND... 3 2. COMPENT OVERVIEW and SPECIFICATIONS... 4 3. FCC USER S INFORMATION....5 4. OPERATION...6-7
Automotive 72 Exterior Smart Lighting Kit
 PACKAGE CONTENTS Automotive 72 Exterior Smart Lighting Kit 36 36 8 x Wire Mounting Bracket 16 x Screws 60" Extension Cable 24 ON / OFF 60 Exterior Kit can also function as interior lighting Instruction
PL2410W LCD Monitor USER'S GUIDE.
 PL2410W LCD Monitor USER'S GUIDE www.planar.com Content Operation Instructions...1 Safety Precautions...2 First Setup...3 Front View of the Product...4 Rear View of the Product...5 Quick Installation...6
RV SATELLITE ANTENNA AUTOMATIC SKEW TWIN LNB SSA-850
 RV SATELLITE ANTENNA AUTOMATIC SKEW TWIN LNB SSA-850 INSTALLATION AND OPERATION MANUAL Please ensure that this manual is read in full prior to installing or using this sphere satellite unit. Design and
Please follow the safety instructions in your notebook s directions for use.
 TV Remote Control Tuner Content Safety Instructions... 2 Battery disposal... 2 Summary... 3 TV card... 3 Remote control... 4 Inserting batteries... 4 Button Layout... 5 Changing the transmission/reception
Contents 1. Safety precautions... 1 Environment protection... 3 Features... 4 Operating notes... 4 Installation... 5
 Motor System for Satellite Receiver Model ID: MH1 EN User manual DE Bedienungsanleitung PL Instrukcja obsługi RU Руководство пользователя 6/2010 jp Contents 1. Safety precautions... 1 2. Environment protection...
INSTRUCTIONS FOR USE Pro-Ject Tuner Box S2
 INSTRUCTIONS FOR USE Pro-Ject Tuner Box S2 Dear music lover, thank you for purchasing a Pro-Ject Audio Systems FM-tuner. In order to achieve maximum performance and reliability you should study these instructions
CAUTION RISK OF ELECTRIC SHOCK NO NOT OPEN
 Evolution Digital HD Set-Top Box Important Safety Instructions 1. Read these instructions. 2. Keep these instructions. 3. Heed all warnings. 4. Follow all instructions. 5. Do not use this apparatus near
In-Motion Automatic Satellite System. Model V30
 In-Motion Automatic Satellite System with built-in DVB for positive satellite identification Model V30 Installation and Operating Instructions Satellite Solutions for Mobile Markets 11200 Hampshire Avenue
Re:connect M 203. RS232 Interface Revox. Dominating Entertainment. Revox of Switzerland. E 2.03
 of Re:connect M 203 RS232 Interface Revox Dominating Entertainment. Revox of Switzerland. E 2.03 Attention! After updating the firmware to version 2.00 or higher, we recommend completely resetting the
FV400 DIGITAL TV RECEIVER WITH MODULATOR INSTRUCTION MANUAL
 FV400 DIGITAL TV RECEIVER WITH MODULATOR INSTRUCTION MANUAL Please read this instruction manual carefully before using your receiver Table of Contents Introduction-----------------------------------------------------------------------------
Portable In-Motion Automatic Satellite System. Model VQ3000
 Portable In-Motion Automatic Satellite System with built-in DVB for positive satellite identification Model VQ3000 Operating Instructions Satellite Solutions for Mobile Markets 11200 Hampshire Avenue South,
C. 48" LED Television FLD C. 6 machine x12 Screws
 2 3 4 8012422C 48" LED Television FLD4800 8012422C 6 6 machine x12 Screws 5 6 7 8 1 18 2 3 4 5 19 20 21 6 7 8 9 10 22 23 24 25 11 12 13 14 15 16 26 27 28 29 30 31 32 33 17 9 I I II 10 11 12 13 14 15 4-digit
SATELLITE TV OPERATION / TECHNICAL MANUAL. Eagle II Controller
 SATELLITE TV OPERATION / TECHNICAL MANUAL Eagle II Controller 10 May 2018 2 Index Warnings... 4 Mount Definitions... 5 Controller Views... 6 Configuration and Software Versions... 8 Menus and Operations...
USER MANUAL. 22" Class Slim HD Widescreen Monitor L215DS
 USER MANUAL 22" Class Slim HD Widescreen Monitor L215DS TABLE OF CONTENTS 1 Getting Started Package Includes Installation 2 Control Panel / Back Panel Control Panel Back Panel 3 On Screen Display 4 Technical
OWNER'S MANUAL MODEL: DTV-2000 STANDBY/ON
 OWNER'S MANUAL MODEL: DTV-2000 STANDBY/ON CH+ CH- TABLE OF CONTENTS SAFETY PRECAUTIONS IMPORTANT SAFETY INSTRUCTIONS and FEATURES ACCESSORIES and LOADING BATTERIES REMOTE CONTROL UNIT FRONT PANEL and REAR
Remote Control. degraded, causing unreliable operation. The recommended effective distance for remote operation is about 16 feet (5 meters).
.") Media Streaming Sound Bar RTS736W User Manual Remote Control using the remote control Point the remote control at the REMOTE SENSOR located on the unit (see Front Panel illustration for precise location).
Media Streaming Sound Bar RTS736W User Manual Remote Control using the remote control Point the remote control at the REMOTE SENSOR located on the unit (see Front Panel illustration for precise location).
PLL1920M LED LCD Monitor
 PLL1920M LED LCD Monitor USER'S GUIDE www.planar.com Content Operation Instructions...1 Safety Precautions...2 First Setup...3 Front View of the Product...4 Rear View of the Product...5 Installation...6
LCD Thermometer / Clock S No. 1253
 Installation and Operating Manual LCD Thermometer / Clock S No. 1253 The 3 fold thermometer with crystal clock is purpose build for the mounting in caravans, boats and intervention vehicles. Please read
Hardware Setup. HP Dual TV Tuner/Digital Video Recorder. Document Part Number:
 Hardware Setup HP Dual TV Tuner/Digital Video Recorder Document Part Number: 374787-001 November 2004 This guide provides steps to help you set up your HP Dual TV Tuner/Digital Video Recorder hardware
ASSEMBLY AND CALIBRATION
 CineMax Kit ASSEMBLY AND CALIBRATION www.cineversum.com Ref: T9003000 Rev: 01 Part. No.: R599766 Changes CineVERSUM provides this manual as is without warranty of any kind, either expressed or implied,
Warranty Information
 Accuform Signs does not handle the warranty for the Digital Signage Displays. Please read below for details on the warranty of your product. If you are having trouble and need assistance, please contact
M203 LG. Multiroom Planer V2.00. Introduction. New features from software V2.00
 of M203 LG D 2.06 Attention! After updating the M203 firmware to version 2.00 or higher, we recommend completely resetting the M203 interface by pressing the Disable softkey on setup page #2 for several
EC5415B. B-Tronic EasyControl. Assembly and Operating Instructions. Wall/hand-held transmitter, 15-channel, bidirectional
 B-Tronic EasyControl EC5415B en Assembly and Operating Instructions Wall/hand-held transmitter, 15-channel, bidirectional Important information for: Fitters / Electricians / Users Please forward accordingly!
English SAFETY PRECAUTION DO NOT INSTALL THE RECEIVER: PAG. 2
 U4109 SAFETY PRECAUTION The lightning fl ash with arrowhead symbol, within an equilateral triangle, is intended to alert the user to dangerous voltage and to prevent from a risk of electric shock. Warning:
SATELLITE TV OPERATION / TECHNICAL MANUAL. Eagle II Controller
 SATELLITE TV OPERATION / TECHNICAL MANUAL Eagle II Controller 8 Nov 2017 2 Index Warnings... 4 Mount Definitions... 5 Controller Views... 6 Configuration and Software Versions... 8 Menus and Operations...
Portable Automatic Satellite System. Model VQ2000
 Portable Automatic Satellite System with built-in DVB for positive satellite identification Model VQ2000 Operating Instructions Satellite Solutions for Mobile Markets 11200 Hampshire Avenue South, Bloomington,
Field Service Procedure Replacement PCU Kit, Coastal
 1. Brief Summary: Troubleshooting document for diagnosing a fault with and replacing the PCU assembly on the coastal series antennas. 2. Checklist: Initialization Rate Sensor Outputs Run the Built In Test
GEOSATpro GS120. DiSEqC 1.2 Motorized H-H H Motor
 DiSEqC 1.2 Motorized H-H H Motor GEOSATpro GS120 Compatible with DiSEqC 1.2 & USALS Receivers Adjustable Hardware Limiters for 140 Degree Coverage Goto X Preprogrammed for North American Satellites LED
Chapter 2: Scanner Operations NOTE: Install the software cartridge Power the Scanner Select the software title Identify the vehicle
 Chapter 2: Scanner Operations This chapter explains general Scanner operations and offers instructions for customizing certain Scanner functions. The following is an outline of basic Scanner operation.
RF Mogul. Quick Start. Model: SDC1. Satellite Dish Controller
 RF Mogul Satellite Dish Controller Model: SDC1 Quick Start 29 February 2012 Minimum required hardware to find a Satellite! This Quick Start document is for connecting and operating a General Dynamics C125M
VF-STB IP Appliance User Guide
 VF-STB IP Appliance User Guide Copyright 2007 Video Furnace, Inc. All Rights Reserved. Copyright 2002-2007 Video Furnace, Inc. All Rights Reserved This document refers to the current published version
Satellite Receiver User s Guide
 Satellite Receiver User s Guide GRD33G3A We bring good things to life. SAFETY INFORMATION WARNING To reduce risk of fire or shock hazard, do not expose this receiver to rain or moisture. WARNING RISK OF
Evolution Digital HD Set-Top Box Important Safety Instructions
 Evolution Digital HD Set-Top Box Important Safety Instructions 1. Read these instructions. 2. Keep these instructions. 3. Heed all warnings. 4. Follow all instructions. 5. Do not use this apparatus near
USER S MANUAL SATELLITE RECEIVER DRD203RW. What is the DSS System?...3. Using the Program Guide...6. Using the Menu System...10
 DRD203RW USER S MANUAL What is the DSS System?...3 Using the Program Guide...6 Using the Menu System...10 Using On-line Help...14 Major Features...16 Setting Up the Remote...36 Connecting the Receiver..42
DSR 5580 Digital SAT-Receiver
 DSR 5580 Digital SAT-Receiver Operating Instructions Operating Instructions Contents Contents...2 General information...4 Safety and installation information...4 Connecting up the receiver...6 Controls,
Model: LCD4WM 3.5 Window Mounted LCD Monitor User Manual Features
 Model: LCD4WM 3.5 Window Mounted LCD Monitor User Manual Features 3.5 High Resolution TFT LCD Monitor Low Profile, Slim Design Fully Adjustable reversing guidelines Built in Speaker Two video inputs Fully
SATFINDER 3 HD SLIM USER GUIDE
 SATFINDER 3 HD SLIM USER GUIDE INDEX General Safety..... 3 Key Features..... 4 Panel Keypads... 5 Accesory.. 6 Satellite Search...... 7 Spectrum..... 8 Cross Polarisation... 9 Packet TP Levels.... 9 Multi
USER MANUAL Full HD Widescreen LED Monitor L215IPS
 USER MANUAL 21.5 Full HD Widescreen LED Monitor L215IPS TABLE OF CONTENTS 1 Getting Started 2 Control Panel/ Back Panel 3 On Screen Display 4 Technical Specs 5 Care & Maintenance 6 Troubleshooting 7 Safety