Arduino Lesson 3. RGB LEDs
|
|
|
- Michael Sparks
- 6 years ago
- Views:
Transcription

1 Arduino Lesson 3. RGB LEDs Created by Simon Monk Last updated on :45:59 PM EDT
2 Guide Contents Guide Contents Overview Parts Part Qty Breadboard Layout Colors Arduino Sketch Using Internet Colors Theory (PWM) Other Things to Do Adafruit Industries Page 2 of 14
3 Overview In this lesson, you will learn how to use a RGB (Red Green Blue) LED with an Arduino. You will use the analogwrite function of Arduino to control the color of the LED. At first glance, RGB (Red, Green, Blue) LEDs look just like regular LEDs, however, inside the usual LED package, there are actually three LEDs, one red, one green and yes, one blue. By controlling the brightness of each of the individual LEDs you can mix pretty much any color you want. We mix colors just like you would mix audio with a 'mixing board' or paint on a palette - by adjusting the brightness of each of the three LEDs. The hard way to do this would be to use different value resistors (or variable resistors) as we played with in lesson 2. That's a lot of work! Fortunately for us, the Arduino has an analogwrite function that you can use with pins marked with a ~ to output a variable amount of power to the appropriate LEDs. Adafruit Industries Page 3 of 14

 - you can use up to 1K ohm")

4 Parts To build the project described in this lesson, you will need the following parts. Part Qty Diffuse RGB LED 10mm Ω Resistors (red, purple, brown stripes) - you can use up to 1K ohm although it will be a little dimmer 3 Half-size Breadboard 1 Adafruit Industries Page 4 of 14

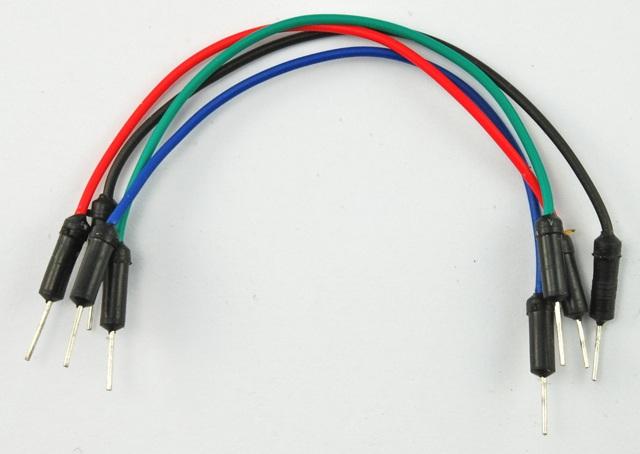
5 Arduino Uno R3 1 Jumper wire pack 1 Adafruit Industries Page 5 of 14
6 Breadboard Layout The RGB LED has four leads. There is one lead going to the positive connection of each of the single LEDs within the package and a single lead that is connected to all three negative sides of the LEDs. The common negative connection of the LED package is the second pin from the flat side of the LED package. It is also the longest of the four leads. This lead will be connected to ground. Each LED inside the package requires its own 270Ω resistor to prevent too much current flowing through it. The three positive leads of the LEDs (one red, one green and one blue) are connected to Arduino output pins using these resistors. If you are using a common ANODE LED instead of common CATHODE, connect the Adafruit Industries Page 6 of 14

7 If you are using a common ANODE LED instead of common CATHODE, connect the long pin to +5 instead of ground Adafruit Industries Page 7 of 14

8 Colors The reason that you can mix any color you like by varying the quantities of red, green and blue light is that your eye has three types of light receptor in it (red, green and blue). Your eye and brain process the amounts of red, green and blue and convert it into a color of the spectrum. In a way, by using the three LEDs we are playing a trick on the eye. This same idea is used in TVs, where the LCD has red, green and blue color dots next to each other making up each pixel. If we set the brightness of all three LEDs to be the same, then the overall color of the light will be white. If we turn off the blue LED, so that just the red and green LEDs are the same brightness, then the light will appear yellow. We can control the brightness of each of the red, green and blue parts of the LED separately, making it possible to mix any color we like. Black is not so much a color as an absense of light. So the closest we can come to black with our LED is to turn off all three colors. Adafruit Industries Page 8 of 14

; // green setcolor(0, 0, 255); // blue setcolor(255, 255, 0); // yellow setcolor(80, 0, 80); // purple setcolor(0, 255, 255); // aqua } void setcolor(int red, int green, int")
9 Arduino Sketch The following test sketch will cycle through the colors red, green, blue, yellow, purple, and aqua. These colors being some of the standard Internet colors. /* Adafruit Arduino - Lesson 3. RGB LED */ int redpin = 11; int greenpin = 10; int bluepin = 9; void setup() { pinmode(redpin, OUTPUT); pinmode(greenpin, OUTPUT); pinmode(bluepin, OUTPUT); } void loop() { setcolor(255, 0, 0); // red setcolor(0, 255, 0); // green setcolor(0, 0, 255); // blue setcolor(255, 255, 0); // yellow setcolor(80, 0, 80); // purple setcolor(0, 255, 255); // aqua } void setcolor(int red, int green, int blue) { analogwrite(redpin, red); analogwrite(greenpin, green); analogwrite(bluepin, blue); } Try the sketch out and then we will dissect it in some detail... The sketch starts by specifying which pins are going to be used for each of the colors: int redpin = 11; int greenpin = 10; int bluepin = 9; Adafruit Industries Page 9 of 14
10 The next step is to write the 'setup' function. As we have learnt in earlier lessons, the setup function runs just once after the Arduino has reset. In this case, all it has to do is define the three pins we are using as being outputs. void setup() { pinmode(redpin, OUTPUT); pinmode(greenpin, OUTPUT); pinmode(bluepin, OUTPUT); } Before we take a look at the 'loop' function, lets look at the last function in the sketch. void setcolor(int red, int green, int blue) { analogwrite(redpin, red); analogwrite(greenpin, green); analogwrite(bluepin, blue); } This function takes three arguments, one for the brightness of the red, green and blue LEDs. In each case the number will be in the range 0 to 255, where 0 means off and 255 means maximum brightness. The function then calls 'analogwrite' to set the brightness of each LED. If you look at the 'loop' function you can see that we are setting the amount of red, green and blue light that we want to display and then pausing for a second before moving on to the next color. void loop() { setcolor(255, 0, 0); // red setcolor(0, 255, 0); // green setcolor(0, 0, 255); // blue setcolor(255, 255, 0);// yellow setcolor(80, 0, 80); // purple setcolor(0, 255, 255);// aqua } Try adding a few colors of your own to the sketch and watch the effect on your LED. If you are using a Common Anode RGB LED, then you will need to change the analog write values so that the color is subtracted from 255, like this: analogwrite(redpin, 255-red); for each of the three colors. Adafruit Industries Page 10 of 14
11 Adafruit Industries Page 11 of 14
12 Using Internet Colors If you have done any Internet programming, you will probably be aware that colors are often represented as a 'hex' number. For example the color red has the number #FF0000. You can find the numbers associated with a particular color using tables like these: ( The six digits of the number are actually three pairs of numbers; the first pair being the red component of the color, the next two digits the green part and the final pair the blue part. Red is #FF0000, because its maximum red (FF is 255 in hex) and it has no green or blue part. It would be pretty useful to be able to dial up one of these color numbers so that it is displayed on the RGB LED. Let's try and make the color indigo (#4B0082). The red, green and blue parts of indigo are (in hex) 4B, 00 and 82 respectively. We can plug those into the 'setcolor' function like this: setcolor(0x4b, 0x0, 0x82); // indigo We have used hex numbers for the three parts of the color by putting '0x' in front of them. Try adding a few colors of your own to the 'loop' function. Don't forget to add a delay after each one. Adafruit Industries Page 12 of 14
13 Theory (PWM) Pulse Width Modulation (or PWM) is a technique for controlling power. We also use it here to control the brightness of each of the LEDs. The diagram below shows the signal from one of the PWM pins on the Arduino. Roughly every 1/500 of a second, the PWM output will produce a pulse. The length of this pulse is controlled by the 'analogwrite' function. So 'analogwrite(0)' will not produce any pulse at all and 'analogwrite(255)' will produce a pulse that lasts all the way until the next pulse is due, so that the output is actually on all the time. If we specify a value in the analogwrite that is somewhere in between 0 and 255 then we will produce a pulse. If the output pulse is only high for 5% of the time then whatever we are driving will only receive 5% of full power. If however the output is at 5V for 90% of the time then the load will get 90% of the power delivered to it. We cannot see the LEDs turning on and off at that speed, so to us, it just looks like the brightness is changing. Adafruit Industries Page 13 of 14
14 Other Things to Do Try putting a ping-pong ball over the LED Try changing the delays to speed up or slow down the color changing There are lots of things you can do with RGB LEDs. Check out some of the projects on the Internet using RGB LEDs and you will find multi-color persistence of vision devices, as well as all sorts of lighting effects. About the Author Simon Monk is author of a number of books relating to Open Source Hardware. The following books written by Simon are available from Adafruit: Programming Arduino ( 30 Arduino Projects for the Evil Genius ( and Programming the Raspberry Pi ( Adafruit Industries Last Updated: :46:01 PM EDT Page 14 of 14
Lesson 4 RGB LED. Overview. Component Required:
 Lesson 4 RGB LED Overview RGB LEDs are a fun and easy way to add some color to your projects. Since they are like 3 regular LEDs in one, how to use and connect them is not much different. They come mostly
Module 4: Traffic Signal Design Lesson 1: Traffic Signal (Arduino) Control System Laboratory Exercise Grade 6-8
 Control System Laboratory Exercise Grade 6-8") Name: Class: Module 4: Traffic Signal Design Lesson 1: Traffic Signal (Arduino) Control System Laboratory Exercise Grade 6-8 Background Traffic signals are used to control traffic that flows in opposing
Name: Class: Module 4: Traffic Signal Design Lesson 1: Traffic Signal (Arduino) Control System Laboratory Exercise Grade 6-8 Background Traffic signals are used to control traffic that flows in opposing
R,G,B LEDs. Three PWM outputs and three primary colors. Just screams to be made, doesn t it? 220 (red,red,brown) or 330 (orange,orange,brown)
 or 330 (orange,orange,brown)") R,G,B LEDs Three PWM outputs and three primary colors. Just screams to be made, doesn t it? Arduino board gnd pin 11 pin 10 pin 9 220 (red,red,brown) or 330 (orange,orange,brown) red green blue With RGB
R,G,B LEDs Three PWM outputs and three primary colors. Just screams to be made, doesn t it? Arduino board gnd pin 11 pin 10 pin 9 220 (red,red,brown) or 330 (orange,orange,brown) red green blue With RGB
Ginger Bread House
 Party @ Ginger Bread House After hundreds of years of listening to Christmas Jingles while working on Santa s toy sweatshop the Elves decided to break with tradition and throw a techno-rave party. But
Character LCDs. Created by lady ada. Last updated on :47:43 AM UTC
 Character LCDs Created by lady ada Last updated on 2017-12-16 12:47:43 AM UTC Guide Contents Guide Contents Overview Character vs. Graphical LCDs LCD Varieties Wiring a Character LCD Installing the Header
Preface. About SunFounder. About Super Kit. Free Support
 About SunFounder Preface SunFounder is a technology company focused on Raspberry Pi and Arduino open source community development. Committed to the promotion of open source culture, we strive to bring
Computer Architecture and Organization. Electronic Keyboard
 Computer Architecture and Organization Electronic Keyboard By: John Solo and Shannon Stastny CPSC - 42, Merced College Professor Kanemoto, December 08, 2017 Abstract Our arduino project consists of an
Experiment 0: Hello, micro:bit!
 Experiment 0: Hello, micro:bit! Introduction Hello World is the term we use to define that first program you write in a programming language or on a new piece of hardware. Essentially it is a simple piece
Bill of Materials: 7-Segment LED Die with Arduino PART NO
 7-Segment LED Die with Arduino PART NO. 2190194 This project is based on the Arduino environment so that you can manipulate a die with a simple common anode 7-segment LED, a transistor PNP-2N3906, 10 resistors
ENGR 40M Project 3b: Programming the LED cube
 ENGR 40M Project 3b: Programming the LED cube Prelab due 24 hours before your section, May 7 10 Lab due before your section, May 15 18 1 Introduction Our goal in this week s lab is to put in place the
1. Arduino Board and Breadboard set up from Project 2 (8 LED lights) 2. Piezo Speaker
 2. Piezo Speaker") Project 3: Music with Piezo and Arduino Description: The Piezo speaker is a small metal plate enclosed in a round case that flexes and clicks when current current is passed through the plate. By quickly
Project 3: Music with Piezo and Arduino Description: The Piezo speaker is a small metal plate enclosed in a round case that flexes and clicks when current current is passed through the plate. By quickly
The Micropython Microcontroller
 Please do not remove this manual from the lab. It is available via Canvas Electronics Aims of this experiment Explore the capabilities of a modern microcontroller and some peripheral devices. Understand
Preface. If you have any TECHNICAL questions, add a topic under FORUM section on our website and we'll reply as soon as possible.
 About SunFounder Preface SunFounder is a technology company focused on Raspberry Pi and Arduino open source community development. Committed to the promotion of open source culture, we strive to bring
EP486 Microcontroller Applications
 EP486 Microcontroller Applications Topic 4 Arduino Apps: LED & 7-Segment-Display Department of Engineering Physics University of Gaziantep Nov 2013 Sayfa 1 Content We ll study some arduino applications:
Arduino LED Matrix Control. Controlling lots of LEDs
 Arduino LED Matrix Control Controlling lots of LEDs Intro LED basics Matrix-connected LED arrays Example: Lego 10196 Grand Carousel LED V/I relation V I 3 2.5 diode current vs. voltage 2 Current flows,
9/23/2014. Andrew Costin, Tom Syster, Ryan Cramer Advisor: Professor Hack Instructor: Professor Lin May 5 th, 2014
 Andrew Costin, Tom Syster, Ryan Cramer Advisor: Professor Hack Instructor: Professor Lin May 5 th, 2014 1 Problem Statement Introduction Executive Summary Requirements Project Design Activities Project
The Infinity Portal Craig A. Lindley 03/16/2011
 OK, I'll admit it. I'm a sucker for colored flashing lights especially if controlled by a micro processor (up). So recently when I came upon a really good deal on RGB LEDs on ebay and another really good
CT-DMX-300 LED Controller
 CT-DMX-300 LED Controller V5.00 (Kindly please read through this manual carefully before use) 1 Product oductbrief Brief CT-DMX-300 Multifunction Full-color Controller is dedicated to control color changes
Model Railway Animation: Part 1, LEDs - Expanded By David King
 Model Railway Animation: Part 1, LEDs - Expanded By David King By now you are most likely ready to proceed past the simple Blink sketch so that is what we will do now. A couple of simple sketches we can
Smart Interface Components. Sketching in Hardware 2 24 June 2007 Tod E. Kurt
 Smart Interface Components Sketching in Hardware 2 24 June 2007 Tod E. Kurt Interface Components? Sensors buttons / knobs light sound Actuators motion / vibration lights sound force proximity, location
Introduction. The Clock Hardware. A Unique LED Clock Article by Craig A. Lindley
 Introduction As hard as it might be to believe, I have never built an electronic clock of any kind. I've always thought electronic clocks were passe and not worth the time to design and build one. In addition,
BLINKIN LED DRIVER USER'S MANUAL. REV UM-0 Copyright 2018 REV Robotics, LLC 1
 fg BLINKIN LED DRIVER USER'S MANUAL REV-11-1105-UM-0 Copyright 2018 REV Robotics, LLC 1 TABLE OF CONTENTS 1 OVERVIEW... 3 1.1 CONNECTIONS... 3 1.2 KIT CONTENTS... 3 1.3 ELECTRICAL RATINGS... 3 1.4 SUPPORTED
successive approximation register (SAR) Q digital estimate
 Q digital estimate") Physics 5 Lab 4 Analog / igital Conversion The goal of this lab is to construct a successive approximation analog-to-digital converter (AC). The block diagram of such a converter is shown below. CLK comparator
Physics 5 Lab 4 Analog / igital Conversion The goal of this lab is to construct a successive approximation analog-to-digital converter (AC). The block diagram of such a converter is shown below. CLK comparator
Lecture (04) Arduino Microcontroller Programming and interfacing. By: Dr. Ahmed ElShafee
 Arduino Microcontroller Programming and interfacing. By: Dr. Ahmed ElShafee") Lecture (04) Arduino Microcontroller Programming and interfacing By: Dr. Ahmed ElShafee 1 Dr. Ahmed ElShafee, ACU : Spring 2019 EEP02 Practical Applications in Electrical Arduino Board Strong Friend Created
Lecture (04) Arduino Microcontroller Programming and interfacing By: Dr. Ahmed ElShafee 1 Dr. Ahmed ElShafee, ACU : Spring 2019 EEP02 Practical Applications in Electrical Arduino Board Strong Friend Created
Circuit Playground Express (& other ATSAMD21 Boards) DAC Hacks
 DAC Hacks") Circuit Playground Express (& other ATSAMD21 Boards) DAC Hacks Created by Phillip Burgess Last updated on 2017-11-17 01:49:03 AM UTC Guide Contents Guide Contents Overview Getting Started Composite Video
Circuit Playground Express (& other ATSAMD21 Boards) DAC Hacks Created by Phillip Burgess Last updated on 2017-11-17 01:49:03 AM UTC Guide Contents Guide Contents Overview Getting Started Composite Video
MAKEVMP502 BASIC LEARNING KIT FOR RASPBERRY PI USER MANUAL
 BASIC LEARNING KIT FOR RASPBERRY PI USER MANUAL USER MANUAL 1. Introduction To all residents of the European Union Important environmental information about this product This symbol on the device or the
Touch Panel RGB LED Controller Part No. touch-panel-rgb
 11235 West Bernardo Court, Suite 102 San Diego, CA 92127 888-880-1880 Fax: 707-281-0567 EnvironmentalLights.com Touch Panel RGB LED Controller Part No. touch-panel-rgb The Touch Panel RGB LED Controller
MAKE AN RGB CONTROL KNOB.
 MAKE AN RGB CONTROL KNOB. This is a knob based colour changing controller that uses a custom programmed microcontroller to pack a lot of features into a small affordable kit. The module can drive up to
8 PIN PIC PROGRAMMABLE BOARD (DEVELOPMENT BOARD & PROJECT BOARD)
") ESSENTIAL INFORMATION BUILD INSTRUCTIONS CHECKING YOUR PCB & FAULT-FINDING MECHANICAL DETAILS HOW THE KIT WORKS LEARN ABOUT PROGRAMMING WITH THIS 8 PIN PIC PROGRAMMABLE BOARD (DEVELOPMENT BOARD & PROJECT
ESSENTIAL INFORMATION BUILD INSTRUCTIONS CHECKING YOUR PCB & FAULT-FINDING MECHANICAL DETAILS HOW THE KIT WORKS LEARN ABOUT PROGRAMMING WITH THIS 8 PIN PIC PROGRAMMABLE BOARD (DEVELOPMENT BOARD & PROJECT
Circuit Playground Hot Potato
 Circuit Playground Hot Potato Created by Carter Nelson Last updated on 2017-11-30 10:43:24 PM UTC Guide Contents Guide Contents Overview Required Parts Before Starting Circuit Playground Classic Circuit
Digital 1 Final Project Sequential Digital System - Slot Machine
 Digital 1 Final Project Sequential Digital System - Slot Machine Joseph Messner Thomas Soistmann Alexander Dillman I. Introduction The purpose of this lab is to create a circuit that would represent the
Theory and Practice of Tangible User Interfaces. Thursday Week 3: Analog Input. week. Sensor 1: Potentiometers. Analog input
 week 03 Sensor 1: Potentiometers Analog input 1 Red LED Recall 2 Diffusers Showcase your diffuser! 3 4 Digital vs. Analog Binary vs. continuous signals Binary / Digital = whether or not Continuous / Analog
Lesson Sequence: S4A (Scratch for Arduino)
") Lesson Sequence: S4A (Scratch for Arduino) Rationale: STE(A)M education (STEM with the added Arts element) brings together strands of curriculum with a logical integration. The inclusion of CODING in STE(A)M
Lesson Sequence: S4A (Scratch for Arduino) Rationale: STE(A)M education (STEM with the added Arts element) brings together strands of curriculum with a logical integration. The inclusion of CODING in STE(A)M
Dynamic Animation Cube Group 1 Joseph Clark Michael Alberts Isaiah Walker Arnold Li
 Dynamic Animation Cube Group 1 Joseph Clark Michael Alberts Isaiah Walker Arnold Li Sponsored by: Department of Electrical Engineering & Computer Science at UCF What is the DAC? The DAC is an array of
Alice EduPad Board. User s Guide Version /11/2017
 Alice EduPad Board User s Guide Version 1.02 08/11/2017 1 Table OF Contents Chapter 1. Overview... 3 1.1 Welcome... 3 1.2 Launchpad features... 4 1.3 Alice EduPad hardware features... 4 Chapter 2. Software
Rfid Based Attendance System
 Rfid Based Attendance System Raj Kumar Mistri 1, Kamlesh Kishore 2, Priyanka Nidhi 3, Pushpakumari 4, Vikrantkumar 5 1, 2 Assistant Professor, 3,4,5 B.Tech Scholar 1,2,3,4,5 Dept. of ECE, RTC Institute
Light Emitting Diodes (LEDs)
") Light Emitting Diodes (LEDs) Example: Circuit symbol: Function LEDs emit light when an electric current passes through them. Connecting and soldering LEDs must be connected the correct way round, the diagram
Light Emitting Diodes (LEDs) Example: Circuit symbol: Function LEDs emit light when an electric current passes through them. Connecting and soldering LEDs must be connected the correct way round, the diagram
R20AD 10-bit Universal Decoder R-series Card Module User Manual
 R20AD 10-bit Universal Decoder R-series Card Module User Manual September 29, 2003 P/N 101645-00 Test Equipment Depot - 800.517.8431-99 Washington Street Melrose, MA 02176 - FAX 781.665.0780 - TestEquipmentDepot.com
Measure the value of water flow using water flow sensor and DC water pump 12 V interfacing with Arduino uno
 1 2 Measure the value of water flow using water flow sensor and DC water pump 12 V interfacing with Arduino uno A flow sensor is a device for sensing the rate of fluid flow. Typically a flow sensor is
Assignment #3: Piezo Cake
 Assignment #3: Piezo Cake Computer Science: 7 th Grade 7-CS: Introduction to Computer Science I Background In this assignment, we will learn how to make sounds by pulsing current through a piezo circuit.
Using Sliders with the 4201-B Lighting Controller Application Note June 26, 2008
 Using Sliders with the 4201-B Lighting Controller Application Note June 26, 2008 This application note will discuss ways of using potentiometers (sliders or normal rotary volume control type) with the
Part No./ 型号 : RGB-Controller-101
 Instructions: Thank you for using RGB-Controller-101 of our company. Before installation, please read this manual carefully to ensure fully understand and proper use in order to avoid unnecessary damages
Fig. 1 Analog pins of Arduino Mega
 Laboratory 7 Analog signals processing An analog signals is variable voltage over time and is usually the output of a sensor that monitors the environment. Such a signal can be processed and interpreted
StickIt! VGA Manual. How to install and use your new StickIt! VGA module
 StickIt! VGA Manual How to install and use your new StickIt! VGA module XESS is disclosing this Document and Intellectual Property (hereinafter the Design ) to you for use in the development of designs
Lab #10: Building Output Ports with the 6811
 1 Tiffany Q. Liu April 11, 2011 CSC 270 Lab #10 Lab #10: Building Output Ports with the 6811 Introduction The purpose of this lab was to build a 1-bit as well as a 2-bit output port with the 6811 training
LEVEL CROSSING MODULE FOR LED SIGNALS LCS2
 LEVEL CROSSING MODULE FOR LED SIGNALS LCS2 Fully Flexible Controller for Common-Anode LED signals Automatically detects trains using an infra-red sensor mounted below the track bed Operates attached yellow
LT-300 LED Controller
 LT-300 LED controller manual Page 1 of 11 LT-300 LED Controller V5.00 (Kindly please read through this manual carefully before use) LT-300 LED controller manual Page 2 of 11, Forward, Thanks for choosing
Introduction 1. Digital inputs D6 and D7. Battery connects here (red wire to +V, black wire to 0V )
") Introduction 1 Welcome to the magical world of GENIE! The project board is ideal when you want to add intelligence to other design or electronics projects. Simply wire up your inputs and outputs and away
Introduction 1 Welcome to the magical world of GENIE! The project board is ideal when you want to add intelligence to other design or electronics projects. Simply wire up your inputs and outputs and away
Design and Implementation of Timer, GPIO, and 7-segment Peripherals
 Design and Implementation of Timer, GPIO, and 7-segment Peripherals 1 Module Overview Learn about timers, GPIO and 7-segment display; Design and implement an AHB timer, a GPIO peripheral, and a 7-segment
Experiment (6) 2- to 4 Decoder. Figure 8.1 Block Diagram of 2-to-4 Decoder 0 X X
 2- to 4 Decoder. Figure 8.1 Block Diagram of 2-to-4 Decoder 0 X X") 8. Objectives : Experiment (6) Decoders / Encoders To study the basic operation and design of both decoder and encoder circuits. To describe the concept of active low and active-high logic signals. To
8. Objectives : Experiment (6) Decoders / Encoders To study the basic operation and design of both decoder and encoder circuits. To describe the concept of active low and active-high logic signals. To
SparkFun Inventor's Kit for micro:bit Experiment Guide
 SparkFun Inventor's Kit for micro:bit Experiment Guide Introduction to the SparkFun Inventor's Kit for micro:bit The SparkFun Inventor s Kit for micro:bit Experiment Guide is your map for navigating the
Objectives: Learn how LED displays work Be able to output your name on the display
 Objectives: Learn how LED displays work Be able to output your name on the display By the end of this session: You will know how simple LED displays work and be able to make them give a useful output.
Introduction 1. Green status LED, controlled by output signal ST. Sounder, controlled by output signal Q6. Push switch on input D6
 Introduction 1 Welcome to the GENIE microcontroller system! The activity kit allows you to experiment with a wide variety of inputs and outputs... so why not try reading sensors, controlling lights or
This module senses temperature and humidity. Output: Temperature and humidity display on serial monitor.
 Elegoo 37 Sensor Kit v2.0 Elegoo provides tutorials for each of the sensors in the kit provided by Maryland MESA. Each tutorial focuses on a single sensor and includes basic information about the sensor,
Design and Implementation of an AHB VGA Peripheral
 Design and Implementation of an AHB VGA Peripheral 1 Module Overview Learn about VGA interface; Design and implement an AHB VGA peripheral; Program the peripheral using assembly; Lab Demonstration. System
DMC550 Technical Reference
 DMC550 Technical Reference 2002 DSP Development Systems DMC550 Technical Reference 504815-0001 Rev. B September 2002 SPECTRUM DIGITAL, INC. 12502 Exchange Drive, Suite 440 Stafford, TX. 77477 Tel: 281.494.4505
PHYS 3322 Modern Laboratory Methods I Digital Devices
 PHYS 3322 Modern Laboratory Methods I Digital Devices Purpose This experiment will introduce you to the basic operating principles of digital electronic devices. Background These circuits are called digital
Basic LabVIEW Programming Amit J Nimunkar, Sara Karle, Michele Lorenz, Emily Maslonkowski
 Introduction This lab familiarizes you with the software package LabVIEW from National Instruments for data acquisition and virtual instrumentation. The lab also introduces you to resistors, capacitors,
Giant Digital Letterforms: LEDs and Pixelated Type
 Giant Digital Letterforms: LEDs and Pixelated Type Calliope Gazetas 2450450 The first time that I saw an LED matrix was in the inaugural issue of CRAFT magazine, published in April 2006. This issue contained
LED Array Tutorial. This guide explains how to set up and operate the LED arrays that can be used for your. Internal Structure of LED Array
 LED Array Tutorial This guide explains how to set up and operate the LED arrays that can be used for your final EE 271 project. This tutorial is directed towards the FYM12882AEG 8x8 LED array, but these
Microcontrollers. Outline. Class 4: Timer/Counters. March 28, Timer/Counter Introduction. Timers as a Timebase.
 Microcontrollers Class 4: Timer/Counters March 28, 2011 Outline Timer/Counter Introduction Timers as a Timebase Timers for PWM Outline Timer/Counter Introduction Timers as a Timebase Timers for PWM Outline
COLORtube EQ Controller
 COLORtube EQ LED-EQ COLORtube EQ Controller LED-EQC USER MANUAL 32-band audio spectrum visualizer using LED tubes CHAUVET, 3000 N 29 th Ct, Hollywood, FL 33020 U.S.A (800) 762-1084 (954) 929-1115 FAX (954)
TV Synchronism Generation with PIC Microcontroller
 TV Synchronism Generation with PIC Microcontroller With the widespread conversion of the TV transmission and coding standards, from the early analog (NTSC, PAL, SECAM) systems to the modern digital formats
Studio DMX Decoders. Part numbers: DMX , DMX , DMX
 Studio DMX Decoders 11235 West Bernardo Court, Suite 102 San Diego, CA 92127 888-880-1880 Fax: 707-281-0567 EnvironmentalLights.com Part numbers: DMX-4-5000-3, DMX-4-5000-5, DMX-24-5000 Environmental Lights
Chapter 4: One-Shots, Counters, and Clocks
 Chapter 4: One-Shots, Counters, and Clocks I. The Monostable Multivibrator (One-Shot) The timing pulse is one of the most common elements of laboratory electronics. Pulses can control logical sequences
Digital Circuits 4: Sequential Circuits
 Digital Circuits 4: Sequential Circuits Created by Dave Astels Last updated on 2018-04-20 07:42:42 PM UTC Guide Contents Guide Contents Overview Sequential Circuits Onward Flip-Flops R-S Flip Flop Level
SWITCH: Microcontroller Touch-switch Design & Test (Part 2)
") SWITCH: Microcontroller Touch-switch Design & Test (Part 2) 2 nd Year Electronics Lab IMPERIAL COLLEGE LONDON v2.09 Table of Contents Equipment... 2 Aims... 2 Objectives... 2 Recommended Timetable... 2
SWITCH: Microcontroller Touch-switch Design & Test (Part 2) 2 nd Year Electronics Lab IMPERIAL COLLEGE LONDON v2.09 Table of Contents Equipment... 2 Aims... 2 Objectives... 2 Recommended Timetable... 2
DOGM GRAPHIC SERIES. 128x64, 3.3V available in low quantity! flat: 5.6mm with LED b./l. mounted TECHNICAL DATA ORDERING CODE ACCESSORIES
 Issue 10.2014 DOGM GRAPHIC SERIES 128x64, 3.3V available in low quantity! flat: 5.6mm with LED b./l. mounted EA DOGM128W-6 + EA LED55x46-A EA DOGM128B-6 + EA LED55x46-W EA DOGM128W-6 + EA LED55x46-W TECHNICAL
Introduction 1. Green status LED, controlled by output signal ST
 Introduction 1 Welcome to the magical world of GENIE! The project board is ideal when you want to add intelligence to other design or electronics projects. Simply wire up your inputs and outputs and away
DOGM GRAPHIC SERIES 132x32 DOTS
 DOGM GRAPHIC SERIES 132x32 DOTS 6.2009 flexible display content! EA DOGM132B-5 + EA LED55x31-W TECHNICAL DATA EA DOGM132W-5 + EA LED55x31-A EA DOGM132W-6 + EA LED55x31-W * HIGH-CONTRAST LCD SUPERTWIST
ECE Lab 5. MSI Circuits - Four-Bit Adder/Subtractor with Decimal Output
 ECE 201 - Lab 5 MSI Circuits - Four-Bit Adder/Subtractor with Decimal Output PURPOSE To familiarize students with Medium Scale Integration (MSI) technology, specifically adders. The student should also
16 Universe LED Matrix Panels Instructions
 Congratulations on buying the high performance LED matrix controller. Eight matrix LED panels 16x32 (8 to 1 scan) Four/Two LED panels 32x32 or 32x64 (16 to 1 scan) Full 24 bit color for 16 million colors,
WaveMaker III Gartech Enterprises Inc. 12/17/2012
 WaveMaker III Gartech Enterprises Inc. 12/17/2012 1 Preface: WaveMaker III standalone unit is produced for those desiring a flexible wave form generator. This unit is capable of providing selectable waveform
Data Acquisition Using LabVIEW
 Experiment-0 Data Acquisition Using LabVIEW Introduction The objectives of this experiment are to become acquainted with using computer-conrolled instrumentation for data acquisition. LabVIEW, a program
Informatics Enlightened Station 1 Sunflower
 Efficient Sunbathing For a sunflower, it is essential for survival to gather as much sunlight as possible. That is the reason why sunflowers slowly turn towards the brightest spot in the sky. Fig. 1: Sunflowers
TV Character Generator
 TV Character Generator TV CHARACTER GENERATOR There are many ways to show the results of a microcontroller process in a visual manner, ranging from very simple and cheap, such as lighting an LED, to much
Design and Implementation of SOC VGA Controller Using Spartan-3E FPGA
 Design and Implementation of SOC VGA Controller Using Spartan-3E FPGA 1 ARJUNA RAO UDATHA, 2 B.SUDHAKARA RAO, 3 SUDHAKAR.B. 1 Dept of ECE, PG Scholar, 2 Dept of ECE, Associate Professor, 3 Electronics,
Edge Connector Light Level Detector
 Description This is a simple tutorial demonstrating how to use a Kitronik edge connector breakout with the BBC micro:bit. The tutorial will cover measuring ambient light levels with an LDR and dimming
Laboratory 11. Required Components: Objectives. Introduction. Digital Displays and Logic (modified from lab text by Alciatore)
") Laboratory 11 Digital Displays and Logic (modified from lab text by Alciatore) Required Components: 2x lk resistors 1x 10M resistor 3x 0.1 F capacitor 1x 555 timer 1x 7490 decade counter 1x 7447 BCD to
Laboratory 11 Digital Displays and Logic (modified from lab text by Alciatore) Required Components: 2x lk resistors 1x 10M resistor 3x 0.1 F capacitor 1x 555 timer 1x 7490 decade counter 1x 7447 BCD to
LED PAR 36 USER MANUAL
 LED PAR 36 USER MANUAL 1. Introduction 2. Safety Information 3. Dimensions 4. Main Function 5. Rear Panel Display and Operation 6. Instructions for Manual Programming 7. Master/Slave Control 8. Cable Connection
WiFi Time Provider v1 for Arduino Nixie Clock Operating Instructions & Construction Manual
 WiFi Time Provider v1 for Arduino Nixie Clock Operating Instructions & Construction Manual Document V001c Contact Information If you want to get in contact with us, please email to: nixie@protonmail.ch
DOGM GRAPHIC SERIES 128x64 DOTS
 DOGM GRAPHIC SERIES 128x64 DOTS 27.6.2007 available from 1 pc. off! flat: 5.6mm incl. LED TECHNICAL DATA EA DOGM128W-6 + EA LED55x46-A EA DOGM128B-6 + EA LED55x46-W EA DOGM128W-6 + EA LED55x46-W * HIGH-CONTRAST
LT A LED RGB Controller. User s Manual
 LT -3800-5A LED RGB Controller Manual Page 1 of 10 LT-3800-5A LED RGB Controller User s Manual (Please read this manual carefully before use) LT -3800-5A LED RGB Controller Manual Page 2 of 10, Forward,
10 Zone RGB-W LED Controller
 10 Zone RGBW LED Controller The ARTECTA LED RGB controller Play10 is specifically designed to be used with multiple receivers and also has the possibility to control individually each of the 10 receivers.
EA DOGL128x-6 EA LED68X51-RGB
 Issue 5.2014 EA DOGL128-6 GRAPHIC 128x64 DOTS, 3.3V also available in low quantity! flat: 6.5mm with LED B/L mounted EA DOGL128W-6 + EA LED68x51-W EA DOGL128B-6 + EA LED68x51-W EA DOGL128W-6 + EA LED68x51-A
Device: LDP This document Version: 1.1. Date: July Description: 64x16 1R1G LED Display Panel
 Device: LDP-6416 This document Version: 1.1 Date: July 2010 Description: 64x16 1R1G LED Display Panel Table of Contents Introduction... 3 Nomenclature... 3 Connections... 3 Power... 3 Pinouts... 4 Controlling
Product Specification
 Product Specification Name:RGBW 4 channel controller Model:RF104 I. Summarization RGBW 4 channel controller is a multifunction controller, mainly used for control 4 channel lamps, it supports switch the
Solutions to Embedded System Design Challenges Part II
 Solutions to Embedded System Design Challenges Part II Time-Saving Tips to Improve Productivity In Embedded System Design, Validation and Debug Hi, my name is Mike Juliana. Welcome to today s elearning.
Lab #6: Combinational Circuits Design
 Lab #6: Combinational Circuits Design PURPOSE: The purpose of this laboratory assignment is to investigate the design of combinational circuits using SSI circuits. The combinational circuits being implemented
7 SEGMENT LED DISPLAY KIT
 ESSENTIAL INFORMATION BUILD INSTRUCTIONS CHECKING YOUR PCB & FAULT-FINDING MECHANICAL DETAILS HOW THE KIT WORKS CREATE YOUR OWN SCORE BOARD WITH THIS 7 SEGMENT LED DISPLAY KIT Version 2.0 Which pages of
Electronic Panel Meters DIGEM Preference Program Process control, automation & laboratory uses Class 0.01 to 1 Current, Voltage, Frequency,
 Electronic Panel Meters DIGEM Preference Program Process control, automation & laboratory uses Class 0.01 to 1 Current, Voltage, Frequency, Temperature, RPM, Pressure, etc. LED/ LCD displays 1999 to 99999
Product Specifications
 Product Specifications Name: 24CH DMX512 Decoder Model: KL-DMXTCON-24CH-DC12-24V Summarization The decoder adopt the advanced micro-computer control technology and converted the DMX512 digital signal widely
W0EB/W2CTX DSP Audio Filter Operating Manual V1.12
 W0EB/W2CTX DSP Audio Filter Operating Manual V1.12 Manual and photographs Copyright W0EB/W2CTX, March 13, 2019. This document may be freely copied and distributed so long as no changes are made and the
ELECTRONIC GAME KIT TEACHING RESOURCES. Version 2.0 BUILD YOUR OWN MEMORY & REACTIONS
 TEACHING RESOURCES SCHEMES OF WORK DEVELOPING A SPECIFICATION COMPONENT FACTSHEETS HOW TO SOLDER GUIDE BUILD YOUR OWN MEMORY & REACTIONS ELECTRONIC GAME KIT Version 2.0 Index of Sheets TEACHING RESOURCES
Lecture 23 Design for Testability (DFT): Full-Scan
: Full-Scan") Lecture 23 Design for Testability (DFT): Full-Scan (Lecture 19alt in the Alternative Sequence) Definition Ad-hoc methods Scan design Design rules Scan register Scan flip-flops Scan test sequences Overheads
Lecture 23 Design for Testability (DFT): Full-Scan (Lecture 19alt in the Alternative Sequence) Definition Ad-hoc methods Scan design Design rules Scan register Scan flip-flops Scan test sequences Overheads
C2 +5V. (14) Vdd (+5 Vdc) (13) OSC1/A7 1.2K (12) 1.2K (11) 1.2K (10) U1 16F628 16F628A 1.2K (1) A2 1.2K (8) 1.2K (7) 1.2K. (Gnd) Vss (5) (6) 1.
 Vdd (+5 Vdc) (13) OSC1/A7 1.2K (12) 1.2K (11) 1.2K (10) U1 16F628 16F628A 1.2K (1) A2 1.2K (8) 1.2K (7) 1.2K. (Gnd) Vss (5) (6) 1.") CN1 Power Sw. SW1 CN2 C1 VR1 78L05 or LP2950ACZ- 5.0 +5V.1uf.1uf 9V Battery Fast Scan (Open) Slow Scan (Closed) Activity LED Reserved for LCD Serial Display R1 10K R2 10K SW2 CN3 LD1 R3 (16) (15) OS/A6
CN1 Power Sw. SW1 CN2 C1 VR1 78L05 or LP2950ACZ- 5.0 +5V.1uf.1uf 9V Battery Fast Scan (Open) Slow Scan (Closed) Activity LED Reserved for LCD Serial Display R1 10K R2 10K SW2 CN3 LD1 R3 (16) (15) OS/A6
EE 367 Lab Part 1: Sequential Logic
 EE367: Introduction to Microprocessors Section 1.0 EE 367 Lab Part 1: Sequential Logic Contents 1 Preface 1 1.1 Things you need to do before arriving in the Laboratory............... 2 1.2 Summary of material
Published in A R DIGITECH
 Design of propeller clock by using 8051 Microcontroller Ahmed H. Al-Saadi*1 *1 (B.Sc. of Computer Engineering in Al Hussein University College of Engineering, Iraq) ah9@outlook.com*1 Abstract The propeller
Lab Using The Multimeter And The Trainer
 Lab 2 Sierra College CIE-01 Jim Weir 530.272.2203 jweir43@gmail.com www.rstengineering.com/sierra 1. Using The Multimeter And The Trainer a. Plug the trainer power cord into a standard wall outlet (110
Self-Playing Xylophone
 Self-Playing Xylophone Matt McKinney, Electrical Engineering Project Advisor: Dr. Tony Richardson April 1, 2018 Evansville, Indiana Acknowledgements I would like to thank Jeff Cron, Dr. Howe, and Dr. Richardson