All-in-One Studio Kit. User Manual
|
|
|
- Shanna Chapman
- 6 years ago
- Views:
Transcription

1 All-in-One Studio Kit User Manual 1
2 Table of Contents Welcome to Livestream Why the All-in-One Studio Kit? Supplies Included with the Kit Other Supplies Needed to Use the Kit What is Livestream Studio What is Mevo? Assembling the Kit Prepare Your Setup Location Add Power Extension Cord and Power Strip Connect the PC Devices to the mini PC Add Surface Go and Headphones Set Up the Audio Mixer and Wireless Microphone Kit Set Up the Portal Router Add ipad to your Setup Assemble the Three Mevo Cameras Configure Windows, Livestream Studio, and Mevo Cameras Start up the mini PC Launch and Configure Livestream Studio Power on the Mevo Boost and Mevo Camera Connect the Mevo Cameras to Livestream Studio Configuring Audio in Livestream Studio Basics of Livestream Studio Software Go Live to Livestream How to Live Edit Your Mevo Shots
3 Introduction to Multi-View and Preview/Program Switching Introduction to Graphics Overlays Importing Videos into the Media Playback Module Media Playback Controls and Options Creating, Importing, and Exporting Projects Livestream Studio Advanced Features Add Windows or Mac Computers as Remote Camera Sources Bring in a Mac Computer as a Source Adding a Remote Live Interview Building a Picture-in-Picture Graphic Setting Auxiliary Outputs Using Chroma Key Importing Animated Graphics Using the Tie Controls Basic Video Replay while Recording Exporting Clips from Livestream Studio Livestream Studio Web Control NewTek NDI Integration in Livestream Studio Setting Up Livestream Studio as an RTMP Server Additional Information Supported Video Formats in Livestream Studio Support Contact Information Hardware Addendum

4 Welcome to Livestream Welcome! You are now part of the over 40,000 organizations, from local communities to global brands, that stream over 10 million events a year using Livestream products. We wanted to take a moment to say thank you for joining our global community. This guide will help you get your kit up and running so you can start streaming and sharing your events with the world. We can t wait to see what you produce with your Livestream 3-Camera Kit!

5 Why the All-in-One Studio Kit? Livestream has been building professional-level hardware and software live video products for 10 years. In an effort to give customers the ability to produce high-quality live events on a budget, Livestream created Mevo, the live event camera, in Mevo gives customers the power to direct their stories with built-in live editing features alongside streaming capabilities not found in other cameras. While Mevo has helped bridge the quality gap between consumer-level and professional-level event productions, Livestream identified a middle level that still called for a better solution: customers who needed more advanced features not offered with entry-level products, but at a budget-friendly cost. We realized that by combining the Mevo camera with our live production switching software, Livestream Studio, and running them on cost-efficient hardware, Livestream could provide a truly complete end-to-end streaming solution at a fraction of the price of a full multicamera live production. Livestream s mission is to create products that enable anyone to share experiences through live video, unlocking a world where every event is available online. With this kit, you re now helping to bring this vision to life. Happy streaming! 5


6 Supplies Included with the Kit Product brands and models may vary. You receive your kit in two separate parts. The first part is a box that contains the monitor. Due to its size, we had to keep the monitor separate from the rest of the kit. The extra width of the monitor will allow you to use both Livestream Studio and monitor your stream side-by-side. A power cable and an HDMI cable are included with the monitor. Next is the Pelican case, which includes the rest of your kit. It weighs about 70 pounds in total but can be wheeled around easily. Open the case to reveal three layers of items. The first layer contains: 1. Mevo Boosts (3) 2. Mevo cameras (3) 3. Portal Wi-Fi router (1) 4. Mouse pad (1) 5. Intel NUC NUC6i&KYK mini PCHTPC (1) 6. ipad mini 2
 (1) 5. Mouse (1) 6. USB-A to USB-B cables (2) 7. 5 Ethernet cables (2) 8. Apple Lightning to USB Camera adapter (1) 9. Apple USB Ethernet adapter (1) 10.")
7 Lift the foam layer up and out of the Pelican case to reveal the second layer. This layer contains: 1. Audio Mixer (1) 2. Intel NUC power supply (1) 3. Livestream Studio Surface Go (1) 4. Livestream Keyboard (under Surface Go) (1) 5. Mouse (1) 6. USB-A to USB-B cables (2) 7. 5 Ethernet cables (2) 8. Apple Lightning to USB Camera adapter (1) 9. Apple USB Ethernet adapter (1) 10. Wireless Microphone Kit (1) 11. Swivel heads (3 - under Wireless Microphone Kit) 12. Noise Isolating Headphones (1) 13. Router power supply (1) 14. Mevo Boost chargers (3) 15. Tablet Stand (1) 16. Pack of 24 AA batteries (1) 17. ipad charging block and 6 nylon charging cable (1 + 1) 18. Gaffer tape, 2 x 25yd (1) 7

 3.")
8 Lift this foam layer to reveal the rest of the kit s contents. This layer contains: power extension cord (1) 2. 7-outlet surge protector power strip (1) 3. Microphone stands (4) Ethernet cables (2) Ethernet cables (2)
9 Other Supplies Needed to Use the Kit While this kit and your Livestream subscription provide almost everything you need to stream your event, there are a few items that you will need to supply yourself in order to produce your event. Table and Chairs You need a place to set everything up and a place to sit while operating the kit. Even a standard folding table and chairs will suffice for your kit setup. Power This may seem obvious, but it does play an enormous role in where you choose to set up your equipment, especially if you intend to travel from venue to venue. Take note of where the power outlets are and determine if you will need additional extension cords or power strips for different locations. Internet Connection While the kit does include a router to put all of the included equipment on the same access point, your event location needs to have an Internet connection to connect it in the first place (e.g., a modem from your local Internet service provider, or ISP). Our recommendations for setting up your local Internet network for streaming are the following: The network should be dedicated solely to streaming. In other words, no other computers or devices should be using the same Internet connection as your kit. The upload speed on your network should be a minimum of 10Mbps. You will need to arrange this with your ISP. Test your Internet connection at If you are streaming from a location that tends to have firewalls and extra security configurations, such as a school, corporation, or hotel, you or your IT administrator should ensure that the following firewall ports are open to incoming and outgoing communication on your network: TCP 1935 (RTMP) TCP 80 (HTTP) TCP 443 (HTTPS) UDP 53 (DNS) Once have your modem from your ISP set up, make sure you have an Ethernet cable available to connect the modem to the Portal router in your kit. Apple ID When you first turn on the ipad, you will be prompted to log in to an Apple icloud account. Be sure to create an Apple ID at if you do not already have one. 9

10 What is Livestream Studio? Livestream Studio is a live video production switcher that incorporates many elements of a professional live multi-camera production into one Windows-based program. Basic features of Livestream Studio include: Up to 25 camera inputs Up to 10 remote cameras Three graphics overlay tracks Two media bins Built-in audio mixer Live video output Basic video replay Chroma key Up to four high-resolution ISO recordings Stream to Livestream and other streaming providers Plus much more!

11 What is Mevo? Mevo is the pocket-sized live event camera that lets you edit while you capture video. While a single Mevo can be used as a stand-alone product, the three Mevo cameras that came with your kit can be integrated into Livestream Studio as remote camera sources that you can switch between. 11
12
13 Assembling the Kit 13

14 Prepare Your Setup Location First, make sure your setup location has everything you need, as discussed in the previous chapter. The order in which you assemble the items in your kit is at your discretion. This chapter goes through the kit setup in the order we recommend, but there are many correct ways to put your kit together. Set Up a Table The kit will take up about 5-6 feet of your table s length. Most folding tables or desks will provide enough space for your kit setup. Below is an example of what your final table setup may look like. Try to be near your power and Internet sources! This will make your setup simpler and quicker, reducing the need to run cables across long distances, which could be a safety hazard.

15 Add Power Extension Cord and Power Strip As you go through the setup, consider labeling each piece of equipment, particularly the various power cables. This will allow you to determine quickly what each item is every time you assemble your kit. Remove the power extension cord and the power strip from the bottom layer of the Pelican case. Plug the power cord into a power outlet and extend it so it reaches your table. Then, plug the power strip into one of the three outlets available on the extension cord. Make sure you turn on the power strip by pressing the power switch; the switch will light up when it is turned on. The power cord included is 10 feet long. If your table is farther away from your power outlet, you will either need to move your table closer or use longer extension cords. You now have nine outlets available at your disposal. 15


16 Connect the PC Devices to the mini PC Once power is available, the next step is to put together the PC. Set up the monitor Place the monitor on the table. Connect the monitor power cable to the DC-IN input on the back of the monitor. Plug the other end of the cable into one of the available power outlets. Connect the monitor to the Intel NUC mini PC Take the Intel NUC mini PC out of the top layer of the Pelican case. Place it next to the base of the monitor. The power source for the mini PC is in the second layer of the kit, in two parts. Connect the AC cable to the matching plug on the block. Connect the cable to the AC port on the back of the mini PC; plug the other end into one of the available power outlets. Use the included HDMI cable to connect the monitor to the mini PC. Plug one end into the HDMI port on the back of the mini PC, and plug the other end into the HDMI IN 1 input on the back of the monitor.


17 Add the keyboard, mouse, and mouse pad. To round out the PC setup, take the Livestream keyboard out of the middle layer of the kit. Connect it to one of the USB ports on the mini PC (there are two in the front and four in the back). 17

18 The included mouse pad can be found in the top layer; The mouse is in the middle layer of the kit. Plug the mouse into the USB port on the upper right side of the keyboard (below the F19 key).

19 Add Surface Go and Headphones Once the PC items are assembled, you can start adding the production elements in your kit. Connect the Studio Surface Go The Studio Surface Go is a compact switching accessory that can control basic functions of the Livestream Studio software, such as switching between cameras and graphics. You can find the Surface Go in the middle layer of the kit, along with the USB cable used to connect it. Plug the USB-B end into the back of the Surface Go and the USB-A end into any of the available USB ports on the mini PC. 19


20 At this point, your setup should resemble this. Plug in headphones The headphones can be found in the middle layer of the kit. Plug them into the headphone jack on the front of the mini PC.


21 Set Up the Audio Mixer and Wireless Microphone Kit Good, clear audio is essential to any video production, particularly live events. While there are many ways to bring audio into your setup, this kit provides a simple yet flexible way to meet this need. Set up the wireless microphone kit The wireless microphone kit can be found in two parts in the middle layer of the kit. Inside the leather pouch are the smaller contents of the microphone kit: 1. A stick microphone 2. A microphone clip 3. A 1/4 audio adapter 4. Wireless antennas (2) 5. An XLR cable 6. A wireless receiver 21


22 First, connect the two antennas to the back of the wireless receiver by lining up the prong on the receiver s connector to the gap on each antenna s connector, and turning it until it is secure. Fold the antennas up for optimum performance. The power adapter can be found in the kit s middle layer. Plug it into the back of the audio receiver; plug the other end into an available power outlet.


23 Connect the audio mixer to the mini PC To help save surface space, you can place the audio mixer on top of the audio receiver. There is another USB-A to USB-B cable in the middle layer of the kit. Connect the USB-B end to the back of the audio mixer. Connect the other end to a USB port on the mini PC. 23


24 Connect the microphone receiver to the audio mixer Plug the female end of the short XLR cable into the MIC OUT XLR port on the back of the wireless receiver. Plug the other end of the cable into one of the mic inputs on the audio mixer.


25 Set up the microphone There are four microphone stands in the bottom layer of the kit. One of them is for your microphone. To set it up, start by turning the lowest knob counter-clockwise to loosen it. This will allow you to extend and lower the legs of the microphone stand. Turn the same knob clockwise to tighten it and set it down on the floor so that it stands on its own. The other two knobs on the microphone stand allow you to adjust the height. The best practice is to loosen the middle knob and raise that section first; then you can loosen and raise the top section to your desired height. 25


26 Screw the microphone clip on top of the microphone stand. Either slide or push the microphone into the clip so that it is securely mounted on the stand. Be sure to turn the microphone on before you use it. Simply press the power button (above Mute) until the green LED turns on. The microphone and wireless receiver are preconfigured to be on the same channel, so you do not need to do any further setup with them.

27 Set Up the Portal Router Now that the mini PC is set up and ready to bring in a quality audio source, the next step is to connect the PC to the Internet. You can find the white Portal router in the top layer of the kit. This will allow you to put all of your connected devices on the same Internet access point, which is crucial for connecting your Mevo cameras to Livestream Studio. We strongly recommend using the included router when setting up your kit.! The network credentials for your Portal router have been preconfigured as follows: Name: LS-3CamKit-# Password: streamnow 27


28 Connect the router to power You can find the router s power cable in the middle layer of the kit. Connect it to the DC-IN port on the back of the router; plug the other end into a power outlet. You will notice that the o in Portal will light up in red. Connect the router to the Internet As covered in the Introduction, you need to supply your own Internet connection from a local ISP, just as you would if you were setting up a router for any home network. Take an Ethernet cable from your modem or switch and plug it into the WAN port on the Portal router. After a moment, the o in Portal will turn green, indicating it is connected to the Internet.


29 Connect the mini PC to the router Your kit came with six Ethernet cables: two 10, two 50, and two 100 cables. Since the router and the PC should be close to each other, we recommend using one of the 10 cables for this purpose; the cables can be found in the middle layer of the kit. Plug one end of the Ethernet cable into one of the four Ethernet ports on the router. Plug the other end of the Ethernet cable into the Ethernet port on the back of the mini PC. 29
30


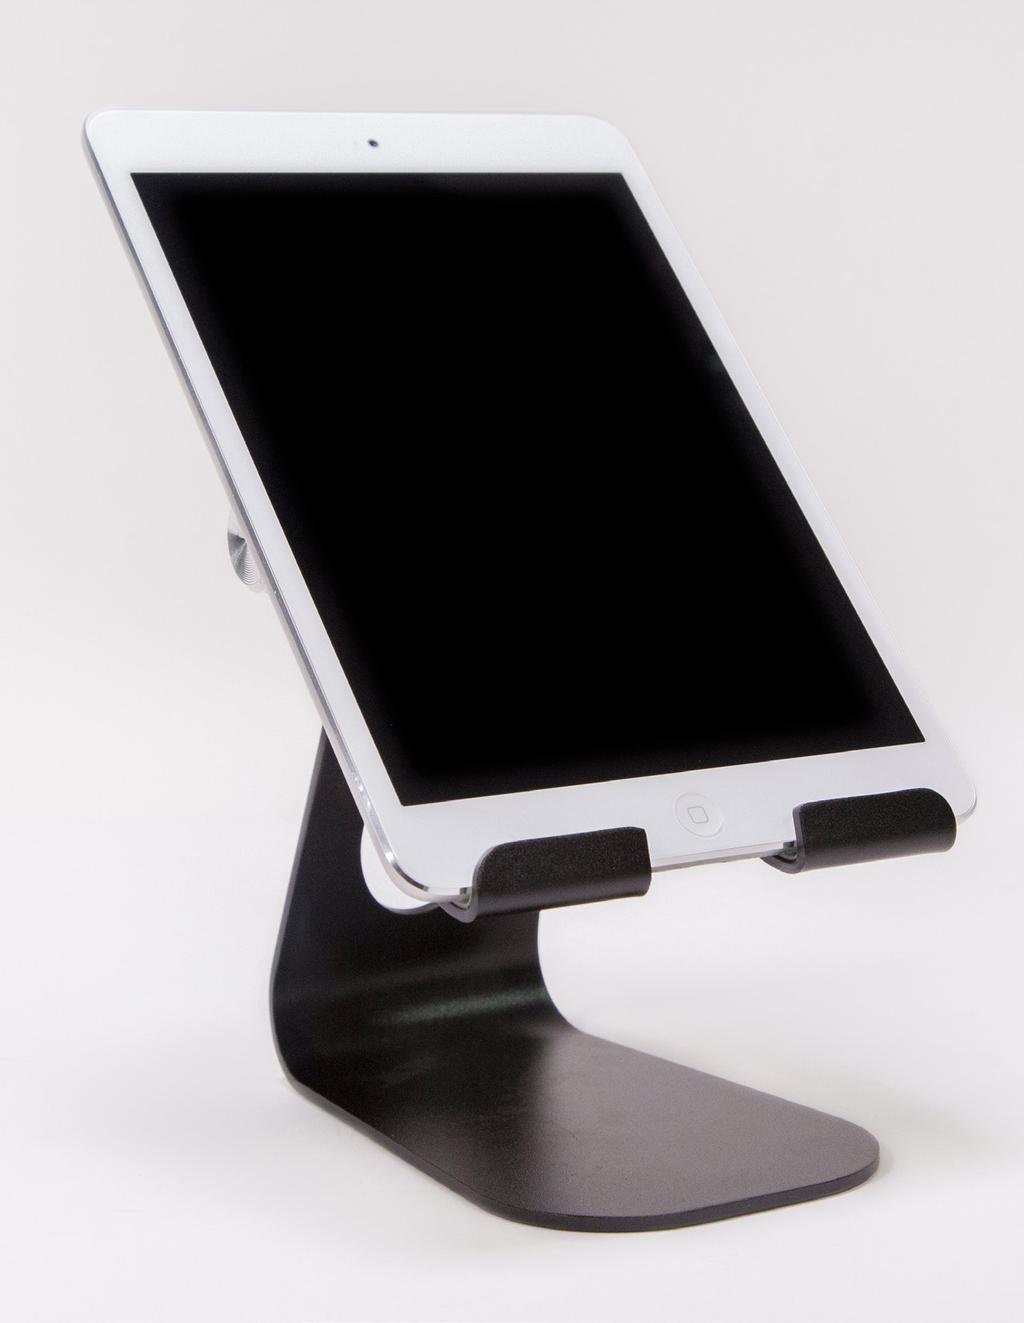
31 Add ipad to your Setup The purpose of the ipad in this kit is to configure and control the three Mevo cameras. Connect ipad to Ethernet A foldable tablet stand is in the middle layer of the kit. Expand it and place it on your table. Place the ipad mini 2, found in the top layer of the kit, on the tablet stand. Be sure to remove the protective plastic from the ipad. The middle layer of the kit has two Apple adapters: a lightning- USB camera adapter and a USB-Ethernet adapter. Start by plugging the Ethernet adapter into the USB port on the lightning-usb camera adapter. Plug the lightning end of the adapter into the lightning port on the ipad. 31
 and plug it into the Ethernet adapter. Plug the other end into the Portal router.")


32 The back of the tablet stand has a hole through which cables can be run. Guide the Ethernet adapter through the hole. This will help with keeping your setup organized. Take another Ethernet cable from the kit (in this example, we used the other 10 cable from the middle layer) and plug it into the Ethernet adapter. Plug the other end into the Portal router. This gives your ipad mini an Ethernet connection, which will make its use more reliable in later steps. You can choose to omit the Ethernet connection and connect the ipad to Wi-Fi instead. Because the ipad is used to configure and control your cameras over the network, we recommend using this Ethernet workflow for a more stable connection. Connect ipad to power The charging block and cable for the ipad are in the middle layer of the kit. Plug the USB end of the cable into the charging block. Be sure to fold out the prongs on the charging block. Plug the charging block into one of the available outlets. Run the cable through the hole in the tablet stand and connect it to the lightning port on the ipad camera adapter. Now your ipad can be used without worrying about battery levels or Wi-Fi signal strength.


33 Assemble the Three Mevo Cameras Now it s time to put together your cameras. Attach the Mevo, Mevo Boost, and microphone stand Start with one of the three remaining microphone stands from the bottom layer of the kit. Use the knobs to extend it as desired. In the middle layer of the kit are three swivel heads. These are optional add-ons to the setup that allow more flexibility for each shot. Take one swivel head and screw it on top of the microphone stand. 33

 and note the name of each camera.")

34 Now, take a Mevo camera. You may notice it already has a mount attached at the bottom. This needs to be removed in order to attach the Mevo to a Mevo Boost. The back side of the camera has a lock and two white indicator tabs. Turn the bottom mount counter-clockwise so that the two white tabs line up. You can now remove the Mevo from the mount. Tip: Before moving forward, check the bottom of your Mevo cameras for their names (Mevo-#####) and note the name of each camera. This will help you identify the different cameras in later steps. Set the mount aside and take a Mevo Boost from the kit. Place the Mevo on top of the Mevo Boost. Turn the outer ring lock clockwise so that the white bar on the back of the Mevo Boost lines up with the red padlock. This will secure the Mevo to the Mevo Boost. Screw the Mevo Boost on top of the swivel head until it is secure.


35 Turn the knob on the side of the swivel head counter-clockwise to adjust the angle of the Mevo s shot as desired; turn it back to tighten it. If you choose not to use the swivel head, you can connect the Mevo Boost to the microphone stand directly. This will require you to remove the adapter from the bottom of the Boost. Use a flathead screwdriver or coin to unscrew the adapter, and then screw the Boost onto the microphone stand. 35


36 Connect the Mevo Boost to the Portal router One of the major benefits of the Mevo Boost is its ability to connect your Mevo camera to the Internet via Ethernet. While these steps are not required in order to use your Mevo cameras, doing so will make the cameras connectivity to Livestream Studio much more stable. To do so, take one of the remaining Ethernet cables from the bottom layer of the kit. Lift the flap on the back of the Mevo Boost and plug one end of the cable into the Ethernet port. Plug the other end into one of the remaining Ethernet ports on the back of the Portal router.


37 Charge the Mevo Boosts Before every event, you should ensure your Mevo Boosts are fully charged or have access to a power outlet during the event. Mevo Boosts have approximately 10 hours of battery life. There are three Mevo chargers, each with a USB cable, in the middle layer of the kit. Take one charger and plug the micro-usb end into the back of the Mevo Boost, underneath the flap. Plug the other end into a power source. Mevo Boost will start charging automatically. Mevo Boost can charge relatively quickly compared to how long its battery lasts; to reach 80%, allow approximately four hours to charge. Charge five to six hours to reach 100%. Repeat all the above steps for the other two cameras. Please note that one camera will need to remain wireless due to the Portal router s having only four Ethernet ports. Connecting your cameras to the router s network over both Ethernet and Wi-Fi are covered in the Connect the Mevo Cameras to Livestream Studio section. 37

38 You are now ready to set up and connect the Livestream Studio software and the three Mevo cameras.
39 Configure Windows, Livestream Studio, and Mevo Cameras 39


40 Start up the mini PC With your all of your kit s equipment assembled, it s now time to start using it. Turn on the PC The power button for the mini PC is on the front left side of the unit. Press it once to turn on the computer. Your monitor will automatically power on once it detects a signal. After a moment, Windows will finish starting up and you can start using the PC. The four recommended Windows configurations outlined below have been preconfigured on your mini PC, but we have provided the steps to set them up in case you ever need to reset Windows or have otherwise changed your settings. Fix Font Sizing Issues in Windows 10 Scaling Windows font to 100% will make it easier to use Livestream Studio with Windows 10. Open the Start Menu and navigate to Windows Settings; Select System.

.")
41 Select Display and drag the scale all the way to the left so it reads 100%. Then, click Apply to save the settings, which will take effect immediately. Force the mini PC to Run the Maximum Number of Cores To optimize your computer s performance when using Livestream Studio, we recommend configuring your system to use the maximum number of cores at all times (in this case, eight). Open the Windows Start Menu and type Run, then open the Run desktop app. Type msconfig into the text field, then click OK. 41
, then click OK. Apply the settings, then click OK.")

42 This window will open up. Navigate to the Boot tab. Click Advanced options... Check Number of processors to enable the dropdown menu. Select the highest number of processors your system has (in this case, eight), then click OK. Apply the settings, then click OK. You will be advised that you may need to restart your computer to apply your settings. We recommend doing so before launching Studio to ensure that the settings have taken effect. Recommended Windows Power Settings Optimizing your power settings helps reduce CPU usage when using Livestream Studio. Go to the Start Menu and navigate to Settings. Select System. Select Power & sleep from the navigation menu on the left side.
43 Click Additional power settings. Select High performance, then click Change plan settings. Under Turn off the display and Put the computer to sleep, select Never. Then, click Save changes. 43


44 Prevent Windows Automatic Updates The last thing you want right before or during an event is to be forced to update Windows, which could postpone your setup or interrupt your stream. While there is no way to turn off updates entirely, you can configure Windows settings to run updates only at certain times. Open the Start Menu and click the gearwheel to open Settings. Select Update & security. Under the Windows Update tab, click Change active hours. You can choose a 12-hour time range during which Windows will not automatically update. If an update becomes available during that time frame, a notification will appear, letting you know that your computer will restart outside of active hours.

45 If you do see the notification and feel your event is going to run longer, you can select Restart Options and tell Windows when to restart your computer to install updates. Launch and Configure Livestream Studio With Windows ready to go, the next step is to launch the Livestream Studio software. Studio has been preinstalled on your mini PC. The Livestream Studio launcher is already on your desktop. Double-click the icon to start the software. All of the settings below can be found by clicking the small gearwheel icon in the upper right corner of Livestream Studio. The settings outlined below have been preconfigured in Livestream Studio. We strongly recommend using these settings with the kit for the best experience and video quality. 45


 to compensate for the latency experienced by wireless sources (in this case, Mevo) and")

46 Configure your project format First, under Settings: Project Format, you should select Low CPU Performance. Choose 720p30 as your Project Format. This will match the Mevo s video resolution and frame rate, thus increasing the quality while reducing CPU usage that would otherwise be used to resize the Mevo video feed. Synchronize your cameras To avoid sync issues, it s best that you set your direct input sources to be delayed by one second. Studio has an easy setting to do this. Click the gearwheel in the upper right corner of Studio, then click the Advanced tab. Navigate to the Remote Inputs Synchronization setting and select Delay All Inputs by 1 Second and Synchronize. This will allow your wired inputs (e.g., your audio mixer) to compensate for the latency experienced by wireless sources (in this case, Mevo) and sync them together. Enable hardware encoding Hardware encoding is a setting that moves the video encoding to a dedicated GPU, greatly reducing your CPU usage while streaming. The NUC mini PC included in your kit has an Intel processor that includes Quick Sync Video, which supports hardware encoding. Navigate to the Streaming menu in Settings. You will find Hardware encoding at the top of the menu. Make sure it is checked, then save your settings.


47 Power on the Mevo Boost and Mevo Camera To turn on the Mevo Boost, press and hold the button on the back of the unit under the outer ring lock until the white LEDs start rotating on and off from left to right. You will know that the Mevo Boost is on when the LEDs stay solid for a moment and the LED ring by the Mevo s battery indicator lights up, showing that it is charging. To power on your Mevo camera, simply press and hold the power button on the top of the camera for a moment. You will hear a pair of pings and the LED ring will show a white light rotating clockwise, after which you can remove your finger. After a moment, the Mevo will complete its startup; you should see a pulsing blue LED over the Wi-Fi indicator on the back of the Mevo. Connect the Mevo Cameras to Livestream Studio Once the Mevo cameras and Boosts are turned on, the next step is to connect each of them to the Mevo app using the ipad provided. Doing so will allow you to continue to configure and control each camera. Set up the ipad and Download the Mevo App Power on the ipad by holding down the lock button on its side. Follow the on-screen prompts to get your ipad up and running, such as setting up a passcode and logging into an icloud account. 47

48 Once you are on the home screen, navigate to the App Store, tap the Search icon, and type in Mevo. The first result should be the official Mevo app. Tap Get to download it. You will need to enter your icloud password in order to download the app. Before continuing, make sure that both Wi-Fi and Bluetooth are enabled on the ipad. This is required in order to detect and connect to the Mevo cameras. For the initial connection, make sure all of your cameras are within 5 15 feet of your ipad. This is to ensure that the Bluetooth communication between devices is reliable. Once they are connected, you may move your cameras anywhere, as long as they are still connected to the Portal router. Launch the Mevo app on the ipad. The app will detect the three cameras. You can only see one camera at a time; swipe left to see the other cameras.


49 Connect Mevo to Livestream Studio over Ethernet In the app, navigate to one of the cameras that are connected via Ethernet. The connection card will direct you to either Configure iphone or Configure Mevo. Tap the blue Configure iphone button and enter the ios Wi-Fi menu. The ipad will search for nearby networks. After a moment, you should see three networks named Mevo-#####. Tap the one that matches the ID of the Mevo with which you are currently working. After a moment, a blue checkmark will appear to its left, indicating the ipad is now connected to the Mevo s wireless hotspot. The No Internet Connection message is normal because the Mevo hotspot does not actually produce an Internet connection. Navigate back to the Mevo app. The app will take a moment to update the connection status. You will then see the card update with a blue Connect button. Note: There may be a short delay for your app to update when changing your Mevo connection settings. Please wait a few moments after making changes to your Mevo connectivity. 49
 in the lower right corner.")
, your Mevo will automatically appear as an option.")

50 Once you tap Connect, the blue light will spin around the top of the camera, then stay solid blue at the front, above the lens. On the ipad, the connection card will spin and reveal your Mevo camera s image. Tap the More Options icon (three dots) in the lower right corner. Next, tap the gearwheel to open the Settings menu. Check the upper left side of the menu to the left of the battery indicator. It should indicate that you are connected via Ethernet. Next, go to Livestream Studio and navigate to one of the Remote Cam tabs. Because your Mevo and Studio are connected to the same access point (i.e., the Portal router), your Mevo will automatically appear as an option. Click it to activate it in Studio. Once one Mevo is connected to Livestream Studio, you no longer need to have it open in the ipad. In the app, go back to the Settings menu; this time, tap Disconnect. This will bring you back to the connection card screen and allow you to connect and control other Mevo cameras by swiping left or right. Your Mevo will still be connected to Livestream Studio. For cameras that are connected via Ethernet, follow the same steps as above.

.")


51 Connect Mevo to Livestream Studio over Wi-Fi If any of your Mevo cameras are not connected via Ethernet, you can still bring them into Livestream Studio by connecting to the Portal router s Wi-Fi network. Navigate to the wireless camera in the Mevo app s connection card screen. On the bottom right of the card, tap the Configure Mevo button. Tap Show Wi-Fi Networks (Disable Mevo Hotspot). You will see a loading wheel for a moment, and then the following screen. A network named LS-3CamKit-# will be included in this list. That is the name of the network coming from your Portal router. Select that network. If your networks do not appear, you can scroll down and tap Refresh Network List to refresh the list. Tap the LS-3CamKit-# network. You will be prompted to enter a password. The password is streamnow. Then, tap Join. After a moment, your Mevo will be connected to your Portal router. This will also be indicated by the LED ring showing a solid green light above the bars icon on the back of the camera and a blue checkmark next to the Wi-Fi network name. 51

52 Tap Done in the upper right corner. The Mevo card will update its status again for a moment. It will soon will give you the option to connect to your Mevo. Tap Connect. You are now communicating with your Mevo via your Wi-Fi network and your Mevo has wirelessly connected to the Portal router. In Livestream Studio, navigate to one of your Remote Cam modules. This Mevo camera should now appear in the list of remote camera options. Click it to activate it in Studio.


 will have a corresponding audio source that you can monitor and adjust.")

53 Configuring Audio in Livestream Studio With all three Mevo cameras recognized by Livestream Studio, the next step is to make sure your microphone and audio mixer are both recognized and configured properly to ensure high-quality audio. Check Settings for the Mixer Livestream Studio s built-in audio mixer can be found by clicking the Audio Mixer tab in the lower left corner of the interface. Each source, including your cameras and any elements you add later (video clips, graphics, etc.) will have a corresponding audio source that you can monitor and adjust. Click the gearwheel button in the upper right corner of Livestream Studio to enter the Settings menu. Navigate to the Audio In tab, then press the + button at the bottom of the window to add an audio source. Click the dropdown menu under Audio Source to select the audio mixer. If the audio mixer appears to already be selected but shows (Inactive) in its name, reselect it from the dropdown menu. This should activate it in Livestream Studio. 53

.")

54 Your audio mixer will be given a default name such as AUDIO1. If you wish to have it referred to as something else, click the name and type in a new name for it. Click Save in settings. You should now see your audio source included with your other sources in the Audio Mixer. Configure Livestream Studio s Audio Mixer With the mixer added to Livestream Studio, the next step is to make sure sound is going from the wireless microphone into Livestream Studio. First, check the input on the mixer into which you plugged the XLR cable from the wireless audio receiver (in this example, Input 1). Turn the audio gain knob that corresponds with that input clockwise; we recommend selecting the range. Test the microphone by speaking into it, tapping it, or otherwise sending noise into it. Audio levels appear on the wireless receiver s display, and the LED in the mixer flashes when it detects sound. This means that the microphone, the wireless receiver, and the mixer are all functioning normally.


55 Continue to test your microphone this way and check Livestream Studio. Under the Audio Mixer tab, navigate to your AUDIO1 source. Green and yellow levels also appear here, indicating that your microphone s audio is reaching Livestream Studio. The more yellow levels appear and the higher they go, the louder your audio is. To adjust the levels of AUDIO1 or any audio source, click and drag the corresponding fader. If audio levels are too high, the mixer s OVR meter for any overmodulating source will blink red. Lower your audio in either Livestream Studio or the mixer to maintain ideal levels. If you want to hear your microphone s audio in both audio channels, navigate to the Input Settings tab and select the Audio tab on the left side. Your microphone s audio may only be coming in through one channel on one input. In this example, audio is coming in through Input 1, but only through the left channel. Click R to enable the right channel. If you wish to plug in a second audio source, such as a music source or another microphone, you can simply repeat these steps using Input 2. As an additional best practice, navigate to the Delay menu under the Input Settings module. 55


56 Because the mixer is directly connected to the PC, whereas your cameras are connected over a LAN, it is possible you may experience audio and video being out of sync. The Delay menu will allow you to delay your audio coming into Livestream Studio by as many as two seconds, in addition to the one second of delay configured in the Launch and Configure Livestream Studio section of this manual. Livestream s testing has shown that adding 100 milliseconds of delay by clicking the +100 button on the far right of the scale will typically resolve most sync issues. As a best practice, always test for audio/video sync before your event begins by having someone speak into the microphone while looking at the camera while another person listens via the headphones and watches in the Livestream Studio multi-view. Go back to the Audio Mixer tab. Audio levels are now coming into AUDIO1 on both channels. With the kit s included equipment, the best practice is to link all three of your Mevo cameras to the mixer to allow for seamless transitioning between the three cameras while maintaining consistent audio. Click one of your Remote Cam sources within the Audio Mixer. You will notice you have the option to link to any other input source. Select Link to AUDIO1. The mixer will indicate which source s audio is being output to that camera. Note that REMOTE1 and AUDIO1 now have identical audio levels.


57 Do the same with the other two remote camera sources. All three should read AUDIO underneath, and be showing identical audio levels Monitoring Audio Through Headphones In live video production, monitoring your audio is essential to ensuring your event goes off without a hitch. This is why noise-isolating headphones are included with your kit. To hear audio in your headphones, go to the Audio Mixer and navigate to the STREAM OUT monitor on the right side of the mixer. Click the headphone button that corresponds with it, which will prompt a light gray border to appear around the button. This will send that source s audio to your headphones without impacting its output to your stream and recording. Next, check that you have set your volume level in the headphones slider bar at the top right corner of the Studio interface. If you are still not hearing audio in your headphone or monitoring speakers, minimize your Studio interface; in Windows, click the speaker icon in the bottom right corner to reveal sound options. It is possible the mixer overrode the headphones as an audio output. 57


58 If you see this, click on Line (Onyx Blackjack)* to reveal more playback device options. Select Headphones. Once the headphones are enabled as the playback device, make sure the Windows volume is set to your desired level. In addition, adjust the volume knob on the left side of the headphones to the desired volume level. *The brand name of your audio mixer may vary.
59 Basics of Livestream Studio Software 59


60 Go Live to Livestream To go live to an event on your Livestream account, click on the Stream tab in Livestream Studio. There are a few providers from which you can choose; select Livestream. Log in to your Livestream account. Choose an event from the dropdown menu (or create a new event), then click Select. Now you can give your stream a title, select its quality, aspect ratio, and the network over which it will stream. When you are ready to start your stream, click Go Live in the bottom right corner.
. Kbps: Displays the current outgoing bitrate.")
61 When streaming is active, the stream module and streaming log on the left provide live updates on streaming status. Streaming Info Window: Displays live streaming status information. Duration: Displays the current stream s duration. FPS: Displays the current outgoing frames per second (FPS). Kbps: Displays the current outgoing bitrate. Viewers: Displays the number of concurrent viewers watching the stream. Stream Status: Displays the current status of the stream. Streaming Log: Displays live streaming updates: Perfect Streaming: The stream is going out with no issues. Internet Too Slow for Quality: Upload bandwidth does not support selected quality. This is generally an on-site IT issue and should be escalated to the IT department. Changing quality requires the stream to be stopped and restarted. Lost Internet Connection: Internet connection has been lost. Again, check with on-site IT if this happens. CPU Warning: CPU usage is becoming very high. Try reducing the number of production elements in use (e.g. stop playing video clips in the Media bins, use fewer graphics layers, stream at fewer qualities). Problem Publishing to Primary Server: Studio is unable to stream to the primary publishing point due to local Internet connection issues or an issue with the publishing point. Antilag Feature Triggered: Antilag has been triggered based on the selected queue limit. Audio Peak Warning: Audio levels are peaking above normal levels; lower the audio faders in the Audio Mixer module or the mixer. 61


62 Click the Streaming button to end the stream. When a stream is terminated, you will be prompted to post the video on demand to the event, save the clip as a draft on the event page, or delete the event post. To change the Livestream event or account to which you stream, hover your mouse over the Livestream logo at the bottom of the module, then click the gearwheel in the menu that pops up. Choose a different event from the dropdown menu. To log out, click the person icon and click Log Out.


63 How to Live Edit Your Mevo Shots Once you have connected any of your Mevo cameras to the ipad, you will see the main Live Editing view. In this view, you will see your Mevo camera s live shot. Manual Editing In the full, wide view of your live shot, you can use the Mevo app gestures to live edit your event: tap to cut pinch to zoom drag to pan 63

64 In the top right corner, you will see your live editing program output. This is what your viewers will see when watching the recording or live stream. Tip: You can use your finger to drag the output monitor to another part of the screen. The icon with three dots at the bottom right corner of the app opens the options menu. This is where you will find options for Camera Assistant, Audio Mixer, and General Settings. Press and hold anywhere on the screen to set a manual shot. You will see a yellow box appear, indicating that the shot is set. The icon with six squares to the left of the options menu icon brings up the Grid View. If you have several manual shots set or faces in your shot that the camera has found, you will see them in a multi- view on your ipad. You can live edit your event in this view by tapping each shot. To return to the live edit view, doubletap one of the shots or tap the X in the bottom right corner. Mevo will stay on the last shot you selected.
65 When you have taken a close-up shot (i.e., not in the full wide shot), a cut-towide icon will appear to the left of the grid icon; tap it to cut back to your wide shot. Enable Face Detection Mevo has the ability to detect up to four faces, making it easy for you to switch focus between subjects. To turn on face detection, tap the More Options menu icon. Tap the Camera Assistant icon on the far left. Turn on Find Faces by tapping it. It will go from gray to white. A blue box should now appear around any human faces that appear in your Mevo s field of view. These trackers will follow each face s motions as long as it stays within view. You can also set up to eight manual shots if there are more than four people in the view or easily cut to non-human objects. Simply tap and hold a spot on the live edit view for a moment; a yellow box will appear. 65

66 Enable Live Follow Enabling Live Follow allows the camera shots to follow the movement of the object they are tracking, such as a person s face. It is ideal for a situation in which you have a speaker walking around a stage or a chef moving from one side of a kitchen to the other. If your subjects are staying fairly still, such as a panel discussion or a meeting, we recommend disabling this feature to prevent unnecessary movements of the camera shot. If you go to the More Options menu and tap the Camera Assistant icon, you will notice three options: Find Faces, Live Follow, and Auto-Pilot. Tap the button to turn Live Follow on; it will go from gray to white. If you would rather keep your shots focused on a specific area, turn Live Follow off. Enable Auto-Pilot Auto-pilot allows the Mevo app to live edit entirely on its own, with no need for you to control the shots. Go to the More Options menu, then tap the Camera Assistant icon. Tap Auto-Pilot to turn it on; it will turn from gray to white. You have the ability to adjust the speed at which you want autopilot to cut between shots by using the slider on the right side of the Camera Assistant menu. Dragging the slider all the way to the left will make the cuts much slower. Moving the slider towards the right will make the auto-pilot cuts faster. Choose your desired speed and exit the menu. The Mevo app will now automatically cut between any detected faces, manually placed shots, and the wide shot.


67 Intro to Multi-View and Preview/Program Switching Livestream Studio is designed for traditional Preview/Program switching, with controls available via mouse, defined keyboard shortcuts, or controls assigned on the Livestream Studio Surface Go. The software includes a multi-view that allows you to see all of your video sources and graphics overlays in a single display. If you are not seeing the full multi-view, go to the Multi-Screen tab in settings, check Enable Primary Screen Multi-View, then click Save. 67
.")


68 At the top of this multi-view are two larger monitors, which are called Preview (left) and Program (right). Preview is where you would typically review any video source or graphics overlay prior to transitioning it to your recording and/or stream. Program is the content that is currently showing in your recording and/or stream; it is what your viewers are currently watching. Below Preview and Program is an arrangement of smaller monitors with every camera input, graphics overlay channel, media bin, remote camera, and color source that you are using. A standard multi-camera production typically involves putting a source into Preview, then using a transition control to switch it into Program.


69 Switching Sources Using the Mouse To put any of your sources into Preview, hover over the source in the multi-view with your mouse, and click it. That source will now be in the Preview monitor, and you should notice a green border around it in the multi-view. If you want to put a source directly into Program without previewing it, hover your mouse over it in the multi-view and right-click it. That source will now be in Program and will have a red border surrounding it in the multi-view. You can also double-click on the Preview monitor, which will automatically transition that source into Program. To adjust how sources are put into Preview and Program using your mouse, navigate to the Mouse / Touch tab in Settings. Select the desired actions, then click Save. 69


70 Livestream Studio s transition controls can be found in the upper right corner of the software interface. Cut switches Preview and Program immediately, with no overlap occurring between them. Clicking the Cut button activates this transition. Another commonly used transition is Dissolve, which is an overlapping crossfade between the two sources. Finally, a Wipe is an animated transition in which the Preview source overlays the Program source during the switch. In Livestream Studio, you can configure fades and wipes under the Transitions tab in the lower right corner. Note on the left side that you can choose to set a transition for both your main mix (i.e., any source in Preview) and each specific graphics overlay channel.


71 Fade is the first option in the menu, which is the dissolve transition. When you select it, you can set the amount of time you want the automatic transition between sources to last. You can also double-click the duration time under the transition controls to change the speed of any automatic transition quickly. The remaining options in this menu are different kinds of wipes. Selecting one will show additional settings on the right. Reverse Direction will push the wipe in the opposite direction from which it moves by default. Flip Flop will alternate the wipe between the default direction and the reverse direction. 71


72 Feathering allows you to determine how hard or soft the edge of the wipe animation will be, in pixels. The more pixels you cover, the more faded the line will be. Some wipes also have options for adjusting their positions and appearance on the screen when they are used. To activate an automatic transition, click Auto in the upper right corner. The sources will then switch based on the duration you set for that transition. You can always employ a manual transition by clicking and dragging the virtual T Bar below the transition buttons. This allows you to control the speed of that particular transition.


73 Switching Sources Using the Keyboard Some people prefer using keyboard commands rather than a mouse to switch their live shows. That s where the keyboard included with your kit comes in. While any standard keyboard will work, this keyboard is designed to match the default hotkey settings configured in Livestream Studio. By default, pressing the 1 key will put the first input source into Preview. Pressing 2 puts the second source in Preview, 3 puts the third source in Preview, and so forth. Similarly, to put the first input source directly into Program, press the F1 key on your keyboard. F2 will put the second source into Program, F3 the third source, and so forth. The Enter key will Cut between Preview and Program; the space bar will auto-transition. You can customize these hotkeys if you wish. Navigate to Settings and select the Hotkeys menu. 73


74 Switching Sources Using the Studio Surface Go Also included with your kit is the Livestream Studio Surface Go. This is a compact USB accessory that you can use to perform basic switching controls during your event, including previewing and transitioning up to five input sources, overlaying graphics, and starting your recording and/or stream. In Livestream Studio Settings, navigate to the Inputs menu. Under the Surface column, you can assign five inputs to the five tracks on your Surface Go (e.g., your three Mevo remote cameras, a media source, and a GFX source). S1 indicates Surface 1, which is used to identify which Surface you were configuring if you have multiple Surface Go units connected to your PC. T1, T2, etc. indicate the track on the Surface Go that you are assigning. Track 1 is the PRV/PGM button column farthest to the left. After saving your settings, the Surface Go will indicate which of your assigned sources are in Preview and Program. The track with the lit green PRV button is in Preview. The track that has the lit red PGM button is in Program.


75 If you want to put one of the assigned sources into Preview, press the corresponding PRV button. Similarly, to put a source directly into Program, press the corresponding PGM button. The Surface Go also includes Cut and Auto transition controls for switching sources between Preview and Program. There is also a mini T bar to execute a manual transition, allowing you to control the speed of a dissolve or wipe. 75


76 The right side of the Surface Go features the graphics overlay controls for all three graphics channels. Finally, the Surface Go includes buttons that allow you to start and stop your recordings and streams. When you first press either button, it will light up red to indicate that it is active. Press the button again to stop the recording or streaming.


77 Introduction to Graphics Overlays Livestream Studio gives you the option to use three graphics overlay channels, each of which can include multiple layers of static or data-driven graphics. Adding Graphic Overlay Tracks To ensure you have the desired number of graphics overlay channels available, go to Settings and navigate to the Advanced tab. The third option is Graphic Overlay Tracks, in which you select the number of GFX tabs (up to three) you want available in the Livestream Studio interface. Next, in the Inputs tab, add your GFX channels as video sources if you wish to see them in your multi-view. This is especially helpful if you are using picture-in-picture. After saving your settings, you will see the desired number of GFX channels and any GFX channels added to your multi-view. 77


78 Designing a New Graphic Layer The first step in adding graphics overlays to the GFX channel is adding a layer. Press the + button to get started. Many options will pop up. To get started, select New Layer from the bottom of the list. The layer will appear on the left side of the module. Click either paintbrush button to enter the GFX Designer to build your graphic. Clicking the +T button will add static text to your graphics layer. Click the attached gearwheel button for editing options (font, size, color, etc.) The next button allows you to add either a static or dynamic image to your graphics layer. A static image is any image file you can import, which will always be visible when that graphics layer is also visible. The image will not change. Supported image formats are.png,.jpg,.jpeg,.bmp,.xpm,.tif, and.tiff.


79 A dynamic image will change if the hosted file itself is changed. In the designer, you choose the file, where it is located, and its dimensions. The next option you can add is a video source. Clicking this will allow you to choose which video source you want to include in your graphics channel, place it, size it, etc. The following button allows you to add text or image data fields. Here is where you set where assets will be, along with their sizes, font colors, etc. The content of those fields is added in a later step. Further to the right, the two arrow buttons are for Undo and Redo. The next button will provide you with a box identifying the title safe (inner box) and action safe (outer box) areas. This lets you know that your graphics will not exceed the view on the screen. 79


80 The next three buttons allow you to change how the GFX Designer displays transparency. This has no impact on the appearance of your graphics overlays. Right-clicking on your content in the Designer allows you to undo and redo actions, move content between layers, copy, paste, etc. Close out of the GFX Designer when you have finished building your graphics layer. If you hover the mouse over your GFX layer, you will notice a name appear at the top of the image. Double-click the text to rename this GFX layer. You can adjust other settings for a graphics layer by clicking the gearwheel button. The settings shown will change based on the type of graphics overlay being used. Adding and Configuring Data Fields Most GFX layer settings are related to your data fields. If you added a text or image field in the GFX Designer, a column for each has been created to the right, which you can rename.


81 You can also add a column by clicking +COLUMN underneath where the data populates and adding that asset in the GFX Designer. In the one row that appears, you can add content to those fields by clicking in the cell. You can then type any desired content into a text field. If you added an image field, a corresponding cell will allow you to browse your computer for an image to put in that image field. Click the adjacent radio button to highlight the row blue. This will make that row of data visible when that GFX layer is shown in Preview or Program. To use the same graphics overlay template for different information or data, click +ROW on the bottom. Fill in the data cells with the information you want to use for those text or image fields. Click the corresponding radio button to make that row of data visible in the graphics layer. You can add as many rows and columns as necessary for any graphics overlay layer. 81


82 The settings allow you to loop your data content automatically. You can change the interval between switches, whether the loop re-starts, if rows are kept, and in what direction the loop moves. Mixing Graphic Overlays into Program Once your graphic is designed and configured, you can start adding it to your production. First, make sure your layer is visible by clicking the eyeball icon. It should be highlighted blue. If you have multiple layers in your graphics overlay channel, highlight the eye icon of every layer that you want to be visible; more than one layer can be visible at a time. Note that if you have multiple layers in one module, you can click the display buttons on the bottom to show your layers in list mode and manage them more easily.


83 You can still access settings, the GFX Designer, and change visibility for each layer when using this view. If you want to put a graphics overlay channel in Preview before pushing it to Program, click the corresponding PRV button in the upper right corner of the interface. You should now see the visible layers of your graphics overlay channel in Preview. You should also notice the yellow PUSH button flashing. Click it to bring your graphics overlays into Program. Your visible layers are now seen in both Preview and Program. This is also indicated by PUSH no longer flashing and the PULL button turning red. 83


84 Now, try making a change to your graphics overlay channel, such as changing a layer s visibility or selecting a different row of data in a currently visible layer. You will notice the change is visible in Preview but is not yet seen in Program. The PUSH button has also started flashing again. This means that Livestream Studio has detected a change in that GFX channel and is ready to change it in Program. Click it when you are ready to show the change to your viewers. You should now see the change reflected in both Preview and Program. For each layer, you have the option to have every change automatically pushed to Program immediately by selecting the AUTO PUSH/PULL button on the bottom right.


85 Please note that if the graphics overlay is not yet in Program, you will need to push it manually by clicking PUSH in the upper right corner. To remove a visible graphics overlay quickly while AUTO PUSH/PULL is enabled, simply click on the radio button of the activated row. Now, the graphic has been removed from Program and the radio button has faded in the graphics module to indicate that the graphics overlay has been removed. Click the red PULL button that corresponds to a channel to remove everything from that graphics overlay channel from Program. 85
86 Doing so will remove that graphics overlay from Program, but you will still see it in Preview if the PRV button is still selected. To remove a graphics overlay from Preview, click the corresponding green PRV button. You will no longer see your graphics overlay in either Preview or Program.


87 Importing Videos into the Media Playback Module Livestream Studio has a video transcoder built into its two media bins, allowing you to import most common video file types and play them back as part of your event. In your media bin, press the + button in the bottom left corner. Browse your computer for your video, then click Open. Livestream Studio will begin transcoding your video immediately. Note: Transcoding time depends on clip length. Once the clip has finished transcoding, you can select it from the bin and it will appear in the player to the right. 87


88 Import Files Using Dropbox You can also connect a Dropbox account to Livestream Studio to bring in video clips. Start by clicking the gearwheel in the upper right corner to enter Settings. Navigate to the Dropbox tab. Click on Connect Dropbox. Your browser will open. Sign in to your Dropbox account in order to connect it to Livestream Studio. When authorization is successful, return to Livestream Studio. The settings will indicate that you are logged in. Click Select Folders. Choose a Local Folder from your PC. This will also allow any files you save to your Dropbox, such as transcoded videos or other integrations such as graphics and projects, to be saved on your local PC.

. Click Save when you are done.")


89 Then, choose the folder in your Dropbox where the videos you want to use are stored. This can be either your general Dropbox, or a folder within your Dropbox (in this example, Videos). Click Save when you are done. Your Dropbox account will sync to Livestream Studio. Make sure that Use Files from Dropbox is checked. Then, click Save. Navigate to one of your media bins. Click the + button in the lower left corner of the module. Your Dropbox folder will open. Click on the video you wish to import, then click Select. 89


90 The video will start transcoding in the media bin. When it is finished, you will be able to play it back as you would normally. To go back to selecting files from your local hard drive, go back to Settings: Dropbox, and un-check Use Files from Dropbox. Be sure to save your settings. If you are having trouble transcoding a video, check that it can successfully play back in Windows Media Player. Videos that cannot be played in Window Media Player will likely not be able to be transcoded in Livestream Studio s media bins. You should also check the Supported Video Formats section in the Additional Information chapter below to see if your video is compatible with Livestream Studio.


91 Media Playback Controls and Options Each media bin comes with a variety of controls and options for playing back your clips. Checking Autoplay will instruct Livestream Studio to start playing the queued video when the media bin source is taken into Program. If you have multiple videos that you want to play back to back, select the Play as List button. When one video ends, the next one will start playing immediately. If you have one clip that you want to repeat, select the Loop button. If you select both the Play as List and Loop buttons, the media bin will play back all videos in order and then loop back to the first clip when the last one has finished. Under the player to the right is a blue timeline where you can track playback of your clip. Use your mouse to drag the red cursor to any point within the clip. 91

92 With your mouse, you can drag and drop both ends and set In and Out points if you want to play back only a portion of your clip. You can also set In and Out points by dragging the orange scrubber to the desired point and clicking the corresponding In or Out bracket buttons in either upper corner of the player. The first and last buttons jump the clip to the beginning of the full clip, regardless of whether In and Out points have been set. The next pair of controls will jump to your set In or Out point, respectively. The next pair of controls can jog your clip forward or backward, respectively, frame by frame. The play control surrounded by brackets will play the clip starting from the In point and finishing at the Out point. When clicked, the play button will turn into a pause button, allowing you to stop playback at any point.


93 Next, you can play back the full video from wherever the scrubber is located by using this play control. This play button also turns into a pause button when the clip is playing back. These controls all have hotkeys assigned to them. Check your settings to see what they are by default or change them to your preferences. When playing back the last clip of a playlist or any clip that is not looping, Studio will give warning indicators as you approach the end of a clip. Yellow indicates 20 seconds or less are remaining. When the media bin player turns red, that indicates 10 seconds or less are remaining. When the clip reaches the end, it will automatically transition to the source in Preview. 93


, it will save automatically. This occurs regardless of whether you rename your project, but now you can identify it.")
94 Creating, Importing, and Exporting Projects Livestream Studio has the ability to save, load, import, and export Livestream Project files, allowing you to keep configurations saved on your system so that you can use them whenever you need to, without starting from scratch every time you start a new production. When you open Livestream Studio, by default you will be working on your previous project (or Untitled Project if it is your first time opening Studio). Click on the title in the upper right corner to see more options. To rename your project, simply type the name into the text box. When you click out of this window, the project will automatically be renamed. As you configure it (add graphics templates, import media clips, arrange inputs, etc.), it will save automatically. This occurs regardless of whether you rename your project, but now you can identify it. You can create a new project at any time by clicking on your project title and selecting New. A new untitled project will open with default configurations. As described above, you can rename the new project by clicking on the title.


 After selecting your preferred option, click Select.")

95 To go back to working on a previously saved project, click on the project title and click Open. A dropdown list of your projects will appear. Click the project that you want to work on. The selected project will then open as it last appeared in Livestream Studio. You may want to keep a Studio project configuration saved on your hard drive if you intend to use it often or move it to another Studio system. For this purpose, we created the Import/Export feature. When your Studio project is configured as you want it, click the project title, then Export. You will have the option to bundle or reference assets. Bundle is ideal if you need to move the file to a different hard drive or system, but it creates a larger file. Reference produces a smaller file, but will not move any associated assets (media clips, etc.) After selecting your preferred option, click Select. Choose where on your system you want to save the Livestream Project file (.lsproj). By default, Windows will open a newly created Livestream Studio Export Projects folder under My Documents, but you can save the file anywhere you want. Click Save. once you have chosen a file location. If you imported media files into your media bin, you will be asked whether to save the original video files or their transcoded versions (i.e., the files created after they were brought into Studio). When you are ready to use that particular project file, you can click on the project title and then on Import. Find your.lsproj file in Windows, select it, and click Open. This will create a new project in Livestream Studio with the proper configurations set. 95


96 You can rename the new project by clicking the project title if desired. If you no longer intend to use the project you are working on, you can click the project title and then Delete. This will not delete an exported file, but you will no longer see it when selecting files from the Open menu. Importing and Exporting Projects via Dropbox You have the option to save your Livestream Studio project files to a Dropbox folder rather than a local folder. You can also import.lsproj files from Dropbox into any Livestream Studio system using the same integration. To configure Dropbox, navigate to Settings by clicking the gearwheel icon in the upper right corner of Studio. Navigate to the Dropbox tab. Click Connect Dropbox. A browser window will open. Log in to your Dropbox account to connect it with Livestream Studio. The browser will indicate that authorization was successful. Return to Livestream Studio.


 or you can expand")


97 The Settings: Dropbox window will indicate that your account is connected. Click Select Folders to choose which folder to use with Livestream Studio. Choose a local folder, which will also include copies of anything you save to Dropbox on the local PC. By default, this will be set to Documents > Dropbox, but you can click BROWSE to choose a different location. Next, choose the Dropbox folder with which you want to work. This can either be the generic Dropbox folder (as selected above) or you can expand into any folders within your Dropbox account (e.g., Projects, seen below). When you are done selecting your folders, click Save. Your Dropbox account will sync with Livestream Studio. Make sure Use Files from Dropbox is checked, then save your settings. When you want to save your project to Dropbox, click the project name from the upper right corner, then click Export... Select whether to Bundle your assets into the project (e.g., graphics, media clips, etc.) or if the project should simply Reference their file paths. 97


98 Give your project a name and make sure your folder is selected, then click Export. The.lsproj file will now be saved in both your Dropbox folder and the local folder you selected in Settings. To import your project into Livestream Studio, click the project name in the upper right corner, then click Import. Click on your.lsproj file from the Dropbox folder, then click Select. Your project will open up in Studio. If want to go back to importing and exporting projects to your local hard drive, navigate to the Settings: Dropbox window and uncheck Use Files from Dropbox. Make sure to save your settings.
99 Livestream Studio Advanced Features 99

.")
100 Add Windows or Mac Computers as Remote Camera Sources In Livestream Studio, you have the option of using a Windows or Mac desktop or laptop computer as a remote camera source by connecting it to Livestream Studio over your local network connection, similar to how you connected your Mevo cameras to Livestream Studio. This is great for adding a slideshow presentation into your production. Before configuring any remote camera settings, be sure to add the necessary number of remote camera modules to your project by going to Settings: Inputs and adding remote cameras. You can have up to 10 remote cameras in the multi-view (including the three Mevo cameras that you have already connected). Bring in a Windows Computer as a Source First, you need to connect your remote Windows PC to your LS-3CamKit-# network so that it is on the same network as your Livestream Studio mini PC. To download the remote software onto your remote PC, go to the Livestream Help Center (help.livestream.com), navigate to Livestream Studio, then Remote Cameras. Open the article entitled Using the Remote Desktop Client for Windows and download the software.

.")

101 Open the downloaded file and follow the on-screen steps to run the installation wizard, then click Finish. Remote Camera will launch in the background of your PC. Right-click on the icon in the bottom toolbar and click Settings. Here you can adjust your remote camera s name and set which video and audio signals are visible from that PC. In this example, only the Desktop screen is visible, but other video sources that are added later to this computer can also be detected (e.g. webcams). Computer Name: The name that will appear in the remote camera module for your remote camera source. Checked sources will be available to use from this system as remote camera sources. Uncheck any sources you do not want to use. Encoder Quality: The resolution you want the video to stream at over your network to Livestream Studio. Slower CPUs should use a lower resolution. Encoder Framerate: The frame rate you want the video to stream at over your network to Livestream Studio. Slower CPUs should use half-speed FPS (30p). 101


102 Back in Livestream Studio, under the Remote Cam tab, you should see your PC listed as a source as long as it is connected to your Portal router via either Ethernet or Wi-Fi. Select it from the list to activate the source; it will appear on the right side of the module. Click the corresponding gearwheel to see more options. Video Source: The remote client has the ability to use any of the system s desktop, an attached webcam, or an installed Blackmagic capture device as a video source. Use the dropdown menu to select the one you want to use. Monitor: If you select Desktop as the video source and the remote system has multiple displays, you can configure which display you would like to use as a source by selecting it from the dropdown menu. Capture Device: If you select a Blackmagic Capture Device as your video source and have more than one installed on your system, choose the one you want to use. Audio Source: You also have the option of selecting from any of your available audio devices. The default is the standard system audio output. Capture Mouse Cursor: Unselect this option if you do not want to see the mouse cursor on the remote system.


103 Bring in a Mac Computer as a Source As with a Windows computer, make sure the Mac computer you want to use is connected to your LS-3CamKit-# network so that Livestream Studio can recognize it. Double-click the Livestream Studio Remote Camera.dmg file in your Finder to start the installer. Drag the Livestream Studio Remote Camera into the Applications folder. Go to the Applications folder and double-click on Livestream Studio Remote Camera to open the application. 103


. In Livestream Studio, select an unused Remote Camera module.")
104 You will see this window pop up, indicating that the remote camera icon will appear in your menu bar at the top of your screen. You can choose to prevent the message from appearing again. The app will run in the background until you close it. You can close it by clicking on the icon in the menu bar and clicking Close. When the Remote Client is running, you can click the icon and click Settings to make further adjustments to your remote camera source. Computer Name: The name that will appear in the remote camera module for your remote camera source. Checked sources will be available to use from this system as a remote camera source. Uncheck any sources you do not want to use. Encoder Quality: The resolution you want the video to stream at over your network to Livestream Studio. Slower CPUs should use a lower resolution. Encoder Framerate: The frame rate you want the video to stream at over your network to Livestream Studio. Slower CPUs should use half-speed FPS (30p). In Livestream Studio, select an unused Remote Camera module. Your Mac computer will appear as an option. Click it to activate it. Your desktop will appear. Click the gearwheel icon to access more settings for your source. Here, you can change which video and audio sources are being shown from your Mac. If you select a desktop monitor, you can also choose to hide or show the mouse cursor.


105 Troubleshooting If you are not seeing any options on the list within the Remote Cam tabs, please check the following: Make sure the remote system is on the same network by connecting it to the Portal router network by Ethernet or Wi-Fi. Check that the following ports are open on your local network if you use a firewall: UDP: 5353, TCP: Check that the Bonjour Service is enabled on the Studio system, as detailed below. To ensure that Bonjour is running, first make sure Studio is closed. Then, open the start menu and type Services. Click the Services icon that appears at the top of the menu. Look for Bonjour Service in the menu and select it. Right-click it and click Restart. Close the menu and relaunch Studio. Remote cameras on your network should now be detected by Studio. 105
 will need an Internet connection, Google Chrome, a webcam, and a microphone connected to their computer.")


106 Adding a Remote Live Interview Livestream Studio customers can add a live webcam source from another location into their Studio production. This is called Live Interview. The guest(s) will need an Internet connection, Google Chrome, a webcam, and a microphone connected to their computer. It is strongly recommended that audio is provided to any local hosts or interviewers directly via the headphone out jack on your Studio unit using headphones, IFBs, etc. Otherwise, there will be a distinct echo in your stream during the interaction. Add a new remote camera source in the Settings: Inputs menu to add Live Interview as a source, in addition to your three Mevo cameras. Navigate to a Remote Camera tab and click Add Stream. Then, click Live Interview. Note: Only one Live Interview can occur in Livestream Studio at this time.! Note: Live Interview currently only works on desktop Chrome; there is currently no support for Live Interview via mobile devices. You will be provided two URLs: a Live Interview Link and a Moderator Link. Press the Copy button to copy the corresponding URL to your clipboard and provide the URL to your guest(s) via or other means. New URLs generate each time a Live Interview is added. If you wish to provide a URL in advance, do not click Remove from list.


107 When someone opens the provided Live Interview URL in Google Chrome, he or she will be prompted to type in a name and allow the camera and microphone to be accessed. When finished, he or she can click Join Interview. The moderator URL can be given to someone who can choose between different interview guest sources. The moderator s camera will not be shown, but the moderator will be able to hear audio from all connected interviewees. The moderator is also connected to the chat to help communicate with all interview guests and the producer. When guests join the interview, they will see their camera feeds, but will also see that they are connected and have access to the internal chat. In Livestream Studio, you will see this chat as well, allowing you to communicate with the guest. 107


108 You can bring in a guest s camera by clicking the dropdown in the upper right corner of the module and clicking the guest s name. You can have as many guests as you wish in the list, but you can only select one guest at a time. After clicking a name, that guest s camera will be available as a remote camera source, which you can switch to whenever you are ready. The guest s view will change to seeing their camera in the lower left corner and a larger view of what is currently in Program. The guest will also hear Program audio and a Preview notification in the upper right hand corner of the screen. When the guest s camera is switched into Program, they will see a red On Air notification in the upper right hand corner and their camera view will take the full screen. Note: By default, guests will hear Program audio but not their own audio, even when they are in Program.


109 Building a Picture-in-Picture Graphic When doing a multi-camera production, many producers like to show two or more camera shots at the same time. Livestream Studio gives you the ability to show up to five inputs within one picture-in-picture graphics layer. Navigate to a graphics tab and add a new layer by clicking the + button, followed by New Layer. Click the corresponding paintbrush button to enter the GFX Designer. Click the camera icon at the bottom of the window. A video source will appear in the Designer. Click the attached gearwheel icon to change which source appears. You can choose any camera input, media source, remote camera, graphics track, or color source. Add another source. 109


110 You can drag and drop either of these anywhere within the Designer. Clicking the gearwheel will also allow you to resize and crop your sources. A sample double-box (or two-box) might look something like this: If you want to give a background to your picture-in-picture, add a third source to the GFX Designer. In this example, we re using a looping video background in Media 1. Right-click the third source and click To Bottom Layer. This will force it to be behind your other two sources. Scale it so it fills the Designer. Now, your picture-in-picture looks like this.
.")

111 Close out of the Designer and make sure your layer is visible (the eye icon is blue). Then, click the corresponding flashing Push button to bring it into Program. Now, both sources are seen in Program at the same time, on top of your background. Click Pull whenever you are ready to show your previous Program source. 111


112 Setting Auxiliary Outputs Livestream Studio gives you the ability to choose up to four auxiliary output mixes. This can be helpful for changing picture-in-picture sources without re-entering the GFX Designer multiple times. Navigate to Settings and enter the Outputs menu. Under Number of AUX Mixes, select the number of auxiliary outputs you want to use. When you set your auxiliary outputs, you should see an AUX Outputs tab appear in the lower left section. To utilize this with your picture-inpicture graphics, go to a Graphics tab (e.g., GFX 1) and create a new layer. Click the Paintbrush icon. The GFX Designer will open. Click on the Video button to bring a video source into your graphics layer.


113 Click on the dropdown menu to change any settings, including your video source. Note that AUX sources are now among your options. When you have finished setting your video source in the graphics layer, close out of the GFX Designer and make sure that layer is visible. Navigate to the AUX Outputs tab and find the AUX source you are using. Here you can select which of your inputs you want to see in the AUX output (in this case, our picture-in-picture graphic). You can choose among any cameras or media bins. Push the graphics channel to Program to allow you and your viewers to see it. 113

.")


114 To change the source in your graphics overlay, go back to the AUX Outputs tab and click on the desired source. That source will turn green, indicating that it is being previewed (e.g., Remote 2). To switch sources, use either the Cut or Auto button to the left. Tip: If you click on the transition type under Auto, you can choose both the type and speed of the transition used for each AUX source. Click a transition control to switch the sources. Remote 2 is now shown in the picture-in-picture graphic.


115 Using Chroma Key Livestream Studio includes chroma key, giving users the ability to remove a color from the video source, typically a background color to replace with an image such as a virtual set. Chroma key is executed through the graphics module. Start by adding a new layer to any graphics overlay channel. Click the paintbrush icon to enter the GFX Designer. Next, click on the camera icon to add an input source to your graphics layer. Click the gearwheel to select which input source you want to use for chroma key. You can adjust how your input source looks inside the GFX Designer as necessary, such as scaling it to fit the whole screen. Click the person icon to turn on chroma key. Livestream Studio will automatically detect the most prominent color (green in this example) and key it out once chroma key is turned on. 115


116 Next, close the GFX Designer and put either a camera, media source, or graphics source into Program from your multi-view. The example above has a white background video from Media 2. Now, push your graphics overlay layer into Program by clicking the corresponding PUSH button. You should now see your chroma-keyed input source overlaying your Program source. To make further adjustments to your chroma key graphic, go back to the GFX Designer. When you select your input source in the graphics overlay while chroma key is turned on, you will see other options in the upper right corner. To apply automatic chroma keying (i.e., key out the most prominent color), click the icon of the eyedropper with an A. To erase all chroma keying on your input source, click the X icon. Note that the green background has returned to the picture.
.")


117 The eyedropper-circle icon will allow you to do rough keying by hand. Select this option, then hover your mouse to the area you want to key (e.g., the back of the chair). Click and drag your mouse to start real-time keying. You can increase or decrease the keying color range, which will be indicated by a circle around the area. The end result should be similar to the image above, where the colors within the range that was selected are now on the chroma key palette and thus not visible. The eyedropper with a plus sign either initializes the chroma key or adds color hues to the chroma key palette. This is helpful if there are shadows in your background that did not fully key out. The eyedropper with a minus sign will exclude colors from your chroma key palette. This is helpful if a color on your set is similar to the color you keyed out and is faded. In this example, the orange chair is keyed out and the red sweater is also largely keyed out. After using the eyedropper minus tool on the red sweater, you can now see the sweater; orange is still on the chroma key palette. Please note that other graphics or images in the same graphics layer will be visible. Use caution with this type of workflow, as it is likely to increase your CPU usage. 117


118 Importing Animated Graphics Livestream Studio will accept a folder of images that it will loop through to give the appearance of an animating graphics overlay. To keep your images backgrounds transparent, PNG files are recommended. This feature is best for lower third graphics and corner bugs. Larger animated graphics, such as backdrops, should be exported as videos and come in through a media bin. Your.PNG files must be less than 1.5 million pixels. To determine a PNG file s number of pixels, view a file s Properties and multiply the height by the width. For this graphic, which has subtle animations, 1920 x 420 = 806,400 pixels.


.")


119 To add an animated graphic, go to a graphics overlay channel and add a new layer. In the GFX Designer, the middle button is for a series of images. Click it to browse your computer. Select the folder that has your.png files and select the first file in that folder. The graphic will take a moment to render in the GFX Designer; it will then appear. From this point, designing the graphic follows the same procedure as designing still graphics (adding data fields, etc.). All other functions of the graphics overlay, including adding data, changing settings, and pushing and pulling the layer are the same as found in other graphics. There are a number of templates available for free in the Livestream Graphics Store at livestream.com/studio/graphics. When you import an.lsgfx file that contains an animated graphic sequence, Livestream Studio will prompt you to select where you want to save the file on your computer s hard drive. Choose your destination and then click Select. The.lsgfx file will load in Livestream Studio; you can edit it in the same fashion as with any other graphic. 119


120 Using the Tie Controls You may need to switch a video source and a graphics overlay simultaneously. This is where the TIE BG and TIE buttons in Livestream Studio come in. At least one of these TIE buttons must be selected at all times. This tells the transition controls Cut, Auto, and the T-Bar what to reference when switching. If only TIE BG is highlighted yellow, then only the video source in Preview will switch to Program when transitioning. Note below that the video sources have switched, but the lower third graphic in Preview has not. To switch the video source and bring in a graphics overlay at the same time, select TIE BG and the corresponding TIE button for your graphic. Make sure your graphics overlay channel is in Preview by selecting the corresponding PRV button.


121 Your Preview and Program monitors should look similar to this, with a GFX channel in Preview. Use a transition control to switch the sources. Now, your video sources have switched and your graphics overlay has been pushed to Program. As another example, if you want to remove one graphic while inserting another one simultaneously, you can select the TIE buttons under each corresponding graphics overlay channel. In this example, GFX 1 has a lower third graphic and GFX 2 is a clock. In order to remove the lower third and insert the clock at the same time, remove GFX1 from Preview and add GFX2. 121


122 Use a transition control. Your graphics overlays in Program will switch but your video sources will not because TIE BG was not selected. To pull a graphics overlay out of Program simultaneously with a video source, tie the background and the graphics overlay together. Next, remove the graphics overlay from Preview. This will tell the transition controls that the graphic is not being shown on the next switch. Your monitors should look similar to this now, with Preview showing a different video source and no graphic. Use a transition control to switch the sources. Your video sources have now changed, and your graphics overlay is no longer in Program.


123 Basic Video Replay While Recording Livestream Studio allows you to play back media while you are recording it for basic replay options during a live event. To start, make sure that one of your media bins is selected in the Recording section of the Livestream Studio settings. Your media will automatically populate within the selected bin once the recording has started. The red dot to the left of the clip duration indicates that this clip is currently being recorded. When recording, the clip in your media bin will behave much like any other media. You can set an IN and an OUT point for playback and scrub along the timeline as well. The main difference is that the timeline is growing as long as the recording process is active, which does not occur when using pre-recorded media. By default, pressing R on your keyboard will set the IN and OUT points on your clip for the most recent 10 seconds. Taking that media bin into Program will automatically play back that section of your recording. You can adjust this setting under the Media Player tab in settings.! There is currently no option in Livestream Studio to slow down your replays. 123


124 Exporting Clips from Livestream Studio The media bins have an export tool that allows you to save your recordings or clips of recordings in them as.mp4 files on your hard drive. First, navigate to Studio Settings. Select the Media Player menu. By default, your video clips will export to the Videos folder on your hard drive. Click Browse to select a different save location, then click Save. In one of your media bins, select a video you want to export. Set In and Out points for your clip. If you want to export the full video, make sure that the brackets enclose the entire timeline. When you are ready to export your clip, click on the arrow icon next to the video s name. The double arrow button at the top of the interface turns blue and shows a small progression bar as your clip is exporting.


.")
125 Click the double arrow button to view your transcoding queue. This will tell you how much time is left in your clip and the status of any other transcoded or exported video. The time it takes to export depends on the length of the clip. When the file has finished exporting, the transcoding queue will indicate that it has completed and you will find the.mp4 of the exported clip in the folder that you designated for exported files. Livestream Studio Web Control What is Web Control? Web Control allows you to give yourself or others access to a Livestream Studio system directly from a supported browser. This is ideal when your production has a lot of moving components that you prefer to assign to individual members of your team (e.g., switching cameras vs. graphics controls). On your Studio system, go to Settings, then click the Web Control tab. Click the checkbox next to Enable Web Control to see more options. First, you will see a Studio ID and a Web Control Link. These are used to add users to your Studio system. You can use the default ID that populates or create your own by clicking the pencil icon to edit it. Click Save when you are done or Cancel to keep the previous name. 125


126 Below is the list of allowed users that you have invited to your Studio Web Control. You can also adjust how much access each user has to your Studio. Finally, you can choose how your Studio Web Control is laid out in the module below. Choose a layout and drag and drop sources you wish to see into your desired positions. When you log in to Studio Web Control at studio-webcontrol.livestream.com using your Livestream account credentials, any Studio system you have been added to will be listed below as offline or online. Select an online Studio. A window such as the one below will open for users granted Full Access:


127 Here is where those users will be able to the see and control the multi-view, control the audio mixer, operate the transition controls, insert mid-roll advertisements, and fade to black. They can also click the menu icon in the upper right corner to change their view and log out. Read-only users will see a similar window to those given Full Access, with the exception of a Read Only ribbon in the upper right control. These users can see every part of the interface that Full Access users can, but they cannot control it or make any changes. Users granted access to the multi-view will see something similar to below, depending on your layout settings. They can click on the sources to put them into Preview and Program. They can also click Stream or Record at the top of the module to go live and start recording, respectively. Users granted access to controls only will see the audio mixer, stream module, and GFX modules: all the options seen under the transition controls. However, they do not have the ability to see or control the multi-view. All users can log out of web control by clicking the menu icon in the upper right corner and clicking Log Out. 127


128 Supported Browsers and Devices In order to use Web Control with Livestream Studio, customers must use the most recent versions of Google Chrome or Mozilla Firefox on the following operating systems only: macos Windows Chromebook Android Web Control is not supported on Microsoft Edge, Safari, or any ios devices. Add a User to Studio Web Control In your Livestream Studio system, go to Settings > Web Control. Enable Web Control by clicking the check box, then navigate to the Users box. To add a user, click the + button. The following window will appear. Enter the person s address and how much access you wish to grant them. The options are: Administrator Full Access Read Only Multi-View Controls Only Click Save and then save your Studio settings. The user you have invited to access your Studio via Web Control will not be able to join it until you save your settings.

129 Note: You can always adjust what kind of access each user has when you go back into Settings. Doing so will remove them from any current session, and they will have to re-enter the Studio Web Control interface again. The address you sent the invite to will receive the following The user should click the blue Open Web Control button. They will be prompted to log into a Livestream account if they are not already, and then directed to the Studio Web Control interface to which you have given them access. Note: The user must have an account on Livestream in order to log into Studio Web Control. If they do not have an account, they can click Join Livestream. The user must use the same address that was invited to Studio Web Control. Using Graphic Overlays in Web Control A Dropbox account is required in order to use this feature. Log in to Dropbox and locate your folders (or create a new one). Save the.lsgfx files you wish to use in Livestream Studio in this folder. Only.lsgfx files are supported in Studio Web Control. Sample.lsgfx files can be found in the Studio Graphics Store (livestream.com/ studio/graphics) or can be created when you export a graphics overlay layer that you manually created in Livestream Studio. 129


130 The first step is within the Livestream Studio software. Navigate to Settings, then select the Dropbox tab. Click Connect Dropbox. Log in to your Dropbox account by entering your account credentials and clicking Sign in. Allow Studio to access your Dropbox account. When authorization is complete, you can close the browser window. You will need to select a folder on your local drive to save your imported file to and a folder in your Dropbox from which to select.lsgfx files. Once you have made your choices, click Save. Studio will indicate that your Dropbox account is now with Studio.
 and select your Livestream Studio.")


131 Next, log in to Web Control (studio-webcontrol.livestream.com) and select your Livestream Studio. You should notice the three graphics overlay tabs in the bottom portion of the screen; select one of them to continue. You can either browse the free Graphics Store within the Web Control graphics overlay module, or scroll down and click Add Custom Layers. Any.lsgfx files saved in your selected Dropbox folder will be listed here. Click the name of the file you wish to use. The graphics file will load, with its design and settings on the left and its data on the right.! Note: It is not possible to open the GFX Designer in Web Control. The appearance of the graphic can only be edited within the Studio software. 131


132 Many of the controls available to you from here are very similar to those found in the Livestream Studio software, such as adding rows and columns for data, Auto Push/Pull, Loop Settings, and selecting rows. Overlaying graphics in Web Control is the same as in Studio software. Click the corresponding PRV button to show your graphics overlay in Preview. Click PUSH to transition the graphic overlay into Program. Now, you will see the graphics overlay in your Program monitor. To remove it from Program, click the corresponding PULL button.


133 NewTek NDI Integration in Livestream Studio Livestream Studio is one of many products that includes NewTek NDI Integration, allowing Livestream Studio producers to input or output video sources over their local networks with other NDI-enabled software and devices. What is NewTek NDI? NDI, which stands for Network Device Interface, is an open protocol developed by NewTek that allows for high-quality video and audio signals to be transferred between devices over a LAN. In other words, different video software products with the NDI tools and applications installed such as Livestream Studio, NewTek TriCaster, Adobe Premiere Pro, and more can now communicate their video signals to each other over your local network with very low latency. How Do I Set Up NDI Integration with Livestream Studio? All you need to do is make sure you are running version 4.5 of Livestream Studio and make sure it is connected to the same local network (i.e., the LS-3CamKit-# network produced by your Portal router) as any other NDI-enabled devices you wish to use with Livestream Studio. The integration is built into the software. How Do I Bring in Another Source via NDI? First, you need to have another NDI-enabled source connected to the same network as your Livestream Studio system. This example will show a looping graphic sequence in Adobe Premiere Pro running on an imac. Learn more about Newtek s NDI tools and downloads at In Livestream Studio, click the gearwheel in the upper right corner to access Settings. Navigate to the Inputs menu. Add an Input and click the Video Source dropdown menu. NDI-enabled sources on your network will be available as input options. The third option here is the imac running Adobe Premiere Pro. Select your NDI source, then click Save. 133


134 Your NDI source will appear in your multi-view in Livestream Studio, along with all other inputs. You can switch it into Preview and Program as you would any other source. A key feature of NDI is alpha channel support. This means a source like the one shown to the left, which is a looping graphic with no background, can also be brought into Livestream Studio with a transparent background. To enable alpha channel support in Studio, navigate to one of the GFX menus, select + and click New Layer. Click the paintbrush icon to open the GFX Designer. To bring in your NDI source as a graphic, click the camera icon. Your first input source will appear. Click the corresponding gearwheel to select your NDI source. Note that the graphic has a transparent background, rather than a black one. Make any appearance adjustments as necessary; in this example, we cropped the empty space and dragged the graphic to the bottom to make it a true lower third graphic. When you are satisfied with your NDI source s appearance, close the GFX Designer.


135 Now you can use your graphics overlay controls in the upper right corner of Livestream Studio to bring in your NDI source as a graphics overlay with alpha channel support. How Do I Output via NDI? Setting up an NDI output is similar to setting up a normal live video output. The difference is that instead of using a video card and video cables to output your Program or other Studio source, you are outputting over your local network. Click the gearwheel in the upper right corner to access Settings. Navigate to the Outputs menu. The lower half of the menu is the NDI Outputs section. Click the + button to add an NDI output. By default, your Program will appear at the output. Click the dropdown menu under Camera to select a different source if you wish. You can rename the field under Device if you wish; this name is what your NDI output will be shown as in other NDIrecognizing devices. After selecting your output(s), be sure to save your settings. Now, other NDI-enabled devices and software on your network will be able to bring in your selected output(s) as a source or input (e.g., other Studio systems, vmix, TriCasters, etc.) 135


136 My NDI Sources are Buffering; How do I Prevent This? If you notice buffering or lag in your NDI sources, you can reduce the bandwidth required to bring them in via Input Settings, in the lower left corner of Livestream Studio. Select your NDI source from the input dropdown menu on the left side. Navigate to the Convert menu. By default, Low bandwidth mode is turned off. Check it to enable it. Your NDI input is now converted to a lower resolution, which will soften its appearance but deliver the video signal more steadily. Setting Up Livestream Studio as an RTMP Server With Livestream Studio, you can send a stream from a third-party encoder via RTMP directly to Studio and bring that stream in as a source. RTMP Input Basics Go to Settings: Inputs. You can add up to 10 RTMP input sources. Make sure to save your settings. Your RTMP tab(s) will appear in the lower left corner of the interface; select one to continue.


, open your RTMP settings and enter the RTMP URL and Stream Name from Studio into the")


137 Your RTMP URL and Stream Name are displayed on the right side and on the left-hand side menu. By default, authentication is turned off. If you would prefer to have a username and password affiliated with your RTMP Server, click Change Settings. This will open the RTMP Server tab in Studio s settings. Check Authentication and enter the desired username and password, then click Save. To save time copying and pasting, Studio gives you the option to Download FMLE Settings, which you can then import into your encoder. In your third-party encoder (e.g., Wirecast, OBS, etc.), open your RTMP settings and enter the RTMP URL and Stream Name from Studio into the corresponding fields. If you enabled authorization, enter your RTMP Input s username and password into your third-party encoder. Start streaming from your third-party encoder to your RTMP Input. In the Livestream Studio multi-view, the video output from your third-party encoder will appear in your RTMP Input. You can transition your RTMP Input into Program, just as you would with any other source. When you end the stream from your third-party encoder, the source will no longer be visible in Livestream Studio. 137


138 ! Important: In order for this feature to work successfully, your network must have Port 1935 open to all communication. If your encoder is streaming to Studio from an external location (i.e., not from the same network), you must ensure that both systems are on a public-facing IP address in order for your encoder and Studio to communicate with each other. Advanced Settings On the left side of the module, scroll down to find more options. Checking Transition to Program will automatically switch the RTMP input into Program as soon as Studio receives the stream. Select your Transition to program mode, which allows you to choose whether your input will Cut or Auto- Transition into Program once the stream is received. Next is Start Stream, which will prompt Studio to automatically start streaming to your selected provider(s) in Livestream Studio (e.g., Livestream) as soon as it receives the RTMP input.

139 When RTMP stream ends allows you to select what Livestream Studio should do when you stop streaming from your third-party encoder. The options are: No Action: Studio will not react to the RTMP stream stopping. Stop streaming and post: Studio will end its stream and post the video on demand. Stop streaming draft: Studio will end its stream and save the video as a draft post (Livestream only). Stop streaming and delete: Studio will end its stream and delete the video on demand (Livestream only). Switch to preview and keep streaming: Studio will continue streaming, but transition the Preview source into Program. With these settings enabled, your RTMP source will now automatically appear in Program, and Livestream Studio will start streaming to your chosen provider without any additional action needed. Tip: You can also configure RTMP input settings via Livestream Studio Web Control. 139
140
141 Additional Information Supported Video Formats in Livestream Studio Generally speaking, the media bins in Livestream Studio can accept most common video format files. The codecs listed below are from Supported media formats in Media Foundation (Windows). Supported media formats in Media Foundation (Windows). Microsoft, 28 Nov Web. 7 Feb. 2013: Please note that Studio does not support Apple-only based formats (e.g., ProRes). File Containers 141
142 Audio Codecs! Note: Media Foundation provides wrappers for several ACM codecs listed in the previous table. However, Media Foundation does not support arbitrary ACM codecs. Video Codecs
 490-1679 When prompted, press 2 for Support.")
143 Support Contact Information If you have any questions or issues regarding your Livestream 3-Camera Kit, there are multiple ways to contact our team. Log in to your Livestream account and visit help.livestream.com. Click Contact Us in the upper right corner. Phone support is available seven days a week, 9:30am to 8:30pm EST. Call +1 (646) When prompted, press 2 for Support. Enter the 7-digit PIN that appears with the phone number on this page. This PIN is associated with your account and should not be shared with anyone. Alternatively, you can open a ticket with our Customer Care team at any time using the dropdown form on this page. 143
Remote Control. degraded, causing unreliable operation. The recommended effective distance for remote operation is about 16 feet (5 meters).
.") Media Streaming Sound Bar RTS736W User Manual Remote Control using the remote control Point the remote control at the REMOTE SENSOR located on the unit (see Front Panel illustration for precise location).
Media Streaming Sound Bar RTS736W User Manual Remote Control using the remote control Point the remote control at the REMOTE SENSOR located on the unit (see Front Panel illustration for precise location).
Brandlive Production Playbook
 There are a number of important components to consider when planning a live broadcast. Deciding on a theme, selecting presenters, curating content, and assigning skilled moderators make up some of the
Hardware Setup. If you have any further questions after checking this document, please contact
 Hardware Setup If you have any further questions after checking this document, please contact support@cognisens.com Hardware Setup Getting Started: NeuroTracker Pro WHAT TO BUY SETTING UP YOUR 3D TV SETTING
Operating Guide. ViewClix offers a revolutionary experience for seniors and their families and friends.
 ViewClix Mini TM Operating Guide ViewClix offers a revolutionary experience for seniors and their families and friends. To make using ViewClix an easy and fun experience for you and your loved ones, we
Ready. Set. Go make your show. Your guide to creating your first video program with
 Ready. Set. Go make your show. Your guide to creating your first video program with TriCaster Mini Go Make Your Show Guide 01 Table of Contents Part 1: Ready. 1) Power, Monitoring and Control 04 2) Bringing
TF5 / TF3 / TF1 DIGITAL MIXING CONSOLE. TF StageMix User's Guide
 TF5 / TF3 / TF1 DIGITAL MIXING CONSOLE EN Note The software and this document are the exclusive copyrights of Yamaha Corporation. Copying or modifying the software or reproduction of this document, by
Classroom Setup... 2 PC... 2 Document Camera... 3 DVD... 4 Auxiliary... 5
 Classroom Setup... 2 PC... 2 Document Camera... 3 DVD... 4 Auxiliary... 5 Lecture Capture Setup... 6 Pause and Resume... 6 Considerations... 6 Video Conferencing Setup... 7 Camera Control... 8 Preview
imso-104 Manual Revised August 5, 2011
 imso-104 Manual Revised August 5, 2011 Section 1 Getting Started SAFETY 1.10 Quickstart Guide 1.20 SAFETY 1.30 Compatibility 1.31 Hardware 1.32 Software Section 2 How it works 2.10 Menus 2.20 Analog Channel
CCE900-IP-TR. User s Guide
 CCE900-IP-TR CCE900-IP-T & CCE900-IP-R User s Guide i-tech Company LLC TOLL FREE: (888) 483-2418 EMAIL: info@itechlcd.com WEB: www.itechlcd.com 1. Introduction The CCE900-IP-T & CCE900-IP-R is a solution
About your Kobo ereader...5
 User Guide Kobo Glo HD User Guide Table of Contents About your Kobo ereader...5 Anatomy of your Kobo ereader...5 Charging your Kobo ereader...7 Charging your Kobo ereader with a wall adapter...8 Turning
Getting started with
 PART NO. CMA11 3 MADE IN CHINA 1. Measuring CAT II 2. Max. voltage 250V ~ 3. Max. current 71 Amp Getting started with Electricity consumption & Solar PV generation monitoring single phase, for homes fitted
Getting started with
 Getting started with Electricity consumption monitoring single phase for homes and some smaller light commercial premises OVERVIEW: The OWL Intuition-e electricity monitoring system comprises of three
Optiflex Interactive Video System
 Optiflex Interactive Video System Optiflex Interactive Video System 1 Before You Start...............2 On-site Video Surveillance.......6 Touchscreen Interface Viewing...10 Secure Remote Look-in........16
THD601DC Set-top box
 THD601DC Set-top box Contents 1. Safety... 1 2. Appearance... 2 3. Rear Panel Connection... 3 4. Remote... 4 5 First Time Set-Up... 7 6. Network Settings... 8 6.1 Available Networks and Checking Current
Automate Pulse Set-Up Instructions
 Automate Pulse Set-Up Instructions ABOUT THE AUTOMATE SHADES SKILL The Automate Pulse app allows for control of your motorized window treatments through your smartphone/tablet THE APP ALLOWS FOR: Individual
WiPry 5x User Manual. 2.4 & 5 GHz Wireless Troubleshooting Dual Band Spectrum Analyzer
 WiPry 5x User Manual 2.4 & 5 GHz Wireless Troubleshooting Dual Band Spectrum Analyzer 1 Table of Contents Section 1 Getting Started 1.10 Quickstart Guide 1.20 Compatibility Section 2 How WiPry Works 2.10
U S E R G U I D E HD1000
 U S E R G U I D E HD1000 1 W e l c o m e t o R o k u! In This Guide... Bring your HDTV to life with Roku. For the first time, you ll enjoy viewing your favorite digital photos in high-definition on your
About your Kobo ereader...6
 User Guide Kobo Glo HD User Guide Table of Contents About your Kobo ereader...6 Anatomy of your Kobo ereader...6 Charging your Kobo ereader...8 Charging your Kobo ereader with a wall adapter...9 Turning
The amazing power of FiOS starts here.
 SELF-INSTALLATION GUIDE The amazing power of FiOS starts here. LET S GET STARTED Welcome to a network that s light years ahead. Welcome to life on FiOS. Congratulations on choosing Verizon FiOS! You re
Harmony Smart Control. User Guide
 Harmony Smart Control User Guide Harmony Smart Control User Guide Table of Contents About this Manual... 6 Terms used in this manual:... 6 At a Glance... 6 Features... 6 Supported devices... 6 Know your
Part 1 Basic Operation
 This product is a designed for video surveillance video encode and record, it include H.264 video Compression, large HDD storage, network, embedded Linux operate system and other advanced electronic technology,
CI-218 / CI-303 / CI430
 CI-218 / CI-303 / CI430 Network Camera User Manual English AREC Inc. All Rights Reserved 2017. l www.arec.com All information contained in this document is Proprietary Table of Contents 1. Overview 1.1
ecast for IOS Revision 1.3
 ecast for IOS Revision 1.3 1 Contents Overview... 5 What s New... 5 Connecting to the 4 Cast DMX Bridge... 6 App Navigation... 7 Fixtures Tab... 8 Patching Fixtures... 9 Fixture Not In Library... 11 Fixture
Operating Instructions
 Marshall Electronics Broadcast A/V Division Model No. VSW-2200 4-Input Seamless SDI A/V Switcher Operating Instructions Table of Contents 1. Overview... 2. Features.... Package Contents... 4. Specifications...
Harmony Ultimate. User Guide
 Harmony Ultimate User Guide Harmony Ultimate User Guide Table of Contents About this Manual... 6 Terms used in this manual... 6 At a Glance... 6 Features... 6 Know your Harmony Ultimate... 6 Features of
LedSet User s Manual V Official website: 1 /
 LedSet User s Manual V2.6.1 1 / 42 20171123 Contents 1. Interface... 3 1.1. Option Menu... 4 1.1.1. Screen Configuration... 4 1.1.1.1. Instruction to Sender/ Receiver/ Display Connection... 4 1.1.1.2.
SELF-INSTALLATION GUIDE
 SELF-INSTALLATION GUIDE Welcome to FrontierTV You are just a few quick connections away from the most amazing TV experience you ve ever had. The colors are stunning and the sound is astonishing. Just follow
May 2006 Edition /A. Getting Started Guide for the VSX Series Version 8.5
 May 2006 Edition 3725-21286-008/A Getting Started Guide for the VSX Series Version 8.5 GETTING STARTED GUIDE FOR THE VSX SERIES Trademark Information Polycom, the Polycom logo design, and ViewStation are
WiPry User Manual. 2.4 GHz Wireless Troubleshooting
 WiPry User Manual 2.4 GHz Wireless Troubleshooting 1 Table of Contents Section 1 Getting Started 1.10 Quickstart Guide 1.20 Compatibility Section 2 How WiPry Works 2.10 Basics 2.11 Screen Layout 2.12 Color
WiPry 5x User Manual. 2.4 & 5 GHz Wireless Troubleshooting Dual Band Spectrum Analyzer
 WiPry 5x User Manual 2.4 & 5 GHz Wireless Troubleshooting Dual Band Spectrum Analyzer 1 Table of Contents Section 1 Getting Started 1.10 Quickstart Guide 1.20 Compatibility 2.10 Basics 2.11 Screen Layout
USING MEDIACAST FOR LIVE EVENTS THERE ARE THREE SEPARATE KEYS NEEDED TO ACCESS THE FRONT AND BACK OF THE VIDEO CART.
 USING MEDIACAST FOR LIVE EVENTS THERE ARE THREE SEPARATE KEYS NEEDED TO ACCESS THE FRONT AND BACK OF THE VIDEO CART. 1). Plug in the cart to a power source and a network plug-in drop that is in the sam
QUICK START GUIDE QT ANALOG HD CAMERA & DVR BUNDLE ENGLISH
 QUICK START GUIDE QT ANALOG HD CAMERA & DVR BUNDLE ENGLISH Table of Contents Welcome What s Included...3 Understanding your DVR...4 Get Connected Registration...5 Connect Your Cameras...5 Connect DVR to
About your ereader Using your Library Reading on your ereader... 25
 User Guide Kobo Aura ereader User Guide Table of Contents About your ereader... 4 Charging your ereader... 7 Using the touch screen... 8 Putting your ereader to sleep and waking it up... 10 Using the light...
imso-104 Manual Revised July 19, 2012
 imso-104 Manual Section 1 Getting Started SAFETY 1.10 Quickstart Guide 1.20 SAFETY 1.30 Compatibility 1.31 Hardware 1.32 Software Section 2 How it works 2.10 Menus 2.20 Analog Channel 2.21 On / Off 2.22
Wireless Cloud Camera TV-IP751WC (v1.0r)
") TRENDnet s, model, takes the work out of viewing video over the internet. Previously to view video remotely, users needed to perform many complicated and time consuming steps: such as signing up for a
TRENDnet s, model, takes the work out of viewing video over the internet. Previously to view video remotely, users needed to perform many complicated and time consuming steps: such as signing up for a
RELEASE NOTES. Introduction. Supported Devices. Mackie Master Fader App V4.5.1 October 2016
 RELEASE NOTES Mackie Master Fader App V4.5.1 October 2016 Introduction These release notes describe changes and upgrades to the Mackie Master Fader app and DL Series mixer firmware since Version 4.5. New
insors Grid Room System Installation Guide
 insors Grid Room System Installation Guide May 2006 insors Integrated Communications www.insors.com 312-786-9169 Introduction insors Grid is a state-of-the-art software-based system that supports a highly
E-MANUAL. Thank you for purchasing this Samsung product. To receive more complete service, please register your product at.
 E-MANUAL Thank you for purchasing this Samsung product. To receive more complete service, please register your product at www.samsung.com/register Model Serial No. Contents Quick Guides Connecting the
ATEM Television Studio
 ATEM Television Studio The new ATEM Television Studio The world s first live production switchers for broadcast, professional and AV users! ATEM Television Studio HD ATEM Television Studio Pro HD ATEM
Getting Started Guide for the V Series
 product pic here Getting Started Guide for the V Series Version 8.7 July 2007 Edition 3725-24476-002/A Trademark Information Polycom and the Polycom logo design are registered trademarks of Polycom, Inc.,
EAN-Performance and Latency
 EAN-Performance and Latency PN: EAN-Performance-and-Latency 6/4/2018 SightLine Applications, Inc. Contact: Web: sightlineapplications.com Sales: sales@sightlineapplications.com Support: support@sightlineapplications.com
E-MANUAL. Thank you for purchasing this Samsung product. To receive more complete service, please register your product at.
 E-MANUAL Thank you for purchasing this Samsung product. To receive more complete service, please register your product at www.samsung.com/register Model Serial No. Contents Quick Guides Using Smart Hub
User Guide. MonitorMix User Guide 1
 User Guide EN MonitorMix User Guide 1 Introduction Thank you for downloading MonitorMix app for ios or Android. With MonitorMix, you can control MIX/MATRIX/AUX mixes wirelessly for your CL, QL or TF series
Contents. Quick Guides. Connections. Remote Control and Peripherals. Connecting a Mobile Device. Using Smart Hub
 SMART TV E-Manual Contents Quick Guides Using Smart Hub 1 Connecting to the Internet 1 Setting up Smart Hub 1 Using Smart Hub Using the Samsung Smart Remote 2 Operating the TV with the POINTER button 3
EM7580 TV Streamer powered by OpenELEC Kodi
 EM7580 TV Streamer powered by OpenELEC Kodi 2 ENGLISH EM7580 - TV streamer powered by OpenELEC Kodi Table of contents 1.0 Introduction... 2 1.1 Introduction TV streamer... 2 1.2 OpenELEC and Kodi introduction...
About your Kobo ereader...6
 User Guide Kobo Touch 2.0 User Guide Table of Contents About your Kobo ereader...6 Anatomy of your Kobo ereader...6 Charging your Kobo ereader...8 Charging your Kobo ereader with a wall adapter...9 Turning
VIDEO JUDGE SYSTEM SETUP & CAPTURE
 VIDEO JUDGE SYSTEM SETUP & CAPTURE TABLE OF CONTENTS GENERAL OVERVIEW... 1 ABOUT THE COMPETITIONS... 1 PRIOR TO THE EVENT... 2 EQUIPMENT LIST... 2 ARRIVAL AT THE VENUE... 3 EQUIPMENT SETUP... 4 Camera
About your Kobo ereader...6
 Kobo Clara HD - User Guide Table of Contents About your Kobo ereader...6 Anatomy of your Kobo ereader...6 Turning your Kobo ereader on and off...8 Charging your Kobo ereader...9 Charging your Kobo ereader
IMPORTANT! This instruction guide explains how to install your CCTV system.
 IMPORTANT! This instruction guide explains how to install your CCTV system. Which accessories do you need before getting started? 1. Monitor or TV (recommended not less than 19" for clear viewing) 2. HDMI
USING THE CENTRAL CONTROL DECK IN THE LEARNING STUDIO
 USING THE CENTRAL CONTROL DECK IN THE LEARNING STUDIO This manual provides detailed information and operating instructions for the Central Control Deck in the learning studios. The learning studio can
Installation and Operation Manual. ATEM Television Studio Switchers
 Installation and Operation Manual ATEM Television Studio Switchers March 08 English Welcome Thank you for purchasing an ATEM switcher for your live production work! If you re new to live production switchers,
MCX-500. Multi-Camera Live Producer. Overview
 MCX-500 Multi-Camera Live Producer Overview The MCX-500 is an affordable, uniquely user-friendly and flexible production switcher that makes it simple for a single operator or small team to produce a broadcast
rekordbox TM LIGHTING mode Operation Guide
 rekordbox TM LIGHTING mode Operation Guide Contents 1 Before Start... 3 1.1 Before getting started... 3 1.2 System requirements... 3 1.3 Overview of LIGHTING mode... 4 2 Terms... 6 3 Steps to easily control
Quick Help Teaching Room Technology Support
 Quick Help Teaching Room Technology Support Technical assistance is available. If you require assistance, please call Ext 6066 Quick Help Technology Overview INDEX INDEX Touch Screen Is not active 3 Technology
About your ereader Anatomy of your ereader Charging your ereader Using the touch screen... 8
 Kobo Glo User Guide Table of Contents About your ereader... 5 Anatomy of your ereader... 6 Charging your ereader... 7 Using the touch screen... 8 Putting your ereader to sleep and waking it up... 10 Using
E-MANUAL. Thank you for purchasing this Samsung product. To receive more complete service, please register your product at.
 E-MANUAL Thank you for purchasing this Samsung product. To receive more complete service, please register your product at www.samsung.com/register Model Serial No. Contents Quick Guides Connecting the
Meetinghouse Webcast Setup Guide for the Europe Area Sending Site
 Meetinghouse Webcast Setup Guide for the Europe Area Sending Site Rev 03 15 Nov 2009 Introduction This guide provides helpful information and details for successfully setting up a webcast in the Europe
S7H-DK S7H 7" High Bright Monitor Deluxe Kit
 S7H-DK S7H 7" High Bright Monitor Deluxe Kit QUICKSTART GUIDE What s Included 1 x S7H Monitor 1 x Camera Shoe Mount 1 x Neoprene Sleeve 1 x Mini-XLR to P-TAP Cable 2 x DV Battery Plate 1 x DV Battery 1
QUICK START GUIDE. QT Analog HD Camera & DVR Bundle ENGLISH
 QUICK START GUIDE QT Analog HD Camera & DVR Bundle ENGLISH Table of Contents Welcome What s Included...3 Understanding your DVR...4 Get Connected Registration...5 Connect Your Cameras...5 Connect DVR to
PogoStick and Research Pogo App Operator s Guide
 PogoStick and Research Pogo App Operator s Guide Research POGO App Overview Getting Started with the Research POGO App When you first start the Research POGO App, you will be asked to log into your Precision
Dell Wyse 5030 PCoIP Zero Client
 Dell Wyse 5030 PCoIP Zero Client User Guide Regulatory Model: PxN Regulatory Type: PxN001 Notes, cautions, and warnings NOTE: A NOTE indicates important information that helps you make better use of your
VSX Series Getting Started Guide
 VSX Series Getting Started Guide September, 2003 Edition 3725-21286-002/A VSX SERIES GETTING STARTED GUIDE Trademark Information Patent Information Polycom and the Polycom logo design are registered trademarks
SX Series with TRC6 Remote Control User Guide
 SX Series with TRC6 Remote Control User Guide Rev 11May2017 Page 1 of 19 OVERVIEW.... 3 BASIC NAVIGATION.... 4 GENERAL USE.... 5 Setup... 5 Microphone.... 6 Volume.... 6 Site to Site Calls.... 7 Connecting
Casambi App User Guide
 Casambi App User Guide Version 1.5.4 2.1.2017 Casambi Technologies Oy Table of contents 1 of 28 Table of contents 1 Smart & Connected 2 Using the Casambi App 3 First time use 3 Taking luminaires into use:
February 2007 Edition /A. Getting Started Guide for the VSX Series Version 8.5.3
 February 2007 Edition 3725-21286-009/A Getting Started Guide for the VSX Series Version 8.5.3 GETTING STARTED GUIDE FOR THE VSX SERIES Trademark Information Polycom, the Polycom logo design, and ViewStation
DX80 Touchscreen User Guide
 DX80 Touchscreen User Guide 07Mar2018 Page 1 of 16 Table of Contents Table of Contents GENERAL USE.... 5 Site to Site Calls.... 6 Connecting to an MBT Site.... 6 Add a Site to Favorites.... 6 Connecting
E-MANUAL. Thank you for purchasing this Samsung product. To receive more complete service, please register your product at
 E-MANUAL Thank you for purchasing this Samsung product. To receive more complete service, please register your product at www.samsung.com M o d e l S e r i a ln o. To directly go to the page that provides
Software Quick Manual
 XX177-24-00 Virtual Matrix Display Controller Quick Manual Vicon Industries Inc. does not warrant that the functions contained in this equipment will meet your requirements or that the operation will be
E-MANUAL. Thank you for purchasing this Samsung product. To receive more complete service, please register your product at.
 E-MANUAL Thank you for purchasing this Samsung product. To receive more complete service, please register your product at www.samsung.com/register Model Serial No. Contents Quick Guides Using Smart Hub
ViewCommander- NVR Version 3. User s Guide
 ViewCommander- NVR Version 3 User s Guide The information in this manual is subject to change without notice. Internet Video & Imaging, Inc. assumes no responsibility or liability for any errors, inaccuracies,
VSP 198CVS Quick Start
 VIEWSIZE THE WORLD VSP 198CVS Quick Start Max 2048 1152@60Hz/2560 1152 50Hz input/output resolution User customize output resolution 3G/HD/SD-SDI input Multiple cascade mapping for super resolution DVI
E-MANUAL. Thank you for purchasing this Samsung product. To receive more complete service, please register your product at.
 E-MANUAL Thank you for purchasing this Samsung product. To receive more complete service, please register your product at www.samsung.com/register Model Serial No. Contents Quick Guides Connecting the
SOFTWARE INSTRUCTIONS REAL-TIME STEERING ARRAY MICROPHONES AM-1B AM-1W
 SOFTWARE INSTRUCTIONS REAL-TIME STEERING ARRAY MICROPHONES AM-1B AM-1W Thank you for purchasing TOA s Real-Time Steering Array Microphone. Please carefully follow the instructions in this manual to ensure
GUIDE TO GETTING STARTED
 GUIDE TO GETTING STARTED Experience Extraordinary DIGICELPLAYTT.COM This is your guide to using your new Digicel Play service, giving you the essentials as well as handy tips on all our great features.
Getting Started Guide for the V Series
 product pic here Getting Started Guide for the V Series Version 9.0.6 March 2010 Edition 3725-24476-003/A Trademark Information POLYCOM, the Polycom Triangles logo and the names and marks associated with
SX80 with Touchpad 10 User Guide
 SX80 with Touchpad 10 User Guide Rev 11May2017 Page 1 of 19 Table of Contents OVERVIEW.... 3 BASIC NAVIGATION.... 4 GENERAL USE.... 5 Setup... 5 Camera Controls... 6 Microphone.... 8 Volume.... 9 Site
E-MANUAL. Thank you for purchasing this Samsung product. To receive more complete service, please register your product at. Model Serial No.
 E-MANUAL Thank you for purchasing this Samsung product. To receive more complete service, please register your product at www.samsung.com Model Serial No. To directly go to the page that provides instructions
SX10/20 with Touchpad 10
 SX10/20 with Touchpad 10 rev 24Sept2018 Page 1 of 19 Table of Contents Table of Contents OVERVIEW.... 3 BASIC NAVIGATION.... 4 GENERAL USE.... 5 Setup... 5 Camera Controls... 6 Microphone.... 8 Volume....
Installation / Set-up of Autoread Camera System to DS1000/DS1200 Inserters
 Installation / Set-up of Autoread Camera System to DS1000/DS1200 Inserters Written By: Colin Langridge Issue: Draft Date: 03 rd July 2008 1 Date: 29 th July 2008 2 Date: 20 th August 2008 3 Date: 02 nd
Store Inventory Instruction Guide
 Store Inventory Instruction Guide Review Equipment & Supplies page 2 Set-Up Access Point page 6 Register Scanners page 8 Place Fixture Stickers/Enter Ranges page 10 Scanning Basics and Additional Keyboard
IoT RF HC8301/HC8301A User s Manual
 IoT RF HC8301/HC8301A User s Manual [V1.02] Directory 1. Product Introduction... 3 2. Network Connection... 4 2.1 Downloading APP- AllCam... 4 2.2 Power Supply... 4 2.3 First Time Setup... 5 2.3.2 Live
OPERATING GUIDE. HIGHlite 660 series. High Brightness Digital Video Projector 16:9 widescreen display. Rev A June A
 OPERATING GUIDE HIGHlite 660 series High Brightness Digital Video Projector 16:9 widescreen display 111-9714A Digital Projection HIGHlite 660 series CONTENTS Operating Guide CONTENTS About this Guide...
Horizontal Menu Options... 2 Main Menu Layout... 3 Using Your Remote... 4 Shortcut Buttons... 4 Menu Navigation... 4 Controlling Live TV...
 Maestro User Guide Contents Welcome Horizontal Menu Options... 2 Main Menu Layout... 3 Using Your Remote... 4 Shortcut Buttons... 4 Menu Navigation... 4 Controlling Live TV... 5 TV Channels TV Channels
User s Manual. Welcome. About the product. Safety Notice
 Welcome Thank you for purchasing this product. Please read this manual thoroughly before use and retain it for future reference. We are confident you will enjoy this product and its many functions. About
E-MANUAL. Thank you for purchasing this Samsung product. To receive more complete service, please register your product at.
 E-MANUAL Thank you for purchasing this Samsung product. To receive more complete service, please register your product at www.samsung.com/register Model Serial No. Contents Quick Guides Using Smart Hub
MANAGERS REFERENCE GUIDE FOR
 MANAGERS REFERENCE GUIDE FOR Receive Components/Supplies Device (Scanner) Set Up Access Point Routers Set up Scanners Scanner Functions Additional Scanner Functions - Menu Button - Function Descriptions
GY-HM200SP USERS GUIDE
 SCORING OVERLAYS GY-HM200SP USERS GUIDE Network Connections, Overlays and Scorebot Live Data Feeds 1 TABLE OF CONTENTS Introduction 3 Step 1: Selecting an Overlay 4 Step 2: Establishing a Connection P2P
DETEXI Basic Configuration
 DETEXI Network Video Management System 5.5 EXPAND YOUR CONCEPTS OF SECURITY DETEXI Basic Configuration SETUP A FUNCTIONING DETEXI NVR / CLIENT It is important to know how to properly setup the DETEXI software
User Manual. Multi-Screen Splicing Processor J6
 User Manual Multi-Screen Splicing Processor J6 Rev1.0.0 NS160100147 Statement Dear users, Welcome to use the J6, a multi-screen splicing processor. This manual is intended to help you to understand and
E-MANUAL. Thank you for purchasing this Samsung product. To receive more complete service, please register your product at.
 E-MANUAL Thank you for purchasing this Samsung product. To receive more complete service, please register your product at www.samsung.com/register Model Serial No. Contents Connecting Antenna and External
E-MANUAL. Thank you for purchasing this Samsung product. To receive more complete service, please register your product at. Model Serial No.
 E-MANUAL Thank you for purchasing this Samsung product. To receive more complete service, please register your product at www.samsung.com Model Serial No. To directly go to the page that provides instructions
KV-901T & AV-901R. Quick Guide
 KV-901T & AV-901R Quick Guide This quick guide provides basic information only, for a complete version of user s manual please down load at: http://www.avextender.com/comm/upfile/p_110913_ 04468.pdf Copyright
EM7680 TV Streamer powered by LibreELEC Kodi
 EM7680 TV Streamer powered by LibreELEC Kodi 2 ENGLISH EM7680 - TV streamer powered by LibreELEC Kodi Table of contents 1.0 Introduction... 2 1.1 Introduction TV streamer... 3 1.2 LibreELEC and Kodi introduction...
Joining a Videoconference via an Invitation
 evisit (Videoconference) Joining a Videoconference via an Email Invitation ios Device Guide Your email invitation and the Vidyo app enable you to join a videoconference using your ios device (e.g., ipad
Wireless Studio. User s Guide Version 5.1x Before using this software, please read this manual thoroughly and retain it for future reference.
 4-743-161-12 (1) Wireless Studio User s Guide Version 5.1x Before using this software, please read this manual thoroughly and retain it for future reference. DWR-R01D/R02D/R02DN/R03D 2018 Sony Corporation
V4.7 Software Quick Start Guide
 V4.7 Software Quick Start Guide INTRODUCTION TO V4.7 The 4.7 software update for the Vi Series includes a major update to the functionality of the Vi4 console in particular, bringing a new level of power
2-/4-Channel Cam Viewer E- series for Automatic License Plate Recognition CV7-LP
 2-/4-Channel Cam Viewer E- series for Automatic License Plate Recognition Copyright 2-/4-Channel Cam Viewer E-series for Automatic License Plate Recognition Copyright 2018 by PLANET Technology Corp. All
E-MANUAL. Thank you for purchasing this Samsung product. To receive more complete service, please register your product at.
 E-MANUAL Thank you for purchasing this Samsung product. To receive more complete service, please register your product at www.samsung.com/register Model Serial No. Contents Quick Guides Connecting the
DH7-DK QUICKSTART GUIDE. DH7 4K Support HDMI On-Camera Field Monitor Deluxe Kit
 DH7-DK QUICKSTART GUIDE DH7 4K Support HDMI On-Camera Field Monitor Deluxe Kit What s Included 1 x DH7 Monitor 1 x AC Adapter 1 x Camera Shoe Mount 1 x Screen Cleaning Wipe 1 x Screen Protection Film 1