THORACIC ESOPHAGECTOMY Transthoracic Esophageal Resections and Reconstruction
|
|
|
- Dylan Reynolds
- 5 years ago
- Views:
Transcription


1
2
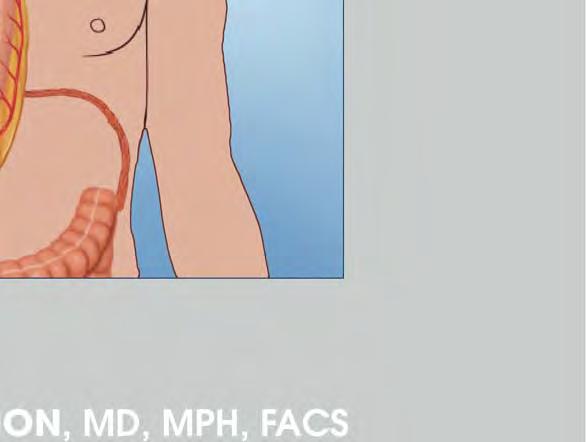
3 THORACIC ESOPHAGECTOMY Transthoracic Esophageal Resections and Reconstruction Shanda H. BLACKMON, MD, MPH, FACS Head, Section of Thoracic Surgery Assistant Professor, Weill Cornell Medical College The Methodist Hospital, Houston, Texas, U.S.A.

4 4 Thoracic Esophagectomy Transthoracic Esophageal Resections and Reconstruction Thoracic Esophagectomy Transthoracic Esophageal Resections and Reconstruction Shanda H. BLACKMON, MD, MPH, FACS Head, Section of Thoracic Surgery Assistant Professor, Weill Cornell Medical College The Methodist Hospital, Houston, Texas, U.S.A. Address for correspondence: Shanda H. Blackmon, MD, MPH, FACS Head, Section of Thoracic Surgery Assistant Professor, Weill Cornell Medical College The Methodist Hospital, Houston, Texas 6550 Fannin Street, Smith Tower, Suite 1661 Houston, Texas, 77030, U.S.A. Shanda H. Blackmon, MD, MPH, FACS 2013 Tuttlingen, Printed in Germany ISBN P.O. Box, D Tuttlingen, Germany Phone: +49 (0) / Fax: +49 (0) / Endopress@t-online.de Editions in languages other than English and German are in preparation. For up-to-date information, please contact Tuttlingen at the address shown above. Important notice: Medical knowledge is ever changing. As new research and clinical experience broaden our knowledge, changes in treatment and therapy may be required. The authors and editors of the material herein have consulted sources believed to be reliable in their efforts to provide information that is complete and in accord with the standards accepted at the time of publication. However, in view of the possibility of human error by the authors, editors, or publisher of the work herein, or changes in medical knowledge, neither the authors, editors, publisher, nor any other party who has been involved in the preparation of this work, warrants that the information contained herein is in every respect accurate or complete, and they are not responsible for any errors or omissions or for the results obtained from use of such information. The information contained within this brochure is intended for use by doctors and other health care professionals. This material is not intended for use as a basis for treatment decisions, and is not a substitute for professional consultation and/or use of peer-reviewed medical literature. Illustrations by: Mike de la Flor (Houston, Tx, U.S.A.) Yvan Freund, Strasbourg, France Figs. 11, 12, Layout and color image processing: Tuttlingen, Germany Printed by: Straub Druck + Medien AG D Schramberg, Germany Some of the product names, patents, and registered designs referred to in this booklet are in fact registered trademarks or proprietary names even though specific reference to this fact is not always made in the text. Therefore, the appearance of a name without designation as proprietary is not to be construed as a representation by the publisher that it is in the public domain. All rights reserved. No part of this publication may be translated, reprinted or reproduced, transmitted in any form or by any means, electronic or mechanical, now known or hereafter invented, including photocopying and recording, or utilized in any information storage or retrieval system without the prior written permission of the copyright holder.
5 Thoracic Esophagectomy Transthoracic Esophageal Resections and Reconstruction 5 Table of Contents Transthoracic Esophageal Resections and Reconstruction Surgical Technique: Checklist Initial Assessment in the Operating Room Bronchoscopy Endoscopy Abdominal Approach Laparoscopic Approach Open Midline Incision Mobilizing the Esophagus Mobilizing the Stomach Left Gastric Artery Division and Celiac Lymph Node Dissection Creating a Tubularized Stapled Gastric Conduit Mobilization of the Duodenum Pyloric Drainage Feeding Tube Placement Thoracic Incisions Thoracoscopic Approach Thoracotomy Thoracic Esophageal Dissection and Lymphadenectomy Intrathoracic Anastomosis Circular Stapled Anastomosis Stapled Side-to-Side Anastomosis Hand-Sewn Anastomosis Completing the Thoracic Portion Additional Tips Postoperative Management Recommended Reading Endoscopes, Instruments, Units and Video Equipment
6 6 Thoracic Esophagectomy Transthoracic Esophageal Resections and Reconstruction Transthoracic Esophageal Resections and Reconstruction Surgical Technique: Checklist Prior to bringing the patient into the operating room, it is important to ensure the entire team understands what surgery is planned. Having a checklist for equipment will decrease intra-operative delays. The following checklist was developed to define each step. Initial Assessment in the Operating Room The patient is brought into the operating room and all appropriate lines and monitors are placed by anesthesia. Empiric antibiotics are administered along with beta blockade, when indicated. Sequential compression devices are applied to the lower extremities with or without medical prophylaxis. General anesthesia with a laryngeal mask airway is initially placed. A copy of endoscopy reports, EUS, CT scans, and PET imaging should be available in the room prior to beginning the case. Table 1: Transthoracic Resections Ivor Lewis esophagectomy = right thoracotomy + laparotomy Hybrid esophagectomy a. laparoscopic abdominal approach + thoracotomy b. laparotomy + thoracoscopic approach c. (a.) or (b.) + neck anastomosis Minimally invasive esophagectomy (MIE) a. laparoscopic abdominal approach + thoracoscopic approach b. (a.) + neck anastomosis McKeown esophagectomy = three-field esophagectomy abdominal incision + thoracic incision + neck incision Left-sided thoraco-abdominal esophagectomy


7 Thoracic Esophagectomy Transthoracic Esophageal Resections and Reconstruction 7 Bronchoscopy A bronchoscopy is performed for all patients with a tumor in proximity to the airway. The bronchoscope is advanced down to the level of the subsegmental bronchi and the entire tracheobronchial tree is visualized for any evidence of abnormality. The absence of tracheal tumor is documented. Based on this, the decision is made to proceed with esophagectomy. The laryngeal mask airway is removed and a double-lumen endotracheal tube is secured into position. Repeat bronchoscopy confirms that the left-sided endotracheal tube is in the left mainstem bronchus and the tracheal opening on the right side allows for visualization of the carina and the entire right mainstem bronchus. 1 Laparoscopic view of diffuse metastatic abdominal disease. Endoscopy Endoscopy is performed to identify the proximal aspect of the tumor and any abnormal tissue proximal to the tumor including Barrett s metaplasia. As long as the tumor is noted to be distal to 30 cm from the incisors, an Ivor-Lewis esophagectomy should be possible with an intrathoracic anastomosis and more than adequate margin. No abnormality within the esophagus should be present proximal to the area of transection including metaplasia. The patient is then placed in the supine position and the abdomen is sterilely prepped and draped. Abdominal Approach Either a laparoscopic abdominal approach or an open midline incisional approach to the abdominal portion of the surgery can be made. The advantage of an initial laparoscopic approach will be early detection of potentially subclinical metastatic peritoneal or liver disease (Fig. 1). Laparoscopic Approach If a laparoscopic approach is taken, five laparoscopic abdominal trocars are placed. The patient can be positioned in the dorsal lithothomy position or supine with a footboard. A 12-mm trocar in the midline or just to the right of midline and two 5-mm trocars on either subcostal area are placed (Fig. 2). An additional 12-mm trocar can be placed in the left subcostal position for visualization using an endocameleon. The right subcostal trocar is used to place a Mediflex liver retractor to retract the liver anteriorly and laterally to the right. An energy source is recommended and is placed through the 12-mm port. A camera port is a 5- to 10-mm trocar in the left medial subcostal area, approximately 4 to 5 cm inferior to the subcostal region. After all the trocars have been placed safely, exploration of the abdomen is performed. The patient is placed into severe reverse Trendelenburg position. Checking for evidence of bowel injury or metastatic disease is necessary prior to making a decision to proceed with the esophagectomy. A minimally invasive approach should only be taken if the exact same quality of resection can be achieved as in open surgery. 2 Laparoscopic trocar port placement.

8 8 Thoracic Esophagectomy Transthoracic Esophageal Resections and Reconstruction Open Midline Incision If an open approach is taken, the surgery can typically be performed through an upper midline laparotomy incision. The midline incision extends to the xyphoid and just to the side of the xyphoid underneath the skin. The incision will infrequently extend below the level of the umbilicus. Using an open incision, a Thompson or Bookwalter retractor device may help to pull the liver and adjacent abdominal wall out of the way. Mobilizing the Esophagus An energy source is used to divide the pars flaccida or the hepatogastric ligament. The left triangular ligament of the liver can be divided to provide additional exposure. Include all tissue in this ligament with the lesser curve specimen erring towards the liver side. The right crus of the diaphragm is dissected with an energy device and the esophagus is mobilized away from the right crus, stripping the peritoneal lining away from the crus to include all tissue with the esophagus to achieve a negative radial margin. If the patient has a small hiatus, the right crus can be divided approximately 1 to 2cm to enlarge the hiatus for additional dissection. This allows for circumferential dissection around the esophagus. The phrenoesophageal membrane is taken down and all tissue adjacent to the esophagus is kept with the esophagus. The crural decussation is dissected posteriorly and the left crus is identified from the right side of the abdomen (Fig. 3). A Penrose secured around the esophagus will help when continuing circumferential dissection. An endoloop can secure the Penrose. 3 Development of the posterior esophageal window. This Penrose can later be recaptured and pulled into the chest to assist in mobilization of the intrathoracic esophagus. Use an Endo-loop to secure the Penrose into position if you are using a laparoscopic approach. The posterior esophageal window is developed and all tissue adjacent to the esophagus is dissected away from the right and left crura. The borders of the dissection are; anteriorly the pericardium and diaphragm and anterior abdominal wall, right laterally the inferior pulmonary ligament and right crus, and left laterally the inferior pulmonary ligament and left crus, and posteriorly the aorta.


, the omentum is divided with an energy device.")
9 Thoracic Esophagectomy Transthoracic Esophageal Resections and Reconstruction 9 After dissecting as far in the cranial direction towards the mediastinum, mobilize the segment of the gastrohepatic ligament towards the lesser curve of the stomach. Making an adequately sized hiatus for passage of the conduit is important. Too large of a hiatus will result in herniation of colon or additional conduit into the chest and too tight of a hiatus can result in an ischemic conduit. It is helpful to dissect as far into the chest as can safely be done prior to closing the abdomen, as the inferior pulmonary ligament nodes from both sides can be taken from the abdomen. It is occasionally possible to dissect to the inferior pulmonary vein, depending on the anatomy of the patient. Mobilizing the Stomach The gastroepiploic artery is identified and approximately 2 cm lateral to this (away from the stomach), the omentum is divided with an energy device. The lesser sac is entered through the greater omentum. Please refer to Fig. 4 entitled Gastric mobilization. Instead of just sparing a small segment of omentum, an omental flap can also be created to be delivered into the chest to cover the anastomosis (Fig. 5). When manipulating the future stomach conduit, take care not to grasp the stomach too hard and especially do not grasp to gastroepiploic artery. The division is completed up to the greater curve of the stomach where the short gastric artery vessels are encountered. Exposure of the short gastric arteries is enhanced by grasping the posterior aspect of the stomach, rolling the organ towards the liver and away from the spleen. The short gastric artery vessels are divided with an energy source towards the left crus of the diaphragm. The posterior attachments of the stomach and the pancreas are divided. Dissect the cardia of the stomach away from the left crus. Create the posterior esophageal window and place a Penrose drain around the esophagogastric junction. Dissect the posterior aspect of the stomach away from the pancreas preserving the right gastric artery. For benign disease, the modification does not typically require complete esophagectomy or lymphadenectomy. Beware of an additional last short gastric artery that may not connect to the spleen but instead pass directly to the splenic artery. a b 4 Gastric mobilization. 5 Pedicled omental flap


10 10 Thoracic Esophagectomy Transthoracic Esophageal Resections and Reconstruction a b Left Gastric Artery Division and Celiac Lymph Node Dissection Once the posterior attachments of the stomach have been divided along with the lesser curve dissection, it should be possible to lift the entire stomach up towards the anterior aspect of the abdomen and visualize the left gastric artery pedicle. It is possible to staple the left gastric artery from either the right side of the abdomen/stomach or the left side of the abdomen/stomach and an endoscopic or linear stapler is passed through the 12-mm midline or slightly right para-midline port if laparoscopic. Passing the stapler through this angle allows for direct visualization while safely passing the stapler at the base of the left gastric artery against the celiac trunk. Beware of any aberrant left hepatic artery anatomy (Fig. 6), especially a replaced left hepatic artery (Fig. 6a) coming completely from the left gastric artery or an accessory hepatic coming from the left gastric artery (Fig. 6b). If this artery is an accessory artery and another left hepatic artery is present, then it can typically be divided without consequence. However, if the entire left hepatic artery is replaced from a left gastric artery origin, then either a laparoscopic or open ultrasound probe can be used to monitor the clamping of this vessel and determine portal flow. If the blood flow to the liver is not diminished by more than fifty percent, then the artery can typically still be divided. In the event the artery has to be preserved, then a more distal ligation of the left gastric artery is necessary (closer to the stomach) to prevent transection of the replaced hepatic branch. This will result in probably a lower lymph node acquisition. A low stapler division of this artery (as proximal as possible to celiac axis) allows for incorporation of all lymphatic tissue to be kept with the specimen. Celiac lymph nodes can be dissected at this time and sent as a separate pathologic specimen. Left gastric artery lymph nodes are then identified and dissected away from the specimen and sent as a separate specimen identified for pathology. The author recommends sending the lymph node dissections as separate specimens labeled for the pathologist. c 6 Replaced left hepatic artery off the left gastric artery (a). Accessory left hepatic artery off the left gastric artery (b). Division of vessels to the stomach during esophagectomy (c).


11 Thoracic Esophagectomy Transthoracic Esophageal Resections and Reconstruction 11 Creating a Tubularized Stapled Gastric Conduit Please see Fig. 7 for stapling and designing the gastric conduit. A vascular stapler or energy device can be used to divide the fat along the edge of the lesser curve towards the edge of the stomach. Begin by placing the stapler beyond the largest arcade from the right gastric artery and fire one load of a linear stapler towards the greater curve of the stomach. An appropriate stapler entry point would be the angular notch or the incisura of the stomach. Follow the greater curve of the stomach creating the conduit width of your choice (2 3cm is typical) and identify the gastroepiploic artery running along the greater curve of the stomach. Beginning at the lesser curve and following the greater curve, create a stapled longitudinal gastric conduit, preserving the gastroepiploic artery. A conduit that is more narrow risks a higher rate of leakage and a conduit that is wider may shorten the actual length provided. Use a retractor from the far left subcostal area to stretch out the superior aspect of the stomach to prevent any twisting of the stomach or shortening the conduit while stapling. Once the staple line has been created, owersewing is optional. Once delivered into the chest and after the chest anastomosis, the remainder of the staple line can also be oversewn. At this point, the conduit can be completely separated from the specimen or left partially attached by not completing the division. If the conduit is completely separated, then it will have to be sewn back to the specimen at the lesser curve side in two places to prevent rotation as it is delivered into the chest. If an omental pedicled flap is created, it should also be tacked to the edge of the conduit to facilitate delivery into the chest. 7 Stapling and creating the tubularized gastric conduit. Mobilization of the Duodenum Kocherize the duodenum to facilitate mobilization of the pylorus to the level of the hiatus, especially when trying to reach the neck. Complete the division of the omentum and the posterior attachments of the antrum to allow the conduit to be delivered easily into the chest. Any attachments to the pancreas are released and beware not to damage the right gastric artery coming off of the proper hepatic artery just distal to the gastroduodenal artery. Pyloric Drainage There are basically three options available to the surgeon to address the pylorus; pyloroplasty, pyloromyotomy, or injection of paralytic (typically IU botox). Some surgeons do not believe a pyloric drainage procedure is necessary, however, there are many reports in the literature of conduit obstruction from inadequate drainage owing to a restricting pylorus. It is impossible to identify those patients who will not need a drainage procedure, and because of this, the author advocates performing a drainage procedure. The pyloroplasty is performed by placing an initial suture on the superior aspect of the pyloric muscle. Electrocautery using an L-hook allows the creation of a longitudinal incision extending from the stomach into the duodenum traversing and dividing the pyloric muscle along the way (Figs. 8a, b). It is possible to perform a pyloromyotomy instead of pyloroplasty and if this is chosen, merely divide the pyloric muscle and preserve the mucosal layer of the stomach and duodenum. a b 8 Pyloroplasty technique
12 12 Thoracic Esophagectomy Transthoracic Esophageal Resections and Reconstruction A long-handled electrocautery instrument can be used to achieve hemostasis during division of the pyloric muscle and in the event a pyloroplasty is chosen, the incision should be completed through the mucosa exposing the internal lumen of the internal duodenum and stomach. The internal mucosa exposure is facilitated by using the previously placed stay sutures on the superior and inferior aspects of the pyloric muscle to expose. Once the longitudinal pyloroplasty has been closed transversely with interrupted sutures, two large endoclips can be placed on the most superior retraction suture to mark the area radiographically in the event of a leak. The pyloroplasty can then be covered with a small piece of omentum. Feeding Tube Placement The laparoscopic feeding jejunostomy tube is created and placed by turning the camera towards the lower portion of the abdomen. The table may be flat instead of in reverse Trendelenburg at this time. Retract superiorly the omentum towards the pyloroplasty area. The transverse colon is easily identified underneath the greater omentum and is also retracted superiorly with an atraumatic grasper. After retracting the transverse colon superiorly, identify the ligament of Treitz. Approximately 20 cm distal to the ligament of Treitz, the proximal jejunum is held to the anterior left abdominal wall. In the event a laparoscopic feeding tube is being placed, either a sutured technique with or without an assist device, or a T-fastener technique can be used. Hold the bowel in place against the anterior abdominal wall and use a subclavian needle to traverse the left anterior abdominal wall in that same point where the bowel meets the anterior abdominal wall to the enter the antimesenteric side of the proximal jejunum. A guide wire is placed into the lumen of the jejunum and guided distally into the bowel. T-fasteners are placed in all four quadrants around the entry point of the guide wire. Injection of saline into the bowel lumen often allows safer and easier passage of intra-luminal devices and distends the bowel for easier placement of the T-fasteners. As an alternate to T-fasteners, the bowel can be sutured to the anterior abdominal wall as well. The T-fasteners are tightened and a dilator and introducer sheath are placed over the guide wire through the left anterior abdominal wall. The dilator and guide wire are simultaneously removed leaving the introducer sheath in the distal jejunum allowing placement of the feeding jejunostomy tube through the introducer sheath. A grasper is used to guide the catheter into place. Ensure the back wall of the bowel is not incorporated into the sutures, as this may cause obstruction. The catheter is sewn to the anterior abdominal wall and secured on the outside. In the laparotomy approach, the feeding tube is simply sutured to the anterior abdominal wall directly and a whitzel can also provide additional protection of the track. Thoracic Incisions The patient is then taken out of the supine position and is rolled into a left lateral decubitus position with the right side up. All pressures points are padded. The arms are placed on an arm board and an axillary roll is placed underneath the axilla. The table is flexed to open the rib spaces. Tape is placed on the hip to secure it into position and a beanbag can be used to hold the patient as well. Either a thoracoscopic or open approach can be used for the chest.


13 Thoracic Esophagectomy Transthoracic Esophageal Resections and Reconstruction 13 Thoracoscopic Approach In the event a thoracoscopic approach is taken, four thoracoscopic trocars are typically placed. Please see Fig. 9 for chest trocar placement. A 3-cm utility port is placed in the posterior axillary line at the seventh intercostal space just above the diaphragm and a camera port is placed in the anterior axillary line in the seventh to eighth intercostal space. A second access port is placed in the right fifth intercostal space in the anterior axillary line. The fourth trocar maybe placed approximately 2 to 3 cm superior to the port in the posterior axillary line. A port protector may be used at the utility site to retract the soft tissue and facilitate suction and exposure and passing of instruments with ease. Beware of sucking within the chest without a vent, as this may cause negative pressure pulmonary edema of the collapsed lung. This can also be minimized by asking the anesthesiologist to open the tracheal tube to air while ventilating the left bronchial side of the double-lumen tube. 9 Thoracic trocar placement. Thoracotomy Open thoracic incisions can include a muscle-sparing or muscle-cutting approach. The advantages of a muscle-sparing approach is preservation of the chest wall musculature in the event a flap is required to repair a leak (Fig. 10). An incision angling towards the infra-mammary crease in the mid axillary line extending to the auscultory triangle allows for a muscle-sparing approach. The incision is typically 6 8cm long in a muscle-sparing approach. If a longer or larger incision is needed, the latissimus muscle can be divided to provide additional exposure, and it is rare the serratus muscle would need to be divided to provide additional exposure for this procedure. Once the ribs are exposed, the chest is entered through the 5 th 6 th intercostal space. The lung is made atelectatic by isolation of ventilation through either a bronchial blocker or double-lumen endo tracheal tube. Resecting a small portion of the rib may facilitate entry into the chest, and some surgeons even advocate removing a long segment of the fifth rib to provide ample exposure. Epidural analgesia is recommended when an open incision is made, as pain control may be improved compared to a traditional patient-controlled analgesia for thoracotomy 10 Right posterolateral muscle-sparing thoracotomy incision. Mobilization of the latissimus anterior as it is spared.


14 14 Thoracic Esophagectomy Transthoracic Esophageal Resections and Reconstruction 11 En bloc lymphadenectomy for eso phagectomy. Thoracic Esophageal Dissection and Lymphadenectomy The lung is retracted anteriorly to expose the mediastinum. An energy device is used to incise the pleura on either side of the esophagus extending from the base of the diaphragm superiorly all the way up to the level of the azygos vein. The inferior pulmonary ligament is taken down to separate the esophagus from the lung and all lymph nodes in this area are identified and sent for pathologic evaluation. A vascular endoscopic stapler or suture ligature is used to seal and divide the azygos vein for additional exposure of the esophagus. This stapler can be passed through a chest tube incision in the anterior axillary line in the seventh intercostal space. Creating this port even in an open case provides another passageway for instruments that can assist in retraction and provide better visualization or the placement of a camera when teaching others how to perform the surgery. An energy source is used to dissect the esophagus circumferentially at the level of the diaphragm. While dissecting towards the abdomen, expose the esophagus inferiorly towards the diaphragm and into the abdomen from the chest to expose the Penrose drain that was left in the abdomen. Placing a suture to retract the diaphragm inferiorly and delivering it out of the chest will facilitate exposure. This Penrose drain is delivered into the chest and is retracted superiorly, allowing identification of the attachments circumferentially around the esophagus. By pulling up on the Penrose, the posterior aspect of the esophagus and all tissue adjacent to the esophagus can be safely divided under direct visualization with an energy device. When an en bloc lymph node dissection is being performed, the azygos vein and thoracic duct are taken with the specimen and thus a thoracic duct ligation is performed (Fig.11). Some authors advocate ligating the thoracic duct regardless of the dissection to limit postoperative thoracic duct leak. When performing a modified en bloc dissection, as we prefer to do, the azygos vein is spared, but lymphatic tissue adjacent to the area is included. Fig.12 depicts the thoracic nodal staging for proper labeling. Dissecting the posterior aspect of the pericardium and the left atrium allows complete dissection around the esophagus keeping all tissue adjacent to the esophagus with the specimen. The right inferior pulmonary ligament is extended all the way up to the level of the right inferior pulmonary vein. The left inferior pulmonary ligament can be identified and lymph nodes dissected from this exposure as well. 12 Eso phageal lymph node map.


15 Thoracic Esophagectomy Transthoracic Esophageal Resections and Reconstruction 15 The esophagus is immobilized all the way up to the level of the azygos vein, taking care to avoid the posterior membranous portion of the trachea and the right and left mainstem bronchi. No energy source is used during dissection of the superior aspect of the esophagus to prevent inadvertent cautery injury to the membranous portion of the trachea or mainstem bronchi. At this time, the subcarinal lymph nodes can be taken. Transection of the esophagus is performed with an energy device or sharp instrument at or above the level of the azygos vein, depending on the location of the tumor and the extent of resection required. It is possible to carry the resection to the top of the thoracic inlet and create an anastomosis as high as would be created in a neck anastomosis, but creation of the anastomosis above the level of the azygos vein will be more than adequate in most cases where a GE junction or lower esophageal adenocarcinoma is involved (Fig.13). If a circular stapled technique is being employed with the specimen left attached to the conduit during the anastomosis and later removed, a segment of the esophagus can be sent to confirm a negative margin. 13 Azygos vein in relationship to the thoracic anastomosis. Intrathoracic Anastomosis Refer to Fig. 14 depicting the sutures that are placed in the terminal end of the esophagus to hold it without damaging or grasping the tissue that will become the anastomosis. Three types of intrathoracic anastomoses can be created to join the terminal end of the esophagus to the gastric conduit. These anastomoses include the more traditional hand-sewn, stapled side-to-side, and the circular stapled. Each will be discussed in detail. The lack of a serosal layer, segmental blood supply, and location make the esophagus a remarkably difficult organ to anastomose. Handling the esophagus with the least amount of trauma, limiting the dissection causing less blood supply just proximal to the anastomosis, and avoidance of too much tension on sutures that may cut through the wall instead of create an anastomosis are paramount. A propensity-matched analysis found the thoracic stapled anastomosis to be safe, effective, and less likely to cause postoperative stricture or dysphagia with equal leak rate when compared to a hand-sewn anastomosis [seeblackmon SH, CORREA AM et al. 2007]. The conduit is not delivered into the chest until the surgeon is ready to create the anastomosis. Bringing the tissue into the chest too early will result in potentially rotating the conduit or having the tissue obstruct a complete view. If the conduit is sutured to the specimen, then the sutures are simply cut and the specimen is sent for histopathologic examination to confirm a negative margin. If a circular stapled anastomosis is being created, a note will need to go to the pathologist to remind them the final margin will be the end-esophageal portion of the donut from the stapler. Do not deliver too much specimen into the chest, or redundancy will cause later dysphagia and poor gastric emptying. Either the additional tissue can be resected from the more ischemic tip of the conduit or the redundant conduit can be tucked back into the abdomen and tacked into position after the anastomosis has been created. 14 Stapled intrathoracic side-to-side anastomosis.


16 16 Thoracic Esophagectomy Transthoracic Esophageal Resections and Reconstruction 15 Circular stapled thoracic anastomosis. Circular Stapled Anastomosis A circular-stapled anastomosis can be created by placing a baseball or purse-string suture on the terminal end of the esophagus. If the specimen has been stapled away from the conduit, the specimen is delivered out of the chest and separated from the gastric conduit by cutting the two stay sutures. Once the baseball suture has run circumferentially around the terminal end of the esophagus at each passage passing through muscle and mucosa, the suture is tied to close the terminal end of the esophagus tightly around the anvil. A second purse-string is placed slightly higher up from the baseball stitch circumferentially around the terminal end of the esophagus leaving more generous suture on the outside of the esophagus than on the inside of the esophagus and this suture is tightened as well. If at this point the esophagus does not appear to be tightly fixed around the anvil, an additional suture may also be placed to facilitate gathering of the terminal end of the esophagus around the anvil. Any redundant tissue left around the anvil that may creep into the anastomosis will cause a leak. The anvil is placed into the terminal end of the esophagus. The stapler is placed through the open proximal end of the gastric conduit and a spike from the EEA stapler is made to exit on a greater curve side of the gastric conduit approximately 4 to 5 cm away from the most proximal end of the gastric conduit that is opened. This allows the two structures to be married to each other creating an end-to-side functional end-to-end anastomosis. The terminal end of the esophagus is stapled to the greater curve side of the gastric conduit in a circumferential fashion again approximately 3 to 4 cm distal to the opened end of the gastric conduit. Please see Fig. 15 for a circular stapled anastomosis. When the specimen is left attached to the gastric conduit, the circular stapler can be passed into a small gastrotomy to exit in a similar fashion out of the greater curve side of the conduit. Once the circular connectionis made and the stapler is removed, the remaining specimen can be retrieved by finishing the conduit creation by placing either a TA or linear endoscopic stapler to complete the divison along the red line in Fig. 15. Remember not to complete the gastric conduit staple line more than two centimeters close to the circular stapled anastomosis, as this will create a watershed area of poor perfusion and become a potential leak. Please note that some reports of stricture when using a size 25 circular-stapled anastomosis have been made, however, other surgeons report no difference with regard to stapler size using either a 25 or 28 size stapler. One should never use a circular stapler below smaller than a size 25. If using the OrVil circular stapler, please refer to the end of this guide for tips for deploying the OrVil. Stapled Side-to-Side Anastomosis Once the most proximal end of the gastric conduit has been removed and the gastric conduit is completely stapled closed with a linear stapler, the conduit can be positioned posterior to the terminal end of the esophagus and sutured in this position to lessen tension on the anastomosis. The esophagus is laid on top of the gastric conduit and again sutured on either side. A gastrotomy is placed on the greater curve side of the gastric conduit approximately 4 to 5 cm inferior caudally (caudal) to the most proximal end of the gastric conduit. A linear stapled side-to-side functional end to end oblique anastomosis is created by firing a size 60 stapler to connect the two structures to one another. The hood of the esophagus is hand-sewn over the opened gastrotomy in an interrupted fashion with either 3-0 vicryl suture or silk suture (Fig. 16). This interrupted suture can be reinforced in a Lembert fashion, but beware not to pull too hard and tear the esophageal wall. 16 Linear stapled thoracic anastomosis.


17 Thoracic Esophagectomy Transthoracic Esophageal Resections and Reconstruction 17 Hand-Sewn Anastomosis To create a hand-sewn anastomosis, the terminal end of the esophagus is placed on top of the gastric conduit as described in Fig. 17 for the beginning of a stapled side-to-side anastomosis. A gastrotomy is created on the greater curve side of the stomach to match the opening of the esophagus. Interrupted sutures are placed circumferentially connecting the terminal end of the esophagus to the greater curve gastrotomy. A second layer of suture is optional, but one must be aware that this may possibly narrow the anastomosis. (note about my study showing higher rate of dysphagia and stricture.) Completing the Thoracic Portion Once the anastomosis is completed and the gastric conduit tip is removed, a nasogastric tube is directed gently into the gastric conduit and the tip is left just above the diaphragm. The conduit is sewn to the diaphragm into the chest. Warm (cold irrigation may induce fibrillation of the heart) irrigation and insufflation of the conduit is performed for confirmation of no air bubbles or leakage around the staple line. Inspect the conduit and ensure that there is no abnormal kinking, redundancy, or malposition. The staple line should be facing the right side of the patient and the greater curve should be facing the left side of the patient. Shown in Fig.18 is the proper orientation of the final conduit and position with the anasto mosis ideally above the level of the azygos vein. The gastric conduit may be tacked into position by suturing it to the mediastinal pleura in several areas. In the event that an omental fat pad vascularized pedicled flap has been harvested, the flap can be positioned on top of the anastomosis or between the trachea and the eso phagus. Be wary not to rotate the gastric conduit when positioning the omental flap. Reduce any redundancy of the conduit back into the abdomen. Once the conduit has been properly positioned, tack the gastric conduit to the diaphragm at the level of the crura. Be sure not to tack the conduit to the dome of the diaphragm, as this will cause the conduit to make an S-shape as it dips down to follow the diaphragm during respiration. The conduit should be straight and directly behind the left atrium of the heart. Redundancy will cause patients to potentially develop dysphagia. A 24-to32-French chest tube is placed in the postero-apical position. We do not recommend placing drains directly adjacent to the anastomosis, but in near proximity such that drainage of a leak will be possible. The lung is re-insufflated and the incisions are closed. Confirmation of a correct instrument count is made. The nasogastric tube can be bridled into position to prevent accidental removal at the end of the case. 17 Hand-sewn thoracic anastomosis. 18 Proper orientation of the gastric conduit.
18 18 Thoracic Esophagectomy Transthoracic Esophageal Resections and Reconstruction Additional Tips Make sure the patient does not receive any intraoperative pressor agents during the entire surgery or in the immediate postoperative period, as this may cause conduit necrosis. Place the nasogastric tube into position after the intrathoracic anastomosis has been completed and after the terminal end of the gastric conduit has been resected to avoid accidentally including the tube in the anastomosis. Repeat endoscopy can be performed to evaluate a questionable anastomosis. Secure your nasogastric tube into position by creating a bridle, placing two ET suction catheters through either nostril exiting from the mouth. Umbilical tape can be tied to the terminal end of the two ET suction catheters and delivery of the ET suction catheters back outside the nostril allows for delivery of either end of the umbilical tape out of the nostril with the loop passing around the septum. The umbilical tape is loosely tied away from the nostril and then tightly tied around the nasogastric tube. This is not meant to hold the nasogastric tube in place but is only a reminder for the patient in the event they pull on the naso gastric tube. Securing this too tight may result in nasal septum necrosis. Remember to place a mesenteric piece of tape on the end of every tube exiting the patient s body to fix it to the patient s body at a point distal from that area from which it exits to prevent accidental tube dislodgement after the surgery. Remember it is important when creating an esophagogastric anastomosis using a circular stapler that a lower staple height is recommended (3.5 mm) and as large a stapler as the esophagus can receive. Larger diameter staplers (28 mm) have a better ability to staple outside the tissue that is secured to the anvil and have a smaller chance to develop stricture. Watch when introducing larger staplers into the esophagus, as they may cause tearing of the mucosal surface. Having a laparoscopic anvil grasper will facilitate the creation of a circular-stapled anastomosis and will make it easier to grasp the anvil during manipulation. Table 2: Complications of Thoracic Esophagectomy Anastomotic leak Bleeding Pneumonia Stricture Dysphagia Reflux Atrial fibrillation Postoperative Management Once the surgery is complete, the patient should be monitored in a specialized setting that is familiar with esophagectomy patients. Post-operative avoidance of intravenous pressors, generous administration of IV fluids, aggressive pulmonary toilet (except positive-pressure oral ventilation or deep vigorous suctioning), maintaining good conduit decompression with a drainage tube, carefully securing all drainage tubes, early ambulation, and careful management of post-operative atrial fibrillation are just a few of the essential keys to good outcomes in such patients. For a list of common complications after thoracic esophagectomy, please refer to Table 2.
19 Thoracic Esophagectomy Transthoracic Esophageal Resections and Reconstruction 19 Recommended Reading BLACKMON SH, CORREA AM, WYNN B, HOFSTETTER WL, MARTIN LW, MEHRAN RJ, RICE DC, SWISHER SG, WALSH GL, ROTH JA, VAPORCIYAN AA. Propensity-matched analysis of three techniques for intrathoracic esophagogastric anastomosis. Ann Thorac Surg 2007; 83: ; discussion 1813 DAI JG, ZHANG ZY, MIN JX, HUANG XB, WANG JS. Wrapping of the omental pedicle flap around esophagogastric anastomosis after esophagectomy for esophageal cancer. Surgery 2011; 149: LAI FC, CHEN L, TU YR, LIN M, LI X. Prevention of chylothorax complicating extensive esophageal resection by mass ligation of thoracic duct: a random control study. Ann Thorac Surg 2011; 91: OKUYAMA M, MOTOYAMA S, SUZUKI H, SAITO R, MARUYAMA K, OGAWA J. Hand-sewn cervical anastomosis versus stapled intrathoracic anastomosis after esophagectomy for middle or lower thoracic esophageal cancer: a prospective randomized controlled study. Surg Today 2007; 37: SHACKCLOTH MJ, MCCARRON E, KENDALL J, RUSSELL GN, PENNE- FATHER SH, TRAN J, PAGE RD. Randomized clinical trial to determine the effect of nasogastric drainage on tracheal acid aspiration following oesophagectomy. Br J Surg 2006; 93: WALTHER B, JOHANSSON J, JOHNSSON F, VON HOLSTEIN CS, ZILLINGT. Cervical or thoracic anastomosis after esophageal resection and gastric tube reconstruction: a prospective randomized trial comparing sutured neck anastomosis with stapled intrathoracic anastomosis. Ann Surg 2003; 238: ; discussion

20 20 Thoracic Esophagectomy Transthoracic Esophageal Resections and Reconstruction ENDOCAMELEON n Diameter 10 mm, length 32 cm Special Features: Variable direction of view HOPKINS telescope with unique rod lens system Easy-to-use adjusting knob for selecting the direction of view Rigid sheath with a diameter of 10 mm AE AE ENDOCAMELEON HOPKINS Telescope, diameter10mm, length 32 cm, autoclavable, variable direction of view 0 120, with adjusting knob for selecting the direction of view, fiber optic light transmission incorporated, color code: gold
21 Thoracic Esophagectomy Transthoracic Esophageal Resections and Reconstruction 21 HOPKINS II Telescopes Diameter 10 mm, length 31 cm n AA AA HOPKINS II Straight Forward Telescope 0, enlargedview, diameter10mm, length 31cm, autoclavable, fiber optic light transmission incorporated, color code: green BA HOPKINS II Forward-Oblique Telescope 30, enlargedview, diameter10mm,length 31cm, autoclavable, fiber optic light transmission incorporated, color code: red FA HOPKINS II Telescope 45, enlargedview, diameter10mm,length31cm, autoclavable, fiberoptic light transmission incorporated, color code: black Diameter 5 mm, length 29 cm AA AA HOPKINS II Straight Forward Telescope 0, enlargedview, diameter5mm, length 29 cm, autoclavable, fiberoptic light transmission incorporated, color code: green BA HOPKINS II Forward-Oblique Telescope 30, enlargedview, diameter5mm,length 29cm, autoclavable, fiberoptic light transmission incorporated, color code: red FA HOPKINS II Telescope 45º, enlarged view, diameter5mm, length 29cm, autoclavable, fiber optic light transmission incorporated, color code: black
22 22 Thoracic Esophagectomy Transthoracic Esophageal Resections and Reconstruction Trocars with 45 LUER-Lock Connector HEIDELBERG Model, Size 11 mm Cannula Trocar only Size: Working length: Trocar, HEIDELBERG model, with blunt tip Cannula, with 45 LUER-Lock connector Trocar only 11 mm 8.5 cm ELX EL X
23 Thoracic Esophagectomy Transthoracic Esophageal Resections and Reconstruction 23 Trocars Sizes 6, 11 and 13 mm Cannula Trocar only Size: Working length: 4 cm 6 mm 6 cm Trocar, with blunt tip Cannula Trocar only AB A B CD C D Size: Working length: 4 cm 11 mm 6 cm Trocar, with blunt tip Cannula Trocar only AB A B CD C D Size: Working length: 4 cm 13 mm 6 cm Trocar, with blunt tip Cannula Trocar only AB A B CD C D
24 24 Thoracic Esophagectomy Transthoracic Esophageal Resections and Reconstruction Trocars Sizes 6 with connector for insufflation Cannula Silicone Leaflet Valve Trocar only Size: Working length: Color code: 6 cm black-white 6 mm 10.5 cm black Trocar, with conical tip Cannula, with thread Trocar only Silicone Leaflet Valve EHX EX H L TRX TX R L1
25 Thoracic Esophagectomy Transthoracic Esophageal Resections and Reconstruction 25 Trocars Sizes 11 with connector for insufflation Cannula Silicone Leaflet Valve Trocar only Size: Working length: Color code: Trocar, with conical tip Cannula, with thread Trocar only Silicone Leaflet Valve 11 mm 10.5 cm green TCS TS C L1
26 26 Thoracic Esophagectomy Transthoracic Esophageal Resections and Reconstruction CUSCHIERI Retractors The distal end of the liver retractor can be activated by rotation of the proximal part of the handle. The retractor is introduced into the peritoneal cavity in its straight, unactivated form. Once inside the abdomen, the distal end is closed with the help of forceps and slipped under the liver. The liver can be safely held clear of the operative site in this manner for extended periods of time. The weighted handle acts as a counter-weight to the liver, making retraction more comfortable for the surgical assistant. In its closed form, the retractor can also be used for manipulation of the bowel and other anatomical structures. This instrument was developed in conjunction with Professor Sir Alfred Cuschieri and his staff at the University of Dundee. Special Features: Automatic retraction of the liver for extended periods of time Also suitable for atraumatic manipulation of other anatomical structures Easy dismantling for cleaning purposes Size 5 mm Operatinginstruments, length 36 cm, foruse with trocar size 6 mm U U CUSCHIERI Retractor, size 5mm, length 36cm
27 Thoracic Esophagectomy Transthoracic Esophageal Resections and Reconstruction 27 CLICKLINE Scissors and RoBi Scissors Size 5 mm, length 36 cm MA MA CLICKLINE Scissors, rotating, dismantling, insulated, with connector pin for unipolar coagulation, with LUER-Lock irrigation connector for cleaning, double action jaws, spoon-shaped blades, serrated, curved, size 5 mm, length 36 cm, Plastic Handle, without ratchet, with larger contact area Metal Outer Sheath Scissors Insert MT MT RoBi Scissors, CLERMONT-FERRAND Model, rotating, dismantling, with connector pin for bipolar coagulation, single action jaws, straight, for cutting and bipolar coagulation of vessels and tissue layers, size 5 mm, length 36 cm, Ring Handle Outer Sheath Scissors Insert
28 28 Thoracic Esophagectomy Transthoracic Esophageal Resections and Reconstruction RoBi Scissors Size 5 mm, length 28 cm LM LM RoBi Scissors, rotating, dismantling, insulated, with connector pin for bipolar coagulation, sheath distally angled, double action jaws, scissor blades open vertically to angulation, size 5 mm, length 28 cm, Ring Handle, with larger contact area at the finger ring Scissors Insert, with outer sheath LU RoBi Scissors, rotating, dismantling, insulated, with connector pin for bipolar coagulation, sheath distally angled, double action jaws, scissor blades open horizontally to angulation, size 5 mm, length 28 cm, Ring Handle, with larger contact area at the finger ring Scissors Insert, with outer sheath MT RoBi Scissors, rotating, dismantling, insulated, with connector pin for bipolar coagulation, sheath distally angled, single action jaws, scissor blades open horizontally to angulation, size 5 mm, length 28 cm, Ring Handle, with larger contact area at the finger ring Scissors Insert, with outer sheath
29 Thoracic Esophagectomy Transthoracic Esophageal Resections and Reconstruction 29 CLICKLINE MANHES Biopsy Forceps Size 5 mm, length 36 cm MB MB CLICKLINE MANHES Biopsy Forceps, rotating, dismantling, insulated, with connector pin for unipolar coagulation, with LUER-Lock connector for cleaning, single action jaws, size 5 mm, length 36 cm, Plastic Handle, without ratchet, with larger contact area Metal Outer Sheath, insulated Forceps Insert RoBi KELLY Dissecting Forceps Size 5 mm, length 28 cm LK LK RoBi KELLY Dissecting Forceps, rotating, dismantling, insulated, with connector pin for bipolar coagulation, sheath distally angled, double action jaws, curved jaws, size 5 mm, length 28 cm, Ring Handle, with larger contact area at the finger ring Forceps Insert, with outer sheath
30 30 Thoracic Esophagectomy Transthoracic Esophageal Resections and Reconstruction CLICKLINE Dissecting and Grasping Forceps Size 5 mm, length 36 cm and 43 cm ML ML CLICKLINE KELLY Dissecting and Grasping Forceps, rotating, dismantling, insulated, with connector pin for unipolar coagulation, LUER-Lock connector for cleaning, double action jaws, long, size 5 mm, length 36 cm, Plastic Handle, with MANHES style ratchet Metal Outer Sheath, insulated Forceps Insert DY CLICKLINE DeBAKEY Grasping Forceps, rotating, dismantling, insulated, with connector pin for unipolar coagulation, with LUER-Lock irrigation connector for cleaning, single action jaws, atraumatic, size 5 mm, length 36 cm, Plastic Handle, with MANHES style ratchet Metal Outer Sheath, insulated Forceps Insert DY Same, length 43 cm AB CLICKLINE MOURET Grasping Forceps, rotating, dismantling, insulated, with connector pin for unipolar coagulation, with LUER-Lock irrigation connector for cleaning, single action jaws, atraumatic, fenestrated, round jaws, slender, size 5 mm, length 43 cm, Plastic Handle, with MANHES style ratchet Metal Outer Sheath, insulated Forceps Insert DYD CLICKLINE DeBAKEY Grasping Forceps, rotating, dismantling, insulated, with connector pin for unipolar coagulation, with LUER-Lock irrigation connector for cleaning, double action jaws, atraumatic, size 5 mm, length 36 cm, Plastic Handle, with MANHES style ratchet Metal Outer Sheath, insulated Forceps Insert
31 Thoracic Esophagectomy Transthoracic Esophageal Resections and Reconstruction 31 CLICKLINE Parenchymal Forceps Size 5 mm, length 28 cm LVS LVS CLICKLINE Parenchymal Forceps, atraumatic, dismantling, without connector pin for unipolar coagulation, single action jaws, curved jaws, for use with linear staplers, size 5 mm, length 28 cm, Metal Handle, with 4 locking positions Outer Sheath with Forceps Insert CLICKLINE Lung Forceps Size 5 mm, length 28 cm LLR LLR CLICKLINE Lung Forceps, atraumatic, dismantling, without connector pin for unipolar coagulation, single action jaws, curved jaws, fenestrated, size 5 mm, length 28 cm, Metal Y-Handle, with ratchet, axial, with 4 locking positions Outer Sheath with Forceps Insert LRR CLICKLINE Lung Nodule Forceps, atraumatic, dismantling, without connector pin for unipolar coagulation, single action jaws, curved jaws, fenestrated, size 5 mm, length 28 cm, Metal Y-Handle, with ratchet, axial, with 4 locking positions Outer Sheath with Forceps Insert
32 32 Thoracic Esophagectomy Transthoracic Esophageal Resections and Reconstruction Dissecting Electrodes Size 5 mm, Trocar size 6 mm UF UF Coagulating and Dissecting Electrode, L-shaped, insulated, with connector pin for unipolar coagulation, size 5 mm, length 30 cm SurgicalSponge Holder Size 5 and 10 mm Trocar size 6 and 11 mm PT PT Surgical Sponge Holder, self-retaining, size5mm, length30cm Handle Outer Sheath, insulated Sponge Holder Insert PT Surgical Sponge Holder, self-retaining, size10mm, length30cm Handle Outer Sheath, insulated Sponge Holder Insert
33 Thoracic Esophagectomy Transthoracic Esophageal Resections and Reconstruction 33 Palpation Probe Size 5 Trocar size 11 mm LT LT Palpation Probe and Knot Tier, distally angled sheath, size 5 mm, length 28 cm Knot Tier Size 5 Trocar size 6 mm SK SK KOECKERLING Knot Tier, forextracorporeal knotting, size5mm, length36cm
34 34 Thoracic Esophagectomy Transthoracic Esophageal Resections and Reconstruction KOH Macro Needle Holders dismantling, axial handles Size 5 mm Trocar size 6 mm Length Handle AO 33 cm Single action jaws Working Insert R Catalog number for the complete instrument RAO KOH Macro Needle Holder, jaws curved to right, with tungsten carbide inserts, for use with suture material size 0/0 to 7/ L LAO KOH Macro Needle Holder, jaws curved to left, with tungsten carbide inserts, for use with suture material size 0/0 to 7/ F FAO KOH Macro Needle Holder, straight jaws, with tungsten carbide inserts, for use with suture material size 0/0 to 7/0

35 Thoracic Esophagectomy Transthoracic Esophageal Resections and Reconstruction 35 Mobile Equipment Cart Units and Accessories: 9626 NB 26" HD Monitor Cold Light Fountain XENON 300 SCB IMAGE 1 HUB HD Camera Control Unit SCB, with SDI module IMAGE 1 H3-Z Three-Chip HD Camera Head THERMOFLATOR SCB HAMOU ENDOMAT, optionalaccessories required EN KARL STORZ AIDA compact NEO advanced AUTOCON II 400 High End-Set 2x DFH Holder for Three-Pedal Footswitch Neutral Electrode Neutral Electrode Connecting Cable M Unipolar High Frequency Cord LE Bipolar High Frequency Cord Double Pedal Footswitch Three-Pedal Footswitch, HF generators DRB Mobile Equipment Cart MZD Monitor Holding Arm TBG Isolation Transformer, 2000 VA FH Bottle Stand, for CO 2 bottles IW Earth Leakage Monitor
36 36 Thoracic Esophagectomy Transthoracic Esophageal Resections and Reconstruction Video Gastroscope SILVER SCOPE Serie PKS Video Gastroscope SILVER SCOPE Serie Color system PAL Working channel: Ø 2.8 mm Diameter: 9.3 mm Working length: 1100 mm Bending section: Up: 190 Down: 100 Left/Right: 120 /120 Following Accessories are included: 1x Transport Case 1x ETO Cap 1x Suction valve 1x Air-Water Valve 1x Leakage tester 1x Caps for biopsy channel (10 pcs.) 1x Irrigation tube 1x Y irrigation tube 1x Bite protector (single-use) 1x Biopsy forceps (single-use) 1x Cleaning brush (single-use) 1x Valve brush for video endoscopes 1x Cover for transportation of flex. endoscopes NKS Video Gastroscope SILVER SCOPE Serie Color system NTSC Working channel: Ø 2.8 mm Diameter: 9.3 mm Working length: 1100 mm Bending section: Up: 210 Down: 100 Left/Right: 120 /120 Following Accessories are included: 1x Transport Case 2x Key for Case 1x ETO Cap 1x Leakage tester 1x Caps for biopsy channel (10 pcs.) 1x Irrigation tube 1x Y irrigation tube 1x Bite protector (single-use) 1x Biopsy forceps (single-use) 1x Cleaning brush (single-use) 1x Valve brush for video endoscopes 1x Cover for transportation of flex. endoscopes 1x Cleaning Valve, reusable 1x Oil for instruments 1x Instruction Manual
37 Thoracic Esophagectomy Transthoracic Esophageal Resections and Reconstruction 37 IMAGE 1 HUB TM HD FULL HD Camera Control Unit Maximum resolution and the consistent use of the 16:9 aspect ratio guarantee FULL HD (High Definition) Endoscopic camera systems are equipped with three CCD chips that support the 16:9 input format as well as capturing images with a resolution of 1920 x 1080 pixels The benefits of FULL HD (High Definition) for medical applications are: High input resolution of the camera head delivers more detail and depth of field with natural color rendition Using 16:9 format during image acquisition enlarges the field of view The 16:9 format of the widescreen monitor supports ergonomic viewing Enhanced color brilliance for optimal diagnosis Progressive scan technology provides a steady, flicker-free display and helps eliminate eyestrain and fatigue U1 IMAGE 1 HUB HD Camera Control Unit SCB U1XX for use with IMAGE 1 FULL HD and IMAGE 1 standard one- and three-chip camera heads, max. resolution 1920 x 1080 pixels, with integrated KARL STORZ-SCB and digital Image Processing Module, color systems PAL/NTSC, power supply VAC, 50/60 Hz Mains Cord BNC/BNC Video Cable S-Video (Y/C) Connecting Cable Special RGBS Connecting Cable 2x Connecting Cable, for controlling peripheral units DVI-D Connecting Cable SCB Connecting Cable Keyboard, with US English character set U102 IMAGE 1 HUB TM HD Camera Control Unit SCB, with SDI module for use with IMAGE 1 FULL HD and IMAGE 1 standard one- and three-chip camera heads, max. resolution 1920 x 1080 pixels, with integrated SDI (Serial Digital Interface) module, KARL STORZ -SCB and digital Image Processing Module, color systems PAL/NTSC, power supply VAC, 50/60 Hz Mains Cord BNC/BNC Video Cable S-Video (Y/C) Connecting Cable Special RGBS Connecting Cable 2x Connecting Cable, for controllingperipheral units DVI-D Connecting Cable SCB Connecting Cable Keyboard, with US English character set
38 38 Thoracic Esophagectomy Transthoracic Esophageal Resections and Reconstruction IMAGE 1 HUB TM HD FULL HD Camera Control Unit U11X U110 IMAGE 1 HUB HD Camera Control Unit SCB, withicm module for use with IMAGE 1 FULL HD and IMAGE 1 standard one- and three-chip camera heads, max. resolution 1920 x 1080 pixels, with integrated ICM (Image Capture Module), KARLSTORZ-SCB and digital Image Processing Module, colorsystems PAL/NTSC, power supply VAC, 50/60 Hz Mains Cord BNC/BNC Cable S-Video (Y/C) Connecting Cable Special RGBS Connecting Cable 2x Connecting Cable, for controllingperipheral units DVI-D Connecting Cable SCB Connecting Cable Keyboard, with US English character set 2x KARL STORZ USB Stick, 4 GB U112 IMAGE 1 HUB HD Camera Control Unit SCB, withsdi/icm module for use with IMAGE 1 FULL HD and IMAGE 1 standard one- and three-chip camera heads, max. resolution 1920 x 1080 pixels, with integrated ICM (Image Capture Module) and SDI (Serial Digital Interface) modules, KARLSTORZ-SCB and integrated digital Image Processing Module, colorsystems PAL/NTSC, power supply VAC, 50/60 Hz Mains Cord BNC/BNC Video Cable S-Video (Y/C) Connecting Cable Special RGBS Connecting Cable 2x Connecting Cable, for controllingperipheral units DVI-D Connecting Cable SCB Connecting Cable Keyboard, with US English character set 2x KARL STORZ USB Stick, 4 GB Specifications: Signal-to-noise ratio AGC Video output Input IMAGE 1 HUB HD, three-chip camera systems 60 db Microprocessor-controlled - FULL HD signal to DVI-D socket (2x) - SDI signal to BNC socket, (only IMAGE 1 HUB HD withsdi module (2x) - RGBS signal to D-Sub socket - S-Video to 4-pin Mini-DIN socket (2x) - Composite signal to BNC socket Keyboard for title generator, 5-pin DIN socket Control output/input Dimensions w x h x d Weight Power supply Certified to: - KARL STORZ-SCB to 6-pin socket Mini-DIN socket (2x) mm stereo jack plug (ACC 1, ACC 2), - Serial port at RJ-11 - USB port (only IMAGE 1 HUB HD with ICM) (2x) 305 x 89 x 335 mm 3.35 kg VAC, 50/60 Hz IEC 601-1, , CSA 22.2 No.601, UL and CE acc. to MDD, protection class 1/CF defibrillation-safe
39 Thoracic Esophagectomy Transthoracic Esophageal Resections and Reconstruction 39 IMAGE 1 HD FULL HD Camera Control Unit U1XX U110 IMAGE 1 HD Camera Control Unit SCB, with ICM module for use with IMAGE 1 FULL HD three-chip camera heads, max. resolution 1920 x 1080 pixels, with integrated ICM (Image Capture Module), KARLSTORZ-SCB and digital Image Processing Module, powersupply VAC, 50/60 Hz Mains Cord 2x Connecting Cable, for controllingperipheral units DVI-D Connecting Cable SCB Connecting Cable Keyboard, with US English character set 2x KARL STORZ USB Stick, 4 GB U1 IMAGE 1 HD Camera Control Unit SCB for use with IMAGE 1 FULL HD three-chip camera heads, max. resolution 1920 x 1080 pixels, with integrated KARLSTORZ-SCB and digital ImageProcessing Module, powersupply VAC, 50/60 Hz Mains Cord 2x SCB Connecting Cable DVI-D Connecting Cable Connecting Cable, for controlling peripheral units Keyboard, with US English character set Specifications: Signal-to-noise ratio AGC Video output Input Control output/input IMAGE 1 HD, three-chip camerasystems 60 db Microprocessor-controlled FULL HD Signal to DVI-D socket Keyboard for title generator, 5-pin DIN socket - USB port (only IMAGE 1 HD with ICM) (2x) - Serial port at RJ mm stereo jack plug (ACC 1, ACC 2) - KARL STORZ-SCB to 6-pin socket Mini-DIN socket (2x) Dimensions w x h x d Weight Power supply Certified to 305 x 89 x 335 mm 3.35 kg VAC, 50/60 Hz IEC 601-1, , CSA 22.2 No.601, UL and CE acc. to MDD, protectionclass 1/CF defibrillation-safe
40 40 Thoracic Esophagectomy Transthoracic Esophageal Resections and Reconstruction IMAGE 1 HUB HD FULL HD Camera Heads Hz IMAGE 1 H3-Z 60 Hz Three-Chip FULL HD Camera Head max. resolution 1920 x 1080 pixels, progressive scan, soakable, gas- and plasma-sterilizable, with integrated Parfocal ZoomLens, focal length f=15 31 mm (2x), 2freelyprogrammable camera head buttons Specifications: IMAGE 1 FULL HD Camera Heads 50 Hz 60 Hz Image sensor Pixel output signal H x V Dimensions (w x h x l) Weight Optical interface Min. sensitivity Grip mechanism Cable Cable length H3-Z (50/60 Hz) 3x 1 /3" CCD chip 1920 x x 49 x 114 mm 270 g integrated Parfocal Zoom Lens, f = mm (2x) F 1.4/1.17 Lux standard eyepiece adaptor non-detachable 300 cm For use with IMAGE 1 HUB HD Camera Control Unit SCB U1xx and IMAGE1 HD Camera Control Unit SCB U1xx
41 Thoracic Esophagectomy Transthoracic Esophageal Resections and Reconstruction 41 IMAGE 1 HUB HD FULL HD Camera Heads autoclavable Hz IMAGE 1 H3-ZA 60 Hz Three-Chip FULL HD Camera Head autoclavable, max. resolution 1920 x 1080 pixels, progressive scan, soakable, gas- and plasma-sterilizable, with integrated Parfocal Zoom Lens, focal length f = mm (2x), 2 freely programmable camera head buttons, for use with color systems PAL/NTSC Hz IMAGE 1 H3-FA 60 Hz Three-Chip FULL HD Camera Head autoclavable, max. resolution 1920 x 1080 pixels, progressive scan, soakable, gas- and plasma- sterilizable, fixed focus, focal length f = 17 mm, 2 freely programmable camera head buttons, for use with color systems PAL/NTSC Specifications: IMAGE 1 FULL HD Camera Heads 50/60 Hz Image sensor Pixels output signal H x V Dimensions (w x h x l) Weight Optical interface Min. sensitivity Grip mechanism Cable Cable length H3-ZA (PAL/NTSC) 3x 1 /3" CCD chip 1920 x x 49 x 100 mm 299 g integrated Parfocal Zoom Lens, f = mm F 1.4/1.17 Lux standard eyepiece adaptor non-detachable 300 cm H3-FA (PAL/NTSC) 3x 1 /3" CCD chip 1920 x x 49 x 93 mm 261 g fixed focus f = 17 mm F 1.4/1.17 Lux standard eyepiece adaptor non-detachable 300 cm For use with IMAGE 1 HUB TM HD Camera Control Unit SCB xx and IMAGE 1 HD Camera Control Unit SCB xx Z3TS Plastic Container for Sterilization and Storage of camera heads IMAGE1 H3-Z, H3-ZA and H3-FA, autoclavable, suitable for use with steam, gas and hydrogen peroxide sterilization, Sterrad compatible, external dimensions (wxdxh): 385 x 255 x 75 mm Please note: The instrument displayed is not included in the plastic container. Only camera heads marked autoclave can be placed in the tray for steam sterilization.
42 42 Thoracic Esophagectomy Transthoracic Esophageal Resections and Reconstruction KARL STORZ FULL HD Monitors 9619 NB 9626 NB/NB-2 KARL STORZ HD and FULL HD Monitors 19" 26" 26" Wall-mounted with VESA 100 adaption 9619 NB 9626 NB 9626 NB-2 Inputs: DVI-D 1x 1x 2x Fiber Optic optional optional optional RGBS/VGA 1x 1x 2x S-Video 1x 1x 2x Composite/FBAS 1x 1x 2x Outputs: DVI-D S-Video Composite/FBAS Signal Format Display: 4:3 5:4 16:9 Picture-in-Picture PAL/NTSC compatible The following accessories are included: Mains Cord External 24VDC Power Supply Signal cables: DVI-D, BNC Optional accessories: 9626 SF Pedestal, for 96XX monitor series Specifications: KARL STORZ FULL HD Monitors Desktop with pedestal Wall-mounted with 100 adaption Brightness Max. viewing angle Pixel distance Reaction time Contrast ratio Mount Weight Rated power Operating conditions Storage Rel. humidity Dimensions w x h x d Power supply 19" optional 9619 NB 280 cd/m vertical 0.29 mm 12 ms 700:1 100 mm VESA 10 kg 120 W 0 40 C C max. 80% x 416 x 75.5 mm VAC 26" optional 9626 NB/NB cd/m vertical 0.30 mm 12 ms 700:1 100 mm VESA 14 kg 120 W 0 40 C C max. 80% 699 x x 87.5 mm VAC
43 Thoracic Esophagectomy Transthoracic Esophageal Resections and Reconstruction 43 KARL STORZ HD, HD WIDEVIEW and HD LED Backlight Monitors 9524 NB, 9526 NBL, 9726 NB TFT Flat Screens HD WIDEVIEW Monitors Wall-mounted with VESA 100 adaption Inputs: SDI HD-SDI 3G-SDI RGBS S-Video Composite/FBAS SOG DVI-D VGA Outputs: SDI HD-SDI 3G-SDI RGBS S-Video Composite/FBAS DVI-D Signal Format Display: 4:3 5:4 16:9 16:10 Picture-in-Picture PAL/NTSC compatible 15" 9515 NB 19" 9519 NB 24" 26" 9524 NB 9526 NBL 9726 NB The following accessories are included: Mains Cord External 24VDC Power Supply Signal cables Optional accessories: 9526 SF Pedestal for 15", 19", 24" and 26" monitors from the 95XX- and 97XX-series
44 44 Thoracic Esophagectomy Transthoracic Esophageal Resections and Reconstruction KARL STORZ HD, HD WIDEVIEW and HD LED Backlight Monitors Specifications: Wall-mounted with VESA 100 adaption Brightness Max. viewing angle Pixel distance Reaction time Contrast ratio Mount Weight Rated power Operating conditions Storage Rel. humidity Dimensions w x h x d Power supply 15" 9515 NB 430 cd/m vertical mm ms 500:1 100 mm VESA 4.8 kg 40 Watt 0 40 C C 5 85%, non-condensing 386 x 302 x 81 mm VAC 19" 9519 NB 300 cd/m vertical mm ms 600:1 100 mm VESA 6.8 kg 65 Watt 0 38 C C 5 85%, non-condensing 465 x 400 x 98 mm VAC 24" 9524 NB 400 cd/m vertical mm 5 12 ms 1000:1 100 mm VESA 7.3 kg 115 Watt 0 40 C C 20 85%, non-condensing 597 x 401 x 100 mm VAC 26" 9526 NBL 400 cd/m vertical 0.3 mm 8 ms 1000:1 100 mm VESA 7.3 kg 60 Watt 0 40 C C 20 85%, non-condensing 73 x 418 x 88 mm VAC 26" 9726 NB 800 cd/m vertical 0.3 mm 8 ms 1000:1 100 mm VESA 8.2 kg 130 Watt 0 40 C C 20 85%, non-condensing 673 x 418 x 88 mm VAC 9515 NB 15" Monitor Wall-mounted with VESA 100 adaption, color systems PAL/NTSC, max. screen resolution 1024x768, powersupply VAC, 50/60 Hz Power Supply Mains Cord Signal cables: S-Video (Y/C), DVI-D 9519 NB 19" HD Monitor Wall-mounted with VESA 100 adaption, color systems PAL/NTSC, max. screen resolution 1280 x 1024, power supply VAC, 50/60 Hz Power Supply Mains Cord Signal cables: DVI-D, BNC 9524 NB 24" HD WIDEVIEW Monitor Wall-mounted with VESA 100 adaption, color systems PAL/NTSC, max. screen resolution 1920 x 1200, image format 16:10, power supply VAC, 50/60 Hz Power Supply Mains Cord Signal cables: DVI-D, BNC LED Backlight Monitors 9526 NBL 26" HD Monitor with LED Backlight Wall-mounted with VESA 100 adaption, color systems PAL/NTSC, max. screen resolution 1920 x 1080, image format 16:10, power supply VAC, 50/60 Hz Power Supply Mains Cord Signal cables: DVI-D, BNC 9726 NB 26" HD Monitor (HighbrightwithLEDBacklight) Wall-mounted with VESA 100 adaption, optical input, color systems PAL/NTSC, max. screen resolution 1920 x 1080, image format 16:10, power supply VAC, 50/60 Hz Power Supply Mains Cord Signal cables: DVI-D, BNC


45 Thoracic Esophagectomy Transthoracic Esophageal Resections and Reconstruction 45 Accessories for Video Documentation For use with telescopes, size 10 mm: 495 NCS Fiber Optic Light Cable, diameter 4.8 mm, length 250 cm For use with telescopes, size 5 mm: 495 NA Fiber Optic Light Cable, diameter 3.5 mm, length 230 cm Cold Light Fountain XENON 300 SCB Cold Light Fountain XENON 300 SCB with built-in antifog air-pump, and integrated KARL STORZ Communication Bus System SCB power supply: VAC/ VAC, 50/60 Hz Mains Cord Silicone Tubing Set, autoclavable, length 250 cm SCB Connecting Cord, length 100 cm Spare Lamp Module XENON with heat sink, 300 watt, 15 volt XENON Spare Lamp, only, 300 watt, 15 volt Cold Light Fountain XENON 100 SCB Cold Light Fontain XENON 100 SCB, with integrated KARL STORZ SCB, with integrated insufflation pump, for use with KARL STORZ Videoendoscops, one 100 watt Xenon lamp, power supply: VAC, 50/60Hz Cold Light Fountain XENON 100 SCB Mains cord Water bottle Bottle holder Rinsing connector for water bottle System requirements for use with SCB-PC: SCB-R-UI-software-release V and from V , but not usable with V
 26 4320 08-1 THERMOFLATOR SCB THERMOFLATOR with KARL STORZ SCB power supply 100 240 VAC, 50/60 Hz Mains Cord OPTITHERM Heating Element, sterilizable Silicone Tubing Set, sterilizable Universal")

46 46 Thoracic Esophagectomy Transthoracic Esophageal Resections and Reconstruction THERMOFLATOR with KARL STORZ SCB with High Flow Insufflation (30 l/min.) THERMOFLATOR SCB THERMOFLATOR with KARL STORZ SCB power supply VAC, 50/60 Hz Mains Cord OPTITHERM Heating Element, sterilizable Silicone Tubing Set, sterilizable Universal Wrench SCB Connecting Cable, length 100 cm * CO 2/N 2O Gas Filter, sterile, for single use, package of 10 * This product is marketed by mtp. For additional information, please apply to: Subject to the customer s application-specific requirements additional accessories must be ordered separately. mtp medical technical promotion gmbh, Take-Off Gewerbepark 46, D Neuhausen ob Eck, Germany HAMOU ENDOMAT with KARL STORZ SCB Suction and Irrigation System HAMOU ENDOMAT SCB, power supply VAC, 50/60 Hz Mains Cord 5x HYST Tubing Set*, for single use 5x LAP Tubing Set*, for single use SCB Connecting Cable, length 100 cm VACUsafe Promotion Pack Suction*, 2 l * This product is marketed by mtp. For additional information, please apply to: mtp medical technical promotion gmbh, Take-Off Gewerbepark 46, D Neuhausen ob Eck, Germany Subject to the customer s application-specific requirements additional accessories must be ordered separately.

47 Thoracic Esophagectomy Transthoracic Esophageal Resections and Reconstruction 47 The New Design of Excellence Hybrid Suite Endoscopy integration Image integration Patient vital signs monitoring Designed for vein harvesting team Images captured from transesophageal echocardiography Ultrasound image routing PACS image routing HD image capture High resolution Pip/Quad video In-light surgical camera connectivity for open procedure viewing Plasma screen technology for visiting guests Telestration for teaching Lighting control for room and surgical lights with SCB system

 and spoken comments of findings and")


48 48 Thoracic Esophagectomy Transthoracic Esophageal Resections and Reconstruction Data Management and Documentation KARL STORZ AIDA compact NEO advanced/standard The Compact Documentation Solution The new KARL STORZ AIDA compact NEO advanced/standard system combines all the required functions for integrated and precise documentation in a single system. All functions are centrally controlled via touch screen, footswitch, camera head buttons or voice control directly from the sterile area. AIDA compact NEO advanced/ standard: Review screen Data Acquisition AIDA compact NEO advanced/standard records still images, video sequences (in HD quality) and spoken comments of findings and intraoperative procedures directly from the sterile area. Recordings are activated via touch screen, footswitch or camera head buttons. Live display of camera images on the touch screen enables immediate monitoring and selection of the recorded data. Flexible Review Before final archiving, the saved data can be viewed or listened to on the review screen. Data no longer required can be simply deleted. Individual images, video and audio sequences can be renamed and given more meaningful names. A pre-defined selection list with keywords simplifies and speeds up data entry. A voice entry of the case report can even be recorded while viewing video and image files. AIDA compact NEO advanced/ standard: Automatic creation of standard reports Automated Data Archiving Once a treatment is completed, AIDA compact NEO advanced/standard automatically stores the data on a DVD, creates a standard report and prints it as an overview if required. AIDA compact NEO advanced/ standard: Efficientarchiving Multipatient Efficient data archiving is assured as the data of multiple patients can be saved on a DVD.
 possible.")
49 Thoracic Esophagectomy Transthoracic Esophageal Resections and Reconstruction 49 Data Management and Documentation KARL STORZ AIDA compact NEO advanced/standard Special Features: Digital storage of still images with a resolution of 1920 x 1080 in both systems (advanced/standard) possible. Video sequences to 1080p with advanced and to 720p withstandard variant possible (via HD-SDI) Audio files can be archived in both systems DICOM/HL7 interface package included Printing from review area (individual images withmeta-data) DVD burning, Blu-ray reading capabilities AIDA Restore Configuration supports simple import and export of system settings Reference screen with new QuickView (favoritesfolder) Video settings (e.g., contrast, ) separate forallchannels Adaptation options for GUI Compressed DICOM Supports OR1 Checklist V1.1 Enhanced support of 15" monitors with OR1 checklist installation Scalable watermark High-quality function and switching of image/video quality without additional settings Sterile, ergonomic operation via touch screen, camera head buttons and/or footswitch Data export to DVD, CD-ROM or USB flash drive, multi-session and multi-patient Network storage possible Automatic creation of standard reports Systems for use in the OR area certified according to EN Compatible with KARL STORZ Communication Bus (SCB) and KARLSTORZ OR1 AV NEO KARL STORZ AIDA compact advanced/standard as an attractive, digital alternative to video printers, videorecorders and dictating machines EN KARL STORZ AIDA compact NEO advanced Documentation system for digital storage of still images, video sequences and audio files, power supply115/230vac,50/60 Hz KARL STORZ AIDA control NEO, withintegrateddvd/cd writer, Blu-ray reading possible AIDA compact HD Frame Grabber Card PS/2 Compact Keyboard, US English, with cover KARL STORZ AIDA compact NEO Software, withvoicecontroland software protection KARL STORZ USB Flash Drive 2x Connecting Cables, for controlling peripheral units BNC/BNC Video Cable BNC Connecting Cable DVI-D Connecting Cable Mains Cord Connecting Cable, Mini-DIN plug to BNC socket EN KARL STORZ AIDA compact NEO standard Documentation system for digital storage of still images, video sequences and audio files, power supply115/230vac,50/60 Hz Specifications: Video systems Signal inputs - PAL, NTSC - S-Video (Y/C) - Composite - RGB (only standard) - SD-SDI (only standard) - HD-SDI (only standard) - DVI-D (only advanced) - JPG - BMP Video formats Audio formats Storage media - MPEG2 - WAV - DVD+R - DVD+RW - DVD-R - DVD-RW - CD-R - CD-RW - USB flash drive Image formats
Laparoscopy and Thoracoscopy in Equine Practice VET /2018-E
 Laparoscopy and Thoracoscopy in Equine Practice VET 22 7.0 02/2018-E Laparoscopy and Thoracoscopy in Equine Practice Minimally invasive procedures offer several advantages over traditional abdominal and
NAME of the products CODES. G- Cath TM EZ Delivery Catheter with Snowshoe Suture Anchors code USGI. G- Lix Tissue TM Grasper code USGI
 NOTES platform PICTURES IOP - Incisionless Operating Platform Transport Endoscopic Access Device code 118180 USGI G- Prox EZ- 33 Endoscopic Grasper code 208220 USGI Transport G- Cath TM EZ Delivery Catheter
Reliability for all Laparoscopic Procedures
 Endoscopy Reliability for all Laparoscopic Procedures Laparoscopic Instruments 1 Laparoscopic Instruments Reliable Solutions for Pediatric, Bariatric and All Gen Stryker Endoscopy's laparoscopic instruments
LAPAROSCOPIC NISSEN FUNDOPLICATION TAMPA GENERAL HOSPITAL, TAMPA, FLORIDA Broadcast September 7, 2005
 LAPAROSCOPIC NISSEN FUNDOPLICATION TAMPA GENERAL HOSPITAL, TAMPA, FLORIDA Broadcast September 7, 2005 NARRATOR 00:00:11.000 Acid reflux, also known as gastroesophageal reflux disease or GERD, is a common
2179-CD Series Fiber Optic Splice Closure. Installation Instructions
 2179-CD Series Fiber Optic Splice Closure Installation Instructions 1.0 Product Introduction The new 3M TM 2179-CD Series Fiber Optic Splice Closure can be used in buried, underground, aerial, and pedestal
Educational Series. Educational Collaboration between King Systems and Michael Sweeney MSN, CRNP, CFRN, CCRN, CNRN, CEN, CPEN
 Educational Series Educational Collaboration between King Systems and Michael Sweeney MSN, CRNP, CFRN, CCRN, CNRN, CEN, CPEN Learning Objectives Understand the following: Design and fundamental operation
In-House Training Solutions for Everyone: The concept of the European Academy for Gynaecological Surgery (EAGS)
") In-House Training Solutions for Everyone: The concept of the European Academy for Gynaecological Surgery (EAGS) In-House Training Solutions for Everyone: Principles of the GESEA programme Scientific evidence
In-House Training Solutions for Everyone: The concept of the European Academy for Gynaecological Surgery (EAGS) In-House Training Solutions for Everyone: Principles of the GESEA programme Scientific evidence
STAHL ENDOSCOPY ARTHROSCOPY
 STAHL ENDOSCOPY ARTHROSCOPY TELESCOPES AUTOCLAVE 18 min / 134 C / 273 F EYE Arthroscope Endoscope-Ø: 2.7 mm Working length: 10 mm Vision: High Definition (HD) Viewing direction: 0 standard Viewing direction:
Tender Notice No: RIMS/PUR/EQUIP/TEN-12 Tender date: 20/09/2012 Due date : 07/11/2012 ANNEXURE-A
 Tender Notice No: RIMS/PUR/EQUIP/TEN-12 Tender date: 20/09/2012 Due date : 07/11/2012 ANNEXURE-A Item No.1:- Specifications of the Laparoscopic Set 1) Laparoscopic Video Monitor (High definition Television)
Mainz COLOVIEW System
 VET 21 6.2 11/2017-E Mainz COLOVIEW System Set for colonoscopic examination and biopsy in mice and rats Mainz COLOVIEW System Set for colonoscopic examination and biopsy in mice and rats Animal models
Laparoscopic Obesity Surgery
 LAP 55-5 07/2014-E Laparoscopic Obesity Surgery CADIERE 5/10 Instrument Set 2 3 Laparoscopic Obesity Surgery CADIERE 5/10 Instrument Set Introduction Obesity has become an epidemic problem in developed
Instructions. Cable with Armor F CAUTION. October Rev A
 3M Single Conductor Accessory Breakout Kits (BOK's) for use with 3M Cable Accessories (Terminations, T-Bodies and Push-On Elbows) For Use With Single Conductor Accessories On Three-Core Conductor Cables
How to Chose an Ideal High Definition Endoscopic Camera System
 How to Chose an Ideal High Definition Endoscopic Camera System Telescope Laparoscopy (from Greek lapara, "flank or loin", and skopein, "to see, view or examine") is an operation performed within the abdomen
Water blocking tape. Locator ridge HPA-0486
 Table of Contents STANDARD RECOMMENDED PROCEDURE 004-138 ISSUE 1 MARCH 2012 PAGE 1 OF 12 Sheath Removal and Mid-Span Access of Dielectric ALTOS Cable with FastAccess Technology p/n 004-138, Issue 1 1.
EndoWorld NOTES 1-E/ A Novel Port for Single Portal Laparoscopic Surgery
 EndoWorld NOTES 1-E/04-2010 A Novel Port for Single Portal Laparoscopic Surgery S-Portal Single Portal Laparosopic Surgery Single Portal (S-PORTAL) Laparoscopic Surgery is the natural extension of traditional
MiniXtend Cable with Binderless* FastAccess Technology Jacket and Buffer Tube Removal Procedures. 1. General. 2. Precautions
 MiniXtend Cable with Binderless* FastAccess Technology Jacket and Buffer Tube Removal Procedures 004-273-AEN, Issue 2 Table of Contents 1. General.... 1 2. Precautions.... 1 2.1 Cable Handling Precautions...
CONTENT / INTRODUCTION VATS / MICS SHORT INTRODUCTION CONTENT
 RZ Medizintechnik GmbH Unter Hasslen 20 D-78532 Tuttlingen Phone: +49 (0)7462/9470-0 Fax: +49 (0)7462/9470-50 sales@rz-medizintechnik.com www.rz-medizintechnik.com INSTRUMENTS CONTENT / INTRODUCTION VATS
Installing a Wire Mesh Pulling Grip on All-Dielectric DX Armored Fiber Optic Cables
 revision history Issue Date Reason for Change Related literature SRP-004-136 Accessing All-Dielectric DX Armored Fiber Optic Cables Admonishments 1. General This procedure provides instructions for installing
EndoWorld ORL 104-E/ Bronchoscopy Giant Optical Grasping Forceps
 EndoWorld ORL 104-E/03-2009 Bronchoscopy Giant Optical Grasping Forceps Rigid Bronchoscopy The history of rigid bronchoscopy dates back well over 100 years to when Gustav Killian performed the world s
2178-L/S Series Fiber Optic Splice Case with Gasket
 2178-L/S Series Fiber Optic Splice Case with Gasket Instructions for: 2178-S Splice Case 2178-LS Splice Case 2178-LL Splice Case 2181-LS Cable Addition Kit May 1997 34-7041-9949-5-A 1 Table of Contents
Gel-sealed in-line fiber optic closure
 SCIL-C Gel donut INSTALLATION INSTRUCTION TC-1363-1-IP Rev A, Oct 2017 www.commscope.com Gel-sealed in-line fiber optic closure Contents 1 General 2 Sizing and product kit information 3 Installation conditions
3M Better Buried Compound Compression Closure System
 3M Better Buried Compound Compression Closure System Instructions March 2016 78-0015-2948-2-A Contents: 1.0 General...3 2.0 Kit Contents...3 3.0 Closure Selection Guide...4 4.0 LHS End Cap Installation...5
EndoWorld CARDIO-VAS 6-3-E/ Endoscopic Removal of the Radial Artery
 EndoWorld CARDIO-VAS 6-3-E/06-2010 Endoscopic Removal of the Radial Artery Endoscopic Removal of the Radial Artery Background Endoscopic removal of the great saphenous vein is a well established technique
ALTOS LITE Loose Tube, Gel-Free Cables with FastAccess Technology, Fibers
 ALTOS LITE Loose Tube, Gel-Free Cables with FastAccess Technology, 12-72 Fibers P/N 004-223-AEN Issue 1 1. General This procedure describes cable-end and mid-span sheath removal and fiber access of ALTOS
FOSC-600 C and D I N S T A L L A T I O N I N S T R U C T I O N
 FOSC-600 C and D I N S T A L L A T I O N I N S T R U C T I O N In-line and butt version Cold applied re-usable fiber optic closure Contents 1 Introduction 1.1 Product description 1.2 Capacity 2 General
SJOF-BS604B. Fiber Optic Splice Closure User Manual Rev.1
 Fiber Optic Splice Closure 1. Introduction 1.1 General SAMJIN s SJOF-BS604B protects fiber optic splicing point in various installation conditions such as aerial, manholes, ducts, wall and direct buried
SPECIFICATION. Spec No : VSS-1402-CS603B
 SPECIFICATION Spec No : VSS-1402-CS603B 1. INTRODUCTION 1.1. General This specification covers the design requirements and characteristics required of fiber optic splice closures to be used on fiber optic
DEIDENTIFIED DEPOSITION SURGICAL ONCOLOGY FELLOW TESTIFIES IN PRE-TRIAL HEARING IN FAILURE TO DIAGNOSE SEPSIS CASE RESULTING IN DEATH OF PATIENT 1
 DEIDENTIFIED DEPOSITION SURGICAL ONCOLOGY FELLOW TESTIFIES IN PRE-TRIAL HEARING IN FAILURE TO DIAGNOSE SEPSIS CASE RESULTING IN DEATH OF PATIENT 2 SUPREME COURT OF THE STATE OF NEW YORK COUNTY OF 3 4,
3M Distribution Box (DDB)
") 3M Distribution Box (DDB) Merged Copper and Fiber Pole/Post Mount Enclosure Installation Instructions November 2015 78-0015-2736-1-A 2 November 2015 78-0015-2736-1-A Contents 1.0 General 2.0 Enclosure
3M Distribution Box (DDB) Merged Copper and Fiber Pole/Post Mount Enclosure Installation Instructions November 2015 78-0015-2736-1-A 2 November 2015 78-0015-2736-1-A Contents 1.0 General 2.0 Enclosure
FOSC 450 C6 and D6 Closures
 FOSC 450 C6 and D6 Closures I N S T A L L A T I O N I N S T R U C T I O N Fiber Optic Splice Closure 1. General Product Information The FOSC 450 C6 and D6 fiber optic splice closures use compressed gel
TP /2018-E TIPCAM 1 S 3D ORL. A Dimension Ahead
 TP 52 2.4 02/2018-E TIPCAM 1 S 3D ORL A Dimension Ahead TIPCAM 1 S 3D ORL A Dimension Ahead With the new TIPCAM 1 S 3D ORL, KARL STORZ launches a 3D video endoscope with a small diameter of 4 millimeters
2178 Fiber Optic Splice Case and 2181 Cable Addition Kit
 2178 Fiber Optic Splice Case and 2181 Cable Addition Kit Instructions January 1994 Issue 1, 34-7029-6387-6 1 2 Contents: 1.0 General... 4 2.0 Specifications... 4 3.0 Kit Contents... 5 SECTION 1: 2178 Splice
FIST-GCOG2-Dx6. Follow all local safety regulations related to optical fiber plant elements.
 FIST-GCOG2 I N S T A L L A T I O N I N S T R U C T I O N TC-986-IP Rev A, Mar 2017 www.commscope.com FIST-GCOG2-Dx6 Content 1 Introduction 2 General 2.1 Abbreviations 2.2 Kit contents 2.3 Tools 2.4 Accessories
3M Fiber Optic Splice Closure 2178-XSB/XSB-FR & 2178-XLB/XLB-FR 3M Cable Addition Kit 2181-XB/XB-FR
 3M Fiber Optic Splice Closure 2178-XSB/XSB-FR & 2178-XLB/XLB-FR 3M Cable Addition Kit 2181-XB/XB-FR Instructions July 2010 78-8135-0094-5-K 3 1.0 General 1.1 3M Fiber Optic Splice Closure 2178-XSB The
*Please note that although this product has been approved in Japan, its launch in other countries has not yet been confirmed.
 make News & Information 1-7-1 Konan, Minato-ku, Tokyo 108-0075, Japan Sony Corporation No.13-085E July 23, 2013 Sony Introduces head-mount image processing unit for endoscopic image display - Images from
Corrigendum for Two Bid Tender form for Hospital Equipment Items. (Tender ID- 827)
") EMPLOYEES STATE INSURANCE CORPORATIONMODEL HOSPITAL (ISO 9001:2008 Certified) LAXMI NAGAR, AJMER ROAD, JAIPUR 302006 Email: ms-jaipur.rj@esic.in & esicmhstorejpr@gmail.com Website: www.esichospitals.gov.in;
EMPLOYEES STATE INSURANCE CORPORATIONMODEL HOSPITAL (ISO 9001:2008 Certified) LAXMI NAGAR, AJMER ROAD, JAIPUR 302006 Email: ms-jaipur.rj@esic.in & esicmhstorejpr@gmail.com Website: www.esichospitals.gov.in;
Mid-Span Access of Loose-Tube Ribbon Fiber Optic Cable
 Application Notes Mid-Span Access of Loose-Tube Ribbon Fiber Optic Cable Author Prasanna Pardeshi and Sudipta Bhaumik Issued November 2013 Abstract In fiber optic network, it is sometime necessary to splice
SPECIFICATION FIBER OPTIC SPLICE CLOSURE. Spec No : VSS-1007-BS403A-04A/SD. VSS-0107-BS403A-04A/SD R & D Center Manufacturing Division
 SPECIFICATION FIBER OPTIC SPLICE CLOSURE Model Spec. No. Distribution Depts. VSOF-BS403A VSS-0107-BS403A-04A/SD R & D Center Manufacturing Division Sales Division Management Division Revision 10. 07 (Rev.4)
3M Better Buried Closures
 3M Better Buried Closures Instructions March 2016 78-0015-2945-8-A Contents: 1.0 General... 3 2.0 Kit Contents... 3 3.0 Closure Selection Guide... 4 4.0 LHS End Cap Installation... 5 5.0 Cable Preparations...
FusionLink Central Tube Ribbon Preparation & handling procedure
 FusionLink Central Tube Ribbon Preparation & handling procedure Table of Contents Page # 1.0 Scope... 1 2.0 Safety...1 3.0 General Installation Considerations.... 1 4.0 Reference Drawing... 2 5.0 Tool
EndoWorld NEURO 3-3-E/ Neuroendoscopy. Recommended Sets acc. to GAAB
 EndoWorld NEURO 3-3-E/06-2008 Neuroendoscopy Recommended Sets acc. to GAAB Neuroendoscopy Recommended Sets acc. to GAAB Neuroendoscopy represents a further step in appropriate minimally invasive neurosurgery,
Fiber Optic Splice Closure GPJ Instruction Manual
 Fiber Optic Splice Closure GPJ09-9401 Instruction Manual 1. Brief Introduction GPJ09-9401 type of Fiber Optic Splice Closure is a member in dome series, the main function is to provice direct pass, branch
3 SLiC Aerial Closure with Rubber End Seal
 3 Aerial Closure with Rubber End Seal Instructions 1.0 General 1.1 This instruction bulletin describes the assembly of the 3M Aerial Closure with external bonding hanger brackets. These closures are suitable
UNITED STATES DISTRICT COURT FOR THE DISTRICT OF DELAWARE
 UNITED STATES DISTRICT COURT FOR THE DISTRICT OF DELAWARE P TECH, LLC, ) ) Plaintiff, ) ) Case No. v. ) ) INTUITIVE SURGICAL, INC. ) ) Defendant. ) JURY TRIAL DEMANDED ) COMPLAINT Plaintiff, P Tech, LLC
(12) Patent Application Publication (10) Pub. No.: US 2017/ A1
 Patent Application Publication (10) Pub. No.: US 2017/ A1") (19) United States US 2017.00561. 66A1 (12) Patent Application Publication (10) Pub. No.: US 2017/0056166A1 Ratz et al. (43) Pub. Date: Mar. 2, 2017 (54) REPLACEMENT HEART VALVES AND Publication Classification
(19) United States US 2017.00561. 66A1 (12) Patent Application Publication (10) Pub. No.: US 2017/0056166A1 Ratz et al. (43) Pub. Date: Mar. 2, 2017 (54) REPLACEMENT HEART VALVES AND Publication Classification
3M Scotchcast Mine and Portable Cable Splice and Jacket Repair Kit M-40
 3M Scotchcast Mine and Portable Cable Splice and Jacket Repair Kit M-40 Instructions 1 & 2 For Jacket Repair (pages 2 & 7) Supplemental Instructions for: Insulation Repair (page 12) Conductor Repair (page
iworx Sample Lab Experiment AN-13: Crayfish Motor Nerve
 Experiment AN-13: Crayfish Motor Nerve Background The purpose of this experiment is to record the extracellular action potentials of crayfish motor axons. These spontaneously generated action potentials
Index. Note: Page numbers of article titles are in boldface type.
 Index Note: Page numbers of article titles are in boldface type. A Adhesiolysis in revisional bariatric surgery, 1355 Adjustable gastric banding (AGB) complications of, 1249 1264 early postoperative, 1250
VISERA 4K UHD GET CLOSER. GET CLOSER Four Times the Resolution of Full HD.
 VISERA 4K UHD GET CLOSER GET CLOSER Four Times the Resolution of Full HD. VISERA 4K UHD IMPROVEMENT OF VISIBILITY VISERA 4K UHD IMAGING CHAIN The Concept of the 4K UHD System Olympus is always trying to
3M Better Buried Closure (with 3M Scotchlok Shield Bond Connector 4462-FN and 3M High Gel Re-enterable Encapsulant 8882)
") 3M Better Buried Closure (with 3M Scotchlok Shield Bond Connector 4462FN and 3M High Gel Reenterable Encapsulant 8882) Instructions April 2016 78813509979C Contents: 1.0 General... 1 2.0 Kit Contents...
3M Better Buried Closure (with 3M Scotchlok Shield Bond Connector 4462FN and 3M High Gel Reenterable Encapsulant 8882) Instructions April 2016 78813509979C Contents: 1.0 General... 1 2.0 Kit Contents...
Instruction manual. KUZMA 4POINT 14 inch TONEARM Serial Number:
 Instruction manual KUZMA 4POINT 14 inch TONEARM Serial Number:.. 2016-09 1 KUZMA LTD INSTRUCTION MANUAL FOR 4POINT 14 tonearm The 4POINT 14 tonearm is a very precisely engineered piece of equipment, however,
INSTALLATION INSTRUCTIONS MO023A
 INSTALLATION INSTRUCTIONS MO023A Nexans N3S ODF system NEXANS N3S ODF SYSTEM Content Product description Patching frame Splice frame Doors Splice module Patch module Protective cover and label panel Guides
TECHNICAL SPECIFICATION
 TECHNICAL SPECIFICATION (FIBER OPTIC SPLICE CLOSURE) Model Spec. No. Distribution Depts. VSOF-BS403A SJP-0609-403A-01A/SD Quality Assurance Team Manufacturing Division Sales Division Management Division
A Room with a View. I opened my eyes to a well-dressed attractive man standing over my bed. He was trying to
 Christine Harker ENG 100 Formal Assignment #1 March 10, 2018 A Room with a View Christine I opened my eyes to a well-dressed attractive man standing over my bed. He was trying to wake me as gently as possible.
UNSIGNED HARDCOPY NOT CONTROLLED
 SUBJECT: APPROVED BY STATUS PURPOSE AFFECTED FUNCTIONS REFERENCES Cable and Harness Making Manager, Hardware Engineering Maintenance Revision Establishes requirements for the fabrication and inspection
Suzannah Sorin, MSPAS, PA-C Robotics Coordinator Physician Assistant Manager NYU Langone Medical Center NARUS February 16, 2018
 TROUBLESHOOTING SCENARIOS- As seen from the assistant Suzannah Sorin, MSPAS, PA-C Robotics Coordinator Physician Assistant Manager NYU Langone Medical Center NARUS February 16, 2018 Financial Disclosure
Spine Cable System. Implants and instruments for use when stabilizing and reconstructing spinal structures.
 Spine Cable System. Implants and instruments for use when stabilizing and reconstructing spinal structures. Technique Guide s and implants approved by the AO Foundation Table of Contents Introduction
8 GENITOURINARY Order inquiries? Items may not be exactly as shown. Foley Catheters
 GENITOURINARY GENITOURINARY 7 A Foley atheters Silastic Foley atheters Latex, 2-way, silicone/elastomer coated, short round tip, ribbed balloon, inflation valve, 2 opposing eyes, 10/box. ard 16 French,
HCS - HES Cabling Systems
 HCS - HES Cabling Systems Installation Manual for HCS High-Capacity Fiber-Optic Rack-Mount Cabinets Be sure to read and completely understand this procedure before applying product. Be sure to select the
Power. Flexibility. Usability.
 Power. Flexibility. Usability. 70 W Holmium:YAG Laser System Power. Flexibility. Usability. The MegaPulse 70 + is the newest addition to the Richard Wolf laser product line. The system is suited for a
VITALink Taped Splice Straight Through Crimp
 A Marmon Wire & Cable Berkshire Hathaway Company VITALink Taped Splice Straight Through Crimp 2 Hour Fire-Rated Splice VITALink MC Cables, UL FHIT 120 Installation Instructions Description The VITALink
Contents. (APPROX) 1 Cautery Machine/Electro Surgical Unit
 1 Cautery Machine/Electro Surgical Unit") Contents List of Items S. No. PARTICULARS QUANTITY REQUIRED (APPROX) 1 Cautery Machine/Electro Surgical Unit 40 with advance vessel sealer system 2 Mid end Anesthesia machine 45 3 Operating Laparoscopic
Contents List of Items S. No. PARTICULARS QUANTITY REQUIRED (APPROX) 1 Cautery Machine/Electro Surgical Unit 40 with advance vessel sealer system 2 Mid end Anesthesia machine 45 3 Operating Laparoscopic
SURGICAL FIBER OPTIC HEADLIGHT
 OPERATION MANUAL SURGICAL FIBER OPTIC HEADLIGHT OM 2 RevB IsoLux llc 100 Ferncroft Road, Danvers, MA USA 01923 PH# 978.774.9136 FAX#978.774.1559 TABLE OF CONTENTS: Page Section 1.0 SPECIFICATIONS 3 Section
Product Manual MNX10015 / REV C MODEL SB142, SB242. Dual Output Series Switch Boxes
 Product Manual MNX10015 / REV C MODEL SB142, SB242 Dual Output Series Switch Boxes Contents Section I Overview Introduction.... 2 Description... 2 Section II Installation Mounting... 3 Electrical Connections...
Loose Tube Cable Mid-Span Access for Splicing For Series 11D, 1GD, 12D, 1AD, 1DD, 1CD, 11, 1G, 12, 12L, 1A, 1D, 1C, 1NY, 13, 1H, HZD and HZA
 Loose Tube Cable Mid-Span Access for Splicing For Series 11D, 1GD, 12D, 1AD, 1DD, 1CD, 11, 1G, 12, 12L, 1A, 1D, 1C, 1NY, 13, 1H, HZD and HZA NOTE: These installation instructions have been written for
TECHNICAL GUIDELINE. Universal/Toneable FTTP Cable Applications Guideline. Materials Required
 Universal/Toneable FTTP Cable Applications Guideline This procedure details the steps to be taken to prepare the ends of a Superior Essex Universal or Toneable FTTP Optical Fiber Cable for splicing. This
INSTALLATION INSTRUCTIONS
 INSTALLATION INSTRUCTIONS MO036A N-HNS (Building Node Cabinet) N-HNS (BUILDING NODE CABINET) Contents Product description Technical data ODF Splice module Cabling organisation Cable/tube/fibre handling
Left to right: Dr. Anil Sharma, Dr. Vandana Soni, Dr. Pradeep Chowbey (Director), Dr. Rajesh Khullar, Dr. Manish Baijal.
, Dr. Rajesh Khullar, Dr. Manish Baijal.") Left to right: Dr. Anil Sharma, Dr. Vandana Soni, Dr. Pradeep Chowbey (Director), Dr. Rajesh Khullar, Dr. Manish Baijal. The Max Institute of Minimal Access, Metabolic and Bariatric Surgery (MAMBS), the
Left to right: Dr. Anil Sharma, Dr. Vandana Soni, Dr. Pradeep Chowbey (Director), Dr. Rajesh Khullar, Dr. Manish Baijal. The Max Institute of Minimal Access, Metabolic and Bariatric Surgery (MAMBS), the
3M Cold Shrink Foldback Splice Jacket Kit
 3M Cold Shrink Foldback Splice Jacket Kit SJ-FB Instructions! CAUTION Working around energized systems may cause serious injury or death. Installation should be performed by personnel familiar with good
3 Foam Sealed Closure 2" (50 mm) with Compound Compression
 with Compound Compression") 3 Foam Sealed Closure 2" (50 mm) with Compound Compression Instructions 1.0 General 1.1 The 3M Foam Sealed Closure is designed to be used in the construction and maintenance of buried and underground PIC
3 Foam Sealed Closure 2" (50 mm) with Compound Compression Instructions 1.0 General 1.1 The 3M Foam Sealed Closure is designed to be used in the construction and maintenance of buried and underground PIC
3 Closure preparation 3.1 Work-stand 3.2. Opening FIST-GCOG2-Dx Preparing drop cable with micro-tubes
 FIST-GCOG2-Dx24 I N S T A L L A T I O N I N S T R U C T I O N FTTH closure for micro-tubes and micro-cables Content 1 Introduction 2 Kit content 3 Closure preparation 3.1 Work-stand 3.2. Opening FIST-GCOG2-Dx24
INSTALLATION INSTRUCTIONS
 LIGHTGUARD 350-20-WTC SEALED FIBER OPTIC CLOSURE VIEW ONLINE TABLE OF CONTENTS: GENERAL...2 SPECIFICATIONS...2 PACKAGE CONTENTS...3 PACKAGE CONTENTS: ACCESSORIES...3 RECOMMENDED TOOLS...3 ADD-ON COMPONENTS...4
- CORRIGENDUM V
 GOVERNMENT OF MAHARASHTRA Directorate of Health Services, Mumbai Procurement Cell, 1st Floor, Arogya Bhavan, St.Georges Hospital Compund, MUMBAI 400 001. Tel. No. 022-22651026/22631831, Fax No. 022-2625799
T5-RM HD MITS. User Manual. 3-Dmed LEARNING THROUGH SIMULATION
 T5-RM HD MITS User Manual 3-Dmed LEARNING THROUGH SIMULATION T5-RM HD Minimally Invasive Training System Thank you for purchasing the T5-RM HD MITS from 3-Dmed Each has been fully tested prior to shipment
Coyote popup display set up instructions
 Coyote popup display set up instructions Frame 1 2 3 Prepare frame for assembly by locating the purple hooks on top of the frame. Stretch frame to size, snapping magnetic locking arms together. Attach
National Wire and Cable and National Cable Molding Headquarters Los Angeles California
 National Wire and Cable and National Cable Molding Headquarters Los Angeles California CAPABILITIES Medical Business Machines Communications Equipment Computer Equipment Audio Systems General Instrumentation
2.1 Kit Contents 2.2 Elements needed from the FIST installation kit 2.3 Tools 2.4 Cable preparation table
 FIST-GCO2-F INSTALLATION INSTRUCTION GCO2-FC GCO2-FD Content 1 Introduction 2 General 2.1 Kit Contents 2.2 Elements needed from the FIST installation kit 2.3 Tools 2.4 Cable preparation table 3 Installation
Gigabit Multi-mode SX to Single Mode LX Converter. User s Manual NGF-728 Series. Warning COPYRIGHT
 COPYRIGHT Gigabit Multi-mode SX to Single Mode LX Converter User s Manual NGF-728 Series All rights reserved. No part of this publication may be reproduced, stored in a retrieval system, or transmitted
Reusable Laparoscopic Instruments. Long-lasting performance
 Long-lasting performance Reusable Laparoscopic Instruments Grena offers an extensive selection of reusable detachable monopolar laparoscopic instruments available as well as in standard and bariatric lengths.
SLiC Fiber Aerial Closure System
 3 SLiC Fiber Aerial Closure System SLFC 533-SP SLFC 533-TS SLFC 733-SP Instructions May 2005 78-8135-4502-3-B N C H E S R A N G E M IL L IM E T E R S.4 10.6.8 A B C 15 20 I 1.0 Kit Contents Note: Examine
TP /2017-E POWER LED 300. Luminous. Efficient. Durable.
 TP 51 2.0 09/2017-E POWER LED 300 Luminous. Efficient. Durable. POWER LED 300 Luminous. Efficient. Durable. Light-emitting diode (LED) technology is rapidly becoming the modern day benchmark in the consumer
NC-1000 INSTALLATION MANUAL NC-1000 FIBRE OPTIC CROSS-CONNECTION SYSTEM
 NC-1000 INSTALLATION MANUAL NC-1000 FIBRE OPTIC CROSS-CONNECTION SYSTEM Content 1. General 5 2. The products of NC-1000 system 6 3. Mounting of the frame 8 4. Earthing of the frame 8 NC-1000 FIBRE OPTIC
Ladies and gentlemen, this DWAYNE WOLF, having been first duly sworn, testified as follows: DIRECT EXAMINATION
 Ladies and gentlemen, this 0 witness has previously been sworn. Proceed, please. DWAYNE WOLF, having been first duly sworn, testified as follows: DIRECT EXAMINATION BY MS. JOHNSON: Q. Sir, could you please
3M Fiber Optic Wall Mount Enclosure 8430 Series
 3M Fiber Optic Wall Mount Enclosure 8430 Series Installation Instructions January 2014 3 78-0013-9429-1-A Table of Contents 1.0 Description...3 2.0 Parts...4 3.0 Assembly...4 4.0 Mounting the Enclosure...6
Instructions for Use: Video Inspection Scope with Display
 Instructions for Use: Video Inspection Scope with Display Brand Name of Product Video Inspection Scope Generic Name of Product Video Inspection Scope Product Code Number(s) FIS-004 Intended Use For visually
Crimp & Cleave Termination Instructions for SEL ST Connectors
 Your Optical Fiber Solutions Partner Crimp & Cleave Termination Instructions for SEL ST Connectors For Use With: ST Termination Kit (SEL, Part Number BT05402-01) 200 µm HCS Fiber-Optic Cable ST Crimp &
Buffer Tube Midspan Access Tool Accessing fibers in buffer tube procedure
 Buffer Tube Midspan Access Tool Accessing fibers in buffer tube procedure Table of Contents page 1.0 Product Applications... 1 1.1 Purpose Of The Procedure... 1 2.0 Warning and Cautionary Statements...
Cable System Installation Guide
 Overview Cable System Installation Guide 5/19/2008 Our recommended approach for the installation of your Circle Graphics Cable Systems on the panels in your market is to install the fixed hardware (namely
ROBOTIC-ASSISTED GYNECOLOGIC ONCOLOGY PROCEDURE HALIFAX HEALTH DAYTONA BEACH, FLORIDA April 24, 2008
 ROBOTIC-ASSISTED GYNECOLOGIC ONCOLOGY PROCEDURE HALIFAX HEALTH DAYTONA BEACH, FLORIDA April 24, 2008 00:00:11 KELLY L. MOLPUS, MD: ANNOUNCER: Welcome to Halifax Health in Daytona Beach, Florida. You're
Creative Suggestions & Billboard Installation
 TMNT CAMPAIGN LOS ANGELES, CA These instructions include creative suggestions as well as handling, installation, and dismantling step by step guides for Light Tape Billboard Installations. R R Creative
4320 SS-25 Self-Strip Terminating Block
 4320 SS-25 Self-Strip Terminating Block Instructions May 2002 78-8130-7677-1 1.0 General The 3M 4320 SS-25 Self-Strip Terminating Block is a factory stubbed, self-stripping connecting block designed for
Non-metallic Aerial Distribution Optical Cables for FTTH Networks
 Non-metallic Aerial Distribution Optical Cables for FTTH Networks Go Taki, 1 Akira Namazue, 1 and Ken Osato 1 One of the common practices to construct economical and efficient Fiber To The Home (FTTH)
Clarinet Assembling the Instrument
 Clarinet Assembling the Instrument 1. Have students take instrument cases to another area of the room and set the cases flat on a table. If no table is available, students should put cases on the floor
Ordering Guide of the Fiber-Optic Splice Closure (FOSC-400)
") Page 1 of 11 Ordering Guide of the Fiber-Optic Splice Closure (FOSC-400) This document provides assistance with the selection of FOSC-400 closures. It includes the following sections: 1 Product description
Page 1 of 11 Ordering Guide of the Fiber-Optic Splice Closure (FOSC-400) This document provides assistance with the selection of FOSC-400 closures. It includes the following sections: 1 Product description
EndoWrist Instrument & Accessory Catalog. January 2013
 EndoWrist Instrument & Accessory Catalog January 2013 Table of Contents EndoWrist Instrument Application Matrix... 3 8 mm Cautery Instruments... 4 Monopolar Cautery Instruments... 4 EndoWrist Bipolar Cautery
2178 L/S Series Fiber Optic Splice Cases and Accessories
 2178 L/S Series Fiber Optic Splice Cases and Accessories The 3M 2178 Fiber Optic Splice Case family has always given you great protection for fiber optic connections. Now, the addition of 3M 2178-L/S Series
Wired Troubleshooting Manual
 Wired Troubleshooting Manual Congratulations on your choice of this product. Its superior sound reproduction will provide enjoyment and entertainment. We appreciate your patronage and take pride in the
3M Fiber Optic Splice Closure 2178-XL & 2178-XL/FR
 3M Fiber Optic Splice Closure 2178-XL & 2178-XL/FR 3M Cable Addition Kit 2181-XL and 2181-XL/FR Instructions September 2017 78-8130-5055-2-M 2 September 2017 78-8130-5055-2-M 1.0 Kit Contents 2.0 General...
MODELS USIX-024 AND USIX-120 INSTRUCTION SHEET FOR FEDERAL SIGNAL UNISTAT STATUS INDICATOR MODEL USIX
 2562089B REV. B 110 Printed in U.S.A. MODELS USIX-024 AND USIX-120 INSTRUCTION SHEET FOR FEDERAL SIGNAL UNISTAT STATUS INDICATOR MODEL USIX Address all communications and shipments to: FEDERAL SIGNAL CORPORATION
3. Electronics and MMU2 unit assembly
 Written By: Jakub Dolezal 2018 manual.prusa3d.com/ Page 1 of 34 Step 1 Tools necessary for this chapter Please prepare tools for this chapter: 2.5mm Allen key for M3 screws 2mm Allen key for nut alignment