The Max TM Family. Max Panel. Users Manual
|
|
|
- Job Craig
- 5 years ago
- Views:
Transcription

1 TM The Max TM Family Max TM Max Panel TM Users Manual
2 Congratulations on your purchase of one of the Max family of products. Enhanced Vision products are designed to give you the highest quality and convenience available. Max products use the latest advances in video and display technology to provide you with a portable system that addresses the need for magnification of text, pictures, and much more. Max products consist of an auto focus camera, which captures and projects images on to either a TV, a pair of Enhanced Vision LCD glasses, a LCD flat screen, a computer monitor or laptop computer (additional hardware may be required). Images can be switched between true color, black & white, high contrast positive or negative. The camera has been designed so either a right or left-handed user would be able to use it very effectively, with a minimum amount of practice and/or training. Prior to using this system, please carefully read and follow the instructions provided within this booklet. A thorough understanding of the functionality will allow you to fully benefit from the flexibility and great features of this device. If you have any questions, please contact the eyecare professional or the supplier from whom you have acquired the unit. User Guide
3 FCC COMPLIANCE NOTICE FCC Compliance Notification This device complies with Part 15 of the FCC Rules. Operation is subject to the following two conditions: (1) This device may not cause harmful interference, and (2) this device must accept any interference received, including interference that may cause undesired operation. This equipment has been tested and found to comply with the limits for a Class B digital device, pursuant to Part 15 of the FCC Rules. These limits are designed to provide reasonable protection against harmful interference in a residential installation. This equipment generates, uses, and can radiate radio frequency energy and, if not installed and used in accordance with the instructions, may cause harmful interference to radio communications. However, there is no guarantee that interference will not occur in a particular installation. If this equipment does cause harmful interference to radio or television reception, which can be determined by turning the equipment off and on, the user is encouraged to try to correct the interference by one or more of the following measures: Reorient or relocate the receiving antenna. Increase the separation between the equipment and receiver. Connect the equipment into an outlet on a circuit different from that to which the receiver is connected. Consult the dealer or an experienced radio/tv technician for help. Unauthorized changes or modification to this system can void the user s authority to operate this equipment. If your Low Vision device has an option to connect to a TV, it must be used with shielded interface cables in order to meet FCC emissions limits for Class B digital devices. It is the responsibility of the user to use the shielded interface cables supplied with the equipment. FCC Compliance Notice
4 Important Safety Precautions... 4 Max... 6 Max Package Contents & Controls... 7 Max Installation... 9 Using Max Max Panel Max Panel Package Contents & Controls Using Max Panel Using LCD Power Pack Common Questions Max Max Panel General Warranty Statement Other Enhanced Vision Products Contact Information Table Of Contents
5 IMPORTANT SAFETY PRECAUTIONS To obtain the maximum benefits from your Max product, please read these safety precautions carefully. SYSTEM WARNINGS The Max family of products are designed to improve the quality of life for visually impaired individuals. The extent to which Max products can improve the ability to see images depends on an individual s condition and level of visual impairment. These products are not designed to restore vision, correct eye conditions or halt degenerative vision loss. An eyecare professional can determine the suitability of Max products for a patient s condition. SYSTEM PRECAUTIONS Avoid exposing Max products to extreme or rapid changes in temperature or humidity as these conditions may cause fogging or damage to products. Max products should never be placed near a radiator or heat register. Do not smoke while using Max products. Cigarette, cigar and pipe smoke release abrasive particles which are potentially damaging to the Max optics. Do not use this product near water, i.e., near a bathtub, kitchen sink, swimming pool, etc. Do not place this product on an unstable cart, stand or table, as the product may fall, causing serious damage. Important Safety Precautions 4
6 Always place the excess cord in an area where it will not be damaged by a person walking on it. To avoid the risk of electrical shock, do not disassemble this product. Return it to the place of purchase if service or repair work is required. Any attempt to disassemble your Max product will void the warranty. Always use the power supply provided within your package. Do not attempt to use any other power supply, doing so will void the warranty. CARING FOR MAX PRODUCTS Always turn the power OFF when you are not using the system. Make sure the power is OFF or unplug your Max product from the wall outlet before cleaning. Do not use liquid cleaners. The plastic surfaces of your Max product may be dusted with a dry cloth. The optical surfaces should be cleaned as needed for best performance. Dampen a lens cleaning tissue with a small amount of lens cleaning solution and gently wipe the optical surfaces clean. Never apply lens cleaning solution directly on any surface of your Max products. 5 Important Safety Precautions

7 Max TM Max 6
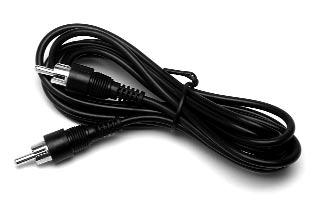
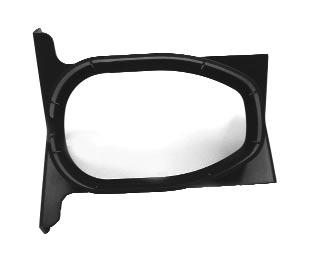
8 MAX PACKAGE CONTENTS & CONTROLS Your Max includes all required accessories for operation with any TV. 1. Max Digital Magnifier (Color or Black & White): captures and enlarges the image. 2. Control Box: connects the camera to the TV set and turns Max ON/ OFF. 3. Viewing Mode Button: for switching between color, black & white, high contrast positive or high contrast negative screen images. 4. Magnification Dial: increases size when turned clockwise Foot RCA Video Cable: connects Max control box to the TV via the Video Input jack. 6. Power Supply: connects Max control box to an outlet. Additional Accessories (not included): 7. MaxTrak: keeps your Max rolling in a straight line across a page. 8. Max Writing Stand: used for limited writing - signing a check or completing a form. 7 Max Package Contents & Controls


:")

9 Video OFF ON Power Camera 5 6 Additional Accessories (not included): 7 8 Max Package Contents & Controls 8
10 MAX INSTALLATION Basic TV Connection Using the RCA Video Cable and Video Input Jack (Refer to Figure 1) 1. Remove Max and the Control Box from the package. 2. Remove the RCA Video Cable from the package. Plug one end of the RCA Video Cable into the Control Box Jack labeled VIDEO. 3. Plug the other end of the RCA Video Cable into the yellow VIDEO INPUT jack of your TV. This jack could be located on either the front or back of your TV. 4. Remove the Power Supply from the package. Plug one end of the Power Supply into the Control Box Jack labeled POWER. Be sure the plug is fully inserted into the Control Box. Then plug in the other end of the Power Supply into an outlet. 5. Turn the power on. The ON and OFF switch is on the side of the control box. Turn the TV ON. You can switch between using Max and your TV with the TV remote control by changing between Video and TV mode. If you have a TV with a built in VCR, you can switch between using Max and your TV by pushing the Input button on your remote. Now you can go to the Using Max section on page 11 for information on how to use Max. 9 Max Installation
11 FIGURE 1 VIDEO IN on Back or Front of TV. RCA Video Cable Max POWER CHANNEL ON VIDEO OFF Power Supply Plugs to Outlet Control Box Max Installation 10
12 USING MAX Now that you have successfully installed your Max you can enjoy it s ease of use and operation. Max can be used to magnify material on any curved or straight surface. Simply place the Max on the item that you need to be magnified and slowly slide the unit across or up and down as desired. 12 Figure 1 3 Adjusting The Magnification Your Max has been preset at its lowest level of magnification. To increase the magnification level, simply turn the large black dial on top of the Max clockwise, a quarter of a turn (1/4) from 12 o clock to 3 o clock (See Figure 1 ). The 12 o clock position is the lowest level of magnification and the 3 o clock position is the highest level of magnification. NOTE: THE MAGNIFICATION DIAL ONLY TURNS BETWEEN 12 O CLOCK AND 3 O CLOCK. DO NOT FORCE THE DIAL BEYOND THE 3 O CLOCK POSITION. 11 Using Max

13 Figure 2 Reading is easy with Max. Reading is easy with Max. Reading is easy with Max. SELECT A VIEWING OPTION You can choose a viewing option by pushing the black button on the top of the digital magnifier. Each push will change your viewing option. If you keep pushing the button you will cycle through all the options. (See Figure 2) There are different viewing options depending on the Max model you have purchased. Viewing Options For Black & White Max Soft-Contrast Positive Image (B&W): This is a soft white back ground and a soft black foreground for text. Useful for viewing illustrations, photographs, or text. High-Contrast Positive Image (B&W): This is a high-contrast white background and a high-contrast black foreground for text. Useful for reading text. High-Contrast Negative Image (B&W): This is a high-contrast black background and a high-contrast white foreground for text. Useful for reading text. Viewing Options for Color Max The color Max has all the viewing options of the B&W model plus Full Color Image. Full Color Image: This is especially useful for viewing newspaper or magazines with color illustrations or photographs. Using Max 12

14 Reading with Max If you are using Max for reading purposes, place the Max on the text so the first line is located approximately in the middle of your TV screen. Slide the Max across, left to right, over the first line. Once completed, slide the Max back to the beginning of the line, and then slide it down to the next line. Practice the motion of moving Max on a straight line by keeping the palm of your hand on the table and holding Max in your hand. Repeat this exercise several times with different printed material varied in column width and length. As you learn to move Max in a straight line and as you gain more control over the unit, it will become easier to use. We highly recommend purchasing the MaxTrak if you are reading for extended periods of time. MaxTrak is designed to attach to your Max and help guide you in a straight line. Please read the section below Using MaxTrak. Using MaxTrak (Accessory not included) When you need the extra support to guide your reading across a page you can attach the MaxTrak to the Max. MaxTrak allows you to follow a straight line easier. For better image quality, the Max must sit all the way down into MaxTrak. Start by placing MaxTrak on your table with the wheels touching the table surface. The small end of MaxTrak should be closest to you. If this is done correctly, you can roll MaxTrak easily from left to right and back again. Then place the Max on top of MaxTrak and slip it into place. 13 Using Max

15 Viewing Options Button 12 3 Magnification Dial To use MaxTrak, slowly glide straight across a page from left to right. When you have reached the end of a line, glide back from right to left to the beginning of the line. Then lift Maxtrak and slightly move it down to continue reading. When you need more flexibility in movement, remove MaxTrak from the magnifier. Using Max Writing Stand (Accessory not included) Place the Max on top of the Max Writing Stand so that the camera cable is facing away from you. If you have inserted it correctly, the Max should fit perfectly in the Max Writing Stand. Move the Max on top of your desired object that you would like to sign or write on. With your non-writing hand, tilt the Max Writing Stand to the LEFT if you are RIGHT handed and to the RIGHT if you are LEFT handed. For the best focus, turn Max to the highest level of magnification by rotating the dial from 12 o clock to 3 o clock. See Adjusting the Magnification on page 11. It is best to use Color or Black & White viewing modes when using the writing stand. Using Max 14

16 Max Panel TM 15 Max Panel
17 MAX PANEL PACKAGE CONTENTS & CONTROLS Your Max Panel is packaged in a soft case that is convenient for storage and transportation. All required accessories for operation are included. Max Panel is comprised of: 1. LCD Screen. 2. LCD Power Pack. 3. Rechargeable Battery: energy source for 3 to 5 hours. 4. On/Off Switch for LCD Power Pack. 5. Max Digital Magnifier (Color or Black & White): captures and enlarge the image. 6. Viewing Options Button: changes viewing options from color, black & white, high contrast positive and high contrast negative, depending on Max camera purchased. 7. Magnification Dial: increases size when turned clockwise. Accessories included: 8. Power Supply: connects to LCD Power Pack and power cord. 9. Power Cord: connects to power supply and wall outlet foot RCA Video Cable: connects LCD Power Pack to a TV. 11. Lens Cloth: used to clean the Max camera and LCD screen. 12. Soft Backpack. 13. MaxTrak: keeps your Max rolling in a straight line across a page. 14. Max Writing Stand: used for limited writing - signing a check or completing a form. Max Panel Package Contents & Controls 16


18 Max Panel Package Contents & Controls
 The LCD screen and Max camera will automatically turn on in a few seconds.")


19 USING MAX PANEL 1. Turning the power ON On the right side of the LCD Power Pack flip the switch from 0 to l. (See Figure 1) The LCD screen and Max camera will automatically turn on in a few seconds. An image of what the camera is on top of should appear on the LCD screen. Turn the power off by flipping the same switch back to the 0 position. However, leave the power on for this training section. Figure 1 Note: If the battery is charged, there is no need to plug in the power supply and cord. If the battery is not charged, then refer to Recharging the Battery section on page Adjusting the LCD screen It is important to orient the LCD screen to provide the best viewing angle. To lift the screen put one hand on the back of the base and the other hand one the LCD and pull forward (see Figure 2-3). Once in the upright position use both hands to adjust vertically (see Figure 4). Figure 2 Figure 3 Figure 4 Using Max Panel 18

20 Viewing Options Button 12 3 Magnification Dial Figure 7 4. Using Max Digital Magnifier The Max Digital Magnifier automatically focuses when it is placed directly over a desired object and projects a magnified image onto the LCD screen. By rotating the magnification dial to increase the size and pushing the viewing options button to change viewing modes, you will be able to find what settings work best for you. (See Figure 7) NOTE: The magnification dial only turns from 12 o clock to 3 o clock. Do not force the dial beyond these two points. For more information on how to use the Max Digital Magnifier, please refer back to page 11 Using Max. 19 Using Max Panel


21 USING LCD POWER PACK Connecting Max or Flipper to the LCD Power Pack If you have purchased the Max camera separate from the LCD Power Pack, you will need to connect them together. To do so, simply plug the end of the cable connector which looks like a telephone connector coming from the Max camera into the open jack labeled Camera on the back of the LCD Power Pack. (See Figure 1) Figure 1 Connecting LCD Power Pack to a TV Set with Video In To connect the LCD Power Pack to a TV set with Video In you will need the 6-foot RCA video cable. Plug one end of the RCA cable into the yellow jack on the back of the LCD Power Pack labeled Video Out and the other end into the yellow Video Input jack on the front or back of your TV. Then switch your TV to Video Mode. This will allow you to view magnified images on your TV screen. (See Figure 2) Note: The LCD Power Pack video output standard is the same as the Max camera used (NTSC or PAL version). Yellow VIDEO IN on front or back of TV Camera Video Out RCA Video Cable Figure 2 Using LCD Power Pack 20

 A green LED light will appear on the front top right corner of the power pack.")

22 Using the LCD Power Pack with an Outlet You should always leave a battery in the LCD Power Pack. Once you are sure the battery is in the LCD power pack, then connect the power supply and power cord together. Connect the power cord to the outlet and the other end of the power supply to the back of the LCD power pack where it says 18 VDC 3AMPS. (See Figure 2 & 3) A green LED light will appear on the front top right corner of the power pack. If the light is solid then the battery is fully charged. If the light is blinking then refer to Recharging the Battery on page 22. You can not overcharge the battery. Note: The battery will drain if you leave the power switch ON when you are not using the LCD Power Pack. Figure 1 Figure 2 Figure 3 18 VDC 3AMPS 21 Using LCD Power Pack


23 Recharging the Battery The battery recharges in the LCD Power Pack. All you need to do is plug in the power supply to the LCD Power Pack and the outlet and the battery will automatically start charging. If the light is solid then the battery is fully charged. If the light is blinking then the battery is not fully charged. The battery will charge while in use as long as the system is plugged into an outlet. The battery will charge at the same rate whether the LCD Power Pack is ON or OFF. You cannot overcharge the battery. The battery has no memory so you can charge it at anytime. However, the more charge cycles, the shorter the battery life. Approximate charge time is 4 hours. Removing and inserting Battery from LCD Power Pack It is recommended to always keep a battery in the LCD Power Pack. The only reason you need to take the battery out is when you are changing batteries. To remove the battery, push down on the RELEASE button on the front top right of the LCD Power Pack. (See Figure 1) The battery should release from the LCD Power Pack so you can slide it out. To insert the battery, gently insert the battery, label facing up, into the base of the LCD Power Pack. Make sure the battery is fully inserted. You should hear a click. (See Figure 2) Figure 1 Figure 2 Using LCD Power Pack 22
24 COMMON QUESTIONS Max Q. How can I use Max with a computer monitor? A. All Enhanced Vision products can be used with a computer monitor by attaching an NTSC to VGA adapter. Enhanced Vision offers a device called Smart Video adapter for this purpose. Smart Video is also available in a laptop version. Q. My TV does not have the necessary Yellow Video In jack. How can I connect my Max to my TV? A. A product known as a Video RF Modulator is available at neighborhood electronic stores which connects to your TV s antenna terminal to the Max s control box. (Examples include Steren Video RF Modulator, P/N or Terk RF Modulator Video Converter.) Q. I have my product connected properly, but I m still not seeing an image. What am I doing wrong? A. First double-check to be certain that all cables are connected securely. Next check to see that the TV is on the proper channel. If your system is being connected through the antenna terminal, make certain that your TV is on channel 3 (some TVs utilize channel 4, please check your TV manufacturers user manual for further details). If your system is connected to the TV s video in jack, check to see that your TV is on the proper video mode, usually located on your remote control or your TV s menu options. Some remote controls access this channel by pressing a TV/Video, Input, Auxiliary (AUX), External (EXT), Game, or Source. (Please note this channel differs depending on the TV maker. Please consult your TV manufacturer s user manual for additional information). 23 Common Questions
25 Q. When I activate my Max, the lights on the bottom no longer come on. How can I fix this? A. The Max has small LED lights built into it that provide illumination for the camera. Over time these lights may burn out. If this has occurred, you will need to send your Max to our service center for repair. Q. Can I purchase replacement parts for my Max? A. Parts such as the RCA video cable can be purchased at a local electronics retailer or from Enhanced Vision. However any internal parts or power supply would have to be replaced or purchased from our service center. Internal parts are not available as separate accessories. Q. Can I use Max on an LCD or flat screen monitor? A. Yes. Max can be used with any TV. However Max can also be used with other monitors as long as they have RCA Video In jack available. Common Questions 24
26 Max Panel Q. How long does the Max Panel battery last? A. The battery will last approximately 3-5 hours per complete charge. Q. How long does it take for the Max Panel battery to recharge? A. The battery needs approximately 4 hours to recharge. Q. How does the Max Panel battery recharge? A. There is no separate battery charger included with the Max Panel. Keep the battery inserted into the LCD Power Pack. Connect the Desktop power supply to the Max Panel and plug it into an outlet socket or surge protection strip. The battery will recharge while in the Max Panel. The battery will also continue to charge if the panel is in use. Q. Can I use the Max Panel without the battery? A. Yes. The Max Panel comes with an Desktop power supply that can be connected to an outlet or power strip. Doing this will run the Max Panel and also recharge the battery at the same time. (Note: The Desktop power supply will also power the system without the battery.) Q. Does the battery have to be completely discharged before I recharge it? A. No. The Max Panel has a lithium ion battery that does not need to be completely discharged before recharging it again. The battery can-not be over charged. However, the fewer charging cycles, the longer the battery life. Q. Can I connect the Max Panel to a TV or monitor? A. Yes. The Max Panel includes an RCA cable that will allow it to connect to a TV. The Max Panel can also be connected to a PC monitor through use of an adapter (not included). To connect the Max Panel to the TV set, plug one end of the RCA cable into the yellow jack on the back of the power pack labeled Video Out and plug the other end into the yellow Video Input jack on the front or the back or front of your TV. Then switch your TV to Video Mode. 25 Common Questions
27 General Q. In case of a problem, how can I get my system serviced? A. For questions or to arrange for product service, please contact Enhanced Vision s customer service team, Monday through Friday from 8am-5pm PST at (714) or (800) or support@enhancedvision.com. We will contact you within 24 hours to provide instructions and a return authorization number. Q. How long does the repair process take? A. Once our service department receives your product, the repair process typically takes about 72 hours or less. If the repair is not covered under warranty, our service team member will contact you with a repair estimate. After the repair is complete, your product will immediately be shipped back to you. Q. How much will it cost for repairs? A. For non-warranty repairs, charges will vary depending on what needs to be completed. Anytime there is cost involved with a repair, our service department will notify you of the charge and get your permission before proceeding. Enhanced Vision will not perform cost related repairs unless first authorized by the system s owner or caregiver. Prepayment of any repair cost is required before repair work can be completed. Q. Does Enhance Vision have local service centers? A. Currently, all service is done at Enhanced Vision s corporate service department. This insures that repairs are not only processed efficiently but that they also meet Enhanced Vision s strict quality guidelines. Common Questions 26
28 WARRANTY STATEMENT Warranty Information (Warranty Form enclosed) Enhanced Vision products are designed to give you the highest quality, convenient features, ease-of-use and reliability. Max products have been inspected and tested prior to shipping. Enhanced Vision warrants the Max and Max Panel against manufacturer defects in material and workmanship under normal use, for two years from the date of purchase. Enhanced Vision at its option, will at no charge either repair or replace the defective product during the warranty period. There are no other expressed or implied warranties accompanying this product. This warranty does not cover the following: 1. Defects or damage from misuse, use in other than normal and customary manner, accident or neglect. 2. Defects or damage from improper operation, maintenance, installation, adjustment, alterations or modification. 3. Defects or damage from spills of food or liquid. 4. All plastic surfaces and all other externally exposed parts that are scratched or damaged due to normal use. 5. Damage due to operation of Max products with equipment not supplied by Enhanced Vision. Service Process In the event that technical support or repair service is needed, please contact your local Enhanced Vision representative or the Enhanced Vision warranty service center. If warranty service is required, please contact Enhanced Vision at (714) or (800) Monday through Friday, between 8 a.m. and 5 p.m. Pacific Standard Time (PST) to request a return authorization number. Warranty repairs will not be accepted without a valid return authorization number. You may wish to keep the original product packaging in case warranty service is required. The manufacturer cannot provide packaging for warranty repairs. 27 Warranty Statement


29 OTHER PRODUCTS FROM ENHANCED VISION Merlin LCD & Merlin Plus Merlin LCD is a video magnifier that pivots and swivels to the most comfortable viewing position. This product includes all the same features as the Merlin but with a sleek ergonomic design. Merlin Plus offers the same advanced features as the Merlin but is compatible with most computer workstations and offers a split screen mode. This mode lets the user view magnified images and computer files concurrently Pebble Compact, Ultra-Portable Magnification! The Pebble is a handheld electronic video magnifier that you can take anywhere. Weighing less than 8 ounces, Pebble features a uniquely-designed folding handle and includes both near-viewing and table reading modes. Small enough to fit in your pocket or purse, the Pebble is the ideal companion to provide magnification, on the go. Featuring a built-in 3.5 or 4.3" LCD screen, the Pebble's Freeze-Frame feature allows you to capture any still image and adjust magnification. Up to 28 different viewing modes allow you to choose alternate color combinations based on your personal preference. Pebble can be powered using standard rechargeable batteries (included) Magnification: 2X 10X Other Products From Enhanced Vision 28


30 Amigo Amigo is a truly portable desktop magnifier. Optimal viewing is achieved with a tilting 6.5 inch viewing screen. Amigo provides 3.5 to 14x digital magnification and the lightest weight in its class. Amigo is battery operated and can be taken anywhere. Acrobat LCD With a built-in 19 LCD, the Acrobat is a 3-in-1 video magnifier ideal for near, distance and self viewing. By rotating the camera, you can read, write, groom, and magnify images at any distance. The Acrobat LCD offers a complete system for those at work, school or home. Magnification: 2.5X 65X (19 LCD) DaVinci DaVinci is a high performance desktop video magnifier (CCTV), featuring HD, text-to-speech (OCR) and a 3-in-1 camera. With HD you will experience high definition color and contrast giving you a beautiful, crystal clear picture and vibrant colors. Experience the joy of reading with our new text-to-speech feature. DaVinci will read any printed text aloud with the push of a button. Magnification: 24 LCD: 2x (minimum) 29 Other Products From Enhanced Vision


31 Accessories Merlin HD Smart Video Connects Enhanced Vision low vision devices to a computer monitor or laptop computer. MaxTrak An essential accessory to keep your Max rolling in a straight line across a page. Batteries Rechargeable batteries for Enhanced Vision portable products, including Jordy, FlipperPort, MaxPort, FlipperPanel and Max Panel. Contact information: Merlin HD s camera technology produces an even truer, more natural image. Easily read books and magazines, read and write letters, manage your financial records, view color photos, do crossword puzzles, and even pursue a favorite hobby. Magnification: 22 LCD: 3.2x (minimum) to 64.7x (maximum) 24 LCD: 3.4x (minimum) to 57.8x (maximum) (US Office) Phone: (714) Fax: (714) (UK Office) Phone: +44 (0) Fax: +44 (0) (DE Office) Phone: +(49) Fax: +(49) Technical Support: Main Toll Free (800) ext. 3 Local Phone: (714) ext. 3 evsupport@enhancedvision.com Other Products User From Guide Enhanced Vision 30
32 Max Family of products are designed to enlarge and enhance images to offer improvement in the quality of life for people with visual impairment. The extent to which Max products can improve the ability to see images depends on a person s individual condition and level of visual impairment. Max products are not designed to restore vision, correct eye conditions or halt degenerative vision loss. An eyecare professional can determine the suitability of Max products for a patient s individual condition. Max products are designed to be worn while sitting or standing still, and are not to be used while walking, driving, or mobility of any kind. (800) (US Office, toll free) (714) (US Office) +44 (0) (UK Office) Tel. + (49) (DE Office) Fax + (49) (DE Office) Part # MAN September, 2012 Copyright 2009 by Enhanced Vision. All rights reserved. Product specifications subject to change without prior notice.
Flipper. The Ultimate in Flexibility Just Point and See! Users Manual. FlipperPanel. Flipper Stand. Flipper
 Flipper The Ultimate in Flexibility Just Point and See! FlipperPanel Flipper Flipper Stand Users Manual Congratulations on your purchase of one of the Flipper family of products. Enhanced Vision products
The Acrobat TM Family
 The Acrobat TM Family AcrobatPanel TM Acrobat TM Acrobat LCD TM Users Manual Congratulations on your purchase of one of the Acrobat family of products. Enhanced Vision products are designed to give you
FCC COMPLIANCE NOTICE
 User Manual TM Congratulations on your purchase of Merlin HD from Enhanced Vision. Merlin HD is a full-color, auto-focus video magnifier system designed to enhance the lifestyle of the visually impaired.
FCC COMPLIANCE NOTICE
 User Manual Congratulations on your purchase of Merlin HD from Enhanced Vision. Merlin HD is a full-color, auto-focus video magnifier system designed to enhance the lifestyle of the visually impaired.
FCC COMPLIANCE NOTICE
 User Manual Congratulations on your purchase of Merlin ultra from Enhanced Vision. Merlin ultra is a full-color, auto-focus video magnifier system designed to enhance the lifestyle of the visually impaired.
AITech ProA/V Media Extender 5GHz Digital
 AITech ProA/V Media Extender 5GHz Digital 5 GHz Wireless Digital Media Transmitter and Receiver User Manual Table of Contents 1. Package Contents 2. Panels and Functions AV Sender AV Receiver 3. Setup
USER MANUAL. 27 Full HD Widescreen LED Monitor L27ADS
 USER MANUAL 27 Full HD Widescreen LED Monitor L27ADS TABLE OF CONTENTS 1 Getting Started 2 Control Panel/ Back Panel 3 On Screen Display 4 Technical Specs 5 Care & Maintenance 6 Troubleshooting 7 Safety
USER MANUAL. 22" Class Slim HD Widescreen Monitor L215DS
 USER MANUAL 22" Class Slim HD Widescreen Monitor L215DS TABLE OF CONTENTS 1 Getting Started Package Includes Installation 2 Control Panel / Back Panel Control Panel Back Panel 3 On Screen Display 4 Technical
USER MANUAL. 27 Full HD Widescreen LED Monitor L270E
 USER MANUAL 27 Full HD Widescreen LED Monitor L270E TABLE OF CONTENTS 1 Getting Started 2 Control Panel/ Back Panel 3 On Screen Display 4 Technical Specs 5 Care & Maintenance 6 Troubleshooting 7 Safety
Merlin LCD Plus. User s Manual
 Merlin LCD Plus TM User s Manual In order to maintain the consistency with the printed version of this manual, this page is intentionally left without manual content. Table of Contents About Merlin LCD
Golf ball tracker. Instruction manual
 Golf ball tracker Instruction manual General Intended use The Prazza golf ball finder is intended for use on the golf course only and should never be used inside the home or any other enclosed environment.the
17 19 PROFESSIONAL LCD COLOUR MONITOR ART
 17 19 PROFESSIONAL LCD COLOUR MONITOR ART. 41657-41659 Via Don Arrigoni, 5 24020 Rovetta S. Lorenzo (Bergamo) http://www.comelit.eu e-mail:export.department@comelit.it WARNING: TO REDUCE THE RISK OF FIRE
USER MANUAL Full HD Widescreen LED Monitor L215ADS
 USER MANUAL 21.5 Full HD Widescreen LED Monitor L215ADS TABLE OF CONTENTS 1 Getting Started 2 Control Panel/ Back Panel 3 On Screen Display 4 Technical Specs 5 Care & Maintenance 6 Troubleshooting 7 Safety
USER MANUAL Full HD Widescreen LED Monitor L215IPS
 USER MANUAL 21.5 Full HD Widescreen LED Monitor L215IPS TABLE OF CONTENTS 1 Getting Started 2 Control Panel/ Back Panel 3 On Screen Display 4 Technical Specs 5 Care & Maintenance 6 Troubleshooting 7 Safety
USER MANUAL. 27" 2K QHD LED Monitor L27HAS2K
 USER MANUAL 27" 2K QHD LED Monitor L27HAS2K TABLE OF CONTENTS 1 Getting Started 2 Control Panel/ Back Panel 3 On Screen Display 4 Technical Specs 5 Troubleshooting 6 Safety Info & FCC warning 1 GETTING
PLL1920M LED LCD Monitor
 PLL1920M LED LCD Monitor USER'S GUIDE www.planar.com Content Operation Instructions...1 Safety Precautions...2 First Setup...3 Front View of the Product...4 Rear View of the Product...5 Installation...6
LF-IRX. 12 Month Limited Warranty LF-IRX. Remote Control Extender. Owner s manual. For customer service and technical information::
 12 Month Limited Warranty Audiovox Electronics Corporation (the company) warrants to the original purchaser of this product that should this product or any part thereof, under normal use and conditions,
USER MANUAL. 28" 4K Ultra HD Monitor L28TN4K
 USER MANUAL 28" 4K Ultra HD Monitor L28TN4K TABLE OF CONTENTS 1 Getting Started 2 Control Panel/ Back Panel 3 On Screen Display 4 Technical Specs 5 Care & Maintenance 6 Troubleshooting 7 Safety Info &
4 PORT HDMI SWITCH
 4 PORT HDMI SWITCH 1518896 IMPORTANT SAFEGUARDS OF HDMI SWITCH PRODUCTS PLEASE READ CAREFULLY THE FOLLOWING SAFEGUARDS THAT ARE APPLICABLE TO YOUR EQUIPMENT 1. Read instructions - All the safety and operating
Electric Wall/Ceiling Projection Screen Saker Plus Series User s Guide
 Electric Wall/Ceiling Projection Screen Saker Plus Series User s Guide Important Safety & Warning Precautions Make sure to read this user s guide and follow the procedures below. Caution: The screen s
USER MANUAL Full HD Widescreen LED Monitor L236VA
 USER MANUAL 23.6 Full HD Widescreen LED Monitor L236VA TABLE OF CONTENTS 1 Getting Started 2 Control Panel/ Back Panel 3 On Screen Display 4 Technical Specs 5 Care & Maintenance 6 Troubleshooting 7 Safety
COMPOSITE VIDEO (BNC) TO VGA VIDEO FORMAT CONVERTER AND SCALER AT-RGB110
 TO VGA VIDEO FORMAT CONVERTER AND SCALER AT-RGB110") User Manual COMPOSITE VIDEO (BNC) TO VGA VIDEO FORMAT CONVERTER AND SCALER AT-RGB110 TABLE OF CONTENTS 1. Introduction... 2 2. Package Contents... 2 3. Features... 2 4. Specification... 2 5. Panel Description...
User Manual COMPOSITE VIDEO (BNC) TO VGA VIDEO FORMAT CONVERTER AND SCALER AT-RGB110 TABLE OF CONTENTS 1. Introduction... 2 2. Package Contents... 2 3. Features... 2 4. Specification... 2 5. Panel Description...
ACCESSORIES MANUAL PART NUMBER: PRODUCT REVISION: 1 TNP100. Tilt N Plug Interconnect Box USER'S GUIDE
 MANUAL PART NUMBER: 400-0091-001 PRODUCT REVISION: 1 TNP100 Tilt N Plug Interconnect Box USER'S GUIDE INTRODUCTION Your purchase of the TNP100 Tilt N Plug Interconnect Box is greatly appreciated. We are
PLL2210MW LED Monitor
 PLL2210MW LED Monitor USER'S GUIDE www.planar.com Content Operation Instructions...1 Safety Precautions...2 First Setup...3 Front View of the Product...4 Rear View of the Product...5 Quick Installation...6
Contents. Disclaimer of Product and Services
 Instruction Manual Contents FCC COMPLIANCE STATEMENT... 3 WARNINGS AND PRECAUTIONS... 3 WARRANTY... 4 STANDARD WARRANTY... 4 THREE YEAR WARRANTY... 4 DISPOSAL... 4 INTRODUCTION... 5 FEATURES... 5 GO KMU-100
900-Lumen Portable LED Projector Part #: User manual
 900-Lumen Portable LED Projector Part #: 21797 User manual 900-Lumen LED Projector Manual Page 2 of 14 900-Lumen LED Projector Manual Page 3 of 14! SAFETY WARNINGS AND CAUTIONS WARNING: To reduce the risk
PL2410W LCD Monitor USER'S GUIDE.
 PL2410W LCD Monitor USER'S GUIDE www.planar.com Content Operation Instructions...1 Safety Precautions...2 First Setup...3 Front View of the Product...4 Rear View of the Product...5 Quick Installation...6
Unauthorized changes or modification to this system can void the user s authority to operate this equipment.
 Users Manual PLUS Congratulations on your purchase of Merlin Plus from Enhanced Vision. Merlin Plus is designed to enhance the lifestyle of the visually impaired. This is Enhanced Vision s most advanced
2.4 GHz WIRELESS SURVEILLANCE SYSTEM
 2.4 GHz WIRELESS SURVEILLANCE SYSTEM Operating Instructions Tested Comply With FCC Standards Model # TBM-18 BEFORE OPERATING THIS PRODUCT, READ, UNDERSTAND, AND FOLLOW THESE INSTRUCTIONS. Be sure to save
By CHANNEL VISION. Flush Mount Amplifier A0350
 Spkrs Local In IR In 24VDC A0350 10 The A0350 can be used with Channel Vision s CAT5 audio hubs to provide a powerful 50Watts per channel in the listening zone. Alternatively, the A0350 can be added to
Designed in Colorado, USA. Bluetooth Cable. Quick Start Guide
 Designed in Colorado, USA Bluetooth Cable Quick Start Guide Registration + Maintenance Tips Congratulations on purchasing your new Bluetooth cable! Make sure to register your new cable and be the first
ACCESSORIES MANUAL PART NUMBER: TNP500. Universal Tilt N Plug Interconnect Box USER'S GUIDE
 MANUAL PART NUMBER: 400-0091-003 TNP500 Universal Tilt N Plug Interconnect Box USER'S GUIDE INTRODUCTION Your purchase of the TNP100 Tilt N Plug Interconnect Box is greatly appreciated. We are sure you
Qianglong Furniture Co., Ltd.
 Qianglong Furniture Co., Ltd. ITEM NO.: 400-12-00K Gaming Chair manual THIS INSTRUCTION BOOKLET CONTAINS IMPORTANT SAFETY INFORMATION. PLEASE READ AND KEEP FOR FUTURE REFERENCE. DO NOT RETURN TO THE STORE
(7) Changing the Ratio (8) Initialization Additional features (1) Adjusting the monitor position (2) Light on/off
 Changing the Ratio (8) Initialization Additional features (1) Adjusting the monitor position (2) Light on/off") Table of Contents 1. What is the SenseView DESKTOP?... 1 2. Safety Precaution... 2 3. Package... 3 4. Overview... 4 5. How to install... 5 (1) Connect the power cable... 5 (2) Using DVI-D cable... 6 (3)
Table of Contents 1. What is the SenseView DESKTOP?... 1 2. Safety Precaution... 2 3. Package... 3 4. Overview... 4 5. How to install... 5 (1) Connect the power cable... 5 (2) Using DVI-D cable... 6 (3)
DISTRIBUTION AMPLIFIER
 MANUAL PART NUMBER: 400-0045-005 DA1907SX 1-IN, 2-OUT VGA/SVGA/XGA/UXGA DISTRIBUTION AMPLIFIER USER S GUIDE TABLE OF CONTENTS Page PRECAUTIONS / SAFETY WARNINGS... 2 GENERAL...2 GUIDELINES FOR RACK-MOUNTING...2
2.4 GHz WIRELESS VIDEO SENDER SYSTEM MODEL: VS6234
 2.4 GHz WIRELESS VIDEO SENDER SYSTEM MODEL: VS6234 Please read this manual thoroughly before operating this system OPERATING INSTRUCTIONS 03/02 1 SAFETY INSTRUCTIONS CAUTION! RISK OF ELECTRIC SHOCK. DO
T850 Day & Night Security Camera
 T850 Day & Night Security Camera For use with Swann 4500 DVR EN INSTRUCTION MANUAL MT850_091014E Swann 2014 Before you begin Introduction Congratulations on your purchase of this T850 Day & Night Security
Miniature Fiber-Optic 3G-SDI Extension Module. User s Manual (SDIX-100, SDIX-100C)
") Miniature Fiber-Optic 3G-SDI Extension Module User s Manual (SDIX-100, SDIX-100C) Manual Contents Manual Contents 1-0 Welcome!, Product Description 1-1 System Requirements for Setup 1-2 Installation 1-3
Miniature Fiber-Optic 3G-SDI Extension Module User s Manual (SDIX-100, SDIX-100C) Manual Contents Manual Contents 1-0 Welcome!, Product Description 1-1 System Requirements for Setup 1-2 Installation 1-3
ServerCall Transmitter
 ServerCall Transmitter User Instruction Manual FCC ID : QBTLTK-SCT TRADE NAME: SERVERCALL TRANSMITTER MODEL NO.: LTK-SCT THIS DEVICE COMPLIES WITH PART 15 OF THE FCC RULES. OPERATION IS SUBJECT TO THE
TR6102HD HDTV/DVD/COMPONENT VIDEO TO RGBHV TRANSCODER USER S GUIDE
 MANUAL PART NUMBER: 400-0031-003 PRODUCT REVISION: 1 HDTV/DVD/COMPONENT VIDEO TO RGBHV TRANSCODER USER S GUIDE INTRODUCTION Thank you for your purchase of the Transcoder. We are certain that you will find
Limited Warranty. TERK and the TERK logo are registered trademarks of AUDIOVOX Corp.
 Limited Warranty Audiovox Corporation (Audiovox) warrants this product against defects in materials or workmanship for one (1) year from the date of purchase. During this period, this product will be replaced
PXL2760MW LED LCD Monitor
 PXL2760MW LED LCD Monitor USER'S GUIDE www.planar.com Content Operation Instructions...1 Safety Precautions...2 Package Overview...3 First Setup...4 Front View of the Product...5 Rear View of the Product...6
SAFETY WARNINGS AND GUIDELINES
 SAFETY WARNINGS AND GUIDELINES Please read this manual thoroughly, paying extra attention to these safety warnings and guidelines: Do not expose this monitor to water or moisture of any kind. Do not handle
LCD VALUE SERIES (32 inches)
") LCD VALUE SERIES (32 inches) http://www.orionimages.com All contents of this document may change without prior notice, and actual product appearance may differ from that depicted herein 1. SAFETY INSTRUCTION
LCD VALUE SERIES (32 inches) http://www.orionimages.com All contents of this document may change without prior notice, and actual product appearance may differ from that depicted herein 1. SAFETY INSTRUCTION
ZvBox 150. HD video distribution over COAX Get Going Guide
 ZvBox 150 HD video distribution over COAX Get Going Guide ZvBox 150 is an HD MPEG 2 Encoder and frequency agile QAM Modulator. It allows you to convert any HD video source, Component or RGB (VGA), in real
User Instructions. 16 SCB Sync Station.
 User Instructions 16 SCB Sync Station Contents Overview... 1 Specifications... 1 Compliance and approvals... 2 Safety instructions... 3 Set up... 4 How to charge multiple devices... 4 How to synchronize
Mini Projector User s Guide
 Mini Projector User s Guide Please read this manual before Model P50 Table of Contents 1. Table of Contents---------------------------------1 2. Warnings-----------------------------------------2 3. Accessories---------------------------------------4
LTC 113x & LTC123x FlexiDome Series Fixed Dome Cameras
 LTC 113x & LTC123x FlexiDome Series Fixed Dome Cameras Eng Installation Instructions F D E NL I IMPORTANT SAFEGUARDS 1. Read Instructions All the safety and operating instructions should be read before
2.0 Wall Mount TV Soundbar Instruction Manual
 8010275 2.0 Wall Mount TV Soundbar Instruction Manual Read all of the instructions before using this soundbar and keep the manual in a safe place for future reference. Safety Information CA UT IO N RISK
RemotePoint. Navigator. User s Manual VP4150
 RemotePoint Navigator User s Manual VP4150 LASER Safety Statement CAUTION: Use of controls or adjustments or performance of procedures other than those specified herein may result in hazardous radiation
INSTRUCTION MANUAL SUPER LASER
 INSTRUCTION MANUAL SUPER LASER WARNINGS When using this SUPER LASER, basic safety precautions should always be followed to reduce the risk of fire, electric shock, and personal injury. Follow the instructions
22" Touchscreen LED Monitor USER'S GUIDE
 22" Touchscreen LED Monitor USER'S GUIDE Content Operation Instructions...1 Unpacking Instructions...2 Safety Precautions...2 Front View of the Product...3 Rear View of the Product...4 Quick Installation...5
DTA Easy Setup Guide. Installation Operation Troubleshooting
 DTA Easy Setup Guide Installation Operation Troubleshooting Table of Contents What s included in this Install... Kit 4 Items that you may also need....5 Start Here... 6 Connecting to a TV (No VCR )....8
Monochrome Video Monitors
 Instructions for Use Monochrome Video Monitors En F D E NL I LTC 2009 LTC 2012 LTC 2017 Philips Communication & Security Systems GB F D E NL I Instructions for Use...1.1 Mode d emploi...2.1 Bedienungsanleitung...3.1
HD Digital MPEG2 Encoder / QAM Modulator Get Going Guide
 series HD Digital MPEG2 Encoder / QAM Modulator Get Going Guide HDb2640 HDb2620 HDb2540 HDb2520 The HDbridge 2000 Series is a combination HD MPEG 2 Encoder and frequency-agile QAM Modulator, all in a 1RU
19 / 20.1 / 22 WIDE SCREEN TFT-LCD MONITOR
 19 / 20.1 / 22 WIDE SCREEN TFT-LCD MONITOR V193/ V220 Series V202 Series USER MANUAL www.viewera.com Rev. 2.0 Table of Contents EMC Compliance......1 Important Precautions...2 1. Package contents....3
LCD MONITOR. 27 Wide LED Monitor User Manual. User Manual P276L
 LCD MONITOR 27 Wide LED Monitor User Manual User Manual P276L Precautions Precautions Warning The following information will help you avoid the risk of electric shock, serious injury or death. Power cord
H270 LED MONITOR USER MANUAL
 H270 LED MONITOR USER MANUAL In order to continue serving our customers and providing the best products, our product information including our user manuals may receive updates from time to time. Please
USER S MANUAL CCTV LED MONITOR MODEL: ADE-117N1 ADE-119N1 ADE-118W1 ADE-121W1 ADE-124W Atherton Electronics Corp. All rights reserved.
 USER S MANUAL CCTV LED MONITOR MODEL: ADE-117N1 ADE-119N1 ADE-118W1 ADE-121W1 ADE-124W1 2015 Atherton Electronics Corp. All rights reserved. TABLE OF CONTENTS FCC information -------------------------------------------------------------------
PLL2710W LED LCD Monitor
 PLL2710W LED LCD Monitor USER'S GUIDE www.planar.com Content Operation Instructions...1 Safety Precautions...2 Package Overview...3 First Setup...4 Front View of the Product...5 Rear View of the Product...6
User Manual MODEL: KKF1500-PCAP. True FLAT P-CAP LCD Monitor. Installation Guide. 15 True FLAT P-CAP Touch LCD Monitor
 True FLAT P-CAP LCD Monitor User Manual Installation Guide 15 True FLAT P-CAP Touch LCD Monitor MODEL: KKF1500-PCAP i-tech Company LLC TOLL FREE: (888) 483-2418 EMAIL: info@itechlcd.com WEB: www.itechlcd.com
FCC Compliance Statement
 FCC Compliance Statement This device complies with part 15 of the FCC Rules. Operation is subject to the following two conditions: 1. This device may not cause harmful interference, and 2. This device
RUBY 7 HD+ Handheld Video Magnifier. User s Guide. Freedom Scientific, Inc Rev. A
 RUBY 7 HD+ Handheld Video Magnifier User s Guide Freedom Scientific, Inc. www.freedomscientific.com 440931-001 Rev. A Freedom Scientific, Inc., 11800 31 st Court North, St. Petersburg, Florida 33716-1805,
Instruction Guide. The TV Jockey Computer Monitor TV Tuner with Remote COMP2VGATVGB. The Professionals Source For Hard-to-Find Computer Parts
 VIDEO ADAPTER The TV Jockey Computer Monitor TV Tuner with Remote COMP2VGATVGB Instruction Guide * Actual product may vary from photo The Professionals Source For Hard-to-Find Computer Parts FCC COMPLIANCE
Congratulations on your mcable purchase! The mcable delivers the best possible picture to your HD or 4K TV by up-converting 480p and 720p content to
 1 USER GUIDE Congratulations on your mcable purchase! The mcable delivers the best possible picture to your HD or 4K TV by up-converting 480p and 720p content to 1080p, up-converting 1080p content to near-native
LED BANNER. THIS PRODUCT IS NOT A TOY! Please read this entire instruction booklet before using. INSTRUCTION MANUAL
 A. DESCRIPTION LED BANNER THIS PRODUCT IS NOT A TOY! Please read this entire instruction booklet before using. INSTRUCTION MANUAL Thank you for purchasing the LED BANNER. This product is not a toy and
In-Ceiling Electric Motorized Front Projection Screen Evanesce Series. User s Guide
 In-Ceiling Electric Motorized Front Projection Screen Evanesce Series User s Guide Important Safety & Warning Precautions Make sure to read this user s guide and follow the procedures below. Caution: The
DCL9AW. User Manual. English
 DCL9AW User Manual English PRECAUTIONS Information for users applicable in European Union countries 1 Information for users applicable in United States of America 1 Installation 1 Power connection 1 Maintenance
The Ray Pico Projector
 Table of Contents 1 The Ray Pico Projector Installation Preparation 2 Ray Box Contents 3 Ray Features 4 Getting Started with Ray Basic Connections Setup Information 5 Watching Videos 5 Connecting Equipment
User Guide. Single-Link DVI Active Cable Extender. DVI-7171c
 User Guide Single-Link DVI Active Cable Extender DVI-7171c TABLE OF CONTENTS SECTION PAGE PRODUCT SAFETY...1 PRODUCT LIABILITY...1 1.0 INTRODUCTION...2 2.0 SPECIFICATIONS...3 3.0 PACKAGE CONTENTS...4 4.0
Operating Instructions
 Operating Instructions LCDRV700 Digital LCD Color Monitor Please read this manual thoroughly before operating the unit, and keep it for future reference. V1.0 Contents 1. Precautions 2. Features 1 3 3.
OPERATIONS MANUAL FOR EDISON PROFESSIONAL Professional ABS Molded Loudspeaker M4000
 M4000 Introduction: Congratulations on your purchase of an M-4000 powered loudspeaker, engineered and manufactured by BriteLite Enterprises. The M-4000 includes a high-output compression driver, and 15
ROLL-A-STRIKE. Assembly Instructions Model CONTACT INFO. Hours. Technical Support Monday to Friday (9am to 5pm EST)
") PATENT - www.eastpointsports.com ROLL-A-STRIKE TM ELECTRONIC BOWLING Assembly Instructions Model --286 CONTACT INFO ASSEMBLY REQUIRED Hours Technical Support Monday to Friday (9am to 5pm EST) Email us
PATENT - www.eastpointsports.com ROLL-A-STRIKE TM ELECTRONIC BOWLING Assembly Instructions Model --286 CONTACT INFO ASSEMBLY REQUIRED Hours Technical Support Monday to Friday (9am to 5pm EST) Email us
User Manual MagniLink Mira
 User Manual MagniLink Mira LVI Low Vision International Verkstadsgatan 5 Tel: +46 470 727700 E-mail: info@lvi.se 352 46 Växjö SWEDEN Fax: +46 470 727725 Internet: www.lvi.se CONTENTS 1. GENERAL INFORMATION...
PORTABLE SATELLITE TV SYSTEM VQ1000 OPERATION MANUAL
 PORTABLE SATELLITE TV SYSTEM VQ1000 OPERATION MANUAL Notes: Introduction Congratulations on your purchase of the ultra-portable VuQube Satellite TV Antenna. The VuQube is equipped with a wireless remote
ZXV10 B760H ZXV10 B760E RichMedia Box User Guide
 ZTE CORPORATION NO.55,Hi-techRoadSouth,ShenZhen,P.R.China Postcode:518057 Tel: (86) 755 26771900 800-9830-9830 Fax: (86) 755 26772236 URL: http://support.zte.com.cn E-mail: doc@zte.com.cn ZXV10 B760H ZXV10
MONOPRICE. Multiformat to SDI Converter with Scaler. User's Manual P/N 15775
 MONOPRICE Multiformat to SDI Converter with Scaler P/N 15775 User's Manual SAFETY WARNINGS AND GUIDELINES This device is intended for indoor use only. Do not expose this device to water or moisture of
INSTRUCTIONAL MANUAL FOR LCD ZOOM MICROSCOPE
 INSTRUCTIONAL MANUAL FOR LCD ZOOM MICROSCOPE ? 8 LCD Screen? 10.4 LCD Screen LCD Zoom Microscope Instruction Manual Please read the Instruction Manual carefully before installation and keep it for future
User Guide. 20 Widescreen LED Monitor NS-20EM50A13
 User Guide 20 Widescreen LED Monitor NS-20EM50A13 Contents Introduction.....................................................1 Safety Precautions...............................................1 WARNINGS:......................................................
HD Digital MPEG2 Encoder / QAM Modulator
 HD Digital MPEG2 Encoder / QAM Modulator YPrPb VGA In QAM Out series Get Going Guide ZvPro 600 Series is a one or two-channel Component or VGA-to-QAM MPEG 2 Encoder/ Modulator, all in a compact package
HDS-21RS Owner s Manual 2 x 1 HDMI Switch with Scaling
 HDS-21RS Owner s Manual 2 x 1 HDMI Switch with Scaling PureLink TM 535 East Crescent Avenue Ramsey, NJ 07446, USA Tel: 201.488.3232 Fax: 201.621.6118 E-mail: info@purelinkav.com www.purelinkav.com For
User s Guide. 5.8GHz Wireless A/V Signal Sender
 1500332 User s Guide 5.8GHz Wireless A/V Signal Sender Thank you for purchasing your A/V Signal Sender from RadioShack. Please read this user s guide before installing, setting up, and using your new sender.
PXL2470MW LED LCD Monitor
 PXL2470MW LED LCD Monitor USER'S GUIDE www.planar.com Content Operation Instructions...1 Unpacking Instructions...2 Safety Precautions...2 Package Overview...3 First Setup...4 Front View of the Product...5
Advanced security made easy PRO-555. Day/Night CCD Security Camera. Operating Instructions SW331-PR5 SR331-PR
 Advanced security made easy PRO-555 Day/Night CCD Security Camera Operating Instructions SW331-PR5 www.swannsecurity.com SR331-PR5-60010-260809 1 Before You Begin FCC Verification: NOTE: This equipment
Indoor/Outdoor Security System with Quad Monitor User s Manual
 Indoor/Outdoor Security System with Quad Monitor User s Manual 4919539 Important! Please read this booklet carefully before installing or using these units. WARNING - These units should ONLY be opened
Winmate Communication INC.
 20.1 Military Grade Display Model: R20L100-RKA2ML User s Manual Winmate Communication INC. May, 2011 1 IMPORTANT SAFETY INSTRUCTIONS Please read these instructions carefully before using the product and
DC162 Digital Visualizer. User Manual. English - 1
 DC162 Digital Visualizer User Manual English - 1 Table of Contents CHAPTER 1 PRECAUTIONS... 5 CHAPTER 2 PACKAGE CONTENT... 7 CHAPTER 3 PRODUCT OVERVIEW... 8 3.1 PRODUCT INTRODUCTION... 8 3.2 I/O CONNECTION...
Electric Wall/Ceiling Projection Screen Saker Tab-Tension Series User s Guide
 Electric Wall/Ceiling Projection Screen Saker Tab-Tension Series User s Guide Important Safety & Warning Precautions Make sure to read this user s guide and follow the procedures below. Caution: The screen
HDMI to Composite Converter. User s Guide
 1500548 HDMI to Composite Converter User s Guide We hope you enjoy your HDMI to Composite Converter from RadioShack. Add flexibility to your viewing experience by converting a digital HDMI video source
Table of Contents FCC COMPLIANCE STATEMENT... 4 WARNINGS AND PRECAUTIONS... 4 WARRANTY... 5 STANDARD WARRANTY... 5 TWO YEAR WARRANTY... 5 DISPOSAL...
 1 Table of Contents FCC COMPLIANCE STATEMENT... 4 WARNINGS AND PRECAUTIONS... 4 WARRANTY... 5 STANDARD WARRANTY... 5 TWO YEAR WARRANTY... 5 DISPOSAL... 6 1. INTRODUCTION... 7 FEATURES... 7 2. CONNECTIONS
Full HD Multi-Channel Expandable Wireless HDMI Gateway Extender
 Full HD Multi-Channel Expandable Wireless HDMI Gateway Extender Installation Guide P/N: CE-H22T11-S1/CE-H22U11-S1 04-1097A 1 Introduction The Full HD Multi-Channel Expandable Wireless HDMI Gateway Extender
WELCOME! WHAT S IN THE BOX: WHAT S IN THE BOX:
 QUICK START GUIDE WELCOME! Thank you for buying the Slingbox TM SOLO. Follow these instructions to connect your new Slingbox and start watching your TV anywhere on your laptop or mobile*. For more information
INFORMATION TO THE USER
 U.S.FEDERAL COMMUNICATIONS COMMISSION RADIO FREQUENCY INTERFERENCE STATEMENT INFORMATION TO THE USER NOTE: This equipment has been tested and found to comply with the limits for a Class B digital device
TimoLabs AMOY I, Model# TM-SS2020BT-2015B. Soundbase/Sound Stand SYSTEM with BLUETOOTH. Quick Start Guide
 TimoLabs AMOY I, Model# TM-SS2020BT-2015B Soundbase/Sound Stand SYSTEM with BLUETOOTH Quick Start Guide GETTING STARTED Your TimoLabs AMOY I TV sound system is designed to fit under televisions with screens
.Power Distribution Center. PD-1. Instruction Manual
 .Power Distribution Center. PD-1 Instruction Manual www.datavideo-tek.com 1 Contents Warnings and Precautions... 3 Warranty... 4 Standard Warranty... 4 Two Year Warranty... 4 Disposal... 4 Packing List...
600 Series Video Surveillance Monitors
 600 Series Video Surveillance Monitors 32 LED Monitor 43, 50, 55 & 55 4K LED Monitor Models: PMCL632: PMCL643 PMCL650 PMCL655 PMCL655K Contents for Wall Mount Monitor User Manual (10/16)... 1 Important
AUTO - SCANNING WITH DIGITAL CONTROL LCD COLOR MONITOR FS-L1903C. User manual (Rev.01) SMITHS HEIMANN
 SMITHS HEIMANN") AUTO - SCANNING WITH DIGITAL CONTROL LCD COLOR MONITOR FS-L1903C User manual (Rev.01) SMITHS HEIMANN www.smithsdetection.com Table of Contents Safety Instructions... 5 Accessories... 8 Power Connections...
AUTO - SCANNING WITH DIGITAL CONTROL LCD COLOR MONITOR FS-L1903C User manual (Rev.01) SMITHS HEIMANN www.smithsdetection.com Table of Contents Safety Instructions... 5 Accessories... 8 Power Connections...
Electric Wall/Ceiling Projection Screen Saker Series User s Guide
 Electric Wall/Ceiling Projection Screen Saker Series User s Guide Important Safety & Warning Precautions Make sure to read this user s guide and follow the procedures below. Caution: The screen s Black
User Guide. Interton TV Streamer
 User Guide Interton TV Streamer Welcome Congratulations on your purchase of a Interton TV Streamer. Interton TV Streamer will provide you with high quality streamed audio from your TV, HiFi stereo, personal
PLANAR LCD MONITOR PL190M MANUAL.
 PLANAR LCD MONITOR PL190M MANUAL www.planar.com Important Safety Instructions Read the Safety Instructions carefully and keep it for later use. Be aware of all warnings and instruction signs marked on