Merlin LCD Plus. User s Manual
|
|
|
- Marjorie Eaton
- 5 years ago
- Views:
Transcription

1 Merlin LCD Plus TM User s Manual
2 In order to maintain the consistency with the printed version of this manual, this page is intentionally left without manual content.
3 Table of Contents About Merlin LCD Plus Computer System Recommended Configuration Merlin LCD Plus at a Glance Safety and Care Setting Up Merlin LCD Plus a. With a Computer b. With Remote Software or Control Box c. With External Video Source Turning on Merlin LCD Plus About Merlin LCD Plus Remote Software Changing Viewing Mode a. Using Merlin LCD Plus Control Panel Viewing Modes b. Using Merlin LCD Plus Control Box Viewing Modes c. Using Merlin LCD Plus Remote Software Viewing Modes d. Using Merlin LCD Plus Foot Switch Viewing Modes Changing Magnification Using Line Markers a. With Control Box b. With Remote Software Using Windowing a. With Control Box b. With Remote Software Using Split Screen a. With Control Box b. With Remote Software Using Merlin LCD Plus Color Select Options Using the X-Y Table Tips for Reading and Writing Programming Setup Options Using a Computer with Merlin LCD Plus OFF Merlin LCD Plus Specifications Troubleshooting Other Enhanced Vision Products Contact Information Warranty
4 About Merlin LCD Plus Congratulations on your purchase of Merlin LCD Plus from Enhanced Vision. Merlin LCD Plus is designed to enhance the lifestyle of the visually impaired. This is Enhanced Vision s most advanced full-color, auto-focus video magnifier system. Merlin LCD Plus is built for users who want a full-featured system. It incorporates connectivity to a computer and VGA monitor or an external video camera to allow the user to split the screen, create line markers and adjust window sizes to make multi-functional processes easier. It also provides optimum viewing for people with certain visual conditions by offering an expanded range of choices of both text and background colors. Merlin LCD Plus enables individuals with low vision to read, write, view photos, enjoy crafts and hobbies, and more in color, black and white, or enhanced positive or negative viewing modes. With easy-to-use buttons that are also distinguishable by touch, you can enlarge or reduce the image in seconds and change viewing modes for easier visibility. Please read this booklet and familiarize yourself with Merlin LCD Plus features and operation before using this system. Merlin LCD Plus is ready to use right out of the box. By reviewing Merlin LCD Plus features and controls before using it and following the directions carefully, you ll be able to enjoy all the great benefits from your purchase. Enhanced Vision products are designed to give you the highest quality image, convenient and easy-to-use features, and years of reliable service. Thank you for choosing the Enhanced Vision Merlin LCD Plus. 4
5 Computer System Recommended Configuration Merlin LCD Plus will work with a variety of computers. The computer system configuration listed below is recommended for usage with Merlin LCD Plus*. Operating System: Windows 98/NT/2000/XP Processor Speed: Pentium III 500mhz Hard Disk: 50MB of hard-disk space available Peripherals: CD-ROM drive One 9-pin serial port available USB port No Internet connection is required No additional software is required besides Merlin LCD Plus Remote Software *For system video requirements, refer to the PC Compatibility section on Page 34. 5
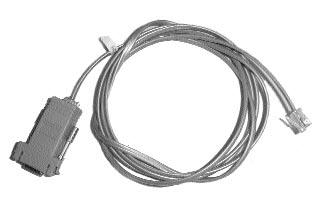
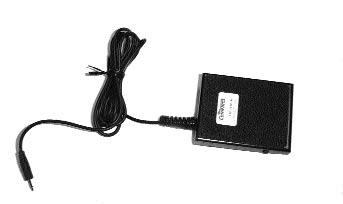
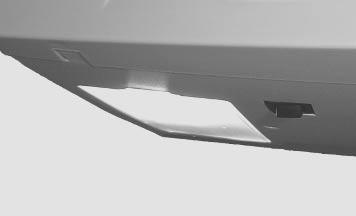
6 Merlin LCD Plus at a Glance Take a few moments to familiarize yourself with the components of your Merlin LCD Plus: 1. Merlin LCD Plus 2. Merlin LCD Plus Power button 3. Magnification dial (Size button) 4. Viewing Mode button 5. X-Y table 6. X-Y table locking lever 7. Recessed handles for carrying Merlin LCD Plus 8. 6-foot RCA Video cable 9. Power supply and power cord 10. VGA extension cable 11. Merlin LCD Plus control box with coil cable 12. Foot Switch 13. Software cable and adapter 14. Merlin LCD Plus Remote Software CD ROM foot S-Video cable 16. Light ON/OFF Switch 17. USB Adapter 6


7 Merlin LCD Plus at a Glance
8 Safety and Care To obtain the most benefit and life from Merlin LCD Plus, please read these safety precautions very carefully. Merlin LCD Plus is designed to enlarge and enhance images in order to improve the quality of life for people who are visually impaired. The extent to which Merlin LCD Plus can improve the ability to see images depends on a person s individual condition and level of visual condition. Merlin LCD Plus is not designed to restore vision, correct eye conditions or halt degenerative vision loss. An eyecare professional can determine the usefulness and suitability of Merlin LCD Plus for a patient s individual impairment. Precautions Merlin LCD Plus is designed to be used on a stable, level surface such as a solid desk or table. Do not place Merlin LCD Plus on an unstable table, cart, or stand. It may fall, causing serious damage to the unit or bodily injury to a user. Merlin LCD Plus should be used indoors, and should not be exposed to extreme or rapid changes in temperature or humidity. Do not place Merlin LCD Plus near a radiator or heater, or where it will be exposed to long hours of direct sunlight. These conditions may cause damage to the unit s electronics or optics. Always place the power cord away from traffic areas to avoid the danger of someone tripping over the cord or damaging it. 8
9 Safety and Care To prevent the risk of electrical shock, do not use Merlin LCD Plus near water and do not attempt to disassemble the unit. Use only the power supply provided with Merlin LCD Plus. Using an unauthorized power supply may cause serious damage to Merlin LCD Plus electronic components. To Move Merlin LCD Plus to Another Location If you are repositioning Merlin LCD Plus a short distance across a desk or table, make sure you do not pull on any power cords or connector cables. Disconnect and secure all power and video cables and lock the X-Y table before moving the unit. Carry Merlin LCD Plus only by the two recessed handles located on either side of its base. Situate Merlin LCD Plus securely in its new location. Caring for Merlin LCD Plus Always turn the power OFF when the system is not in use. Always turn the power OFF before cleaning. The plastic surfaces of Merlin LCD Plus can be cleaned with a soft dry cloth or an electrostatic dusting wipe. DO NOT use liquid cleaners. The protective glass covering the camera can be cleaned as needed with the lens cloth provided within your Merlin LCD Plus packaging. 9

.")
 into the port labeled COMPUTER on the back of your Merlin")
. 5.")
10 Setting Up Merlin LCD Plus figure 1 figure 2 figure 3 figure 4 a. With a Computer Note: Prior to installation, it is recommended you set your computer to one of the resolutions listed on the specification page Find a steady and level location, such as a table or desk, where you will be comfortable using Merlin LCD Plus. 2. Carry Merlin LCD Plus only by the two recessed handles on the sides of the base for a secured grip (see figure 1). Place it on the table or desk. 3. Connect the female end of the VGA extension cable provided (item 10 on page 7) into the port labeled COMPUTER on the back of your Merlin LCD Plus. Connect the male end of the VGA extension cable into the 15-pin VGA output port on your omputer. This is usually where you would onnect your VGA monitor to your computer (see figure 2). 5. Connect the foot switch cable provided (item 12 on page 7) into the jack labeled FOOT SWITCH on the back of Merlin LCD Plus (see figure 3). 6. Plug the power supply cord (item 9 on page 7) into the outlet and the other end into the DC IN 12V jack on the back of Merlin LCD Plus (see figure 4). 10
.")
 to the serial end of Software cable (item 13 on page 7).")
11 Setting Up Merlin LCD Plus b. With Remote Software or Control Box Two options are available to control the Merlin LCD Plus split screen, line markers, and window size features. It is recommended that you use the Merlin LCD Plus Remote Software provided on the CD-ROM enclosed (see item 14 on page 7). Using the software enables you to work more efficiently by using hotkeys and leaving your hands on the computer keyboard at all times. 1. Merlin LCD Plus with Remote Software A. Connect using the USB port on your computer Connect the serial end of the USB Adapter (item 17 page 7) to the serial end of Software cable (item 13 on page 7). Plug the phone jack end (item 13 on page 7) into the port labeled CONTROL figure 1 BOX on the back of Merlin LCD Plus. Plug the USB end (item 17 page 7) into your computer (see figure 1). OR B. Connect using the serial port on your computer Connect the software cable phone jack cord (item 13 on page 7) into the port labeled CONTROL BOX on the back of figure 2 Merlin LCD Plus. Connect the 9-pin female adapter end of the software cable into a serial port on the back of your computer (see figure 2). Turn on the computer. Insert the Merlin LCD Plus Remote Software CD into your CD- ROM drive. After a few moments, a Welcome Menu will appear automatically. If no menu appears within 30 seconds, go to the Windows Explorer and double click on the CD-ROM drive letter. 11

. 2.")
12 Setting Up Merlin LCD Plus On the Merlin LCD Plus Welcome Menu, click on the Merlin LCD Plus Software Installation icon. This will bring up an installation wizard to walk you through the set-up process. At the end of the installation process, you may choose to run the application immediately. It is recommended you choose this option. Please note that the software will be always running as a permanent application in the background on your computer. For further details about the Remote Software, please click on the HELP menu on the main application window (see figure 3). 2. Merlin LCD Plus with Control Box Connect the phone jack end of the Control Box Coil Cable (see item 11 on page 7) into the port labeled CONTROL BOX on the back of Merlin LCD Plus (see figure 4). c. With External Video Source If you want to use an external video source with Merlin LCD Plus, simply connect a RCA video cable (see item 8 on page 7) from the video output of your external device (for example a JORDY or FLIPPER) to the port labeled VIDEO IN in the back of Merlin LCD Plus as shown in figure figure 3 figure 4 figure 1
.")
13 Turning on Merlin LCD Plus Merlin LCD Plus Power Button The Power button on Merlin LCD Plus is located on the far right side of the control panel (#1 above). Press the Power button. A green light to the left of the Power button will illuminate, indicating the power is ON (#2 above). If Merlin LCD Plus is plugged into a power strip/surge protector, make sure its power switch is turned ON before attempting to turn on Merlin LCD Plus. If the power strip/surge protector comes with a circuit breaker, make sure the circuit breaker has been reset before attempting to turn on Merlin LCD Plus. #2 #1 13
14 About Merlin LCD Plus Remote Software Merlin LCD Plus Remote Software Actively Running on Your Computer Upon installation as described on page 12, your computer will now display the EV Remote Software icon at the lower portion of your screen as shown on figure 1. This indicates the software is properly running as a permanent resident program on your computer and is ready for use. figure 1 The software will always be automatically running upon a new Windows session. To turn OFF the software completely, please refer to page 17. Accessing the Main Application Window To access the main application window of the remote software as shown on figure 2, you may either: figure 2 Double left click on the EV Remote Software icon as shown on figure 1. Right click on the EV Remote Software icon as shown on figure 1 and left click on MAXIMIZE on the drop down list. Press the CONTROL+F5 keys simultaneously on your computer keyboard. You should then see the main application window as shown on figure 2. Note: to close the Main Application Window, press the ALT+F4 keys on your computer keyboard simultaneously. Minimizing the Main Application Window To minimize the main application window, simply click on the minimize icon or the EXIT icon as shown on figure 2. Note that clicking on the EXIT icon does not turn OFF the application. To do so, refer to page
15 About Merlin LCD Plus Remote Software Using the Default HOT KEYS Default HOT KEYS have been programmed into the Remote Software application. Main Application Window Windowing Line Markers Options Width - Decrease Width - Increase Position - Decrease Position - Increase CRTL and F5 CRTL and F6 CRTL and F7 CRTL and F8 CRTL and F9 CRTL and F10 CRTL and F11 CRTL and F12 HOT KEYS allow for a quick operation of Merlin LCD Plus without having to maximize the software application window. For instance, from another application, you may simply key in a preset HOT KEY combination and Merlin LCD Plus will react to it. There is no need to use the mouse. This allows you to keep your hands on the keyboard at all times. Note: The HOT KEYS serve the same function as the Control Box. Programming New HOT KEYS HOT KEYS may be reprogrammed to your liking or to avoid a conflict with third party software. To view or change the HOT KEYS panel, you may either: Right click on the EV icon (see figure 1 on page 14) and left click on HOT KEYS on the drop down list. Left click on HOT KEYS in the Main Application Menu as shown in figure 2 on page 14. The HOT KEYS panel will then open as shown in figure 3. To select a new HOT KEY, simply click on the function key icons that you wish to use as the combination desired and select an alphanumeric key from the drop down list. Your combination may include one or several keys. 15 figure 3
16 About Merlin LCD Plus Remote Software Disabling HOT KEYS If you do not wish to use any HOT KEY, you may simply disable them all without having to reprogram them at a later time. To do this, open the HOT KEY panel as described above and check OFF the ENABLE HOT KEYS mark at the top left of the panel as shown on figure 3. This will keep your settings yet make all HOT KEYS inoperable. This is a way to avoid a conflict with third party software HOT KEYS. Note: The HOT KEYS are enabled by default during first time use. Using the Main Application Window Controls The controls on the main application window use a click and drag type of interface. You may also use the HOT KEYS as described above for quicker access. Note: A full description of each control is NONE provided with the software. To access the help, click on HELP, CONTENTS on the main figure 4 application menu as shown on figure 4. About the CONNECTION STATUS Indicator The CONNECTION STATUS indicates if a valid connection is detected with Merlin LCD Plus. A green indicator shows an active connection (ACTIVE PORT 1) (see figure 5). A red indicator shows a non-valid onnection-none (see figure 4). ACTIVE PORT 1 The indicator is constantly updated to allow you to quickly detect a problem or a valid figure 5 connection. If a problem occurs, please refer to the Troubleshooting section of this manual or the application software HELP as described earlier. 16
17 About Merlin LCD Plus Remote Software Turning OFF Merlin LCD Plus Remote Software: If you want to completely exit from Merlin LCD Plus Remote Software, you may right click on the EV icon as shown in figure 1 and left click on EXIT on the drop down list. figure 1 You will not be able to use HOT KEYS on page 15 anymore. To run the software again, use the START MENU, PROGRAMS, MERLIN PLUS REMOTE and click on the MERLIN PLUS REMOTE icon. Uninstalling Merlin LCD Plus Remote Software: To uninstall the application completely from your system, use the START MENU, PROGRAMS, MERLIN PLUS REMOTE and click on the UNINSTALL icon. In the uninstall window, click on YES to proceed with the un-installation. 17
18 Changing Viewing Mode a. Using Merlin LCD Plus Control Panel Viewing Modes You can choose a viewing option by pressing the MODE button on the control panel. Each push will change your viewing option. If you keep pressing the button you will cycle through all the default options. The default options can be used regardless of the control box settings. They are as follows: Full Color Image Text Images! Black and White Image Enhanced Positive Enhanced Positive Image Enhanced Negative Image Crisp, Clear Color Select 1 Text Images! Color Select 2 Enhanced Negative Color Select 3 Full Color Image This mode is used most often because it gives you a true color representation of the image that is being magnified. When Merlin LCD Plus is first turned on, it displays the image in full color. Black and White Image Based on your preference, you can choose the black and white mode. 18 Crisp, Clear
19 Changing Viewing Mode Enhanced Positive Image This mode provides a white background with black text. This mode increases the contrast to offer crisp text images for reading. Enhanced Negative Image This mode provides a black background with white text. This mode increases the contrast to offer crisp text images for reading. Color Select 1 This mode provides a blue background with yellow text. This is one of the most commonly used color combination. Color Select 2 This mode provides a black background with green text. Color Select 3 This mode provides a black background with yellow text. b. Using Merlin LCD Plus Control Box Viewing Modes You can choose a viewing mode by pressing the OPTIONS button on the control box. This will change the current viewing mode as follows: Full Video Magnifier Full Computer Image Split Screen Between Computer Image and Video Magnifier Image Full Image with External Camera Split Screen Between Computer Image and External Image 19


.")
20 Changing Viewing Mode Full Video Magnifier Image This is the default video magnifier mode that comes on when Merlin LCD Plus is turned on (see figure 1). Full Computer Image This mode displays the full image coming from the computer attached to Merlin LCD Plus. If this source is not available or not valid, an On Screen Display will warn you once (see figure 2). NOTE: To reduce glare, Merlin LCD Plus lights can be turned OFF. You may turn OFF Merlin LCD Plus lights using the light control. See item #16 on page 7. This will prevent glare while keeping Merlin LCD Plus ON. Split Screen Between Computer Image and Video Magnifier Image This mode displays a split screen between the video magnifier image and the computer image. If the computer source is not available, an On Screen Display will warn you once (see figure 3). Full Image with External Camera This mode displays a full image from a connected external video source. If the external video is not available, an On Screen Display will warn you once (see figure 4). figure 1 figure 2 figure 3 figure 4 20
21 Changing Viewing Mode Split Screen Between Computer Image and External Image This mode displays a split screen between a connected external video source and the computer image. If the computer source is not available, an On Screen Display will warn you once (see figure 5). figure 5 NOTE: A 20 TV monitor with S-Video will only display the full video magnifier image and full image with connected external camera. c. Using Merlin LCD Plus Remote Software Viewing Modes The software provided on the CD-ROM features identical capabilities as the control box. Please refer to previous section b on page 23 for a list of all viewing options. The Remote Software uses a click and drag type of interface. Simply click on the OPTIONS icon to toggle through the available viewing modes (see figure 6). figure 6 figure 7 d. Using Merlin LCD Plus Foot Switch Viewing Modes The foot switch is a convenient alternate to the OPTIONS button on the control box and the OPTIONS icon on the software. It enables you to cycle through the viewing modes hands free as described in section b starting on page
22 Changing Magnification figure 1 You can increase or decrease the size of the image by using the SIZE dial at the center of the control panel (see figure 1). There are sixteen levels of magnification SIZE-7 available on Merlin LCD Plus. To increase the size of the age, turn the dial clockwise, or to the right. To decrease the size of the image, turn the dial counterclockwise, or to the left. The size you selected will be displayed in the figure 2 upper left corner of your monitor (see figure 2). 22
23 Using Line Markers Line Markers are used to frame an image between two lines. These lines may be used as a reading guide for long lines of text, or as a guide to help keep your place as you move from one side of the page to the other, or just to make writing easier and neater. a. With the Control Box You can choose horizontal or vertical line markers by pressing the LINES button on the control box (see figure 1). Line Markers are available in full video magnifier mode and external video source mode. See Viewing Mode Features Available on page 36. You can increase or decrease the distance between the line markers by turning the WIDTH knob on the control box. You can change the line markers position across the screen in the horizontal or vertical direction by turning the POSITION knob on the control box. b. With the Remote Software You can choose horizontal or vertical line markers by clicking on the LINES icon on the graphical user interface (see figure 2). Line markers are available in full video magnifier mode and external video source mode. See Viewing Mode Features Available on page 36. You can increase or decrease the distance between the line markers by clicking and dragging the WIDTH cursor. You can also click on the left and right arrows on the graphical user interface. You can change the line markers position across the screen in the horizontal or vertical direction by clicking and dragging the POSITION cursor. You can also click the left and right arrows on the graphical user interface. 23 figure 1 figure 2

24 Using Windowing Windowing is similar to Line Markers, except that it allows you to completely block out portions of the screen so that you display only the portion of the image you want to view. a. With the Control Box You can choose horizontal or vertical windowing by pressing the WINDOW button on the control box (see figure 1). Windowing is available in full video magnifier mode and external video mode source. See Viewing Mode Features Available on page 36. You can increase or decrease the size of the windowing by turning the WIDTH knob on the control box. You can change the windowing position across the screen in the horizontal or vertical direction by turning the POSITION knob on the control box. b. With Remote Software You can choose horizontal or vertical windowing by clicking the WINDOW icon on the graphical user interface (see figure 2). Windowing is available in full video magnifier mode and external video source mode. See Viewing Mode Features Available on page 36. You can increase or decrease the size of the windowing by clicking and dragging the WIDTH cursor. You can also click on the left and right arrows on the graphical user interface. You can change the windowing position across the screen in the horizontal or vertical direction by clicking and dragging the POSITION cursor. You can also click on the left and right arrows on the graphical user interface. 24 figure 1 figure 2
25 Using Split Screen A Split-Screen picture is one in which both the computer and the video magnified image are displayed simultaneously on the SVGA or VGA monitor. a. With the Control Box You can choose horizontal or vertical split screen by pressing the WINDOW button on the control box (see figure 1). Split screen is only available with a computer attached and a compatible VGA signal. See Viewing Mode Features Available on page 36. You can increase or decrease the viewable split areas by turning the WIDTH knob on the control box. A minimum viewable area of either source will always be visible in split screen mode. You change the viewable split areas position by turning the POSITION knob on the control box. b. With the Remote Software You can choose horizontal or vertical split screen by clicking the WINDOW icon on the graphic user interface (see figure 2). Split screen is only available with a computer attached and a compatible VGA signal. See Viewing Mode Features Available on page 36. You can increase or decrease the viewable split areas by clicking and dragging the WIDTH cursor. You can also click on the left and right arrows on the graphical user interface. You can change the viewable split areas position by clicking and dragging the POSITION cursor. You can also click on the left and right arrows on the graphical user interface. 25 figure 1 figure 2
26 Using Merlin LCD Plus Color Select Options Merlin LCD Plus was designed to provide optimum viewing for people with certain visual conditions by offering an expanded range of choices in both text and background colors. Merlin LCD Plus provides up to 28 color combinations to best fit your eye condition. See page 33 for a list of color combinations. Three modes have been pre-programmed for ease of use. Up to five color select viewing modes can be programmed per your personal preferences. How to Program a Color Select Option With Merlin LCD Plus turned ON, place a piece of reading material on the X-Y table so that it appears on your monitor at a magnification size that is comfortable for viewing. Follow these steps to program the color select options: Step 1: Press and hold the MODE button until the words ENTERING SETUP appear on your monitor. ENTERING SETUP Step 1 26
27 Using Merlin LCD Plus Color Select Options Step 2: Step 3: Step 4: Turn the SIZE dial Clockwise to scroll through the menu options. Choose a COLOR SELECT prompt (1-5) and press the MODE button. Turn the SIZE dial to choose your preferred color combination and select one of the following: You can reverse each color text and background set by pressing the MODE button. Then, hold down the MODE button to save the settings. If you want to turn OFF the current COLOR SELECT (1-5) option, select OFF by turning the SIZE button clockwise and press MODE to return to previous menu. OR, if no change is desired select EXIT by turning the SIZE button clockwise and press MODE to return to previous menu. To program another color select viewing mode, repeat steps 2-4. If you are finished, turn the SIZE dial COLOR SELECT 2 Step 2 POSITIVE SET II Step 3 EXIT Step 4 counterclockwise to EXIT and press MODE to return to normal use. 27
. A Unlock Position B Lock Position Reading with the X-Y Table 1.")

28 Using the X-Y Table Locking the X-Y Table To lock the X-Y table, slide the lever all the way to the right until it clicks and locks (A). Unlock the X-Y table by sliding the lever to the right again and release the lever (B). A Unlock Position B Lock Position Reading with the X-Y Table 1. With the X-Y table unlocked, place a book, newspaper, etc., on the table. 2. Glide the X-Y table to the left, which will make the words flow across the screen for reading. 3. When you have reached the end of a line, glide the table back to the beginning of the line. 4. Move the table away from you slightly to display the start of the next line. 5. Repeat steps 2, 3 and 4 to continue reading. 28
29 Tips for Reading and Writing Reading with Merlin LCD Plus New users of video magnifier systems have a tendency to overmagnify their reading material. Make the type large enough to see it comfortably, but not so large that it becomes tedious to scan across a page. Use the X-Y table to move reading materials under the camera, rather than moving the material manually, except small items such as a checkbook or a business card. New users should use two hands when moving the X-Y table for reading, until they become comfortable using one hand. Writing with Merlin LCD Plus Beginners should start at smaller magnification sizes, and then increase magnification as they become more comfortable using Merlin LCD Plus for writing. The smaller the magnification size the bigger you tend to write; the higher the magnification size the smaller you ll write. Use a pen that makes a bold line, such as a heavy point rollerball pen, a felt-tip marker, or a fine point marker, for easier visibility. It might be helpful to use lined paper to more easily find and keep your place. It might be easier to keep your place if you write a few words at a time, then move the X-Y table and write again, rather than moving continually as you write. Write in either Color, Black and White or Positive viewing modes. 29
30 Programming Set-up Options You can program Merlin LCD Plus set-up options. There are three options you can select in set-up mode: Exit, Screen Messages and Color Select. Entering Set-up 1. Turn the SIZE dial all the way counterclockwise, to the lowest size. This will start you at the beginning of the menu when you enter setup. 2. Press and hold the MODE button. Merlin LCD Plus will say and display ENTERING SETUP. Then the screen will fade to black and the word EXIT will appear. 3. Turn the SIZE dial to the right to select the different set-up options. 4. Press the MODE button to activate or deactivate each option. Set-up Options In clockwise order starting at Exit, the options you can program are: Exit: When programming is complete, select this option and press MODE to exit. Screen Messages: If Screen Messages are turned off, Merlin LCD Plus will not display magnification sizes or viewing modes. Color Select: This allows you to choose up to 28 color combinations to best fit your eye condition. See Specifications on Page


31 Using a Computer with Merlin LCD Plus OFF figure 1 At times, you may want to use your computer without Merlin LCD Plus. Just make sure you turn Merlin LCD Plus OFF by pressing the POWER button (see figure 1). The computer s display signal will automatically flow through the Merlin LCD Plus even when it is turned OFF. There is no need to disconnect any cables (see figure 2). figure 2 31
32 Merlin LCD Plus Specifications General: Up to 32 basic CCTV video modes available plus split screen functionality Up to 5 split screen video modes supported Smooth movable XY table Maximum monitor weight 100lbs (45kg) External composite video input External control box module for split screen control with 5-foot coil cable Virtual control box PC software for control box emulation and split screen control Foot pedal module for quick video mode switching with 6-foot cable Auto-focus camera Large onscreen display Auto detection of computer / external camera presence Camera: 60Hz 1/4 IT CCD (EXview HAD) NTSC Resolution: 768(H) * 494 (V) / 470 TV lines XY Table: XY table size: 17.5 (44.5cm) * 12.5 (32cm) Working space height: 7.5 (19cm) Total X dimension travel: 11 (28cm) Total Y dimension travel: 10.5 (26.5cm) Table height clearance: 1.75 (4.4cm) greater than control box height Video Magnifier Modes: Full color mode Black and White mode High contrast Positive (Black text on White background) High contrast Negative (White text on Black background) 32
33 Merlin LCD Plus Specifications Up to 28 Color Select Modes to Choose From (up to 5 enhanced modes storable): Color Select Black text on Green background Color Select Black text on Orange background Color Select Black text on Blue background Color Select Black text on Yellow background Color Select Black text on Purple background Color Select Black text on Red background Color Select Green text on White background Color Select Red text on White background Color Select Purple text on White background Color Select Blue text on White background Color Select Blue text on Yellow background Color Select Orange text on White background Color Select Green text on White background Color Select Green text on Yellow background Color Select Green text on Black background Color Select Orange text on Black background Color Select Blue text on Black background Color Select Yellow text on Black background Color Select Purple text on Black background Color Select Red text on Black background Color Select White text on Green background Color Select White text on Red background Color Select White text on Purple background Color Select White text on Blue background Color Select Yellow text on Blue background Color Select White text on Orange background Color Select White text on Green background Color Select Yellow text on Green background 33
34 Merlin LCD Plus Specifications Split Screen Video Modes: Full CCTV video Full computer video (if VGA connected) Split CCTV and VGA split screen (if VGA connected) Full external video (if external camera attached) Split external video and VGA split screen (if external camera and VGA attached) PC Compatibility: Connects to any computer with external VGA SUB-D15 connector outputting at least one of the following resolutions: VESA (DMT 1.0) VGA (640*480) VESA (DMT 1.0) SVGA(800*600) VESA (DMT 1.0) XGA (1024*768) at 60, 72, 75, 85Hz at 60, 72, 75, 85Hz at 60, 70, 75Hz LCD Default Resolution: VESA (DMT 1.0) XGA (1024*768) at 60Hz Magnification: 3X to 58X on a 19 LCD 2.7X to 52X on a 17 LCD 34
35 Merlin LCD Plus Specifications Control Panel: Zoom: 16 preset zoom levels Mode: Switches between 7 default video modes (up to 9 modes is possible when 5 enhanced modes are stored) Color Black and White Enhanced contrast Positive Enhanced contrast Negative Color select Yellow text on Blue background Color select Green text on Black background Color select Yellow text on Black background Mode to enter interactive menu for settings adjustments: External Control Box: Window: Options: Lines: video Screen messages ON/OFF 5 user defined color select modes Adjusts the Video Magnifier/VGA split screen Switches between split screen video modes Adjusts horizontal or vertical line markers on CCTV Foot Pedal: Switches between split screen video modes 35
36 Merlin LCD Plus Specifications Viewing Mode Features Available: The following charts illustrate the viewing mode features available on a VGA monitor and TV monitor. LCD Features Available FEATURES AVAILABLE LINE MARKERS WINDOWING Viewing Mode 1. Full Video Magnifier YES YES 2. Full Computer Image NO NO 3. Split Screen video magnifier / computer image NO YES 4. Full External Video YES YES 5. Split Screen external video / computer image NO YES Optional TV Monitor Features Available Using S-Video Connection FEATURES AVAILABLE LINE MARKERS WINDOWING Viewing Mode 1. Full Video Magnifier YES YES 2. Full Computer Image N/A N/A 3. Split Screen video magnifier / computer image N/A N/A 4. Full External Video YES YES 5. Split Screen external video / computer image N/A N/A 36
37 Merlin LCD Plus Specifications Illumination: Two user-replaceable 5-watt fluorescent bulbs (10,000-hr life) Connections: S-Video output for CCTV modes with optional TV RCA Composite video output for CCTV modes RCA Composite video input for external camera modes 12VDC Power input Computer VGA input (SUB-D15) Foot pedal jack input Control box RJ-11 input Power: V / 50-60Hz / 29W max External power supply with removable power cord Connector IEC-C13/14 Weight/Dimensions: Base unit: 23lbs (10.5kg) Height: (35cm) Length: 20.5 (52cm) Width: 19 (48cm) Environment: Operating temperature: +32F to 122F (0C to 50C) Storage temperature: -4F to 140F (-20C to 60C) Operating humidity: 20% to 95% Storage humidity: 20% to 80% 37
38 Troubleshooting 1. Merlin LCD Plus Does Not Turn ON Make sure the power supply is the proper one for Merlin LCD Plus, 12V output, 3A minimum. Make sure the power supply cord is completely plugged into the outlet. Make sure the two parts of the power supply cord are securely connected. Make sure the power supply cord is completely plugged into the DC 12V IN jack in the back of Merlin LCD Plus. Check the power strip/surge protector s ON/OFF switch and circuit breaker if Merlin LCD Plus is plugged into one. Push the POWER button on Merlin LCD Plus control panel. A green light next to the POWER button should turn ON, indicating the power is ON (see page 13). 2. Merlin LCD Plus Lights are Not ON Check that Merlin LCD Plus is ON. If not, check FAQ 1. Check that the light switch (item 16 on page 7) under Merlin LCD Plus control panel is ON. 3. The Foot Switch Does Not Work Check that the foot switch cable is properly secured into the part labeled foot switch. Check that a valid computer signal or external video is connected to the back of Merlin LCD Plus. If no computer or external video is connected to Merlin LCD Plus, you will not be able to use the FOOT SWITCH. An OSD should warn you once about missing computer signal or external video source. 4. The Control Box Does Not Work Check that the coil cable is properly secured in the control box. Check that the coil cable is properly secured in the port labeled CONTROL BOX in the back of Merlin LCD Plus. Please refer to Setting Up Merlin LCD Plus with Remote Control Software or Control Box on page 11 for further details. 38
39 Troubleshooting 5. The Remote Software Does Not Work Check that the software cable and its adapter are properly secured into a serial port on your computer. Check that the software cable is properly secured into the port labeled CONTROL BOX in the back of Merlin LCD Plus. Maximize the application software window and make sure the communication indicator is green. A red indicator indicates a faulty computer to Merlin LCD Plus communication. The software automatically detects a proper connection so no configuration is required. 6. The Image is Blurred or Out of Focus Clean the protective glass covering the camera with the non-abrasive lens cleaning cloth provided with your Merlin LCD Plus. Clean the monitor screen with a non-abrasive cloth sprayed with a glass cleaning solution. 7. X-Y Table Does Not Move Smoothly Make sure the locking lever is positioned completely to the left (see page 28). 8. X-Y Table Does Not Stay in Locked Position Make sure the locking lever is all the way to the right and that the handle pops up into the locking slot (see page 28). 15. Light Bulb Burns Out Your Merlin LCD Plus comes equipped with two 10,000-hour fluorescent light bulbs designed to provide years of trouble-free service. However, if one burns out, contact your place of purchase or Enhanced Vision at (800) for instructions or assistance on replacing the bulb. 16. When Reading Using the X-Y Table, the Video Magnifier Image Appears Jerky or Not Smooth Make sure your computer is set to a 60Hz refresh rate. This will provide the smoothest picture possible. However, this may cause a picture flicker sensation. Adjust to the settings that work best for you. If you have any questions or require technical assistance please call (800) , Monday Friday from 8 a.m. to 5 p.m. PST. 39

 Magnification: 4X")


40 Other Enhanced Vision Products Jordy Two Low Vision Systems in One For distance, intermediate and near viewing. Magnification: 1X 30X Four viewing modes for optimum visibility: Color, Black/White, Enhanced Positive, Enhanced Negative Jordy Docking Stand (optional) Magnification: 4X 40X Acrobat The Acrobat's innovative rotating camera design enables people with low vision to perform daily tasks more effectively. By rotating the camera, the user can read, write, self-view, and magnify images at any distance. This full color, auto-focus Acrobat has the most versatile and flexible arm available. Flipper The Ultimate in Flexibility Read, write, get more out of life! Our innovative camera design lets you magnify in almost any position with images in full color. Magnification: 1X 44X* *With optional stand Available with Color and Black & White Display Modes 40


41 Other Enhanced Vision Products Flipper Stand The Flipper Stand is compatible with both the Flipper and FlipperPort products. The Flipper Stand extends the flexibility of these products by elevating Flipper to 15 inches on a platform which allows users to view materials easily in classroom or audience settings. The Stand also converts quickly to a desktop Video Magnifier once the user points the Flipper camera down towards the table. Max Powerful Magnifier A powerful magnifier for reading. Connects to any TV in seconds. Magnification: 17X 25X on a 20" Television Available in Color or Black & White Amigo Amigo is a truly portable desktop magnifier. Optimal viewing is achieved with a tilting 6.5 inch viewing screen. Amigo provides 3.5 to 14x digital magnification and the lightest weight in its class. Amigo is battery operated and can be taken anywhere. 41
42 Other Enhanced Vision Products Accessories Smart Video Connects Enhanced Vision s low vision devices to a computer monitor. Carrying Cases Convenient cases for storage and transport of all Enhanced Vision products. MaxTrak An essential accessory to keep your Max straight while rolling across a page. Battery Rechargeable batteries for Enhanced Vision s low vision devices. Contact information: Toll Free: (800) Phone: (714) Fax: (714) evinfo@enhancedvision.com evsupport@enhancedvision.com 42
43 Warranty Enhanced Vision Merlin LCD Plus Video Magnifier Warranty Policy Enhanced Vision products are designed to give you the highest quality image, convenient features, ease of use and reliable service. Merlin LCD Plus has been inspected and tested prior to shipping. Our company stands behind the quality materials, components and workmanship of the Merlin LCD Plus video magnifier. For these reason we are pleased to offer two warranty options. These options are available when the purchaser completes the warranty registration form. Three-year warranty for the Merlin LCD Plus base and the monitor. This option can be selected on the warranty registration form by the agencies, states, groups, multi-users, product demonstration sites and the individual purchasers. Enhanced Vision warrants Merlin LCD Plus against defects in materials and workmanship under normal use for three years from the date of original purchase. Enhanced Vision, at its option, will at no charge either repair the product or replace it during the warranty period. Lifetime warranty for the Merlin LCD Plus base at a one-time cost of $ Monitor is not included in this option. (Individual purchaser only) This option can be selected on the warranty registration form and it is only available to the individual purchaser. Enhanced Vision warrants Merlin LCD Plus base against defects in materials and workmanship under normal use for the lifetime of the individual purchaser. Enhanced Vision, at its option, will at no charge either repair the product or replace it during the warranty period. The Monitor is not covered by the lifetime warranty and it is covered for three years only. The lifetime warranty is non-transferable and does not apply to groups, multi-users or agencies. This warranty is not available for International Customers. On the warranty card the purchaser will be asked to select between the three-year (no-cost) or lifetime warranty for a one-time fee of $ If lifetime coverage is elected, a $ check made payable to Enhanced Vision will need to be included with the warranty form. The lifetime product warranty is only valid if the product is registered within 30 days of purchase and a $ check made payable to Enhanced Vision is included with the warranty registration form. If this form has not been provided, please request one from the local Enhanced Vision representative or call us at (800) Restrictions All product purchases need to be registered with Enhanced Vision. Registering Merlin LCD Plus confirms the right to maximum protection and service of the product warranty. If no selection is made on the warranty form or payment is missing, the individual purchaser will default to the three-year warranty. The lifetime warranty is non-transferable and does not apply to groups, multi-users or agencies. It has been designed for end-consumer / individual purchaser. Agencies, states, group homes, classrooms and demo site units will receive Enhanced Vision standard three-year product warranty detailed above. Enhanced Vision also reserves the right to repair or replace any purchasers Merlin LCD Plus with a similar or better product. 43
44 Warranty In the case that the end-consumer / original individual resells the Merlin LCD Plus within a THREE year time period from original purchase date and the product is resold by a recognized manufacturer representative, the Merlin LCD Plus warranty will default to the balance of what remains of the standard THREE year warranty (from original purchase date). The lifetime warranty would be void. Consider the example below: After one year Mary Smith s vision deteriorates past using the Merlin LCD Plus to assist her. She resells the Merlin LCD Plus to a recognized Enhanced Vision manufacturer representative, and he/she then sells the Merlin LCD Plus to Anne Clark. Anne Clark receives a two-year warranty with the Merlin LCD Plus (the amount left on a standard THREE year warranty). Anne will need to complete and submit a warranty registration form, marking the box that she is a converted original owner and provide the serial number for the product. The THREE-year and optional lifetime product warranty does not cover the following: 1. Defects or damage from misuse, use in other than suggested manner, accident or neglect. 2. Defects or damage from improper operation, maintenance, installation, adjustment, alterations or modification. 3. Defects from spills of food or liquid. 4. All plastic surfaces and all other externally exposed parts that are scratched or damaged due to normal use. 5. Damage due to operating Merlin LCD Plus with equipment not supplied by Enhanced Vision. 6. Light bulbs that are not covered under warranty. 7. The Merlin LCD Plus monitor is not included in the lifetime warranty and it is covered for three years. THERE ARE NO OTHER EXPRESSED OR IMPLIED WARRANTIES FOR THIS PRODUCT. Service Process We don t expect that you will need to have repairs on the Merlin LCD Plus but if you do, you will need to send the unit to our warranty service center. If warranty service is required, please call Enhanced Vision between 8 a.m. 5 p.m. PST for a return authorization number. Warranty repairs are not accepted without a return authorization number. You may wish to keep your original packaging in case warranty service is required. The manufacturer cannot provide packaging for warranty repairs. Proof of purchase must be provided, bearing date of purchase, in order to receive warranty service. Purchaser is responsible and shall pay for shipment of products to Enhanced Vision for repair. Enhanced Vision is responsible and shall pay for return shipment of repaired products back to purchaser. Enhanced Vision reserves the right to use reconditioned and/or serviceable used parts for warranty repairs. Anyone using this product knowingly assumes certain risks, due to the need to utilize vision enhancement devices. Thank you for making Enhanced Vision and Merlin LCD Plus your choice for better vision. 44
45
46
47
48 The Merlin LCD Plus video magnifier is designed to enlarge and enhance images to improve the lives of people who have low vision. The extent to which Merlin LCD Plus can improve the ability to see images and text depends on a person s individual condition and level of visual impairment. Merlin LCD Plus is not designed to restore vision, correct eye conditions or halt degenerative vision loss. An eyecare professional can best determine the suitability of Merlin LCD Plus for a patient s specific condition. For more information, please visit (800) (714) MRX JAN 2007 Copyright by Enhanced Vision. All rights reserved. Product specifications subject to change without prior notice.
Unauthorized changes or modification to this system can void the user s authority to operate this equipment.
 Users Manual PLUS Congratulations on your purchase of Merlin Plus from Enhanced Vision. Merlin Plus is designed to enhance the lifestyle of the visually impaired. This is Enhanced Vision s most advanced
FCC COMPLIANCE NOTICE
 User Manual Congratulations on your purchase of Merlin HD from Enhanced Vision. Merlin HD is a full-color, auto-focus video magnifier system designed to enhance the lifestyle of the visually impaired.
FCC COMPLIANCE NOTICE
 User Manual TM Congratulations on your purchase of Merlin HD from Enhanced Vision. Merlin HD is a full-color, auto-focus video magnifier system designed to enhance the lifestyle of the visually impaired.
FCC COMPLIANCE NOTICE
 User Manual Congratulations on your purchase of Merlin ultra from Enhanced Vision. Merlin ultra is a full-color, auto-focus video magnifier system designed to enhance the lifestyle of the visually impaired.
Flipper. The Ultimate in Flexibility Just Point and See! Users Manual. FlipperPanel. Flipper Stand. Flipper
 Flipper The Ultimate in Flexibility Just Point and See! FlipperPanel Flipper Flipper Stand Users Manual Congratulations on your purchase of one of the Flipper family of products. Enhanced Vision products
The Max TM Family. Max Panel. Users Manual
 TM The Max TM Family Max TM Max Panel TM Users Manual Congratulations on your purchase of one of the Max family of products. Enhanced Vision products are designed to give you the highest quality and convenience
The Acrobat TM Family
 The Acrobat TM Family AcrobatPanel TM Acrobat TM Acrobat LCD TM Users Manual Congratulations on your purchase of one of the Acrobat family of products. Enhanced Vision products are designed to give you
USER MANUAL. 27 Full HD Widescreen LED Monitor L27ADS
 USER MANUAL 27 Full HD Widescreen LED Monitor L27ADS TABLE OF CONTENTS 1 Getting Started 2 Control Panel/ Back Panel 3 On Screen Display 4 Technical Specs 5 Care & Maintenance 6 Troubleshooting 7 Safety
USER MANUAL. 22" Class Slim HD Widescreen Monitor L215DS
 USER MANUAL 22" Class Slim HD Widescreen Monitor L215DS TABLE OF CONTENTS 1 Getting Started Package Includes Installation 2 Control Panel / Back Panel Control Panel Back Panel 3 On Screen Display 4 Technical
PL2410W LCD Monitor USER'S GUIDE.
 PL2410W LCD Monitor USER'S GUIDE www.planar.com Content Operation Instructions...1 Safety Precautions...2 First Setup...3 Front View of the Product...4 Rear View of the Product...5 Quick Installation...6
PLL2210MW LED Monitor
 PLL2210MW LED Monitor USER'S GUIDE www.planar.com Content Operation Instructions...1 Safety Precautions...2 First Setup...3 Front View of the Product...4 Rear View of the Product...5 Quick Installation...6
USER MANUAL. 27 Full HD Widescreen LED Monitor L270E
 USER MANUAL 27 Full HD Widescreen LED Monitor L270E TABLE OF CONTENTS 1 Getting Started 2 Control Panel/ Back Panel 3 On Screen Display 4 Technical Specs 5 Care & Maintenance 6 Troubleshooting 7 Safety
PLL1920M LED LCD Monitor
 PLL1920M LED LCD Monitor USER'S GUIDE www.planar.com Content Operation Instructions...1 Safety Precautions...2 First Setup...3 Front View of the Product...4 Rear View of the Product...5 Installation...6
INSTRUCTIONAL MANUAL FOR LCD ZOOM MICROSCOPE
 INSTRUCTIONAL MANUAL FOR LCD ZOOM MICROSCOPE ? 8 LCD Screen? 10.4 LCD Screen LCD Zoom Microscope Instruction Manual Please read the Instruction Manual carefully before installation and keep it for future
LA1500R USER S GUIDE.
 LA1500R USER S GUIDE www.planar.com The information contained in this document is subject to change without notice. This document contains proprietary information that is protected by copyright. All rights
2013, 2014 Hewlett-Packard Development Company, L.P.
 User Guide 2013, 2014 Hewlett-Packard Development Company, L.P. The only warranties for HP products and services are set forth in the express warranty statements accompanying such products and services.
USER MANUAL Full HD Widescreen LED Monitor L215ADS
 USER MANUAL 21.5 Full HD Widescreen LED Monitor L215ADS TABLE OF CONTENTS 1 Getting Started 2 Control Panel/ Back Panel 3 On Screen Display 4 Technical Specs 5 Care & Maintenance 6 Troubleshooting 7 Safety
USER MANUAL Full HD Widescreen LED Monitor L215IPS
 USER MANUAL 21.5 Full HD Widescreen LED Monitor L215IPS TABLE OF CONTENTS 1 Getting Started 2 Control Panel/ Back Panel 3 On Screen Display 4 Technical Specs 5 Care & Maintenance 6 Troubleshooting 7 Safety
Introduction...2. Features...2 Safety Precautions...2. Installation...4
 PE1900 Contents Introduction...2 Features...2 Safety Precautions...2 Installation...4 Unpacking the Display...4 Locations and Functions of Controls...4 Connections...5 Using Your Display...7 Turning the
PXL2760MW LED LCD Monitor
 PXL2760MW LED LCD Monitor USER'S GUIDE www.planar.com Content Operation Instructions...1 Safety Precautions...2 Package Overview...3 First Setup...4 Front View of the Product...5 Rear View of the Product...6
22" Touchscreen LED Monitor USER'S GUIDE
 22" Touchscreen LED Monitor USER'S GUIDE Content Operation Instructions...1 Unpacking Instructions...2 Safety Precautions...2 Front View of the Product...3 Rear View of the Product...4 Quick Installation...5
USER MANUAL. 27" 2K QHD LED Monitor L27HAS2K
 USER MANUAL 27" 2K QHD LED Monitor L27HAS2K TABLE OF CONTENTS 1 Getting Started 2 Control Panel/ Back Panel 3 On Screen Display 4 Technical Specs 5 Troubleshooting 6 Safety Info & FCC warning 1 GETTING
PX1710M LCD Monitor USER S GUIDE
 PX1710M LCD Monitor USER S GUIDE www.planar.com The information contained in this document is subject to change without notice. This document contains proprietary information that is protected by copyright.
USER MANUAL. 28" 4K Ultra HD Monitor L28TN4K
 USER MANUAL 28" 4K Ultra HD Monitor L28TN4K TABLE OF CONTENTS 1 Getting Started 2 Control Panel/ Back Panel 3 On Screen Display 4 Technical Specs 5 Care & Maintenance 6 Troubleshooting 7 Safety Info &
USER MANUAL Full HD Widescreen LED Monitor L236VA
 USER MANUAL 23.6 Full HD Widescreen LED Monitor L236VA TABLE OF CONTENTS 1 Getting Started 2 Control Panel/ Back Panel 3 On Screen Display 4 Technical Specs 5 Care & Maintenance 6 Troubleshooting 7 Safety
PXL2470MW LED LCD Monitor
 PXL2470MW LED LCD Monitor USER'S GUIDE www.planar.com Content Operation Instructions...1 Unpacking Instructions...2 Safety Precautions...2 Package Overview...3 First Setup...4 Front View of the Product...5
DCL9AW. User Manual. English
 DCL9AW User Manual English PRECAUTIONS Information for users applicable in European Union countries 1 Information for users applicable in United States of America 1 Installation 1 Power connection 1 Maintenance
PLL2710W LED LCD Monitor
 PLL2710W LED LCD Monitor USER'S GUIDE www.planar.com Content Operation Instructions...1 Safety Precautions...2 Package Overview...3 First Setup...4 Front View of the Product...5 Rear View of the Product...6
PT1500MX / PT1550MX PT1555MU / PT1505MU Touch Screen LCD Monitors
 PT1500MX / PT1550MX PT1555MU / PT1505MU Touch Screen LCD Monitors USER S GUIDE www.planar.com Important Recycle Instructions: Lamp(s) inside this product contains mercury. This product may contain other
Home Roam TV Basic User Manual
 Page1 Home Roam TV Basic User Manual Table of Contents 1. Safety Disclaimer... 2 2. Introduction... 2 3. What s in the Box... 2 4. Specifications... 2 5. Unit Functions... 3 5-1. Transmitter Module...
TR6102HD HDTV/DVD/COMPONENT VIDEO TO RGBHV TRANSCODER USER S GUIDE
 MANUAL PART NUMBER: 400-0031-003 PRODUCT REVISION: 1 HDTV/DVD/COMPONENT VIDEO TO RGBHV TRANSCODER USER S GUIDE INTRODUCTION Thank you for your purchase of the Transcoder. We are certain that you will find
ACCESSORIES MANUAL PART NUMBER: TNP500. Universal Tilt N Plug Interconnect Box USER'S GUIDE
 MANUAL PART NUMBER: 400-0091-003 TNP500 Universal Tilt N Plug Interconnect Box USER'S GUIDE INTRODUCTION Your purchase of the TNP100 Tilt N Plug Interconnect Box is greatly appreciated. We are sure you
DISTRIBUTION AMPLIFIER
 MANUAL PART NUMBER: 400-0045-005 DA1907SX 1-IN, 2-OUT VGA/SVGA/XGA/UXGA DISTRIBUTION AMPLIFIER USER S GUIDE TABLE OF CONTENTS Page PRECAUTIONS / SAFETY WARNINGS... 2 GENERAL...2 GUIDELINES FOR RACK-MOUNTING...2
Precautions About the Product... 4 Package Overview Product Overview... 6 Start Your Installation... 8
 2 Table of Contents Usage Notice Precautions... 3 Introduction About the Product... 4 Package Overview... 5 Installation Product Overview... 6 Start Your Installation... 8 User Controls User Control Overview...
ACUBRITE 23 SS. Manual. Stainless Steel Chassis 23" LCD Display. Content
 ACUBRITE 23 SS Stainless Steel Chassis 23" LCD Display Manual Introduction... 2 Hardware Installation... 2 The Display Timing... 5 The Display Outline Dimensions... 6 The Display Controls... 7 The Screen
COMPOSITE VIDEO (BNC) TO VGA VIDEO FORMAT CONVERTER AND SCALER AT-RGB110
 TO VGA VIDEO FORMAT CONVERTER AND SCALER AT-RGB110") User Manual COMPOSITE VIDEO (BNC) TO VGA VIDEO FORMAT CONVERTER AND SCALER AT-RGB110 TABLE OF CONTENTS 1. Introduction... 2 2. Package Contents... 2 3. Features... 2 4. Specification... 2 5. Panel Description...
User Manual COMPOSITE VIDEO (BNC) TO VGA VIDEO FORMAT CONVERTER AND SCALER AT-RGB110 TABLE OF CONTENTS 1. Introduction... 2 2. Package Contents... 2 3. Features... 2 4. Specification... 2 5. Panel Description...
(7) Changing the Ratio (8) Initialization Additional features (1) Adjusting the monitor position (2) Light on/off
 Changing the Ratio (8) Initialization Additional features (1) Adjusting the monitor position (2) Light on/off") Table of Contents 1. What is the SenseView DESKTOP?... 1 2. Safety Precaution... 2 3. Package... 3 4. Overview... 4 5. How to install... 5 (1) Connect the power cable... 5 (2) Using DVI-D cable... 6 (3)
Table of Contents 1. What is the SenseView DESKTOP?... 1 2. Safety Precaution... 2 3. Package... 3 4. Overview... 4 5. How to install... 5 (1) Connect the power cable... 5 (2) Using DVI-D cable... 6 (3)
900-Lumen Portable LED Projector Part #: User manual
 900-Lumen Portable LED Projector Part #: 21797 User manual 900-Lumen LED Projector Manual Page 2 of 14 900-Lumen LED Projector Manual Page 3 of 14! SAFETY WARNINGS AND CAUTIONS WARNING: To reduce the risk
42 Freestanding Infrared Multi Touch Screen Kiosk User s Manual
 42 Freestanding Infrared Multi Touch Screen Kiosk User s Manual Manual Version L42HD-T2.2 Safety Instructions Please keep the display away from any heat sources such as radiators or direct sunlight. Place
PRO-ScalerHD2V HDMI to VGA & Audio Scaler Converter. User s Guide. Made in Taiwan
 PRO-ScalerHD2V HDMI to VGA & Audio Scaler Converter User s Guide Made in Taiwan Congratulations for owning a gofanco product. Our products aim to meet all your connectivity needs wherever you go. Have
Table of Contents Table of Contents... 1 Usage Notice... 2 Introduction... 4 Installation User Controls Appendices...
 Table of Contents Table of Contents... 1 Usage Notice... 2 Precautions... 2 Introduction... 4 Product Features... 4 Package Overview... 5 Product Overview... 6 Main Unit... 6 Control Panel... 7 Connection
Quick Setup 1 Unpack the projector
 PowerLite 410W Quick Setup 1 Unpack the projector You should have the following items: Projector and lens cover Power cord Remote control and batteries Computer cable Projector CD-ROMs Password protected
Camera 220C Document Camera User s Guide
 Camera 220C Document Camera User s Guide #401-220C-00 Table of Contents TABLE OF CONTENTS... 0 TABLE OF CONTENTS... 1 COPYRIGHT INFORMATION... 2 CHAPTER 1 PRECAUTIONS... 3 CHAPTER 2 PACKAGE CONTENT...
Dell Wyse 5030 PCoIP Zero Client
 Dell Wyse 5030 PCoIP Zero Client User Guide Regulatory Model: PxN Regulatory Type: PxN001 Notes, cautions, and warnings NOTE: A NOTE indicates important information that helps you make better use of your
AC335A. VGA-Video Ultimate Plus BLACK BOX Back Panel View. Remote Control. Side View MOUSE DC IN OVERLAY
 AC335A BLACK BOX 724-746-5500 VGA-Video Ultimate Plus Position OVERLAY MIX POWER FREEZE ZOOM NTSC/PAL SIZE GENLOCK POWER DC IN MOUSE MIC IN AUDIO OUT VGA IN/OUT (MAC) Remote Control Back Panel View RGB
P XGA TFT Monitor. User s Manual
 P6151 15 XGA TFT Monitor User s Manual Disclaimers This manual has been carefully checked and believed to contain accurate information. Axiomtek Co., Ltd. assumes no responsibility for any infringements
Marshall Electronics. Pro A/V Communications VMV-402-SH. 3G/HD/SD-SDI Quad-viewer/Switcher with Audio Meter Display. User Manual.
 Marshall Electronics Pro A/V Communications VMV-402-SH 3G/HD/SD-SDI Quad-viewer/Switcher with Audio Meter Display User Manual Table of Contents 1. Introduction... 3 2. Features... 3 3. Package Contents...
Owner s Manual. Backup Monitor System. LCD Monitor & CCD Color Camera
 Backup Monitor System LCD Monitor & CCD Color Camera Backup Monitor System Copyright 2003 TMI Products, Inc. All Rights Reserved Corona, CA U.S.A. 060300 Owner s Manual 1493 Bentley Drive Corona, CA 92879
LCD VALUE SERIES (32 inches)
") LCD VALUE SERIES (32 inches) http://www.orionimages.com All contents of this document may change without prior notice, and actual product appearance may differ from that depicted herein 1. SAFETY INSTRUCTION
LCD VALUE SERIES (32 inches) http://www.orionimages.com All contents of this document may change without prior notice, and actual product appearance may differ from that depicted herein 1. SAFETY INSTRUCTION
Indoor/Outdoor Security System with Quad Monitor User s Manual
 Indoor/Outdoor Security System with Quad Monitor User s Manual 4919539 Important! Please read this booklet carefully before installing or using these units. WARNING - These units should ONLY be opened
CrossLine Generator Operation Manual
 WARRANTY MicroImage Video Systems warrants that each CL5400A is free from defects due to faulty materials or improper workmanship for a period of one (1) year. MicroImage Video Systems further warrants
VITEK VTM-TLM191 VTM-TLM240
 VTM-TLM191 VTM-TLM240 19 & 24 Professional LED Monitors with HDMI, VGA, and Looping BNC VITEK FEATURES 19 & 24 Wide Screen LED Display Panel HDMI, VGA, and Looping BNC Composite Video Inputs & Stereo Audio
Diamond View DV180. Colour LCD Monitor (45.9 cm) LCD Panel Size. User s Manual
 LCD Panel Size. User s Manual") Diamond View DV180 Colour LCD Monitor 18.1 (45.9 cm) LCD Panel Size User s Manual TABLE OF CONTENTS 1. 2. 3. 4. 5. 6. 7. 8. SAFETY INSTRUCTIONS AND MAINTENANCE... 3 INTRODUCTION... 4 UNPACKING THE MONITOR...
Diamond View DV180 Colour LCD Monitor 18.1 (45.9 cm) LCD Panel Size User s Manual TABLE OF CONTENTS 1. 2. 3. 4. 5. 6. 7. 8. SAFETY INSTRUCTIONS AND MAINTENANCE... 3 INTRODUCTION... 4 UNPACKING THE MONITOR...
17 19 PROFESSIONAL LCD COLOUR MONITOR ART
 17 19 PROFESSIONAL LCD COLOUR MONITOR ART. 41657-41659 Via Don Arrigoni, 5 24020 Rovetta S. Lorenzo (Bergamo) http://www.comelit.eu e-mail:export.department@comelit.it WARNING: TO REDUCE THE RISK OF FIRE
HD Digital Set-Top Box Quick Start Guide
 HD Digital Set-Top Box Quick Start Guide Eagle Communications HD Digital Set-Top Box Important Safety Instructions WARNING TO REDUCE THE RISK OF FIRE OR ELECTRIC SHOCK, DO NOT EXPOSE THIS PRODUCT TO RAIN
19 / 20.1 / 22 WIDE SCREEN TFT-LCD MONITOR
 19 / 20.1 / 22 WIDE SCREEN TFT-LCD MONITOR V193/ V220 Series V202 Series USER MANUAL www.viewera.com Rev. 2.0 Table of Contents EMC Compliance......1 Important Precautions...2 1. Package contents....3
Dell D3218HN. User s Guide. Regulatory model: D3218HNo
 Dell D3218HN User s Guide Regulatory model: D3218HNo Notes, cautions, and warnings NOTE: A NOTE indicates important information that helps you make better use of your computer. CAUTION: A CAUTION indicates
DA1909 COMPUTER VIDEO LINE DRIVER WITH EQUALIZATION USER S GUIDE
 MANUAL PART NUMBER: 400-0108-002 PRODUCT REVISION: 1 COMPUTER VIDEO LINE DRIVER WITH EQUALIZATION USER S GUIDE INTRODUCTION Altinex appreciates your purchase of the Line Driver. We are sure you will find
Part names (continued) Remote control
 Remote control") Introduction Part names (continued) Remote control (1) STANDBY ( 25) (1) (2) ON ( 25) (3) (3) ID - 1 / 2 / 3 / 4 s ( 18) (4) (4) COMPUTER 1 ( 27) (7) (5) COMPUTER 2 * (8) (6) COMPUTER 3 * (10) (13) (7)
Introduction Part names (continued) Remote control (1) STANDBY ( 25) (1) (2) ON ( 25) (3) (3) ID - 1 / 2 / 3 / 4 s ( 18) (4) (4) COMPUTER 1 ( 27) (7) (5) COMPUTER 2 * (8) (6) COMPUTER 3 * (10) (13) (7)
Lite USER GUIDE. 3 Lite. For more information visit
 USER GUIDE Lite 3 Lite For more information visit www.caldigit.com Table of Contents Section 1 : General Information Introduction 3 General Use Warnings 3 Safety Warnings 3 System Requirements 4 In the
PRECAUTIONS CONTENTS: Please follow these precautions:
 PRECAUTIONS Please follow these precautions: To prevent fire or shock hazard, do not expose the unit to rain or moisture. To prevent electrical shock, do not open the cabinet. Refer to qualified personnel
Usage Notice Precautions Follow all warnings, precautions and maintenance as recommended in this user s guide to maximize the life of your unit. Warni
 Table of Contents Table of Contents... 1 Usage Notice... 2 Precautions... 2 Introduction... 4 Product Features... 4 Package Overview... 5 Product Overview... 6 Main Unit... 6 Panel Control... 7 Connection
Safety Precautions and Maintenance
 Safety Precautions and Maintenance 1. Unplug the monitor before cleaning it with a slightly damp cloth. 2. Wiping the screen with a dry cloth is recommendable, and only during the power has been switched
PRO-ScalerV2HD VGA to HDMI & Audio Scaler Converter. User s Guide. Made in Taiwan
 VGA to HDMI & Audio Scaler Converter User s Guide Made in Taiwan Congratulations for owning a gofanco product. Our products aim to meet all your connectivity needs wherever you go. Have fun with our products!
USER GUIDE 3. For more information visit
 USER GUIDE 3 For more information visit www.caldigit.com Table of Contents Section 1 : General Information Introduction 3 General Use Warnings 3 Safety Warnings 3 System Requirements 4 In the Box 4 TS3
Evolution Digital HD Set-Top Box Important Safety Instructions
 Evolution Digital HD Set-Top Box Important Safety Instructions 1. Read these instructions. 2. Keep these instructions. 3. Heed all warnings. 4. Follow all instructions. 5. Do not use this apparatus near
INFORMATION TO THE USER
 U.S.FEDERAL COMMUNICATIONS COMMISSION RADIO FREQUENCY INTERFERENCE STATEMENT INFORMATION TO THE USER NOTE: This equipment has been tested and found to comply with the limits for a Class B digital device
Table of Contents. English. Table of Contents... 1 Usage Notice Introduction Installation User Controls Appendices...
 Table of Contents Table of Contents... 1 Usage Notice... 2 Precautions... 2 Introduction... 4 Product Features... 4 Package Overview... 5 Product Overview... 6 Main Unit... 6 Control Panel... 7 Connection
HP EliteDisplay LED Backlit Monitors. User Guide
 HP EliteDisplay LED Backlit Monitors User Guide 2013 Hewlett-Packard Development Company, L.P. Microsoft and Windows are U.S. registered trademarks of Microsoft Corporation. The only warranties for HP
H270 LED MONITOR USER MANUAL
 H270 LED MONITOR USER MANUAL In order to continue serving our customers and providing the best products, our product information including our user manuals may receive updates from time to time. Please
User s Manual. Digital Media Converter Package Part #: DL-HDCAT
 User s Manual Digital Media Converter Package Part #: DL-HDCAT 800-530-8998 www.libav.com TABLE OF CONTENTS 1-1 Table of Contents 1-2 Welcome and Safety Notes 1-3 Product Description and General Specifications
MaxView Cinema Kit Quick Install Guide
 SYSTEM SETUP The MaxView will work at any of the following display settings: INSTALLATION MaxView Cinema Kit Quick Install Guide Step 1 - Turn off your computer. Disconnect your monitor s VGA cable from
Warning & Cautions. Warning. Cautions
 Contents 1. Warning & Cautions 2. Components 3. Monitor Buttons 4. Connecting Monitor Cables 5. On Screen Display Menu 6. Display Specifications 7. Monitor Specifications 8. Troubleshooting (When using
COLOR TFT LCD MONITOR WITH MULTI-TOUCH FUNCTION Manual
 COLOR TFT LCD MONITOR WITH MULTI-TOUCH FUNCTION Manual DEAR CUSTOMERS Thank you for choosing our TFT LCD (liquid crystal display) monitor. This product employs integrate circuits, low power consumption,
VGA CAT-5 1:8 Distribution S VGA CAT-5 Distribution R
 VGA CAT-5 1:8 Distribution S VGA CAT-5 Distribution R EXT-VGA-CAT5-148S EXT-VGA-CAT5-148R User Manual www.gefen.com ASKING FOR ASSISTANCE Technical Support: Telephone (818) 772-9100 (800) 545-6900 Fax
Service FOR SERVICE. Quick Reference Guide. Page 23. Contact your help desk at
 Service Page 2 FOR SERVICE Contact your help desk at Quick Reference Guide 0 Judson Street, Unit 5 Toronto, ON M8Z 5T6 Tel: -800-652-266 www.adcom.ca Copyright 2004 Power Source Page 22 UPS Connect the
HOME THEATER. HDMI Selector Switches. Vanco Part Numbers (5x1) (3x1) Technical Support
 (3x1) Technical Support") HOME THEATER HDMI Selector Switches Vanco Part Numbers 280710 (5x1) 280711 (3x1) Technical Support www.vanco1.com info@vanco1.com 800-626-6445 DEAR CUSTOMER Thank you for purchasing this product. For optimum
HOME THEATER HDMI Selector Switches Vanco Part Numbers 280710 (5x1) 280711 (3x1) Technical Support www.vanco1.com info@vanco1.com 800-626-6445 DEAR CUSTOMER Thank you for purchasing this product. For optimum
12.1 Inch CGA EGA VGA SVGA LCD Panel - ID #492
 12.1 Inch CGA EGA VGA SVGA LCD Panel - ID #492 Operation Manual Introduction This monitor is an open frame LCD Panel monitor. It features the VESA plug & play system which allows the monitor to automatically
ACCESSORIES MANUAL PART NUMBER: PRODUCT REVISION: 1 TNP100. Tilt N Plug Interconnect Box USER'S GUIDE
 MANUAL PART NUMBER: 400-0091-001 PRODUCT REVISION: 1 TNP100 Tilt N Plug Interconnect Box USER'S GUIDE INTRODUCTION Your purchase of the TNP100 Tilt N Plug Interconnect Box is greatly appreciated. We are
VGA CAT-5 1:8 Distribution S VGA CAT-5 Distribution R. EXT-VGA-CAT5-148S EXT-VGA-CAT5-148R User Manual
 VGA CAT-5 1:8 Distribution S VGA CAT-5 Distribution R EXT-VGA-CAT5-148S EXT-VGA-CAT5-148R User Manual INTRODUCTION Congratulations on your purchase of the VGA CAT-5 1:8 Distribution S. Your complete satisfaction
SK2002DA SIDEKICKER 1-IN, 2-OUT VGA-UXGA DISTRIBUTION AMPLIFIER CABLE USER S GUIDE DISTRIBUTION AMPLIFIERS
 MANUAL PART NUMBER: 400-0152-001 PRODUCT REVISION: 0 SK2002DA SIDEKICKER 1-IN, 2-OUT VGA-UXGA DISTRIBUTION AMPLIFIER CABLE USER S GUIDE TABLE OF CONTENTS Page PRECAUTIONS / SAFETY WARNINGS...2 GENERAL...2
Composite to HDMI Scaler
 Composite to HDMI Scaler GTV-COMPSVID-2-HDMIS User Manual Version A2 gefen.com ASKING FOR ASSISTANCE Technical Support: Telephone Email 1-707-283-5900 1-800-472-5555 support@gefen.com Technical Support
Table of Contents. English. Usage Notice. Introduction. Installation. User Controls. Appendices. Precautions... 2
 Table of Contents Usage Notice Precautions... 2 Introduction Product Features... 4 Package Overview... 5 Product Overview... 6 Main Unit... 6 Control Panel... 7 Connection Ports... 8 IR Remote Control...
VGA / Audio Extender Single CAT5 / CAT6 with RGB Delay Control & EQ
 VGA / Audio Extender Single CAT5 / CAT6 with RGB Delay Control & EQ Model #: VGA-C5A-SET 2010 Avenview Inc. All rights reserved. The contents of this document are provided in connection with Avenview Inc.
User s Manual. Digital Media Converter Package Part #: DL-HDCAT-WP
 User s Manual Digital Media Converter Package Part #: DL-HDCAT-WP TABLE OF CONTENTS 1-1 Table of Contents 1-2 Welcome and Safety Notes 1-3 Product Description and General Specifications 1-4 Environmental
2 Connect your video source
 EX90 2 Connect your video source Quick Setup Connect the projector to a computer or video source using any of the available connections shown below. Check the connectors on your video equipment. If more
Instruction Manual. 4x1 VGA Routing Switcher Series
 MULTIMEDIA AUDIO AND VISUAL Instruction Manual MODEL : SB-406 4x VGA ROUTING SWITCHER 4x VGA Routing Switcher Series Thank you for purchasing the SB-406 VGA Router Switcher. You will find this unit easy
MVP. Instruction Manual MVP-50 MVP-100 MVP-150
 MVP Instruction Manual MVP-50 MVP-100 MVP-150 This Instruction Manual is for the Multi Video Product (MVP) series of Ken-A-Vision Cameras. Macintosh Computer Users Be aware of some special notes when using
RUBY 7 HD+ Handheld Video Magnifier. User s Guide. Freedom Scientific, Inc Rev. A
 RUBY 7 HD+ Handheld Video Magnifier User s Guide Freedom Scientific, Inc. www.freedomscientific.com 440931-001 Rev. A Freedom Scientific, Inc., 11800 31 st Court North, St. Petersburg, Florida 33716-1805,
User Manual. Model 1365 Video Scaler
 User Manual Model 1365 Video Scaler Model 1365 PC/HD Video Converter Table Of Contents 1.0 Introduction........................3 2.0 Specifications....................... 4 3.0 Checking Package Contents................5
AVTuner PVR Quick Installation Guide
 AVTuner PVR Quick Installation Guide Introducing the AVTuner PVR The AVTuner PVR allows you to watch, record, pause live TV and capture high resolution video on your computer. Features and Benefits Up
Operation Manual VMS 3.0 Video System
 Operation Manual VMS 3.0 Video System for the AlterG Anti-Gravity Treadmill 1 This manual covers operation procedures for the following AlterG products: AlterG Video System model VMS 3.0 NOTE: The following
Table of Contents Table of Contents... 1 Usage Notice... 2 Introduction... 4 Installation User Controls Appendices...
 Table of Contents Table of Contents... 1 Usage Notice... 2 Precautions... 2 Introduction... 4 Product Features... 4 Package Overview... 5 Product Overview... 6 Main Unit... 6 Control Panel... 7 Connection
DC162 Digital Visualizer. User Manual. English - 1
 DC162 Digital Visualizer User Manual English - 1 Table of Contents CHAPTER 1 PRECAUTIONS... 5 CHAPTER 2 PACKAGE CONTENT... 7 CHAPTER 3 PRODUCT OVERVIEW... 8 3.1 PRODUCT INTRODUCTION... 8 3.2 I/O CONNECTION...
PRECAUTIONS. Please follow these precautions:
 User manual PRECAUTIONS Please follow these precautions: To prevent fire or shock hazard, do not expose the unit to rain or moisture. To prevent electrical shock, do not open the cabinet. Refer to qualified
LCD MONITOR. quick start guide P2070,P2270,P2370,P2070G,P2270G,P2370G
 LCD MONITOR quick start guide P2070,P2270,P2370,P2070G,P2270G,P2370G ii Introduction Package Contents Please make sure the following items are included with your monitor. If any items are missing, contact
PLANAR LCD MONITOR PL190M MANUAL.
 PLANAR LCD MONITOR PL190M MANUAL www.planar.com Important Safety Instructions Read the Safety Instructions carefully and keep it for later use. Be aware of all warnings and instruction signs marked on
10.4" LCD Monitor with Aluminum Front Bezel YPM1040PHB
 SPECIFICATION FOR APPROVAL M0DEL: 10.4" LCD Monitor with Aluminum Front Bezel YPM1040PHB BASE MODEL Customer's Confirmation Approved by: Reviewed by: Prepared by: Supplier's Confirmation Approved by: Reviewed
ivw-fd122 Video Wall Controller MODEL: ivw-fd122 Video Wall Controller Supports 2 x 2 Video Wall Array User Manual Page i Rev. 1.
 MODEL: ivw-fd122 Video Wall Controller Supports 2 x 2 Video Wall Array User Manual Rev. 1.01 Page i Copyright COPYRIGHT NOTICE The information in this document is subject to change without prior notice
Technical Support HOME THEATER. VGA over Cat5e/ Cat6 Extenders with Audio
 HOME THEATER VGA over Cat5e/ Cat6 Extenders with Audio Vanco Part Number: 280544 (500 ft.) 280546 (1000 ft.) Technical Support www.vanco1.com info@vanco1.com 800-626-6445 DEAR CUSTOMER Thank you for purchasing