YAMAHA AUTHORIZED PRODUCT MANUAL DIGITAL RHYTHM PROGRAMMER
|
|
|
- Myrtle Pearson
- 5 years ago
- Views:
Transcription
1 YAMAHA AUTHORIZED PRODUCT MANUAL DIGITAL RHYTHM PROGRAMMER
2 YAMAHA DIGITAL RHYTHM PROGRAMMER OWNER S MANUAL
3 Congratulations on your purchase of the Yamaha RX5 Digital Rhythm Programmer! Your RX5 has been developed through over a century of Yamaha research and design, using state-of-the-art electronic music technology, combined with in-depth knowledge of the art of making music. The RX5 features advanced microcomputer control plus a top-quality digital PCM sound storage and reproduction system. With the RX5 you will be able to program virtually any type of rhythm pattern as well as melodic sequences, and since the instrument sounds are digitally recorded they are virtually indistinguishable from live instruments. To ensure that the RX5 will give you maximum performance and versatility, we urge you to read this manual carefully while operating the RX5. The manual begins with the all-important PRECAUTIONS section. The INSTRUMENTS chapter gives you an introduction to the sounds available on the RX5. The next three chapters describe how to create Patterns, Songs and Song Chains. The following MODE chapters contain full descriptions of the operating modes of the RX5. Each chapter contains a brief OVERVIEW, a list of the JOBS (functions) in that mode, and full details of each JOB. If you encounter any unusual messages on the LCD (Liquid Crystal Display) of your RX5, refer to the ERROR MESSAGES chapter near the end of the manual. Finally, the PATTERN CHART and SONG/CHAIN CHART enable you to keep an accurate written record of the rhythm programs you have created on your RX5, and you can use the DRUM SET CHART to record voice editing and key assign parameters for a complete 24-instrument drum set which you have created on your RX5. And now it s all up to you. Enjoy your Yamaha RX5 Digital Rhythm Programmer!
4 INTRODUCTION HOW TO USE THIS MANUAL PRECAUTIONS... 1 CONTROL PANEL... 2 REAR PANEL/CONNECTIONS... 4 THE INSTRUMENTS... 5 PLAYING THERX5 S INSTRUMENTS... 5 INSTRUMENT VOLUME... 6 ACCENTS... 6 THE REVERSE FUNCTION... 6 THE DAMP FUNCTION... 6 THE WAVEFORM DATA CARTRIDGE... 7 ASSIGNING OTHER VOICES TO INSTRUMENT KEYS... 8 PATTERN S... 9 OVERVIEW... 9 ENTERING THE PATTERN MODE... 9 PATTERN SELECTION... 9 PATTERN PLAY... 9 REAL TIME WRITE MODE STEP WRITE MODE PATTERN/INSTRUMENT CLEAR QUANTIZE FUNCTION TEMPO FUNCTION CLICK FUNCTION SWING FUNCTION PATTERN COPY/APPEND PATTERN EDITING PATTERN MEMORY CHECK SONG COPY SONG CLEAR SONG MEMORY CHECK THE JOBS JOB #01: SEARCH MARK JOB #02: SET MARK JOB #03: SONG NAME JOB #04: INITIAL TEMPO SONG CHAIN MODE OVERVIEW THEJOBS ENTERING THE SONG CHAIN MODE JOB #01: CHAIN PLAY JOB #02: EDIT CHAIN JOB #03: CHAIN NAME JOB #04: CHAIN CLEAR EDIT VOICE MODE OVERVIEW THEJOBS ENTERING THE EDIT VOICE MODE JOB #01: SELECT VOICE FOR EDIT JOB #02: PITCH EDIT JOB #03: ENVELOPE EDIT JOB #04: BEND RATE/RANGE JOB #05: VOICE LEVEL JOB #06: LOOP ON/OFF JOB #07: STORE VOICE JOB #08: INITIALIZE VOICE JOB #09: RECALL EDIT EDIT COMPARE SONG S KEY ASSIGN MODE OVERVIEW ENTERING THESONG MODE SONG SELECTION SONG PLAY REPEAT SONG PLAY EDIT SONG MODE INSERT FUNCTION DELETE FUNCTION PART COPY FUNCTION REPEATS TEMPO CHANGE FUNCTION VOLUME CHANGE FUNCTION OVERVIEW THEJOBS ENTERING THE KEY ASSIGN MODE JOB #01: VOICE ASSIGN JOB #02: PARAMETER ASSIGN JOB #03: MULTI VOICE JOB #04: MULTI STEP JOB #05: ACCENT LEVELS JOB #06: OUTPUT CHANNEL ASSIGN JOB #07: SAVE KEY DATA JOB #08: LOAD KEY DATA JOB #09: COPY VOICE
5 CARTRIDGE MODE OVERVIEW THE JOBS ENTERING THE CARTRIDGE MODE SAVING DATA (JOBS #01 #04) LOADING DATA (JOBS #11 #14) VERIFYING DATA (JOBS #21 24) FORMATTING (JOB #30) CASSETTE MODE OVERVIEW THE JOBS ENTERING THE CASSETTE MODE SAVING DATA (JOBS #01 #05) LOADING DATA (JOBS #11 #15) VERIFYING DATA (JOBS #21 25) SYNC MODE OVERVIEW SELECTING SYNC MODES TAPE SYNC APPLICATIONS JOB #08: DEVICE NUMBER JOB #09: RECEIVE BULK JOB #10: TRANSMIT BULK ERROR MESSAGES GENERAL ERROR MESSAGES CARTRIDGE MODE ERROR MESSAGES CASSETTE MODE ERROR MESSAGES SPECIFICATIONS EDIT VOICE BLOCK DIAGRAM MIDI IMPLEMENTATION CHART PATTERN CHART SONG/CHAIN CHART DRUM SET CHART UTILITY MODE OVERVIEW THE JOBS ENTERING THE UTILITY MODE JOB #01: REMAINING PATTERN MEMORY JOB #02: REMAINING SONG MEMORY JOB #03: MEMORY PROTECT JOB #04: CHANGE VOICE JOB #05: CLEAR ALL PATTERNS JOB #06: CLEAR ALL SONGS MIDI MODE OVERVIEW THE JOBS ENTERING THE MIDI MODE JOB #01: CHANNEL MESSAGE JOB #02: RECEIVE CHANNEL JOB #03: TRANSMIT CHANNEL JOB #04: NOTE NUMBER ASSIGN JOB #05: INITIALIZE NOTE JOB #06: E.G. VELOCITY JOB #07: GATE TIME... 65
6 1 Avoid placing the RX5 in locations exposed to direct sunlight or high temperatures, excessively high or low humidity. high dust concentration. or vibration. Be sure to connect the RX5 to an AC power supply that meets the power supply specifications listed on the accompanying PA volt power supply convertor. If there is any danger of lightning occurring nearby, turn the RX5 off, remove the power plug from the wall socket in advance. Be sure to make all connections properly, as shown in the REAR PANEL/ CONNECTIONS section. To avoid damaging your speakers and other playback equipment, turn off the power of all related equipment before making connections. Do not use excessive force in handling control switches and knobs. To avoid broken cords and short circuits, be sure to unplug all connectors by grasping the respective plugs-not the cords. Remove the power plug from the AC mains socket if the unit is not to be used for an extended period of time. Remove all plugs and connections if the unit is to be transported, to prevent damage to the cords and jacks. Do not use solvents or paint thinners to clean the unit. Do not use insecticides or other pressurized spray products in proximity to the unit. Wipe off the exterior using a mild detergent on a cloth, then dry with a soft cloth. EFFECTS ON OTHER ELECTRONIC EQUIPMENT Since this unit incorporates digital circuitry, simultaneous use of other equipment such as TVs. radios, etc., in close proximity may cause noise and erroneous operation. If this occurs, separate the affected units sufficiently to eliminate the problem. It is also a good idea to use separate line filters on each piece of equipment.
7 2
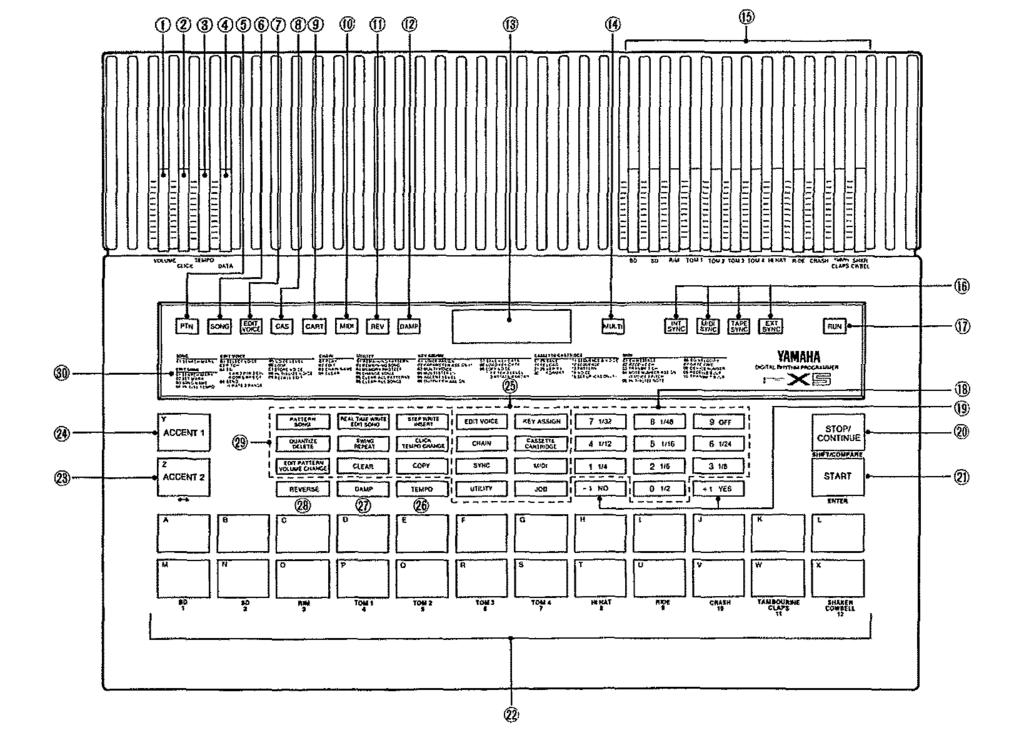
8 3 1. MASTER VOLUME fader control. This controls the overall level of ONLY the HEADPHONE and STEREO AUDIO OUTPUTS. 2. CLICK VOLUME fader control. 3. TEMPO slider control. When this slider is moved the tempo will jump to the value corresponding to the position of the slider. 4. DATA ENTRY slider control for setting of all parameter values. When this slider is moved the selected parameter will jump to the value corresponding to the position of the slider. 5. PTN LED lights when a Pattern is played or recorded. 6. SONG LED lights when a Song is played or edited. 7. EDIT VOICE LED lights when a voice is edited. 8. CAS LED lights when the Cassette Mode is used. 9. CART LED lights when the Cartridge Mode is used. 10. MIDI LED lights when the MIDI Mode is used. 11. REV LED lights when the Reverse function is used. 12. DAMP LED lights when the Damp function is used. 13. LCD (Liquid Crystal Display) shows information regarding current status of the RX5, Backlit, 16 characters X 2 lines. 14. MULTI LED lights when the Multi Mode is used. 15. INSTRUMENT VOLUME fader controls-to adjust individual levels of outputs 1 thru SYNC LED S light when RX5 sync is set to Internal Clock (INT SYNC), External MIDI Clock (MIDI SYNC), External Tape Sync (TAPE SYNC) or External Non-MIDI Sync (EXT SYNC). 17. RUN LED lights when a Pattern, Song or Chain is played, or when a Pattern is recorded. 18. NUMERIC KEY PAD for setting all parameter values, and selection of Job, Pattern, Song and Chain numbers /NO and +1/YES keys for setting of parameter values, Pattern numbers, voices, and all NO and YES entries. In most data entry operations, press and release one of these keys to change data by one step, or hold down a key for rapid continuous data change. 20. STOP/CONTINUE key to stop recording or play, or continue playback. Also functions as EDIT COMPARE key (when editing voices) and SHIFT key (when writing Song names, Chain names or Search marks.) 21. START key. Starts play and record. Also functions as ENTER key (when entering data such as new parameter values.) 22. INSTRUMENT KEYS A thru X, arranged in 12 pairs, corresponding to the 12 output channels. Also used for entering letters (A thru X) for Song names and Chain names and Search marks. 23. ACCENT2 key adds a programmed level change to any voice. Also functions as CURSOR MOVE key, and to enter the letter Z in Song names, Chain names and Search marks. 24. ACCENT 1 key adds a programmed level change to any voice. Also used to enter the letter Y in Song names, Chain names and Search marks. 25. MODE/JOB keys for selection of Modes and Jobs. 26. TEMPO key for tempo setting. 27. DAMP key for damping of sustained sounds. Also used as PERIOD key when entering name of Song, Chain or Search mark. 28. REVERSE key reverses all instrument sounds. Also used as SPACE key when entering name of Song, Chain or Search mark. 29. SONG/PATTERN operation keys. Refer to the PATTERN S and SONG S chapters for details. 30. JOB TABLE. Lists all available Jobs, under Mode headings.
9 4 1. INDIVIDUAL AUDIO OUTPUTS. For output channels 1 thru 12. The instrument names on each output refer to the RX5 s internal voices. 2. CLICK OUTPUT. For monitoring of the Click (metronome) signal 3. STEREO AUDIO OUTPUTS. For stereo monitoring of the RX5 Stereo positions are fixed for each of the 12 output channels. If a cable is connected to the L/MONO output ONLY, the RX5 can be monitored in mono. 4. PHONES OUTPUT. For monitoring the RX5 with stereo headphones. 5. DATA CARTRIDGE SLOT. For the Yamaha RAM4 Data Cartridge. 6. WAVEFORM DATA CARTRIDGE SLOT. For the Yamaha Waveform Data Cartridge. 7. FOOT SWITCH CONNECTION. For a Yamaha footswitch, which can be used to control the RX5 s STOP and START functions. 8. EXTERNAL CLOCK IN and OUT CONNECTORS. For transmission and reception of Clock signals, when using the RX5 with non-midi external devices such as sequencers or other drum machines. 9. CASSETTE INTERFACE. For connection to a cassette recorder, when saving and loading data. Also used when recording or receiving Tape Sync signals. 10. MIDI IN connector. For reception of MIDI signals, such as when the RX5 is controlled by an external MIDI sequencer or keyboard. 11. MIDI OUT connector. For transmission of MIDI signals, such as when the RX5 is controlling an external MIDI sequencer or keyboard, or sending Bulk data to another RX MIDI THRU connector. MIDI signals received at the MIDI IN connector will be passed unchanged via this connector, to another MIDI device, when the RX5 is part of a chain of MIDI devices. 13. DC 12-VOLT INPUT. For power supply from the Yamaha PA-1210 Power Supply Unit. 14. POWER ON/OFF SWITCH.
10 5 NOTE: A brief output pulse appears at the RX5 outputs when the power is initially turned on. To prevent this from possibly damaging your speaker system, turn the RX5 on first, then your sound system. PLAYING THE RX5 INSTRUMENTS The RX5 instruments can be played in real-time (without programming patterns or songs) by tapping on the black instrument keys. Using either a pair of headphones plugged into the PHONES jack, or a sound system connected to the RX5 STEREO AUDIO OUTPUTS or INDIVIDUAL AUDIO OUTPUTS, turn the RX5 ON and tap any of the black instrument keys, while adjusting the MASTER VOLUME and/or INSTRUMENT VOLUME faders until you can hear the RX5 s instruments at a comfortable listening level. You can now play all the instrument keys to become familiar with their sound. The sounds you will hear initially will be RX5's Internal voices. They are pre-assigned to the instrument keys as shown in the following chart. If you are using the RX5 s stereo outputs, you will find that the instruments are panned to different positions in the stereo field. Each pair of instrument keys (i.e., each output channel) has a set stereo pan position. If you are using the individual outputs you can, of course, use the pan controls on your mixer to pan the instruments to any desired position. The following chart indicates the stereo positions corresponding to each pair of instrument keys. Stereo positions are indicated by numbers. 15 means LEFT, 1 means RIGHT, and the other numbers are equally spaced in between (8 means CENTER). These are equivalent to the stereo numbers 1/15 thru 15/1 on the Yamaha RX11 and RX15 Digital Rhythm Programmers.
11 6 Up to 12 sounds may be played simultaneously on the RX5. However, if you press two instrument keys in the same pair (for example, A and M, or Land X) you will only hear one sound, because only one sound can be output from each of the RX5 s 12 output channels. INSTRUMENT VOLUME Using the INSTRUMENT VOLUME fader controls, you can adjust the output volume of each pair of instrument keys (A and M, B and N, etc.) and balance the overall sound of the RX5. The level of each voice can be independently programmed independently of the INSTRUMENT VOLUME fader setting. Refer to EDIT VOICE JOB #05. The level of each instrument key can also be independently programmed. Refer to KEY ASSIGN JOB #02. ACCENTS Pressing any instrument key while holding either of the green ACCENT keys causes that instrument to sound at its ACCENT 1 or ACCENT 2 level. This applies whether the RX5 is being played in real time, or programmed in either the Real Time Write or Step Write Modes. Accents allow you to add natural dynamics to your drum patterns. Two accent levels can be set for each instrument key. Refer to KEY ASSIGN JOB #05. THE REVERSE FUNCTION Pressing the Reverse key allows you to play any of the RX5 s voices in reverse. This applies whether the RX5 is being played in real time, or programmed in either the Real Time Write or Step Write Modes. When the Reverse key is ON, its LED will light. NOTE: Using the Reverse function plays a voice with its ORIGINAL E.G. (Envelope Generator) parameter values (though of course reversed) even if these values have been edited using VOICE EDIT JOB #03. Also, the Reverse function does NOT reverse Pitch Bend parameters (refer to VOICE EDIT JOB #04) so if your voice bends UP in pitch, it will do the same when reversed. THE DAMP FUNCTION The Damp function allows you to damp sustained sounds, a particularly realistic effect when used with cymbals. This function can only be used when the RX5 is in the Real Time Write Mode (refer to REAL TIME WRITE MODE in the PATTERN S chapter). This is the procedure for damping sounds: 1. Record a Pattern, using the Real Time or Step Write method. 2. Press PATTERN SONG to enter the Pattern Mode, then press REAL TIME WRITE and START. You can now listen to the Pattern you have written. 3. Press the Damp key. The DAMP LED will light. 4. You can now damp any note in the Pattern, by pressing the appropriate instrument key. For example, if you press the CRASH key just after a cymbal crash sound is heard, the sound will be damped at exactly the point at which you pressed the CRASH key. When the Pattern playback recycles, you will hear the effect of the Damp. NOTE: The Damp function is dependent on the Quantize Rate. (Refer to the QUANTIZE section of the PATTERN S chapter). The Damp point will be moved to the nearest Quantize division. Also, if you damp a note during the first half of the FIRST quantize division following the start of the note, the note will be cleared (erased). So, for free time damping, it is best to turn the Quantize OFF. 5. Press DAMP again to exit the Damp function. The DAMP LED will go out. The RX5 will continue in the Real Time Write Mode. You can now exit this mode in the normal manner, or enter more notes, which can also be damped (return to Step 3 above). The Damp function can also be controlled from an external MIDI keyboard. The MIDI MODE chapter describes how to control the RX5 from a MIDI keyboard. The Damp function can be controlled as follows: 1.Connect the MIDI OUT of the MIDI keyboard to the MIDI IN of the RX5. Set the RX5 so that it can be played from the MIDI keyboard. Refer to MIDI JOB # Start writing a Pattern in the Real Time Mode. 3. Press DAMP. The DAMP LED will light. Now, when you play the RX5 from the MIDI keyboard, it will receive NOTE OFF signals as well as NOTE ON signals. When it receives a NOTE OFF signal (as you release a key) the instrument sound will be damped. This can be especially convenient if, for example, you are using the RX5 in its Tunable Note Mode (refer to MIDI JOB #04) to play an Electric Bass voice-you can play clearly articulated notes, which are held as long as you hold a key, just as with a real bass (but check the following NOTE when doing this!) NOTE: The Damp function is dependent on the Quantize Rate. (Refer to the QUANTIZE section of the PATTERN S chapter). The Damp point will be moved to the nearest Quantize division. Also, if you damp (release) a note during the first half of the FIRST quantize division following the start of the note, the NOTE OFF signal will be ignored, and the note will NOT be damped. So, for free time damping, it is best to turn the Quantize OFF. 4. Press DAMP again to exit the Damp function. The DAMP LED will go out. The RX5 will continue in the Real Time Write Mode. You can now exit this mode in the normal manner, or enter more notes in the normal manner. At any time while in the Real Time Mode, you can press DAMP again to activate the Damp Mode. NOTE: While using the Damp function, you can NOT enter any new notes, even though the RX5 is in the Real Time Write Mode. You can, however, clear notes during the Damp function.
12 7 THE WAVEFORM DATA CARTRIDGE The RX5 comes with a Yamaha Waveform Data Cartridge as standard. This cartridge contains a further 28 voices, listed below, which can be assigned lo any instrument keys on the RX5. You can now choose to either accept the new cartridge voices, or retain the voices that are now in the RX5 s Voice Edit Memory (which came from the previous cartridge that was used). If you DO NOT wish to accept the new cartridge voices, press -1/NO. The RX5 will return to the Select Pattern Mode. If you DO wish to accept the new cartridge voices, press +1/YES. The LCD will show WAVEFORM DATA CARTRIDGE VOICE LIST 1: SD3 Snare Drum 2: BD3 Bass Drum 3: CgaHMT Conga (High Muted) 4: CgaHOP Conga (High Open) 5: CgaLO Conga (Low) 6: BgoHl Bongo (High) 7: BgoLO Bongo (Low) 8: TimblH Timbale (High) 9: TimblL Timbale (Low) 10: AgoHl Agogo (High) 11: AgoLO Agogo (Low) 12: Cuica Cuica 13: Cstnt Castanet 14: Whstl Whistle 15: Timpn Timpani 16: GlsCsh Glass Crash effect 17: Gun Gunshot effect 18: FMprc1 Synth-percussion (high) 19: FMprc2 Synth-percussion (medium) 20: FMprc3 Synth-percussion (low) 21: EbassH Electric Bass Gtr (high) 22: EbassL Electric Bass Gtr (low) 23: DXorch Synth-orchestra 24: DXmrmb Synth-marimba 25: DXclav Synth-clavinet 26: Hey Vocal Sound 27: Wao Vocal Sound 28: Ooo Vocal Sound The cartridge should be inserted into the WAVEFORM DATA CARTRIDGE slot on the RX5 s rear panel while the power is OFF. Then turn the RX5 power ON. If this is the first time you have inserted a Waveform Data Cartridge, or if you have inserted a different Waveform Data Cartridge to the one that was previously inserted, the LCD will show: You now have another chance to cancel the new cartridge voices, by pressing -1/NO. To accept the new cartridge voices, press +1/YES again. The RX5 will return to the Select Pattern Mode. Refer to the next section for details on how you can assign the cartridge voices to the instrument keys. NOTE: If you turn on the RX5 without having inserted a Waveform Data Cartridge, keys to which a cartridge voice was assigned will not sound. Also, if you select a function in which the LCD displays voices (for example, KEY ASSIGN JOB #01, described in the next section) the LCD will show the following types of displays. Cartridge voice was assigned to this key Copied Voice location assigned to this key contained a Cartridge voice Turn the RX5 power OFF again, and insert a Waveform Data Cartridge.
13 8 ASSIGNING OTHER VOICES TO INSTRUMENT KEYS Using KEY ASSIGN JOB #01 you can assign any voices from the three voice memories (Internal, RAM, Cartridge) to the 24 instrument keys. The following Key Assign chart lists all the instruments (and RAM positions) available at each pair of instrument keys, in their factory preset locations. The RX5 s RAM allows you to copy up to 12 Internal or Cartridge voices, and edit them to make new voices. Of course, you can edit voices in their original locations, but the RAM conveniently enables you to have a further 12 voices instantly available and assign them to any key. On the LCD, RAM voice names are preceded by Cp, which stands for Copied. Refer to KEY ASSIGN JOB #09 to see how to copy voices into the RAM. RAM stands for Random Access Memory. 1. Press KEY ASSIGN. then select Job #01 by pressing JOB then 0 then Press the instrument key to which a voice is to be assigned. Example: key A. 4. Press any Mode key, or the PATTERN/SONG key, to exit the KEY ASSIGN Mode. You can also assign voices to keys other than those shown in the above chart enabling you to set any voice in any stereo position, when using the RX5 s stereo outputs. Refer to KEY ASSIGN JOB #09 to see how to re-assign Internal voices to any key. Refer to KEY ASSIGN JOB #06 to see how to re-assign Copied and Cartridge voices to any key. 3. Use the -1/NO and +1/YES keys to step through the voices which are available at the selected key. When the LCD shows the desired voice, it is automatically assigned to the selected key. Internal voices are preceded by Int, Copied voices are preceded by Cp and Cartridge voices are preceded by Crt. Example: Cartridge voice BASS DRUM 3.
14 9 OVERVIEW The Pattern operations available on the RX5 let you: Write (record) up to 100 rhythm Patterns, using either Real Time Write or Step Write. Select a Pattern and play it at any tempo. Clear (Erase) a Pattern, or a single instrument in a Pattern. Alter Pattern Write functions, including Quantize, Swing and Click. Copy or append (connect) Patterns. Edit Patterns (alter 5 parameters relating to individual notes). Check the remaining Pattern memory of the RX5. The RX5 contains a variety of factory-programmed Patterns in Pattern locations 00 thru 54. These include basic rock rhythms, complex fills, syn-drum type sequences, and interesting melodic Patterns. These Patterns are permanently stored in the Rx5 s internal memory. So if you clear them, or edit (alter) them to make your own Patterns, the original preset Patterns are still available and can be re-loaded into the Pattern locations simply by holding the ACCENT 1 key while you turn the RX5 s power on. NOTE: Some of the Song/Pattern Operation keys on the RX5 have two functions. The UPPER function written on each key applies to the Pattern Mode. ENTERING THE PATTERN MODE All Pattern operations are preceded by entering the Pattern Mode. When you turn on the RX5. the Pattern Select Mode is automatically selected (unless you have inserted a different Waveform data Cartridge than the one that was previously used). If the RX5 is already in use, in a different mode, press PATTERN/SONG. Repeated pressing of this key switches the RX5 between the Pattern Mode and the Song Mode. When the Pattern Mode is selected, the PTN (Pattern Mode) LED will light. The LCD will show the last Pattern number that was selected, plus its time signature and number of bars (measures). You ll also see a flashing cursor. Whenever this appears, it means you can enter data relating to the parameter adjacent to the cursor-in this case, the Pattern number. You will also see a w in the right upper corner of the LCD if the Pattern already contains data ( w stands for written ). This is a more convenient way of selecting a Pattern in a distant number range. FUNCTION PATTERN SELECTION To select a Pattern for play, editing, etc. To select an empty Pattern for writing. The RX5 can store up to 100 Patterns, numbered 00 thru 99. Once you have selected a Pattern, you can then play the Pattern, edit it. copy it, clear (erase) it and write on it (to add more notes). You can also select an empty Pattern (one that contains no data) prior to writing a new Pattern. In the Pattern Select Mode, there are two methods of selecting Patterns /NO AND +1/YES KEYS This is a convenient way of selecting an adjacent or nearby Pattern. Pressing the -1/NO key selects the Pattern number immediately BELOW the current Pattern number. Pressing the +1/YES key selects the Pattern number immediately ABOVE the current Pattern number. 2. NUMERIC KEY PAD This is a convenient way of selecting a Pattern in a distant number range. Use the Numeric Key Pad to enter a two-digit Pattern number. Pattern numbers below 10 must be preceded by a zero. For example, for Pattern 5. enter 0 then 5. FUNCTION PATTERN PLAY Continuous play of a selected Pattern. Once a Pattern is written, the Pattern Play function will repeatedly play the Pattern until you stop play. 1. After selecting a Pattern, press START.
15 10 During play, the RUN LED will light. Also, as Pattern 00 is a two-bar Pattern, the LCD will alternate between bar 1 and bar 2, as these bars are played. 2. New Patterns can be selected during play, using either of the two methods described in PATTERN SELECTION. The newly selected Pattern will commence playing immediately after the last beat of the first Pattern. 3. To stop play, press STOP/CONTINUE. The RUN LED will go out, and the LCD will show the bar in which play was stopped. 4. To restart play, press START to play from the beginning of the Pattern, or STOP/ CONTINUE, to play from the point at which play was stopped. During Pattern Play, you can alter the Tempo, turn on the Click function and change the Click rate. These functions are described later in this chapter. REAL TlME WRITE MODE NOTE: The Quantize Function, described later in this chapter, needs to be understood before you can write a Pattern. We suggest that you read the Quantize section, after reading this section, before writing a Pattern. If the Memory Protect is ON, the LCD will show MEMORY PROTECTED when Real Time Write is selected, indicating that writing cannot be carried out. Use UTILITY JOB #03 to turn off the Memory Protect function. 2. To set the first part of the time signature of the Pattern, use the Numeric Key Pad to enter a two-digit number. Range: Press ACCENT 2 to move the cursor to the next position, and use the Numeric Key Pad to set the second part of the time signature. NOTE: This time, refer to the fraction numbers written on each key. Numbers available are 1/2, 1/4, 1/6, 1/8, 1/12, 1/16, 1/24 and 1/32. (1/48 can NOT be used for time signature). 4. Press ACCENT 2 to move the cursor to the Pattern Length position, and use the Numeric Key Pad to enter a two-digit number, corresponding to the number of bars in the Pattern. Range: Example: Time Signature 6/8, Pattern Length 4 bars. FUNCTION Write a Pattern using the Real Time Write function. This is the first of two ways of writing Patterns on the RX5 It lets you play a Pattern on the instrument keys, while listening to a click guide. You can add instruments and rhythms until the Pattern is complete. The advantage of this method is that you can actually hear the Pattern being built up as you write it, as opposed to Step Write, where a Pattern is built up without hearing it. SETTING PATTERN PARAMETERS Prior to writing a new Pattern its parameters the time signature and length (in bars) must be set. 1. In the Pattern Mode, press REAL TIME WRITE. The LCD will show the default setting of 4/4, one bar length. NOTE: If the selected Pattern already contains data, the cursor will not appear, as time signature and Pattern length are already fixed. You can now write on this Pattern, to add extra notes, if desired. You can use the ACCENT 2 key again to move the cursor, should you wish to change any settings prior to writing. If the default settings (4/4 time, 1 bar) are acceptable, steps 2 thru 4 can be omitted. You can exit the Real Time Write Mode at any time by pressing STOP/CONTINUE. WRITING A PATTERN When you write a Pattern, you will hear a Click guide, with an accent on the first beat of each bar. This can be set at different rates and Levels, as described later in this chapter. The Tempo can be set in a number of ways, as described later in this chapter. 1. Once the Pattern parameters have been set, press START to commence writing. The RUN LED will light, and the LCD will show the current bar being written (if the Pattern is over one bar in length). The RX5 will continue cycling through the Pattern, while you build up a Pattern. 2. Write the Pattern by playing on the instrument keys. You can play one instrument at a time. listen to it as the Pattern recycles, and gradually add other instruments. Accented beats can be entered by holding down one of the green ACCENT keys while playing an instrument. (Refer to ACCENTS in THE INSTRUMENTS chapter). Mistakes can be erased by holding the CLEAR key, and tapping the instrument key at the time of the note which is to be cleared. During Real Time Write, you can alter the Tempo, Quantize, Swing and Click functions. These functions are described later in this chapter.
16 11 3. Once you ve written a Pattern, press STOP. The RUN LED will go out. You can now play your Pattern by pressing START. You can also select another Pattern for writing: an empty one, to create a new Pattern, or an already-written Pattern to which you can add new instruments or notes. WRITING A PATTERN 1. Once the Pattern parameters have been set, press START to commence writing. NOTE: When adding new data to a previously-written Pattern, if you write a note where a previously-written note occurs on the same output channel, the original note will be erased. Each output channel corresponds to a pair of instrument keys (A and M, Band N, etc.) The RX5 is a polyphonic unit, with a maximum capacity of 12 notes sounding at any one time. STEP WRITE MODE NOTE: The Quantize Function, described later in this chapter, needs to be understood before you can write a Pattern. We suggest that you read the Quantize section, after reading this section, before writing a Pattern. FUNCTION Write a pattern using the Step Write function. This is the second of two ways of writing Patterns on the RX5. It lets you create a Pattern, using the instrument keys to enter single notes at preselected beat intervals. You add instruments and rhythms one at a time until the Pattern is complete. This is an ideal way for creating perfectly-timed Patterns, especially if reading from a score, It also allows you to create Patterns that are too complex or rapid to be played in Real Time. You can keep a written record of a Pattern as you write it. Refer to the PATTERN CHART at the end of this manual. SETTING PATTERN PARAMETERS Prior to writing a new Pattern its parameters the time signature and length (in bars) must be set. This is described in the REAL TIME WRITE MODE section of this chapter. Briefly, this is the Pattern Parameter setting procedure. 1. In the Pattern Mode, press STEP WRITE. If the LCD shows MEMORY PROTECTED writing cannot be carried out. Use UTILITY JOB #03 to turn off the Memory Protect function. 2. Set the first part of the time signature, using the 10-keys. 3. Press ACCENT 2 to move the cursor, and press one of the lo-keys to set the second part of the time signature. 4. Press ACCENT 2 to move the cursor, and use the 10-keys to enter the Pattern length. If the default settings (4/4 time, 1 bar) are acceptable, steps 2 thru 4 can be omitted. You can exit the Step Write Mode at any time by pressing STOP/CONTINUE. This display prompts you to input a note on the first beat of bar You can EITHER: Write a note by tapping an instrument key. OR: Enter a rest by pressing +1/YES. In either case the beat will advance one count, and you can enter the next note. This process continues up to the last beat of the last bar of the Pattern. The number of beats in a bar is determined by the setting of the Quantize function (described later in this chapter) and is NOT necessarily the same as the number of beats in the time signature. The Pattern then starts again at the beginning, enabling you to enter more notes and instruments. As you can only enter one instrument at a time, simultaneous notes at the same beat are entered on successive cycles through the Pattern. Accented beats can be entered by holding down one of the green ACCENT keys while playing an instrument. (Refer to ACCENTS in THE INSTRUMENTS chapter). Mistakes can be erased by stepping through the Pattern until you locate the erroneous note, then holding the CLEAR key, and tapping the appropriate instrument key. You can step through a Pattern rapidly by holding down +1/YES useful in the case of long or complex Patterns. You can also use the -1/NO key to back up through the Pattern at any time. This allows you to rapidly enter several notes at the same beat, without having to cycle through the entire Pattern. Simply press -1/NO after entering a note, to return to the same beat and enter another note. NOTE: The -1/NO. unlike the +1/YES key (which enters rests) does NOT enter any data. It is ONLY for stepping backwards through the Pattern. Holding down this key allows continuous backward stepping. You will NOT hear any sound when you use this key. During Step Write, you can alter the Tempo, Quantize, Swing and Click functions. These functions are described later in this chapter. 3. Once you ve written a Pattern, press STOP. You can now play your Pattern by pressing START. You can also select another Pattern for writing: an empty one, to create a new Pattern, or an existing Pattern to which you can add new instruments or notes. NOTE: When adding new data to a previously-written Pattern, if you write a note where a previously-written note occurs on the SAME output channel, the original note will be erased. Each output channel corresponds to a pair of instrument keys (A and M, B and N, etc.)
17 12 PATTERN/INSTRUMENT CLEAR 2B. To clear a selected instrument, press 2. FUNCTION To clear a selected Pattern, or a selected instrument in a Pattern. You can instantly clear (erase) a whole Pattern. This would be done, for example, if the RX5 s Pattern memory were full and you wanted to write another Pattern. You can also clear a selected instrument within a Pattern. This gives you an easy way of re-arranging a Pattern to make a new one. Simply remove an instrument (or several instruments) and write new parts as needed. 3. Press the instrument key corresponding to the instrument you wish to clear. You can also clear all 100 Patterns simultaneously. Refer to UTILITY MODE JOB # To clear the instrument, press START. 1. Press PATTERN/SONG once or twice and select the Pattern you wish to clear, then press CLEAR. If you wish, you can now cancel the Clear operation by pressing -1/NO. To carry out the Clear operation, press +1/YES, to see: You can now either clear the whole Pattern, or clear a single instrument in the selected Pattern. If the Memory Protect is ON, the LCD will show MEMORY PROTECTED when the Clear function is selected, indicating that Pattern Clear cannot be carried out. Use UTILITY JOB #03 to turn off the Memory Protect function. Followed by 2A. To clear the whole Pattern, press 1. If you wish, you can now cancel the Clear operation by pressing -1/NO. To carry out the Clear operation, press +1/YES, to see: Followed by QUANTlZE FUNCTION FUNCTION During Rest Time Write, to automatically correct the timing of a Pattern to a pre-selected beat length. During Step Write, to set the minimum beat length for entry of notes. Quantize determines the smallest note-values which can be written into a Pattern. Any notes played between these values will be moved to the nearest value, or beat These are NOT to be confused with the beats a bar is divided into. For example, setting the Quantize at 1/8 means that the shortest notes that can be written are 1/8th notes i.e., the maximum number of notes that can be written in a 4/4 bar is 8. Application of the Quantize function depends on which Pattern writing mode you are using.
18 13 REAL TIME WRITE In the Real Time Write mode, the Quantize function is used as a timing correction device. If the Quantize is set to OFF, your Pattern will sound exactly as you play it, with all the timing subtleties of your original performance. (Actually, when the Quantize is OFF, it is recording your performance in increments of 1/96th notes, which are short enough to capture the finest nuances of timing). However, the Quantize function can be used to make the writing of perfectly-timed Patterns easy and rapid. For example, you could set the Quantize Rate at 1/4, and write in a simple bass drum part. Even if you play the notes off the beat, you ll hear them sound exactly on the beat as soon as the Pattern recycles. STEP WRITE In the Step Write mode, the Quantize function is used to set the minimum length of each beat. Although your Pattern may contain a complex arrangement of rhythms, you can save Pattern writing time by writing each instrument in at the appropriate Quantize Rate, in a similar fashion to the use of Quantize for Real Time writing. Here s the same Pattern we gave as an example of Quantized Real Time writing, displayed as a Step Write chart. The white dots indicate notes, entered by pressing an instrument key; the black dots indicate rests, entered by pressing +1/YES. You could then, without stopping Real Time writing, change the Quantize rate to 1/8 and record an off-beat Snare Drum part. If you wrote the whole Pattern at a Quantize rate of 1/16. the chart would look like this. Then you could reset to 1/16 Quantize and add a more complex Hi-Hat part, to complete the following basic rhythm Pattern. In this example the first Hi-Hat note is open, the rest are closed. You could even turn the Quantize OFF and add ad-lib Tom or Latin percussion sounds. if, for example, your Pattern were to be used as an intro or fill. So it s easy to see that the intelligent use of Quantize can substantially cut down on the number of rests you need to enter. You can also use the Quantize function to facilitate writing complex rhythms such as the snare drum triplets in the next example.
19 14 NOTE: Quantize can be set at any time. After pressing the QUANTIZE key you must then press the key corresponding to the function the RX5 was using prior lo setting the Quantize rate, should you wish to return to that function. For example, if you were writing in Real Time, press REAL TIME WRITE after setting the Quantize rate so that you can continue writing. Using a high Quantize Rate allows you to add subtle timing variations. For example, many rock drummers create an exciting feel by slightly delaying their off-beat on the snare drum. This is easy to create in the Step Write Mode, In this example, the Snare Drum is entered using a Quantize rate of 1/48. The 2nd and 4th quarter-notes fall at beats 13 and 37 respectively, so the Snare Drum notes are entered at beats 14 and 38 to provide the delay. FUNCTION TEMPO FUNCTION To set the tempo (speed) of Pattern play, Song Play, Chain play or Pattern write. Tempo can be set at any time. The range is quarter-notes per minute. NOTE: After pressing TEMPO you must then press the key corresponding to the function the RX5 was using prior to setting the Tempo, should you wish to return to that function. For example, if you were writing in Real Time, press REAL TIME WRITE after setting the Tempo so that you can continue writing. There are three ways to set the Tempo. 1. TEMPO SLIDER When the Tempo slider is moved, the tempo will jump to the position corresponding to the position of the slider, rather than changing gradually. This is a useful way to rapidly set an approximate tempo. If you wish to see the Tempo setting, press TEMPO. Example: Pattern Select Mode. 1. Before or during Pattern writing, press QUANTIZE/DELETE /NO AND +1/YES KEYS This is a convenient way of slightly altering, or gradually altering, the Tempo. 2. Use the Numeric Key Pad to set the Quantize Rate. The fraction numbers on the Numeric Key Pad indicate the Quantize Rate. The LCD will indicate the new Quantize Rate. Range: 1/2, 1/4, 1/6, 1/8, 1/12, 1/16, 1/24, 1/32, 1/48, OFF. In the Step Write Mode, if the Quantize is set to OFF, you can write a Pattern with beat lengths of 1/96th notes. During Step Write, if you change the Quantize Rate after the first beat of a bar, writing will continue at the old Quantize Rate until the Pattern recycles (or, in a Pattern containing more than one bar, until you reach the next bar). 1. Press TEMPO. The LCD will show the current Tempo. 2. Press a -1/NO key or +1/YES key to decrease or increase the Tempo by one beat per minute. Holding one of these keys causes a continuous smooth change. 3. NUMERIC KEY PAD This is a convenient way of entering an exact Tempo setting. If carried out during play or write, the tempo will switch to the new setting as soon as the last figure of the new tempo is entered. 1. Press TEMPO. The LCD will show the current Tempo. 2. Use the Numeric Key Pad to enter a two-digit tempo (in the case of a tempo of 40-99) or a three-digit Tempo (in the case of tempo of 100 to 250).


20 15 FUNCTION CLICK FUNCTION To provide a metronome-type click during Pattern play or write. The Click function gives you an exact rhythm guide, for writing a Pattern in Real Time, or for play. It is heard via headphones or via a separate Click Output jack which can be connected to your mixer or amplifier. The Click can be set to sound once every 1/2, 1/4, 1/6, 1/8, 1/12, 1/16, 1/24 or 1/32 note. The pitch of the Click is higher on the first beat of each bar. The Click rate can be set before or during any Pattern operations. NOTE: After setting the Click function you must then press the key corresponding to the function the RX5 was using prior to pressing CLICK, should you wish to return to that function. For example, if you were writing in Real Time, press REAL TIME WRITE after setting the Click function, so that you can continue writing. A setting of 67% creates a triplet-type shuffle effect. 1. Press CLICK. The LCD will show the current Click Rate. Example: Pattern select Mode. 2. Use the Numeric Key Pad to set the Click Rate. 3. The Click always functions during Real Time writing. To turn the Click off or on for Pattern Play, press -1/NO (OFF) or +1/YES (ON). Example: Click ON; 1/4 note. 1. Before or during Pattern writing, press SWING/REPEAT. Example: during Real Time Write. 4. The level of the Click is adjusted using the CLICK VOLUME slider. FUNCTION SWlNG FUNCTION To automatically add a swing feel to a Pattern written in Real Time. 2. Press the +1/YES key to step forward through the Swing Value settings, until you reach the desired setting. The -1/NO key moves you backwards through the Swing Value settings, until you reach the OFF setting. Range: 54%, 58%, 63%, 67%, 71%. The Swing function offers a simple and rapid way to write a Pattern that contains a jazz-type swing feel. It can ONLY be used with a Quantize rate of 1/8 or 1/16. The Swing function works by delaying the off-beats in a bar. The amount of swing is calculated by taking a quarter-note as 100% With no swing, the off-beats will occur at 50%. You can set the amount of delay (swing) at five points between 54% (a very subtle effect) and 71% (a very pronounced swing). NOTE: After setting the Swing function you must press the key corresponding to the function the RX5 was using prior to pressing SWING, should you wish to return to that function. For example, if you were writing in Real Time, press REALTIME WRITE after setting the Swing function, so that you can continue writing.
21 16 FUNCTION PATTERN COPY/APPEND To copy a Pattern to another destination, or append a Pattern to another Pattern. The Pattern Copy function lets you copy any selected Pattern to another destination in the RX5 s Pattern memory. This is useful if you want to copy a Pattern in order to alter it to create a new Pattern, while retaining the original Pattern. It is also useful if you want to have the Patterns in a particular order in the RX5's memory (so that, for example, you can easily play one Pattern followed by the adjacent Pattern, by pressing the +1/YES key during play). The Pattern Append function lets you join any Pattern onto the end of any other Pattern, to form a new, longer Pattern. The Patterns MUST have the same time signatures. You could append several Patterns to create a long Pattern which could function as part of a song. This would save on the number of parts needed to create a song-each section of the song (verse, chorus, etc.) could correspond to a different Pattern. It would then be very easy to re-arrange a song. You can even append a Pattern to itself, to create the same Pattern played twice. 4. Press START. If the Pattern destination is empty, the Pattern will immediately be copied. Followed by Operation of the Pattern Copy and Pattern Append functions is slightly different. If the Pattern destination already contains a Pattern (which will be erased if you carry out the copy operation) the LCD will show. If the Memory Protect is ON, the LCD will show MEMORY PROTECTED when the Copy key is pressed, indicating that Pattern Copy/Append cannot be carried out. Use UTILITY JOB #03 to turn off the Memory Protect function. PATTERN COPY 1. Press PATTERN/SONG once or twice and select the Pattern you wish to copy, then press COPY. You can now press -1/NO, if you do not wish to copy to this Pattern destination. This will return you to the select Pattern Mode, from which you can once again call the Pattern Copy function, and select another destination. If you wish to copy to the selected destination (re-writing the Pattern contained there) press START again. The LCD will show completed and return to the Select pattern Mode). PATTERN APPEND 2. To select the Pattern Copy function, press Press PATTERN/SONG once or twice and select the Pattern you wish to append, then press COPY. 3. Use the Numeric Key Pad to enter the number of the Pattern destination to which the selected Pattern will be copied. 2. To select the Pattern Append function, press 2


22 17 You can also change any voice in a Pattern to another voice (refer to UTILITY JOB #04). 3. Use the Numeric Key Pad to enter the number of the Pattern to which the selected Pattern will be appended. 1. Press PATTERN/SONG once or twice and select the Pattern you wish to edit, then press EDIT PATTERN/VOLUME CHANGE. 4. To append the Pattern, press START. If the Memory Protect is ON, the LCD will show MEMORY PROTECTED when EDIT VOICE is pressed, indicating that Pattern editing cannot be carried out. Use UTILITY JOB #03 to turn off the Memory Protect function. 2. To enter the Pattern Edit Mode, press START. The LCD will show the last Pattern Edit parameter that was selected, and the instrument that plays the first note in the Pattern. Followed by PATTERN EDlTlNG FUNCTION To edit the pitch, level, attack, decay and reverse on/off parameters of individual notes in a selected Pattern. The al symbol indicates that the all instruments note search mode is active. Clocks shown on the LCD are actually 96th notes. These are the smallest noteincrements that can be recorded by the RX5. and enable you to exactly locate a note. For example, notes in the Real Time Write Pattern example given in the QUANTIZE section of this chapter would occur at the following clocks. The Pattern Edit function is an extremely useful and creative feature of the RX5 It allows you to step through a Pattern, note by note, and alter the parameters of each individual note. You can step through all instruments in the Pattern, or select a single instrument and step through only the notes that it plays. Live drums have many nuances of level, attack, decay and even pitch, dependent on how hard they are played. With the Pattern Edit Mode, it s easy to program these small variations. You can also use this Mode to delete a note by setting its level to zero: add sound effects by reversing sounds; alter the pitch of tuned instruments such as the RX5 s bass and synthesizer voices, to create melody lines; create a fade-in or fade-out by programming a gradual increase or decrease of levels. Parameters set in this mode refer to the NOTE only, and not the VOICE that is playing or the KEY to which it is assigned. They are therefore independent of the parameters set using EDIT VOICE JOBS #02, #03 #04 or the KEY ASSIGN JOB #02. You can now search through the Pattern to find notes to be edited.

23 18 NOTE SEARCH To locate notes for editing, you can search through all notes in a Pattern, or only notes played by a selected instrument. 1. To search through all notes in a Pattern, press +1/YES. The LCD will show the next note in the Pattern, which may occur at a different time, on a different instrument. Note the al symbol on the LCD, indicating that the all instruments note search mode is active. 2. Use the -1/NO and +1/YES keys or the DATA ENTRY slider to change the pitch by semitone units. Holding the 0 key while using the -1/NO or +1/YES key to change pitch allows pitch change in 10-cent (1/10th semitone) units. Pitch values are shown in 10-cent (1/10th semitone) units. Range: ±60 semitones displayed as ± 600 units. Actual pitch range is +24/-36 semitones (actual pitch cannot be set outside these limits). 3. As soon as you change this parameter value, it will start flashing on the LCD. Press START to enter the new value. The parameter value will then stop flashing. 4. You can now select another parameter for editing, or exit the Pattern edit Mode by pressing STOP/CONTINUE. The LCD will return to the Select pattern display. PARAMETER 2: LEVEL 1. To select Level, press 2. Repeated pressings of +1/YES will move you through the Pattern. If you hold down this key, you can fast forward through the Pattern. The -1/NO key works in the opposite direction, but you will NOT hear any notes when using it. 2. To select an instrument for note search, press its instrument key. The al symbol will change to 01, indicating that the first note of the selected instrument has been located. 2. Use the -1/NO and +1/YES keys or the DATA ENTRY slider to change the level. Range: ± 31. Actual level range is 00/+31 (actual level cannot be set outside these limits). Now, when you press +1/YES to search through the Pattern, the RX5 will automatically locate the next note played by the selected instrument, and display its note number. In our Pattern example, the Hi Hat (closed) plays eight notes. Once you locate the last note (with a displayed note number of 08 ) the next pressing of the +1/YES key will return you to note At any time, you can select another instrument, by pressing its instrument key. The LCD will show the first note played by that instrument. 4. To return to the all instruments note search mode, press EDIT PATTERN/VOLUME CHANGE. The LCD will show the first note in the Pattern, and display the al symbol. Having located a note, you can now select a parameter for editing. 5. Press ACCENT 2 to move the cursor to the parameter name position in the top right corner of the LCD. PARAMETER 1: PITCH 1. To select Pitch, press As soon as you change this parameter value, it will start flashing on the LCD. Press START to enter the new value. The parameter value will then stop flashing. 4. You can now select another parameter for editing, or exit the Pattern edit Mode by pressing STOP/CONTINUE. The LCD will return to the Select pattern display. PARAMETER 3: ATTACK 1. To select Attack, press Use the -1/NO and +1/YES keys or the DATA ENTRY slider to change the Attack Rate. Range: ± 63. Actual Attack Rate range is 01/+99 (actual Attack Rate cannot be set outside these limits).
24 19 NOTE: Long attacks create looping. Refer to EDIT VOICE JOB #03 for comments about this. 3. As soon as you change this parameter value, it will start flashing on the LCD. Press START to enter the new value. The parameter value will then stop flashing. 4. You can now select another parameter for editing, or exit the Pattern edit Mode by pressing STOP/CONTINUE. The LCD will return to the Select pattern display. PATTERN MEMORY CHECK This function allows you to check the remaining Pattern memory of the RX5, as a percentage of its total Pattern memory capacity. Refer to UTILITY JOB #01. PARAMETER 4: DECAY 1. To select Decay, press 4 2. Use the -1/NO and +1/YES keys or the DATA ENTRY slider to change the Decay Rate. Range: ±63. Actual Decay Rate range is 01/+99 (actual Decay Rates cannot be set outside these limits). NOTE: Long decays create looping. Refer to EDIT VOICE JOB #03 for comments about this. 3. As soon as you change this parameter value, it will start flashing on the LCD. Press START to enter the new value. The parameter value will then stop flashing. 4. You can now select another parameter for editing, or exit the Pattern edit Mode by pressing STOP/CONTINUE. The LCD will return to the Select pattern display. PARAMETER 5: REVERSE ON/OFF 1. To select Reverse, press Use the -1/NO and +1/YES keys or the DATA ENTRY slider to set the Reverse function ON or OFF. 3. As soon as you select ON or OFF, it will start flashing on the LCD. Press START to enter the new setting. ON or OFF will then stop flashing on the LCD. 4. You can now select another parameter for editing, or exit the Pattern edit Mode by pressing STOP/CONTINUE. The LCD will return to the Select pattern display.
, volume changes in a Song. Select a Song and play it at any tempo, or from any selected Part (location).")

25 20 OVERVIEW The Song operations available on the RX5 let you: Edit (assemble) up to 20 Songs, each consisting of up to 999 Parts. Each Song can be given a name, and an initial tempo. Insert repeats, tempo changes (accelerando, ritardando), volume changes in a Song. Select a Song and play it at any tempo, or from any selected Part (location). Set a named Search mark in a song, and locate it instantly, for playback or re-editing. Clear (Erase) a Song. Copy a Song, or part of a Song. Check the remaining Song memory of the RX5. The RX5 contains factory-programmed Songs in Song locations 00 thru 02, showing how you can put together interesting sequences of Patterns. These Songs are permanently stored in the RX5 s internal memory. So if you clear them, or edit (alter) them to make your own Songs, the original preset Songs are still available and can be re-loaded into the Song locations simply by holding the ACCENT 1 key while you turn the RX5's power on. Song 02 shows how you can use the RX5 as a complete musical instrument, programming melodic parts and sound effects as well as rhythms. It also contains Search Marks, named A, B, C, D and E to demonstrate the Search Mark function, which lets you instantly locate any selected Part of a Song. To use this convenient function, refer to JOB #01: SEARCH MARK later in this chapter. The function of the Song Mode is to allow you to connect Patterns in order to form a drum sequence for an entire Song. Each Song can contain up to 999 Parts. A Part can contain a Pattern, or other data such as a Repeat Command, a Tempo Change, a Volume Change or a Search Mark. SONG SELECTION FUNCTION To select a Song for play, editing, etc. To select an empty Song for writing. The RX5 can store up to 20 Songs, numbered 00 thru 19. Once you have selected a Song, you can then go on to play the Song, edit it, copy it, clear (erase) it. You can also select an empty Song (one that contains no data) prior to editing a new Song. Press PATTERN/SONG until the LCD indicates Song Mode, then use the Numeric Key Pad to enter a two-digit Song number. Song numbers below 10 must be preceded by a zero. For example, for Song 5, enter "0" then "5". SONG PLAY FUNCTION To play a selected Song. 1. Press PATTERN/SONG until the LCD indicates Song Mode, and use the 10- keys to select a Song. 2. Press START to play the Song. During play, the RUN LED will light. The LCD will indicate the current measure, Part number and Pattern number. NOTE: Some of the Song/Pattern Operation keys on the RX5 have two functions. The LOWER function written on each key applies to the Song Mode. ENTERING THE SONG MODE All Song operations are preceded by entering the Song Mode. Press PATTERN/SONG. Repeated pressing of this key switches the RX5 between the Pattern Mode and the Song Mode. When the Song Mode is selected, the SONG LED will light. The LCD will show the number of the last Song that was selected, plus its name, initial tempo and number of bars (measures). 3. To stop play, press STOP/CONTINUE. The RUN LED will go out, and the LCD will show the point in the Song at which play was stopped. 4. To restart play, press START to play from the beginning of the Song, or STOP/ CONTINUE, to play from the point at which play was stopped. 5. When the Song has finished playing, the LCD will again display the first measure and Part of the Song

26 21 During Song Play, you can alter the Tempo by moving the TEMPO slider control. or by pressing TEMPO and using the 10-keys or the +1/YES and -1/NO keys. The Click function can also be used during Song play, but it must be turned on in the Pattern Mode. Refer lo the PATTERN S chapter for a full description of these functions. REPEAT SONG PLAY FUNCTION Continuous play of a selected Song. This function allows you to play a Song repeatedly, until you press the STOP key. This can be useful when you are rehearsing a song. It can also aid composition, providing a continuous rhythm track while you work on ideas for a song. EDIT SONG MODE FUNCTION To connect Patterns in order to create a Song. In the Edit Song Mode, you can connect up to 999 Patterns to form a rhythm track for an entire Song. Each Pattern, when used in a Song, is called a Part. Parts can also contain other data such as repeats, tempo changes and volume changes. These are described later in this chapter. 1. Press PATTERN/SONG until the LCD indicates Song Mode, then use the Numeric Key Pad to select a Song. When editing a new Song, an empty Song should be selected. This will be indicated by a zero measure count on the LCD. 1. Press PATTERN/SONG until the LCD indicates Song Mode, then press SWING/ REPEAT. Songs that have already been edited can be selected for re-editing, in exactly the same manner. 2. Press REAL TIME WRlTE/EDlT SONG. 2. Use the +1/YES or -1/NO keys to turn the Repeat function On or OFF. 3. Press PATTERN/SONG to return to the Song Mode, then select and play a Song. The Song will play through and once it is finished, immediately recommence play. The LCD will at this point return to the beginning of the Song and restart counting of measures and Parts. If you wanted a pause between repeat plays of a Song, you could insert an empty Pattern (of any length) at the end of the Song. 4. The STOP/CONTINUE key is used in exactly the same way as normal Song play. If the selected Song already contains data, the LCD will show the data of the first Part. If the Memory Protect is ON, the LCD will show MEMORY PROTECTED when Real Time Write is selected, indicating that writing cannot be carried out. Use UTILITY JOB #03 to turn off the Memory Protect function. 3. The LCD is prompting you to enter the Pattern number for the first Part. Use the 10-keys to enter a Pattern number. If the displayed Part already contains a Pattern (in the case of a Song that has already been edited) you can change the Pattern by entering a new pattern number in the same way.
27 22 4. Press +1/YES to move to the next Part, and enter another Pattern number in the same way. You can also insert Repeals, Tempo Changes, Volume Changes and Search Marks by pressing the keys corresponding to those functions after pressing the INSERT key. 5. Continue moving through the Song, entering Pattern numbers as desired. It s a good idea to keep a written record of a Song, as you edit it. Refer to the SONG/CHAIN CHART at the end of this manual. You can move backwards through a Song using the -1/NO key. This lets you go back to check a Part. Any lime a Part is displayed, you can change the Pattern contained in that Part by entering a new Pattern number. Holding down a -1/NO or +1/YES key lets you move rapidly through a Song. 6. Once you have entered all the Parts of your Song, press PATTERN/SONG to exit the Edit Song Mode. You can now play your Song. FUNCTION INSERT FUNCTION To insert new Parts into a Song. The Insert Function lets you select any point in a Song that has already been assembled, and insert new Parts between the already-programmed Parts. For example, if you want to insert a Pattern between Parts 2 and 3 of a Song, this means that you have to insert a new Part Press PATTERN/SONG until the LCD indicates Song Mode, and use the Numeric Key Pad to select a song. Then press REAL TIME WRITE/EDIT SONG to enter the Edit Song Mode. 2. Use the +1/YES key to locate the Insert point in the selected Song. 3. Press STEP WRITE/INSERT. 4. The LCD is prompting you to insert a new Pattern number. Use the Numeric Key Pad to do this. Example: Pattern 99. The new Pattern has now been inserted. You can, at this time, change the new Pattern number before exiting the Edit Song Mode. If you use the +1/YES key to move forward through the Song, you will see that all following Parts have been moved forward by one step. 5. Press PATTERN/SONG to exit the Edit Song Mode.

28 23 FUNCTION DELETE FUNCTlON To delete parts from a Song. 3. Press QUANTIZE/DELETE The Delete Function works in the opposite way to the Insert Function. It lets you remove any Part from a Song that has already been assembled. For example, if you want to remove the Pattern that we inserted in our Song in the previous section, you would locate Part 3 and carry out the Delete Function. You can now press -1/NO if you wish to cancel the Delete operation. The LCD will return to the previous display. 4. To delete Pattern 99, press +1/YES. The LCD will now show that the selected Part (Part 003) has a new Pattern number. This was the pattern that was assigned to the following Part (Part 004) prior to the Delete operation. If you use the +1/YES key to move forward through the Song, you will see that all following Parts have been moved backward by one step. 5. Press PATTERN/SONG to exit the Edit Song Mode. You can also delete Parts containing Repeats, Tempo Changes, Volume Changes and Search Marks, in exactly the same way. 1. Press PATTERN/SONG until the LCD indicates Song Mode, and use the Numeric Key Pad to select a song. Then press REAL TIME WRITE/EDIT SONG to enter the Edit Song Mode. 2. Use the +1/YES key to locate the Delete point in the selected Song. FUNCTION PART COPY FUNCTION To copy a selected number of parts to a subsequent point in a Song. This function lets you choose a Part or group of Parts, and copy them to a later point in a Song, or to the end of the Song. Any Parts following the copy destination point will be cleared (erased). This function can really save time if you have programmed the Parts for a verse, for example, and want to repeat the same verse later in a Song You can copy the entire verse in one operation, instead of having to copy each individual Part. For example, suppose in this short Song, you want to copy Parts 2 and 3 onto the end of the Song.
29 24 1. Press PATTERN/SONG until the LCD indicates Song Mode, and use the Numeric Key Pad to select a song. Then press REAL TIME WRITE/EDIT SONG lo enter the Edit Song Mode. 2. Use the +1/YES key to locate the Copy destination point in the Song. You can also copy to a destination BEFORE the end of the Song, provided it comes AFTER the Parts which which are to be copied. Be careful! If you do this, ALL Parts following the selected destination will be cleared (erased). This example shows what happens if we copy Parts 2 and 3 to Part Press COPY. 4. Use the Numeric Key Pad to enter the number of the first Part of the section to be copied-a three-digit number. 5. The cursor will move to the next prompt. Enter the number of the last Part of the section to be copied (if copying only one Part, this number would be the same as the previous number entered). 6. Press START to carry out the Copy operation. The LCD will now display the empty Part following the last Part of the newly edited Song. In this example, it would be Part Press PATTERN/SONG to exit the Edit Song Mode.
30 25 REPEATS FUNCTION To enter repeat commands in a Song. Repeats can save a lot of editing time, by making it possible to repeat any Part or group of Parts up to 99 times. This is needed, for example, when the same rhythm plays through an entire verse. Repeats are entered in two operations. The Begin repeat command is entered at the start of the section which is to be repeated. Then the End Repeat is entered at the end of the section to be repeated, together with a number indicating the number of times that the section is to be repeated. Remember that the number of repeats should be ONE LESS than the total number of plays of the selected section. Each repeat command counts as a Part. In this example, Parts 3 and 4 are repeated twice, making a total of three plays of those Parts. 3. Press 1 to select a Begin Repeat command. 4. Continue editing (entering Pattern numbers) and when you reach the point at which the End repeat command is needed (for example, Part 5) press SWING/REPEAT then press 2 to select an End repeat command. ACTUAL PLAYING SEQUENCE The LCD will display 01 the default number of repeats. If only one repeat is needed, you can now press +1/YES to continue editing the Song. 5. To enter a different number of repeats, use the Numeric Key Pad entering a two-digit number (for example, 02). Range: You can enter any number of repeats in a Song. You can also nest repeat commands, so that a short repeat section can occur within a larger repeat section. This would be done, for example, if a whole verse were to be repeated (repeat commands at start and end of the verse) AND a short section within the verse were to be repeated (repeat commands at start and end of short section in the verse). You can actually enter up to ten nests of repeats, one inside another. You can now continue editing. Repeats are often entered AFTER all the Pattern numbers have been entered for a Song. Refer to the INSERT FUNCTION (described earlier in this chapter) and enter the repeats in the normal way, after pressing the INSERT key. Remember that a Repeat Command will create a new Part, and move all subsequent Parts forward. 1. Press PATTERN/SONG until the LCD indicates Song Mode, then use the Numeric Key Pad to select a Song. 2. Press REAL TIME WRITE/EDIT SONG and start editing the Song. When you reach the point at which the Begin Repeat command is needed (for example, Part 2) press SWING/REPEAT.
 or decrease (ritardando). You can set the overall range of the Tempo Change, and the duration of the change. A Tempo Change counts as a Part of a Song.")
31 26 FUNCTION TEMPO CHANGE FUNCTION To enter gradual tempo changes into a selected Song. This function allows you to enter a gradual change of tempo in a Song. The tempo can increase (accelerando) or decrease (ritardando). You can set the overall range of the Tempo Change, and the duration of the change. A Tempo Change counts as a Part of a Song. If you enter a Tempo Change during a repeat section, the Tempo Change will also be repeated, allowing you to make a gradual Tempo Change over a long period (longer than the maximum of 99 quarter-notes which can be set for a single Tempo Change). NOTE: When you play a Song that contains a Tempo Change, the final tempo of the Song will be different from the initial tempo. If you have not set an Initial Tempo for a Song, and you immediately play the Song again, it wilt commence play at the new tempo. Therefore, it is recommended that you always set the Initial tempo for a Song. Refer to JOB #04: INITIAL TEMPO. 1. Press PATTERN/SONG until the LCD indicates Song Mode, then use the 10-keys to select a Song. 2. Press REAL TIME WRITE/EDIT SONG to enter the Edit Song Mode, and start editing a Song. When you reach the point at which the Tempo Change is needed press CLICK/TEMPO CHANGE. NOTE: The overall Tempo range of the RX5 is quarter-notes/minute. The Tempo Change function can NOT alter the tempo beyond these limits. 5. Press ACCENT 2 to move the cursor to the Tempo Change duration position, and use the Numeric Key Pad to enter the Tempo Change duration. Range: 0 99 quarter-notes. You can use the ACCENT 2 key to move the cursor back and forth, to reset the two Tempo Change parameters, as needed. 6. The Tempo Change is now set, and you can press +1/YES to move on to the next Part and continue editing, or press PATTERN/SONG to exit the Edit Song Mode. Tempo Changes can be entered AFTER all the Pattern numbers have been entered for a Song. Refer to the INSERT FUNCTION (described earlier in this chapter) and enter the Tempo Change in the normal way, after pressing the INSERT key. Remember that a Tempo Change will create a new Part, and move all subsequent Parts forward. VOLUME CHANGE FUNCTION FUNCTION To enter a volume change at any point in a Song. This function allows you to enter a volume change at any location in a Song. The volume can increase or decrease. This can be used to add subtle dynamics to a Song, or for more pronounced or sudden volume changes. You could also enter a Volume Change at the start of a Song, to alter the overall level of the whole Song. A Volume Change counts as a Part of a Song. If you enter a Volume Change during a repeat section, the Volume Change will also be repeated, allowing you to make a gradual Volume Change over a long period. You could, for example, set a single Pattern to repeat at the end of a Song, together with a slight volume decrease. This would create a fade-out. The opposite approach (repeating Patterns at start of a Song, with slight volume increase) would create a fade-in. 3. Press 1 to select Accelerando (tempo increase) or 2 to select Ritardando (tempo decrease). As the operation is identical for both types of Tempo Change, we ll describe Accelerando only. The only difference is that the Tempo Change value is shown as a positive number for Accelerando, and a negative number for Ritardando. 1. Press PATTERN/SONG until the LCD indicates Song Mode, then use the Numeric Key Pad to select a Song. 2. Press REAL TIME WRITE/EDIT SONG to enter the Edit Song Mode, and start editing a Song. When you reach the point at which the Volume Change is needed press EDIT PATTERN/VOLUME CHANGE. 4. Use the Numeric Key Pad to set the value of the Tempo Change. Range: 0-99 quarter-notes/minute.

32 27 3. Press 1 to select Up (volume increase) or 2 to select Down (volume decrease). As the operation is identical for both types of Volume Change, we ll describe volume increase only. The only difference is that the Volume Change value is shown as a positive number for volume increase, and a negative number for volume decrease. If the Memory Protect is ON, the LCD will show MEMORY PROTECTED when the Copy key is pressed, indicating that Song Copy cannot be carried out. Use UTILITY JOB #03 to turn off the Memory Protect function. 2. Use the Numeric Key Pad to enter the number of the Song destination to which the selected Song will be copied. 4. Use the Numeric Key Pad to set the value of the Volume Change. Range: If more than one Volume Change command is entered into a Song, the resulting volume depends on the combination of Volume Changes. For example, if you enter a Volume Change of +5, then later in the a Song enter a Volume Change of -5, the combined Volume Change is zero, so the final level of the Song will be equal to its original level. 3. Press START. If the Song destination is empty, the Song will immediately be copied. Followed by NOTE: The Volume range of the RX5 is The Volume Change function can NOT alter the volume beyond these limits. 5. The Volume Change is now set, and you can press +1/YES to move on to the next Part and continue editing, or press PATTERN/SONG to exit the Edit Song Mode. Volume Changes can be entered AFTER all the Pattern numbers have been entered for a Song. Refer to the INSERT FUNCTION (described earlier in this chapter) and enter the Volume Change in the normal way, after pressing the INSERT key. Remember that a Volume Change will create a new Part, and move all subsequent Parts forward. FUNCTION SONG COPY TO copy a Song to another destination. The Song Copy function lets you copy any selected Song to another destination in the RX5 s Song memory. This is useful if you want to copy a Song in order to alter it to create a new Song, while retaining the original Song. 1. Press SONG/PATTERN until the LCD indicates Song Mode, then use the Numeric Key Pad to select the Song to be copied, and press COPY. If the Song destination already contains a Song (which will be erased if you carry out the copy operation) the LCD will show You can now press -1/NO, if you do not wish to copy to this Song destination. This will return you to the Select Song Mode, from which you can once again call the Song Copy function, and select another destination. If you wish to copy to the selected destination (re-writing the Song contained there) press +1/YES. The LCD will show completed and return to the Select Song Mode). FUNCTION SONG CLEAR To clear a selected Song. You can instantly clear (erase) an entire Song. This would be done, for example, if the RX5's Song memory were full and you wanted to write another Song. You can also clear all 20 Songs simultaneously. Refer to UTILITY MODE JOB #06.
33 28 1. Press PATTERN/SONG until the LCD indicates Song Mode, and use the Numeric Key Pad to select the Song you wish to clear, then press CLEAR. THE JOBS Some functions in the Song Mode are called Jobs and appear on the JOB TABLE on the front panel of the RX5 Jobs are selected by first entering the Song Mode or Edit Song Mode, then pressing JOB and entering the Job number using the 10-key panel. SONG MODE JOB Job #01: SEARCH MARK. Automatically locate a Mark (a named location) or a Part in a Song, for playback. You can now cancel the Song Clear operation, if you wish, by pressing -1/NO. The LCD will return to the Song select display. If the Memory Protect is ON, the LCD will show MEMORY PROTECTED when the Clear function is selected, indicating that Song Clear cannot be carried out. Use UTILITY JOB #03 to turn off the Memory Protect function. 2. To clear the Song, press +1/YES. If you wish, you can now cancel the Clear operation by pressing -1/NO. To carry out the Clear operation, press +1/YES, to see: EDIT SONG MODE JOBS Job #01: SEARCH MARK. Automatically locate a Mark (a named location) or a Part in a Song, for editing. Job #02: SET MARK. Name a selected location in a Song, so that it can be automatically located using the Search Mark function. Job #03: SONG NAME. Name a selected Song. Job #04: INITIAL TEMPO. Set the initial playback tempo of a Song. FUNCTION JOB #01: SEARCH MARK To automatically locate a selected location in a Song, for playback or editing. This function lets you instantly locate any Part in a Song, or a Mark that has been set in a Song (refer to the SET MARK section of this chapter). This is extremely useful and time-saving. It allows you to play a Song from any selected point, or locate any point in the Song for editing (this can be compared to tape transport memory devices in recording studios, which allow you to punch in at a preselected point in a recording). Followed by The LCD will now show that the selected Song is empty (the measure count is zero). You can now edit a new Song. 1. Press PATTERN/SONG until the LCD indicates Song Mode, the use the Numeric Key Pad to select a Song. If you are using the Search Mark function to find a point from which to playback ONLY, omit the next step and go to step If you are using the Search Mark function to find a point from which to edit a Song, press REAL TIME WRITE/EDIT SONG to enter the Edit Song Mode. 3. Press JOB. If in the Song Mode, the LCD will now show the Search function. If in the Edit Song Mode, use the Numeric Key Pad to select Job #01. Example: Edit Song Mode. SONG MEMORY CHECK This function allows you to check the remaining Song memory of the RX5, as a percentage of its total Song memory capacity. Refer to UTILITY JOB #02. You can now search a location either by entering a Part number or by entering a Mark name.

34 29 SEARCH PART 1. From the SEARCH display, use the Numeric Key Pad to enter a three-digit Part number. As soon as you enter the first digit, the LCD will show. If you are in the Edit Song Mode, you can now continue editing from this point. If you are in the Song Mode, you can now play the Song from this point, by pressing STOP/CONTINUE. NOTE: During Song editing, when using either the Search Mark or Search Part operation, if the search point coincides with the end of the Song, the LCD will display an end of song!! message. JOB #02: SET MARK 2. When you have entered the complete Part number, the LCD will immediately show the selected Part, and the Pattern or other data contained there. Example: Part 006; Pattern 23. FUNCTION To name a selected location in a Song. The Set Mark function allows you to give a name (up to six characters-letters and numerals) to any selected location (Part) of a Song. This Mark can be instantly located at any time, using the Search Mark function. You can set any number of Marks in a Song. A Mark counts as a Part in a Song. If you are in the Edit Song Mode, you can now continue editing from this point. If you are in the Song Mode, you can now play the Song from this point, by pressing STOP/CONTINUE. SEARCH MARK 1. From the SEARCH display, enter the Mark name by pressing the instrument keys (for entering letters A thru X) or ACCENT 1 or 2 (for entering letters Y and Z respectively). The cursor will move to the right when a letter is entered, enabling you to enter the next letter. Letters are entered as upper case (capitals). Lower case letters may be entered by holding down STOP/CONTINUE while entering letters. Numerals may be entered by using the Numeric Key Pad. Spaces may be entered by using the REVERSE key. Periods may be entered by using the DAMP key. If you make a mistake, use the -1/NO and +1/YES keys to move the cursor to the erroneous character, and enter a new character. The LCD will now show the Mark name. Example: Bridge. 2. Press START to carry out the Search Mark function. The LCD will immediately show the Part number of the selected Mark. Example: Part Press PATTERN/SONG until the LCD indicates Song Mode, the use the Numeric Key Pad to select a Song. 2. Press REALTIME WRITE/EDITSONG to enter the Edit Song Mode, and start editing a Song. When you reach the point at which the Mark is needed select Job # Enter letters by pressing the instrument keys (for letters A thru X) or ACCENT 1 or 2 (for letters Y and Z respectively). The cursor will move to the right when a letter is entered, enabling you to enter the next letter. Letters are entered as upper case (capitals). Lower case letters may be entered by holding down STOP/CONTINUE while entering letters. Numerals may be entered by using the Numeric Key Pad NOTE: The first character of a Mark name can NOT be a numeral, because when using the Search function, entering a numeral first will activate the Search Part function instead of the Search Mark function. Spaces may be entered by using the REVERSE key. Periods may be entered by using the DAMP key. If you make a mistake, use the -1/NO and +1/YES keys to move the cursor to the erroneous character, and enter a new character. 4. Press START to enter the Mark name. Example: Part 3, Mark name Bridge.
35 30 5. The Mark is now set, and you can press +1/YES to move on to the next Part and continue editing, or press PATTERN/SONG to exit the Edit Song Mode. Marks can be entered AFTER all the Pattern numbers have been entered for a Song. Refer to the INSERT FUNCTION (described earlier in this chapter) and enter the Mark in the normal way, after pressing the INSERT key. Remember that a Mark will create a new Part, and move all subsequent Parts forward. JOB #03: SONG NAME FUNCTION To enter a name for a selected Song. This function lets you enter a name of up to eight characters (letters and numerals) for a Song. JOB #04 lnltial TEMPO FUNCTION To set the initial tempo of a selected Song. This function lets you set the exact tempo for a Song, thus avoiding the need for manually changing tempos between playback of Songs. Or if you connect Songs to make a Chain, this ensures that each Song will play at its correct tempo. Of course, any Tempo Change commands you have included in the Song will function (within the limits of the RX5 s tempo range) and you can also vary the Tempo manually at any time. 1. Press PATTERN/SONG until the LCD indicates Song Mode, then use the Numeric Key Pad to select the Song which is to have its Initial Tempo set. 2. Press REAL TIME WRITE/EDIT SONG to enter the Edit Song Mode, and select Job # Press PATTERN/SONG until the LCD indicates Song Mode, then use the Numeric Key Pad to select the Song that is to be named. 2. Press REAL TtME WRITE/EDIT SONG to enter the Edit Song Mode, and select Job #03. If the Initial Tempo has already been set, the LCD will show lnit Tempo ON. You can now alter the Initial Tempo setting, in exactly the same way as entering the setting for the first time. Or you can press -1/NO to turn the Initial Tempo function OFF. If the selected Song already has a name, it will be displayed, and can be changed in exactly the same way as entering a new name. 3. Enter letters by pressing the instrument keys (for letters A thru X) or ACCENT 1 or 2 (for letters Y and Z respectively). The cursor will move to the right when a letter is entered, enabling you to enter the next letter. Letters are entered as upper case (capitals). Lower case letters may be entered by holding down STOP/CONTINUE while entering letters. Numerals may be entered by using the Numeric Key Pad. Spaces may be entered by using the REVERSE key. Periods may be entered by using the DAMP key. If you make a mistake, use the -1/NO and +1/YES keys to move the cursor to the erroneous character, and enter a new character. 4. Press START to enter the new name. The LCD will return to the EDIT SONG display. 5. Press PATTERN/SONG to exit the Edit Song Mode. 3. Press +1/YES to turn the Initial Tempo function ON. 4. Press START. The LCD will show the current setting of the RX5 s Tempo. If the Initial Tempo was already set, the LCD will show its value. Example: 120 quarternotes per minute. 5. Use the Numeric Key Pad to set the Initial Tempo. Range: quarter-notes per minute. 6. Press START again to enter the Initial Tempo. The LCD will return to the EDIT SONG display, showing the first Part of the Song.

36 31 The Song Chain mode lets you: OVERVIEW Edit (assemble) and name up to 3 Chains, each containing up to 90 Steps (each Step is a Song). Clear (Erase) a Chain. Select a Chain and play it at any tempo. The function of the Song Chain Mode is to allow you to connect Songs in order to form a drum sequence for an entire group of Songs, for a live performance or a recording. Each Chain can contain up to 90 Songs, which when used in a Chain are called Steps. 2. Use the Numeric Key Pad to enter the Chain number (0, 1 or 2). 3. Press START to play the Chain. During play, the RUN LED will light. The LCD will indicate the current measure, Step and Song number. THE JOBS Job #01: CHAIN SELECT/PLAY. Select one of 3 Chains and play at any tempo. Job #02: EDIT CHAIN. Edit (assemble) a Chain. Job #03: CHAIN NAME. Name a Chain. Job #04: CHAIN CLEAR. Clear (erase) a Chain ENTERING THE SONG CHAIN MODE To enter the Song Chain Mode, press the CHAIN key. The LCD will show the last Chain that was selected in this Mode. Now, or after setting any Chain function, press any Mode key, or the PATTERN/SONG key, to exit this Mode. Jobs are selected by pressing the JOB key (after pressing the CHAIN key) then entering the job number using the Numeric Key Pad panel. Once in this Mode, there is no need to press the CHAIN key prior to selecting other jobs. JOB #01: CHAIN PLAY FUNCTION To select a Chain for play. To select an empty Chain for editing. The RX5 can store up to 3 Chains, numbered 0 thru 2. Once you have selected a Chain, you can then go on to play the Chain, edit it (if it is empty) or clear (erase) it. 1. Press CHAIN to enter the Chain Mode. Job #01 is automatically selected. If however you have already selected another Job in this Mode, press JOB then use the 10-keys to enter 01. The LCD will show the last Chain that was selected in this Mode. Example: Chain 0, containing 256 measures and named Concerto. 4. To stop play, press STOP/CONTINUE. The RUN LED will go out, and the LCD will show the point in the Chain at which play was stopped. 5. To restart play, press START to play from the beginning of the Chain, or STOP/ CONTINUE, to play from the point at which play was stopped. 6. After the Chain has played, the LCD will return to the Chain select display. During Chain Play, you can alter the Tempo by moving the TEMPO slider control, or by pressing TEMPO and using the Numeric Key Pad or the +1/YES and -1/NO keys. The Click function can also be used during Chain play, but it must be turned on in the Pattern Mode. Refer to the PATTERN S chapter for full descriptions of these functions. FUNCTION JOB #02: EDIT CHAlN To connect Songs in order to create a Chain. 1. Press CHAIN to enter the Chain Mode, then use the 10-keys to select a Chain. When editing a new Chain, an empty Chain should be selected. This will be indicated by a zero measure count on the LCD.
37 32 JOB #03: CHAIN NAME FUNCTION To enter a name for a selected Chain. 2. Select Job #02. This function lets you enter a name of up to eight characters (letters and numerals) for a Chain. 1. Press CHAIN to enter the Chain Mode, then use the Numeric Key Pad keys to select the Chain that is to be named. 2. Select Job #03. If the selected Chain already contains data, the LCD will show the Song contained in the first Step. If the Memory Protect is ON, the LCD will show MEMORY PROTECTED when this Job is selected, indicating that editing cannot be carried out. Use UTILITY JOB #03 to turn off the Memory Protect function. 3. The LCD is prompting you to enter the Song number for the first Step. Use the Numeric Key Pad to enter a Song number. If the displayed Step already contains a Song (in the case of a Chain that has already been edited) you can change the Song by entering a new Song number in the same way. 4. Press +1/YES to move to the next Step, and enter another Song number in the same way. If the selected Chain already has a name, it will be displayed, and can be changed in exactly the same way as entering a new name. 3. Enter letters by pressing the instrument keys (for letters A thru X) or ACCENT 1 or 2 (for letters Y and Z respectively). The cursor will move to the right when a letter is entered, enabling you to enter the next letter. Letters are entered as upper case (capitals). Lower case letters may be entered by holding down STOP/CONTINUE while entering letters. Numerals may be entered by using the Numeric Key Pad. Spaces may be entered by using the REVERSE key. Periods may be entered by using the DAMP key. If you make a mistake, use the -1/NO and +1/YES keys to move the cursor to the erroneous character, and enter a new character. 4. Press START to enter the new name. The LCD will then return to the Chain Play display. JOB #04: CHAlN CLEAR FUNCTION To clear a selected Chain. 5. Continue moving through the Chain, entering Song numbers as desired. It s a good idea to keep a written record of a Chain, as you edit it. Refer to the SONG /CHAIN CHART at the end of this manual. You can move backwards through a Chain using the -1/NO key. This lets you go back to check a Step. Any time a Step is displayed, you can change the Song contained in that Step by entering a new Song number. Holding down a -1/NO or +1/YES key lets you move rapidly through a Chain. 6. Once you have entered all the Steps of your Chain, press PATTERN/SONG to exit the Edit Chain Mode, or select Job #01 to play your Chain. You can instantly clear (erase) an entire Chain. This would be done, for example, if the RX5's Chain memory were full and you wanted to write another Chain. 1. Press CHAIN to enter the Chain Mode, and use the Numeric Key Pad to select the Chain you wish to clear. 2. Select Job #04.
38 33 You can now cancel the Chain Clear operation, if you wish, by pressing -1/NO. If the Memory Protect is ON, the LCD will show MEMORY PROTECTED when the Clear function is selected, indicating that Chain Clear cannot be carried out. Use UTILITY JOB #03 to turn off the Memory Protect function. 3. To clear the Chain, press +1/YES. If you wish, you can now cancel the Clear operation by pressing -1/NO. To carry out the Clear operation, press +1/YES, to see: Followed by The LCD will now show that the selected Chain is empty (the measure count is zero). You can now edit a new Chain.
. Store an edited voice to the same memory location as the selected voice. Recall the last voice you were editing.")
.")
39 34 The Edit Voice Mode lets you: OVERVIEW Edit any voice that has been assigned to an instrument key, to create a new voice. Initialize any voice (automatically return its parameters to their original settings). Store an edited voice to the same memory location as the selected voice. Recall the last voice you were editing. Compare an edited voice with its previous version. Refer to the EDIT VOICE BLOCK DIAGRAM near the end of this manual, for a visual explanation of how voice data is edited on the RX5. Any voice selected for editing wilt be affected by the Parameter Assign functions corresponding to its instrument key (refer to KEY ASSIGN JOB #02). For example, if the pitch at the selected key is set to +3 semitones, any voice assigned to that key will have its pitch raised by 3 semitones. This pitch change, however, will NOT show on the LCD in this Mode. Also, if KEY ASSIGN JOB #02 has been used to set a parameter at the upper or lower limit of its range, it cannot be set beyond these limits using the Edit Voice Mode. THE JOBS Job #01: SELECT VOICE. Select any voice which has already been assigned to an instrument key, for editing. Job #02: PITCH. Edit the pitch of the selected voice. Job #03: E.G. (Envelope Generator). Edit six parameters releating to the envelope of the selected voice. Job #04: BEND. Alter the Pitch Bend Rate and Pitch Bend Range of the selected voice. Job #05: VOICE LEVEL. Alter the level of the selected voice. Job #06: LOOP. Turn on/off the loop section of the selected voice. Job #07: STORE VOICE. Store the edited voice into the RX5 s Voice Edit Memory, at the same location as the selected voice, Job #08: INITIALIZE VOICE. Return all parameters of an edited voice to their original values. Job #09: RECALL EDIT. ENTERING THE EDIT VOICE MODE To enter the Edit Voice Mode, press the EDIT VOICE key. The EDIT VOICE LED will light. The LCD will show the last instrument key, job and parameter value selected in this Mode. Now, or after setting any Edit Voice parameter or function, press any Mode key, or the PATTERN/SONG key, to exit this Mode. As soon as any parameter is changed, the E of EDIT VOICE will change to lower case. This will remain even if the parameter is returned to its original value. Jobs are selected by pressing the JOB key (after pressing the EDIT VOICE key) then entering the job number using the Numeric Key Pad. Once in this Mode, there is no need to press the EDIT MODE key prior to selecting other jobs. If the Memory Protect is ON, the LCD will show MEMORY PROTECTED when the Edit Mode is selected, indicating that editing cannot be carried out. Use UTILITY JOB #03 to turn off the Memory Protect function. JOB #01: SELECT VOlCE FOR EDIT FUNCTION To select, for editing, any voice which has already been assigned to an instrument key. 1. Press EDIT VOICE then select JOB #01. The LCD will show the last voice that was selected. Press the instrument key corresponding to the voice which you wish to edit. You can now select parameters for editing the displayed voice, by selecting other Jobs in this Mode. NOTE: If. when calling up this Job, a hyphen appears next to key on the LCD, this indicates that the voice which was last edited is now not assigned to an instrument key (i.e., another voice has since been assigned to that key).
40 35 FUNCTION JOB #02: PITCH EDIT To alter the pitch of the selected voice. This function can be carried out on the voice that has been selected using EDIT VOICE JOB # After selecting a voice in JOB #01, select JOB # Use the -1/NO and +1/YES keys or the DATA ENTRY slider to change the pitch by semitone units. Holding the 0 key while using the -1/NO or +1/YES key to change pitch allows pitch change in 10-cent (1/10th semitone) units. Pitch values are shown in 1-cent (1/100th semitone) units. Range: +24/-36 semitones, displayed as +2400/-3600 cents. FUNCTION JOB #03: ENVELOPE EDIT To edit the envelope generator of the selected voice. This function can be carried out on the voice that has been selected using EDIT VOICE JOB #01. Each voice on the RX5 has an envelope, with six separate parameters, as shown in the following diagram. This graph indicates visually what happens to the level of a single sound. With percussion instruments, the initial attack is usually very rapid -you hit the instruments, and the sound builds to a peak almost instantly. Slower attacks (where the sound takes a noticeable time to reach the maximum level) occur with violin, flute, the human voice, or a cymbal played with a soft mallet. Then a first decay follows as the sound drops in level, to the first decay level. This is followed by a second decay, and a final release as the sound dies away to silence. This kind of envelope can be heard clearly in the case of a cymbal played with a hard slick. The sound begins instantly (a high Attack Rate). The first bright tone decays quickly to a more muted middle lone as the complex harmonics of the initial impact dissipate (high Decay 1 Rate, then a lower Decay 1 Level). The middle tone slowly decreases in level (low Decay 2 Rate). Finally, the tail end of the sound consists of a few lower harmonics which die away to silence (low Release Rate). And in many other instruments, a similar envelope structure occurs, perhaps with more rapidity. Of course, each voice on the RX5 is an accurate digital recording of a real percussion instrument (or in some cases, a synthesizer sound) and contains its own built-in envelope. The Envelope Edit function allows you to modify the envelope in a very natural way, to create new, equally authentic voices. The Gate Time indicates the overall length of the envelope, excluding the Release part of the envelope. It can be described by comparing it to what happens in a synthesizer such as a Yamaha DX7. When you hold a note down on a DX7, it s like opening a digital gate, allowing the sound to pass. Then, when you release the key, the sound dies away gradually according to its Release Rate. So the Gate Time does NOT affect the Release Time, but as it is decreased, it will progressively cut the Decay 2 time, then the Decay 1 time. Generally, increasing the attack or decay rate will shorten the attack or decay time, and vice versa. NOTE: If envelope settings are set so as to create a long envelope, the original sound is usually lengthened by looping - taking a short portion of the sound and repeating it with increasing or decreasing level, for a natural extended effect. Refer to EDIT VOICE JOB #06 to see how to turn a loop off. Also, the decay length cannot be set to more than 6.5 seconds (the maximum gate Time on the RX5). Therefore, very long decays may be cut off before they have faded to silence. 1. After selecting a voice in JOB #01, select JOB #03. The LCD will show the last parameter selected in this Job. You can now select from the six parameters which can be edited. PARAMETER 1: ATTACK RATE AR = Attack Rate (parameter 1) DIR = Decay 1 Rate (parameter 2) D1L = Decay 1 Level (parameter 3) D2R = Decay 2 Rate (parameter 4) RR = Release Rate (parameter 5) GT = Gate Time (parameter 6) 1. To select Attack Rate, press 1.

41 36 2. Use the -1/NO and +1/YES keys or the DATA ENTRY slider to change the Decay 2 Rate. Range: Use the -1/NO and +1/YES keys or the DATA ENTRY slider to change the Attack Rate. PARAMETER 5: RELEASE RATE 1. To select Release Rate, press 5. Range: PARAMETER 2: DECAY 1 RATE 1. To select Decay 1 Rate, press 2 2. Use the -1/NO and +1/YES keys or the DATA ENTRY slider to change the Release Rate. Range: Use the -1/NO and +1/YES keys or the DATA ENTRY slider to change the Decay 1 Rate. PARAMETER 6: GATE TIME 1. To select Gate Time, press 6. Range: PARAMETER 3: DECAY 1 LEVEL 1. To select Decay 1 Level, press 3 2. Use the -1/NO and +1/YES keys or the DATA ENTRY slider to change the Gate Time. Range: seconds, displayed as ms (milliseconds.) 2. Use the -1/NO and +1/YES keys or the DATA ENTRY slider to change the Decay 1 Level. Range: PARAMETER 4: DECAY 2 RATE 1. To select Decay 2 Rate, press 4. JOB #04: BEND RATE/RANGE FUNCTION To set the pitch bend range and rate of a selected voice. The RX5 voices have preset Bend Range and Bend Rate settings. The Bend function raises or lowers the pitch in 1/100th cent steps, resulting in a smooth pitch change starting from the original pitch. The Range setting affects the final pitch to which the note is bent ; the Rate setting affects the width (time value) of each step, as shown in the following graph.


42 37 JOB #O5: VOICE LEVEL FUNCTION To set the level of a selected voice. Each voice in the RX5 (and in the Waveform Data Cartridge) has a preset level setting. This Job allows you to change the level of each individual voice. This level is independent of the Key Level (refer to KEY ASSIGN JOB #02) which lets you offset the level of a selected instrument key, regardless of the voice which is assigned to that key. It is also independent of the setting of the INSTRUMENT VOLUME faders, which control the final output level of each pair of keys corresponding to an output channel. 1. After selecting a voice in JOB #01, select JOB #04. The LCD will show the last parameter that was selected in this Job. You now have the choice of selecting Bend Rate or Bend Range. Press 1 to select Bend Rate, or press 2 to select Bend Range. 1. After selecting a voice in JOB #01, select JOB #05. Bend Rate Use the -1/NO and +1/YES keys or the DATA ENTRY slider to set the Bend Rate. Range As the Bend Rate is increased, the pitch bend becomes more rapid. At the zero setting, there is no pitch bend. Also, If the Bend Range is set at zero, any setting of the Bend Rate will produce no pitch bend. Bend Range Use the -1/NO and +1/YES keys or the DATA ENTRY slider to set the Bend Range, in semitone units. Range ± 60 semitones. Negative settings result in a downward pitch bend; positive settings result in an upward pitch bend. At the zero setting, there is no pitch bend. Also, If the Bend Rate is set at zero, any setting of the Bend Range will produce no pitch bend. 2. Use the -1/NO and +1/YES keys or the DATA ENTRY slider to set the level. Range At the zero setting, the voice is turned off. However, If the instrument key level is set above zero (refer to KEY ASSIGN JOB #02) the instrument will still sound. JOB #06: LOOP ON/OFF FUNCTION To turn on or off the Loop section of the selected voice. This function can be carried out on the voice that has been selected using EDIT VOICE JOB #01. Looping of voices is a digital method for expanding a sampled sound to create an extended envelope. With longer voices (cymbals, for example) the sampled sound is expanded by taking the tail end of the sample and repeating it with decreasing level, for a natural decay effect, with the full duration of an authentic cymbal sound. When editing the envelope of a voice (refer to EDIT VOICE JOB #03) looping automatically occurs when you alter the Attack Rate or Decay Rate to create a sound that exceeds the envelope length of the original sample. This loop can be turned off, restoring the sound to its original sampled state, often featuring a sharp cut-off, which can be useful for special effects. NOTE: The Bend Range cannot alter the pitch of a note outside the limits of its pitch range (refer to EDIT VOICE JOB #02.)


43 38 1. After selecting a voice in JOB #01, select JOB #06. You now have another chance to cancel the Store operation, by pressing -1/NO. 3. To store the voice, press +1/YES again. 2. EITHER: Press -1/NO to turn the Loop OFF. OR: Press +1/YES to turn the Loop ON. JOB #07: STORE VOICE FUNCTION To store the edited voice. This function can be carried out on the voice that has been selected using EDIT VOICE JOB #01, and edited. It allows you to store the newly-edited voice. The original voice data is not lost, however. Refer to Job #08 for how to return a voice to its original state. If you exit the Edit Mode after editing a voice, but you have not stored the voice, the voice will remain in its edited state, until you initialize it (refer to Job #08) or re-enter the Edit Mode and select another voice for editing. JOB #08: INITIALIZE VOlCE FUNCTION To initialize all parameters of the selected voice. This function can be carried out on the voice that has been selected using EDIT VOICE JOB #01, and edited. It allows you to return all parameters of the selected voice to their original values. NOTE: If the selected voice is not restored to its original sound, after this function has been carried out, it means that the key to which it has been assigned has had its parameters altered, using the Parameter Assign or Multi function. Refer to KEY ASSIGN JOBS #02, #03 respectively. 1. After selecting a voice in JOB #01, select JOB # After selecting a voice in JOB #01, select JOB #07. You can now cancel the Initialize operation by pressing -1/NO. The LCD will display the Edit Mode Job that was selected prior to selecting this Job. You can now exit the Edit Mode, or continue editing the voice. 2. To continue the Initialize operation, press +1/YES. You can now cancel the Store operation by presssing -1/NO. The LCD will display the Edit Mode Job that was selected prior to selecting this Job. You can now exit the Edit Mode, or continue editing the voice. 2. To continue the Store operation, press +1/YES. You now have another chance to cancel the Initialize operation, by pressing -1/NO. 3. To initialize the voice, press -1/YES again.


44 39 FUNCTION JOB #09: RECALL EDlT To recall the last voice that was in the Voice Edit buffer. This function uses a second memory as a back-up function. It is used only while you are actually editing, BEFORE storing a voice and exiting the Edit Mode. It covers you in three possible situations. 1. You were editing a voice, then accidentally selected another voice for editing BEFORE storing the first voice. You can use this Job to recall the first voice. 2. You had already edited and stored a voice. You then edited it again, but decided that you wanted to return to the first edited version. BEFORE storing the newly edited version, you can use this Job to restore the voice to its previously edited state (as opposed to restoring it to its original state, which is done by using the Initialize function-refer to Job #08). 3. You had already edited and stored a voice. You then selected it for editing again, and initialized it, but decided that you did want the previously edited version. BEFORE storing the newly initialized voice, you can use this Job to restore the voice to its previously edited state. 1. During editing, select JOB #09. You can now continue editing, or store the recalled voice (refer to Job #07). FUNCTION EDIT COMPARE To compare an edited voice with its previously selected state. This function allows you to instantly compare a voice that is being edited with the state it was in when you selected it for editing (the compared state may not be the same as the initial version of the voice, as it may already have been edited and stored). It can only be used when the RX5 is in the Edit Mode. You can use it at any time during editing-a convenient way to check both aurally and visually (by reading parameter values) the effect of your editing. 1. While editing a voice, press STOP/CONTINUE. You will now be able to hear the original version of the voice, by playing the corresponding instrument key. On the LCD, a compare mark will appear above the e of edit, and the cursor will disappear. The original value of the parameter that is currently being edited will be displayed. Example: Pitch. You can now cancel the Recall operation by pressing -1/NO. The LCD will display the Edit Mode Job that was selected prior to selecting this Job. You can now exit the Edit Mode, or continue editing. 2. To continue the Recall operation, press +1/YES. 2. Press STOP/CONTINUE again to return to the edited version of the voice. The compare mark will disappear, and the cursor will reappear. You now have another chance to cancel the Recall operation, by pressing -1/NO. 3. To carry out the Recall Edit, press +1/YES again. The LCD will show the last voice that was edited. Or If this was a previously edited version of the latest voice you selected, you will see the same voice display, but when you press the instrument key corresponding to the voice, you will hear it in its previously edited state. You can select other parameters (Jobs #02 thru #06) and use the STOP/CONTINUE key for comparison of parameter values.
45 40 The Key Assign mode lets you: OVERVIEW Copy voices into the RX5's RAM. Assign voices to instrument keys and output channels. Edit parameters relating to each instrument key. Save and load key data. THE JOBS Job #01: KEY ASSIGN. Assign any selected voice to an instrument key. (Refer also to Jobs #06 and #09). Job #02: PARAMETER ASSIGN. Alter four parameters relating to each key. Job #03: MULTI VOICE. Assign one voice to the upper row of 12 instrument keys, to create a drum keyboard with an ascending or descending Multi Step scale of pitches, levels, attack rates and decay rates. (Refer also to Job #04). Job #04: MULTI STEP. If a voice is already assigned to Multi Voice, alter its Multi Step parameters. (Refer also to Job #03). Job #05: ACCENT LEVELS. Set accent levels (2 for each voice). Job #06: OUTPUT CHANNEL ASSIGN. Assign any voice to one of the 12 output channels relating to each pair of instrument keys. This is usually done prior to assigning a voice to an instrument key. (Refer to Jobs #01 and #09). Job #07: SAVE KEY DATA. Save up to 3 drum sets, consisting of all data relating to instrument keys. (Refer to Jobs #01 thru #04). Job #08: LOAD KEY DATA. Load a drum set (Refer to Job #07). Job #09: COPY VOICE. Copy an Internal or Cartridge voice into the internal RAM. ENTERING THE KEY ASSIGN MODE To enter the Key Assign Mode, press the KEY ASSIGN key. The LCD will show the last job that was selected in this Mode. Now, or after setting any Key Assign parameter or function, press any Mode key, or the PATTERN/SONG key, to exit this Mode. Jobs are selected by pressing the JOB key (after pressing the KEY ASSIGN key) then entering the job number using the Numeric Key Pad. Once in this Mode, there is no need to press the KEY ASSIGN key prior to selecting other jobs. (refer to the Key Assign chart in THE INSTRUMENTS chapter). So when you select a key, it will have five or six voices (two internal voices, one copied voice, and two or three cartridge voices) from which you can select. The same voices will be available at the other key of the same pair of keys. You can assign voices to keys other than those shown in the Key Assign chart, enabling you to set any voice in any stereo position, when using the RX5 stereo outputs. Refer to KEY ASSIGN JOB #09 to see how to re-assign Internal voices to any key. Refer to KEY ASSIGN JOB #06 to see how to re-assign Internal and Cartridge voices to any key. The following chart shows all the possibilities of voice/output assign. Instrument keys A X Each pair of keys corresponds to an Output Channel (e.g. A + M Ch.1) 1. Press KEY ASSIGN then select Job #01. The LCD will show the last voice that was selected in this Job. 2. Press the instrument key to which a voice is to be assigned. JOB #01: VOICE ASSIGN FUNCTION To assign voices to instrument keys. Each output channel on the RX5 corresponds to a pair of instrument keys (for example: channel 1 corresponds to keys A and M). All voices are factory-preset to output channels 3. Use the -1/NO and +1/YES keys to step through the voices which are available at the selected key. When the LCD shows the desired voice, it is automatically assigned to the selected key.

46 41 JOB #02: PARAMETER ASSIGN FUNCTION To edit the pitch, level, attack and decay parameters of any selected instrument key. This function works independently of the Edit Voice functions. It offsets the parameters of ANY voice assigned to a selected instrument key. If a new voice is assigned to the same key, it will be offset exactly the same amount as the previous voice. The LCD will show both the offset amount, and the actual parameter value (a combination of the parameter values set using this job and the Edit Voice Mode.) If the Edit Mode has already been used to set a parameter at the upper or lower limit of its range, it cannot be set beyond these limits using the Key Assign Mode. 2. Use the -1/NO and +1/YES keys or the DATA ENTRY slider to change the instrument key level. Range: + 31 (offset). Actual level range is 00/+31 (actual level cannot be offset outside these limits). PARAMETER 3: ATTACK 1. To select Attack, press 3. Key Assign parameters are memorized when a Pattern is written. You could then change the parameters and write more notes on the same Pattern -ideal for adding other sounds or pitches to a Pattern. 1. Press KEY ASSIGN then select JOB #02. The LCD will show the last parameter selected in this Job. 2. Press the instrument key to be edited. You can now select from the four parameters which can be edited. PARAMETER 1: PITCH 1. To select Pitch, press Use the -1/NO and +1/YES keys or the DATA ENTRY slider to change the Attack Rate. Range: + 63(offset). Actual Attack Rate range is 01/+99 (actual Attack Rate cannot be offset outside these limits). NOTE: Long attacks create looping. Refer to EDIT VOICE JOB #03 for comments about this. PARAMETER 4: DECAY 1. To select Decay, press Use the -1/NO and +1/YES keys or the DATA ENTRY slider to change the pitch by semitone units. Holding the 0 key while using the -1/NO or +1/YES key to change pitch allows pitch change in 10-cent (1/10th semitone) units. Pitch values are shown in 10-cent (1/10th semitone) units. Range: + 60 semitones (offset) displayed as units. Actual pitch range is +24/-36 semitones (actual pitch cannot be offset outside these limits). PARAMETER 2: LEVEL 2. Use the -1/NO and +1/YES keys or the DATA ENTRY slider to change the Decay Rate. 1. To select Level, press 2.
47 42 Decay 1 and Decay 2 Rates are equally affected. Refer to EDIT VOICE JOB #03 for an explanation of these parameters. Decay 1 Level is NOT affected by this function. Range: + 63(offset). Actual Decay Rate range is 01/+99 (actual Decay Rates cannot be offset outside these limits). NOTE: Long decays create looping. Refer to EDIT VOICE JOB #03 for comments about this. JOB #03: MULTI VOICE FUNCTION To assign any selected voice to instrument keys A thru L, then program a sliding scale of parameters to these 12 keys. In the Multi Voice Mode, only monophonic play of the assigned voice is possible, even If its original key is not within the range A thru L. If using stereo outputs, the voices at keys A thru L will be set at the same stereo position as the original selected voice. The Multi Voice Mode permits independent entry of four Multi Step values. These values measure the difference in the pitch, voice level, Attack Rate and Decay Rate of adjacent keys. This, in effect, turns instrument keys A thru L into a 12-note keyboard, using the selected voice as its sound source. The pitch, level, Attack Rate and Decay Rate can increase or decrease in equal steps from key A to key L. The original voice sounds at Keys A thru L will be replaced by the selected voice, while the Multi Voice Mode is ON. While the Multi Voice Mode is ON, another voice cannot be assigned to keys A thru L. To alter Multi Step parameter settings after you have already set them and exited this Job, do NOT use this Job again as that will cancel all your settings. Refer to Job # Press KEY ASSIGN and select JOB #03. PARAMETER 1: PITCH 1. To select Pitch, press Use the -1/NO and +1/YES keys or the DATA ENTRY slider to change the pitch step by 10-cent (1/10th semitone) units. Pitch step values are shown in 1-cent (1/ 100th semitone) units. Range: + 2 semitones, equal to a range over the 12 instrument keys of + 2 octaves. Displayed as units. 3. Press START to enter the pitch step setting. On the LCD the word step will briefly change to set!, then return to step. The original pitch will be retained at key A. Keys B through L will ascend or descend in pitch, according to a positive or negative pitch step setting. NOTE: The Multi Step function cannot alter a voice s pitch beyond the upper and lower limits of its pitch range (as set by the EDIT VOICE or KEY PARAMETER ASSIGN functions). If a voice s pitch is already set at or near these limits, this will result in all keys to the right of the first key that reaches this limit having the same pitch. PARAMETER 2: VOICE LEVEL 1. To select Level, press 2. If the Multi Voice Mode is already on, you can press -1/NO to turn it OFF. The LCD will return to the Decay display of the previous Job (Job #02: Parameter Assign). 2. turn the Multi Voice Mode ON, press the instrument key corresponding to the selected voice. The MULTI LED will light. The selected voice can now be played on keys A thru L, and Multi Step parameters can be selected and set. The LCD will show the selected voice, and the last Multi Step parameter that was selected. Example: Pitch. 2. Use the -1/NO and +1/YES keys or the DATA ENTRY slider to change the level step. Range: + 10.
48 43 3. Press START to enter the level step setting. On the LCD the word step will briefly change to set! then return to step. The original level will be retained at key A. Keys B through L will increase or decrease in level, according to a positive or negative level step setting. NOTE: The Multi Step function cannot alter a voice s level beyond the upper and lower limits of its level range (as set by the EDIT VOICE or KEY PARAMETER ASSIGN functions). If a voice s level is already set at or near these limits, this will result in all keys to the right of the first key that reaches this limit having the same level. PARAMETER 3: ATTACK RATE 1. To select Attack, press Use the -1/NO and +1/YES keys or the DATA ENTRY slider to change the attack step. Range: Press START to enter the attack step setting. On the LCD the word step will briefly change to set! then return to step. The original Attack Rate setting will be retained at key A. Keys B through L will increase or decrease in Attack Rate, according to a positive or negative Attack Rate step setting. NOTE: The Multi Step function cannot alter a voice s attack rate beyond the upper and lower limits of its Attack Rate range (as set by the EDIT VOICE or KEY PARAMETER ASSIGN functions). If a voice s Attack Rate is already set at or near these limits, this will result in all keys to the right of the first key that reaches this limit having the same Attack Rate. PARAMETER 4: DECAY RATE 1. To select Decay press Use the -1/NO and +1/YES keys or the DATA ENTRY slider to change the decay step. Range: Press START to enter the decay step setting. On the LCD the word step will briefly change to set! then return to step. The original Decay Rate setting will be retained at key A. Keys B through L will increase or decrease in Decay Rate, according to a positive or negative Decay Rate step setting. NOTE: The Multi Step function cannot alter a voice s decay rate beyond the upper and lower limits of its Decay Rate range (as set by the EDIT VOICE or KEY PARAMETER ASSIGN functions). If a voice s Decay Rate is already set at or near these limits, this will result in all keys to the right of the first key that reaches this limit having the same Decay Rate. FUNCTION JOB #04: MULTI STEP To alter the Multi Step parameters of a voice assigned to instrument keys A thru L, via the Multi Voice function. This job carries out exactly the same functions as the Multi Step functions described in the previous Job, If a voice has ALREADY been assigned to instrument keys A thru L via the the Multi Voice function. It enables you to make adjustments to Multi Step parameters that you have already set. Otherwise, If you attempt to alter Multi Step settings by using Job #03, you will first have to re-assign your selected voice to the Multi Mode, and this will cancel all previous Multi Step settings. Multi Step parameters are memorized when a Pattern is written. You could then change the parameters and write more notes on the same Pattern-ideal for adding other sounds or pitches to a Pattern. NOTE: This Job can NOT be selected If a voice has not first been assigned to the Multi Mode. 1. After assigning a voice to the Multi Mode, press KEY ASSIGN and select JOB #04. The LCD will show the last Multi Step parameter that was selected. 2. Multi Step parameters can be selected and re-edited. Refer to Job #03 for operation details. FUNCTION JOB #05: ACCENT LEVELS To program two different level changes to individual voices. Pressing any instrument key while holding either of the green ACCENT keys causes that instrument to sound at its ACCENT 1 or ACCENT 2 level. The accent level range is the same as the voice level range (refer to EDIT VOICE JOB #05). The accent level setting is ADDED to the voice level setting to produce the actual accent level. Negative accent levels can also be set, for interesting effects.

49 44 1. Press KEY ASSIGN and select JOB #05. The LCD will show the last Accent Level that was selected in this Job. Example: Accent Press the instrument key for which the Accent Level is to be set. Pressing ACCENT 2 moves the cursor back and forth between the Voice position and the Channel number position. 2. Move the cursor to the voice position. Use the -1/NO and +1/YES keys to select the voice to be assigned. 3. Move the cursor to the output channel number. Use the DATA ENTRY slider to set the output channel (1 thru 12). FUNCTION JOB #07: SAVE KEY DATA Store, in the RX5 s memory, data relating to all 24 instrument keys. Stored data is all KEY ASSIGN MODE data, and includes 3. Accents are set by first pressing either ACCENT 1 or ACCENT 2, then using the -1/NO and +1/YES keys or the DATA ENTRY slider to set the corresponding Accent Level. Range: The voice level range is If the Accent Level setting PLUS the original voice level setting exceeds 31 or is less than 0 (in the case of negative accent level settings) the actual Accent Level will be set to 31 or 0 (off) respectively. JOB #06: OUTPUT CHANNEL ASSlGN FUNCTION To assign Copied and Cartridge voices to output channels. Each output channel (1 thru 12) corresponds to a pair of instrument keys (A-plus-M thru L-plus-X). This function facilitates assignment of any Copied or Cartridge voice to any key, by first assigning the voice to the appropriate output channel, then using KEY ASSIGN JOB #01 to assign the voice to one of the two keys corresponding to that output channel. JOB #01 data (Voice Assign) JOB #02 data (Parameter Assign) JOB #03 data (Multi Voice) JOB #04 data (Multi Step). Three complete sets of data can be independently stored. This function allows you to store three completely different drum sets. NOTE: When you save Key Data, any data in the selected destination will be erased. If you wish to avoid this, save the data to cassette tape first. Refer to CASSETTE MODE JOB # Press KEY ASSIGN and select Job #07. Internal voices are pre-assigned to output channels (refer to the Key Assign chart in the PLAYING THE RX5 INSTRUMENTS section of THE INSTRUMENTS chapter.) However, you can copy up to 12 of these voices into the RX5 s RAM (refer to KEY ASSIGN JOB #09) so that they can then be assigned to any output channel. 1. Press KEY ASSIGN and select JOB #06. The LCD will show the last voice and cursor position that was selected in this Mode. 2. Press 1, 2 or 3 to select the destination to which the key data is to be stored Example: 1.
50 45 You can, prior to loading, select other key data for loading. 3. Press the +1/YES key to load the key data. The LCD will briefly show You can, prior to saving, select another destination. 3. Press the +1/YES key to store the key data. The LCD will briefly show JOB #09: COPY VOlCE FUNCTION To copy internal and Cartridge voices into the Internal RAM. You will then see the previous display, without a cursor. JOB #08: LOAD KEY DATA FUNCTION Load, from the RX5 s memory, data relating to all 24 instrument keys. This function allows you to rapidly load Key Data comprising one of three completely different drum sets. For details of the actual data that is loaded, refer to Job #07. Internal voices are pre-assigned to output channels (and consequently to specific pairs of instrument keys.) By copying a voice to the RAM it can then be assigned to any output channel (refer to KEY ASSIGN JOB #06) and from there, to any key (refer to KEY ASSIGN JOB #01.) Both Internal and Cartridge voices can be copied to the RAM (to more than one location. if desired) and edited to make new voices, while the original voice is retained and can also be played. can also be played. 1. Press KEY ASSIGN and select Job #09. The LCD will show the last voice. copy destination and cursor position that was selected. 1. Press KEY ASSIGN and select Job # Use ACCENT 2 to move the cursor between voice name and copy destination number. Use the No/-1 and +1/YES keys to select the voice and the copy destination. 3. Press START to carry out the copy function. The LCD will briefly show 2. Press 1, 2 or 3 to select the key data which is to be loaded. Example: 1. then return to the previous display.
51 46 The Cartridge Mode lets you: OVERVIEW Save Sequence (Pattern/Song/Chain) data and Voice data onto Yamaha RAM4 Data Cartridge. Verify that data has been correctly saved. Load data from cartridge into the RX5. Format a data cartridge. Prior to entering this Mode, make sure that a RAM4 Data Cartridge is firmly inserted into the Data Cartridge slot on the RX5 s rear panel. Verify operations are highly recommended after every Save operation. This will ensure that your data is correctly saved, otherwise you may lose irreplaceable data. The Verify function compares the data saved onto cartridge with the original data in the RX5. THE JOBS The Cartridge Mode has 13 jobs, covering the four main functions (Save, Load, Verify and Format). These are arranged as follows. ALL SEQUENCE ALL SINGLE ALL AND SEQUENCE PATTERN VOICE VOICE DATA DATA DATA SAVE # 01 # 02 # 03 # 04 LOAD # 11 # 12 # 13 # 14 VERIFY # 21 # 22 # 23 # 24 FORMAT # 30 [FORMAT NEW RAM4 CATRIDGE OR USE IN RX5] ENTERING THE CARTRIDGE MODE To enter the Cartridge Mode, press the CASSETTE/CARTRIDGE key. Repeated pressings of this key switch the RX5 between cartridge operation and cassette operation. The CART (cartridge) LED will light when the Cartridge Mode is selected. Now, or after executing any Cartridge function, press any Mode key, or the PATTERN/ SONG key, to exit this Mode. Jobs are selected by pressing the JOB key (after entering the Cartridge Mode) then entering the job number using the IO- key panel. Once in this Mode, there is no need to press the CASSETTE/CARTRIDGE key prior to selecting other jobs. SAVING DATA JOB #01: SAVE SEQUENCE AND VOICE DATA JOB #02: SAVE SEQUENCE DATA JOB #04: SAVE VOICE DATA FUNCTION To save all sequence and/or voice data onto Yamaha RAM4 Data Cartridge. Save operations allow you to save the sequence data for up to 100 Patterns, 20 Songs and 3 Chains and/or the voice data for all 64 voices stored in the RX5. NOTE (JOB #01): If your cartridge already contains data, it will be completely erased when you perform a Save Sequence and Voice Data operation, so check that this data is not needed. NOTE (JOB #02): If your cartridge already contains sequence data. it will be erased when you perform a Save Sequence Data operation, so check that this data is not needed. Voice Data contained in the cartridge will NOT be affected by this operation. NOTE (JOB #04): If your cartridge already contains voice data, it will be erased when you perform a Save Voice Data operation, so check that this data is not needed. Sequence Data contained in the cartridge will NOT be affected by this operation. Operation Is identical for the above three Jobs. 1. Press CASSETTE/CARTRIDGE until the LCD indicates Cartridge Mode, then select Job #01, #02 or #04. Example: Job #01.


52 47 2. To continue the Save operation, press +1/YES. 1. Press PATTERN/SONG until the LCD indicates Pattern Mode, then use the Numeric Key Pad or the -1/NO and +1/YES keys to select the pattern you wish to save. 2. Press CASSETTE/CARTRlDGE until the LCD indicates Cartridge Mode, then select Job #03. You now have a chance to cancel this operation by pressing -1/NO, if you do not wish to erase data in the cartridge. 3. To save the data, press +1/YES again. 3. To continue the save operation, press +1/YES. followed by 4. Press ACCENT 2 to move the cursor to the right, and use the Numeric Key Pad to select the Pattern Destination number. Example: 00. JOB #03: SAVE SINGLE PATTERN. FUNCTION To save the data of a single selected Pattern onto Yamaha RAM4 Data Cartridge. This operation allows you to save the sequence data for a single Pattern, Any Pattern destination may be selected. NOTE: If the Pattern destination selected in your cartridge already contains data, it will be erased when you perform a Save Single Pattern operation, so check that this data is not needed. Voice Data contained in the cartridge will NOT be affected by this operation. You can use the ACCENT 2 key to move the cursor backwards and forwards to allow you to reset the Pattern and Pattern destination numbers. 5. Press +1/YES to continue the Save operation.


53 48 You now have a chance to cancel the Save operation by pressing -1/NO, if you do not wish to erase data in the cartridge. 6. To save the data, press +1/YES again. 2. To continue the Load operation, press +1/YES. Followed by LOADlNG DATA JOB #11: LOAD SEQUENCE AND VOlCE DATA JOB #12: LOAD SEQUENCE DATA JOB #14: LOAD VOICE DATA You now have a chance to cancel this operation by pressing -1/NO, if you do not wish to load the data. 3. To load the data, press +1/YES again. Followed by FUNCTION To load sequence and voice data from Yamaha RAM4 Data Cartridge into the RX5 Load operations allow you to load the sequence data for up to 100 Patterns, 20 Songs and 3 Chains and/or the voice data for all 64 voices stored in the RAM4 cartridge. NOTE (JOB #11): If the RX5 already contains data, it will be completely erased when you perform a Load Sequence and Voice Data operation, so check that this data is not needed. NOTE (JOB #12): If the RX5 already contains sequence data, it will be erased when you perform a Load Sequence Data operation, so check that this data is not needed. NOTE (JOB #14): If the RX5 already contains voice data, it will be erased when you perform a Load Voice Data operation, so check that this data is not needed. Operation is identical for the above three Jobs. JOB #13: LOAD SINGLE PATTERN. FUNCTION To load the data of a single selected Pattern from Yamaha RAM4 Data Cartridge into the RX5. This operation allows you to load the sequence data for a single Pattern. Any Pattern may be loaded into any Pattern destination. NOTE: If the Pattern destination selected already contains data, it will be erased when you perform a Load Single Pattern operation, so check that this data is not needed. Voice Data contained in the RX5 wilt NOT be affected by this operation. 1. Press CASSETTE/CARTRIDGE until the LCD indicates Cartridge Mode, then select Job #11, #12 or #14. Example: Job #11.


 Save Jobs, as follows. JOB #21 verifies JOB #01. JOB #22 verifies JOB #02.")
54 49 1. Press PATTERN/SONG until the LCD indicates Pattern Mode, then use the Numeric Key Pad or the -1/NO and +1/YES keys to select the pattern destination to which you wish to load data. 2. Press CASSETTE/CARTRIDGE once or twice to enter the Cartridge Mode, then select Job #13. You now have a chance to cancel the Load operation by pressing -1/NO, if you do not wish to erase data in the Pattern destination. 8. To Load the Pattern, press +1/YES again. VERIFYING DATA 3. To continue the Load operation, press +1/YES. JOB #21: VERIFY SEQUENCE AND VOICE DATA JOB #22: VERIFY SEQUENCE DATA JOB #24: VERIFY VOICE DATA 4. Use the Numeric Key Pad to select the number of the Pattern you wish to load. Example: 11. FUNCTION To verify that sequence and/or voice data has been correctly saved onto Yamaha RAM4 Data Cartridge. Operation is identical for the above three Jobs. These Jobs correspond to (and should be carried out subsequent to) Save Jobs, as follows. JOB #21 verifies JOB #01. JOB #22 verifies JOB #02. JOB #24 verifies JOB # After saving the data select Job #21, #22 or #24 as appropriate. Example: Job # To continue the Load operation, press ACCENT 2. The cursor will move to the right. You can now alter the Pattern destination number, or proceed to Step 7, to continue the Load operation. 6. To alter the Pattern destination number, use the 10-keys. You can use the ACCENT 2 key to move the cursor backwards and forwards to allow you to reset the Pattern and Pattern destination numbers. 7. Press +1/YES to continue the Load operation. 2. To continue the verify operation, press +1/YES. You now have a chance to cancel this operation by pressing -1/NO. if you do not wish to verify the data.


55 50 3. To verify the data, press +1/YES again. 3. Use the Numeric Key Pad to select the number of the Pattern stored in the RX5. Example: 11. If the data has been correctly saved, the LCD will then show 4. Press ACCENT 2 to move the cursor to the right, and use the Numeric Key Pad to select the number of the Pattern saved on the cartridge. Example: 22. If any other messages appear, refer to the ERROR MESSAGES chapter. JOB #23: VERIFY SINGLE PATTERN. FUNCTION To verity that the data of a single selected Pattern has been correctly saved onto Yamaha RAM4 Data Cartridge. This operation actually allows you to compare any of the 100 Patterns stored in the RX5 with any of the 100 Patterns saved onto cartridge. The two Pattern numbers you will enter may be different, if you have saved a Pattern to a differently-numbered destination in the RAM4 cartridge. You can use the ACCENT 2 key to move the cursor back and forwards to allow you to reset the RX5 Pattern and cartridge Pattern numbers. 5. Once the cursor is on the right of the LCD, Press +1/YES to continue the Verify operation. This Job corresponds to (and should be carried out subsequent to) Job #03, Save Single Pattern. 1. After saving a Pattern, press CASSETTE/CARTRIDGE once or twice to enter the Cartridge Mode, then select Job #23. You now have a chance to cancel the Verify operation by pressing -1/NO. 6. To verify the data, press +1/YES again. If the data has been correctly saved, the LCD will then show 2. To continue the Verify operation, press +1/YES. If any other messages appear, refer to the ERROR MESSAGES chapter.


56 51 FORMATTING JOB #30: FORMAT CARTRIDGE FUNCTION To format the RAM4 Data Cartridge for use with the RX5. This function MUST be carried out on any new Yamaha RAM4 Data Cartridge that you purchase for use with your RX5, prior to using the cartridge for saving data. 1. Insert your new RAM4 Data cartridge into the Data Cartridge slot on the rear of the RX5. 2. Press CASSETTE/CARTRIDGE until the LCD indicates Cartridge Mode, then select Job # To continue the Format operation, press +1/YES. You can now either format the cartridge, or press -1/NO to cancel the Format operation. 4. To format the cartridge, press +1/YES again. Followed by Your RAM4 cartridge is now formatted, and can be used for saving data.
57 52 The Cassette Mode lets you: OVERVIEW NOTE: All Save, Load and Verify operations can be interrupted by pressing CASSETTE/ CARTRIDGE while the operation is executing. Example: Verify. Save Sequence (Pattern/Song/Chain) data, Voice data and Set-up (Drum set/accent Level/MIDI) data onto a standard cassette tape. Verify that data has been correctly saved. Load data from cassette into the RX5. Prior to entering this Mode, ensure that the RX5 is correctly connected to a cassette deck (refer to the REAR PANEL/CONNECTIONS section) The RX5's cassette output is rated to match with a microphone input, while its cassette input matches a normal data recorder output. Therefore, a computer data cassette recorder is recommended, but any high-quality recorder may be used. Make sure that the heads on your cassette recorder are clean and demagnetized. Avoid using any noise reduction system, which could affect the accuracy of the recording. Keep record and playback levels high, to minimize tape hiss. Clear this display by pressing JOB, or any Mode key. THE JOBS The Cassette Mode has 15 jobs, covering the three main functions (Save, Load and Verify). These are arranged as follows. ALL SEQUENCE ALL SINGLE ALL SET-UPS AND SEQUENCE VOICE DATA DATA PATTERN VOICE DATA SAVE # 01 # 02 # 03 # 04 # 05 LOAD # 11 # 12 # 13 # 14 # 15 VERIFY # 21 # 22 # 23 # 24 # 25 SAVE S: Prior to all Save operations, make sure that a blank cassette is loaded into your cassette player. LOAD AND VERIFY S: Prior to all Load and Verify operations, make sure that the data cassette is loaded into your cassette player, and is at the beginning of the recorded data. VERIFY S are highly recommended after every Save operation. This will ensure that your data is correctly saved, otherwise you may lose irreplaceable data. The Verily function compares the data saved onto cassette with the original data. ENTERING THE CASSETTE MODE To enter the Cassette Mode, press the CASSETTE/CARTRIDGE key. Repeated pressings of this key will switch the RX5 between cartridge operation and cassette operation. The CAS (cassette) LED will light when the Cassette Mode is selected. The LCD will show the last job that was selected in this Mode. Now, or after carrying out any Cassette function, press any Mode key, or the PATTERN/ SONG key, to exit this Mode. Jobs are selected by pressing the JOB key (after entering the Cassette Mode) then entering the job number using the Numeric Key Pad panel. Once in this Mode, there is no need to press the CASSETTE/CARTRIDGE key prior to selecting other jobs. SAVING DATA JOB #01: SAVE SEQUENCE AND VOICE DATA JOB #02: SAVE SEQUENCE DATA JOB #04: SAVE VOICE DATA JOB #05: SAVE SET-UPS FUNCTION To save all sequence and/or voice data, or set-up data, onto cassette tape. Save operations allow you to save the sequence data for up to 100 Patterns, 20 Songs and 3 Chains and/or the voice data for all 64 voices stored in the RX5 Set-Up Data can also be saved, and includes the following data: The 3 sets of Key data stored in the RX5 (refer to KEY ASSIGN JOB #07). The Accent Levels of all 64 voices. The MIDI Transmit channels of all 64 voices. The MIDI Receive channel. The MIDI Notes of all 64 voices.


58 53 Operation is identical for the above four Jobs. 1. Press CASSETE/CARTRIDGE until the LCD indicates Cassette Mode, then select Job #01. LOADING DATA 2. To save the data, start the cassette player in RECORD, and press +1/YES. JOB #11: LOAD SEQUENCE AND VOICE DATA JOB #12: LOAD SEQUENCE VOICE DATA JOB #14: LOAD VOICE DATA JOB #15: LOAD SET-UP Followed by FUNCTION To load sequence and/or voice data, or set-up data, from cassette tape, into the RX5. JOB #03: SAVE SlNGLE PATTERN. FUNCTION To save the data of a single selected Pattern onto cassette tape. This operation allows you to save the sequence data for a single Pattern. 1. Press PATTERN/SONG until the LCD indicates Pattern Mode, then use the Numeric Key Pad or the -1/NO and +1/YES keys to select the pattern you wish to save. 2. Press CASSETTE/CARTRIDGE until the LCD indicates Cassette Mode, then select Job # To save the data, start the cassette player in RECORD, and press +1/YES. Load operations allow you to load the sequence data for up to 100 Patterns, 20 Songs and 3 Chains and/or the voice data for all 64 voices saved on cassette. Set-up data can also be loaded (refer to Job #05 for a description of Set-ups). NOTE (JOB #11): If the RX5 already contains sequence and voice data, it will be erased when you perform a Load Sequence and Voice Data operation, so check that this data is not needed. NOTE (JOB #12): If the RX5 already contains sequence data, it will be erased when you perform a Load Sequence Data operation, so check that this data is not needed. NOTE (JOB #14): If the RX5 already contains voice data, it will be erased when you perform a Load Voice Data operation, so check that this data is not needed. NOTE (JOB #15): If the RX5 already contains set-up data, it will be erased when you perform a Load Set-ups operation, so check that this data is not needed. Operation for the above four Jobs is identical. These Jobs correspond to (and should be carried out subsequent to) Save Jobs, as follows. JOB #11 loads data that was saved in JOB #01. JOB #12 loads data that was saved in JOB #02. JOB #14 loads data that was saved in JOB #04. JOB #15 loads data that was saved in JOB # Press CASSETTE/CARTRIDGE until the LCD indicates Cassette Mode, then select Job #11, #12, #14 or #15. Example: Job #11. Followed by


59 54 2. To continue the Load operation, press +1/YES. 1. Press PATTERN/SONG until the LCD indicates Pattern Mode, then use the 10-keys or the -1/NO and +1/YES keys to select the pattern destination to which you wish to load data. 2. Press CASSETTE/CARTRIDGE until the LCD indicates Cassette Mode, then select Job #13. You now have a chance to cancel this operation by pressing -1/NO, if you do not wish to load the data. 3. To load the data, press +1/YES again. 3. To continue the Load operation, press +1/YES. Start playback of the data cassette, to commence data loading. After loading, the LCD will show You now have a chance to cancel this operation by pressing -1/NO, if you do not wish to load the data. 4. To load the data, press +1/YES again. JOB #13: LOAD SINGLE PATTERN. Start playback of the cassette, to commence data loading. After loading, the LCD will show FUNCTION To load the data of a single selected Pattern from cassette tape into the RX5. This operation allows you to load the sequence data for a single Pattern. Any Pattern destination may be selected. This function can only be carried out if the data that you wish to load was saved to cassette in a Save Single Pattern operation (refer to Job #03). The number of the Pattern that was saved, however, does not affect this operation-it can be loaded into any Pattern destination. NOTE: If the Pattern destination selected already contains data, it will be erased when you perform a Load Single Pattern operation, so check that this data is not needed. Voice Data contained in the RX5 will NOT be affected by this operation.
 Save Jobs, as follows.")
60 55 VERlFYlNG DATA JOB #21: VERIFY SEQUENCE AND VOICE DATA JOB #22: VERIFY SEQUENCE DATA JOB #24: VERIFY VOICE DATA JOB #25: VERIFY SET-UP DATA FUNCTION To verify that sequence and/or voice data, or set-up data, has been correctly saved onto cassette. Operation for the above four Jobs is identical. These Jobs correspond to (and should be carried out subsequent to) Save Jobs, as follows. JOB #21 verifies JOB #01. JOB #22 verifies JOB #02. JOB #24 verifies JOB #04. JOB #25 verifies JOB #05. JOB #23: VERIFY SINGLE PATTERN FUNCTION To verify that the data of a single selected pattern has been correctly saved onto cassette. This Job corresponds to (and should be carried out subsequent to) Job #03, Save Single Pattern. 1. After saving a Pattern, press PATTERN/SONG until the LCD indicates Pattern Mode. and use the Numeric Key Pad to select the number of the Pattern which was saved onto cassette. 2. Press CASSETTE/CARTRIDGE once or twice to select the Cassette Mode, and select Job # To verify the data, press +1/YES. 1. After saving the data, select Job #21, #22, #24 or #25 as appropriate. Example: Job #21. Start playback of the cassette, to commence data verifying. If the data has been correctly saved, the LCD will then show 2. To verify the data, press +1/YES. If any other messages appear, refer to the ERROR MESSAGES chapter. Start playback of the cassette, to commence data verifying. If the data has been correctly saved, the LCD will then show If any other messages appear, refer to the ERROR MESSAGES chapter.
61 56 OVERVIEW The Sync Mode lets you select four different ways of controlling the Clock Rate (speed of playback or recording) and Start/Stop/Continue functions on the RX5. Internal Sync (the RX5 runs according to its Internal Clock). MIDI Sync (the RX5 is controlled by another MIDI device). Tape Sync (the RX5 is controlled by a synchronization signal recorded on tape). External Sync (the RX5 is controlled by another non-midi device). The INT SYNC (Internal Sync) setting is the normal mode for the RX5 The playback speed of Patterns, Songs and Chains, and the Real Time Pattern writing speed, are controlled by the RX5's internal Clock, the speed of which is set by the Tempo functions. Playback and writing are operated by using the RX5 s STOP/CONTINUE and START keys. The Internal Sync Mode is also used when using the RX5 to control external MIDI devices (the MIDI signal is transmitted via the MIDI OUT terminal) or non-midi devices (the control signal is transmitted via the EXT. CLOCK OUT terminal) or to record a Tape Sync signal (the sync signal is transmitted via the CASSETTE terminal). The MIDI SYNC setting lets you start, stop and control the speed of playback and Real Time Pattern writing on the RX5 from an external MIDI device such as a QX5 Sequence Recorder, a Music Computer, or even another RX5. The MIDI control signal is fed into the RX5 via the MIDI IN terminal. The TAPE SYNC setting lets you use a Tape Sync signal to start, stop and control the speed of playback and Real Time Pattern writing. This signal, which incorporates a pre-selected tempo, is recorded onto tape from the RX5, or from MIDI devices capable of transmitting a Tape Sync signal (for example, a QX5). When the tape (containing the Tape Sync signal) is played it will cause the RX5 to commence play at the preselected tempo, and subsequently stop play. Refer to the TAPE SYNC APPLICATIONS section later in this chapter, for a full description of this Sync Mode. The EXT SYNC (External Sync) setting lets you start, stop and control the speed of playbackand Real Time Pattern writing on the RX5 from an external non-midi device which transmits a gate-type clock or trigger signal. The control signal is fed into the RX5 via the External Clock In terminal. The RX5 can also control this type of external device, via the External Clock Out terminal. NOTE: At any time, you can instantly see which Sync Mode the RX5 is using, by checking which of the four Sync LED s is lit, on the RX5 s control panel. SELECTlNG SYNC MODES 1. Press SYNC to enter the Sync Mode. The LCD will show the current Sync status of the RX5. 2. Sync Modes are selected by using the +1/YES and -1/NO keys. Pressing the +1/YES key will step through the four Sync Modes in the following sequence. Pressing the -1/NO key will step through the Sync Modes in the opposite direction. As you select a Sync Mode, the corresponding LCD will light. 3. After setting the RX5 s sync status, press any Mode key, or the PATTERN/SONG key, to exit the Sync Mode. The LED corresponding to the selected Sync Mode will remain lit at all times. CONTROLLING THE RX5 FROM AN EXTERNAL DEVICE. 1. Make sure the external device is connected to the correct terminal on the rear of the RX5 (refer to the REAR PANEL/CONNECTIONS section earlier in this manual). 2. Start play (Pattern, Song or Chain) or Real Time Pattern Write in the normal manner. The RUN LED will light, but the RX5 will not actually start until the external device sends a MIDI. Clock or Tape Sync signal causing the RX5 to start, and subsequently stop play or Real Time Write.
62 57 TAPE SYNC APPLICATlONS This system example shows how Tape Sync can be used with the RX5. It uses the RX5 together with a DX7 Synthesizer, an MT1X Multitrack Cassette Recorder, and an audio mixer. keep. These new Songs will NOT need Initial Tempo or Tempo Change commands, as they are part of the recorded Tape Sync signal. RECORDING A TAPE SYNC SIGNAL NOTE: The RX5 s cassette output is rated to match a microphone input, while its cassette input matches a normal data recorder output. 1. Make sure the tape deck is connected to the RX5 s CASSETTE terminal, and the RX5 is set to Internal Sync, and ready to play the selected Song or Pattern. 2. Start the tape deck in record, then press START on the RX5 to start playback of the Song or Pattern. 3. If playing a Pattern, press STOP/CONTINUE to stop playback at the desired point the STOP signal will also be recorded as part of the Tape Sync signal. 4. Once play is finished, stop the tape deck. The complete Tape Sync signal is now recorded, and can be used to control the RX5 or any MIDI Clock-type device. TAPE SYNC PLAY/PATTERN WRITE 1. Make sure the tape deck output is connected to the RX5 s CASSETTE terminal, and the tape is rewound to just before the start of the recorded sync signal. 2. Set the RX5 to Tape Sync, select the desired Song or Pattern, (and if writing a Pattern, press REAL TIME WRITE) then press START. The RUN LED will light, but the RX5 will not start until the tape is played. 3. Start playback of the tape. The RX5 will now play the selected Song or Pattern (or commence Real Time Write) and stop at the end of the Tape Sync signal. The following procedure illustrates one possible way of using this MIDI/Tape Sync system. 1. Edit a Song on the RX5. Initial Tempo or Tempo Change commands can be included. 2. With the RX5 set to Internal Sync, play the Song at the desired tempo, and record the Tape Sync signal onto track 1 of the MT1X. Tempo changes during the Song will also be recorded. 3. Set the RX5's Sync Mode to Tape Sync, and press START. Now, when you play the tape, it will automatically start the RX5 and run it at the correct tempo. You can now proceed to record DX7 parts onto tracks 2, 3 and 4 of the MT1X. You can also reedit the Song on the RX5 if needed it will still remain in synchronization. 4. Finally, playback of the finished tape will enable you to hear the three recorded DX7 tracks, while the Sync signal on the track 1 will keep the RX5 in perfect synchronization with the recorded tracks. You can still re-edit the Song on the RX5 or even create several Songs to fit the recorded music, and decide later which one you want to
63 58 The Utility Mode lets you: OVERVIEW Check the remaining Pattern and Song memory space. Turn the RX5's Memory Protect on/off. Change a voice in a Pattern, or in all Patterns. Clear (erase) all Patterns or Songs in a single operation. THE JOBS Job #01: REMAINING PATTERN. Check the amount of remaining Pattern memory. Job #02: REMAINING SONG. Check the amount of remaining Song memory Job #03: MEMORY PROTECT. Turn the RX5 s Memory Protect function on/off. Job #04: CHANGE VOICE. Change any selected voice in a Pattern (or in all Patterns) to another selected voice. Job #05: CLEAR ALL PATTERNS. Clear (erase) all Patterns in the RX5. Press UTILITY then select Job #01. JOB #02: REMAINING SONG MEMORY FUNCTION Shows, as a percentage, the remaining Song memory space. Press UTILITY then select Job #02. Job #06: CLEAR ALL SONGS. Clear (erase) all Songs in the RX5. ENTERING THE UTILITY MODE To enter the Utility Mode, press the UTILITY key. The UTlLITY LED will light. The LCD will show the last Job that was selected in this Mode. Now, or after using any Utility Mode function, press any Mode key, or the PATTERN/ SONG key, to exit this Mode. Jobs are selected by pressing the JOB key (after pressing the UTILITY key) then entering the Job number using the 10-key panel. Once in this Mode, there is no need to press the UTILITY key prior to selecting other Jobs. JOB #01: REMAINING PATTERN MEMORY FUNCTION Shows, as a percentage, the remaining pattern memory space. JOB #03: MEMORY PROTECT FUNCTION To prevent accidental erasure of Patterns, Songs, Chains, voices. When the Memory Protect is ON, the following operations cannot be carried out. If any of these operations are attempted, the LCD will show MEMORY PROTECTED. PATTERN WRITE, EDIT, COPY, CLEAR. SONG EDIT, NAME, COPY, CLEAR. CHAIN EDIT, NAME, CLEAR. EDIT VOICE. CHANGE VOICE (UTILITY JOB #04) CLEAR ALL PATTERNS (UTILITY JOB #05) CLEAR ALL SONGS (UTILITY JOB #06) LOAD DATA (CASSETTE/CARTRIDGE JOBS 11-15) RECEIVE BULK (MIDI JOB #09) This function will remain on even if the RX5 s power is turned off.
64 59 1. Press UTILITY then select Job #03. The LCD will show the current Memory Protect status. Example: Memory Protect OFF. 5. Press ACCENT 2 to move the cursor to the lower voice. Use the -1/NO and +1/YES keys to select the new voice. The cursor can be moved up and down by pressing ACCENT 2 at any time, to enable selection of voices. 6. Press START. 2. Press +1/YES to turn Memory Protect ON or press -1/NO to turn Memory Protect OFF. JOB #04: CHANGE VOICE FUNCTION Change a voice to another voice, in a single Pattern, or all Patterns. After this operation, the new voice you have selected may be assigned to a different instrument key than the original voice. Refer to KEY ASSIGN JOB #09 to see how to re-assign Internal voices to any key. Refer to KEY ASSIGN JOB #06 to see how to re-assign Copied and Cartridge voices to any key. If the Memory Protect is ON, the LCD will show MEMORY PROTECTED when this Job is selected, indicating that this operation cannot be carried out. Use UTILITY JOB #03 to turn off the Memory Protect function. 1. To change a voice of a single Pattern, select the Pattern prior to entering the Utility Mode. To change a voice in all Patterns, go on to the next step. 2. Press UTlLITY and select Job # EITHER: Press +1/YES to carry out the voice change. OR: Press No/-1 to cancel the voice change. The LCD will return to the first display in this Job. JOB #05: CLEAR ALL PATTERNS FUNCTION To remove data from all Patterns. NOTE: This function will clear (erase) every Pattern in the RX5's memory. If you wish to retain these Patterns, you should first save them onto tape or data cartridge. Refer to CASSETTE or CARTRIDGE MODE, JOB # Press 1 for single Pattern voice change, 2 for all Pattern voice change. 1. Press UTILITY and select Job # The cursor will flash at the upper voice. Use the -1/NO and +1/YES keys to select the voice which is to be changed.
65 60 2. Press +1/YES. You can now press -1/NO to cancel the Clear All Songs function. The LCD will return to the first display in this Job. 3. To clear all Songs, press START. If the Memory Protect is ON, the LCD will show MEMORY PROTECTED, indicating that this operation cannot be carried out. Use UTILITY JOB #03 to turn off the Memory Protect function You can now press -1/NO to cancel the Clear All Patterns function. The LCD will return to the first display in this Job. 3. To clear all Patterns, press START. JOB #06: CLEAR ALL SONGS FUNCTION To remove data from all Songs. NOTE: This function will clear (erase) every Song in the RX5 s memory. If you wish to retain these Songs, you should first save them onto tape or data cartridge. Refer to CASSETTE or CARTRIDGE MODE, JOB # Press UTILITY and select Job # Press +1/YES. If the Memory Protect is ON, the LCD will show MEMORY PROTECTED, indicating that this operation cannot be carried out. Use UTILITY JOB #03 to turn off the Memory Protect function.
66 61 The MIDI Mode allows you to: OVERVIEW Set the RX5 to receive MIDI note numbers, and assign note numbers to each instrument, so that they can be triggered from an external keyboard or sequencer (Note Number Mode). Set the RX5 to receive MIDI pitch signals, so that selected voices (up to 16) can be used as sound sources for up to 16 external MIDI keyboards or sequencers (Tunable Note Mode). Assign instruments to MIDI channels, for transmission of MIDI note numbers. A selected Gate Time will also be transmitted. ON (refer to JOB #01). SYSTEM EXAMPLE Set the amount by which key velocity of an external MIDI device will affect the envelope parameters of all voices. Carry out reception and transmission of bulk data, with a second RX5 or other suitable MIDI equipment. The RX5 Sync Mode should be set to MlDl SYNC in order for it to be controlled by an external MIDI device. It should be set to INTERNAL SYNC if it is being used to control an external MIDI device. Refer to the SYNC MODE chapter. The RX5, when used with any other MIDI devices, should have its Channel Message function turned

67 62 In this example, the RX5 is part of a sophisticated digital music system comprising a DX7 synthesizer, a QX5 sequence recorder, and a TX816 FM tone generator system. An MJC8 MIDI junction controller enables instant switching between a wide variety of MIDI setups, to make full use of the RX5 s versatility. The RX5 can be controlled by the QX5 sequence recorder in two ways: (1) by receiving stop/start messages and clock signals to control its tempo (refer to JOB #01) or (2) by receiving actual note information-the drum part would be stored in the QX5 instead of in the RX5 s data memory) refer to JOB #08. The RX5's instrument sounds can be played by the DX7 in two ways: (1) by assigning each instrument on the RX5 to a note on the DX7, so that complete rhythm patterns could be played and recorded from the keyboard (refer to JOB #04 Note Number Mode) or (2) by using the Tunable Note function, enabling the DX7 to play one of the RX5's voices over the entire range of its keyboard (refer to JOB #04 Tunable Note Mode). The RX5 can act as a type of sequencer, sending note data (including Note Off messages) on independent MIDI channels to the DX7 and to each module in the TX816 (refer to JOB #03). THE JOBS Job #01: CHANNEL MESSAGE. Set the RX5 to receive and transmit MIDI messages. Job #02: RECEIVE CHANNEL. Set the MIDI channel(s) on which the RX5 receives MIDI messages. Job #03: TRANSMIT CHANNEL. Assign each instrument to one of the 16 available MIDI channels, for transmission. ENTERING THE MlDI MODE To enter the MIDI Mode, press the MIDI key. The MIDI LED will light. The LCD will show the last Job that was selected in this Mode. Now, or after using any MIDI Mode function, press any Mode key, or the PATTERN/ SONG key, to exit this Mode. Jobs are selected by pressing the JOB key (after pressing the MIDI key) then entering the Job number using the 10-key panel. Once in this Mode, there is no need to press the MIDI key prior to selecting other Jobs. JOB #01: CHANNEL MESSAGE FUNCTION To enable reception/transmission of Note Number messages. This function lets you control the RX5 from an external MIDI device (reception of MIDI data) or use the RX5 to control an external MIDI device (transmission of MIDI data). NOTE: The MIDI Receive and/or MIDI Transmit channels must be set to match the MIDI channel of the external MIDI device. Refer to Jobs #02, #03 respectively. 1. Press MIDI and select Job #01. The LCD will show the current ON/OFF status of this Job. Job #04: NOTE NUMBER ASSIGN. Assign the RX5 s voices to a selected MIDI note number, for MIDI receive and transmit (Note Number Mode). Also assign one voice to each of the 16 MIDI channels to use as sound source for external device (Tunable Note Mode). Job #05: INITIALIZE NOTE. Return the MIDI note number settings of all 64 instruments of the RX5 to their default settings. Job #06: E.G. VELOCITY. Set the amount by which envelope parameters can be affected by the velocity of an external MIDI device, 2. Press -1/NO or +1/YES to turn the Channel Mode Message OFF or ON respectively. JOB #02: RECEIVE CHANNEL Job #07: GATE TIME. Set the length of the Gate Time transmitted by the RX5 to external FUNCTION To turn on or off each of the 16 MIDI Channels, for reception MIDI devices. of MIDI control signals from external MIDI devices. Job #08: DEVICE NUMBER. Set the RX5 to receive or transmit System Exclusive Information, on a selected MIDI channel. Job #09: RECEIVE BULK. Send a Bulk Dump Request to an external MIDI device. Job #10: TRANSMIT BULK. Transmit Bulk data to an external MIDI device. This Job is related to Job #04, NOTE NUMBER ASSIGN. If, in Job #04, you have selected VOICE, the RX5 is now set to the Note Number Mode. In this Mode the RX5 can receive MIDI control signals on any one of the 16 available MIDI Channels. If. in Job #04, you have selected PITCH, the RX5 is now set to the Tunable Note Mode. In this Mode, the RX5 can receive MIDI control signals on any or all of the 16 available MIDI channels. Each channel will have an RX5 voice assigned to it (also using JOB #04).


68 63 NOTE NUMBER MODE Setting of the Receive Channel is different for the Note Number and Tunable Note Modes. 1. Press MIDI and select Job #03. The LCD will show the last voice and MIDI Transmit Channel that was set in this Job. 1. With the RX5 set to Note Number Mode, press MIDI and select Job #02. The LCD will show the RX5 s current MIDI Receive status. 2. Use the +1/YES and -1/NO keys, or the DATA ENTRY slider to set the MIDI Receive channel. Range: TUNABLE NOTE MODE 1. With the RX5 set to Tunable Note Mode, press MIDI and select Job #02. The LCD will show the RX5 s current MIDI Receive status. The cursor will be flashing at the MIDI Receive Channel position it was last set at in this Job. Example: Channel Use the DATA ENTRY slider or the -1/NO and +1/YES keys to select the voice. 3. Press ACCENT 2 to move the cursor to the MIDI Channel position. Use the DATA ENTRY slider or the -1/NO and +1/YES keys to set the MIDI Transmit Channel. Range: You can now use ACCENT 2 to move the cursor back to the voice name, and select another voice to have its MIDI Transmit Channel set. JOB #04: NOTE NUMBER ASSlGN FUNCTION 2. Use the -1/NO key to turn OFF the channel marked by the cursor, or the 1/YES key to turn the channel ON. When a channel is turned ON, the corresponding number will be displayed. When a channel is turned OFF, an asterisk will be displayed. 3. Press ACCENT 2 to move the cursor to the next channel position, and turn it on or off as desired. Use ACCENT 2 to move the cursor to the right, until all channels have been set. When the cursor reaches the channel 16 position, pressing ACCENT 2 again will return it to the channel 1 position. JOB #03: TRANSMIT CHANNEL FUNCTION To assign each voice to a selected MIDI channel for MIDI transmission. When using the RX5 to control external MIDI devices, this function allows you to assign each instrument to one of the 16 available MIDI channels. This means that the RX5 can control up to 16 MIDI devices simultaneously. As a simple example, you could set 12 instruments to MIDI Channel 1. to control a second RX5 for extra percussion sounds, and set the other 12 instruments to MIDI Channel 2 to play riffs on a DX7. 1. Assign each voice to a selected MIDI note number, for MIDI receive and transmit (Note Number Mode). 2. Assign a voice to each MIDI Receive Channel (Tunable Note Mode). When using the RX5 with external MIDI devices, this function allows you to select either of two extremely useful Modes. 1. NOTE NUMBER MODE. You can assign each voice to a MIDI note number, corresponding to a note on a MIDI keyboard. Middle C, for example, is key number 60. The next note up (C#) is number 61, and so on. Note numbers range from 0 (C five octaves below middle C) to to 127 (G five and a half octaves above middle C). When you play a note on a MIDI keyboard connected to the RX5, or send a note number from a connected MIDI sequencer or music computer, you will hear the RX5 voice which has been assigned to that note. You can assign more than one voice to the same note number. The RX5 has default settings for note numbers, which can automatically be set. Refer to Job # TUNABLE NOTE MODE. You can use an RX5 voice as the sound source for an external MIDI keyboard or sequencer. The selected voice can be played over a full five-octave range (C1 C6). This is, of course, most suitable for pitched voices such as DX MARIMBA or ELECTRIC BASS. The voice is assigned to a MIDI channel matching the MIDI transmit channel of the external device. Each channel can have only one voice assigned to it. It is, therefore, possible to have up to 16 external devices controlling 16 voices on the RX5.
 or 2 to select the PITCH function (corresponding to the Tunable Note Mode). In this case, you cannot assign a voice.")


69 64 1. Press MIDI and select Job #04. The LCD will show the last function that was selected in this Job. 2. Press 1 to select the VOICE function (corresponding to the Note Number Mode) or 2 to select the PITCH function (corresponding to the Tunable Note Mode). In this case, you cannot assign a voice. Use JOB #02 to turn the selected MIDI Receive Channel ON, then return to this Job and assign a voice to the selected MIDI Receive Channel. JOB #05: INITIALlZE NOTE VOICE FUNCTION FUNCTION To return the MIDI Note Numbers of all voices to their default settings. 1. Use the DATA ENTRY slider or the -1/NO and +1/YES keys to select the voice. 2. Press ACCENT 2 to move the cursor to the Note Number position. Use the DATA ENTRY slider or the -1/NO and +1/YES keys to set the Note Number. Range: C-2 G8. You can now use ACCENT 2 to move the cursor back to the voice name, and select another voice to have its Note Number set. PITCH FUNCTION 1. Use the DATA ENTRY slider or the -1/NO and +1/YES keys to select the MIDI Receive Channel. Range: Press ACCENT 2 to move the cursor to the Voice position. Use the DATA ENTRY slider or the -1/NO and +1/YES keys to select a voice. This function allows you to instantly return the MIDI Note numbers of all 64 voices of the RX5 to their initial (default) values. 16 of the voices (and their Note Nembers) correspond to the voices of the RX11 Digital Rhythm Programmer, so this is a rapid method of setting the RX5 so that it could control an RX11, or vice-versa. The following chart shows the voices and their default settings. Voices corresponding to RX11 voices are marked with an asterisk. NOTE NUMBER CHART *BD2 44 (G#1) *BD 1 *SD 2 49 (C#2) *SD 1 RIM2 46 (A#1) *RIM 1 E.TOM 1 43 (G1) *TOM 1 E.TOM 2 42 (F#1) *TOM 2 E.TOM 3 41 (F1) *TOM 3 E.TOM 4 40 (E1) *TOM 4 *HH OPEN 59 (B2) *HH CLOSED RIDE (EDGE) 63 (D#3) *RIDE (CUP) CHINESE 61 (C#3) *CRASH TAMBOURINE 58 (A#2) *CLAPS *SHAKER 56 (G#2) *COWBELL COPIED VOICES Cp01 Cp12: NOTES CARTRIDGE VOICES 1 28: NOTES Press MIDI and select Job # (A1) 52 (E2) 51 (D#2) 53 (F2) 50 (D2) 40 (C2) 47 (B1) 57 (A2) 62 (D3) 60 (D3) 54 (F#2) 55 (G2) You can now use ACCENT 2 to move the cursor back to the MIDI Receive Channel, and select another channel to which a voice can be assigned. NOTE: When you assign a voice to a MIDI Receive Channel, the channel MUST be turned ON (refer to Job #02). If it is turned OFF, you will see the following display when you try to assign a voice in this Job. Example: MIDI Receive Channel 1. You can now exit the Initialize operation, if you wish, by selecting another Job or Mode. 2. To carry out the Initialize function, press +1/YES.

 as key velocity increases. This gives a longer, more percussive note, which is exactly what happens when a drum is played harder.")

70 65 JOB #06: E.G. VELOCITY FUNCTION Set the amount by which envelope parameters can be affected by the velocity of an external MIDI device. When the RX5 is controlled by an external MIDI device its voices respond to the key velocity sent by an external MIDI device. Key velocity can affect not only voice level, but the envelope parameters. When you use the E.G. (Envelope Generator) Velocity function, the Attack rate increases (faster attack) as key velocity increases (louder note). The Decay 1 and Decay 2 rates decrease (longer decay) as key velocity increases. This gives a longer, more percussive note, which is exactly what happens when a drum is played harder. The amount by which the E.G. rates are affected can be varied from 01 (slight response) to 04 (strong response). 1. Press MIDI and select Job #06. The LCD will show the current setting of the E.G. Velocity function. 2. Use the DATA ENTRY slider or the -1/NO and +1/YES keys to set the Gate Time, in increments of 0.01 second. Range: second. JOB #08: DEVICE NUMBER FUNCTION To set the RX5 to receive or transmit System Exclusive Data (including Bulk Data) on a specified MIDI Channel. This function MUST be turned on prior to receiving or transmitting bulk data (refer to JOBS #09, #10). It makes the RX5 available to the reception of System Exclusive MIDI data from an appropriate external MIDI device (for example, the reception of a preprogrammed drum part from a QX5 Digital Sequence recorder) or the exchange of bulk data with a second RX5. or a Yamaha QX1 or QX5 Digital Sequence Recorder. The Device Number MUST be set to match that of the external MIDI device. 1. Press MIDI and select Job #08. The LCD will show the current Device Number status. 2. Use the DATA ENTRY slider or the -1/NO and +1/YES keys to turn on and set the E.G. Velocity. Range: OFF, JOB #07: GATE TIME FUNCTION Set the length of the Gate Time transmitted by the RX5 to external MIDI devices. When using the RX5 to control an external MIDI keyboard or sequencer, NOTE OFF signals as well as NOTE ON signals are sent, allowing the RX5 to play notes of a selected length, using the external MIDI device as a sound source. The note pitches it will play will correspond to the Note Number settings (refer to Job #04). The overall length of each note is known as the Gate Time. 1. Press MIDI and select Job # Use the DATA ENTRY slider or the -1/NO and +1/YES keys to turn on and set the Device Number. Range: OFF, JOB #09: RECEIVE BULK FUNCTION To set the RX5 to receive bulk data from an external MIDI device. This function makes the RX5 available to receive bulk data from another RX5 or appropriate external MIDI device, such as a Yamaha QX1 or QX5 digital sequence recorder. Bulk data includes all Sequence and Voice data. Once this function is set, the next step is to transmit the data from the external device, or send a Bulk Dump request from the RX5. NOTE 1: Prior to selecting this Job, the DEVICE NUMBER must be turned ON (refer to JOB #08) and the number set to match the System Exclusive Data channel of the external device. NOTE 2: For this operation, the MIDI IN of the RX5 should be connected to the MIDI OUT of the external device.
. If the RX5 Memory Protect is on, the LCD will show Memory Protected and prevent Bulk Dump.")
 and Bulk Data will be transmitted to the external device.")
71 66 1. Press MIDI and select Job # Press MIDI and select Job # EITHER: Press +1/YES to send a Bulk Dump Request to the external device. OR: Set the transmitting device to transmit bulk data (if it is a second RX5, use JOB #10). If the RX5 Memory Protect is on, the LCD will show Memory Protected and prevent Bulk Dump. Use UTILITY JOB #03 to turn off the Memory Protect function. 2. Set the external device to receive bulk data (if it is a second RX5, use JOB #09). 3. EITHER: Press +1/YES on the RX5. OR: Send a Bulk Dump request from the external device (if it is an RX5, use JOB #09) and Bulk Data will be transmitted to the external device. During transmission, the RX5 s LCD will show During Bulk Dump the RX5 s LCD will show After transmission the LCD will show then return to the previous display. Bulk transmission depends on the amount of data in the RX5. For example, the factory-preset Pattern and Song data in your RX5 takes about 10 seconds to transmit. NOTE: When the RX5 receives Bulk Data, all of the Data currently in the RX5 is erased. You may wish to save the current data prior to a Bulk Dump (refer to CARTRIDGE or CASSETTE JOB 01 ). JOB #10: TRANSMIT BULK FUNCTION To transmit bulk data from the RX5 to an external MIDI device. This function enables the RX5 to transmit bulk data to another RX5 or appropriate external MIDI device, such as a Yamaha QX1 or QX5 digital sequence recorder. Bulk data includes all Sequence and Voice data. Prior to using this function, the external device must be set to receive Bulk Data. NOTE 1: Prior to selecting this Job, the DEVICE NUMBER must be turned ON (refer to JOB #08) and the number set to match the System Exclusive Data channel of the external device. NOTE 2: For this operation, the MIDI OUT of the RX5 should be connected to the MIDI IN of the external device.
72 67 The RX5 s LCD will display an error message if: You have made an operating mistake (for example, tried to enter wrong data). Memory limits have been reached. You need to know about malfunctions or operational information concerning the RX5 or external MIDI devices or cassettes or cartridges. NOTE: All LCD messages that indicate an error will be illustrated with the error message ONLY. This is because some error messages can occur in several different Modes or Jobs. The error message always appears in the lower half of the LCD. For example, trying to record a Pattern in realtime when the RX5 s Internal Memory Protect is ON, will produce the following LCD message. In this section, the following illustration will be used. Memory Protected
73 68 GENERAL ERROR MESSAGES MESSAGE checksum error? illegal input! memory full!! Memory Protected MIDI BUFFER FULL MIDI DATA ERROR! no data! not found! too 1arge PART! too large PTN! wrong signature! CAUSE 1. During a Receive Bulk operation (MIDI JOB #09), there was a break in transmission, due to faulty cable or electrical interference. 2. Prior to turning on the RX5 power, you have inserted a faulty Waveform Data Cartridge. Using the Part Copy function (Edit Song Mode) you entered a part number that does not appear in the Song, or the second Part number you entered was lower than the first Part number. The sequence memory (Pattern, Song or Chain) is full. You have tried lo clear or rewrite voice or sequence data (by entering or loading new data) and the Memory Protect function is turned on. The RX5 s MIDI Buffer is full, because too much data has been sent loo rapidly from an external device. The MIDI Buffer is a kind of wailing room for MIDI data, where data is held for minute periods of time (of the order of.0003 seconds for one Byte) while it is being processed by the RX5. You have turned on power to a connected MIDI device, which sends a non-standard signal to the RX5. Technically, this is called a framing error or an overrun error. You have tried to use the Edit Pattern function to edit a Pattern that does not contain data. 1. You have used the Search Mark function and entered the name of a Mark that has not been set in the Song. 2. You have used the Search Part or Copy Part function and entered a Part number that is higher than the total number of Pads in the Song. 1. You have tried to insert a Part in a Song that already contains 999 Parts. 2. You are trying to use the Copy Part function with the result that the new Song will have more than 999 Parts. 1. A Pattern contains the maximum amount of data, and you are trying to write more data into it. 2. You are trying to append a Pattern to another Pattern. and the two Patterns combined contain more than the maximum amount of data. 1. You have tried to append two Patterns which have different time signatures. 2. You have tried to append two Patterns which, when combined, total more than 100 bars in length. REMEDY 1. Check that the MIDI cable is not faulty, and repeal the operation. Also read the PRECAUTIONS section of this manual for advice on electrical interference. 2. Turn the RX5 power off and remove the faulty Waveform data Cartridge. You can now turn the power on again and use the RX5's Internal and Copied voices, until such time as you can insert a new Waveform Data Cartridge. Enter correct Part numbers. Save the data presently in the RX5 to cartridge or cassette, and clear (erase) data to make room in the memory. Patterns, Songs and Chains can be cleared individually, or you can clear all Patterns or all Songs (UTILITY MODE JOBS #05 and #06 respectively). Turn the RX5 s Memory Protect OFF using UTILITY JOB #03. Then carry out the data operation again. Press any key to clear the LCD. Send less dense data, or send al a slower tempo. Press any key to clear the LCD, and continue normal operation. 1. Enter the correct Mark name. 2. Enter the correct Part number. Edit two or more Songs, each of which forms a section of the long Song you were trying to create. Then use the Chain Edit Mode to combine these Songs into a continuous sequence. Write two or more shorter Patterns, each of which forms a section of the long Pattern you were trying to create. Then use the Song Edit Mode to combine these Patterns into a continuous sequence. 1. Write a new Pattern which will have a time signature equivalent to the two original Patterns combined. For example, if you had wanted to append a 4/4 Pattern with a 3/4 Pattern, write a new 7/4 Pattern (3/4 + 4/4 = 7/4). 2. Rewrite the same two Patterns using longer bars, then append them. For example, if the two Patterns each contained 52 bars of 4/4 time (total 104 bars), rewrite them as Patterns containing 26 bars of 8/4 time (total 52 bars), which can then be appended.
74 69 CARTRIDGE MODE ERROR MESSAGES MESSAGE Cartrg not ready Cartrg other typ Cartrg protected Format conflict! no data! Verify error! CAUSE You have entered the Cartridge Mode, but you have not inserted a RAM4 Cartridge into the RX5 You have entered the Cartridge Mode, but the RX5 s Sequence Data Cartridge slot contains the wrong type of cartridge (for example, a Waveform Data Cartridge). You have tried to save data, or execute the Format operation, with the Memory Protect turned ON on your RAM4 Cartridge. You have entered the Cartridge Mode, but the RX5 s Sequence Data Cartridge slot contains a cartridge with a different format. You have tried to save, load or verify a Pattern containing no data. You have tried to verify cartridge data, but the RX5 contains different data than that contained in the RAM4 cartridge. REMEDY Insert a RAM4 Cartridge, then enter the Cartridge Mode again. Remove the wrong cartridge, then insert a RAM4 Cartridge, then enter the Cartridge Mode again. Remove the RAM4 Cartridge and turn its Memory Protect OFF by flicking the switch on the underside of the cartridge. Then insert the cartridge and enter the required Job number once more. 1. Remove the cartridge and insert a RAM4 cartridge that has been formatted for use with the RX5. 2. Remove the cartridge and insert a RAM4 Cartridge that has not been formatted, then enter the Cartridge and execute the Format operation (JOB #30). 3. If the data contained in the cartridge is not needed, make sure its Memory Protect is OFF, and format it for use with the RX5 (CARTRIDGE JOB #30). 1. Save the data again, then execute the Verify operation once more. 2. In the case of verifying a single Pattern, execute the verify operation again, making sure you have entered the correct Pattern numbers. CASSETTE MODE ERROR MESSAGES data error Sum MESSAGE I CAUSE error type error You have tried to verify cassette data. The type of data is correct (e.g., Single Pattern data) but the RX5 contains different data to that contained on the cassette. There is a checksum data error in data that you have tried to verify or load from cassette. You have tried to load or verify data from cassette, using an incorrect Job number. For example, you used the Load Single Pattern operation (Job #13) when trying to load Voice data. REMEDY Save the data again, then execute the Verify operation once more. Repeat the Load or Verify operation, making sure that the playback level is high. Also, check that the connections between the RX5 and the cassette recorder are correctly made, with cables that are functioning properly. If necessary, clean and demagnetize the tape heads. EITHER: Use the correct Job number. OR: Use the correct cassette data.
75 70 SOUND SOURCE INTERNAL: 12 BIT, 24 VOICES RAM: 12 BIT, 12 VOICES WAVEFORM DATA CARTRIDGE: 28 VOICES MEMORY CAPACITY 100 PATTERNS (MAX. LENGTH: 99 MEASURES) 20 SONGS (MAX. LENGTH: 999 PARTS) 3 CHAINS (MAX. LENGTH: 999 STEPS) 3 SETS OF KEY DATA CONTROLLERS SLIDERS: MASTER VOLUME, CLICK VOLUME, TEMPO, DATA ENTRY, INSTRUMENT VOLUME (12) BUTTONS: ACCENT 1, ACCENT 2, STOP/CONTINUE/SHIFT, START/ENTER, INSTRUMENTS A THRU X (24) KEYS: PATTERN &SONG KEYS (PATTERN/SONG, REAL TIME WRITE/ EDIT SONG, STEP WRITE/INSERT, QUANTIZE/DELETE, SWING/REPEAT, CLICK/ TEMPO CHANGE, EDIT PATTER/VOLUME CHANGE, CLEAR, COPY), REVERSE, DAMP, TEMPO, MODE & JOB KEYS (EDIT VOICE, CHAIN, SYNC, UTILITY, KEY ASSIGN, CASSETTE/CARTRIDGE, MIDI, JOB), 10-key PANEL, -1/NO, +1/YES CONNECTIONS AUDIO OUTPUT: PHONES, L/MONO, R, INDIVIDUAL OUTPUTS (12) MIDI: IN, OUT, THRU INTERFACE: CASSETTE/TAPE SYNC (IN/OUT), EXT. CLOCK IN, EXT. CLOCK OUT, WAVEFORM DATA CARTRIDGE, SEQUENCE DATA CARTRIDGE CONTROL: FOOT SWITCH POWER: DC 12V IN DIMENSIONS (W x D x H): 439 x 340 x 88mm. WEIGHT 3.8 kg. POWER REQUIREMENTS (WITH PA V VOLTAGE CONVERTOR) U.S./CANADA: 120V, 50/60HZ GENERAL MODEL: / V, 50/60 HZ SELECTABLE * Specifications are subject to change without notice. DISPLAY LCD: 16 CHARACTERS x 2 LINES LED: PATTERN, SONG, EDIT VOICE, CAS, CART, MIDI, REV, DAMP, MULTI, SYNC (INT, MIDI, TAPE, EXT), RUN
76 71 This gives a simple visual representation of how voice data is transferred and edited in the RX5 All Jobs are Edit Voice Mode Jobs. The RX5 s voice editing process, from stared voice to actual sound, is described as follows: 1. A voice is selected, using EDIT VOICE JOB #01. This voice belongs to one of three types: Internal, Copied, or Cartridge. 2. Primary data is entered, using EDIT VOICE JOBS #2 thru #6. The Edit Voice Block Diagram shows how voice data is transferred and edited. Primary data affects ALL INSTRUMENT KEYS to which the voice is assigned. and ALL NOTES played by the voice in Patterns. 3. Additional data is entered once the voice is assigned to an instrument key, using KEY ASSIGN JOBS #02 thru #04. This data will affect sounds played AT THAT KEY ONLY. Then, once the selected voice has been used to play notes in a Pattern, further data can be entered by selecting a note and using the PATTERN EDIT function. This data will affect THAT NOTE ONLY. 4. Finally, on playback of the Pattern, the voice sound, modified by the data that has been entered, will be heard. 5. Primary data and additional data can be changed at any time, with the results described in preceding paragraphs 2 and 3.
77 Function... Transmitted Recognized Remarks Basic Channel Mode Default Changed Default Messages Altered x ************** Note Number : True voice 0 ************** Velocity Note ON Note OFF After Touch Key's Ch's o x 9nH,v= nH,v=64 Pitch Bender x x x x x xx 0-127/36-96 x o x x x x v=1-127 memorized *1 Control Change Prog Change : True # x ************** o Note# asgn:pitch System Exclusive o o voice & sequence System : Song Pos : Song Sel Common : Tune System :Clock Real Time :Commands Aux :Local ON/OFF :All Notes OFF Mes- :Active Sense sages:reset Notes: x o 0-19 x o o x x o x o o 0-19 x o o x x o x *1 = When Note number assign switch is set to VOICE, each voice sounds by each note. ( Note # range : ) When Note number assign switch is set to PITCH, each voice sounds by each channel. ( Note # range : ) Mode 1 : OMNI ON, POLY Mode 3 : OMNI OFF, POLY Mode 2 : OMNI ON, MONO Mode 4 : OMNI OFF, MONO o : Yes x : No

78 RX5 PATTERN CHART
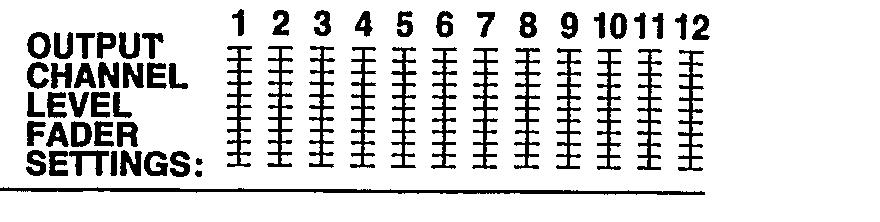
79 RX5 SONG/CHAIN CHART
80 RX5 "DRUM SET" CHART


81 SINCE 1887 YAMAHA NIPPON GAKKI CO., LTD. HAMAMATSU, JAPAN IJ

82 YAMAHA Yamaha Corporation of America 6600 Orangethorpe Avenue, P.O. Box 6600, Buena Park, CA
COPYING A PATTERN...35
 f TABLE OF CONTENTS INTRODUCTION...5 WELCOME TO THE SR18 DRUM MACHINE!...5 GROUND RULES...5 CONNECTION DIAGRAM...8 TOP PANEL PHYSICAL LAYOUT...9 GENERAL CONTROLS...9 NAVIGATION BUTTONS...10 MODE BUTTONS...10
To ensure long, trouble-free operation, please read this manual carefully. Precautions
 Thank you purchasing the Korg ELECTRIBE M EM-1. In order to enjoy long and trouble-free use, please read this manual carefully and use the instrument correctly. E 1 To ensure long, trouble-free operation,
Edit Menu. To Change a Parameter Place the cursor below the parameter field. Rotate the Data Entry Control to change the parameter value.
 The Edit Menu contains four layers of preset parameters that you can modify and then save as preset information in one of the user preset locations. There are four instrument layers in the Edit menu. See
SDMK4. Digital Drum pads user s Manual. BEAT PEDAL 2 PEDAL 1 DRUM 1 DRUM 2 CHORD LEARNING RECORD DEMO TAP START METRONOME REVERB
 ON SDMK4 Digital Drum pads user s Manual BEAT SONG KITS PAD ASS. PEDAL PEDAL 2 DRUM DRUM 2 BASS CHORD OFF TAP START 2 3 4 5 6 SONG LEARNING RECORD METRONOME REVERB DEMO POWER MASTER VOLUME SONG VOLUME
Real panel Real panel screws. Real panel
 Classico 750 CAUTION Please take a few minutes to read the following pages of instruction and precaution. 1. Please use AC 110V power cord. 2. Use the AC power cord correctly. 3. Avoid injecting water
Operation Manual. ZOOM Corporation. Reproduction of this manual, in whole or in part, by any means, is prohibited.
 Operation Manual ZOOM Corporation Reproduction of this manual, in whole or in part, by any means, is prohibited. USAGE AND SAFETY PRECAUTIONS SAFETY PRECAUTIONS In this manual, symbols are used to highlight
Dual and Split voice modes. One-touch Performance recall. High quality AWM piano and other sounds. Master keyboard features. Organ combination editing
 Congratulations! and thank you for purchasing the Yamaha P-. The P- is a high-performance electronic piano with full-scale, weighted action keyboard, a selection of high quality piano and other useful
We will cover the following topics in this document:
 ÂØÒňΠSupplemental Notes MC-505 Advanced Programming October 20th, 1998 SN90 v1.0 It all started with the MC-303 in 1996. Then, in 1998, the MC-505 Groove Box exploded on the scene and added a whole new
Important Safety Instructions
 Important Safety Instructions 1) Do not use near water. 2) Clean only with dry cloth. 3) Do not block any ventilation openings. 4) Do not place near any heat sources such as radiators, heat registers,
Software version 2.0. Operator's Manual
 3 Software version 2.0 Operator's Manual By Roger Linn Copyright 1987, 1988, 1989 Akai Electric Co., LTD. Document revision date: April 20, 1989 4 READ THIS BEFORE YOU START! Power requirements Power requirements
multitrack sequencer USER GUIDE Social Entropy Electronic Music Instruments
 multitrack sequencer Social Entropy Electronic Music Instruments IMPORTANT SAFETY AND MAINTENANCE INSTRUCTIONS TABLE OF CONTENTS BACKGROUND... 1 CONCEPTS... 2 DIAGRAM CONVENTIONS... 3 THE BASICS WHAT
English. Light Operator 24 USER'S MANUAL. Please read before use
 English Light Operator USER'S MANUAL Please read before use Contents Light Operator Improvement and changes to specifications, design and this manual, may be may at any time without prior notice. All rights
SCENEMASTER 3F QUICK OPERATION
 SETTING PRESET MODE SCENEMASTER 3F QUICK OPERATION 1. Hold [RECORD], and press [CHNS] (above the Channels Master) to set Scenes, Dual, or Wide mode. WIDE MODE OPERATION In Wide mode, both CHANNELS and
USER GUIDE V 1.6 ROLLERCHIMP DrumStudio User Guide page 1
 USER GUIDE V 1.6 ROLLERCHIMP 2014 DrumStudio User Guide page 1 Table of Contents TRANSPORT... 3 SONG NAVIGATOR / SECTION EDITING...4 EDITOR...5 TIMING OPTIONS...6 PLAYBACK OPTIONS... 7 RECORDING OPTIONS...8
DP-25 digital piano. user manual
 DP-25 digital piano user manual Musikhaus Thomann e.k. Treppendorf 30 96138 Burgebrach Germany Telephone: +49 (0) 9546 9223-0 E-mail: info@thomann.de Internet: www.thomann.de 25.02.2013 Table of contents
y POWER USER MUSIC PRODUCTION and PERFORMANCE With the MOTIF ES Mastering the Sample SLICE function
 y POWER USER MUSIC PRODUCTION and PERFORMANCE With the MOTIF ES Mastering the Sample SLICE function Phil Clendeninn Senior Product Specialist Technology Products Yamaha Corporation of America Working with
Written by Jered Flickinger Copyright 2019 Future Retro
 Written by Jered Flickinger Copyright 2019 Future Retro www.future-retro.com 2 TABLE OF CONTENTS Page 4 - Overview Page 5 Controls Page 6 Inputs and Outputs Page 7 MIDI Page 8 Jumper Settings Page 9 Standalone
24 CHANNEL DIMMER CONSOLE USER MANUAL
 PAGE 1 wdmlighting.com CHANNEL DIMMER CONSOLE USER MANUAL WDM LIGHTING 3 OAK LAWN AVE., STE. 1, DALLAS, TX 7519 Improvement and changes to specifications, design and this manual, may be made at any time
DRUMULATOR OWNERS MANUAL
 DRUMULATOR OWNERS MANUAL How to Use this Manual You can use this manual to line bird cages, as kindling when starting a fire in the fireplace, as the raw material for creating paper gliders, or most importantly,
American DJ. Show Designer. Software Revision 2.08
 American DJ Show Designer Software Revision 2.08 American DJ 4295 Charter Street Los Angeles, CA 90058 USA E-mail: support@ameriandj.com Web: www.americandj.com OVERVIEW Show Designer is a new lighting
Vocal Processor. Operating instructions. English
 Vocal Processor Operating instructions English Contents VOCAL PROCESSOR About the Vocal Processor 1 The new features offered by the Vocal Processor 1 Loading the Operating System 2 Connections 3 Activate
USER'S MANUAL. ADJ R Junostraat EW Kerkrade
 USER'S MANUAL ADJ R Junostraat EW Kerkrade www.adj.com Improvement and changes to specifications, design and this manual, may be made at any time without prior notice. All Rights Reserved Contents Features
Techni-Lux. COMMANDER 24&48 24&48 Ch DMX Controllers USER'S MANUAL. Please read before use V1.1
 Techni-Lux COMMANDER & & Ch DMX Controllers USER'S MANUAL Please read before use V1.1 COMMANDER & & Ch DMX Controllers Improvement and changes to specifications, design and this manual, may be made at
QUICK START GUIDE FP-S SPINET DIGITAL PIANO. Designer Series
 QUICK START GUIDE FP-S SPINET DIGITAL PIANO Designer Series QUICK START GUIDE INDEX PLAYING THE DEMO SONGS... 2 PLAYING SONGS FROM THE FLOPPY DISKS... 3 BUY OR DOWNLOAD SONGS TO PLAY... 4 USING THE LCD
Deluxe Home Digital Piano. Owner s Manual
 DP-77 Deluxe Home Digital Piano Owner s Manual Suzuki Musical Instrument Corporation P.O. Box 710459 Santee, California 92072-0459 800-854-1594 www.suzukimusic.com Copyright Suzuki Musical Instrument Corporation
Reference such as (p. **) indicate pages in this manual to which you can refer.
 indicate pages in this manual to which you can refer.") Owner s Manual Thank you, and congratulations on your choice of the BOSS DR-3 Dr. Rhythm. Before using this unit, carefully read the sections entitled: USING THE UNIT SAFELY (page 2 4) IMPORTANT NOTES
Owner s Manual Thank you, and congratulations on your choice of the BOSS DR-3 Dr. Rhythm. Before using this unit, carefully read the sections entitled: USING THE UNIT SAFELY (page 2 4) IMPORTANT NOTES
BodyBeat Metronome Instruction Manual
 BodyBeat Metronome Instruction Manual Peterson Electro-Musical Products, Inc. 2013 Power The StroboPlus contains a powerful internal rechargeable Lithium-Ion battery. Before initial use, we recommend that
III Phrase Sampler. User Manual
 III Phrase Sampler User Manual Version 3.3 Software Active MIDI Sync Jun 2014 800-530-4699 817-421-2762, outside of USA mnelson@boomerangmusic.com Boomerang III Phrase Sampler Version 3.3, Active MIDI
Controller DMX DC-1224
 Manual Controller DMX DC-1224 Table of Contents 1. Safety instructions... 4 1.1. FOR SAFE AND EFFICIENT OPERATION... 4 3. Overview... 6 3.1. Front view... 6 3.2. Rear view... 9 4. Operation guide... 10
Stereo Cassette Deck
 3-864-773-11(1) Stereo Cassette Deck Operating Instructions TC-SD1 1998 by Sony Corporation WARNING WARNING To prevent fire or shock hazard, do not expose the unit to rain or moisture. To avoid electrical
PLAYMATE PROFESSIONAL STEREO 19 MIXER, USB/SD CARD AND BLUETOOTH PLAYER. User Guide and Reference Manual. page 1
 PLAYMATE PROFESSIONAL STEREO 19 MIXER, USB/SD CARD AND BLUETOOTH PLAYER User Guide and Reference Manual page 1 INTRODUCTION Congratulations and thank you for purchasing the NewHank Playmate mixer. This
To ensure long, trouble-free operation, please read this manual carefully. Precautions
 Thank you purchasing the Korg ELECTRIBE A EA-. In order to enjoy long and trouble-free use, please read this manual carefully and use the instrument correctly. E To ensure long, trouble-free operation,
STAGE 2412 DMX 24 CHANNELS DMX CONSOLE FOR CONVENTIONAL LIGHTING
 English STAGE 1 DMX User Manual Rev. 11 STAGE 1 DMX CHANNELS DMX CONSOLE FOR CONVENTIONAL LIGHTING This symbol on the product or on its packaging indicates that this product shall not be trated as household
fxbox User Manual P. 1 Fxbox User Manual
 fxbox User Manual P. 1 Fxbox User Manual OVERVIEW 3 THE MICROSD CARD 4 WORKING WITH EFFECTS 4 MOMENTARILY APPLY AN EFFECT 4 TRIGGER AN EFFECT VIA CONTROL VOLTAGE SIGNAL 4 TRIGGER AN EFFECT VIA MIDI INPUT
For example, an indication of Range: 60, 67, 72, 75 (Hz) means that 60 Hz is the default value.
 means that 60 Hz is the default value.") Owner s Manual This manual explains how to use an MV-8000 in which System Program Version 3.0 is installed. About the Symbols and icons in this manual Text in square brackets [ ] refers to buttons on the
Owner s Manual This manual explains how to use an MV-8000 in which System Program Version 3.0 is installed. About the Symbols and icons in this manual Text in square brackets [ ] refers to buttons on the
USAGE AND SAFETY PRECAUTIONS
 Operation Manual USAGE AND SAFETY PRECAUTIONS USAGE AND SAFETY PRECAUTIONS SAFETY PRECAUTIONS In this manual, symbols are used to highlight warnings and cautions for you to read so that accidents can be
ÂØÒňÎ. Workshop. The Rhythms of the Fantom-X. No. 3 in the Fantom-X Workshop Series
 ÂØÒňΠWorkshop The Rhythms of the Fantom-X No. 3 in the Fantom-X Workshop Series 1 2004 Roland Corporation U.S. All rights reserved. No part of this publication may be reproduced in any form without the
ALGORHYTHM. User Manual. Version 1.0
 !! ALGORHYTHM User Manual Version 1.0 ALGORHYTHM Algorhythm is an eight-step pulse sequencer for the Eurorack modular synth format. The interface provides realtime programming of patterns and sequencer
Chapter 40: MIDI Tool
 MIDI Tool 40-1 40: MIDI Tool MIDI Tool What it does This tool lets you edit the actual MIDI data that Finale stores with your music key velocities (how hard each note was struck), Start and Stop Times
randomrhythm Bedienungsanleitung User Guide
 randomrhythm Bedienungsanleitung User Guide EN Foreword Whether random really exists or is just an illusion, shall be discussed by philosophers and mathematicians. At VERMONA, we found a possibility to
INSTRUCTION MANUAL. 61-Key Electronic Teaching Keyboard SKY SKY3160. Ver. 2
 Ver. 2 INSTRUCTION MANUAL 6-Key Electronic Teaching Keyboard SKY2954 + SKY360 TOOLS REQUIRED WRENCH HARDWARE PERSON ASSEMBLY APPROXIMATELY 5 MIN. ASSEMBLY 2 5 x 35mm 5 x 35mm 4 5 x 25mm 3 4 PCS 4 PCS 8
VERSION 2.A 10/21/1999. Lightronics Inc. 509 Central Drive, Virginia Beach, VA TEL
 7/ 0(025< /,*+7,1*&21752/ &2162/( 2:1(56Ã0$18$/ VERSION 2.A 10/21/1999 Contents DESCRIPTION OF CONTROLS 3 OPERATION 4 USING THE MENU SYSTEM 5 MENU FUNCTIONS 5 RECORDING SCENES 7 USING SCENES 8 RECORDING
R H Y T H M G E N E R A T O R. User Guide. Version 1.3.0
 R H Y T H M G E N E R A T O R User Guide Version 1.3.0 Contents Introduction... 3 Getting Started... 4 Loading a Combinator Patch... 4 The Front Panel... 5 The Display... 5 Pattern... 6 Sync... 7 Gates...
Operation Manual (not in Cubase LE)
") Operation Manual (not in Cubase LE) Matthias Klag, Michael Ruf Cristina Bachmann, Heiko Bischoff, Christina Kaboth, Insa Mingers, Sabine Pfeifer, Kevin Quarshie, Benjamin Schütte This PDF provides improved
Operation Manual (not in Cubase LE) Matthias Klag, Michael Ruf Cristina Bachmann, Heiko Bischoff, Christina Kaboth, Insa Mingers, Sabine Pfeifer, Kevin Quarshie, Benjamin Schütte This PDF provides improved
Data handling. To ensure long, trouble-free operation, please read this manual carefully. Precautions
 E To ensure long, trouble-free operation, please read this manual carefully. Precautions Location Using the unit in the following locations can result in a malfunction. In direct sunlight Locations of
LEGATO. digital piano. owner's manual
 LEGATO digital piano owner's manual LEGATO DIGITAL PIANO CAUTION: TO REDUCE THE RISK OF ELECTRIC SHOCK, DO NOT REMOVE COVER OR BACK. NO USER-SERVICEABLE PARTS INSIDE. REFER SERVICING TO QUALIFIED SERVICE
Owner s Manual AC & BATTERY POWERED FET
 Owner s Manual AC DC AC & BATTERY POWERED FET Thank you, and congratulations on your choice of the BOSS RC-2 Loop Station. Before using this unit, carefully read the sections entitled: USING THE UNIT SAFELY
The MPC X & MPC Live Bible 1
 The MPC X & MPC Live Bible 1 Table of Contents 000 How to Use this Book... 9 Which MPCs are compatible with this book?... 9 Hardware UI Vs Computer UI... 9 Recreating the Tutorial Examples... 9 Initial
Reason Overview3. Reason Overview
 Reason Overview3 In this chapter we ll take a quick look around the Reason interface and get an overview of what working in Reason will be like. If Reason is your first music studio, chances are the interface
Colour Control48 Order Code: Control48
 Colour Control48 Order Code: Control48 www.cobrainternational.com User Manual Cobra Colour Control 48 Dear Customer, Thank you for purchasing the Cobra Colour Control 48. With decades of experience in
1ENGLISH P R O Thanks for your reliability on us having acquired a product WORK. We hope it provides you a long and reliable service. The STAGE is a l
 LIGHTING CONTROL MIXER P R O STAGE 1 DMX R STAGE DMX OPERATING INSTRUCTIONS 1ENGLISH P R O Thanks for your reliability on us having acquired a product WORK. We hope it provides you a long and reliable
Owner s Manual LED COMMANDER 16/2
 Owner s Manual LED COMMANDER 16/2 Content Introduction...2 Technical Specification...2 Maintenance and care...2 Notes on safety...3 Features...4 Overview...5 Installation...6 Operation...6 Channel Assignment...7
VITEK VTM-TLM191 VTM-TLM240
 VTM-TLM191 VTM-TLM240 19 & 24 Professional LED Monitors with HDMI, VGA, and Looping BNC VITEK FEATURES 19 & 24 Wide Screen LED Display Panel HDMI, VGA, and Looping BNC Composite Video Inputs & Stereo Audio
ttr' :.!; ;i' " HIGH SAMPTE RATE 16 BIT DRUM MODUTE / STEREO SAMPTES External Trigger 0uick Set-Up Guide nt;
 nt; ttr' :.!; ;i' " HIGH SAMPTE RATE 16 BIT DRUM MODUTE / STEREO SAMPTES External Trigger 0uick Set-Up Guide EXIERNAL 7 RIOOER. QUIGK 5EI-UP OUIDE The D4 has twelve trigger inputs designed to accommodate
The Complete Guide to Music Technology using Cubase Sample Chapter
 The Complete Guide to Music Technology using Cubase Sample Chapter This is a sample of part of a chapter from 'The Complete Guide to Music Technology', ISBN 978-0-244-05314-7, available from lulu.com.
X D M PREAMP MIXER
 User Instructions X D M - 3 5 2 PREAMP MIXER Thank you for purchasing this American DJ product. The XDM-352 is ready to be used, there is no assembly required. Please read the following instructions before
Operation Manual ZOOM Corporation
 Operation Manual ZOOM Corporation Reproduction of this manual, in whole or in part, by any means, is prohibited. USAGE AND SAFETY PRECAUTIONS In this manual, symbols are used to highlight warnings and
English. Deutsch. Français. Owner s Manual. Bedienungsanleitung. Mode d emploi
 Owner s Manual English Bedienungsanleitung Deutsch Mode d emploi Français Congratulations! You are the proud owner of an extraordinary electronic keyboard. The Yamaha PSR-6000 PortaTone combines the most
M-16DX 16-Channel Digital Mixer
 M-6DX 6-Channel Digital Mixer Workshop Getting Started with the M-6DX 007 Roland Corporation U.S. All rights reserved. No part of this publication may be reproduced in any form without the written permission
MIC CUE MIC 1 MIC 2 TREBLE BASS MIC1/2 Tone Controls GROUND
 /V-/ Hz Your PYRAMID Series Performance Mixer is a sophisticated control center, perfect for mixing sound from multiple playback sources such as microphones, tuners, CD players, turntables or the audio
USER GUIDE 8-CHANNEL DMX CONTROLLER December 2013 Version 1.0 CHASE / STROBE SPEED FADE SPEED RED GREEN BLUE WHITE AMBER DIMMER INSERT
 8-CHANNEL DMX CONTROLLER RED GREEN BLUE YELLOW 1 2 3 4 5 6 CYAN ORANGE PURPLE WHITE RED GREEN BLUE WHITE AMBER DIMMER RECORD INSERT DELETE TAP CLEAR MANUAL MUSIC 1 2 3 5 6 7 AUTO CHASE / STROBE SPEED 4
CFX 12 (12X4X1) 8 mic/line channels, 2 stereo line channels. CFX 16 (16X4X1) 12 mic/line channels, 2 stereo line channels
 8 mic/line channels, 2 stereo line channels. CFX 16 (16X4X1) 12 mic/line channels, 2 stereo line channels") COMPACT CFX MIXERS COMPACT SOUND REINFORCEMENT MIXERS WITH EFX FOR THE GIGGING MUSICIAN THREE MODELS CFX 12 (12X4X1) 8 mic/line channels, 2 stereo line channels CFX 16 (16X4X1) 12 mic/line channels, 2
COMPACT CFX MIXERS COMPACT SOUND REINFORCEMENT MIXERS WITH EFX FOR THE GIGGING MUSICIAN THREE MODELS CFX 12 (12X4X1) 8 mic/line channels, 2 stereo line channels CFX 16 (16X4X1) 12 mic/line channels, 2
QUICK START GUIDE. GP-3 Mini-Grand Digital Piano
 QUICK START GUIDE GP-3 Mini-Grand Digital Piano QUICK START GUIDE INDEX PLAYING THE DEMO SONGS... 2 PLAYING SONGS FROM THE FLOPPY DISKS... 3 BUY OR DOWNLOAD SONGS TO PLAY... 4 USING THE LCD AND ITS CONTROLS..
RE-303 CPU. SONIC-POTIONS!!! PRELIMINARY DRAFT!!! v WORK IN PROGRESS
 RE-303 CPU SONIC-POTIONS!!! PRELIMINARY DRAFT!!! v 0.911 WORK IN PROGRESS Intro... 3 Quickstart... 3 The random way... 3 The manual way...3 Control scheme... 4 Pattern Write Mode... 4 Auto Exit... 4 Normal
Syrah. Flux All 1rights reserved
 Flux 2009. All 1rights reserved - The Creative adaptive-dynamics processor Thank you for using. We hope that you will get good use of the information found in this manual, and to help you getting acquainted
DMX OPERATOR PRO. User Manual
 User Manual (24-004-1262 Rev 2.0) E-mail: support@elationlighting.com Internet: http://www.elationlighting.com Sections: Table of Contents DMX OPERATOR PRO 1 : General Introduction..... 3 2 : Safety Information
CVP-609 / CVP-605. Reference Manual
 CVP-609 / CVP-605 Reference Manual This manual explains about the functions called up by touching each icon shown in the Menu display. Please read the Owner s Manual first for basic operations, before
S I N E V I B E S FRACTION AUDIO SLICING WORKSTATION
 S I N E V I B E S FRACTION AUDIO SLICING WORKSTATION INTRODUCTION Fraction is a plugin for deep on-the-fly remixing and mangling of sound. It features 8x independent slicers which record and repeat short
K150 USER S MANUAL. Kurzweil Music Systems, Inc. Waltham, MA. June 1986 version KMSI P/N:
 K150 USER S MANUAL Kurzweil Music Systems, Inc. Waltham, MA June 1986 version KMSI P/N: 91002501 Copyright (C) 1986 Kurzweil Music Systems, Inc. Preface......................... 6 How To Use This Manual.............
Show Designer 3. Software Revision 1.15
 Show Designer 3 Software Revision 1.15 OVERVIEW... 1 REAR PANEL CONNECTIONS... 1 TOP PANEL... 2 MENU AND SETUP FUNCTIONS... 3 CHOOSE FIXTURES... 3 PATCH FIXTURES... 3 PATCH CONVENTIONAL DIMMERS... 4 COPY
Model. Owner s Manual
 Model Thank you, and congratulations on your choice of a Hammond XLK-3. The XLK-3 is the lower keyboard unit for Hammond XK-3/3C. In order to get the most out of this instrument for many years to come,
Digital Grand Player Piano. Owner s Manual
 Digital Grand Player Piano Owner s Manual Suzuki Musical Instrument Corporation P.O. Box 710459 Santee, California 92072-0459 800-854-1594 www.suzukimusic.com Copyright Suzuki Musical Instrument Corporation
Reference Manual. Manual Development Group 2017 Yamaha Corporation Published 11/2017 PO-B0 v1.10
 Reference Manual This Reference Manual explains advanced features of Genos that are not explained in the Owner s Manual. Please read the Owner s Manual first, before reading this Reference Manual. Manual
CMX-DSP Compact Mixers
 CMX-DSP Compact Mixers CMX4-DSP, CMX8-DSP, CMX12-DSP Introduction Thank you for choosing a Pulse CMX-DSP series mixer. This product has been designed to offer reliable, high quality mixing for stage and/or
TF5 / TF3 / TF1 DIGITAL MIXING CONSOLE. TF Editor User Guide
 TF5 / TF3 / TF1 DIGITAL MIXING CONSOLE EN Special notices Copyrights of the software and this document are the exclusive property of Yamaha Corporation. Copying or modifying the software or reproduction
Overview. A 16 channel frame is shown.
 Overview A 16 channel frame is shown. 22 Mono Input Channel 1 - MIC INPUT The mic input accepts XLR-type connectors and is designed to suit a wide range of BALANCED or UNBALANCED signals. Professional
Recommendations for Producing XG Song Data
 Recommendations for Producing XG Song Data V 2.00 Created on February 2, 1999 Copyright 1999 by YAMAHA Corporation, All rights reserved XGX-9903 1999.021.3CR Printed in Japan Introduction Introduction
Owner s Manual DMX MASTER I & II
 Owner s Manual DMX MASTER I & II Content Introduction...2 Technical Specification...2 Maintenance and care...2 1. Notes on safety...3 2. General Instructions...3 3. Overview...5 4. Operation Guide...7
DMX48. User s instruction manual. 24 Channel DMX controller
 WWW.LIGHTEMOTIONS.COM.AU DMX48 24 Channel DMX controller User s instruction manual This manual contains important information about the safe installation and use of this product Please read this instruction
Stereo Cassette Deck
 3-858-050-11(1) Stereo Cassette Deck Operating Instructions 199 by Sony Corporation 3-858-050-11 (1) WARNING To prevent fire or shock hazard, do not expose the unit to rain or moisture. To avoid electrical
Lets go through the chart together step by step looking at each bit and understanding what the Chart is asking us to do.
 Lesson Twenty Lesson 20 IDS PAS2 Performing a Song- The Buzz Lesson Objectives Developing our ability to play a piece of music. Strengthen our understanding chart reading. Apply many of the skills learned
SP-500 Main Features. EasyStart CONTENTS
 EasyStart 88 key RH2 (Real Weighted Hammer Action 2) keyboard. Different degrees of resistance from top to bottom. Velocity sensitive with 6 touch curves for custom response. TouchView Graphical user interface.
******************************************************************************** Optical disk-based digital recording/editing/playback system.
 Akai DD1000 User Report: ******************************************************************************** At a Glance: Optical disk-based digital recording/editing/playback system. Disks hold 25 minutes
TABLE OF CONTENTS TABLE OF CONTENTS TABLE OF CONTENTS. 1 INTRODUCTION 1.1 Foreword 1.2 Credits 1.3 What Is Perfect Drums Player?
 TABLE OF CONTENTS TABLE OF CONTENTS 1 INTRODUCTION 1.1 Foreword 1.2 Credits 1.3 What Is Perfect Drums Player? 2 INSTALLATION 2.1 System Requirments 2.2 Installing Perfect Drums Player on Macintosh 2.3
Tiptop audio z-dsp.
 Tiptop audio z-dsp www.tiptopaudio.com Introduction Welcome to the world of digital signal processing! The Z-DSP is a modular synthesizer component that can process and generate audio using a dedicated
QUICK START GUIDE. G-33 Digital Grand Piano
 QUICK START GUIDE G-33 Digital Grand Piano QUICK START GUIDE INDEX PLAYING THE DEMO SONGS... 2 PLAYING SONGS FROM THE FLOPPY DISKS... 3 BUY OR DOWNLOAD SONGS TO PLAY... 4 USING THE LCD AND ITS CONTROLS..
192 Channel DMX Controller
 DM-X 92 Channel DMX Controller USER MANUAL 54. 9UK Vers ion. D M X 5 2 C O N T R O L L E R S E R I E S Content. Before you begin. What is included.......2 Unpacking instructions....3 Safety instructions...
Four Head dtape Echo & Looper
 Four Head dtape Echo & Looper QUICK START GUIDE Magneto is a tape-voiced multi-head delay designed for maximum musicality and flexibility. Please download the complete user manual for a full description
2002 Martin Professional A/S, Denmark.
 Freekie user manual 2002 Martin Professional A/S, Denmark. All rights reserved. No part of this manual may be reproduced, in any form or by any means, without permission in writing from Martin Professional
Manual Version 1.0. User Guide. English
 Manual Version 1.0 User Guide English Table of Contents Introduction... 6 Tutorial... 14 Support... 6 Starting Up... 14 About This User Guide... 6 Launching Clips... 14 Important Notes... 6 Editing Clips
Tau Quick Reference. For Setup: Factory Tau 1 For software version and above
 Tau Quick Reference. For Setup: Factory Tau For software version..9 and above Contents. Eigenharp Terminology. Layout overview. Choosing Splits. Split. Split. Split 7. ercussion s 8. groups 9. Drummer
VARIGATE 4+ MANUAL V.1
 www.malekkoheavyindustry.com 814 SE 14TH AVENUE PORTLAND OR 97214 USA TABLE OF CONTENTS SPECIFICATIONS 1 INSTALLATION 2 DESCRIPTION 3 OVERVIEW 4-5 PROGRAMMING GATES PER STEP 6 PROGRAMMING CV/NOTES PER
ED3. Digital Encoder Display Page 1 of 13. Description. Mechanical Drawing. Features
 Description Page 1 of 13 The ED3 is an LCD readout that serves as a position indicator or tachometer. The ED3 can display: Speed or position of a quadrature output incremental encoder Absolute position
Modcan Touch Sequencer Manual
 Modcan Touch Sequencer Manual Normal 12V operation Only if +5V rail is available Screen Contrast Adjustment Remove big resistor if using with PSU with 5V rail Jumper TOP VEIW +5V (optional) +12V } GND
Commander 384. w w w. p r o l i g h t. c o. u k U S E R M A N U A L
 Commander 384 w w w. p r o l i g h t. c o. u k U S E R M A N U A L 1, Before you begin 1.1: Safety warnings...2 3 1.2: What is included...4 1.3: Unpacking instructions...4 2, Introduction 2.1: Features...4
PRECAUTIONS NOTE: IT IS VERY IMPORTANT THAT YOU READ THIS SECTION TO PROVIDE YEARS OF TROUBLE FREE USE. THIS UNIT REQUIRES CAREFUL HANDLING.
 PRECAUTIONS NOTE: IT IS VERY IMPORTANT THAT YOU READ THIS SECTION TO PROVIDE YEARS OF TROUBLE FREE USE. THIS UNIT REQUIRES CAREFUL HANDLING. All warnings on this equipment and in the operating instructions
CD-2i Workshop. Presented by
 CD-2i Workshop Presented by The Education and Business Development Division ROLAND CORPORATION US 5100 Southeastern Avenue Los Angeles, CA 90040 317/331-9262 CD-2i Overview The CD-2i combines advanced
y POWER USER Understanding Master Mode Phil Clendeninn Senior Product Specialist Technology Products Yamaha Corporation of America
 y POWER USER Understanding Master Mode Phil Clendeninn Senior Product Specialist Technology Products Yamaha Corporation of America This synthesizer is loaded with such a wealth of different features, functions
3URJUDPPDEOH 'LJLWDO (IIHFWV 3URFHVVRU. Introduction Installation... 2 AC Power Hookup... 2 Audio Connections... 2 Safety Precautions...
 7KH$57 3URJUDPPDEOH 'LJLWDO (IIHFWV 3URFHVVRU TABLE OF CONTENTS Introduction... 1 Installation... 2 AC Power Hookup... 2 Audio Connections... 2 Safety Precautions... 2 Quick Start Instructions... 3 Quick
MUSC 1331 Lab 1 (Sunday Class) Basic Operations and Editing in Performer. Quantization in Performer
 Basic Operations and Editing in Performer. Quantization in Performer") MUSC 1331 Lab 1 (Sunday Class) Basic Operations and Editing in Performer Objectives: Quantization in Performer; Cut, Copy, and Paste editing in Performer; Transposing parts in Performer; Repeating tracks
MUSC 1331 Lab 1 (Sunday Class) Basic Operations and Editing in Performer Objectives: Quantization in Performer; Cut, Copy, and Paste editing in Performer; Transposing parts in Performer; Repeating tracks