INSTRUKCIJA MARĖĒJUMAM:
|
|
|
- August Lambert
- 6 years ago
- Views:
Transcription
1
2 0
3 INSTRUKCIJA MARĖĒJUMAM: SASTĀV NO DIVĀM DAěĀM GALVENĀ: Šie norādījumi būs redzami uz pirmās lappuses (vāka), vāka otrā pusē vai uz pašas pirmās instrukcijas lapas, iekrāsoti izceltā krāsā kā "background''.norādījumu skaits nav noteikts, dotais izvietojums ir tikai piemērs un iespejami citi veidi, kādā norādes izvietotas. I DaĜa Divi grafiski simboli un papildu marėējums, ar paskaidrojošu paziħojumu.. Katrs grafiskais simbols ar paskaidrojumu. II DaĜa Brīdinājums : Trijstūra simbols ar bultiħu galā domāts, lai brīdinātu lietotāju par iespējamu neizolētu strāvu ierīces korpusā, kas var izraisīt risku. Uzmanību: Trijstūris ar izsaukuma zīmi brīdina lietotājus par instrukciju esamību, par to, ka ierīcei paredzēta speciāla, īpaša pielietošana. 1
4 Saturs I. Vispārīga informācija 1 1. Priekšvārds 3 2. Galvenās sastāvdaĝas 3 3. Ierīce Priekšējais panelis Aizmugurējais panelis Tālvadības pults 5 4. STB Savienojums 7 5. STB Uzstādīšana 7 6. Izvēlnes struktūra Kanālu uzstādīītājs Sistēmas uzstādījumi Valodas uzstādījumi Laika uzstādījumi AV uzstādījumi Vecāku uzstādījumi OSD uzstādījumi Kanālu uzstādīšana Kanālu meklēšana Meklēšanas veidi CA sistēma CA informācija PiekĜuveslīmenis(vecuma ierobežojums) Mainīt PIN kodu Rūpnīcas uzstādījumi Sistēmas informācija Sākotnējo uzstādījumu ielade Īsinājumikona STB Uzlabošana 19 9.Piederumi 19 II. Problēmu risināšana 19 2
5 III. Specifikācija 20 I I. Vispārīga informācija 1. Priekšvārds Paldies, par jūsu pirkumu, digitālo virszemes uztvērēju. Jaunākās tehnoloăijas, izcils dizains, kas nodrošina augstu kvalitāti un attēla stabilitāti, jums ērtu lietošanu. Pirms lietošanas lūdzu lietojiet rokasgrāmatu. 2. Galvenās sastāvdaĝas 1. PiekĜuves sistēmu nodrošina Irdeto/Conax/CI 2. Adoptēts čips STi5202 ST40CPU Ātrums: 266MHz 3. OS(operēšanas sistēma) Linux MPEG-4(10 daĝa) pamatā un augsta līmeħa 3/MPEG-2 MP@ML 5. DDRAM AtmiĦa 128/256Mbytes (izvēles) 6. AtmiĦas lielums 64/128Mbit (izvēles) 7. HDMI 1.3 Izeja 8. USB 2.0 Interface (PIC un SW uzlabošanai) 9. DVB-T kanāli TV un radio programas 12. IknedēĜas elektroniskais programmu gids (EPG) 13. OSD teletekst s(dvb) un subtitri 14. Automātiski islēdzas un izslēdzas pēc taimera iestatījumiem 15. Teletekst VBI ievietošana (tikai ar SD scartu ) 16. Vairākas valodas (angĝu franču, vācu, itāĝu, spāħu, portugāĝu, latviešu un citas 13 valodas) 3
6 (1) Priekšējais panelis 1. Izvēlne 2. Labi 3. Pa kreisi 4. Uz leju 5. Pa labi 6. Uz augšu 7. Strāva 8. Viedkartes ieeja (2) Aizmugures panelis 1 ANT IN 2 LOOP 3 SPDIF 4 USB ieeja 5 HDMI ieeja 6 TV SCART 7 VCR SCART 4
7 (3) Tālvadības pults 5
8 (1) POWER: Strāva Ieslēgt/Izslēgt (2) L/R: SkaĦas celiħa izvēle (3) : Ieslēgt/Izslēgt taimeri (4) EPG: elektroniskais programmu gids (5) MENU : Galvenās izvēlnes atvēršana (6) OK: Izvēlēties (7) Volume+/Volume-: SkaĜāk/klusāk (8) AUDIO: Audio atlase (9) SUBT:Subtitri Ieslēgti/Izslēgti (10) DELETE: Dzēst programau. (11) TV/RADIO: TV/RADIO izvēle (12) MUTE: Klusums (13) 0-9: Kanāli no 0-9 (14) RECALL: AtpakaĜ (15) INFO: Programmas informācija (16) EXIT: Izeja (17) Cursor: Kursora atslēga (18) PAGE+/PAGE-: Lappusi augšup vai lejup (19) TEXT :Teleteksts (20) FAV: Izlase (21) ASPECT: Mainīt video konversiju (22) LIST: Iziet 3. STB Savienojums Vērsiet uzmanību uz attēlu,kas norāda tehnisko parametru nozīmi( strāvas vada ieeja utml). 6
9 1 ANTIN KabeĜa signāla ieeja 2 LOOP RF izeja uz TV 3. S/PDIF S/PDIF izeja 4 USB ieeja 5. HDMI ieeja 6. TV SCART :SCART izeja uz TV 7. VCR SCART:SCART izeja/ieeja uz VCR 4. STB Uzstādīšana Solis1: Sistēmas pieslēgšanas pārbaude Pārbaudiet visus savienojumus strāvas vadu, signāla kabeli, Audio/video ierīces kabeli.. Solis 2: Ierīces ieslēgšana Pēc visu kabeĝu un strāvas kabeĝu savienojuma,ieslēdziet uztvērēju, ierīcē ieslēgsies sarkana gaismiħa, ieslēdziet TV un uzstādiet to uz video režīmu( uz tālvadības pults vai uz TV paneĝa. Solis 3: 7
10 Automātiskā meklēšana Gadijumā, ja ierīce nav ieprogrammēta, uz ekrāna parādīsies "open screen" - tuksha bilde. Nospiediet taustiħu MENU, izmantojot taustiħus UP (uz augšu) un DOWN (uz leju), lai izvēlētos Search Settings - meklēšanas iestatījumus. Tad nospiediet OK, izvēlieties meklēšanas veidu, nospiediet OK, lai uzsāktu programmas meklēšanu. Solis 4: TV un radio programmu izvēle. 1. Lūdzu, nospiediet MENU, izmantojot UP un DOWN taustiħus,lai izvēlētos Channel Manager - (izveletos kanalu)., nospiediet OK, kad esat izvēlējies vēlamo programmu. 2. Ja vēlaties klausīties radio un izvēlēto programmu, nospiediet OK, kad ieslēgta Non-Menu programma. Lai izvēlētos, izmantojiet taustiħus LEFT (pa kreisi) un RIGHT (pa labi). Lietotājs var atrast detalizētu meklēšanas informāciju, kamēr tiek meklēta programma. Kad meklēšana pabeigta, uz ekrāna būs norādīts, cik programmas jums pieejamas. 5. Izvēlnes struktūra Ja vēlaties kaut ko izmainīt uztvērējā, nospiediet taustiħu MENU uz tālvadības pults,lai ieietu galvenajā izvēlnē. Main Menu (Galvenā izvēlne) ietilpst: 8
11 6.1 Channel Manager: Izvēlne programmas vadībai 6.2 SIstēmas uzstādījumi: izvēlne sistēmas vai nosacījumu noteikšanai. 6.3 Meklēšanas parametri: Izvēle kanālu meklēšanai 6.4 CA sistēma: Pēc izvēles noteikt piekĝuvu kanāliem. 6.5 Failu sistēma: Izvēle USB failu pārlūks un programmas atjauninājumi/uzlabojumi. 6.6 Rūpnīcas uzstādījumi :Atgriezties atpakaĝ uz rūpnīcas iestatījumiem. Lūdzu, spiediet UP un DOWN taustiħus, lai izvēlētos vēlamo. Spiediet OK,lai apstiprinātu. 6.1 Kanālu uzstādītājs/organiztors Lai izvēlētos kanālus sistēmas iestatīšanai, nospiediet OK lai apstiprinātu. Izmantojiet UP un DOWN taustiħus, lai izceltu izlases programmas kanālu sarakstā un spiediet OK. Tālvadības pults krāsaino taustiħu nozīme un funkcijas: 9
12 Sarkans: Šėirot Zils: Pievienot Izlasei Dzeltens: Kustība Delete : Dzēst programmu, kura jūs neapmierina 6.2 Sistēmas uzstādījumi Izvēlēties System settings izvēlni un spiediet OK, lai ieietu System settings izvēlnē. 10
13 6.2.1 Valodas uzstādījumi Izvēlieties Language Settings lodziħā System Setting un nospiediet OK,lai ieietu valodas izvēlnes System Menu. Lietojot LEFT un RIGHT taustiħus, lai sakārtotu katru no izvēlnēm zem Menu, Audio, Subtitle pēc jūsu ieskatiem. 11
14 Uzmanību: Audio valoda un subtitrus nodrošina vietējais operators Laika uzstādījumi Izvēlieties Time Settings izvēlnē System Setting un nospiediet OK taustiħu, lai ieietu laika uzstādījumus. Atkarībā no jūsu laika joslas, varēsiet uzstādīt GMT uzstādījumus. Lietojiet LEFT un RIGHT taustiħus, lai automātiski izvēlētos ieslēgšanu/izslēgšanu. Piemēram, izvēloties Enable - aktivizēts, un tad varat ievadīt vēlamo. 12
15 Uzmanību: laika iestatījumu skaitĝi ir no 0-23 (stundām) un no 0-59 (minūtēm) AV uzstādījumi Izvēlieties AV Setting izvēlni, tad System Setting, nospiediet OK,lai apstiprinātu to. Iespēja mainīt Audio/Video lielumus pēc jūsu ieskatiem. 13
16 6.2.4 OSD uzstādījumi Izvēlieties OSD System Setting izvēlnē, nospiediet OK lai ieietu. Lietojot LEFT un RIGHT taustiħus,lai uzstādītu necaurredzamību un LCN kā pieejamu vai nepieejamu.. 14
17 6.3. Meklēšanas uzstādījumi 6.3.1Kanālu meklēšana: Izvēlieties Search Settings tad Main Menu, nospiediet OK,lai ieietu izvēlnē. Izvēlieties Search izvēlne un tad nospiediet OK, uztvērējs automātiski uzsāks meklēšanu. Meklēšanai beidzoties, uz ekrāna būs tādas prorammas,pēc kāda kritērija tās izvēlejāties. 15
18 6.3.2 Meklēšanas veidi Ir trīs meklēšanas veidi : manuālā meklēšana (Manu), tīkla meklēšana (Nit) un automātiskā meklēšana (Auto). 1. Manu meklēšana Saglabājiet atrastos kanālus un tad pievienojiet programmas kanālu sarakstam. 16
19 2. Nit meklēšana Atkarībā no jūsu izvēlētās frekvences, tiks uztverti esošie kanāli. Tādā veidā jūs ietaupīsiet laiku un meklēšanas ātrums palielināsies. Nospiediet EXIT, lai apturētu tīkla meklēšanu. 17
20 3. Auto meklēšana Meklēšana aizħems ilgāku laiku, lai atrastu visus esošos kanālus. Nospiediet OK,lai apturētu automātisko meklēšanu. 18
21 6.4 CA Sistēma CA Informācija Ieejot CA sistēmā, izvēlieties izvēlnes lodziħu CA information un jūs iegūsiet attiecīgo informāciju par CA - seriālais numurs, pārskatīšana, u.c. 19
22 6.4.2 PiekĜuves līmenis(vecuma ierobežojums) Pastāv 4 līmeħi : General, PG-Parent guide, A-Over 18 un X-Erotic. Lietojot LEFT un RIGHT, iespēja kontrolēt līmeni, ievadiet CA kartes PIN kodu, tad nospiediet OK, lai to apstiprinātu.ca kartes PIN kods sastāv no 4 cipariem, kuru nodrošina sistēma Mainīt CA Pin kodu Izvēlieties izvēlnes lodziħu Change CA PIN zem nosacījuma piekĝuves sistēmas, nospiediet OK,lai ievadītu. Tad vadoties pēc instrukcijas,rīkojieties,kamēr CA PIN kods ir veiksmīgi nomainīts. 20
23 6.5 Failu sistēma Failu sistēma paredzēta USB pārlūkam un programmatūras uzlabošanai un turpmāk tiks pievienota arī daudzfunkcionalitāte. 21
24 6.6 Ražotāja uzstādījumi Nospiediet izvēlnes lodziħu MENU",lai izvēlētos Ražotāja uzstādījumus. Nospiediet OK,lai ievadītu ražotāja uzstādījumus Tad nospiediet UP un Down vienu no diviem System Information vai Load Default, lai to apstiprinātu, nospiediet OK. Skat Sistēmas informācija Sākotnējo uzstādījumu ielāde 22
25 7. Īsinājumikona 7.1 OPT: Audio valodas darbības 7.2 TEXT: Teletext lapa. Nospiediet TEXT taustiħu uz tālvadības pults, lai atvērtu Teleteksta funkcijas. 23
26 7.3 INFO (Informācija: Ieejot Non-Menu režīmā un nospiežot INFO, esošo kanālu informācija tiks attēlota uz ekrāna. Ietverot kanāla Nr, kanāla nosaukumu, signāla kvalitāti u.t.m.l 24
27 7.4 EXIT: Izejas sektors 7.5 List ( saraksts) Nospiediet List uz tālvadības pults, un lietojot Left aun Right lai pārslēgtos uz TV/RADIO/FAV, un lietojiet UP un Down lai izvēlētos kanālus, visbeidzot nospiediet OK,lai apstiprinātu. 25
28 7.6 DELETE: Dzēst programmas 7.7 BACK: Atgriezties uz iepriekšējo lapu 7.8 MENU: Ieiet galvenajā izvēlnē 7.9 Elektroniskais Programmu Gids EPG : Izvēlieties GUIDE taustiħu uz tālvadības pults,un nospiediet OK,lai ieietu EPG izvēlnē. EPG ietver sekojošu informāciju: Ataino programmu,kuru skataties Ataino nedēĝas TV programmu un saglabā atmiħā jūsu izvēlēto prorammu 26
29 Lietojiet UP un DOWN taustiħus,lai izvēlētos programmu un LEFT un RIGHT taustiħus,lai atainotu TV programmu SkaĜums Audio SkaĦu var pielāgot, lietojot taustiħus uz tālvadības pults vai TV,uztvērēja priekšējā paneĝa pogas. Pieejams arī uz tālvadības pults taustiħš MUTE. 8. STB uzlabošana: Patstāvīgi nodrošinam programmatūras uzlabošanu un atbilstību jaunājām augstajām tehnoloăijām. Sīkākai informācijai- lūdzu sazinieties ar mums. 27
30 9. Piederumi 1 Tālvadības pults 1 Lietošanas instrukcija 2 (AAA) Baterijas II. Problēmu risināšana Simptoms Iemesls Kā novērst Indikators ON / OFF priekšējā panelī nav iededzies Slikts attēls/ piekĝuves kĝūda Nav attēla un skaħas Nav attēla un skaħas bet priekšējais panelis rāda laiku Tālvadības pults nedarbojas Uztvērējs nereāăē uz tālvadības pults darbībām Strāvas vads nav Pārbaudiet visus galvenos ievietots sienas savienojumus uztvērējam. rozetē. Vājš signāls Pārbaudiet skaħas RF izeju Vāja signāla kvalitāte Pārbaudiet antennas un vai slikts kabeĝa savienojumus. starpsavienojums Kamēr ir gaidīšanas Nospiediet taustiħu uz režims tālvadības pults Baterijas izlādējušās vai nav pareizi Nomainiet baterijas. ievietotas. (1) Jānomaina (1) Jānomaina baterijas baterijas tālvadības tālvadības pultī pultī (2) Ir šėērslis starp (2) Pārbaudiet vai starp uztvērēju un tālvadības pulti un tālvadības pulti uztvērēju nav šėēšĝu Piezīme : ja nevarat atrisināt problēmas, vadoties pēc ieteikumiem problēmu risināšanai, lūdzu sazinieties ar mums. 28
31 III. SPECIFIKĀCIJA Uztvērējs Ieejas Frekvences diapazons 47~858MHz Ieejas Signāla līmeħa -73 to -2 dbm diapazons Ieejas pilna pretestība 75Ω Demodulācija GX1001 Demodulācija QAM16~QAM256 FEC Reed-Solomon (204,188) DEMULTIPLEXER Standarts ISO/IEC Procesa biti 110M bit/s (serial), 13.5M byte/s (parallel) VIDEO DEKODĒŠANA Transportplūsma ISO/IEC Profila Līmenis part 10)pamatā un augsta profila līmenis3/mpeg-2 4:3, 16:9 teksta lodziħš Attēla formāts Pilnekrāna, Centrālais ekrāns, 16:9 teksta lodziħš Video Sinhronizācija 300mVp-p Video Izšėirtspēja 1080i,720p,576i AUDIO dekodēšana MPEG-2, MPEG-4 AAC(optional ) Standarts ISO/IEC Audio dekodēšana MPEG1/2 Layer I & II Audio Režīms Single/Dual mono/stereo ModeĜa Frekvence 16/22.05/24/32/44.1/48 khz Audio izejas Līmenis 0-6 dbu SkaĦas līmenis 16 līmeħi 29
32 PROCESORS un ATMIĥA OS Linux 2.6 CPU ST5202 ST40 CPU Procesora ātrums 266MHz DDRAM atmiħa 128/256Mbytes FLASH atmiħa 64/128Mbit Aizmugures PANELIS HDMI/ HDCP 1.3 USB USB 2.0 Scart Izeja Viens TV, viens VCR (RS232) S/PDIF Digitālā Audio Izeja 1*COAXIAL POWER Ieejas strāva AC90~250V, 50/60HZ Strāvas patēriħš 12W max, standby<5w Aptverošs Darbības temperatūra
33 0
34 INSTRUKCIJOS ŽYMENYS: SUSIDEDA IŠ DVIEJŲ DALIŲ: Bendra: Šie ženklai turi būti ant viršelio, viršelio kitoje pus je, arba kituose instrukcijos puslapiuose, gerai pažym tos fonui kontrastinga spalva, žym jimo aukštis yra neprivalomas, sutartinai pavaizduotas kaip pavyzdys, kiti susitarimai, kurie atvaizuoja vartotojo ketinimus, gali būti priimtini. I Dalis Du grafiniai symboliai ir papildomi ženklinimai bus kaip aiškinamasis pranešimas per visą tekstą.. Kiekvienas grafinis symbolis su jo reikšm s paaiškinimu. II Dalis Atsargiai: Žaibo simbolis lygiakraščiame trikampije skirtas įsp ti vartotoją, kad neizoliuota pavojinga įtampa einanti per produktą gali būti pakankamo dydžio, kad sukeltų pavojų žmogui. D mesio: Šaukštukas lygiakraščiame trikampije skirtas įsp ti vartotoją, kad atlikdami svarbius veikmus diegiant imtuvą, griežatai laikytis instrukcijos. 1
35 Turinys I. Bendra Informacija 3 1. Įžanga 3 2. Pagrindin s savyb s 3 3. Įrenginys Priekinis skydelis Galinis skydelis Nuotolinio valdymo pultas 5 4. Imtuvo Pajungimas 6 5. Imtuvo Diegimas 7 6. Meniu struktūra 8 6.1Kanalų redaktorius Sistemos nustatymai Kalbų nustatymai Laiko nustatymai AV Nustatymai OSD Nustatymai Paieškos nustatymai Kanalų paieška Paieškos būdai CA Sistema CA Informacija Brandos reitingas Keisti CA PIN kodą Failų sistema Gamyklos Nustatymas Trumpinys Imtuvo programin s įrangos Atnaujinimai 28 9.Priedai 28 II. Galimų problemų pašalinimas 29 III. Technin Charakteristika 30 2
36 I. Bendra Informacija 1. Įžanga D kojame už nupirktą skaitmenin s antžemin s imtuvą. Naujausios technologijos ir išskiriantis dizainas padeda užtikrinti aukštą patikimumą ir stabilų vaizdą, patogias operacijas. Rekomenduojame susipažinti su vartotojo instrukcija prieš diegiant įrenginį. 2. Pagrindin s savyb s 1. Sąlygin prieiga prie sistemos palaiko Irdeto / Conax / PI 2. Galingas lustas STi5202 ST40CPU Greitis: 266MHz 3. OS Linux MPEG-4(dalis10) pagrindinis ir aukšto lygio 3/MPEG-2 MP@ML 5. DDRAM Atmintis 128/256Mbytes (neprivaloma) 6. Flash 64/128Mbit (neprivalomal) 7. HDMI 1.3 iš jimas 8. USB 2.0 sąsaja (PIC naršimui ir SW atnaujinimui) 9. Fully DVB-T compliant TV ir radijo kanalų 12. Visiškai palaiko 7 dienų elektroninį programų gidą (EPG) 13. OSD teletekstas (DVB compliant) ir dalie funkcijų palaikymas 14. Automatinis įjungti / išjungti laikmačio nustatymas 15. Teleteksto palaikymas pagal VBI įterpimą ( tik SD Scart) 16. Multi- kalbų palaikymas (Anglų, Prancūzų, Vokiečių, ir Italų Ispanu, Portugalų, Lativių, 13 kalbos rūšių.) 3
37 3. Įrenginys (1) Prekinis skydelis 1. Meniu 2. OK 3. Kair 4. Žemyn 5. Dešin 6. Aukštyn 7. Galia 8.Smart kortel s lizdas (2) Galinis skydelis ( Žr. Nuoroda) 1 ANT IN 2 LOOP 3 SPDIF 4USB lizdas 5 HDMI lizdas 6 TV SCART 7 VCR SCART 4
38 (3) NVP (Nuotolinio valdymo pultas) 5
39 (1) Galia: Power ON/OFF (2) L/R: garso takelio pasirinkimas (3) : ON/OFF laikmatis (4) EPG: Elektroninis programų gidas (5) MENU : Įeiti į pardindinį Meniu (6) OK: Pažym ti (7) Volume+/Volume-: Garsą pamažinti arba padidinti (8) AUDIO: Garso pasirinkimas (9) SUBT:Subtitrai Įjn/Išj. (10) DELETE: Ištrinti programą. (11) TV/RADIO: TV/RADIO pasirinkimas (12) MUTE: Begarsis režimas (13) 0-9: Kanalo ir skaitmen s vert s pasirinkimas (14) RECALL: ATGAL (15) INFO: Programos informacija (16) EXIT: Išeiti iš pasirinkimų (17) Cursor: Kursoriaus mygtukas (18) PAGE+/PAGE-: Puslapis žemyn arba aukštyn (19) TEXT :Teletekstas (20) FAV:Favoritai (21) ASPECT: Keisti vaizdo konvertavimą (22) LIST: Iš sąrašo 4. IMTUVO PAJUNGIMAS Prašome žiūr ti į imtuvo jungiamąją shemą, kuri apima įtampą, signalo, TV ir kitą susijusią įranga. 6
40 1. ANT IN kab linio signalo įvedimui 2. LOOP RF iš jimas į TV 3. S/PDIF S/PDIF iš jimas 4. USB lizdas 5. HDMI lizdas 6. TV SCART :SCART iš jimas į TV 7. VCR SCART:SCART įš jimas/įvedimas į VCR 5. IMTUVO DIEGIMAS 1 Žingsnis: Patikrinti sistemos pajungimą Prašome atsižvelgiant į imtuvo jungiamąją shemą, patikrinkite signalinį kabelį, AV įrangą ir ar gerai pajungtas maitinimas. 2 Žingsnis: Įjunkite imtuvą Teisingai pajungus visus kabelius, įjunkite imtuvą į maitinimą. Galios indikatorius (raudona lemput ) tampa raudonas, įjunkite TV ar perjunkite TV į Video režimą, jeigu iš anksto bus įrašytos programos, čia bus kanalų skaičius ir ant TV ekrano bus antrašt nurodanti signalo kokybę. 3 Žingsnis: 7
41 Visu programų Auto Paieška Tuo atveju, jeigu iš anksto nebus įrašytų programų, bus atidaryta tik ekrano užsklandą ekrane. Prašome paspauskite MENU, naudodami kursoriaus mygtuką UP / Aukštyn ir DOWN / Žemyn, pasirinkite Search Settings / Paieškos Nustatymai, paspauskite OK, tada pasirinkite susijusius veiksnius su paieška ir v l paspauskite OK paleisti programų paiešką. Vartotojas gali rasti išsamios ieškomos informacijos programos paieškos proceso metu. Kai pasibaigia paieška, ant ekrano bus parodyta kiek iš viso programų Jūs galite gauti. 4 žingsnis: TV ir Radijo programų pasirinkimas: 1. Prašome paspauskite MENU, naudodami kursoriaus mygtuką UP / Aukštyn ir DOWN / Žemyn, pasirinkite Channel Manager / Kanalų redaktorius, paspauskite OK ir pažym kite Jūsų m gstamas programas. 2. Jei norite klausytis radijo ir MöGSTAMIAUSIOS programos, paspauskite OK, Non- Menu režime. Naudokite kursoriaus mygtukus LEFT / KAIRö ir RIGHT / DEŠINö, nor dami pasirinkti. 6. Meniu struktūra Jei norite nustatyti imtuvą naudodami Non-Main Menu būdą, paspauskite mygtuką MENU ant nuotolinio valdymo pulto, įeikite į pagrindinį meniu, funkcija Pagrindinis Menu ( Main Menu ) sudaro: 8
42 6.1 Channel Manager /Kanalų redaktorius: valdymo programos meniu. 6.2 System Settings/Sistemos nustatymai: sistemos meniu arba sąlyginiai parametrai Search Settings/ Paieškos nustatymai: kanalų paieškos meniu. 6.4 CA System/ CA sistema: sąlyginis prieigos kanalų nustatymo meniu. 6.5 File system/failų sistema: USB naršykl s ir programin s įrangos atnaujinimo meniu. 6.6 Factory Setting/ Gamykliniai nustatymai: numatyta sistema ir grąžina sistemos nustatymus prie gamykliniu nustatymu. Prašome paspauskite mygtukus UP / Aukštyn ir DOWN / Žemyn, nor dami pasirinkti modelį, kurį Jūs pageidaujate. 9
43 Paspauskite OK, tada Jūs gal site laisvai naudotis visomis meniu operacijomis. 6.1 Kanalų Redaktorius Sistemos nustatymuose pasirinkite Channel Manager / Kanalų Redaktorių, paspaukite OK patvirtinimui. Naudodami mygtukus UP / Aukštyn ir DOWN / Žemyn, pabr žkite programas ir paspauskite OK perjungdami tarp savo m gstamiausių kanalų sąrašo ir kanalų sąrašo.paspauskite spalvų mygtuką lengvam savo kanalų valdymui. Spalvų mygtuko funkcijos:: Raudonas: Rūšiuoti M lynas: Prid ti prie m gstamiausių Geltonas: Persik limas Trinti: Ištrinti bet kurią programą, kuri Jums nepatinka. 10
44 6.2 Sistemos nustatymas Pasirinite System Setting / Sistemos nustatymas, paspauskite OK, įeikite į Sistemos nustatymus Kalbos nustatymai Sistemos nustatymuose pasirinkite Language Settings / Kalbos nustatymai, ir paspauskite OK ir įeikite į Kalbos Sistemos Meniu. Po to naudodami mygtukus LEFT / Kair ir RIGHT / Dešin, nustatykite pagal savo pageidavimą kiekvienam punktui submenių MENU, AUDIO, SUBTITRAI. 11
45 D mesio: Garso Kalbą ir subtitrus tur tų remti vietos valdžios institucija Laiko nustatymai Sistemos nustatymuose pasirinkite Time Settings / Laiko Nustatymai, ir paspauskite OK, įeikite į laiko nustatymus. Remiantis Jūsų laiko zona, Jūs turite nustatyti GMT pagal Jūsų vietinius nustatymus. Paspauskite mygtukus LEFT / Kair ir RIGHT / Dešin nor dami pasirinkti automatinį įjungimą/ išjungimą. Pavyzdžiui, nustyta Leisti reiškia, kad funkcija įjungta, ir tada Jūs galite įvesti laiką, kuris Jums reikalingas. 12
46 D mesio: absoliutūs skaičiai laiko nustatymui yra 0-23 valandoms ir 0-59 minutems AV Nustatymai Sistemos nustatymuose pasirinkite AV Setting / AV Nustatymai, paspauskite OK patvirtinimui. Jūs pakeisite veiksnius į Audio/Video pagal Jums reikiamą atlikimą. 13
47 6.2.4 OSD Nustatymai Sistemos nustatymuose, paspauskite OK nor dami įeiti. Naudodami mygtukus LEFT / Kair ir RIGHT / Dešin nustatykite Neskaidrumą, ir pasirinkite LCN būseną Įjungtas arba Išjungtas. 14
48 6.3. Paieškos Nustatymai 6.3.1Kanalų paieška: Pagrindiniame Meniu pasirinkite Search Settings / Paieškos nustatymai, nor dami įeiti paspauskite OK. Jūsų patogumui mes pareng me visų kanalų informaciją, tokia kaip: Kanlo Nr., Dažnis, Sparta, Ant maitinimas, Išsaugojimo tipas ir Paieškos tipas. Jums tik reikia pažym ti Search / Paieška ir paspausti OK, imtuvas prad s automatinę paiešką. Baigus paiešką, ant ekrano bus rodoma kiek programų buvo ieškoma, priklausomai nuo pasirinkto paieškos tipo. 15
49 6.3.2 Paieškos būdai Yra tris paieškos būdai, kurie apima rankinę paiešką (Manu), tinklo paiešką (Net) ir automatinę paiešką (Auto). 1. Menu paieška Išsaugokite tik Jūsų ieškotą kanalą. Tada įtraukite programas į Jūsų kanalų sąrašą. 16
50 2. Net paieška Pagal Jūsų pasirinktą skaitmeninį dažnį, Jūs ieškosite realiai egzistuojančių kanalų. D l to bus padidintas paieškos greitis. Paspauskite EXIT / Išeiti, nor dami sustabdyti paiešką. 17
51 3. Auto paieška Toks paiešos budas surasti visus realiai egzistuojančius kanalus užims daug laiko. Paspauskite OK nor dami sustabdyti automatinę paiešką. 18
52 6.4 CA Sistema CA Informacija. Įeidami į CA sistemą, pažym kite CA informacija ir Jūs gausite atitinkamą informaciją apie CA, tokią kaip serijos numerį, peržiūrą ir t.p. 19
53 6.4.2 Brandos Reitingas Čia yra keturi lygiai, kurie apima M lynus filmus: Bendra, PG- t vų vadovas, A- virš 18 ir X- Erotika. Naudodami mygtukus LEFT / Kair ir RIGHT / Dešin konroliuosite lygius, įeikiye į CA kortos PIN kodą, poto paspauskite OK patvirtinimui. CA kortos PIN kodą sudaro keturi skaičiai, kuriuos pateikia Komercinis operatorius. 20
54 6.4.3 Keisti CA PIN kodą Pasirinkite Keisti CA PIN kodą pagal sąlyginę prieigos sistemą, paspauskite OK įeiti. Po to vykdykite instrukcijos nurodymus kol CA PIN kodas bus s kmingai pakeistas. 21
55 6.5 Failų sistema Šiuo metu Failų sistema yra skirta peržiūr ti failus per USB ir atnaujinti programinę įrangą. 22
56 6.6 Gamyklianiai Nustatymai Paspaudę Menu, pasirinkite Factory Setting / Gamykliniai Nustatymai. Paspauskite OK įeiti į gamyklinius nustatymus. Po to paspauskite UP / Aukštyn ir Down / Žemyn nor dami pasirinkti System Information / Sistemos informacija arba Load Default / Pakrovimas pagal nutyl jimą, paspauskite OK užtikrinti savo pasirinkimą Sistemos informacija Pakrovimas pagal nutyl jimą. 23
57 7. Trumpinys 7.1 OPT: Garso kalbų pasirinkimas 7.2 TEXT: Teleteksto puslapis! Paspauskite mygtuką TEXT ant NVP, nor dami atidaryti Teleteksto funkciją. 24
58 7.3 INFO (Informacija) : Įeidami į Non- Menu režimą, ir paspaudę INFO, informacija apie einantį kanalą pasirodys ant televizoriaus ekrano, apimant Kanalo Nr., Kanalo pavadinimą, Signalo kokyb ir t.t. 25
59 7.4 EXIT: Iš jimo skyrius. 7.5 Sąrašas Paspauskite List ant NVP ir naudodami mygtukus Left / Kair ir Right / Dešin perjungikite tarp TV/RADIO/FAV, ir su mygtuku pagalba UP / Aukštyn ir Down / Žemyn pasirinkite kanalą, paspauskite OK patvirtinimui. 26
60 7.6 DELETE: Ištrinti programą. 7.7 BACK: Grįžti į paskutinį puslapį. 7.8 MENU: įeiti į pagrindinį menių. 7.9 Elektroninis programų gidas (EPG) : Pasirinkite GUIDE ant NVP ir paspaudę OK įeikite į EPG Meniu. Tokia informacija gali būti rasta EPG Meniu: Peržiūr ti Jūsų žiūrimos programos informaciją Peržiūr ti kas savaitę TV programą ir pasirinkti Jūsų m gstamas programas. 27
61 Naudokite mygtukus UP / Aukštyn ir Down / Žemyn nor dami pasirinkti programą ir mygtukus Left / Kair ir Right / Dešin žiūr ti TV programą Garsas. TV arba Radijo paslaugoms Garso stiprumą galima reguliuoti naudodami NVP arba mygtukus ant STB priekinio skyd lio. Rankin Audio MUTE funkcija taip pat galima ir ant RCU. 8. Imtuvo programin s įrangos atnaujinimas: Siekiant, kad Jūsų imtuvas tur tų daugiausia galimybių, mes nuolat atnaujinsime programinę įrangą. Daugiau informacijos PLS sužinosite susisiekę su mumis. 9. Priedai 1 Nuotolinis valdymo pultas 2 (AAA) Elementai 1 Vartotojo vadovas 28
62 II.Galimų problemų pašalinimas Problema Galima priežastis Ką daryti Patikrinkita ar pagrindinis Ekranas priekinio Neprijungtas kabelis įjungtas į maitinimo skydelio neįsižieb pagrindinis kabelis lizdą. Blogas vaizdas/ Sumažinkite antenos Signalas per stiprus Blokavimo klaida signalo lygį N ra vaizdo arba garso N ra garso ir vaizdo, tačiau ant prekinio skydelio rodomas laikas Patikrinkite antenos Bloga signalo kokyb sistemą. Patikrinkite kabelio arba bloga jungtis jungtis. Imtuvas veikia Paspauskite raktą ant NVP laukimo režimu Neveikia NVP Blogi elementai Pakeiskite elementus (1) Reikia pakeiti elementus Jūsų nuotolinio valdymo (1) Pakeiskite elementus Nuotolinio valdymo pulte. (2) Įsitikinkite, kad n ra pultas neveikia su (2) Yra kliūčių kliūčių blokuojančių signalą Jūsų STB blokuojančiu signalą tarp nuotolinio valdymo tarp nuotolinio pulto ir imtuvo. valdymo pulto ir imtuvo PASTABA: jeigu negalite išspręsti problemos remdamiesi problemos pašalinimo lentele, kreipkites į specializuotą meistrą. 29
63 III. TECHNINö CHARAKTERISTIKA IMTUVAS Priimamo dažnio riba 47~858MHz Priimamo signalo lygio -73 iki -2 dbm riba Pasipriešinimas 75Ω DEMOLUDACIJA GX1001 Demodulacija QAM16~QAM256 FEC Reed-Solomon (204,188) Demultiplekseris Standartas ISO/IEC Procesoriaus sparta 110M bit/s (serial), 13.5M byte/s (parallel) VAIZDO DEKODAVIMAS Perdavimo srautas ISO/IEC Profilio lygis part 10) main and high profile level 3/MPEG-2 4:3, 16:9 pašto dežūt Ekrano santykis Visas ekranas, Ekrano Cenras, 16:9 pašto dežūt Vaizdo sinchronizavimo sritis 300mVp-p Vaizdo rezoliucija 1080i,720p,576i GARSO DEKODAVIMAS MPEG-2, MPEG-4 AAC(optional ) Standartas ISO/IEC Garso dekodavimas MPEG1/2 Layer I & II 30
64 Garso režimas Single/Dual mono/stereo Sample Frequency 16/22.05/24/32/44.1/48 khz Garso iš jimo lygis 0-6 dbu Garso stiprumo lygiai 16 Lygių PROCESORIUS IR ATMINTIS OS Linux 2.6 CPU ST5202 ST40 CPU Procesorio Greitis 266MHz DDRAM Atmintis 128/256Mbytes FLASH Atmintis 64/128Mbit GALINIS SKYDELIS HDMI/ HDCP 1.3 USB USB 2.0 Scart Iš jimas One for TV and One for VCR (RS232) S/PDIF Skaitmeninis garso iš jimas 1*COAXIAL MAITINIMAS Įeinanti įtampa AC90~250V, 50/60HZ Suvartojamas maitinimas 12W max, standby<5w AMBIENT Darbo temperatūra
65 0
66 MÄRGISTUSTE INSTRUKTSIOON: Koosneb kahest osast. Üldine: Need märgised märgitakse kaanel on pöördel kaanel või juba järgmisel lehel kasutusjuhendis, värvimiseks silmapaistvalt ja kontrastset värvi taustal, märgise kõrgus on vabatahtlik, muu mille ümber sama kavatsusega kasutaja võib olla vastuvõetav. Osa I Kaks graafilist sümbolit ja täiendav märgistamine, ja selleks on täistekstis selgitav märge. Iga graafilise sümboli selgitus ja selle tähendus. Osa II Ettevaatust: See vórdkülgne kolmnurk koos välgu sümboliga, on mõeldud selleks, et hoiatada kasutajat isoleerimata ohtliku pinge eest,mis võib olla piisava ulatusega, et kujutada ohtu inimesele. Tähelepanu: See on 1 hüüumärk, mis on võrdkülgne kolmnurk ja tema eesmärk on hoiatada kasutajat, et edastamine on tähtis töö ja hooldus (teenindus) juhised seadmel kaasas.
67 Sisukord I. Üldteave 1 1. Eessóna 3 2. Peamised funktsioonid 3 3. Riistvara Esipaneel Tagapaneel RCU 5 4. STB Ühendus 7 5. STB Paigaldamine 7 6. Menüü struktuur 9 6.1Kanali haldamine Süsteemi seaded Keele seaded Aja seaded AV seaded Vanema seaded OSD seaded Kanalite paigaldamine Kanalite otsing Otsi viisi CA SÜsteem CA Informatsioon Lópptähtaegade reiting Muuta PIN Tehase seadistus Süsteemi informatsioon Lae vaikimisi Otsetee STB Uuendus 19 9.Tarvikud 19 II. Probleemne laskmine 19 2
68 III. Tehniline spetsifikatsioon Eessóna I. Üldine informatsioon Täname digitaalse maapealse vastuvõtja ostu eest. Uusima tehnoloogia ja silmapaistvaid projekteerimisest võetud kõrge usaldusväärsuse ja pildi stabiilsus. Soovitame lugeda enne kasutamist kaasasolevat kasutusjuhendit. 2. Peamised funktsioonid 1. Tingimusklik juurdepääsu süsteem toetab Irdeto / Conax / CI 2. Vastuvótuks vóimas kiip STi5202 ST40CPU Kiirus: 266MHz 3. OS Linux MPEG-4(part 10) on peamine ja 3/MPEG-2 MP@ML on kórge profiili tasandil. 5. DDRAM Mälu 128/256Mbytes (optional) 6. Flash 64/128Mbit (optional) 7. HDMI 1.3 Väljund 8. USB 2.0 liides(et sirvida PIC ja Upgrade SW) 9. Täielik ult DVB-T ühilduv TV kanalit ja raadio programmi 12. Toetab täielikult kuni 7 päeva programmi EPG 13. OSD teletekst (DVB ühilduvus ) ja alapealkirjaga funktsiooni toetus 14. Automaatne sisse/välja lülitus taimeri seadega. 15. Teleteksti toetus VBI sisestamisel (ainult SD Scart) 16. Toetab mitut keelt : Inglise, Prantsusmaa, Saksamaa, Itaalia 3
69 Hispaania, Portugali, Läti, ja veel 13 erinevat keelt. 3. Riistvara (1) Esipaneel 1. Menü 2. OK 3.Vasak 4. Alla 5. Parem 6. Üles 7. Toide 8.Smart kaardi pesa (2) Tagapaneel ( vt. juhiseid) 1 ANT sisend 2 LOOP 3 SPDIF 4 USB pesa 5 HDMI pesa 6 TV SCART 4
70 7 VCR SCART (3) RCU (Kaugjuhtimis pult) 5
71 (1) Toide: Toide(Vool) ON/OFF (2) L/R: helirajaga valik 6
72 (3) : ON/OFF taimer (4) EPG: Elektrooniline programmi juhend (5) MENU : Siseneda peamenüüsse (6) OK: Valige (7) Heli+/Heli-: Heli alla vói üles (8) AUDIO: Heli valik (9) SUBT:Subtiitrid ON/OFF (10) DELETE: Kustuta programm. (11) TV/RADIO: TV/RADIO valikud (12) MUTE: Kólatu ( Vaikus ) valikud (13) 0-9: Kanalite ja arvväärtuse valikud (14) RECALL: Tagasi (15) INFO: Programmi info (16) EXIT: Välja (17) Cursor: Kursori vóti (18) PAGE+/PAGE-: Lehekülg alla ja üles (19) TEXT :Teletekst (20) FAV:Lemmik (21) ASPECT: Muuta video konverteerimine (22) LIST: Nimekiri läbi 4. STB Ühendus 7
73 1 ANT sisend:signaali sisend 2 LOOP: RF väljund TV 3 S/PDIF:S/PDIF väljund 4 USB pesa 5 HDMI pesa 6 TV SCART :SCART väljund TV-sse 7 VCR SCART:SCART väljund/sisend VCR-sse 5. STB Paigaldamine Samm 1: Uurida süsteemi ühendust Palun viidake vastuvõtja ühendusliinide diagrammile ja uurida signaali kaablit, kas AV seadmed ja toiteplokk on ühendatud või mitte. Samm 2: Lülitage vastuvõtja sisse Pärast head ühendust on kogu kaabli vóimsus STB. Seejärel vastuvótja märgutuli (punane valgus) muutub punaseks, teler lülitage TV "Video" režiimile, kui on olemas eelnevalt STB programmid,kanalid No. ja Signal Quality bännerid paigutatud teleri ekraanile. 8
74 Samm 3: Täis automaatne otsing Kui ei ole eelnevalt olemas programme,siis on ainult avatud ekraani pilt ekraanil. Palun vajitage MENU, kasutage UP ja DOWN kursori nuppu Search Settings, vajutage OK valmista ette mida otsida ja lópuks vajutage OK programm alustab otsimist. Kasutaja võib leida üksikasjalikku otsitavat teavet menetluse käigus ja programmi otsida. Kui otsing on lõppenud, siis saab näidata ekraanil, kui palju programme saate. Samm 4: 1. Valik TV ja Raadio programmides 2. Palun vajutage MENU, kasutage UP ja DOWN kursori nuppu,et valida Channel Manager, vajutage OK ja seejärel valige oma lemmik programm. 3. Juhul kui soovite kuulata raadiot ja lemmik programmi, vajutage OK ärge kasutage menüüd. Kasutage LEFT ja RIGHT kursori nuppu. 6. Menüü struktuur Kui soovite veel seatud STB, ärge kasutage menüüd, vajutage kiirklahvi MENU kaugjuhtimis puldist, siseneda peamenüüsse, funktsioonide Main Menu hulka : 9
75 6.1 Kanali haldaja: menüü programmi juhtimine 6.2 Süsteemi seaded: menüü süsteemi seade 6.3 Otsingu seaded: menüüs otsida kanaleid 6.4 CA Süsteem: menüü, milles on tingimuslikud juurdepääsu kanalid 6.5 Failisüsteem: failisirvimiseks ja tarkvara uuendamiseks 6.6Tehase seadistus: tagasi tehase seadistus Vajutage UP ja DOWN valige mudel. Vajutage OK, seejärel saate nautida kogu menüü operatsiooni vabalt 6.1 Kanali haldaja Valige süsteemi seaded ja, vajutage OK et kinnitada. Kasuta UP ja DOWN valida programmid ja vajutage OK vahetamiseks sinu lemmikute hulka ja kanali 10
76 loend.te vajutage värvi nuppe need võimaldavad hõlpsasti hallata oma kanaleid. Nuppude värvi funktsioonid: Punane: Sorteeri Sinine: Add Fav. Kollane: Liikumine Kustuta: Kustuta kóik programmid sulle ei meeldi 6.2 Süsteemi seadistamine Valige System Setting, vajutage OK sisenete Setting. System 11
77 6.2.1 Keele seaded Valige Language Settings siis System Setting, ja vajutage OK sisenete keele menüüsse System Menu. Kasutage LEFT ja RIGHT et määrata iga kirje alla alammenüü Menu, Audio, Subtitle kui soovite. 12
78 Tähelepanu:. Audio keelt ja alapealkiri peaks toetama kohalik omavalitsus Aja seaded: Valige Time Settings siis System Setting, ja vajutage OK et siseneda aja seadesse. Vastavalt oma ajavóóndile, määrake GMT sinu kohaliku seadega. Vajutage LEFT ja RIGHT valige automaatne käik on/off. Näiteks, set Enable tähendab, et funktsioon on sisse lülitatud, ja sa saad aega sedistada nii nagu soovite. 13
79 Tähelepanu: ajaseade absoluutsed numbrid on 0-23 tundi 0-59 minutit.. ja AV Seaded: Valige AV Setting siis System Setting,vajutage OK et kinnitada. Audio/Video tegureid saate muuta oma soovi järgi. 14
80 6.2.4 OSD Seaded Vali OSD süsteemi seade, vajutage OK lópetuseks. Te kasutage LEFT ja RIGHT,et määrata suitsusus, ja LCN kas lubada vói keelata. 15
81 6.3. Otsingu seaded 6.3.1Kanali otsing: Vali Search Settings siis Main Menu, vajuta OK lópetuseks. Kóik on tehtud Teie jaoks vóimalikult mugavaks Kanali number, Sagedus, Bandwidth, Antenni vool, Salvesta tüüp ja otsi liik. Too esile Search, ja siis vajuta OK, STB hakkab automaatselt otsida. Pärast otsingu viimistlust, ekraanil näidatakse, kuidas programme otsitakse, sõltub millist tüüpi sa valid. 16
82 6.3.2 Vóimaluste otsimine On kolm vóimalust otsimiseks manual search (Manu), network search (Nit) ja automatic search (Auto). 1. Manu otsing Otsida välja kanalid, seejärel programmid on kanali nimekirjas. 17
83 2. Nit otsing Valite oma digitaalse sageduse, teie otsitavad kanalid eksisteerivad tegelikkuses.sellepärast, et saaks salvestatud tuleb otsimise kiirust suurendada.. Vajutage EXIT,et lópetada otsing. 18
84 3. Auto otsing Otsinguks kulub liiga kaua aega, et leida kóik kanalid. Vajutage OK et peatada automaatne otsing. 19
85 6.4 CA Süsteem CA Informatsioon Sisenedes CA süsteemi, valige CA informatsioon ja te saata vajalikku infot CA, nagu seerianumber. läbivaatamine jne. 20
86 6.4.2 Lópptähtaeg Reiting Seal on neli taset sinised failid sisaldavad: Üldine, PG-ema juhend-üle 18 ja X-Erootilised.Kasuta vaskut ja paremat taseme kontrolli, siseneb CA kaardi PIN, siis vajutage OK kinnituseks. CA kaardi PIN on neli numbrit, mis on sätestatud operaatori poolt. 21
87 6.4.3 Muuta CA Pin Vali Muuda CA PIN, tingimusjuurdepääsusüsteemis ja vajuta OK lópetuseks.. Seejärel järgige juhiseid tegutsemiseks kuni CA PIN on edukalt muudetud. 22
88 6.5 Failisüsteem Praegu saab USB kaudu faile sirvida ja tarkvara uuendada aga tulevikus lisandub MF. 23
89 6.6 Tehase seadistus Valige Factory Setting ja vajutage MENU". Vajutage OK siseneb tehase seade. Siis vajuta UP ja Down kas System Information vói Load Default, saavutamiseks, siis, vajutage lihtsalt OK kinnituseks Süsteemiinformatsioon Laadida vaikimisi 24
90 7. Otsetee 7.1 OPT: Audio keel vabatahtlik 7.2 TEXT: Teleteksti leht! Vajutage TEXT on the RCU mis avab teleteksti funktsiooni. 25
91 7.3 INFO (Informatsioon) : Sisenedas mitte kasutada menüü reziimi vajutage INFO, praeguse kanali info ilmub ekraanile.siis te ei näe kanali nime, signaali kvaliteeti ja nii edasi. 26
92 7.4 EXIT: Välja kóik 7.5 Nimekiri Vajuta List on RCU, ja kasuta Left ja Right vahetamiseks TV/RADIO/FAV, ja kasuta UP ja Down et valida kanaleid, lópuks vajutage OK kinnituseks. 27
93 7.6 KUSTUTA: kustuta programm. 7.7 TAGASI: Tagasi eelmisele leheküljele 7.8 MENÜÜ: Siseneda peamenüüsse 7.9 Electronic Program Guide (EPG) : Vali GUIDE on RCU, ja vajuta OK enter EPG Menüü. Järgmist teavet leiate aadressilt EPG. Et kuvada programmi infot vaatate. Vaatamiseks iganädalast TV programmi ja jätab meelde sinu lemmik programmi. 28
94 Kasuta UP ja DOWN vali program ja LEFT ja RIGHT TV prognoosi vaatamiseks Maht Audio kóidet saab muuta kas RCU vói STB esipaneelil nupud, TV vói Raadio teenuste jaoks. Mugav Audio MUTE funktsioon on saadaval ka RCU. 8. STB Uuendus: Selleks, et hoida teie vastuvõtjat vastavalt kõrgtehnoloogiale uuendatud tarkvara pidevalt. Loe lähemalt PLS. 9. Tarvikud 29
95 1 Kaugjuhtimispult 2 (AAA) Patareid 1 Kasutusjuhend II. PROBLEEMID Probleem Vóimalik póhjus Mida teha Ekraani Voolukaabel esipaneelil Kontrollige, et voolukaabel pole ühendatud tuli ei sütti. on ühendatud voolupesaga. Halb pilt/ Blokeerimise viga Pole pilti või heli. Signaal on liiga tugev Kehv signaali kvaliteet või halvad ühendused. Proovi signaal summutada RF. Kontrollige antenni süsteemi ja ühendusi. EI ole heli ja pilti, kuid esipaneel näitab aega. Seade on ootereziimis ¾. Vajutage klahvi RCU RCU ei tóóta Patarei puudub Vaheta patareid (1) Patareid teie (1) Asenda patareid kaugjuhtimispuldis on (2) Kontrollige, et Kaugjuhtimispult tóóta ( STB ) ei vaja vahetada. (2) Et on takistusi mis blokeerib signaali ei oleks midagi, kaugjuhtimispuldi ja vastuvõtjad kaugjuhtimispuldi ja vahel. vastuvótja vahel. 30
96 Märkus: Kui te ei saa probleemi lahendada, viidates eespool trouble shootingule,siis pöörduge uuesti müüja poole. III. SPETSIFIKATSIOONID Düüner Sisend Sagedus Vahemik 47~858MHz Sisend Signaali Tase -73 to -2 dbm Vahemikus Sisend takistus 75Ω DEMOLUDATION GX1001 Demodulatsioon QAM16~QAM256 FEC Reed-Solomon (204,188) DEMULTIPLEXER Standard ISO/IEC Protsessi pitte 110M bit/s (serial), 13.5M byte/s (parallel) VIDEO DECODEERIMINE Transport stream ISO/IEC Profiili tase part 10) ja kórge profiil tasandil 3/MPEG-2 4:3, 16:9 Kirjakasti Üldine Täisekraan, Keskus ekraanil, 16:9 Kirjakast Video sünkroonimise ulatus 300mVp-p Video Resolutsioon 1080i,720p,576i AUDIO MPEG-2, MPEG-4 AAC(vabatahtlik) 31
97 DEKODEERIMINE Standard ISO/IEC Audio Decoding MPEG1/2 Layer I & II Audio olek Üksik/Kahekordne mono/stereo Proovide sagedus 16/22.05/24/32/44.1/48 khz Audio väljund tase 0-6 dbu Volume Level 16 Levels Protsessor ja mälu OS Linux 2.6 CPU ST5202 ST40 CPU Protsessori kiirus 266MHz DDRAM Mälu 128/256Mbytes FLASH Mälu 64/128Mbit Tagapaneel HDMI/ HDCP 1.3 USB USB 2.0 Scart väljund One for TV and One for VCR (RS232) S/PDIF Digital Audio väljund 1*COAXIAL Toide Sisendpinge AC90~250V, 50/60HZ Energiatarve 12W max, standby<5w Ümbritsev Tóótemperatuur
98 1
99 INSTRUCTION MARKINGS: CONSIST OF TWO PARTS General: These markings shall appear on the cover page, the reverse side of the cover page, or the very next page of the instruction manual, painting prominently in contrasting color to the background, marking height is optional, the arrangement depicted is an example, other arrangements which convert the same intent to the user may be acceptable. Part I The two graphical symbols and the supplemental marking, will a full text explanatory notice. Each graphical symbol with an explanation of this meaning. Part II Caution: The lightning flash with arrowhead symbol, within an equilateral triangle, is intended to alert the user to the presence of non-insulated dangerous voltage within product's enclosure that may be of sufficient magnitude to constitute a risk to persons. Attention: The exclamation point, within an equilateral triangle, is intended to alert the user to the presence of important operation and maintenance (servicing) instructions in the literature accompanying the appliance. 2
100 Content I. General Information 1 1. Preface 3 2. Main Features 3 3. Hardware Front Panel Back Panel RCU 5 4. STB Connection 7 5. STB Installation 7 6. Menu Structure 9 6.1Channel Manage System Settings Language settings Time Settings AV Settings Parental Settings OSD Settings Channel Installation Channel Search Search Ways CA System CA Information Maturity Rating Change PIN Factory Setting System Information Load Default Shortcut STB Upgrade Accessories 19 II. Trouble Shooting 19 III. Technical Specification 20 3
101 I. General Information 1. Preface Thanks for your purchase digital terrestrial receiver. The latest technology and the outstanding design are adopted to provide high reliability and picture stability, for your convenient operation, strongly advised reading the manual before using. 2. Main Features 1. Conditional Accessing System supported Irdeto/Conax/CI 2. Adopt the powerful chip STi5202 ST40CPU Speed: 266MHz 3. OS Linux MPEG-4(part 10) main and high profile level 3/MPEG-2 5. DDRAM Memory 128/256Mbytes (optional) 6. Flash 64/128Mbit (optional) 7. HDMI 1.3 Output 8. USB 2.0 Interface (for browse PIC and Upgrade SW) 9. Fully DVB-T compliant channels TV and radio programs 12. Fully support 7 days of electronic program guide (EPG) 13. OSD teletext (DVB compliant) and subtitle function supported 14. Automatic turn on/off by timer setting 15. Teletext support by VBI insertion (only SD Scart) 16. Multi-language supported (English, French, German, and Italian Spanish, Portuguese, Lativan, 13 kinds of Languages.) 4
102 3. Hardware (1) Front Panel 1. Menu 2. OK 3. Left 4. Down 5. Right 6. Up 7. Power 8.Smart card slot (2) Back Panel ( See Reference) 1 ANT IN 2 LOOP 3 SPDIF 4 USB slot 5 HDMI slot 6 TV SCART 7 VCR SCART 5
103 (3) RCU (Remote Control Unit) 6
104 (1) POWER: Power ON/OFF (2) L/R: sound track selection (3) : ON/OFF timer (4) EPG: Electronic Program Guide (5) MENU : Enter into main menu (6) OK: Select (7) Volume+/Volume-: Volume down or up (8) AUDIO: Audio Selection (9) SUBT:Subtitle ON/OFF (10) DELETE: Delete program. (11) TV/RADIO: TV/RADIO selection (12) MUTE: Mute selection (13) 0-9: Channel and numerical value selection (14) RECALL: BACK (15) INFO: Program Info (16) EXIT: Exit Selection (17) Cursor: Cursor key (18) PAGE+/PAGE-: Page down or up (19) TEXT :Teletext (20) FAV:Favorite (21) ASPECT: Change the video conversion (22) LIST: List out 4. STB CONNECTION Please refer to the following diagram connecting, which includes the power, signal. TV, and other related equipment. 7
105 1. ANTIN:For Cable Signal input 2. LOOP: RF output to TV 3. S/PDIF:S/PDIF output 4.USB slot 5. HDMI slot 6. TV SCART :SCART output to TV 7. VCR SCART:SCART output/input to VCR 5. STB Installation Step 1: System connection examining Please refer to the receiver connecting diagram, examine the signal cable, AV equipment and power supply well connected or not. Step 2: Switch on the power of the receiver After well connected all the cable, power on the STB. Then power indicator light (red light) turns red, power on the TV, and switch the TV to Video mode, if STB pre-exist programs, there will be Channels No. and Signal Quality banners on the TV screen. Step 3: 8
106 All Auto Search In case of without pre-exist programs, there will be only open screen picture on the screen. Please press MENU, Use the UP and DOWN cursor button to select Search Settings, press OK then select related factors for preparing to search and finally press OK start program searching. User can find detailed searching information during the procedure of program searching. When searching finished, there will be indicate on the screen how many programs you get totally. Step 4: The selection of TV and Radio program 1. Please press MENU, Use the UP and DOWN cursor button to select Channel Manager, press OK then to select your favorite program 2. In case of want to listen to the radio and FAVORITE program, press OK when Non-Menu mode. Use the LEFT and RIGHT cursor button to select. 6. Menu structure If you want a further set to STB, on the mode of Non-Main Menu, press the shortcut Key MENU on the Remote Control Unit, to enter the main menu, function of the Main Menu include: 9
107 6.1 Channel Manager: the menu of program management 6.2 System Settings: the menu of system or conditional setting. 6.3 Search Settings: the menu of searching channels 6.4 CA System: the menu of setting the conditional accessing channels 6.5 File system: the menu of USB file browser and software update 6.6 Factory Setting: default the system and return the system back to factory setting Please press UP and DOWN to select the model as you prefer. Press OK, then you can enjoy all the menu operation freely. 6.1 Channel Manager 10
108 Select Channel Manage when System Setting, press OK to confirm. Use UP and DOWN to highlight the programs and press to OK to switch between your favorite list and channel list. You would press the color button to easily manage your channels. Color buttons function: Red: Sort Blue: Add Fav. Yellow: Moving Delete: Delete any program you dislike 6.2 System Setting Select System Setting, press OK enters into System Setting. 11
109 6.2.1 Language Settings Select Language Settings when System Setting, and press OK to enters into Language System Menu. Then use LEFT and RIGHT to set each item under the submenu Menu, Audio, Subtitle as you prefer. 12
110 Attention: Audio Language and Subtitle should be supported by local authority Time Settings Select Time Settings when System Setting, and press OK to enter into time setting. According to your time zone, you would set GMT at your local setting. Press LEFT and RIGHT to select the automatic turn on/off. For example, set Enable to mean the function is on, and then you can type the time as your need. 13
111 Attention: the time setting absolute number is 0-23 for hours and 0-59 for minutes AV Settings Select AV Setting when System Setting, Press OK to confirm. You would change the factors on Audio/Video as your perform. 14
112 6.2.4 OSD Settings Choose OSD while System Setting, Press OK to enter. You would use LEFT and RIGHT to set Opacity, and LCN as Enable or Disable. 15
113 6.3. Search Settings 6.3.1Channel Search: Select Search Settings when Main Menu, press OK to enter. We had prepared all channel information for your convenience like Channel No, Frequency, Bandwidth, Ant Power, Save Type and Search Type. You only need highlight Search, and then press OK, STB will be automatically searching. After finishing searching, the screen will show how many programs are searched out depends on what type you choosed. 16
114 6.3.2 Search Ways There are three search ways include manual search (Manu), network search (Nit) and automatic search (Auto). 1. Manu search Only store current searched channel, then add the programs to your channel list 17
115 2. Nit search According to your choice on digital frequency, you will search the channels exist in reality. Because of that, the time would be saved and the searching speed increase. Press EXIT to stop network search. 18
116 3. Auto search The searching will spend long time to find all channels exist in reality. Press OK to stop automatic search. 19
117 6.4 CA System CA Information When entering into CA system, select CA information and you will catch relevant information about CA, such as serial number, revision, etc. 20
118 6.4.2 Maturity Rating There are four levels for Blue Movies includes: General, PG- Parent guide, A-Over 18 and X-Erotic. You would use LEFT and RIGHT to control the level, enters CA card s PIN, then press OK to confirm. CA card s PIN has four numbers, which is provided by Commercial operator. 21
119 6.4.3 Change CA Pin Choose Change CA PIN under conditional access system, press OK to enter. Then follow the instruction to operate until CA PIN changed successfully. 22
120 6.5 File system Currently, file system is for USB file browse and software upgrade, and multi- function will be added in the future. 23
121 6.6 Factory Setting Select Factory Setting when your press the MENU". Press OK enters factory setting. Then press UP and Down to either System Information or Load Default, in order to achieve that, just press OK to confirm System Information Load Default 24
122 7. Shortcut 7.1 OPT: Audio language optional 7.2 TEXT: Teletext page! Press the TEXT on the RCU to opens the Teletext function. 25
123 7.3 INFO (Information) : When entering into Non-Menu mode, and press INFO, the current channel s information will be shown on the screen. Including Channel No, Channel Name, Signal Quality and so on.. 26
124 7.4 EXIT: Exit section. 7.5 List Press List on RCU, and use Left and Right to switch between TV/RADIO/FAV, and use UP and Down to select channels, finally press OK to confirm. 27
125 7.6 DELETE: Delete program. 7.7 BACK: Back to last page. 7.8 MENU: To enter into main menu. 7.9 Electronic Program Guide (EPG) : Select GUIDE on RCU, and then press OK enter EPG Menu. The following information can be found from the EPG. To display the program info you are watching. To view the weekly TV forecast and reserves your favorite program. 28
126 Use UP and DOWN select program and LEFT and RIGHT view the TV forecast Volumes Audio Volume can be adjusted using either the RCU or the STB front panel keys, for TV or Radio services. An handy Audio MUTE function is also available on the RCU. 8. STB Upgrade: In order to keep your receiver with latest high technology, we will release upgraded software continually. More details PLS fell free to contact us. 9. Accessories 1 Remote Control Unit 2 (AAA) Batteries 29
SYMBOLS USED ON THE RECEIVER... 3 SAFETY INSTRUCTIONS... 4 I.GENERAL INFORMATION...
 Table of Contents SYMBOLS USED ON THE RECEIVER... 3 SAFETY INSTRUCTIONS... 4 I.GENERAL INFORMATION... 5 1. Preface... 5 2. Main Features... 5 3. General Operation of the Receiver... 6 4. Front Panel...
Xpresionn Digital Terrestrial Receiver. User Guide
 Xpresionn 2150 Digital Terrestrial Receiver User Guide GENERAL INFORMATION...3 A) SAFETY PRECAUTIONS...3 B) MAIN FEATURES...4 C) CONTENTS OF THE PACKAGING...4 D) REMOTE CONTROL...5 INSTALLATION...6 A)
FV400 DIGITAL TV RECEIVER WITH MODULATOR INSTRUCTION MANUAL
 FV400 DIGITAL TV RECEIVER WITH MODULATOR INSTRUCTION MANUAL Please read this instruction manual carefully before using your receiver Table of Contents Introduction-----------------------------------------------------------------------------
Be sure to run the vehicle engine while using this unit to avoid battery exhaustion.
 CAUTION: TO REDUCE THE RISK OF ELECTRIC SHOCK DO NOT REMOVE COVER (OR BACK) NO USER-SERVICEABLE PARTS INSIDE REFER SERVICING TO QUALIFIED SERVICE PERSONNE; Please Read all of these instructions regarding
I.General Information Preface Main Features For Your Safety General Operation of the Receiver Front Panel...
 I.General Information...3 1. Preface...3 2. Main Features...3 3. For Your Safety...4 4. General Operation of the Receiver...4 5. Front Panel...5 6. Rear Panel...6 7. Remote control unit...7 8. Installation
User manual FT-8100 HD. English
 User manual FT-8100 HD English WARNING!!! On the USB Memory Function for FT-8100 HD model, user can make recording or playing function using by external USB devices such as USB Flash Memory Disk or external
GDB9 INSTRUCTION MANUAL DIGITAL TERRESTRIAL RECEIVER
 GDB9 INSTRUCTION MANUAL DIGITAL TERRESTRIAL RECEIVER Goodmans Support: www.goodmans.co.uk/support Please read these instructions before use and keep for future reference IMPORTANT SAFETY INSTRUCTIONS Thank
Thank you for purchasing STB10HD Digital High Definition Set Top Box.
 Thank you for purchasing STB10HD Digital High Definition Set Top Box. This manual will help you to install, use and maintain the receiver. Please read this manual carefully before operating your unit and
DIGITAL SET TOP BOX STB 7017 INSTRUCTION MANUAL
 DIGITAL SET TOP BOX STB7017 INSTRUCTION MANUAL STB 7017 CHANNEL After Sales Support Now you have purchased a Tevion product you can rest assured in the knowledge that as well as your 3 year parts and labour
The following symbols will serve as follows: Indicates any other additional important or helpful information. Indicates warning information.
 Contents 1 2 HD2011IR User Manual Notice This manual can help you to become familiar with the many great features of our high definition digital Satellite receiver, as well as how to use and operate these
OWNER'S MANUAL MODEL: DTV-2000 STANDBY/ON
 OWNER'S MANUAL MODEL: DTV-2000 STANDBY/ON CH+ CH- TABLE OF CONTENTS SAFETY PRECAUTIONS IMPORTANT SAFETY INSTRUCTIONS and FEATURES ACCESSORIES and LOADING BATTERIES REMOTE CONTROL UNIT FRONT PANEL and REAR
Digital Terrestrial Television Receiver USER S MANUAL
 # 5024 Digital Terrestrial Television Receiver USER S MANUAL CAUTION RISK OF ELECTRIC SHOCK DO NOT OPEN This symbol is intended to alert the user to the presence of insulated dangerous voltage within the
OPERATION Channel Manager HDD Installation... 22
 1.General Information... 3 2. Main Features... 3 3. FOR YOUR SAFETY... 4 4. ACCESSORIES... 4 OVERVIEW... 6 1. REMOTE CONTROL KEY... 6 2.FRONT PANEL... 8 3.REAR PANEL... 9 CONNECTION DIAGRAMS... 11 1. PVRX2
For Freeview HD User s Manual
 extra Terrestrial HD For Freeview HD User s Manual 1 Table of contents 1 INTRODUCTION...4 2 MAIN FUNCTIONS AND FEATURES...4 3 THE REMOTE CONTROL...5 4 FRONT AND REAR PANEL...7 4.1 FRONT PANEL... 7 5 FIRST
SET TOP BOX MODEL: GDB01SFV1 USER MANUAL
 SET TOP BOX MODEL: USER MANUAL 1 2 3 4 5 6 7 8 Welcome Your Set Top Box 2.1 In The Box 2.2 Front View 2.3 Rear View Quick Setup 3.1 TV Connection 3.2 Recording from the set top box 3.3 Record one channel
WARNING/CAUTION FCC NOTICE
 WARNING/CAUTION The lightning flash with ar rowhead symbol, within an equilateral triangle, is intended to alert the user to the presence of uninsulated dangerous voltage within the product s enclosure
Mini Combo STB Model:Timbox-Mini
 Model: Main Feature: DVB-S/S2, DVB-T/T2 or DVB-C tuner and demodulation MPEG-2/MPEG-4AVC/H.264 SD/HD decoding Automatic, manual and full band channel scanning Manage up to 1000 TV and Radio channels Channel
HD X1 Technical specification
 2013 HD X1 Technical specification DVB-C HD MPEG-4 Receiver FOR INTERNAL USE ONLY GLOBO MULTIMEDIA Sp. z o.o. Sp. k. Gryfińska 104, 70-772 Szczecin, Poland 2013-09-10 Version 2.03 Albin Kimsa albin.kimsa@globo.com.pl
Front and Rear Panel Remote Control Connecting to a Television...4. Connecting to an Audio System...5
 Table of Contents Front and Rear Panel... 1 Remote Control...... 2 Connecting to a Television...4 Connecting to an Audio System...5 Connecting to a DVD Recorder or VCR... 6 First Time Installation... 7
User s Guide. Digital Satellite Receiver
 User s Guide Digital Satellite Receiver Before Getting Started Information contained in this manual is subject to change without notice. No part of this publication may be copied, reproduced, or translated
IMPORTANT SAFETY INSTRUCTIONS
 USER MANUAL 1 2 3 IMPORTANT SAFETY INSTRUCTIONS 1. Be sure to read this user manual before operating your PVR. 2. Never open the cover. It is very dangerous to touch the inside of the unit due to possible
Table of Contents. Table of Contents. Safety Warning General Information. Installing Equipment Channel List Guide Menu Guide Main Page
 TABLE OF CONTENTS Table of Contents Table of Contents Safety Warning General Information Package Contents & Features Front Panel Rear Panel Remote Control Unit (RCU) Programing the Remote Control Installing
DIGITAL TERRESTRIAL RECEIVER NVR-2090DU CHANNEL
 DIGITAL TERRESTRIAL RECEIVER NVR-2090DU CHANNEL 1 Espanol ~ Digital Video Broadcasting 2 3 STANDBY DTV/VCR TEXT MUTE VOL+ INFO PLAY/PAUSE EPG VOL- CH+ STOP SETUP EXIT 23 FAV- ENTER FAV+ 24 25 SOURCE CH-
MAX T200 HD QUICK INSTALLATION GUIDE
 MAX T200 HD QUICK INSTALLATION GUIDE MAX T200 HD QUICK INSTALLATION GUIDE CONTENT receiver BATTERIES x 2 REMOTE CONTROL Quick installation guide Quick Installation Guide The lightning flash with arrowhead
Digital Terrestrial Television Receiver USER S MANUAL
 Digital Terrestrial Television Receiver USER S MANUAL CAUTION RISK OF ELECTRIC SHOCK DO NOT OPEN This symbol is intended to alert the user to the presence of insulated dangerous voltage within the products
GENERAL INFORMATION INSTALLATION MENU INFORMATION. Main Features For your Safety Unpacking General Operation RCU Rear Panel.
 GENERAL INFORMATION 3 Main Features For your Safety Unpacking General Operation RCU Rear Panel 3 4 7 7 8 9 INSTALLATION 10 MENU INFORMATION Main Menu 1. Installation 1.1 Satellite list 1.2 Dish Setting
Table of Contents. Table of Contents
 Table of Contents Table of Contents 1. SAFETY PRECAUTIONS 2. GENERAL FEATURES 3. HARDWARE DESCRIPTION 4. HOW TO CONNECT YOUR RECEIVER 5. SYSTEM SETUP 6. MENU STRUCTURE 7. MENU OPERATION 7.1. USER SETTING
User Manual High Definition Digital Set Top Box DVBT9070 Please read this User Manual carefully to ensure proper use of this product and keep this man
 User Manual High Definition Digital Set Top Box DVBT9070 Please read this User Manual carefully to ensure proper use of this product and keep this manual for future reference. Important Safety Instructions
SAFETY PRECAUTION ENGLISH DO NOT INSTALL THE RECEIVER: PAG. 2
 MAX S92+ HDMI SAFETY PRECAUTION The lightning fl ash with arrowhead symbol, within an equilateral triangle, is intended to alert the user to dangerous voltage and to prevent from a risk of electric shock.
User's Manual 700HDMI PVR
 Digital Satellite Receiver User's Manual 700HDMI PVR INDEX INDEX... 3 Precautions... 5 1. Important Safety Instructions... 5 2. Notice... 5 3. Copyright... 6 4. Disclaimer... 6 Before You Begin... 7 1.
User Manual. High Definition Digital Set Top Box HDSTB250
 User Manual High Definition Digital Set Top Box HDSTB250 CHANNEL HDSTB250 Please read this User Manual carefully to ensure proper use of this product and keep this manual for future reference. Important
1. Before Getting Started Main Features Accessories 2
 çêðð Ð Í» Š ̱ Š Þ± Ë» Ž Ù«¼» For your safety Information contained in this manual is subject to change without notice. No part of this publication may be copied, reproduced, or translated to another
USER MANUAL (UK) IMPORTANT! Please read this manual before you connect the receiver! DIGIALITY T-2000 FTA / T-2001 CX
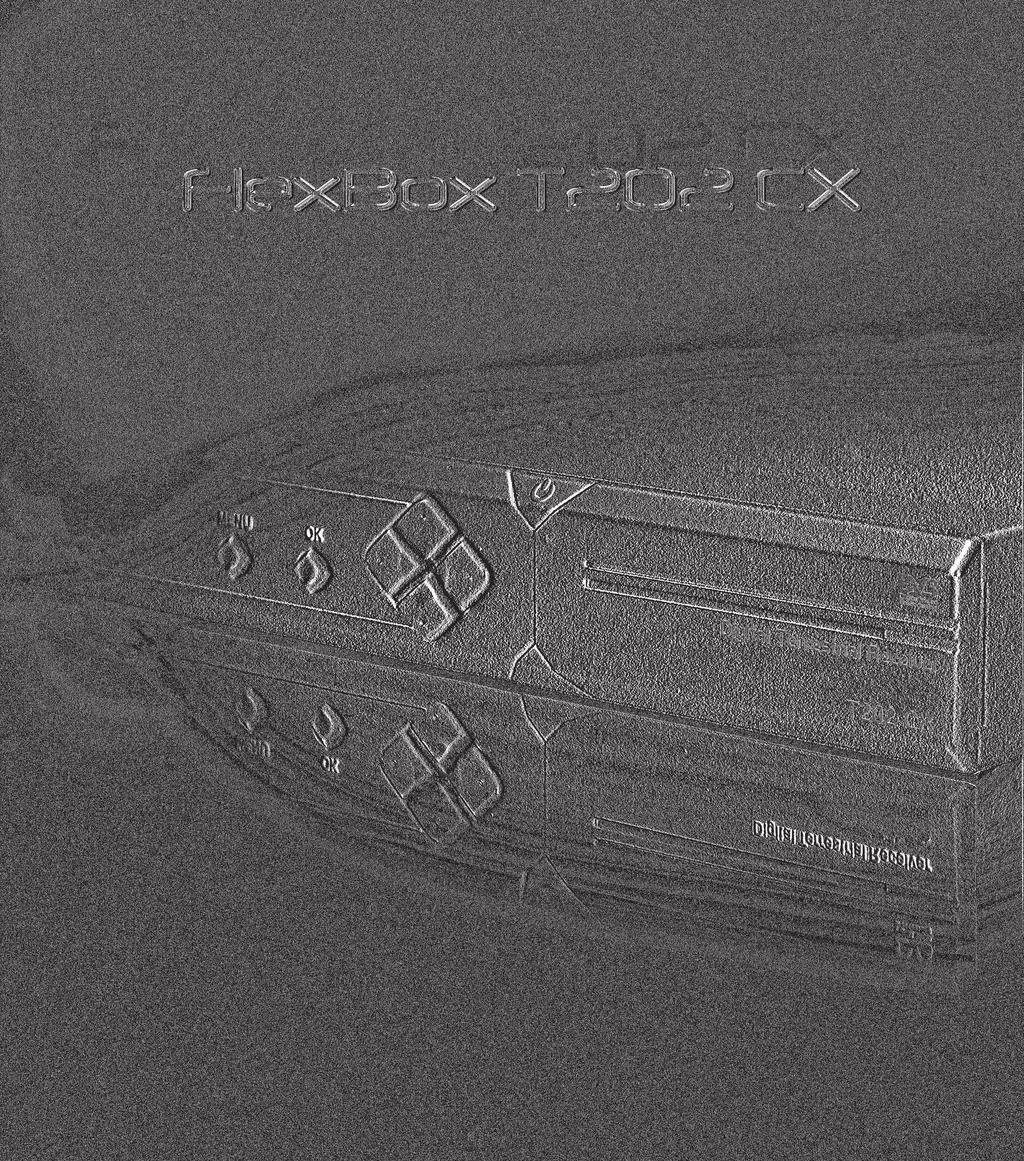
 IMPORTANT! Please read this manual before you connect the receiver! DIGIALITY T-2000 FTA / T-2001 CX") USER MANUAL (UK) IMPORTANT! Please read this manual before you connect the receiver! DIGIALITY T-2000 FTA / T-2001 CX 1 2 DIGIALITY T-2000 FTA / T-2001 CX BASIS USE AND BASIS FUNCTIONS TABLE OF CONTENTS
USER MANUAL (UK) IMPORTANT! Please read this manual before you connect the receiver! DIGIALITY T-2000 FTA / T-2001 CX 1 2 DIGIALITY T-2000 FTA / T-2001 CX BASIS USE AND BASIS FUNCTIONS TABLE OF CONTENTS
HD Digital Satellite Receiver. User s Manual
 HD Digital Satellite Receiver ZDX-670 User s Manual Keep this manual for future reference II General Safety This STB has been manufactured to meet international safety standards. Please read the following
TRIAX T-HD505 VA Digital terrestrial DVB-T/T2 set-top box A
 TRIAX T-HD505 VA Digital terrestrial DVB-T/T2 set-top box 305060-A Contents Safety Precautions... 3 Disposal of batteries and set-top box... 4 Overview... 5 Front panel incl. CA-module and smart card...
All Rights Reserved. Disclaimer. Trademarks
 WWW.I-CAN.TV i All Rights Reserved The product described in this manual is protected by international copyright laws. Under this copyright law, you are prohibited from duplicating the software or hardware
English CONTENTS 1. GUIDE OUTLINE THE MENU OSD INSTRUCTION TECHNICAL SPECIFICATION TROUBLE SHOOTING...
 English CONTENTS 1. GUIDE...2 1.1 IMPORTANT SAFETY INSTRUCTIONS...2 1.2 UNPACKING...2 1.3 PRODUCT OVERVIEW& ILLUSTRATION...3 1.4 INSTALLATION OF METER...4 2. OUTLINE...5 3. THE MENU OSD INSTRUCTION...6
English CONTENTS 1. GUIDE OUTLINE THE MENU OSD INSTRUCTION TECHNICAL SPECIFICATION...17
 USER S MANUAL English CONTENTS 1. GUIDE...2 1.1 IMPORTANT SAFETY INSTRUCTIONS...2 1.2 UNPACKING...2 1.3 PRODUCT OVERVIEW& ILLUSTRATION...3 1.4 INSTALLATION OF METER...4 2. OUTLINE...5 3. THE MENU OSD INSTRUCTION...6
PART 1 English 1.0 Usage
 SAT OUT SAT IN Thank you for choosing this Strong satellite receiver. This receiver is of our latest development and it is designed to be capable of safely install your receiver and to achieve its optimum
Remote Control Unit
 Contents Declaration of Conformity --------------------------------------------------------------------------------- 3 General Information -----------------------------------------------------------------------------------------
CONNECTION TO THE SATELLITE DISH LNB
 Safety Instructions Safety Instructions This product has been manufactured to satisfy the international safety standards. Please read all of safety and operating instructions before operating the product
NMS ETA TM Stereo Advanced Digital TV Set-top Box
 Digital TV HD Set-top Box STB2-T2 NMS ETA TM Stereo Advanced Digital TV Set-top Box User Guide CONTENTS Safety Information... 3 Introduction... 4 Set-top Box Front Panel... 4 Set-top Box Back Panel...
English SAFETY PRECAUTION DO NOT INSTALL THE RECEIVER: PAG. 2
 U4125 SAFETY PRECAUTION The lightning fl ash with arrowhead symbol, within an equilateral triangle, is intended to alert the user to dangerous voltage and to prevent from a risk of electric shock. Warning:
Contents. Safety instructions Reference 1.1 Genareal Features Delivery... 04
 HD 580 user manual Contents Safety instructions... 03 1. Reference 1.1 Genareal Features... 04 1.2 Delivery... 04 2. Names and key assignment 2.1 Front view... 05 2.2 Rear view... 05 2.3 Remote Control...
SAFETY PRECAUTION ENGLISH DO NOT INSTALL THE RECEIVER: PAG. 2
 MAX S21 SAFETY PRECAUTION The lightning fl ash with arrowhead symbol, within an equilateral triangle, is intended to alert the user to dangerous voltage and to prevent from a risk of electric shock. Warning:
Throughout the whole user manual, pay special attention to the following marks that
 Notice Warnings, Cautions and Notes Throughout the whole user manual, pay special attention to the following marks that indicate hazardous situations. Warning ** Indicates a hazardous situation which could
Evolution Digital HD Set-Top Box Important Safety Instructions
 Evolution Digital HD Set-Top Box Important Safety Instructions 1. Read these instructions. 2. Keep these instructions. 3. Heed all warnings. 4. Follow all instructions. 5. Do not use this apparatus near
English SAFETY PRECAUTION DO NOT INSTALL THE RECEIVER: PAG. 2
 U4127 SAFETY PRECAUTION The lightning fl ash with arrowhead symbol, within an equilateral triangle, is intended to alert the user to dangerous voltage and to prevent from a risk of electric shock. Warning:
CAUTION RISK OF ELECTRIC SHOCK NO NOT OPEN
 Evolution Digital HD Set-Top Box Important Safety Instructions 1. Read these instructions. 2. Keep these instructions. 3. Heed all warnings. 4. Follow all instructions. 5. Do not use this apparatus near
English SAFETY PRECAUTION DO NOT INSTALL THE RECEIVER: PAG. 2
 U4109 SAFETY PRECAUTION The lightning fl ash with arrowhead symbol, within an equilateral triangle, is intended to alert the user to dangerous voltage and to prevent from a risk of electric shock. Warning:
English CONTENTS 1. GUIDE OUTLINE THE MENU OSD INSTRUCTION TECHNICAL SPECIFICATION TROUBLE SHOOTING...
 USER S MANUAL English CONTENTS 1. GUIDE...2 1.1 IMPORTANT SAFETY INSTRUCTIONS...2 1.2 UNPACKING...2 1.3 PRODUCT OVERVIEW& ILLUSTRATION...3 1.4 INSTALLATION OF METER...4 2. OUTLINE...5 3. THE MENU OSD INSTRUCTION...6
Quick Start Digital Terrestrial Receiver
 Quick Start Digital Terrestrial Receiver Support of SD / HD (MPEG2 / MPEG4 H.264), DVB-T system PVR Ready - possibility to record on external USB drive Time Shift (video pausing, rewinding) HDMI video
Quick Start Digital Satellite Receiver HD
 Quick Start Digital Satellite Receiver HD One slot for Smart Card in Conax system One slot for Common Interface Module Support of SD / HD (MPEG2 / MPEG4 H.264), DVB-S, DVB-S2 system High resolution video
High Definition Digital Set Top Box With USB Record DFTA45R. The Gold Technical Support Line: (Charges will apply at $2.
 High Definition Digital Set Top Box With USB Record INSTRUCTION MANUAL DFTA45R The Gold Technical Support Line: 1902 215 259 (Charges will apply at $2.95 per minute) Safety Instructions Always read the
Quick Start Digital Satellite Receiver
 Quick Start Digital Satellite Receiver Support of SD (MPEG2), DVB-S system Standard resolution video output - SCART Compatible with Diseqc 1.0, 1.1, 1.2, and USALS Electronic Program Guide - EPG Multilingual
5 Getting Started Connecting the DVB-T Receiver First Steps... 9
 Table of Contents 1. Introduction... 2 2. Features... 3 3. Safety Notes... 4 4. Your Receiver and its Functions... 5 4.1 Remote Control Functions... 5 4.2 Front Panel Controls... 7 4.3 Rear Panel Connections...
High Definition Digital Terrestrial Receiver USER S MANUAL
 High Definition Digital Terrestrial Receiver USER S MANUAL Important Safety Instructions To avoid electric shock, do not open the unit. There are no user-serviceable parts inside. Servicing can only be
Receiver/Digital Decoder DVB-T2 Set Top Box. Installation Manual & User Manual
 Receiver/Digital Decoder DVB-T2 Set Top Box Installation Manual & User Manual SAFETY PRECAUTION CAUTION: The lightening flash with arrowhead symbol, within an equilateral triangle, is intended to alert
Digital Terrestrial Receiver SRT 5200/SRT 5202/SRT5205
 Digital Terrestrial Receiver SRT 5200/SRT 5202/SRT5205 Picture similar User manual Table of Contents 1.0 Instruction 2 1.1 Safety Instructions 2 1.2 Storage 3 1.3 Equipment Set-up 4 1.4 Features & Accessories
English DOWNLOAD ONLY
 English What's included? English Easy Setup Guide HDMI Cable Power Adapter Power Cord External IR Cable RCU Battery RCU 1 Front Panel Idle Server Mode Left Side CI Module slot Smartcard reader slot 2 Rear
User s Manual. Digital Satellite Receiver. INSTRUCTION ABOUT WEEE SYMBOL I/B parenthesis to offer information for user. Viaccess CAS Embedded
 INSTRUCTION ABOUT WEEE SYMBOL I/B parenthesis to offer information for user. User s Manual Viaccess CAS Embedded This marking shown on the product or its literature, indicates that it should not be disposed
English DMB-118HDMK3
 English DMB-118HDMK3 Table of Contents Safety Information...1 System Connection...1 Remote Control...2 First Time Installation...3 Basic Operation...3 Change Channel...3 Volume and Mute...3 Subtitle/Audio
What's included? RCU. Easy Setup Guide. HDMI Cable. Loop-through Cable. Power Cord. SATA Cable. RCU Battery
 English What's included? RCU Easy Setup Guide HDMI Cable SATA Cable Power Cord Loop-through Cable RCU Battery 1 Front Panel LCD Display Displays graphic logos of channels and uploaded user s favorite images.
1. GUIDE Important Safety Instructions Unpacking PRODUCT OVERVIEW&ILLUSTRATION INSTALLATION OFMETER
 1. GUIDE... 3 1.1 Important Safety Instructions... 3 1.2 Unpacking... 3 1.3 PRODUCT OVERVIEW&ILLUSTRATION... 4 1.4 INSTALLATION OFMETER... 6 2. OUTLINE... 6 3. THE MENU OSD INSTRUCTION... 7 3.1 DVB S2...
HDTV-Sat-Irdeto-Receiver
 HDTV-Sat-Irdeto-Receiver TABLE OF CONTENTS 1 SAFETY ADVICE... 4 2 QUICK SETUP... 6 3 FEATURES... 8 4 HOW TO CONNECT YOUR RECEIVER... 9 5 HARDWARE:... 11 6 WATCHING TV... 15 7 MENU OPERATION... 23 8 EDITING
Xsarius Satmeter Pro. Manual
 Xsarius Satmeter Pro Manual 1 2 Directory of content Introduction Directory of content 3 Introduction 3 Satmeter Pro 02 Frontpanel & buttons 6 Xsarius provides high quality products that enable you to
MKV, MOV, MPEG-1/2/4, H.264)
") dvblink DVB-T tuner Dual DVB-T tuner Product features Dual DVB-T tuner DVB-T MPEG2 and MPEG4 compatible (HD) AFS* - auto frequenzy switching USB AV-player port USB-devices up to 2TB (FAT32 and NTFS), supports
dvblink DVB-T tuner Dual DVB-T tuner Product features Dual DVB-T tuner DVB-T MPEG2 and MPEG4 compatible (HD) AFS* - auto frequenzy switching USB AV-player port USB-devices up to 2TB (FAT32 and NTFS), supports
Naudojimo instrukcijos. Prieš naudodamiesi įrenginiu, atidžiai perskaitykite šias instrukcijas ir pasilikite jas naudojimui ateityje.
 PDP TELEVIZORIUS (PLASMA DISPLAY PANEL) Naudojimo instrukcijos Prieš naudodamiesi įrenginiu, atidžiai perskaitykite šias instrukcijas ir pasilikite jas naudojimui ateityje. MENIU EKRANE (ON-SCREEN MENUS)
40FDI7514 (REF. NO.: )
") 40FDI7514 (REF. NO.: 10094076) LIETUVIŲ Turinys Saugos informacija... 2 Darbo pradžia... 3 Pranešimai, savybės ir priedai... 3 Nuotolinio valdymo pultas... 6 Jungtys... 7 Pirminis įdiegimas USB jungtys...
40FDI7514 (REF. NO.: 10094076) LIETUVIŲ Turinys Saugos informacija... 2 Darbo pradžia... 3 Pranešimai, savybės ir priedai... 3 Nuotolinio valdymo pultas... 6 Jungtys... 7 Pirminis įdiegimas USB jungtys...
Goodmans Helpline Phone Number
 Goodmans Helpline Phone Number 0870 873 0080 contents Introduction 4 Connecting up 5 Overview diagrams 6 Getting started 8 Using the main menu 10 Troubleshooting 15 Technical Specifications 16 3 introduction
DVB-T2. Digital Terrestrial Receiver WD-822T2 USER S MANUAL
 DVB-T2 Digital Terrestrial Receiver WD-822T2 USER S MANUAL Index Important Safety Instructions... 3 Main Features.... 5 Front and Rear Panel.... 6 Remote Control..... 7 Installing the Batteries..... 8
广州七彩商贸有限公司. Guangzhou Qicai Business Trade Co.,LTD. Moile : Tell:
 Model price feature DM500-S USD$36 MOQ:100 广州七彩商贸有限公司 Guangzhou Qicai Business Trade Co.,LTD Moile :+86-013560411838 Tell: +86-02039522997 DM500S Specification 1)250 MHz IBM PowerPC Processor(350 Mips)
User s manual U6000. Index. 0 Control elements and connections Front Panel Rear Panel Remote control...
 Index 0 Control elements and connections...3 0.1 Front Panel... 3 0.2 Rear Panel... 3 0.3 Remote control... 4 1 First installation...5 1.1 Box content... 5 1.2 Accessories and installation examples...
DVB-T USB SET-TOP BOX
 DVB-T USB SET-TOP BOX User Manual Version: 1.0 (February 2005) TRANSYSTEM INC. No.1-2 Li-Hsin Rd.I Science-Based Industrial Park, Hsinchu, Taiwan Tel:+886-3-5780393 Fax:+886-3-5784111 e-mail: sales@transystem.com.tw
DURING A LIGHTNING STORM,
 Safety Instructions Safety Instructions This product has been manufactured to satisfy the international safety standards. Please read all of safety and operating instructions before operating the product
40FDI7714 (REF. NO.: )
") 40FDI7714 (REF. NO.: 10093250) LIETUVIŲ Turinys Saugos informacija... 2 Darbo pradžia... 3 Pranešimai, savybės ir priedai... 3 Nuotolinio valdymo pultas... 6 Jungtys... 7 Pirminis įdiegimas USB jungtys...
40FDI7714 (REF. NO.: 10093250) LIETUVIŲ Turinys Saugos informacija... 2 Darbo pradžia... 3 Pranešimai, savybės ir priedai... 3 Nuotolinio valdymo pultas... 6 Jungtys... 7 Pirminis įdiegimas USB jungtys...
DSR 9500A FTA, CI, EM VIA, VIA CI. Instructions for use REV 1.0 DIGITAL SATELLITE RECEIVER MF A
 DSR 9500A FTA, CI, EM VIA, VIA CI Instructions for use REV 1.0 GB MF68-00247A DIGITAL SATELLITE RECEIVER SAFETY INSTRUCTIONS This STB has been manufactured to satisfy international safety standards. Please
FUNAI BRAND ࠉ NEW PRODUCT LOGO (revised edition 㸧 1,APR., FDI5755 LIETUVIŲ
 32FDI5755 LIETUVIŲ Turinys Saugos informacija... 3 Darbo pradžia... 4 Pranešimai, savybės ir priedai... 4 Nuotolinio valdymo pultas... 7 Jungtys... 8 Pirminis įdiegimas USB jungtys... 9 Televizoriaus meniu
KGNϭϬϴϬWWZKϮϮs USER MANUAL
 USER MANUAL KGN X P.MODE S.MODE SLEEP AUDIO 1 2 3 4 5 6 7 8 9 USB/SD A/DTV FAV + 0 SOURCE MENU OK INFO EXIT MUTE VOL CH ASPECT /C AN CE L TTX /SIZE D.MENU/HOLD U P G /AUTO DVD.SETU P /S B A E TITLE EPG
The product must be installed in accordance with national regulations.
 Important safety instructions to be kept with the product Please read attentively To prevent fire and electric shock, do not expose this receiver to rain or moisture. In order to avoid any possible risk
Digital Terrestrial Receiver SRT 5300
 Digital Terrestrial Receiver SRT 5300 Picture similar User manual www.strong.tv 17 Feb 2011 21:16 1 2 3 4 5 1 Table of Contents 1.0 Instruction 2 1.1 Safety Instructions 2 1.2 Storage 3 1.3 Equipment Set-up
2. Saugos reikalavimai
 1. Turinys 1. Turinys... 1 2. Saugos reikalavimai... 2 3. Trumpas imtuvo aprašymas... 3 4. Komplektuotė... 3 5. Imtuvo aprašymas ir iliustracijos... 3 5.1. Priekinis skydelis... 3 5.2. Galinis skydelis...
IMPORTANT SAFETY INSTRUCTIONS
 IMPORTANT SAFETY INSTRUCTIONS All the safety and operating instructions should be read before operating this product. The safety and operating instructions should be retained for future reference. All
RFT-806HD. Digital modulator HDMI QAM. User Manual
 RFT-806HD Digital modulator HDMI QAM User Manual 1. Purpose of use RFT-806HD is a Full-HD encoder to modulate high quality audio and video into QAM (DVB-C) multiplex. RFT-806HD support up to 1920*1080p
The User s Manual. Digital Terrestrial Receiver Personal Video Recorder
 TM The User s Manual Digital Terrestrial Receiver Personal Video Recorder Please read this User's Manual carefully. The menu structure and specification can be changed without notice. TABLE OF CONTENTS
1. INTRODUCTION SAFETY INSTRUCTIONS HHT895 FEATURES INCLUDE: ACCESSORIES INCLUDED WITH YOUR RECEIVER:...
 1. INTRODUCTION... 2 1.1 SAFETY INSTRUCTIONS... 2 1.2 HHT895 FEATURES INCLUDE:... 3 1.3 ACCESSORIES INCLUDED WITH YOUR RECEIVER:... 4 2. INSTALLATION... 4 2.1 FRONT PANEL... 4 2.2 REMOTE CONTROL UNIT BATTERY
AVE HOME FAGOR CVBS TO DVB-T ENCODER MODULATOR. Fagor Electr6nica
 AVE HOME CVBS TO DVB-T ENCODER MODULATOR FAGOR Fagor Electr6nica TABLE OF CONTENTS 1. SPECIFICATIONS... 12 1.1 Product Overview... 12 1.2 Appearance and Description... 12 1.3 Diagram... 13 1.4 Characteristics...
I. Introduction. I.1 ADV-DVBT2 Product Overview. Features Summary
 The lighting flash with arrowhead symbol within an equilateral triangle is intended to alert the user to the presence of uninsulated dangerous voltage within the product s enclosure that may be of sufficient
High Definition Digital Set Top Box With USB Record
 High Definition Digital Set Top Box With USB Record INSTRUCTION MANUAL DFTA46R Toll Free Warranty and Service: 1800 509 394 The Gold Technical Support Line: 1902 215 259 (Charges will apply at $2.95 per
RFT-851FTA. Twin DVB-T to PAL remodulator. User Manual
 RFT-851FTA Twin DVB-T to PAL remodulator User Manual 1. Purpose of use RFT-851FTA is designed for prosessing two COFDM modulated signals into standard CCIR channels. RFT-851FTA is supplied with a A2 stereo/dual/swap
CONNECTION TO THE SATELLITE DISH LNB
 Safety Instructions Safety Instructions This product has been manufactured to satisfy the international safety standards. Please read all of safety and operating instructions before operating the product
HD Digital Set-Top Box Quick Start Guide
 HD Digital Set-Top Box Quick Start Guide Eagle Communications HD Digital Set-Top Box Important Safety Instructions WARNING TO REDUCE THE RISK OF FIRE OR ELECTRIC SHOCK, DO NOT EXPOSE THIS PRODUCT TO RAIN
HRM 8760 CI+ User s Manual (ENG)
") HRM 8760 CI+ User s Manual (ENG) TABLE OF CONTENTS 1 SAFETY ADVICE... 3 2 QUICK SETUP... 5 3 FEATURES... 7 4 HOW TO CONNECT YOUR RECEIVER... 7 5 HARDWARE... 9 6 WATCHING TV... 13 7 MENU OPERATION... 21
HRM 8760 CI+ User s Manual (ENG) TABLE OF CONTENTS 1 SAFETY ADVICE... 3 2 QUICK SETUP... 5 3 FEATURES... 7 4 HOW TO CONNECT YOUR RECEIVER... 7 5 HARDWARE... 9 6 WATCHING TV... 13 7 MENU OPERATION... 21
Preparation. Connection. Switching On. Tuning In. Please refer to Antenna Connection (See the page 10).
.") Preparation Connection Please refer to Antenna Connection (See the page 10). NOTE: Please use good-quality RF cable. Make sure well connected with tuner to ensure effect. Switching On Turn on your TV Set.
Preparation Connection Please refer to Antenna Connection (See the page 10). NOTE: Please use good-quality RF cable. Make sure well connected with tuner to ensure effect. Switching On Turn on your TV Set.
Register your product and get support at.
 Register your product and get support at www.philips.com/welcome Saturs Svarīgi...1 TV izmantošana...2 Tālvadības pults...2 Paziņojumi, funkcijas un piederumi...3 Energoefektivitāte...3 TV ritināšanas
USER MANUAL KGNPRO19VD
 USER MANUAL KGNPRO19VD X P.MODE S.MODE SLEEP AUDIO 1 2 3 4 5 6 7 8 9 A/DTV USB/SD FAV + 0 SOURCE MENU OK INFO EXIT MUTE VOL CH ASPECT TTX TITLE /AUTO DVD.SETU P EPG SU BTITL E D.MENU ZOOM/REC.LIST GOTO
Thank you for purchasing DVBS2 800CA Digital Satellite Receiver.
 Thank you for purchasing DVBS2 800CA Digital Satellite Receiver. This manual will help you to install, use and maintain the receiver. Please read this manual carefully before operating your unit and keep
User Manual Of Digital Set Top Box
 Size:120X170mm User Manual Of Digital Set Top Box VEA T100 Please read this User Manual carefully to ensure proper use of this product and keep this manual for future reference. Safety Instructions Always
CONTENTS SAFETY PRECAUTION...3 ENVIRONMENT PROTECTION...4 FRONT PANEL...5 REAR PANEL...5 CONNECTING YOUR SYSTEM...6 REMOTE CONTROLLER...
 CONTENTS SAFETY PRECAUTION...3 ENVIRONMENT PROTECTION...4 FRONT PANEL...5 REAR PANEL...5 CONNECTING YOUR SYSTEM...6 REMOTE CONTROLLER...7 1. BASIC OPERATIONS...9 1.1 TURN ON STB...9 1.2 POWER... 9 1.3
Set Top Box STB 237 OWNER'S MANUAL. Digital receiver. Read this manual before installation and use. English STB 237 CHANNEL
 Set Top Box Digital receiver STB OWNER'S MANUAL STB CHANNEL Read this manual before installation and use. English SAFETY INSTRUCTIONS TO REDUCE THE RISK OF FIRE AND ELECTRIC SHOCK, DO NOT EXPOSE THIS UNIT